Photography Tutorial · 2022-08-07
What Does a 100MP Panorama That Took 6 Hours to Edit Look Like?
Merging 7 wide-angle frames into a single 100-megapixel masterpiece?
What operations were done across 6 hours of post-processing?
How are techniques like panorama distortion correction, dodging & burning, and luminosity masks used?
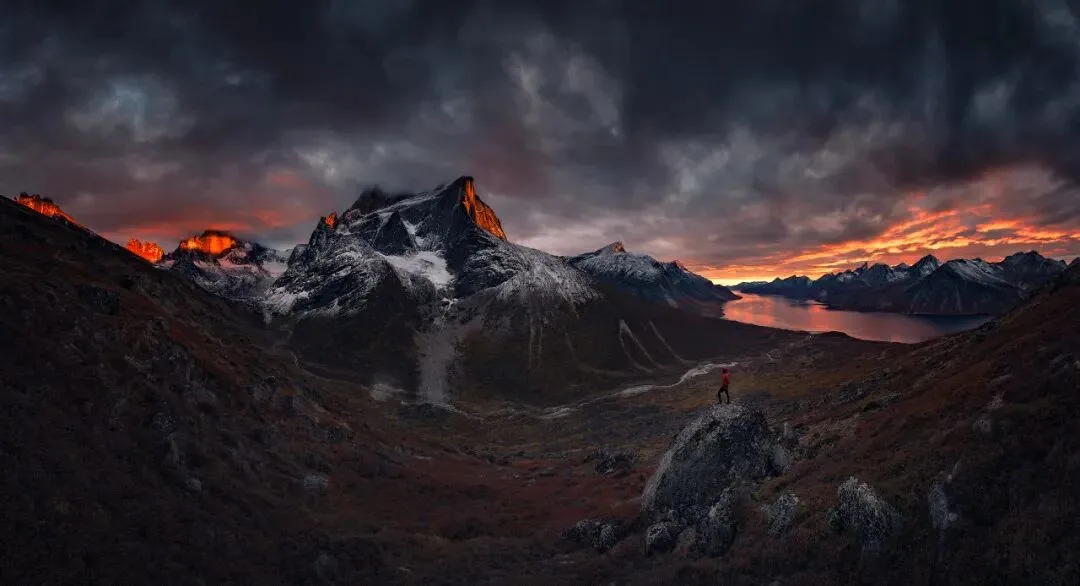
In today's photography tutorial, I'll open the working .psb file and share the capture and post-processing ideas behind this photo of Greenland's uninhabited fjord region.
Video
▶ Watch the video tutorial on Bilibili
This is the fully illustrated companion to the video above: Thomas opens the PSB working file of his Greenland fjord panorama and condenses six hours of retouching into a repeatable workflow — reading a gap in the clouds for red light, a 7-frame vertical stitch, base grading in Camera Raw, transform correction and dodge & burn in Photoshop, subject blending, and the final darkening. Skim the frames for the framework, then dive into the video for the details.
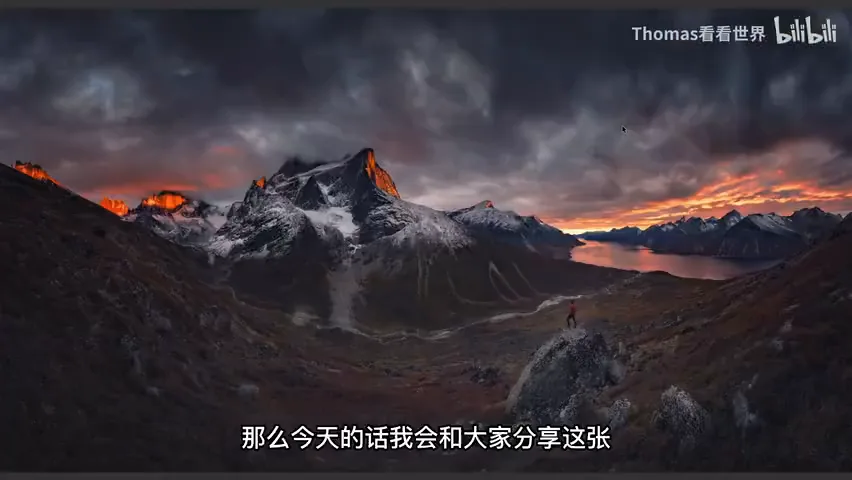
Start with the final image: storm clouds pressing down, sunlit red peaks at the end of the fjord, and a tiny figure on a two-person-tall rock. The breakdown below follows three stages — shooting, Raw grading, and Photoshop refinement.
01 In the Field: Five Minutes of Red Light Through a Cloud Gap
In 2017 in an uninhabited Greenland fjord, Thomas and his friend landed by boat at the river mouth and set up camp. Thick clouds covered the sky that afternoon, but a gap remained on the horizon — from this they predicted five to ten minutes of sunset red light when the sun slid into it, and climbed the hill early to scout a vantage point (at 0:30 in the video).
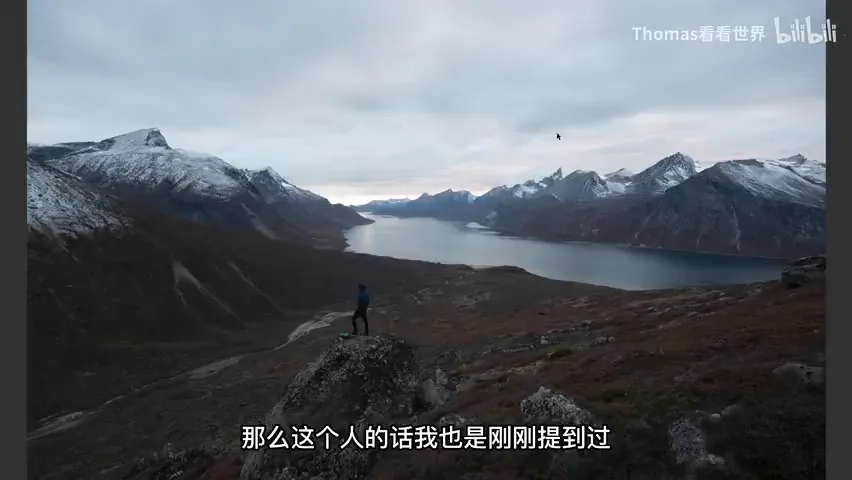
The foreground is a protruding rock platform: a two-person-tall boulder with rich texture, an ideal stage for the "grand dialogue between man and nature." Before the red clouds arrived, he set the tripod with an interval timer and photographed himself standing there — real red light would last only five minutes, far too hectic to pose in, and since the figure depends little on skylight it could be shot in advance (at 1:19 and 1:47 in the video).
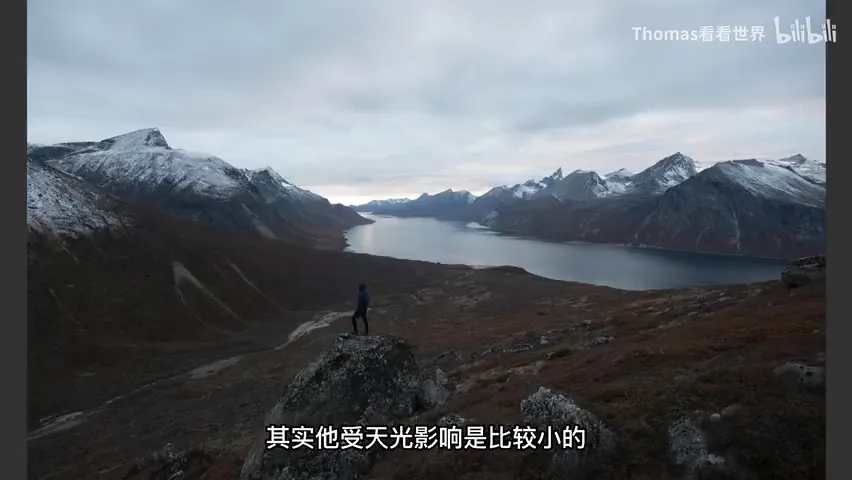
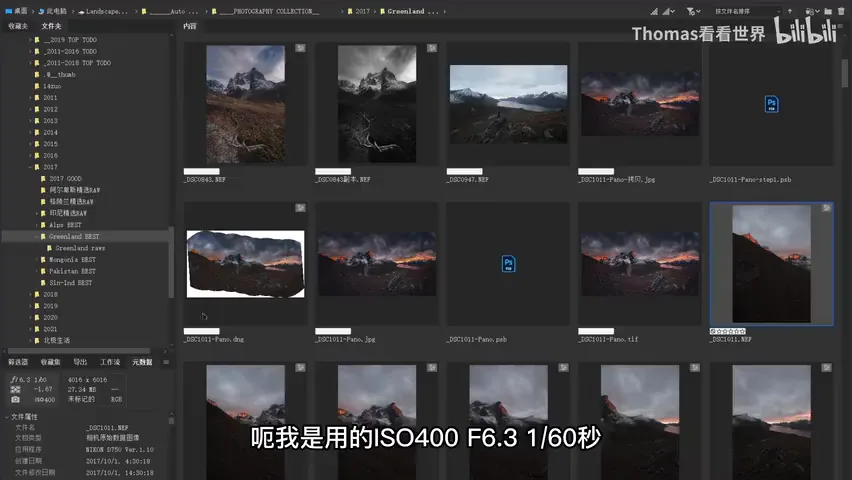
When the red clouds finally appeared, he turned the camera vertical and fired a burst of 7 frames covering the whole scene, at ISO 400, f/6.3, 1/60 s (at 2:20 in the video). The light was shifting too fast for a cable release, so ISO 400 secured a hand-holdable shutter speed. These seven frames are the entire raw material of the "100-megapixel" panorama in the title.
02 Camera Raw: Stitching and Base Grading
All seven frames are selected in Camera Raw and merged into a panorama (at 2:38 in the video; the stitching basics were covered in an earlier tutorial). The base adjustments follow: recover highlight detail to kill clipping, lift shadows and blacks, then push Dehaze and Clarity way up — that is where the overall texture comes from (at 2:50 in the video).
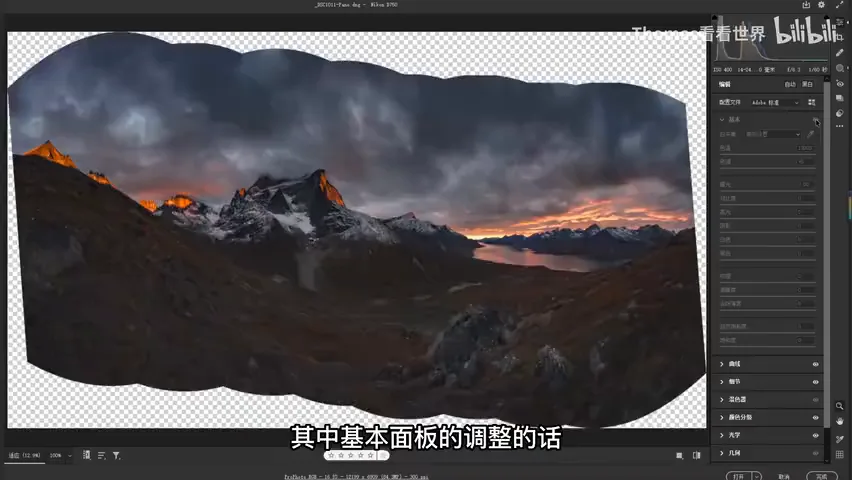
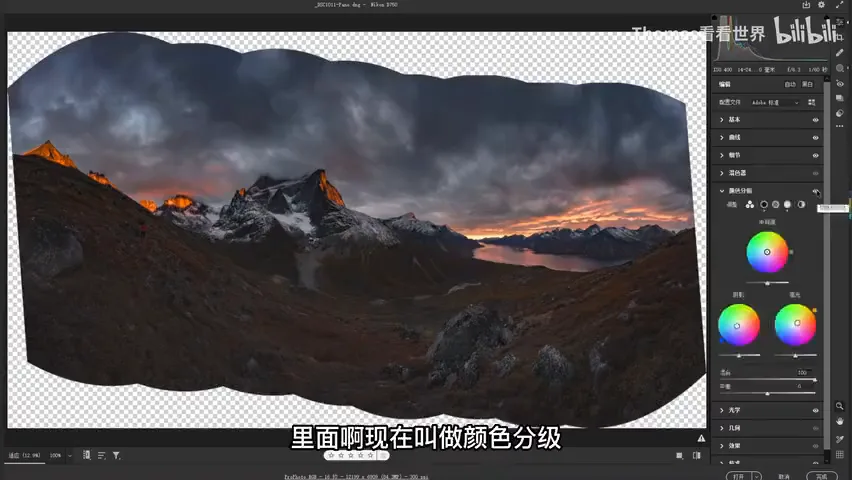
A global Curves darkening sets the moody base while detail stays at defaults. Split toning ("Color Grading" in newer versions) builds the atmosphere: cool shadows, warm highlights — and between them a natural magenta transition appears, which flatters sunrise and sunset scenes especially well (at 3:12 in the video). In the Optics panel, remove chromatic aberration gets checked.
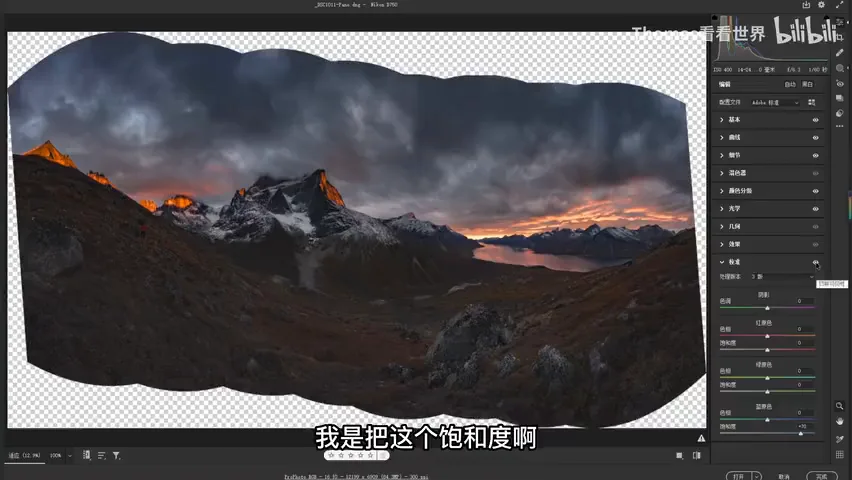
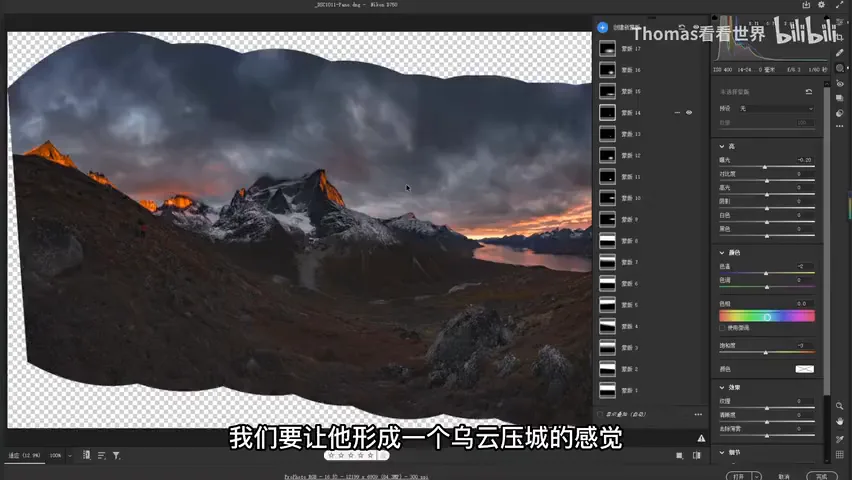
The Calibration panel is a staple of Thomas's landscape grading: blue primary saturation up to +70 amplifies the color of the whole frame while staying comfortable, never garish (at 3:36 in the video). Then come masks, which make a world of difference: brighten the rock, darken the sky; for the heavy clouds, a linear gradient over the sky stacked with Dehaze — sometimes minus a bit of exposure — creates that storm-pressing-down feeling (at 4:00 in the video).
03 Transform Correction: Straightening a Hurried Stitch
The first Photoshop step is transform correction. Shooting in a rush during the red-light window left the stitch slightly skewed — easily fixed with Ctrl+T free transform, especially pulling the left side in so the panorama reads level and square (at 4:40 in the video).
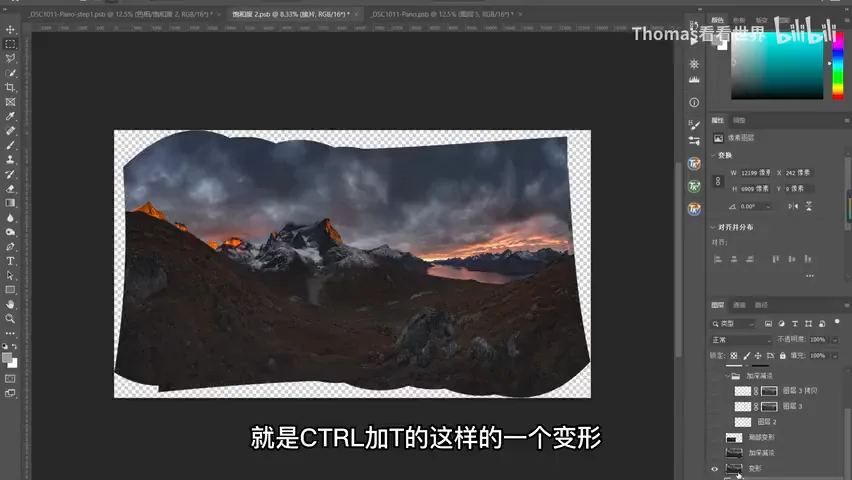
A subtler problem is stitch perspective: the mountains on the left got squeezed together, unbalancing the frame. The fix is to stretch them back horizontally, restoring the mountains' true bulk; locally warped wide-angle areas get the same treatment. Only after this does the composition truly read level and balanced (at 5:02 in the video).
04 Dodge & Burn and Blending In the Figure
Dodge & burn is the pivotal step of this edit. On a new Soft Light layer, a white brush brightens where the figure will stand — effectively a spotlight on the person within the scene (at 5:33 in the video). That soft-light layer is then restricted with a luminosity mask: the snow turns whiter and the river valley below lifts slightly, so viewers can read the river running through the fjord (at 5:47 in the video).
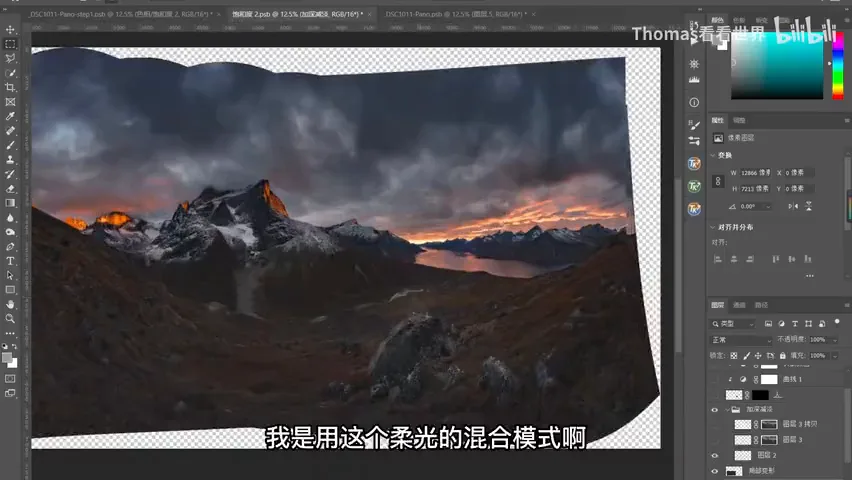
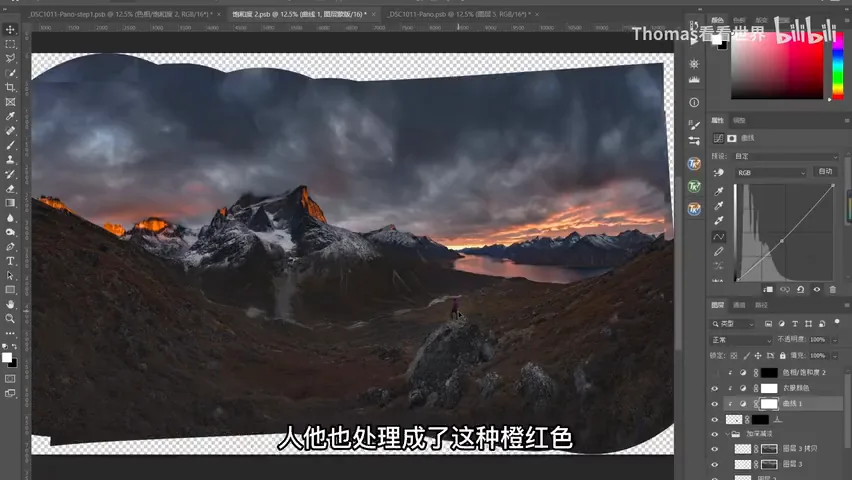
The figure was shot on site: once selected and placed, its perspective and scale fall naturally into place with almost no adjustment (at 6:04 in the video). A gentle Curves darkening matches the person to the ambient light; the jacket, originally dark blue, is shifted with Hue/Saturation into the same orange-red family as the sunlit peaks, then slightly desaturated — the figure now belongs to the scene, answering the mountains (at 6:39 in the video).
05 Refinement: Filters, Huge Files, and the Final Darkening
Then come layers of fine processing: in Nik's Color Efex Pro, Pro Contrast and Polarization filters push clarity further, followed by another cool-warm pass — blues into the midtones, warmth into the highlights; Selective Color nudges yellows redder and richer (at 7:07 in the video). Another round of dodge & burn gives the featureless rock real dimension — boulders pop and the frame gains layers of detail (at 7:34 in the video).
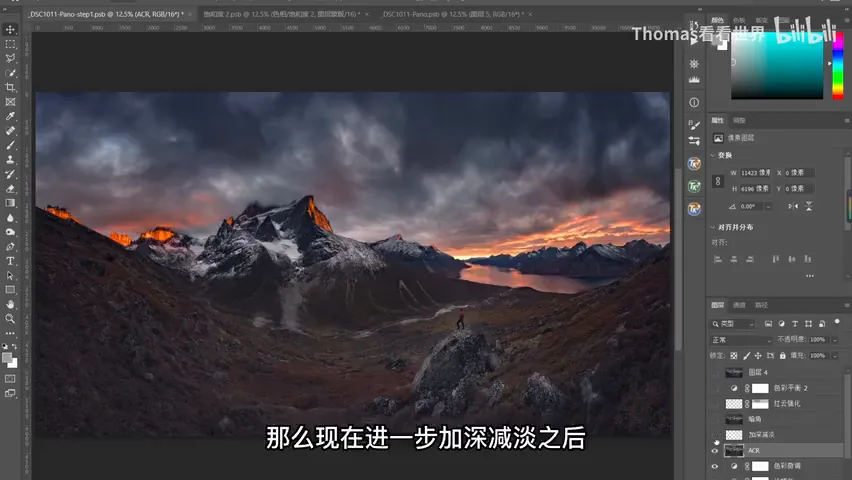
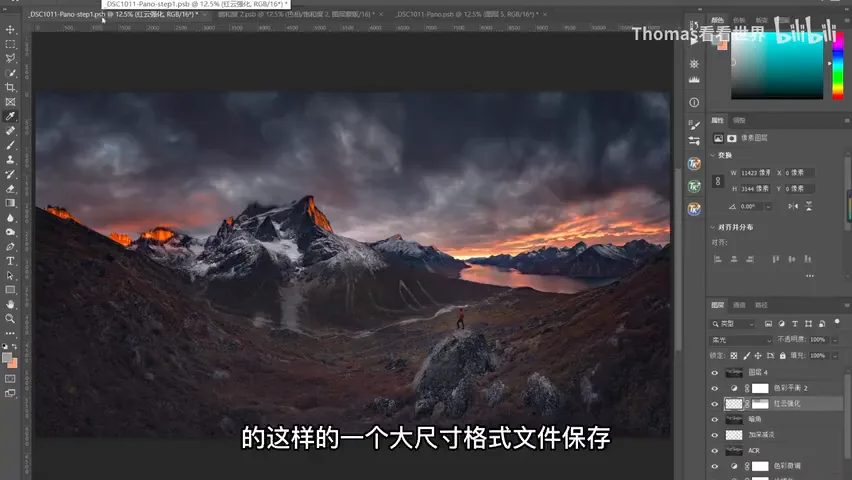
Atmospheric finishing: a gradient vignette in the Camera Raw filter; then a new Soft Light layer where an eyedropper picks a natural orange from the scene and brushes it on, gently reinforcing the red glow, with Color Balance adding a touch more warmth (at 8:00 in the video). At this point the stitch runs eighty-to-ninety megapixels, and dozens of layers and smart objects pile into a PSB so heavy even an XPS 17 chokes — so everything is stamped into one layer in a fresh document, freeing memory instantly; the remaining moves happen in this lighter PSB: edge vignetting in Camera Raw, slightly lower and bluer saturation, added contrast, and a final Curves darkening (at 8:46 in the video).
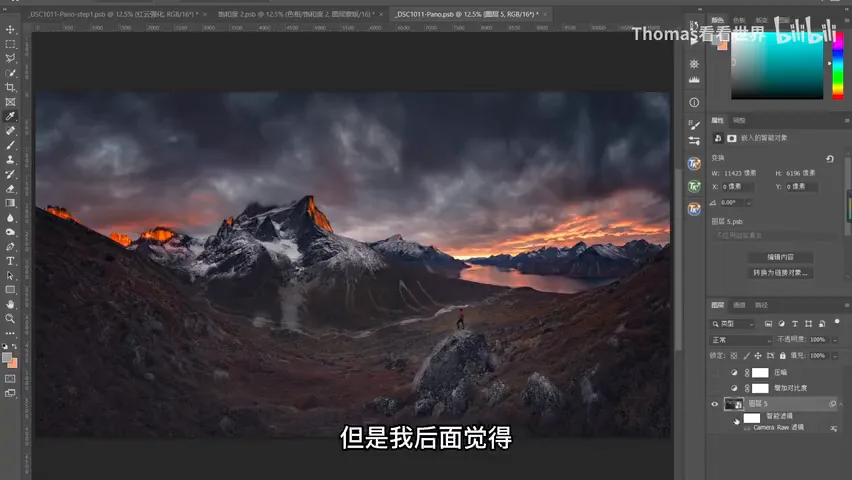
Thomas stresses that every step moves only a little — a finely retouched image demands slow carving, and it helps to step away for a few days and look again. He found his first version too bright to convey the storm's oppressive weight, so he darkened the whole frame one more stop for the final result (at 9:16 in the video).
1. In overcast weather, read the cloud gap and predict a 5-10 minute red-light window: set up and shoot the figure before it arrives, then fire 7 vertical frames for the stitch (ISO 400, f/6.3, 1/60 s); 2. A Camera Raw pipeline — merge the panorama, recover highlights, Dehaze and Clarity for texture, split-toned cool shadows and warm highlights, blue primary at +70, masked sky darkening for the pressing clouds; 3. In Photoshop, Ctrl+T the stitch straight and stretch compressed mountains, dodge & burn on Soft Light layers with luminosity masks, darken the on-site figure and shift it to orange-red so it belongs; 4. Refinement is many small steps: stacked filters, a stamped lighter file to free memory, and one more stop of darkening after a few days away.