Photography Tutorial · 2016-08-28
Don't Let Distortion Ruin Your Photos: Basic Corrections in ACR/Lightroom
A common mistake in photography is focusing too much on exposure and color while overlooking the huge damage that distortion, aberration and spots do to a photo.
In ACR/Lightroom, the first step of post-processing is actually lens corrections, level & perspective corrections, and spot removal — fixing problems from the capture stage. Today Thomas shares how to perform these basic corrections in ACR or Lightroom.
Topics: barrel distortion, pincushion distortion, perspective distortion, vignetting, chromatic aberration, spots
Reading time: about 11 minutes

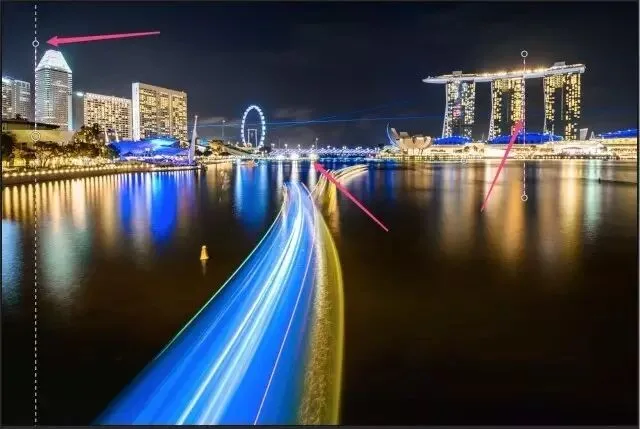
The photo below is a typical uncorrected photo. At first glance the colors and the long-exposure boat trails look nice. But something about the photo feels off.
In our minds, city high-rises are straight and solid. Yet the buildings in this photo lean every which way due to perspective distortion, as if about to collapse sideways — an unpleasant feeling for viewers.

The flaw of the photo above is ignoring the important 'basic correction' step in post. Photography divides into capture and post-processing. During capture, equipment and environment introduce lens distortion, vignetting, chromatic aberration, perspective distortion, spots and other problems.
The first step of post is 'basic correction' — fixing capture-stage problems. Never ignore them and let them amplify through further processing, ultimately ruining the final image.

1
Lens corrections
When opening an image in ACR/Lightroom, it's best not to start directly with exposure and color.
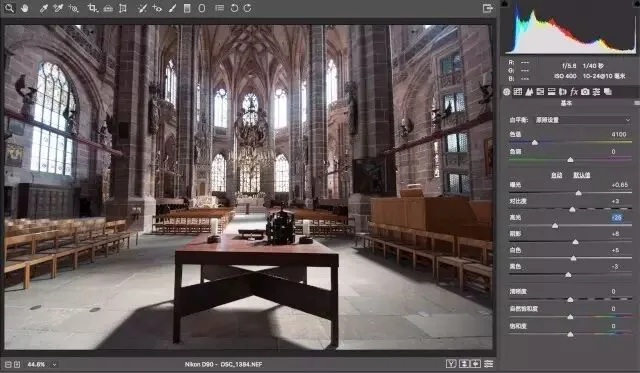
Instead, open the sixth panel — 'Lens Corrections' — and fix the distortion, vignetting and chromatic aberration introduced by the lens.
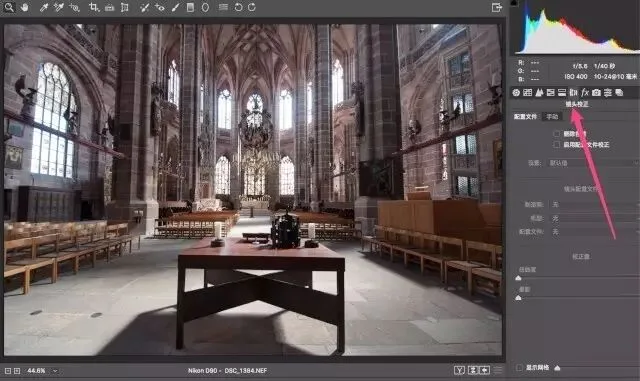
First to fix is lens distortion.
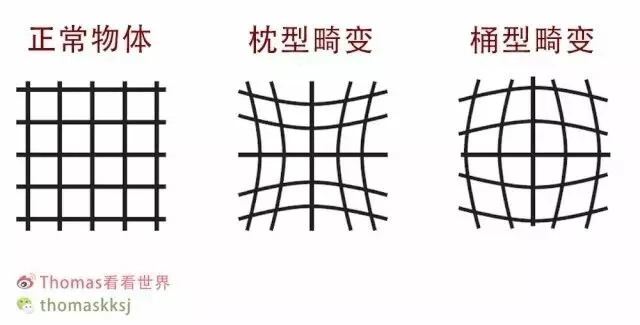
A lens is made of a series of convex and concave elements, which inevitably produce pincushion and barrel distortion.
Pincushion distortion usually appears in telephoto lenses: straight lines contract toward the center, like a pillow. Barrel distortion usually occurs at wide angles: straight lines at the frame edges bulge outward, forming a barrel shape.
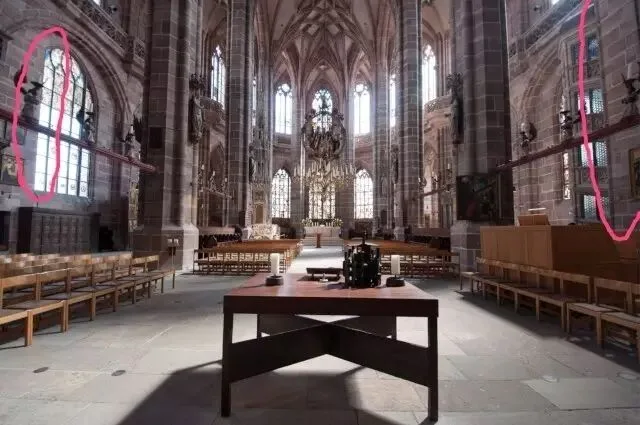
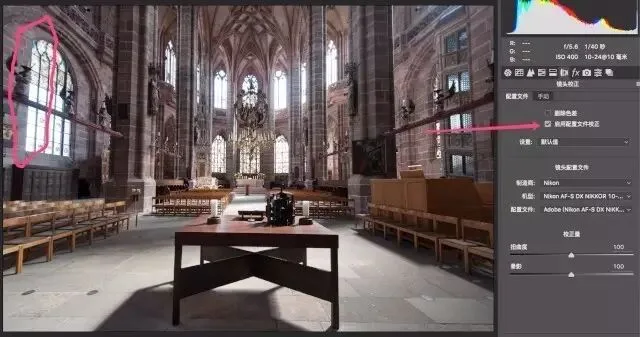
Look closely at this wide-angle church interior: the windows and walls circled in red, which should be perfectly straight lines, all bend outward to varying degrees. That's barrel distortion.
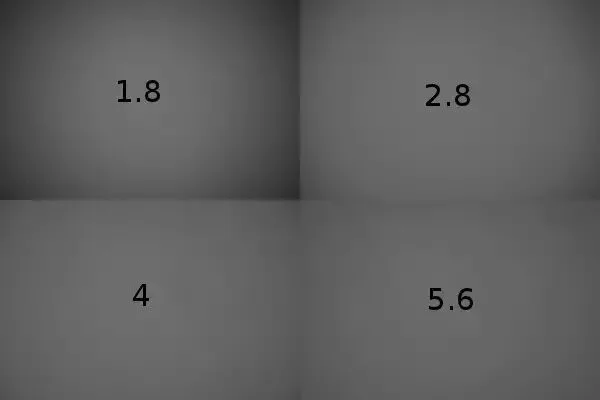
Besides distortion, 'vignetting' also comes from the lens's complex structure. Vignetting, also called 'dark corners', means the photo's edges are darker than the center. It's especially obvious at wide apertures. (Below: a 35mm f/1.8 lens's vignetting at various f-stops.) Sometimes vignetting adds a nice effect, but more often we need to correct it.
Correcting lens distortion and vignetting is simple: in the Lens Corrections - Profile panel, tick 'Enable Profile Corrections'. Immediately the window edges straighten and the corners brighten.
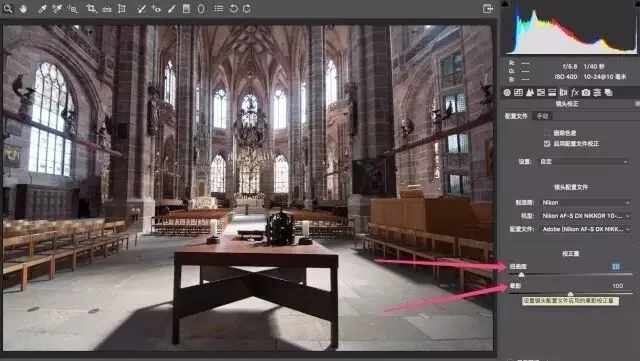
After ticking 'Enable Profile Corrections', the Lens Profile and Amount areas below activate.
The lens profile automatically reads the photo's EXIF, identifies the lens and camera, and matches the corresponding preset. Of course we can also manually switch to another profile.
The Amount section shows the current correction levels for distortion and vignetting — 100% by default. If I like the original barrel distortion, I can move the Distortion slider left to reduce the correction.
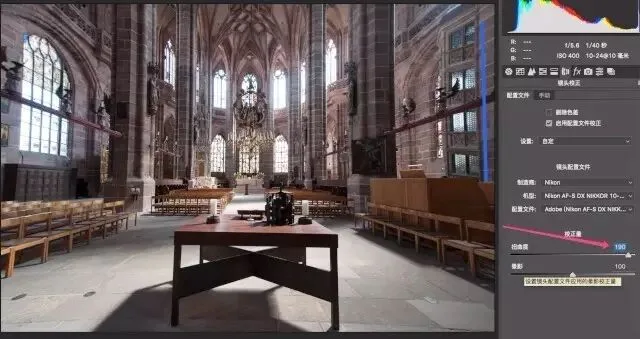
If I feel the distortion correction isn't enough, I can increase it. Below, with Distortion at 200%, the frame edges go from barrel to pincushion distortion — too much of a good thing.
Similarly, we can move the Vignetting slider to control the vignette correction.
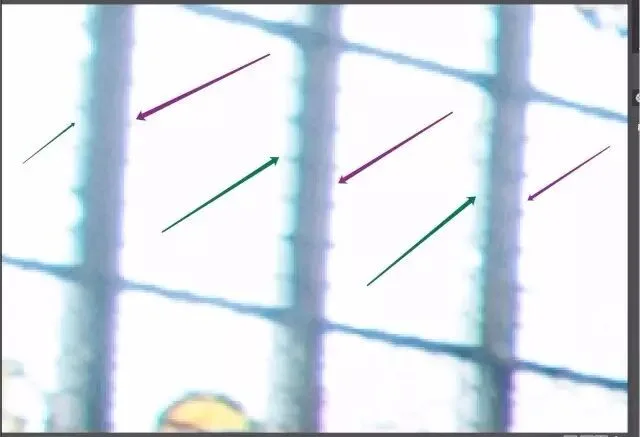
Besides distortion and vignetting, lenses often show chromatic aberration: green or purple fringes where highlights meet dark areas. Zooming into the church window, you can see green and purple fringes where bright light meets the frame — that's chromatic aberration.
Removing chromatic aberration is also very simple: above 'Enable Profile Corrections' there's a 'Remove Chromatic Aberration' option. Tick it and Adobe Camera Raw automatically detects light-dark boundaries and removes the green and purple fringes.
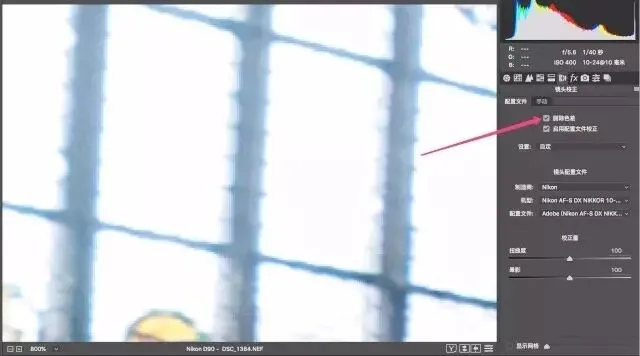
With these two options in the Lens Corrections - Profile panel ticked, 99.99% of lens distortion, vignetting and chromatic aberration problems are completely solved — no other work needed. For the rare unsolved cases, there's the Lens Corrections - Manual panel for manual adjustment of distortion, defringe and vignetting.
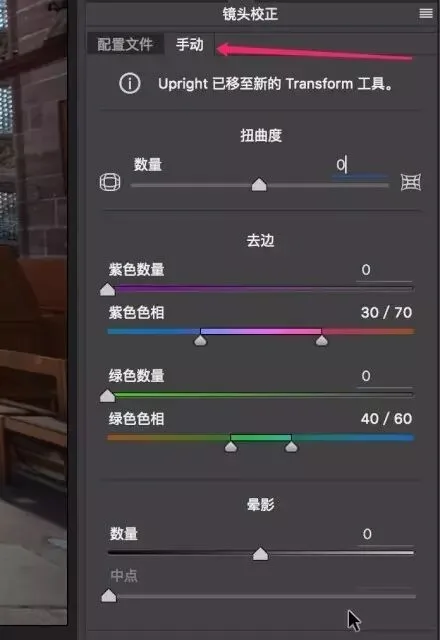
That's the lens correction part — just tick the two options in the 'Lens Corrections - Profile' panel, and barrel/pincushion distortion, vignetting and chromatic aberration are all swept away.
2
Level and perspective correction
We know objects appear near-big and far-small. Sometimes, to capture a whole building, we have to tilt the camera up — creating a big-bottom-small-top effect where parallel lines become converging diagonals. This distortion is called perspective distortion.
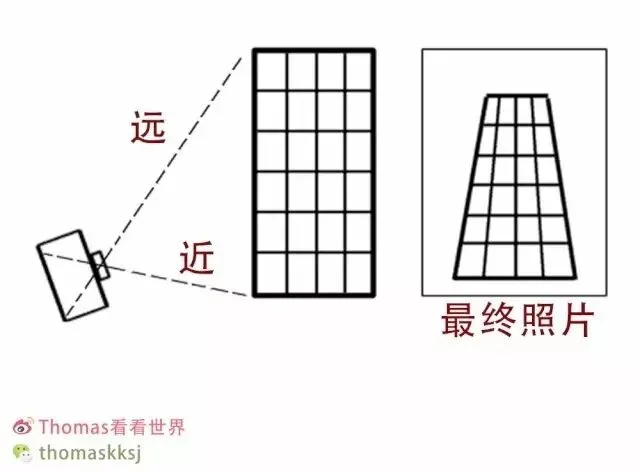
Sometimes we hold the camera unlevel, so lines that should be horizontal — like the sea horizon — aren't. We call this the horizon problem. Both horizon and perspective issues are easily corrected in ACR.
In early ACR versions, the level and perspective tools lived under Lens Corrections. In the latest ACR you'll see the note 'Upright has moved to the Transform tool' — these tools moved to the Transform panel (icon: a trapezoid grid). (Adobe's move makes sense: horizon and perspective problems come not from the lens itself but from shooting angle.)
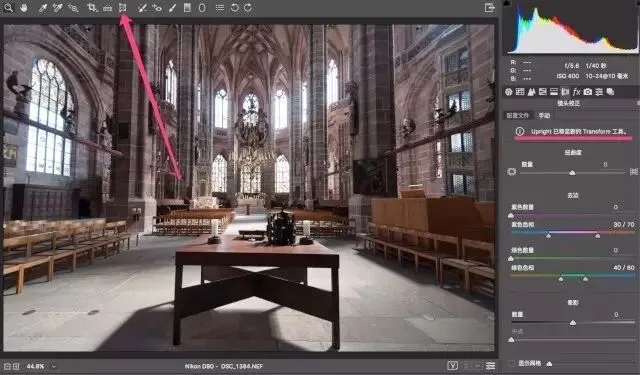
Click the 'Transform' icon and the Transform panel appears on ACR's right. Marks 1-6 are the 6 buttons we use most; the 7 manual sliders below are needed in 0.001% of cases.
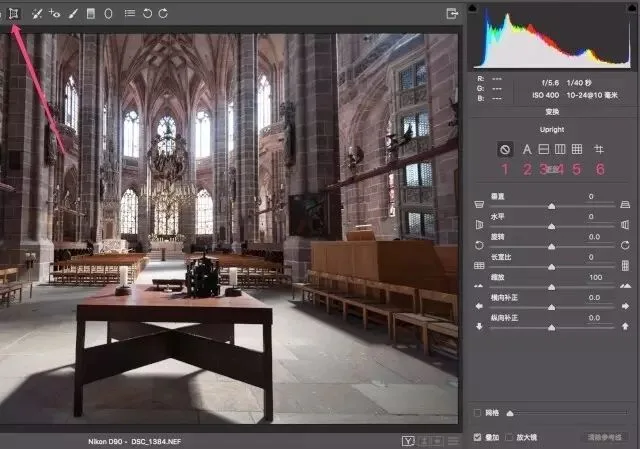
Entering the Transform panel, the default selection is the 'circle with a diagonal line' icon — no level or perspective correction applied.
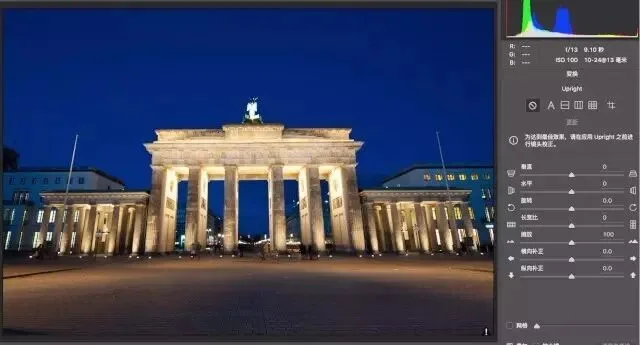
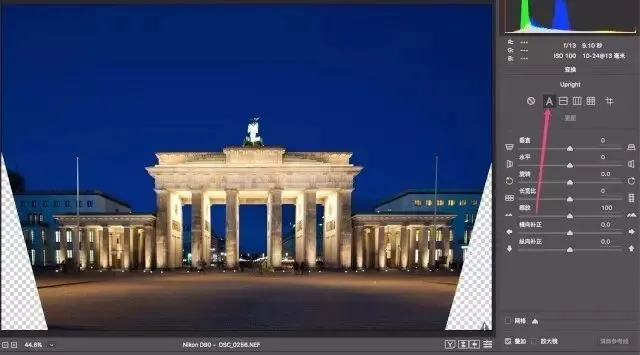
The next icon, 'A', is Auto correction: click it and ACR automatically analyzes the image and applies level and perspective correction. A very smart button — accurate about 60% of the time.
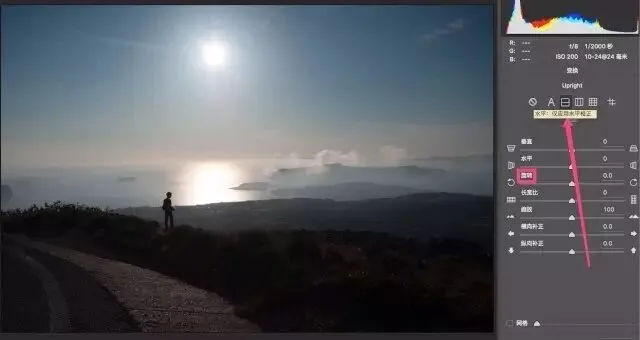
Button 3 (icon: a square with a horizontal line) applies level correction only — adjusting the horizon. Take the image below: no perspective problem, just a tilted sea level.
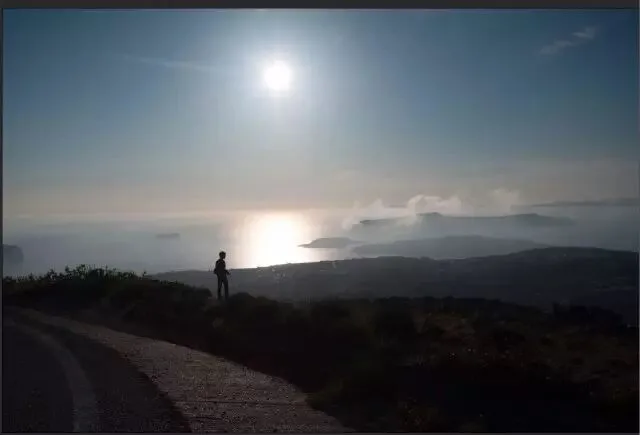
Click button 3 'Level' and ACR instantly flattens the horizon. The 'Level' button makes ACR auto-detect horizontal lines in the photo and rotate the image back to level.
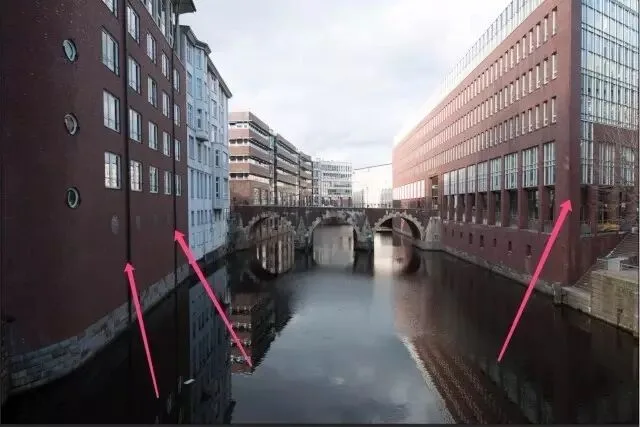
The photo below has vertical perspective problems on top of the horizon issue. The 3 straight building lines marked by arrows should be vertical to the ground and parallel to each other, but now they diverge.
Click button 4 in the Transform panel (icon: a square with 3 vertical lines) to apply 'level + vertical perspective correction' — first fix the horizon, then the vertical perspective.
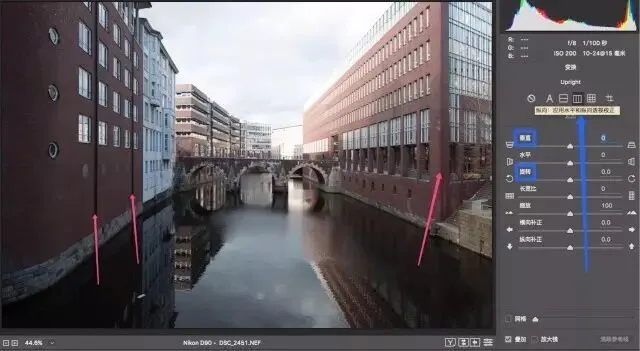
Button 5 is 'level, horizontal and vertical perspective correction' (icon: a square with both horizontal and vertical lines) — beyond button 4's corrections, it also tries to fix horizontal perspective (pulling horizontal elements onto one plane). This button is rarely used and often produces the bad effect shown...
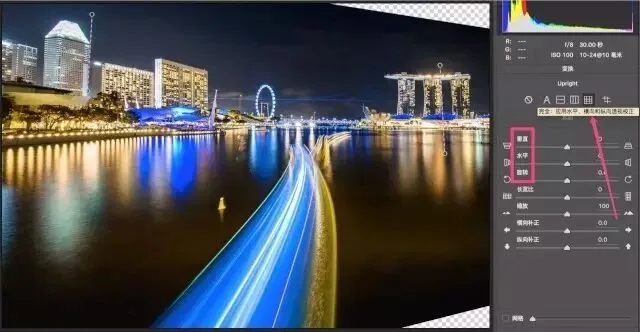
For most photos, we only need to try buttons 2-5 one by one and see ACR's automatic results. But sometimes the software can't analyze the perspective well — for this church image, with button 2 (Auto) applied, the windows are still tilted and the table is crooked.
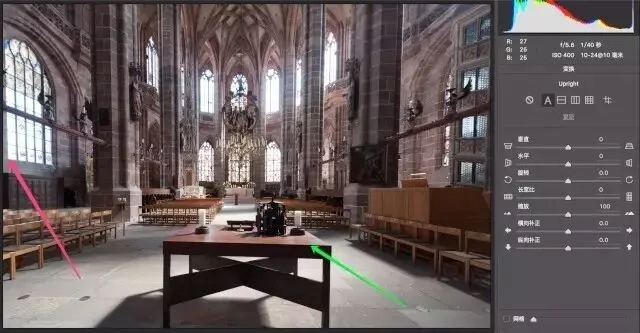
That's when we need the ultimate weapon — Guided correction (button 6, icon: 2 crossed horizontal and 2 vertical lines). (Older ACR versions lack this weapon — update now!)
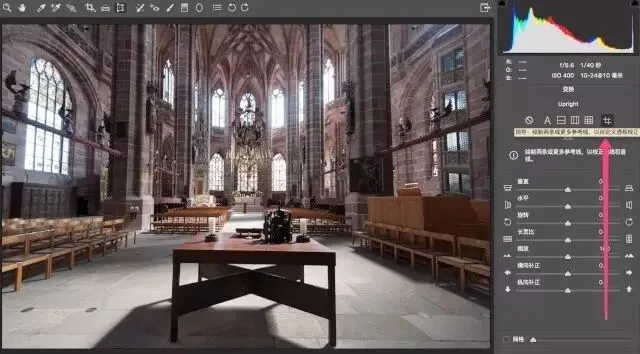
With this button selected, we drag the mouse to draw 2-4 guide lines in the image. Guide lines should be drawn along features that should actually be horizontal or vertical. Usually draw 2 vertical guides first to fix perspective distortion.
For example, the left window edge should be vertical, so I drag along it to draw the first guide line. (Nothing changes yet — ACR needs at least 2 guides to analyze.)
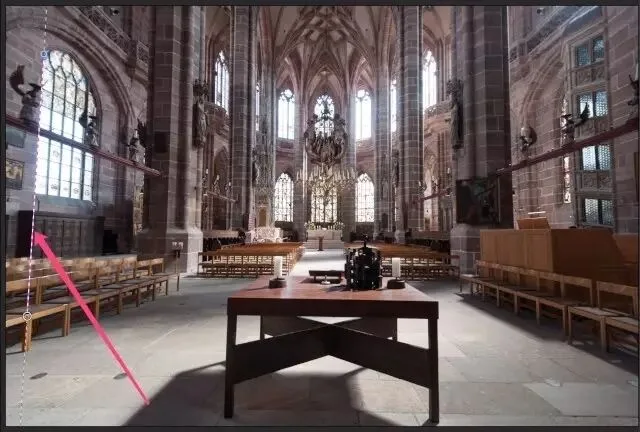
On the right wall there's another line that should be vertical — draw a guide there too. (Note: always do lens correction before perspective correction, or the wall lines here are still bent by barrel distortion...)
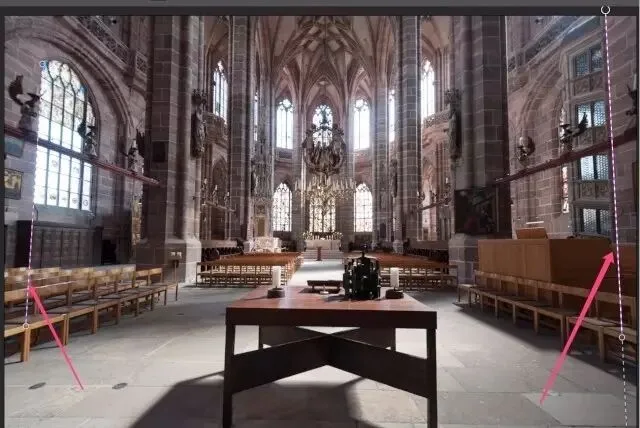
Release the mouse after the second line — a miracle: both guided lines become perpendicular to the ground. But the table is still crooked.
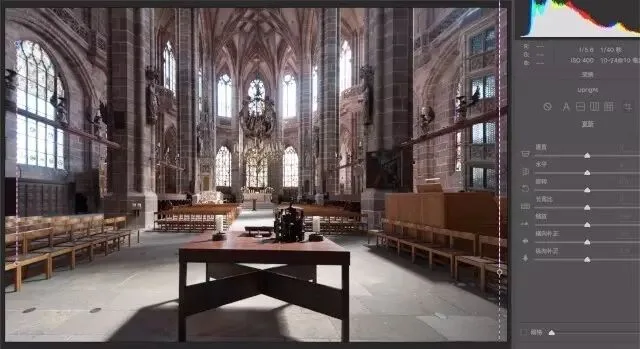
So draw one more horizontal guide to mark the level plane — here along the table's top edge.
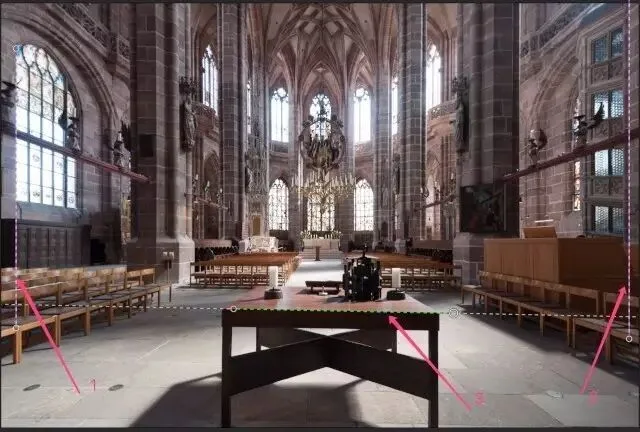
Release the mouse — the table becomes level while the windows and walls stay vertical.
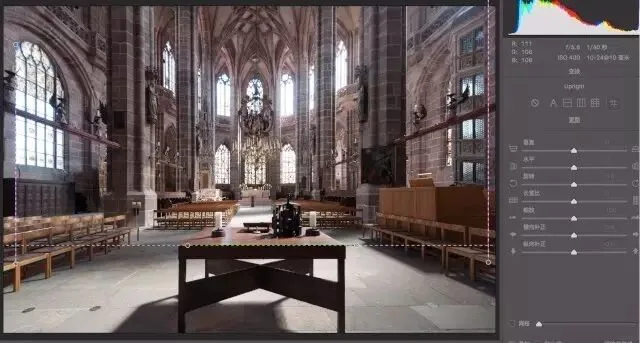
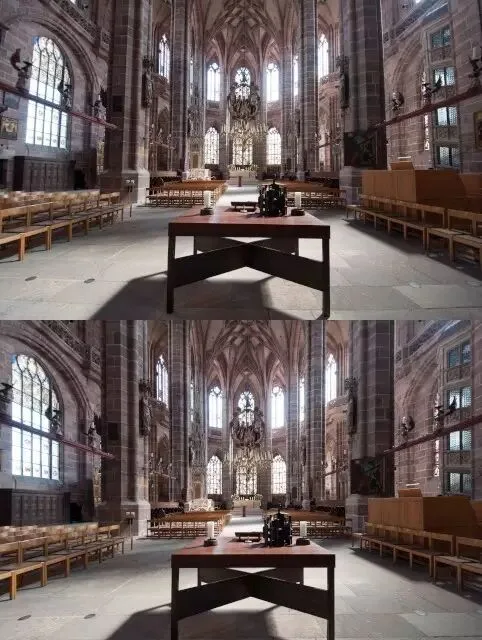
Ta-da — check the before/after: doesn't the perfectly squared church below look more solemn and majestic?
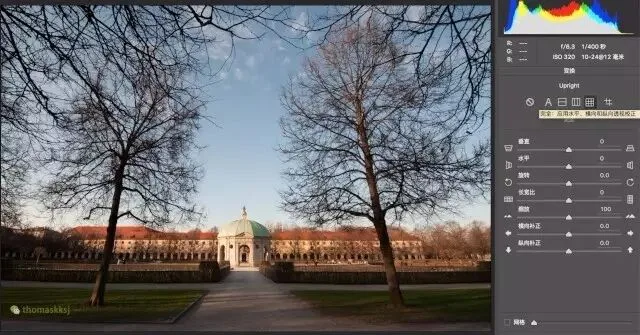
This photo of trees below also defeats the auto buttons — the trees seem to fall toward the center. Only the 'Guided' tool can save it.
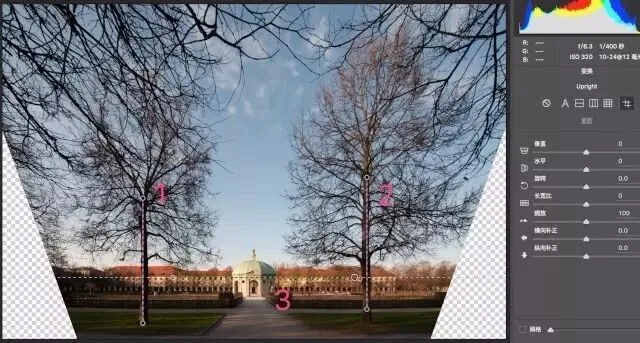
Draw two vertical guides along the two trees and one horizontal guide along the building's level plane — the squared-up frame returns.
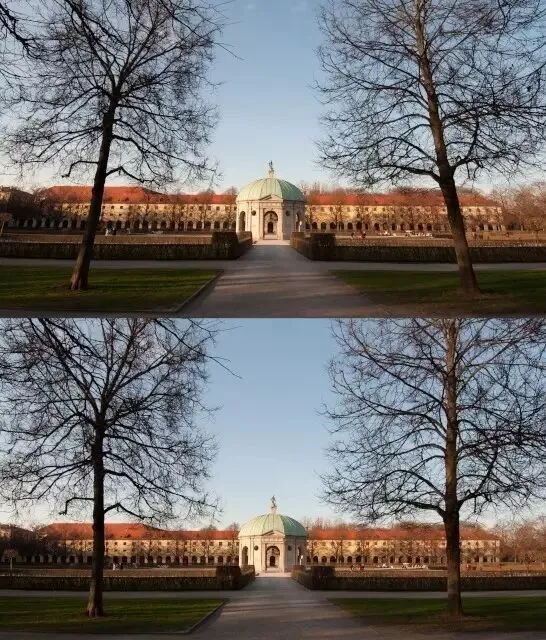
Compare before and after cropping — the power of correction speaks for itself.
Vertical guide lines are best placed near the frame edges, where distortion is more pronounced than at the center.
Generally one horizontal guide is enough to restore level. If the frame has horizontal perspective distortion, draw a second horizontal guide to correct it.
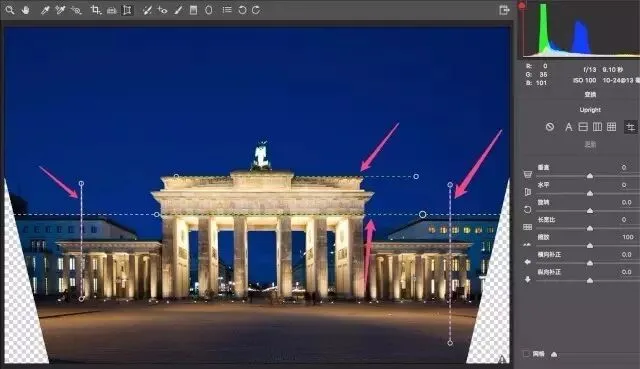
In this Brandenburg Gate photo, the buildings on the left and right should be the same size, but due to horizontal perspective, the right one is larger than the left.
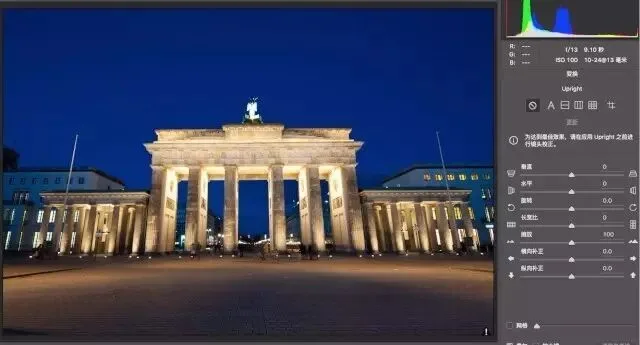
So for this photo I drew 4 guides — 2 horizontal and 2 vertical — fixing horizon and vertical perspective plus the horizontal perspective distortion.
3
Spot removal
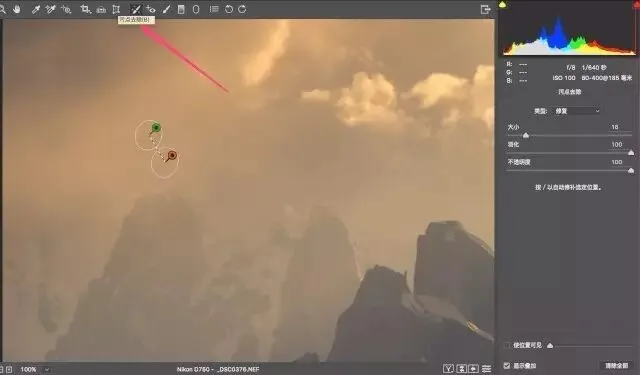
With lens distortion and aberration eliminated and perspective fixed, one remaining capture-stage weakness is dust on the camera sensor. Dust can enter when changing lenses, leaving dirty spots on photos.
Removing spots is simple: select the 'Spot Removal' tool at the top of ACR (the brush-with-sparkle icon); the mouse becomes a brush in the image. Adjust the brush size and paint over spots — ACR automatically finds similar texture to cover them.
Weekly summary
1. The first step of post is basic correction: lens corrections, level & perspective corrections, and spot removal. 2. Tick the 2 options in Lens Corrections - Profile to easily fix barrel/pincushion distortion, vignetting and chromatic aberration. 3. In the Transform tool you can correct horizon and perspective problems — usually buttons 2-5 let the software auto-analyze and fix; otherwise use button 6 (Guided) to draw vertical and horizontal guides. 4. Paint over spots with the Spot Removal brush to erase them.
I'm @Thomas Chu Photo — every Sunday evening I share an original piece of photography know-how.