Photography Tutorial · 2021-06-20
One Video Covering Every PS Cutout Tool: Solve 99% of Your Local Editing Problems
Thomas Chu Photo
Photoshop has so many cutout tools! Quick Selection, Select and Mask, the Pen Tool, channels, Color Range... beginners often find them bewildering.
In today's post-processing tutorial, Thomas covers nearly all the commonly used PS cutout tools in a concise 15-minute video — their usage, differences, and the order to apply them in.
After watching today's tutorial, cutouts will never trouble you again — no matter how complex the edge!
Video Tutorial
▶ Watch the video tutorial on Bilibili
This is the fully illustrated companion to the video above. Photoshop has too many selection tools — Quick Selection, Select and Mask, Pen, Channels, Color Range — and beginners get lost in them. Thomas strings them all into one clear logic: AI first, then obvious edges, then complex edges, and finally manual and translucent selections, with live operation screenshots from the video. Master this and 99% of cutout problems are solved.
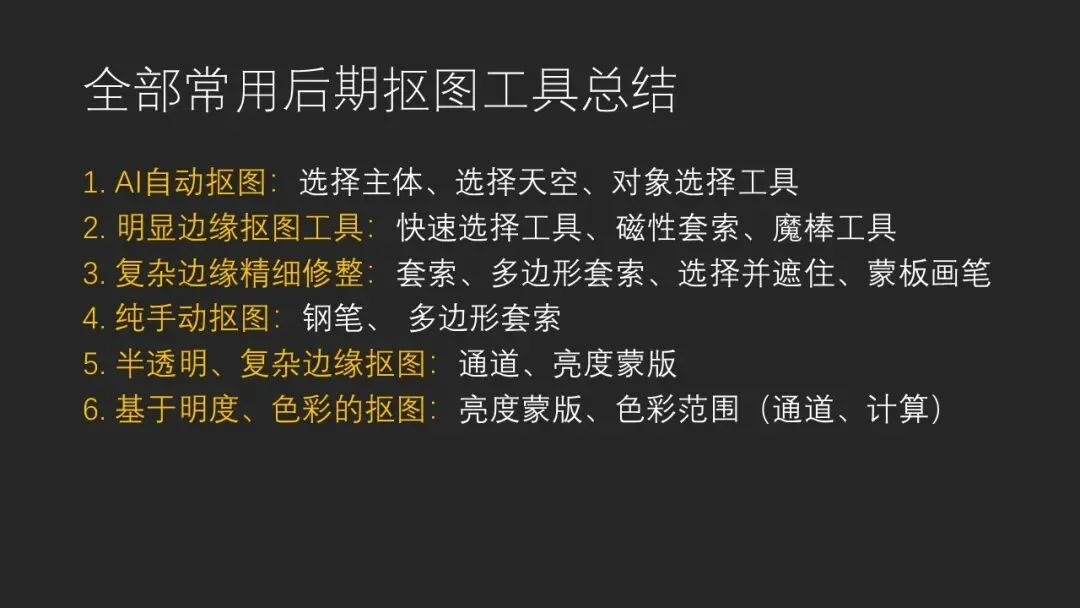
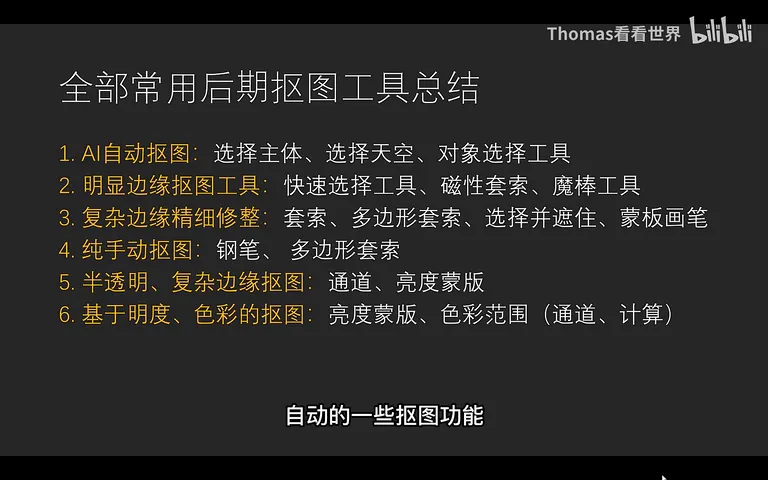
Start with the overview: this summary card, shown repeatedly in the video, lists the six families of tools arranged from easy to hard, automatic to manual — the same order the article follows.
01 AI Auto Selection: Try One Click First
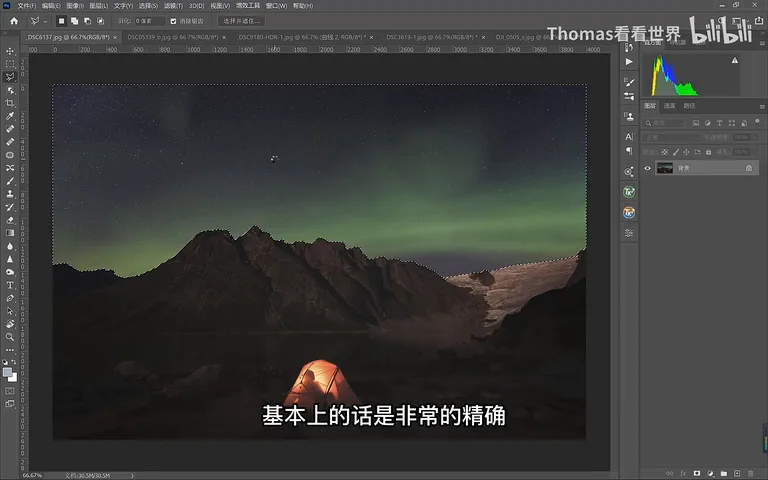
The first move for any cutout is to trust the AI. To select the sky, open the Select menu and click Sky: the AI recognizes and masks it almost perfectly, with only a few local edges needing touch-ups — in the aurora photo from the video, the ridge line comes out spotless after one click (at 0:44 in the video).
To select the subject — a person, a tent, a car in the background — use Select Subject. In the video one click lifts the climber and the rock out as a whole; if the result is sloppy, switch to the Object Selection tool (fourth group in the toolbar) and marquee a region so the AI only picks the subject inside your box — far more controllable than a full-frame subject selection (at 1:06 in the video).
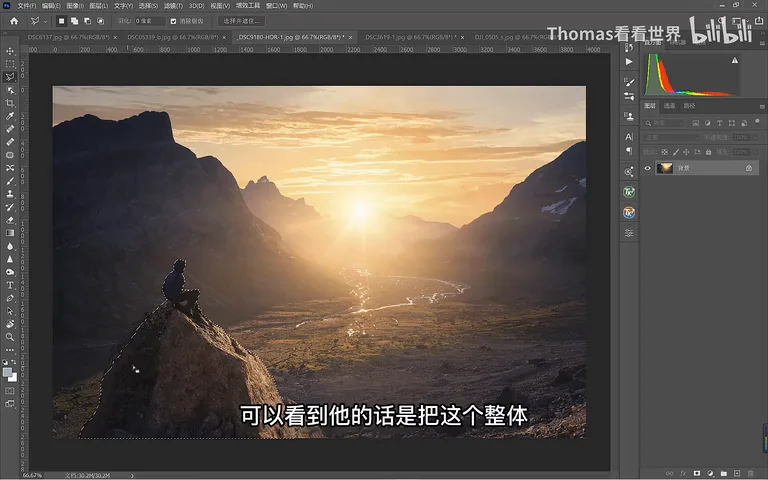
AI auto selection solves over 80% of problems. The rest fall into three groups by edge type — obvious edges, complex edges, and translucent or luminosity/color-based selections — which is exactly how the remaining tool families divide the work.
02 Obvious Edges: Quick Selection, Plus and Minus
When an object is neither sky nor subject but its edge contrasts strongly with the background in color or brightness — like the sea and sky inside the train window against the dark frame in the video — the Quick Selection tool shines: paint with the plus brush and the window contents join the selection in seconds (at 2:46 in the video). The Magnetic Lasso and Magic Wand belong to the same family.
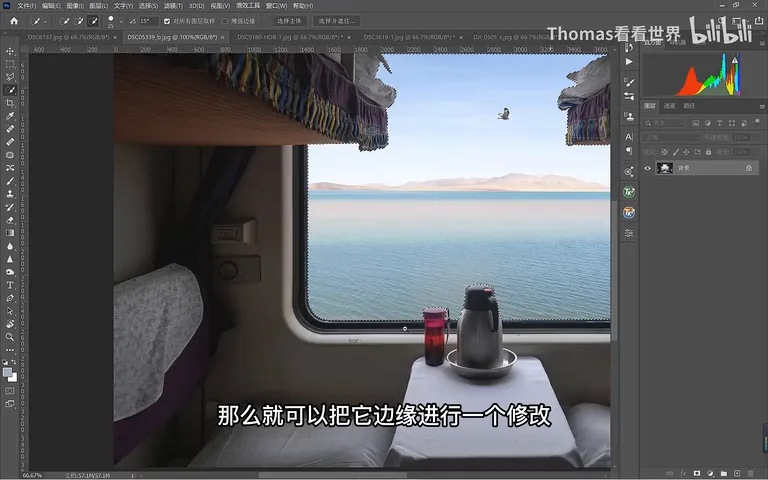
Over-selected? Hold Alt and the brush becomes a minus, subtracting the excess from the selection; every selection tool obeys the same rule — Shift adds, Alt subtracts. A few passes of plus and minus and an obvious edge like the window is cleanly closed (at 3:22 in the video).
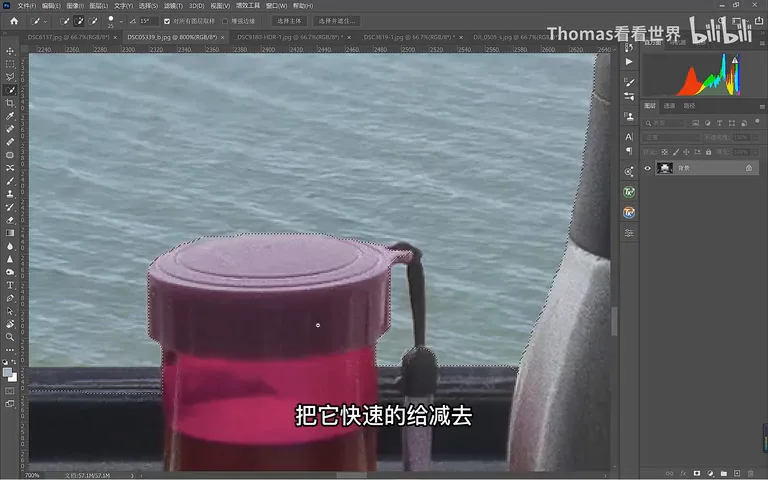
03 Complex Edges: Lasso and Select and Mask
When the edge gets trickier but its path is still visible, repair it manually with the Lasso and Polygonal Lasso. The video's example is the handle of a cup on the windowsill: click point by point along the handle with the Polygonal Lasso. Don't dismiss it as a straight-line tool — photos are pixel maps, not vectors, so a few extra points on curves hug them just fine, and Shift-add / Alt-subtract still applies (at 4:54 in the video).
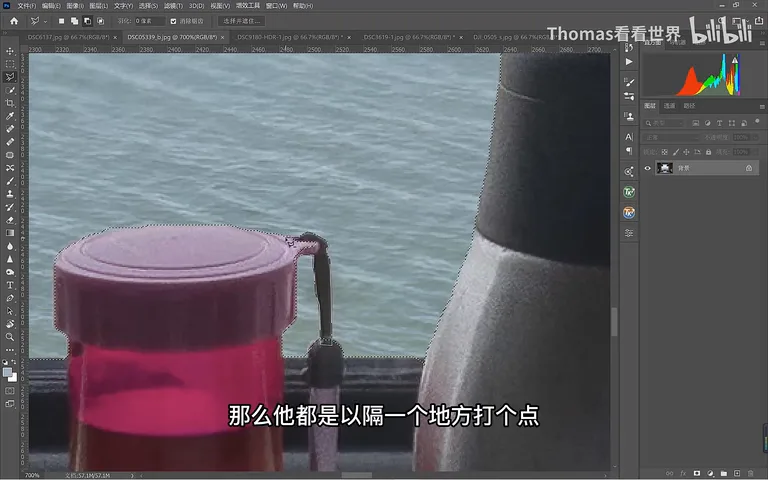
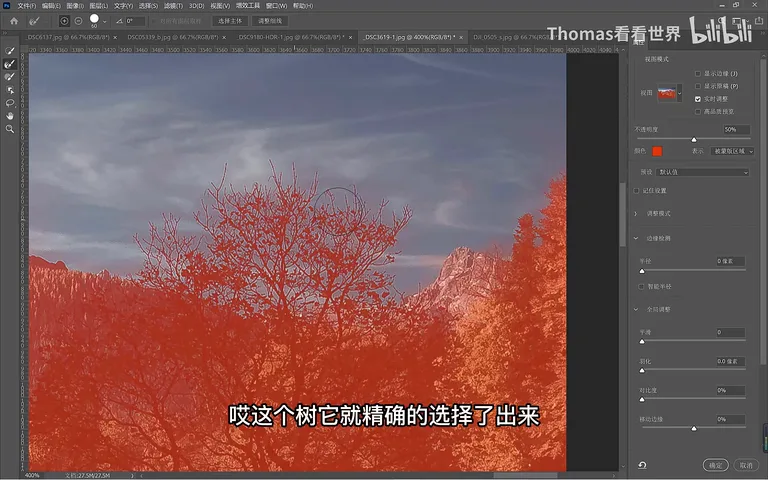
The genuinely tough cases are branching trees and pet fur. However you built the selection, the options bar offers Select and Mask: inside, pick the second tool, the Refine Edge Brush, and sweep it along the treetops — red overlay marks unselected areas, transparency marks selected ones, and Photoshop automatically separates twigs from the sky behind them; on exiting, the selection is precise down to each branch (at 6:38 in the video).
04 Precision Manual Cutouts: Pen and Feathering
The fourth family sees little daily use — it serves commercial-grade key visuals and pure-manual purists who find AI and lassos 'soulless'. The video's example: a pair of black hiking boots whose color and texture are nearly indistinguishable from the black trousers beside them, so faint even the eye cannot tell where the boot ends — hopeless for AI. The Polygonal Lasso clicked along the approximate outline picks them out, with extra points on the curves (at 8:02 in the video).
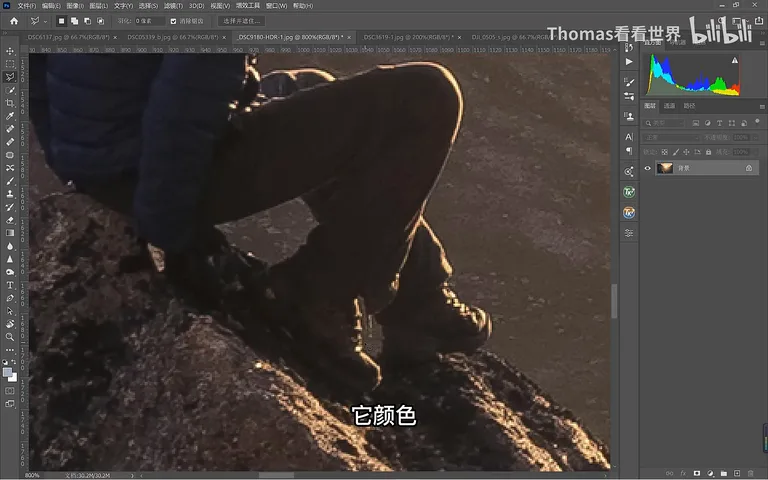
Adjusting a hard selection directly leaves harsh edges, so enlarge the selection's feather — 2.6 pixels in the video — and the transition turns natural instantly. For the ultimate precision, the Pen tool remains the definitive manual cutout instrument; tutorials abound online, so it is not repeated here (at 9:19 in the video).
05 Translucent and Tonal Selections: Channels and Luminosity Masks
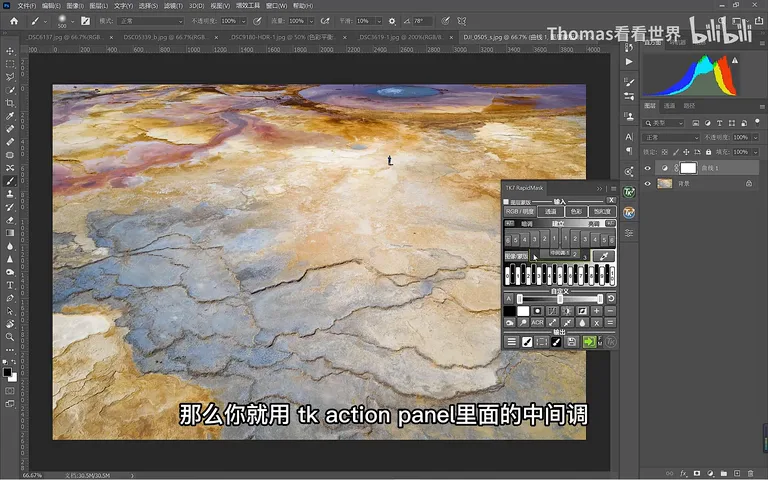
The last family selects objects that are complex and translucent — a cloud, rising flames, or the winding river in the distance from the video. They were never suited to painted selections; you select by brightness instead, via Channels or luminosity masks. Channels are the foundation of luminosity masks, and Thomas generates them in one click with the TK Actions plugin: pick the mask whose tonal distribution best matches the target, push the background darker still, and the river lights up all by itself (at 9:44 in the video).
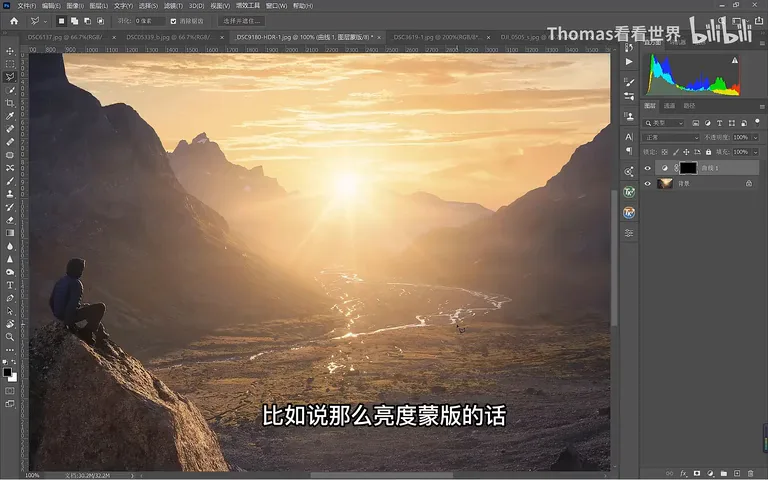
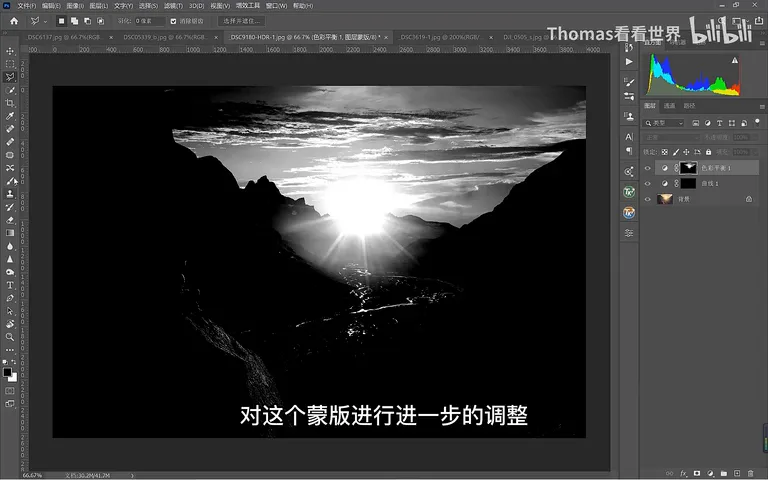
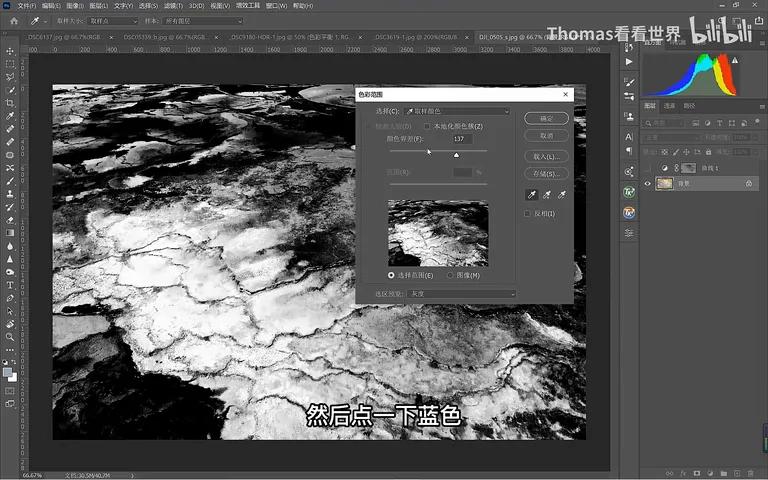
Luminosity masks select not just 'what is bright' but 'what color'. To boost contrast only in the midtones, generate a midtone mask from the TK panel and apply an S-curve — the contrast lands on the midtones alone, without the global S-curve's telltale stretching of highlights and shadows (at 12:36 in the video). To select every blue in the frame, use Select > Color Range and click the blue, then steer precision with Fuzziness: a high value drags in neighboring cyans and violets, a low one keeps the selection tight (at 13:21 in the video).
1. Trust AI first: Select Sky, Select Subject and Object Selection solve 80% of cutouts; 2. Hand obvious edges to Quick Selection, Magnetic Lasso and Magic Wand, refining with Shift-add and Alt-subtract; 3. Use Select and Mask's Refine Edge Brush for branches and fur, and Pen plus Polygonal Lasso with feathering for commercial-grade retouching; 4. For translucent subjects like clouds, flames and rivers, use channels and luminosity masks, and select midtones or colors with the TK panel and Color Range fuzziness.
PPT