Photography Tutorial · 2018-06-11
Every Warp and Transform Technique for Landscape Post-Processing
Thomas Chu Photo
One practical tutorial a week — making photography easy to learn
I'm AdventureX member miller姚明来.
In this article, I'll round up every method for warping and transforming scenery in landscape post-processing.
1. Free Transform
This is my most frequently used warping method — practical and easy to operate.
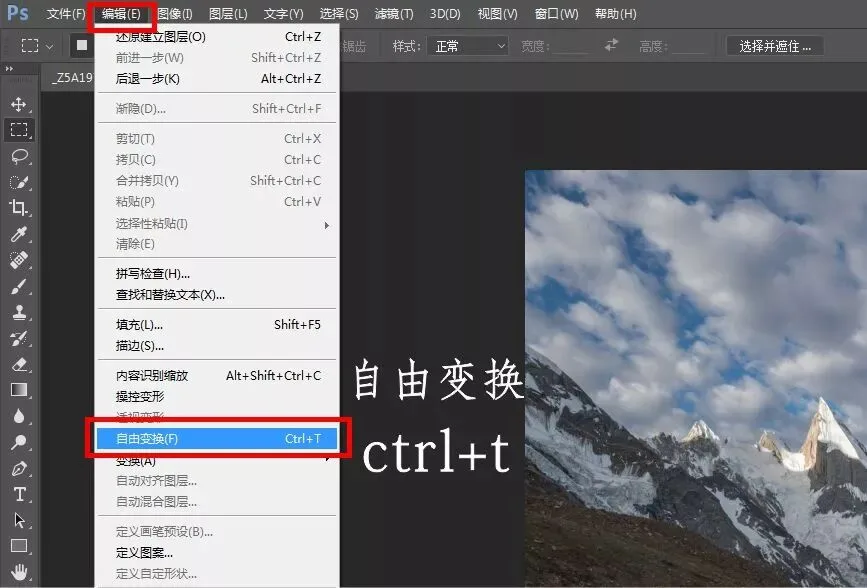
In Photoshop, click "Free Transform" from the Edit menu. The shortcut Ctrl+T is the usual way to invoke it.
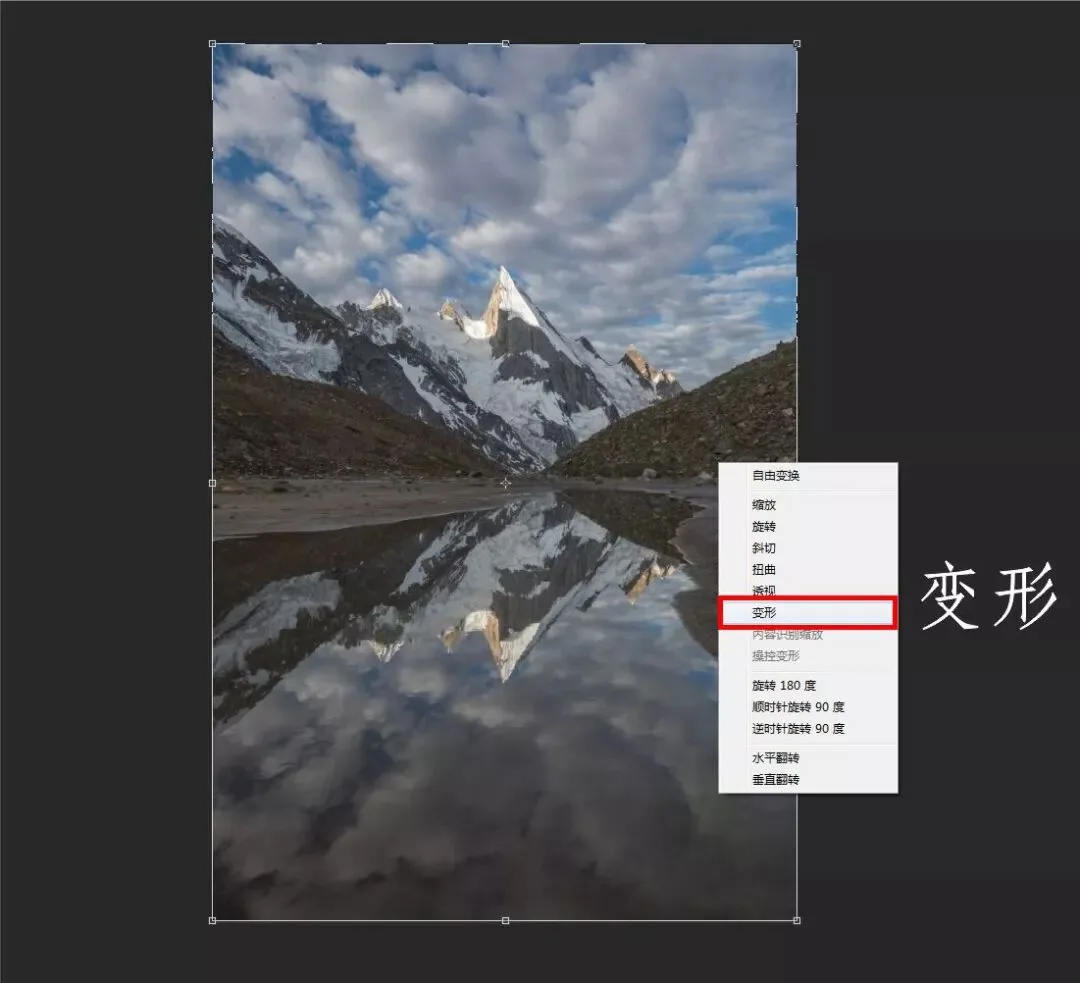
Then right-click the image to bring up the menu and choose "Warp."
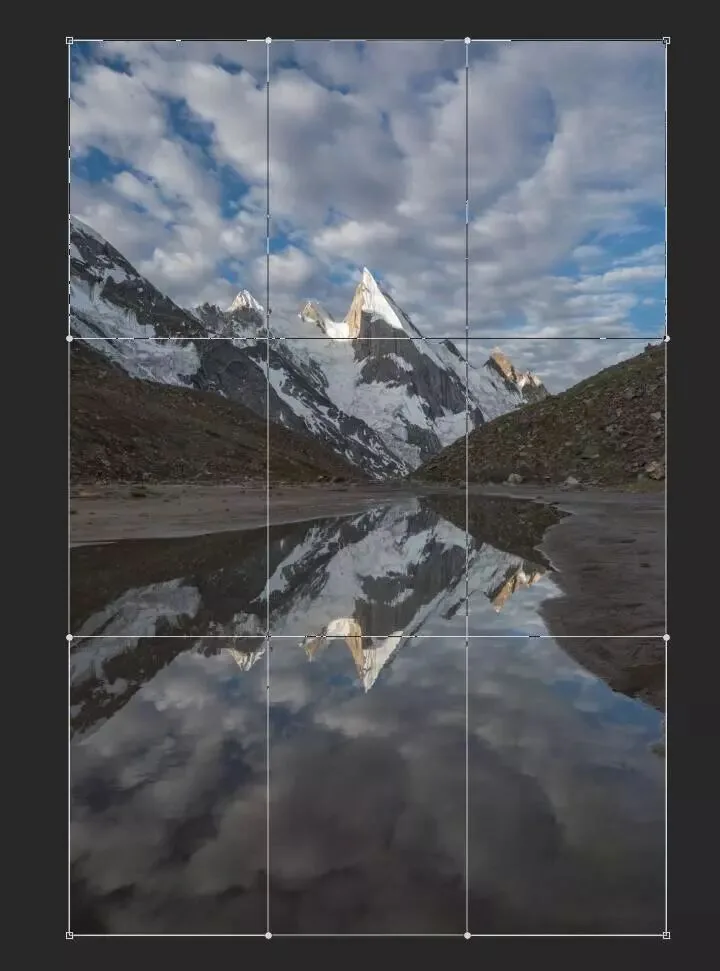
A rectangular wireframe appears over the image. Drag the horizontal and vertical lines to change the shape, proportion, and size of elements. For example, to make a peak look sharper and taller, stretch the horizontal lines vertically.
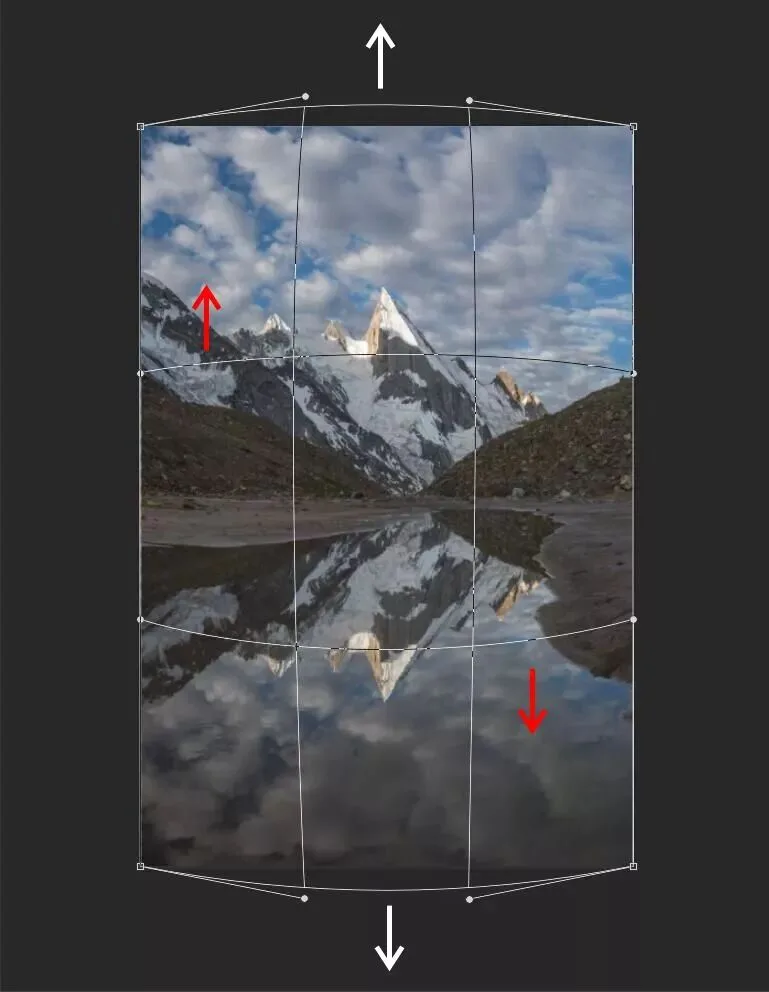
This tool handles bold, large-scale changes to the affected area. For small local tweaks, combine it with selection tools. For instance, to stretch only the secondary peak on the left, first select that area with the Rectangular Marquee.
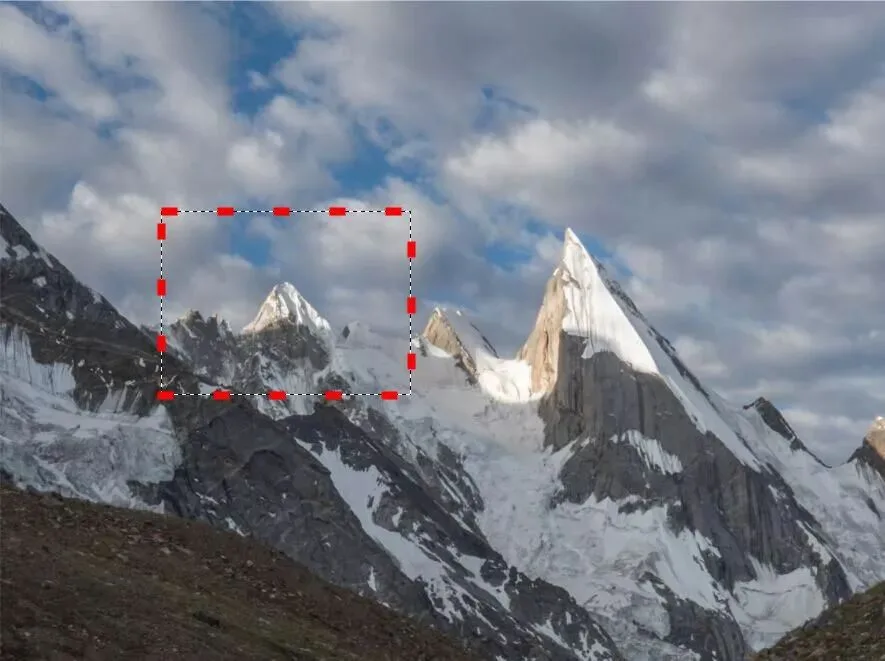
Then press Ctrl+T for Free Transform, right-click, and choose Warp.
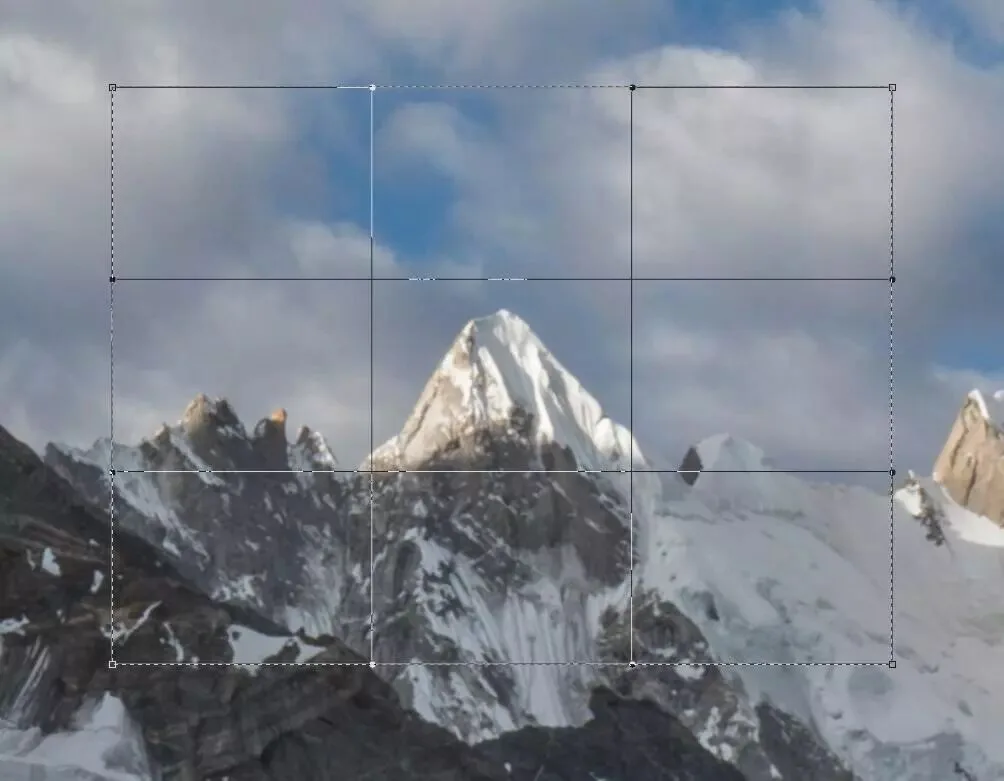
Drag the wireframe to stretch the mountain into the shape you want, and press Enter to apply.
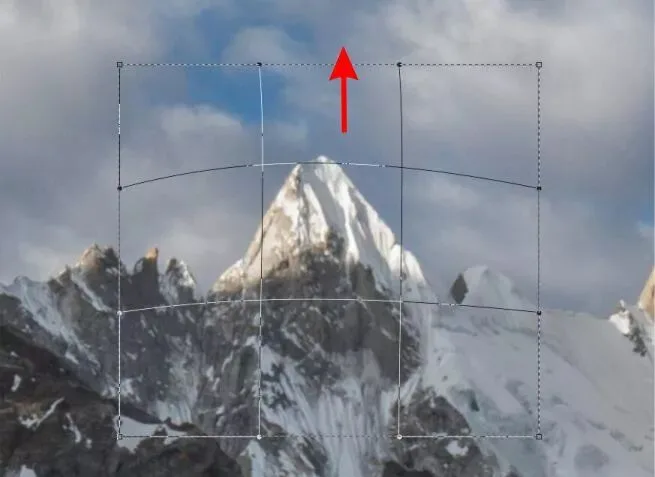
When using Free Transform with a selection, never drag the four outermost border lines — that would misalign the image.
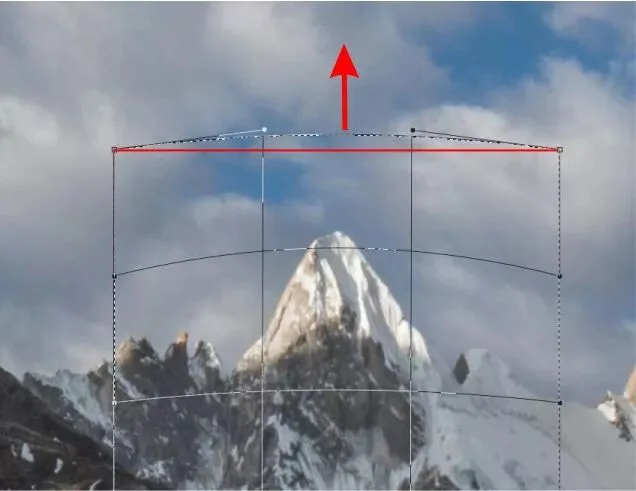
For example, if I accidentally bend the topmost horizontal line while stretching, the frame gets misaligned like the image below.
Free Transform can not only stretch mountains to make peaks taller, but also compress scenery to re-balance the composition.
The image below has only basic stitching, no color grading yet.
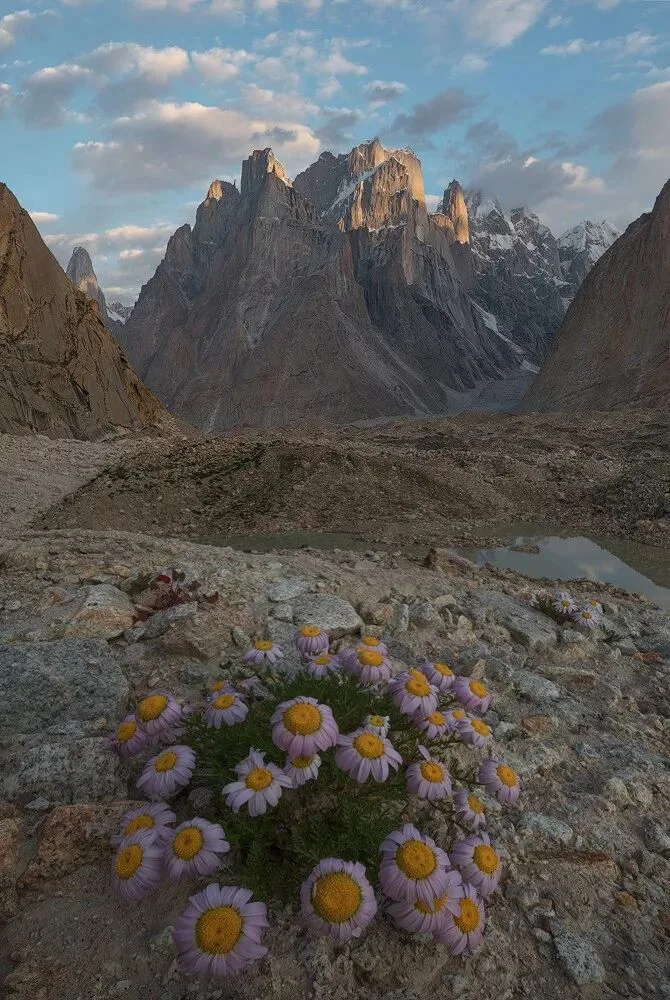
Because of the terrain at capture time, the midground takes up too much of the frame, and the messy rocks break the visual connection between foreground and background, leaving the composition loose. Here I can select the midground with the Rectangular Marquee and compress it.
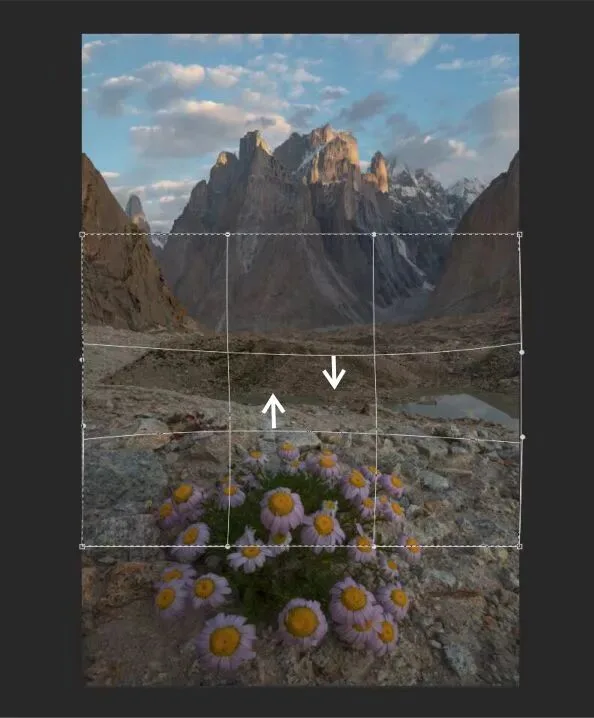
This operation also enlarges some of the flowers near the midground — two birds with one stone.
Free Transform can also reposition the foreground for a more precise composition.
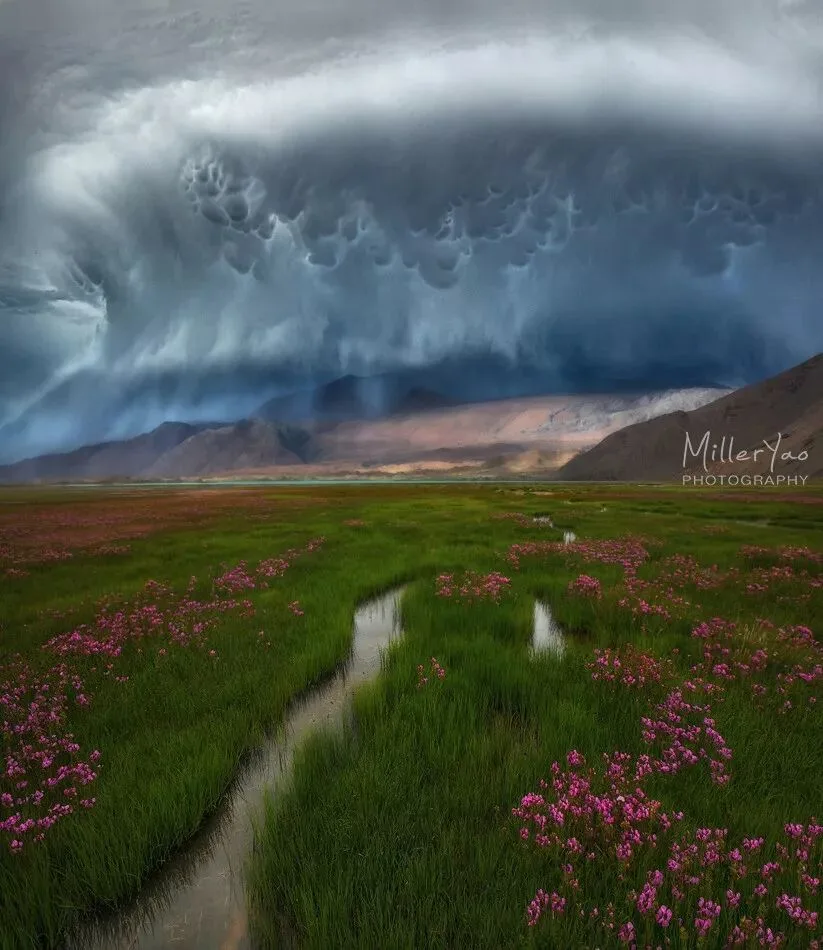
The leading line of this image is the small foreground stream, flowing from the lower-left corner into the distance — but I noticed its starting point sits slightly off. Without cropping, I can use Free Transform to place the stream's origin exactly at the lower-left corner.
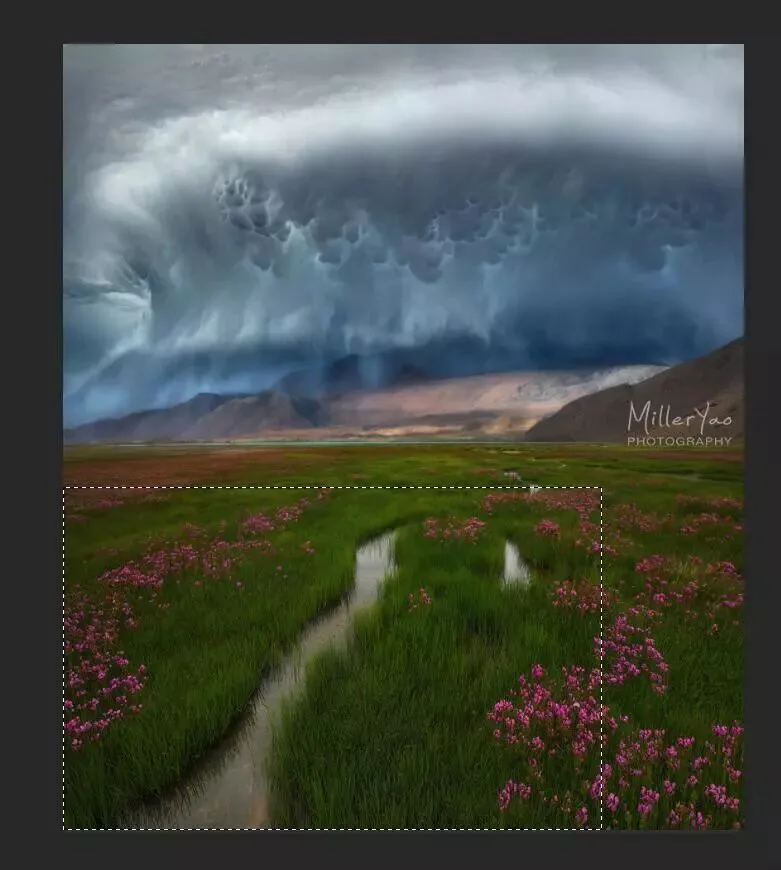
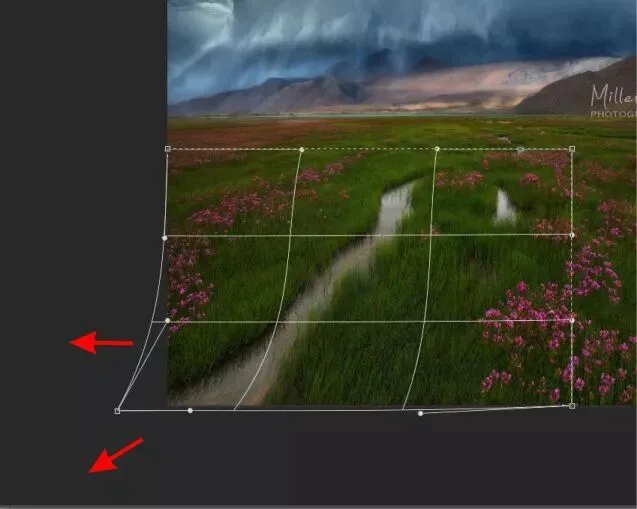
As before, select the area you want to adjust, then transform and stretch it.
After transforming, the stream's leading line extends precisely from the lower-left grid point.
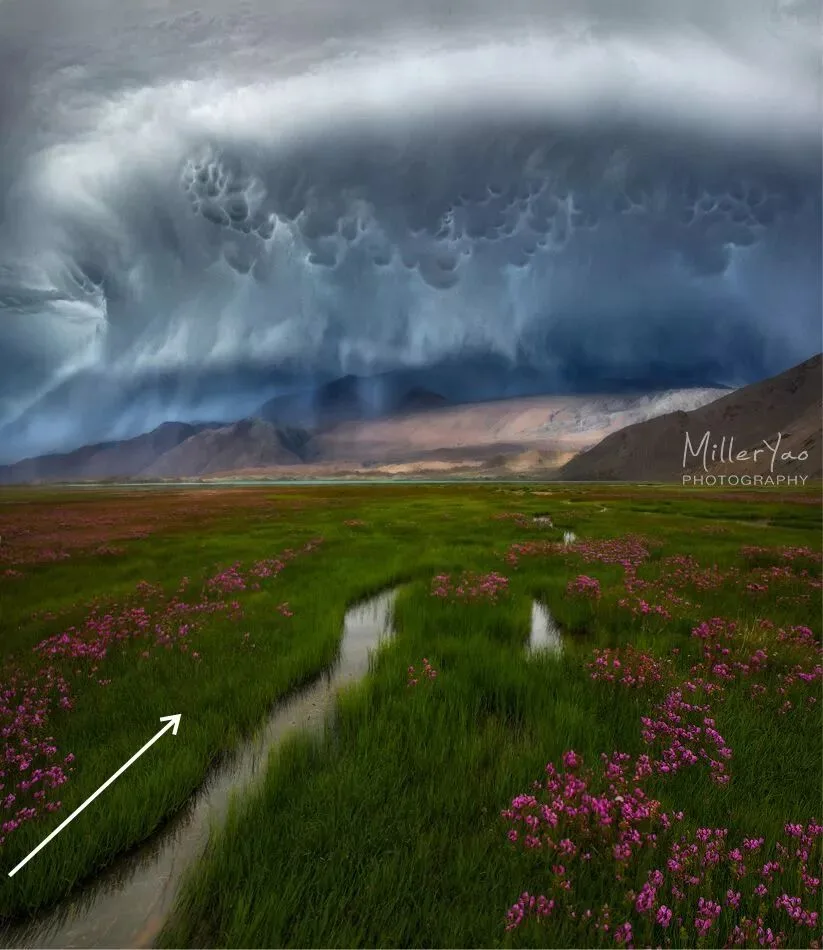
Free Transform enables many more adjustments. So when you spot a composition problem, don't rush to crop — try whether Free Transform can rescue it first.
2. Perspective Warp
Click "Perspective Warp" from Photoshop's Edit menu to invoke the tool.
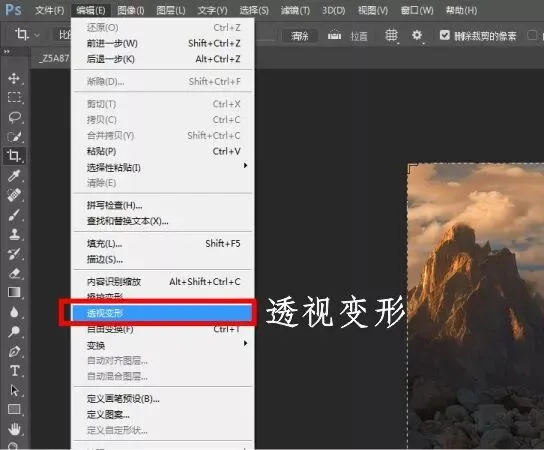
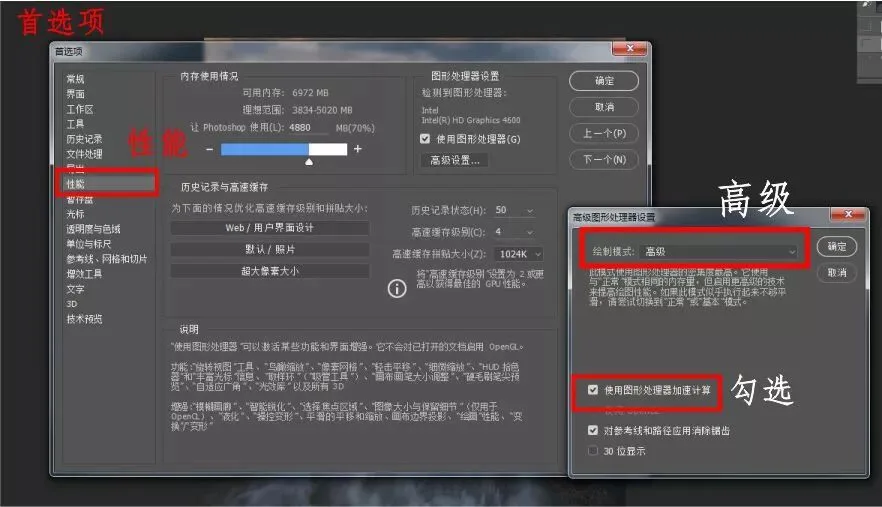
Some of you may find "Perspective Warp" grayed out. Go to Edit - Preferences - Performance, check "Use Graphics Processor," set Drawing Mode to "Advanced" in Advanced Settings, and check "Use GPU for computation." That activates Perspective Warp.
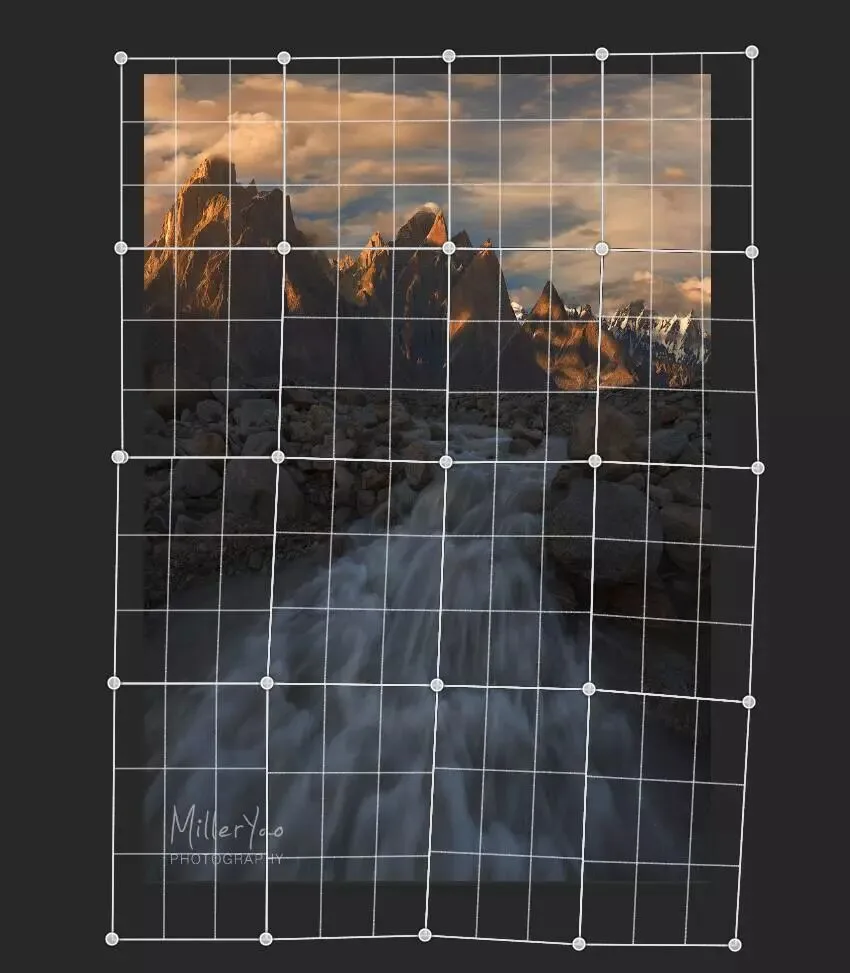
First, drag rectangular frames to cover the whole image — the more frames you lay out, the higher the adjustment precision and the more control points you get.
Then switch to the "Warp" panel on top.
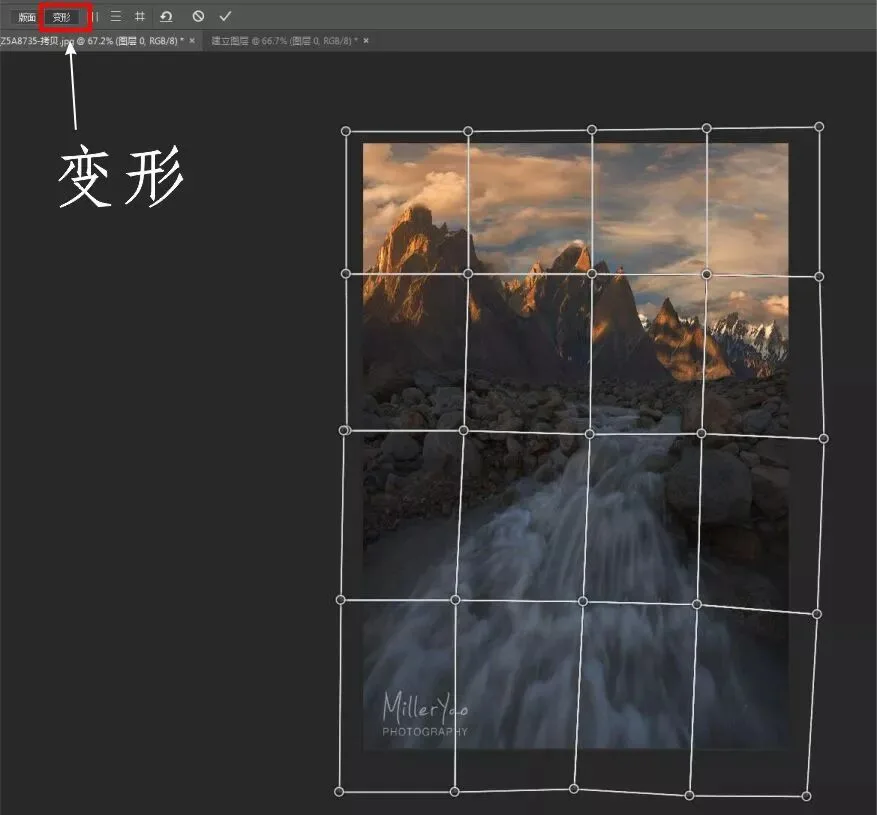
Drag individual grid points to reshape elements. To make the mountain taller, for example, drag the grid points in the mountain area upward.
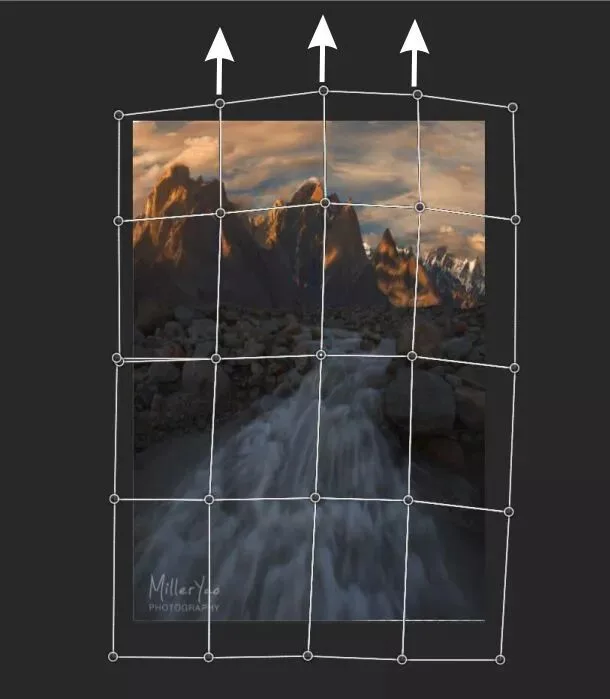
Finally, press Enter to apply the effect.
For large-scale reshaping, I prefer Perspective Warp — it's more controllable and the effect is more pronounced.
3. Liquify
Everyone knows Liquify — it's most common in portrait work. I use it only for small detail tweaks; large-scale warping with Liquify destroys pixels and image quality, and I've heard prints can come out terrifying.
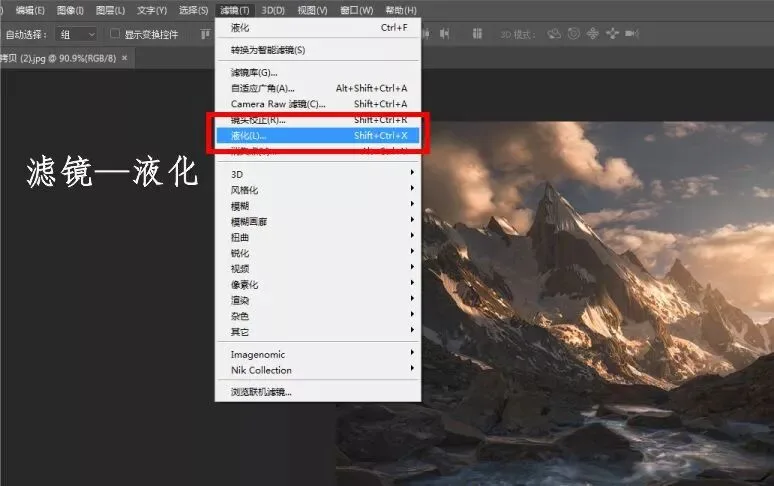
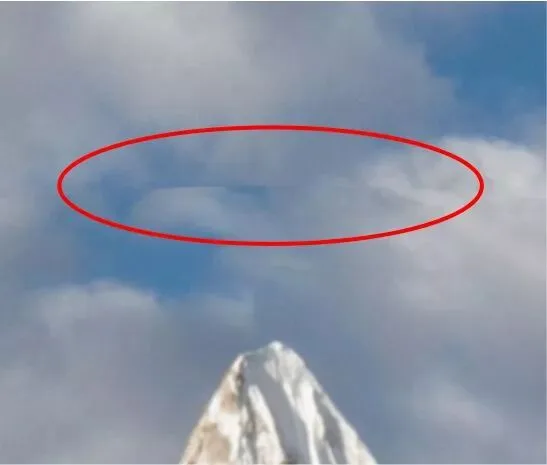
Choose "Liquify" from the Filter menu at the top of PS to open the panel. To adjust the shape of the clouds above the peak, for example, Liquify does the job.
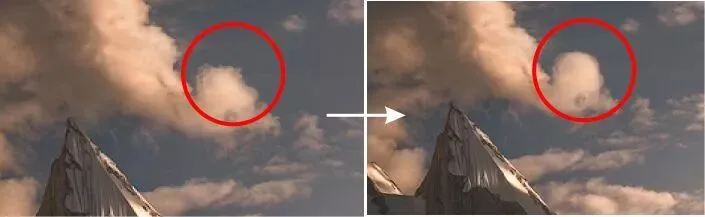
Liquify achieves finer shape adjustments than the previous two methods — but remember: never use it on large areas, details only.
4. Focal-Length Blending
When shooting with a wide-angle lens and a close foreground, lens distortion magnifies the foreground while shrinking the distance. Focal-length blending compensates for this ultra-wide parallax and restores the background's grandeur.
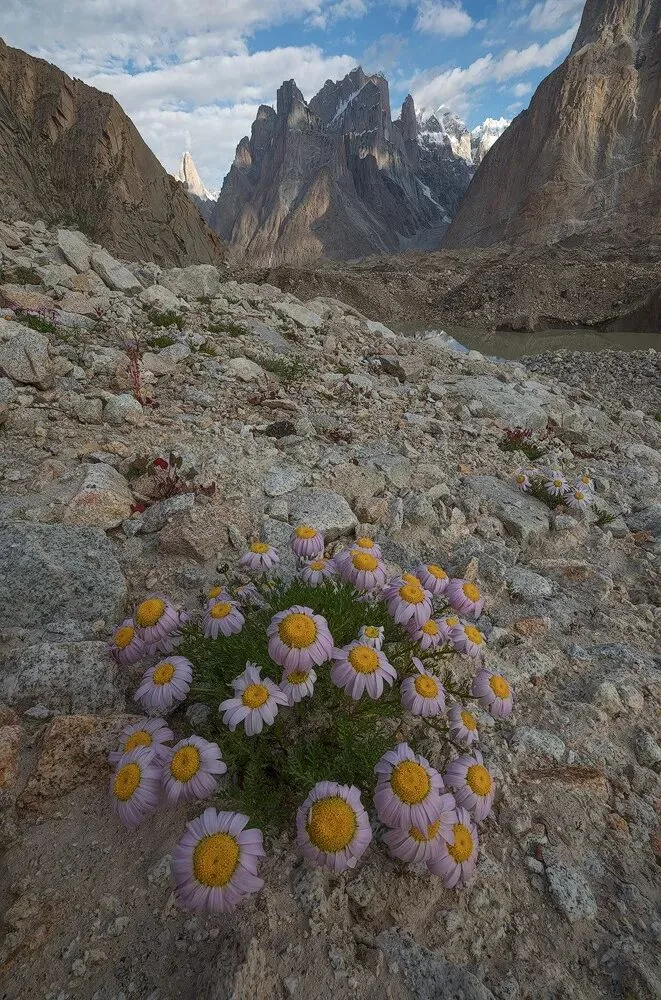
The image above was shot at 16mm on a 16-35 lens. Because the lens was close enough, the unremarkable foreground wildflowers are hugely magnified — while the majestic distant peak is compressed into insignificance.
So I shot a second frame at 35mm with the snow mountain at its proper size.
Then blend the two frames in the midground:
Focal-length blending is a controversial technique — use it judiciously and in moderation.
