Photography Tutorial · 2017-02-12
Beyond Wide Angle: The Magic of Panorama Stitching
When we encounter a magnificent landscape, even an ultra-wide lens can't capture it all in one frame. Or when we see a truly breathtaking scene, we want a large-format image to show off its details. That's when stitching (panoramas) becomes invaluable.
This article explains in detail what to watch for when shooting panoramas, and how to stitch photos quickly with Lightroom/ACR.
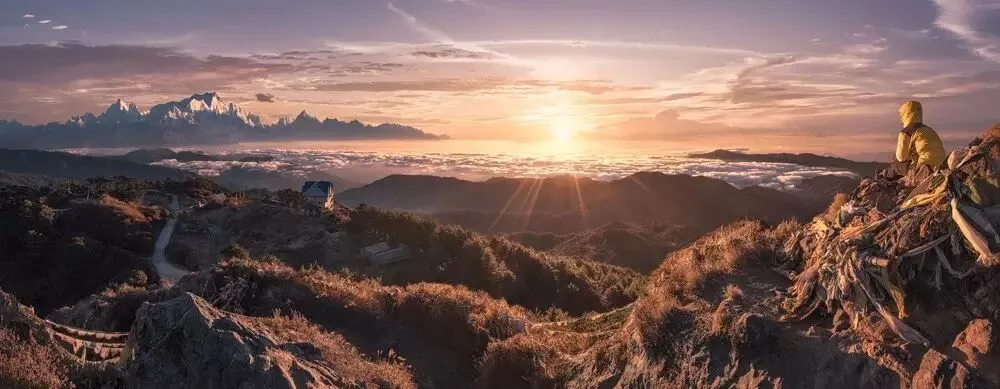
Photographer: Thomas Chu Photo, thomaskksj.tuchong.com
1
Field Considerations
Shooting for a stitch looks simple — just rotate the camera across the scene. But overlook a few details, and your photos may well fail to merge in post.
First is overlap. Adjacent frames should overlap by 33%–66% so the software can merge them correctly. Telephoto lenses generally need less overlap — about 33% is enough. Ultra-wide stitches (like a Milky Way arch) need around 50%.
Of course, more overlap isn't always better: too much (over 66%) can actually make it hard for the software to tell the two images apart, causing the blend to fail.
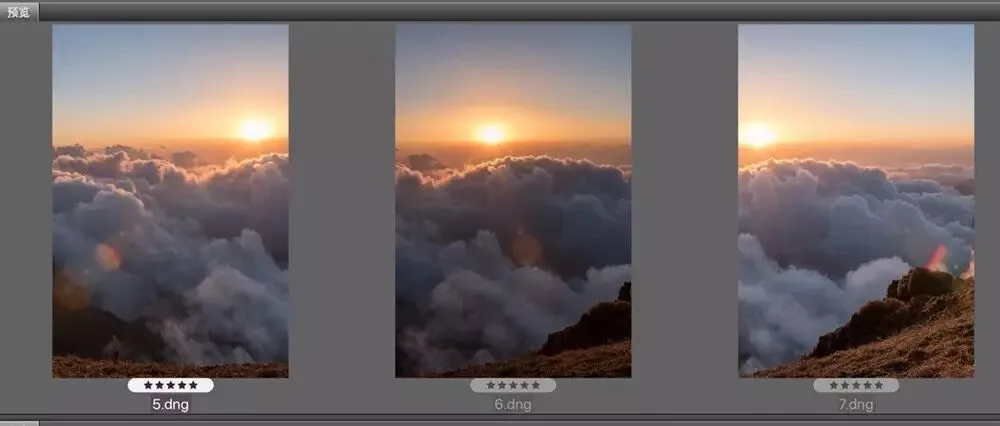
Ideally, the overlapping area of two frames should contain no moving objects — cars, people, clouds — and no strongly distorted subjects like warped buildings, to keep the stitch manageable.
The second issue is parallax. Parallax is the culprit behind many failed panorama merges.
Here's a simple experiment. Open only one eye, hold up a finger, and align it with a distant object, like the teapot in the image below. Now turn your head: the teapot that was lined up with your finger shifts — the relative positions of objects have changed. That phenomenon is parallax.
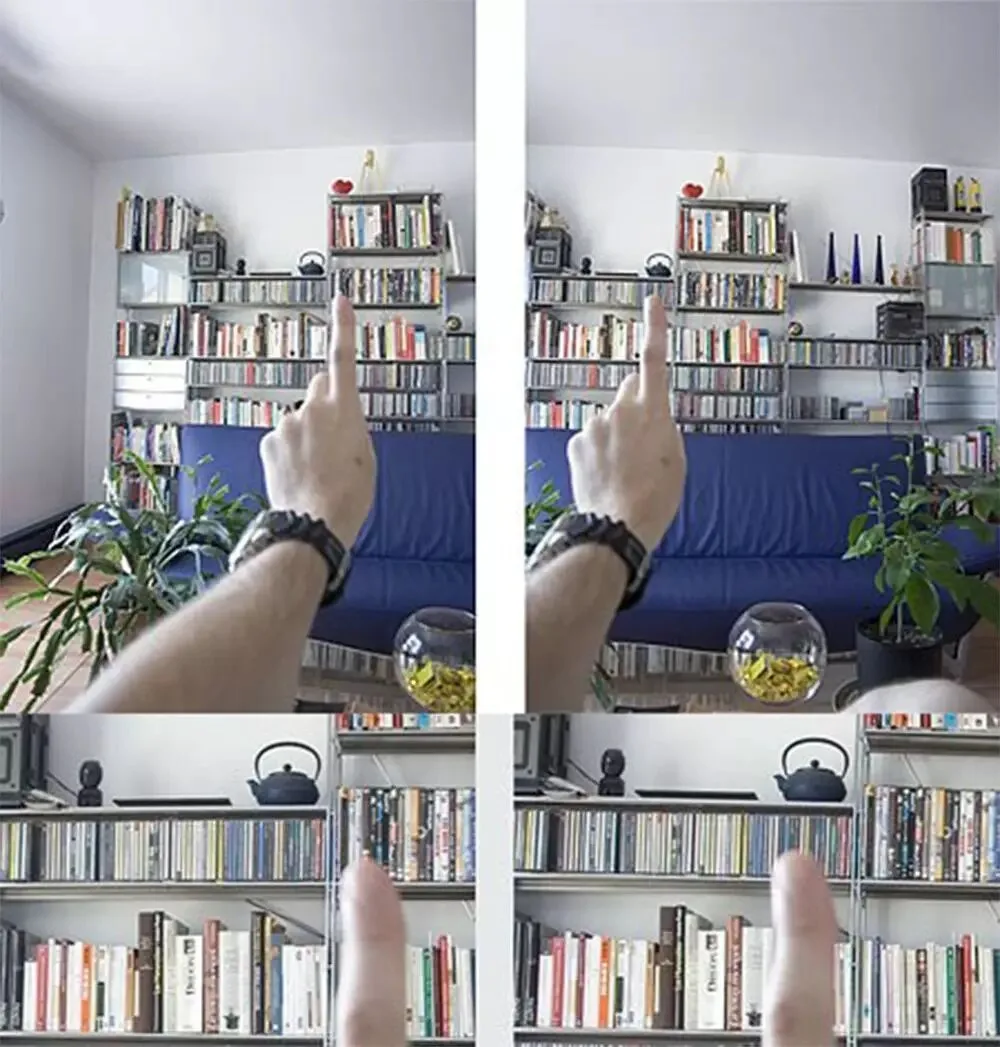
(Image source: http://t.cn/RJ6ntvw)
Parallax has a destructive effect on stitching, causing misaligned blends or outright merge failures, so we need two ways to eliminate or minimize it.
Parallax arises because our axis of rotation and the so-called "nodal point" (the no-parallax point) are not aligned. In the experiment above, the nodal point is the eye, but the axis of rotation is the neck. The small distance between eye and neck creates the parallax we see.
A camera's nodal point usually sits somewhere inside the lens. Dedicated panoramic heads can align the rotation axis with the nodal point — look them up online if you're interested — but most shooting doesn't require that level of precision.
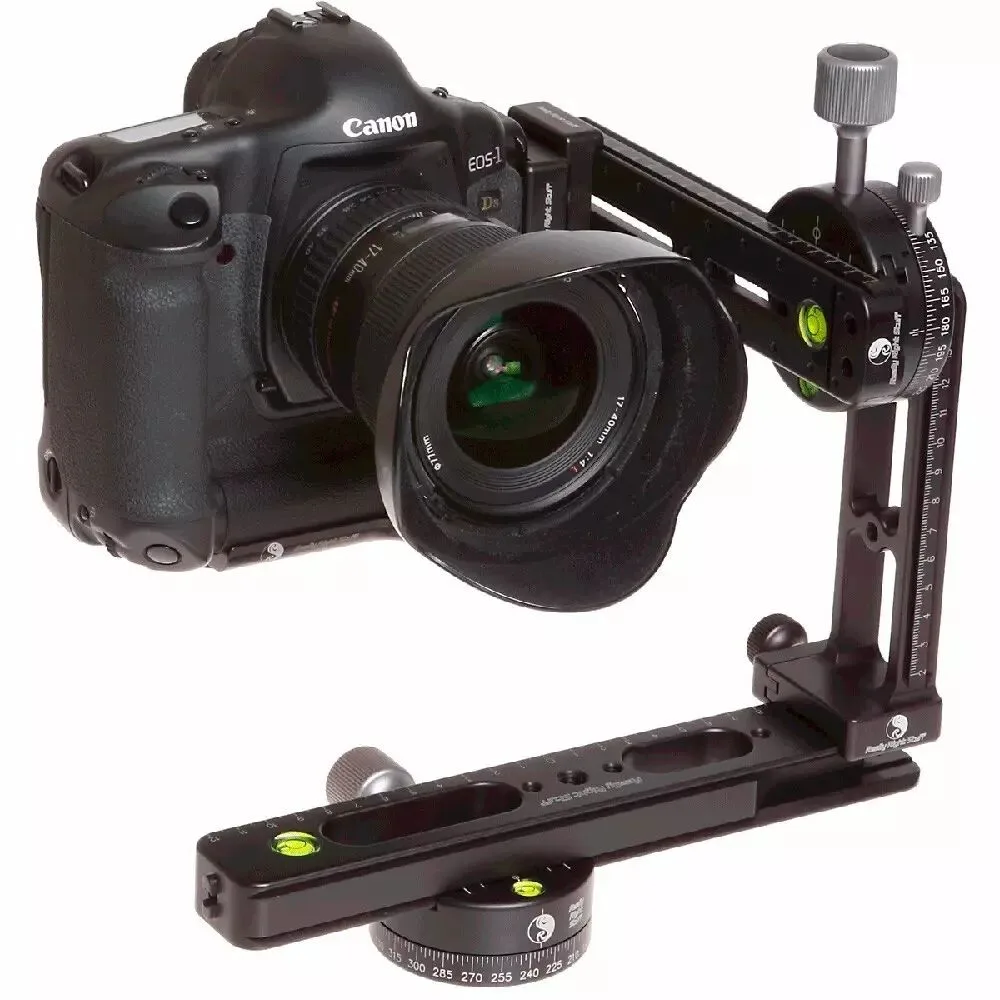
Putting the camera on a tripod and head noticeably reduces parallax compared to hand-holding. If you must shoot handheld, try opening the rear screen, resting the camera on one hand, and rotating around that hand — rather than holding the camera up and rotating your whole body.
Beyond the nodal point, parallax also depends on subject distance: the closer the object, the more pronounced the parallax; for mid-ground and distant subjects it's nearly negligible. So keeping your distance from foreground objects is critical. The ultra-close foreground technique used in the single wide-angle shot below — within half a meter — almost always creates unfixable parallax in a panorama.
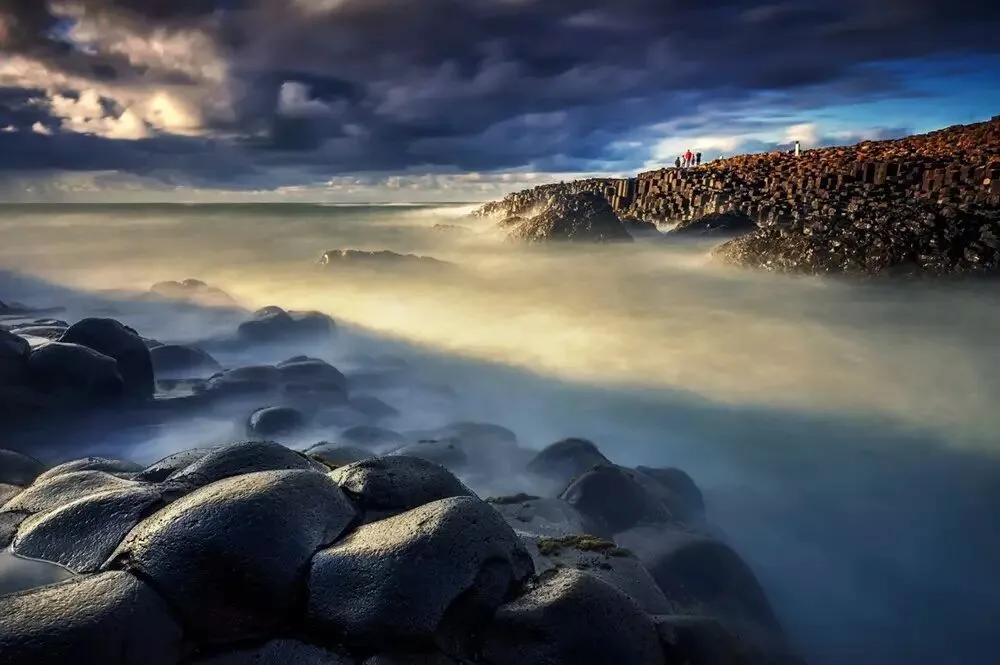
Photographer: Thomas Chu Photo, thomaskksj.tuchong.com
The third consideration is lens distortion and perspective deformation. Ultra-wide lenses introduce heavy edge distortion and perspective stretch, making frames hard to merge or producing severely warped results. For panoramas, prefer medium-to-long focal lengths.
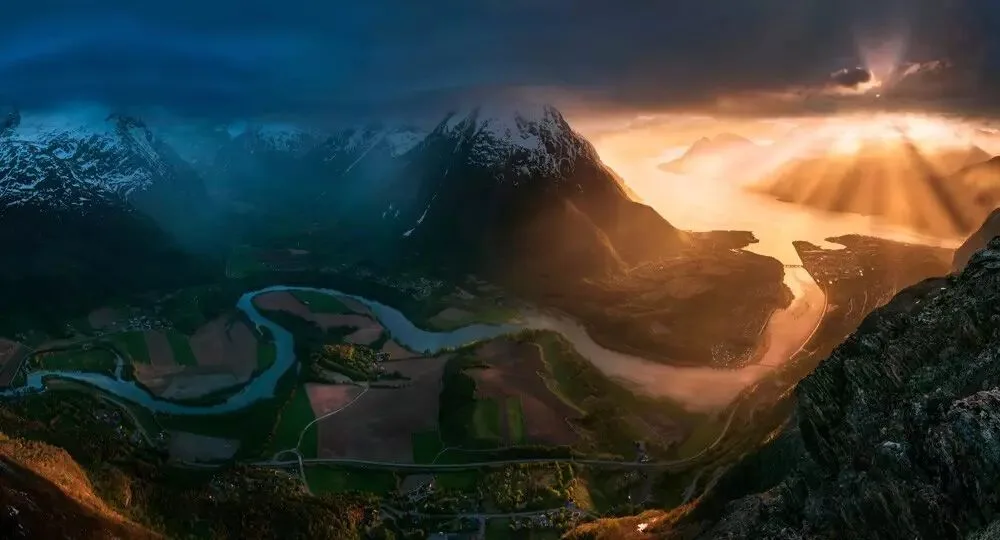
Photographer: Max Rive, maxrive.tuchong.com
We can also choose foregrounds of water, grass, dirt, or clouds — subjects with indistinct features. In the photo below, for instance, the grassy foreground makes any deformation nearly impossible to spot.
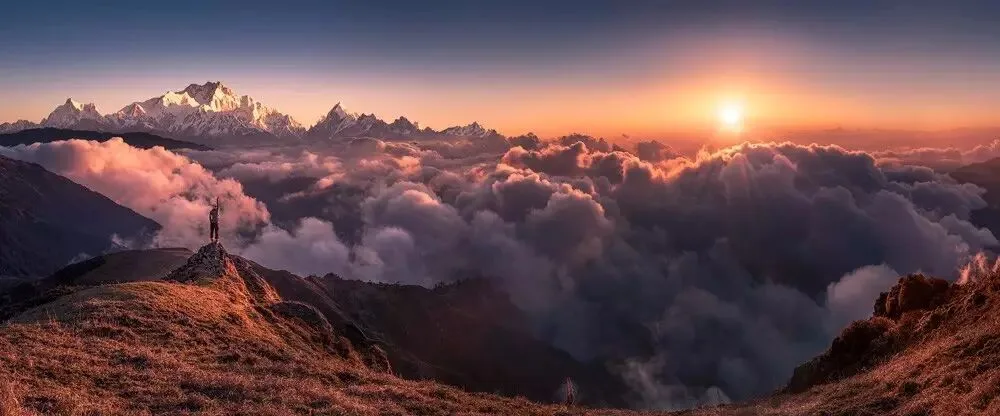
Photographer: Thomas Chu Photo, thomaskksj.tuchong.com
And deformation isn't necessarily a bad thing — sometimes we can exploit it. Warped rocks, dead trees, and flowing water in the foreground often produce dramatic, exaggerated effects.
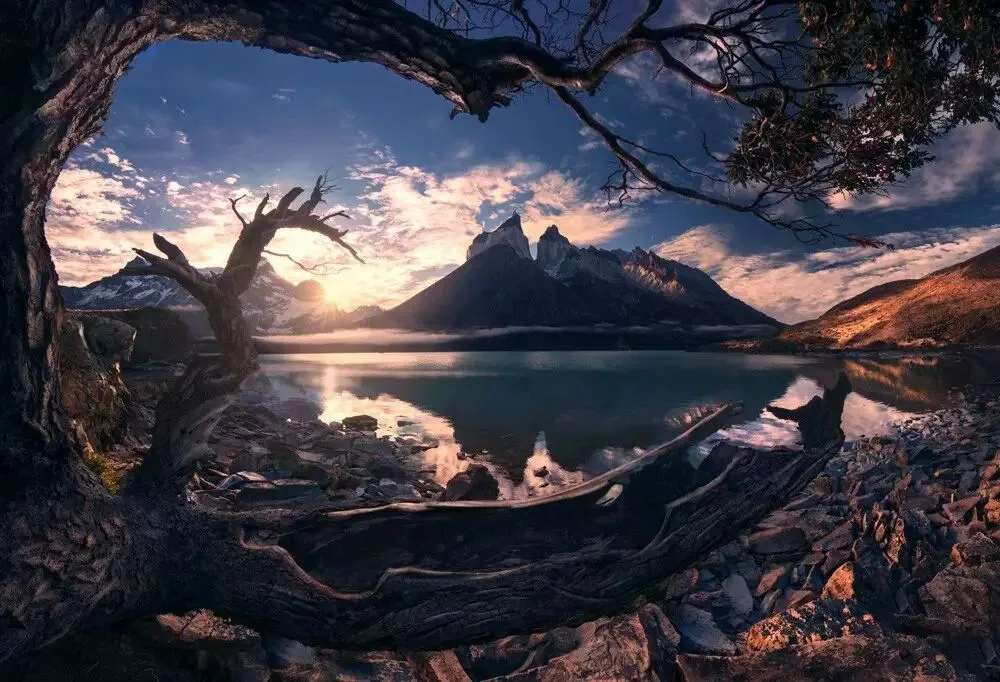
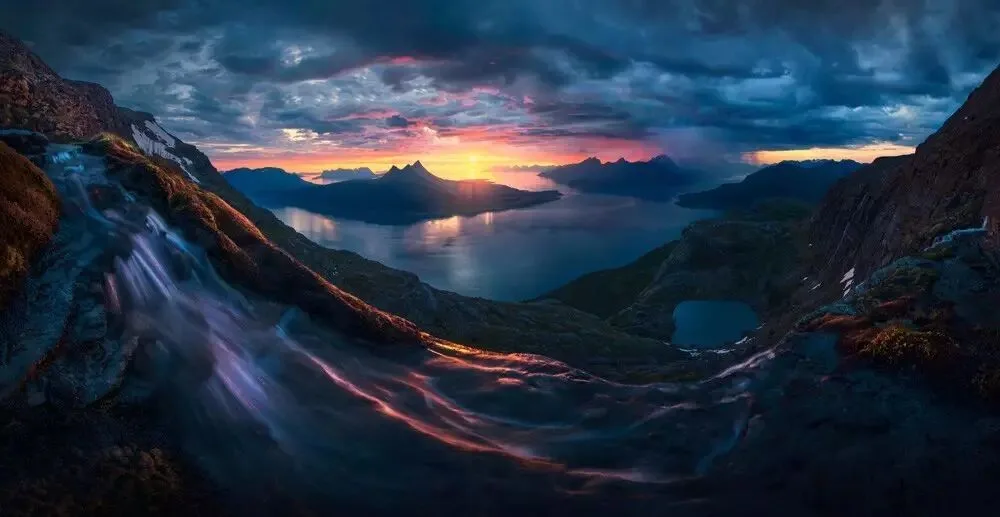
Photographer: Max Rive, maxrive.tuchong.com
When shooting a stitch, lock down the camera's exposure (aperture, shutter, ISO), focus point, and white balance. Many stitching tools can now automatically reconcile frames with different exposures and white balances, but consistency in the field guarantees a trouble-free merge.
Locking white balance is easy: switch from Auto to a preset like "Shade" or "Daylight." To lock focus, focus first, then switch the lens or camera to M (manual focus). To lock exposure, meter the scene, switch to M mode, and dial in the aperture and shutter. If the contrast range is too great, shoot bracketed exposures (merge to HDR first in post, then stitch the panorama).
Stitched images often have blank edges that need cropping or warp-filling, so deliberately capture extra scene in the field. If 60mm looks just right, shoot the stitch at 50mm; if an 80-degree sweep covers the vista, rotate 90 degrees. The extra frame area gets trimmed away in post.
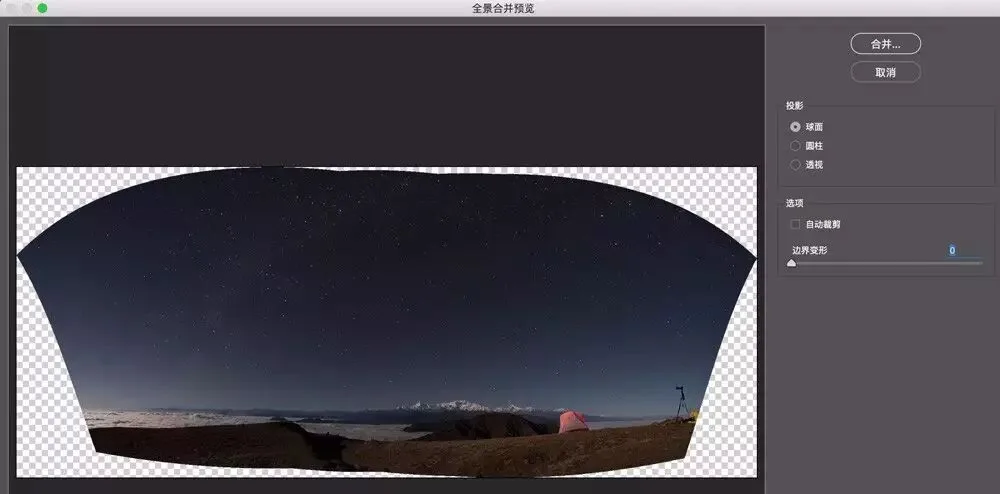
When panning horizontally, keeping the camera level is crucial — otherwise you'll get a tilted horizon, a wavy skyline, or heavy pixel loss in cropping. A panoramic head or a head with a bubble level helps enormously. With a regular head or handheld, turn on the camera's built-in level, or use the horizon or sea surface as a reference, adjusting as you rotate.
Stitching works not only horizontally but vertically, and even in multiple rows. The image below shows the Brenizer Method for portraiture: 32 telephoto frames in 4 rows stitched into a wide-angle, shallow-depth-of-field portrait. If you're curious, read https://digital-photography-school.com/5-steps-to-rock-the-brenizer-method/
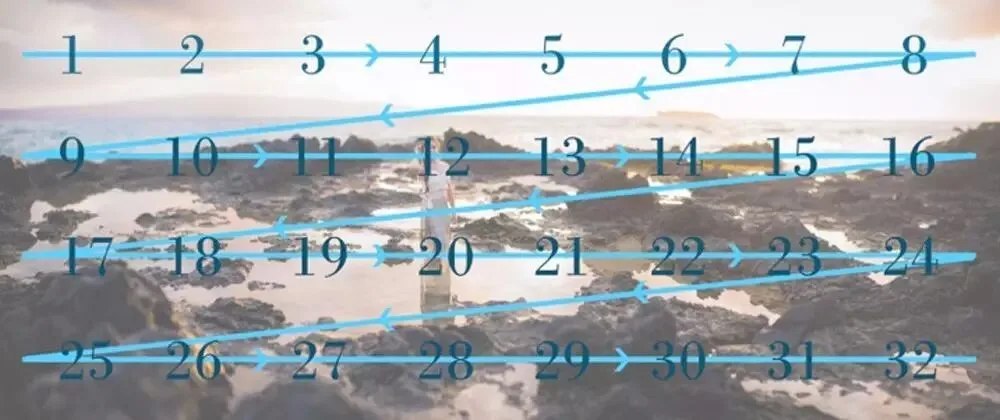
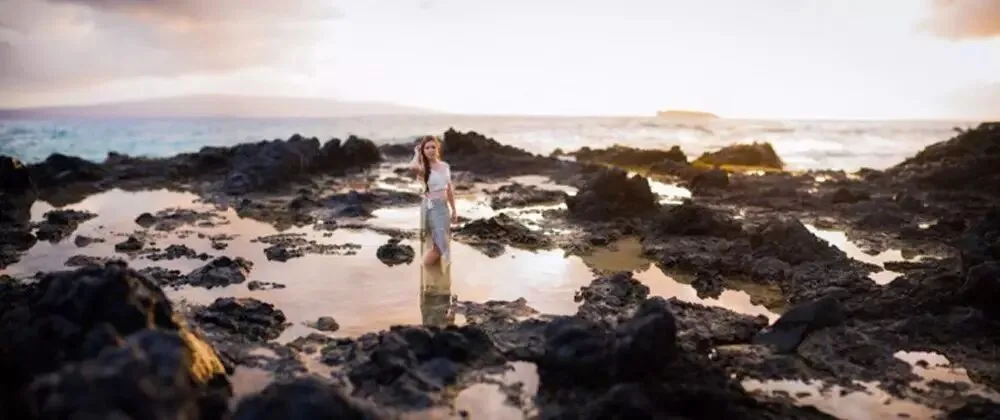
Image source: http://t.cn/RJ6n9oF
For horizontal stitches — especially at medium-wide focal lengths — holding the camera vertically beats shooting landscape orientation; an L-bracket is a fantastic tool. And use polarizers with caution when shooting panoramas.
2
Scenes and Compositions That Suit Stitching
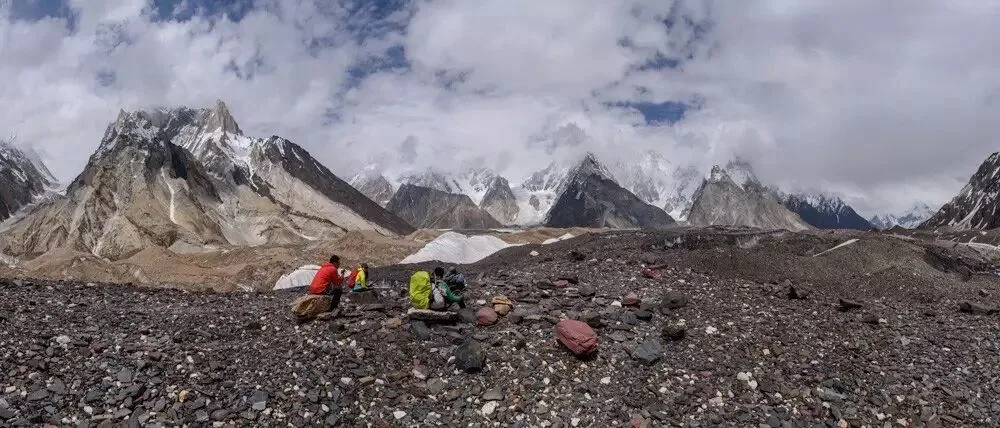
First of all, not every scene suits a panorama. The stitch below, for example, has several flaws.
1) Stitched from flat ground, so the foreground/mid-ground/background layering is weak and the grandeur of the vast scene never comes through.
2) The foreground takes up too much of the frame and is too cluttered — a pile of chaotic rocks with no aesthetic appeal.
3) Shot at high noon, so the light is flat and the photo lacks a compelling visual anchor.
4) A stitch takes in a huge amount of scenery; if those elements don't relate to or echo one another, the wider the stitch, the messier the photo.
Now let's enjoy some work by Max Rive, one of the world's top panorama masters — perhaps we'll find some inspiration.
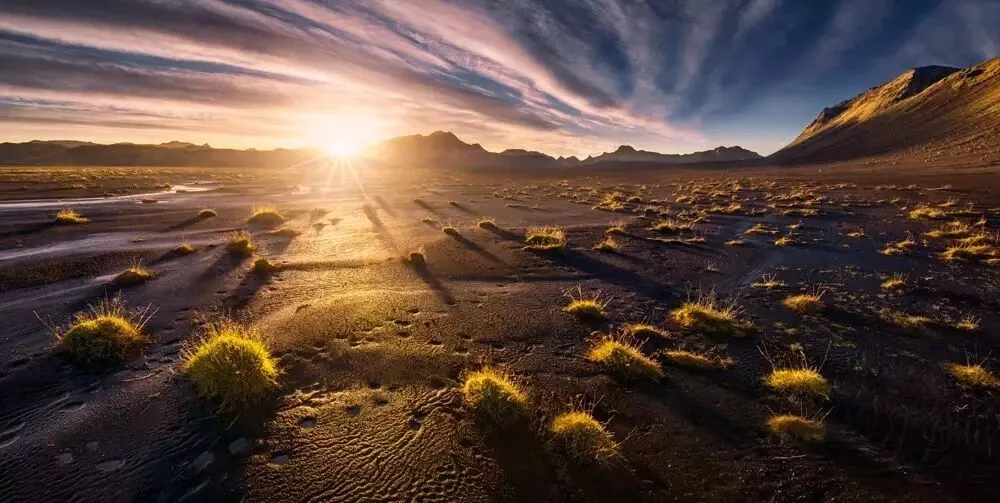
Photographer: Max Rive, maxrive.tuchong.com
Compared with the counterexample at the start, this photo was, first, shot at sunset, so its tonal range is far richer, and the bright, high-contrast areas form a visual anchor. Second, the foreground is dirt and small plants — cleaner and more pleasing.
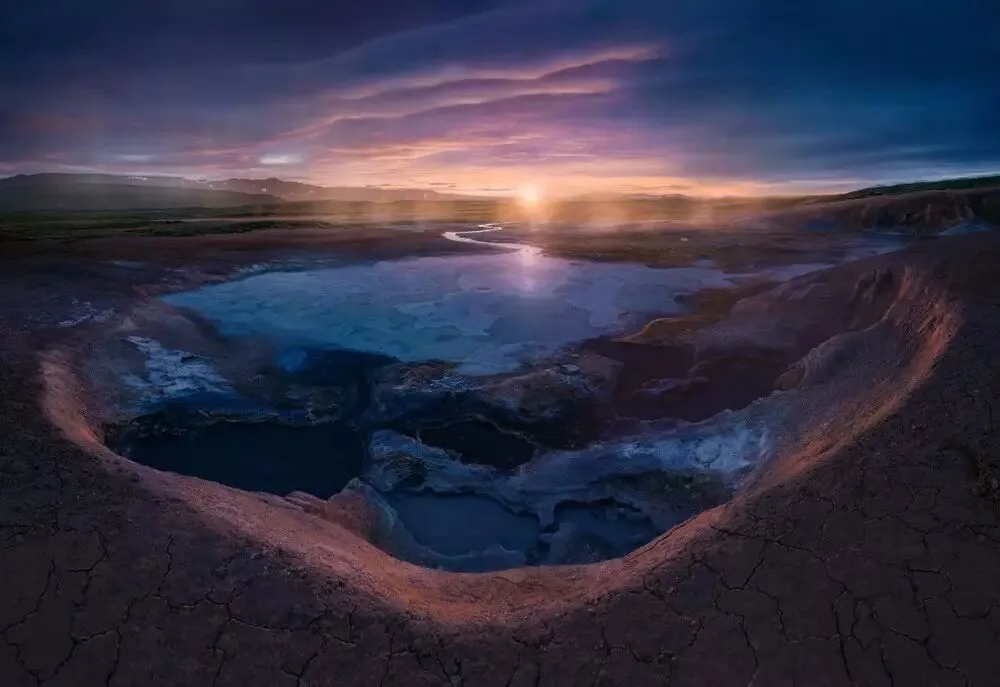
Photographer: Max Rive, maxrive.tuchong.com
In this panorama, the foreground is fairly flat dirt that doesn't feel cluttered. The higher vantage point enriches the mid-ground, where a river winds into the distance toward the sun, whose light in turn falls on the foreground soil. Every element relates to the others, guiding the viewer's eye naturally through the frame.
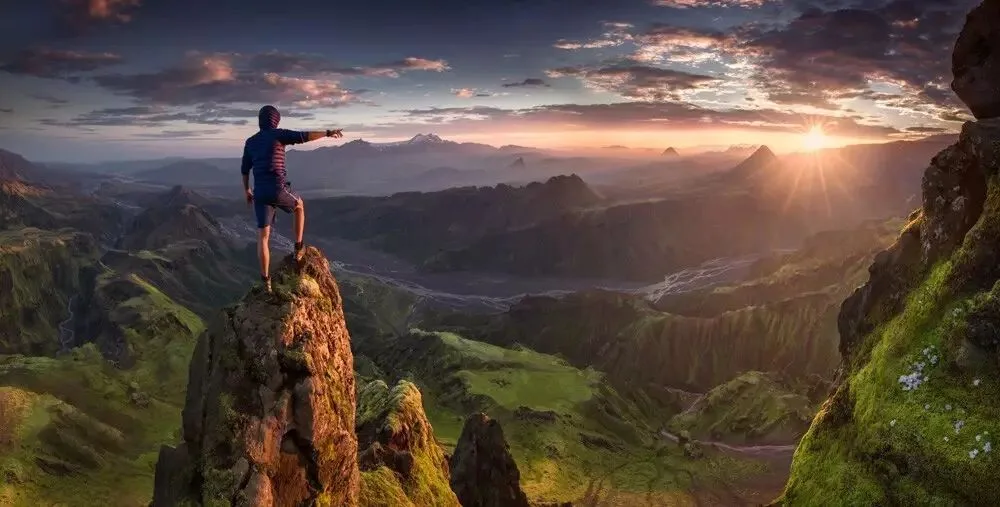
Photographer: Max Rive, maxrive.tuchong.com
This one is a true classic. The very high vantage point brings two benefits: the canyon mid-ground is revealed in full grandeur, and the foreground needs only a few towering rocks — simple and beautiful. On the left, a climber atop a rock points toward the distant sun, whose light falls back onto the foreground — these relationships keep the panorama from being a heap of clutter. The giant rock on the right is a masterstroke: it balances and closes off the composition while conveying three-dimensional space through exaggerated perspective.
3
Stitching in Post
There are many stitching tools, but in 95% of cases Lightroom or ACR is the best choice.
Lightroom and ACR share an identical panorama module. Its strengths: fast and convenient; the output is a DNG digital negative that supports further lossless adjustment to mine the raw files' potential; Boundary Warp and Auto Crop are handy too. Its weakness: you can't manually edit the stitch regions.
Photoshop has long had the Photomerge stitching system, which is rather underwhelming these days. Its strengths: more options than ACR, and results delivered as layers plus masks, making it easy to manually fix the blend and inspect misaligned seams. Its weaknesses: very slow computation, non-raw output, and less power than dedicated software.
PTGui Pro and Autopano Giga are two top-tier dedicated stitching tools offering stronger features, finer manual control, and more sophisticated algorithms. Many photos that fail in ACR or PS merge successfully in these two. But both are expensive, and most situations don't call for such specialized tools.
Next I'll show how to stitch in ACR (the steps are similar in Lightroom).
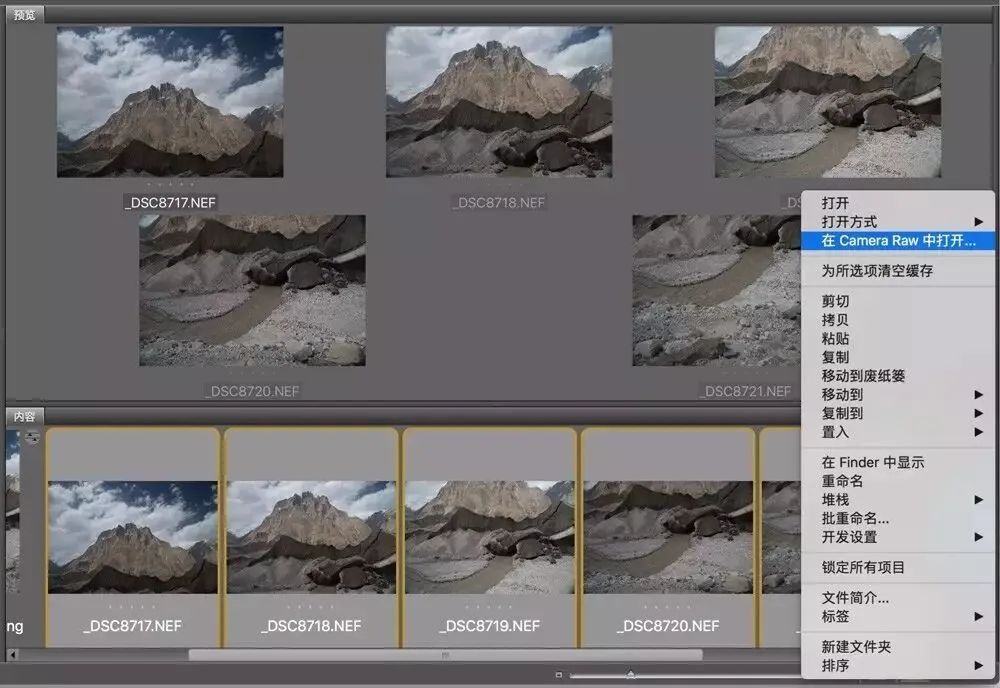
First, import the images into ACR. You can select the photos in Bridge, right-click, and choose "Open in Camera Raw."
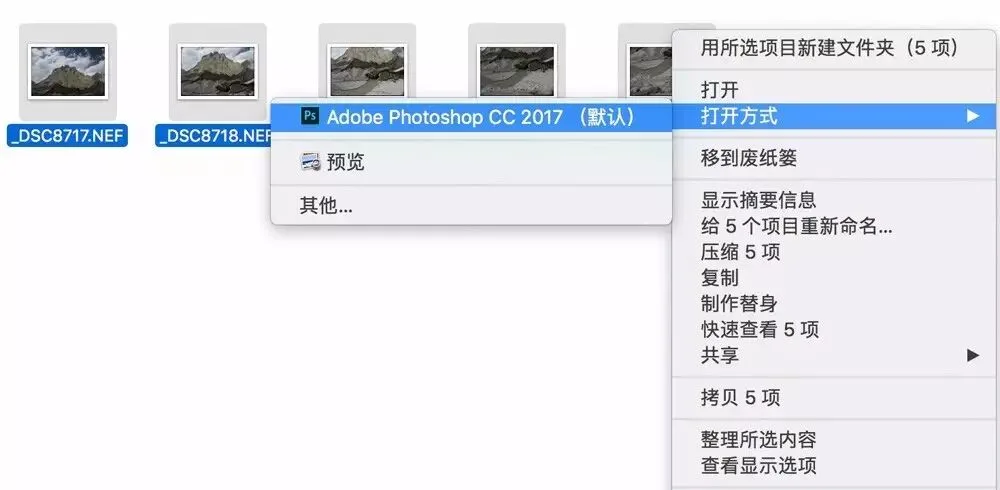
If you don't use Bridge, select the photos in your file folder, right-click, and open them in Photoshop (or drag the images straight into PS).
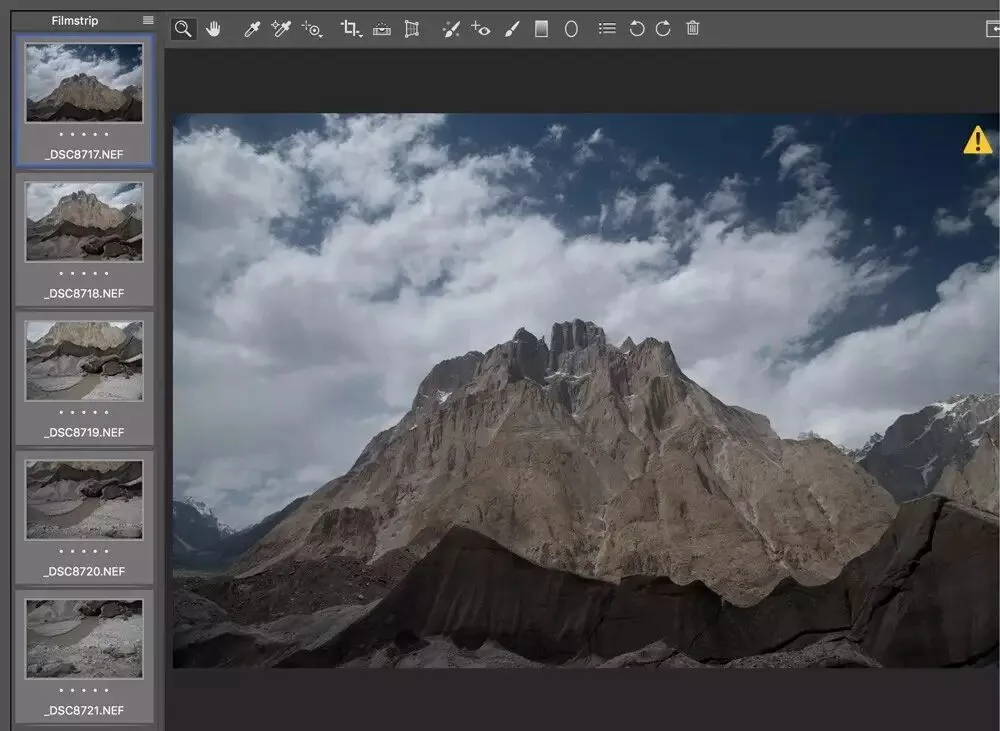
Once in ACR, click a thumbnail on the left, then right-click and Select All (or press Ctrl+A).
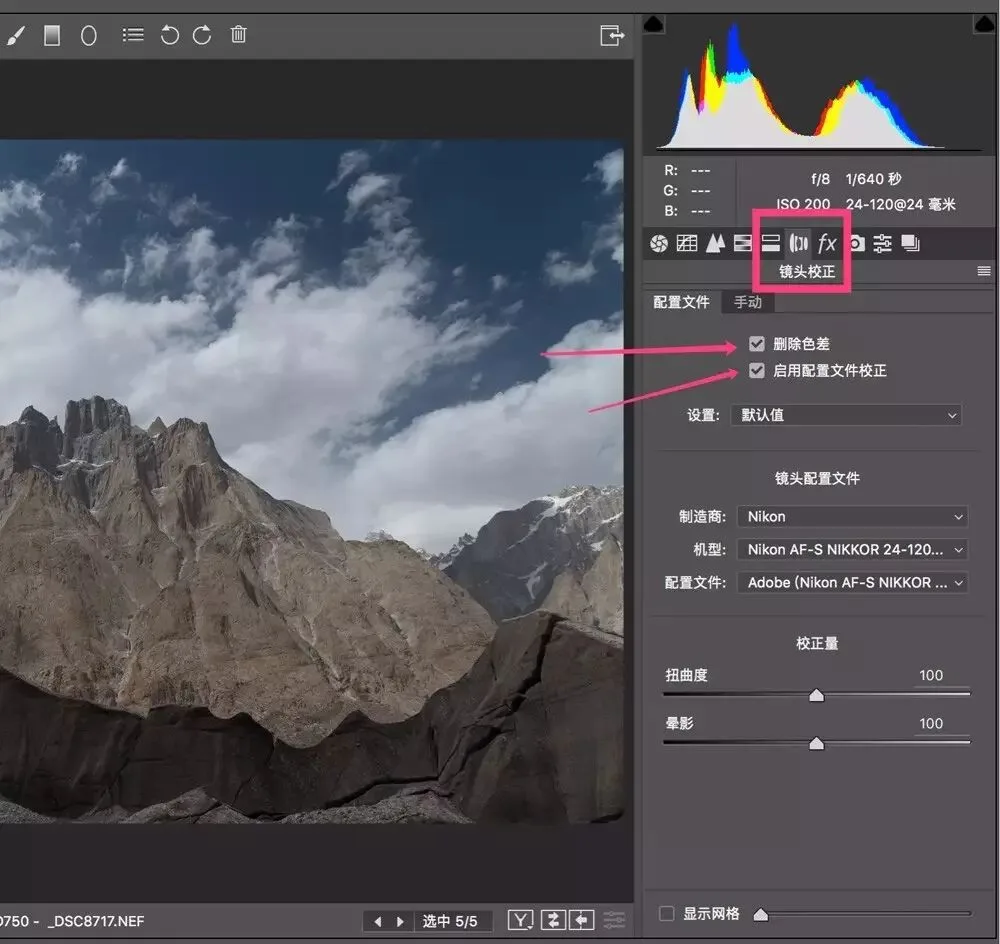
Remember to apply lens corrections first: check "Remove Chromatic Aberration" and "Enable Profile Corrections." Since we've selected all photos, the correction applies to every frame.
Note that we generally don't make other exposure or color adjustments before stitching, because ACR discards or overwrites some of our edits during the merge.
Right-click any selected photo and choose "Merge to Panorama."
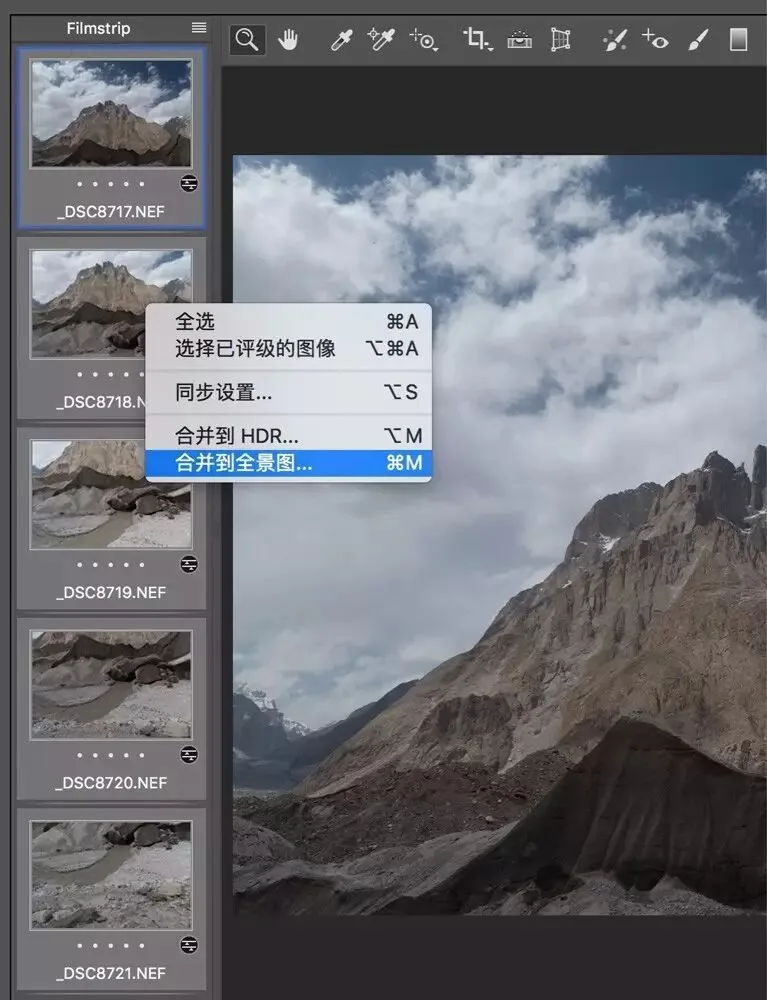
ACR then stitches the images automatically. There are three projection modes: Spherical, Cylindrical, and Perspective. ACR picks one based on the images' characteristics — usually Cylindrical.
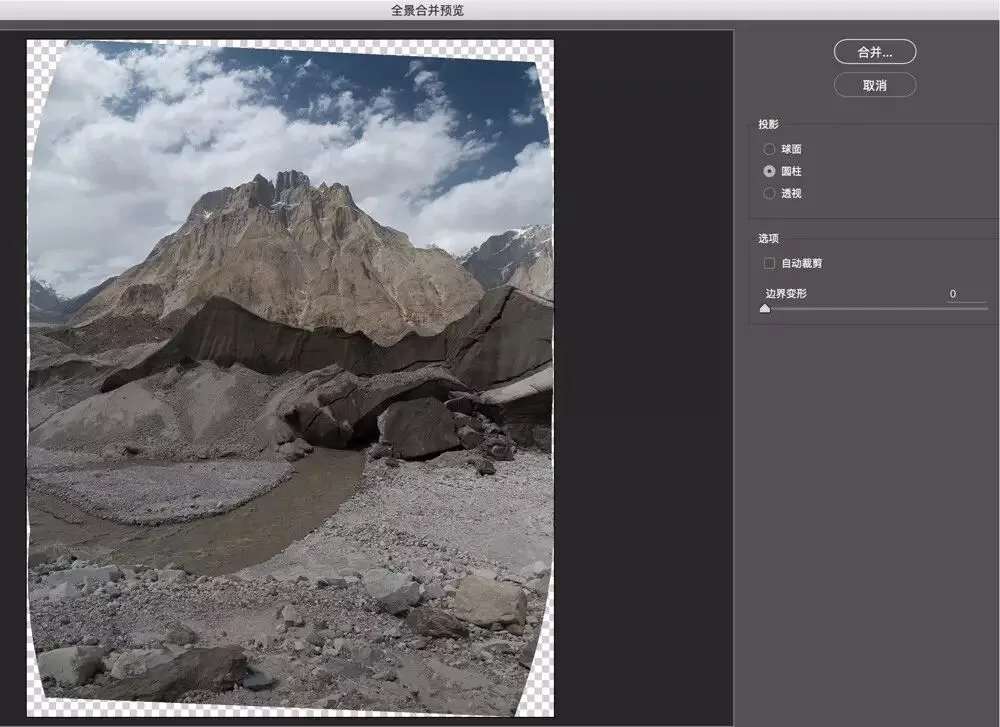
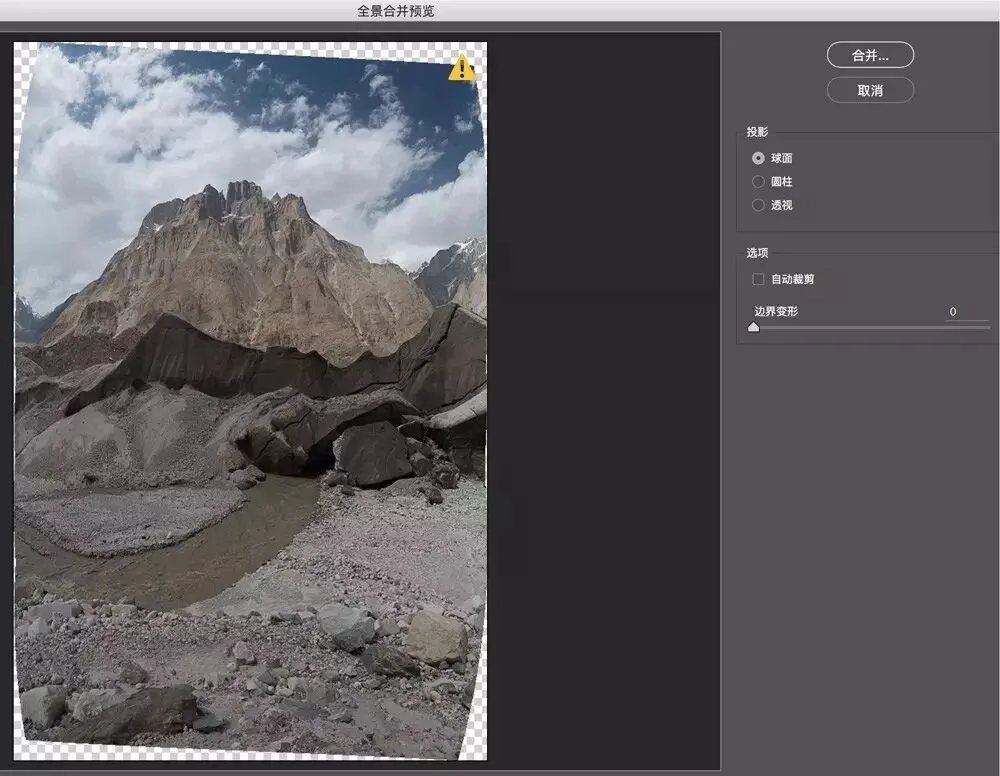
We can also click the preview to try other projections. Spherical generally suits stitches shot at a pitch angle, like Milky Way panoramas.
Perspective suits telephoto stitches; used on medium-wide shots, it tends to look extremely exaggerated.
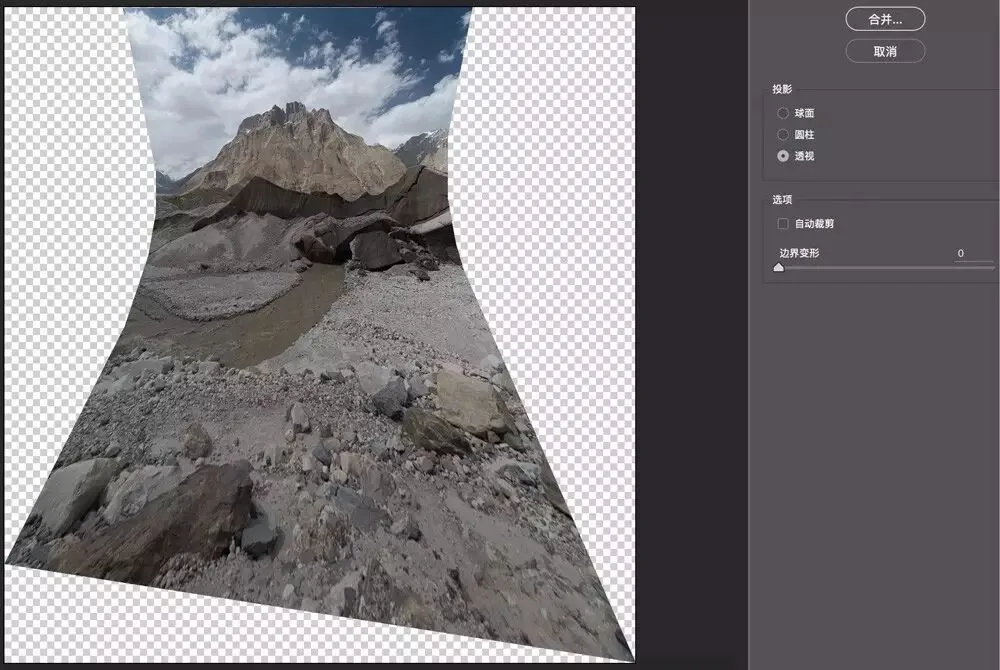
Below sits the Auto Crop option. Enable it, and ACR trims away the blank areas around the edges. Cropping discards the surrounding pixels we captured, so ACR offers another approach.
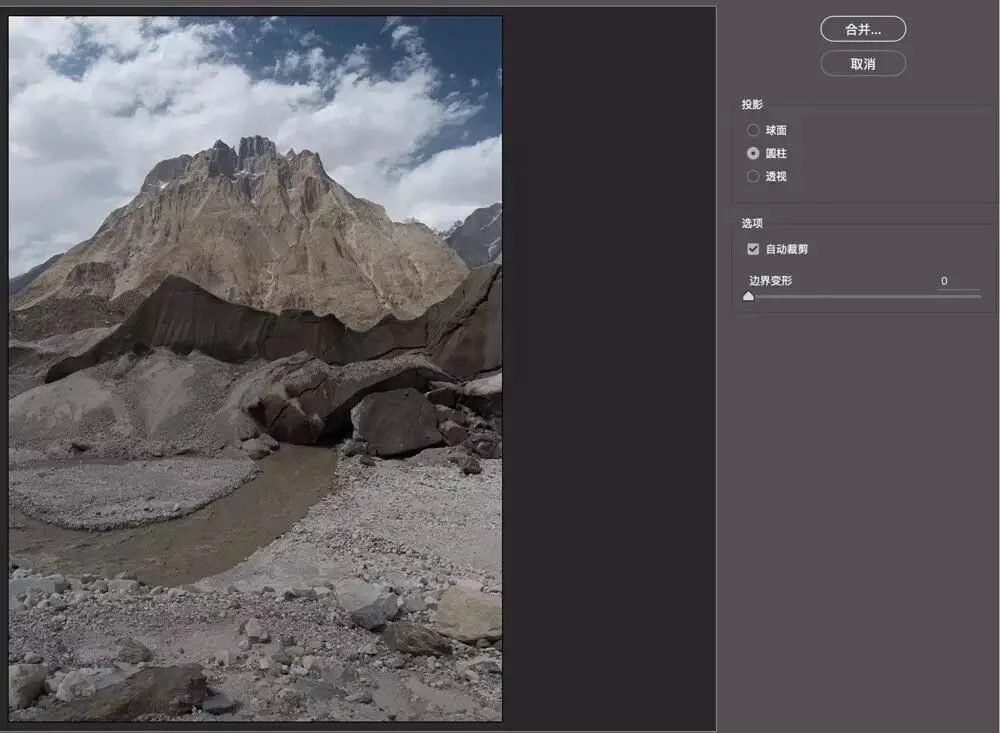
That approach is Boundary Warp. The slider defaults to 0; drag it right, and ACR fills the surrounding blank pixels by warping the edges of the photo.
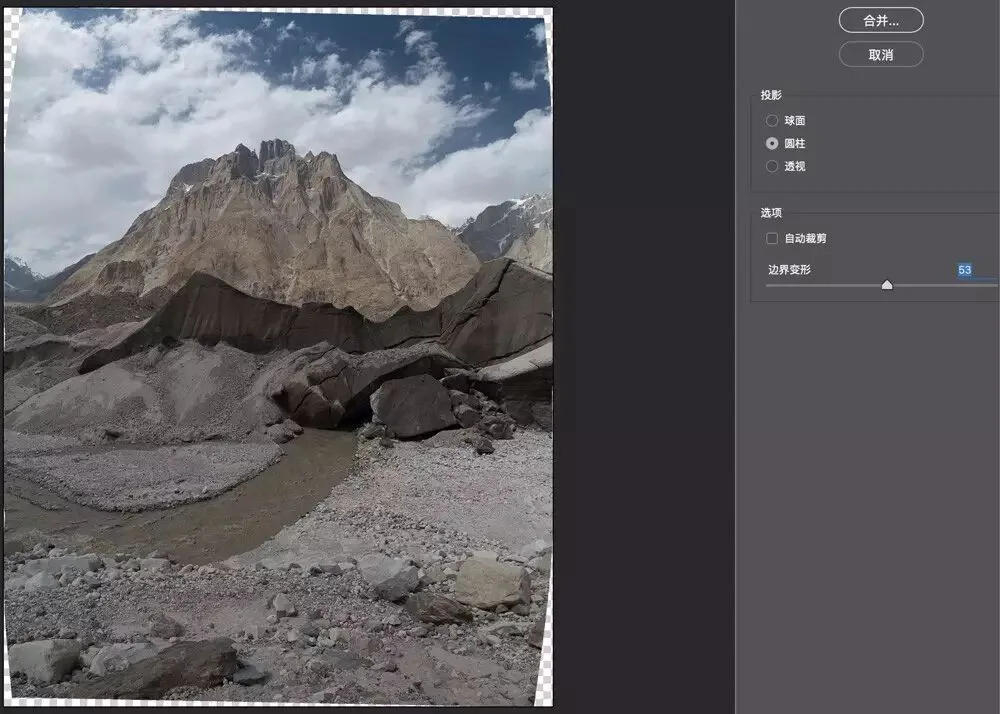
Push the slider all the way, and every blank edge gets warp-filled — every pixel we captured is put to use.
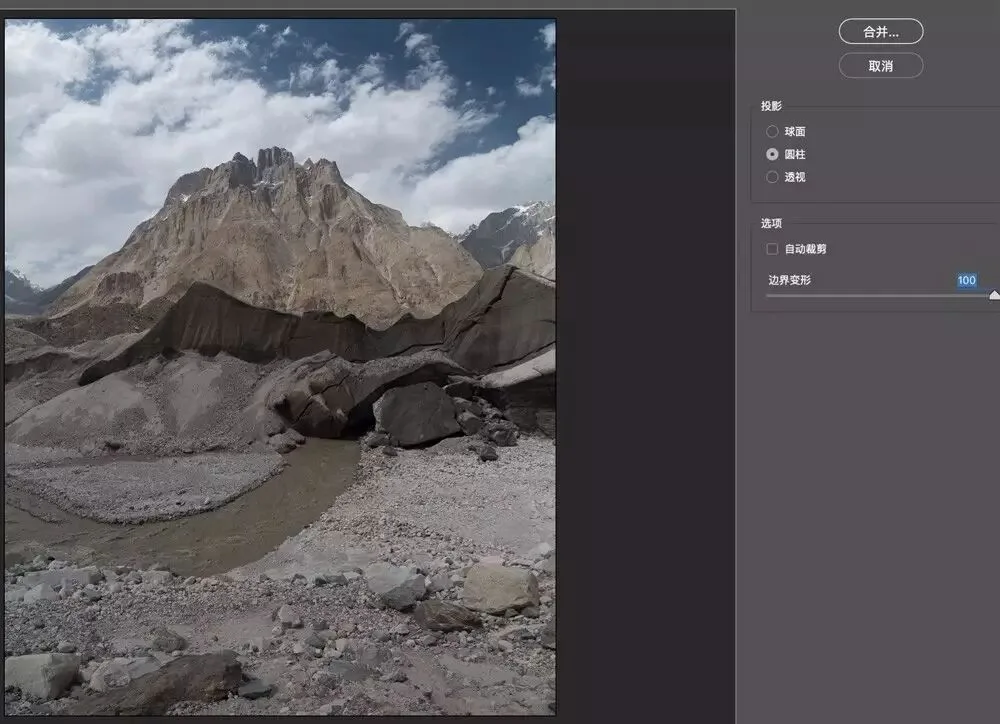
When using Boundary Warp, watch prominent horizontal lines and salient objects closely, or visible warping artifacts will ruin the photo.
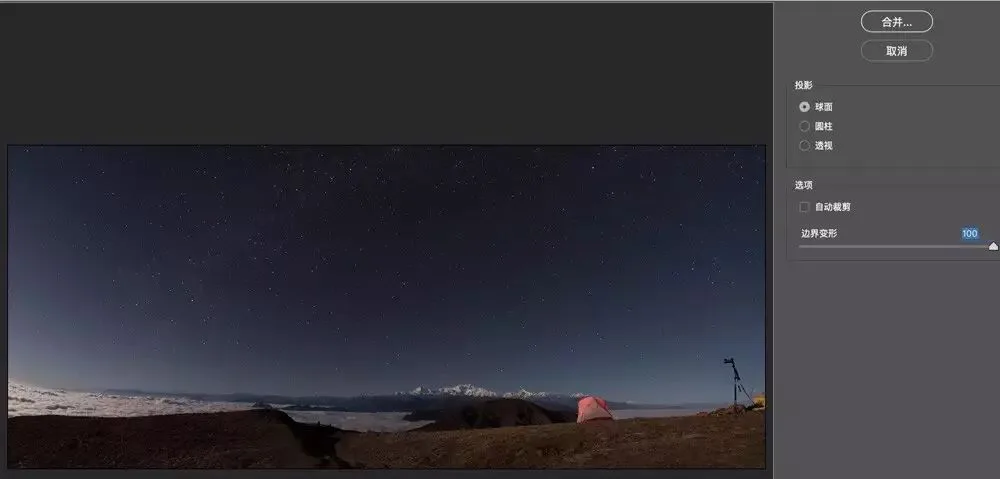
Finally, click Merge to save the stitch to disk in DNG format.
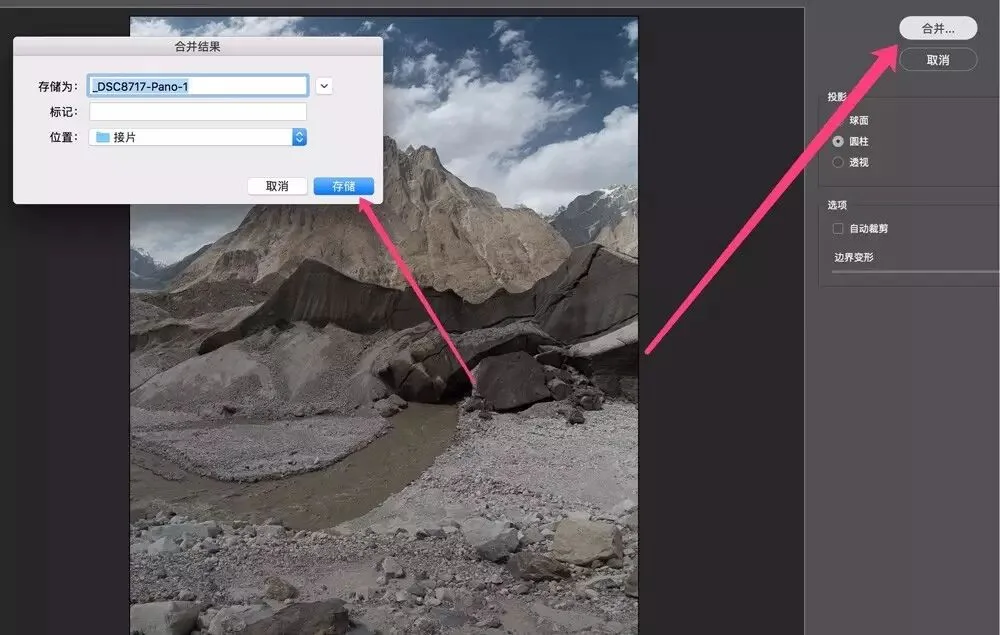
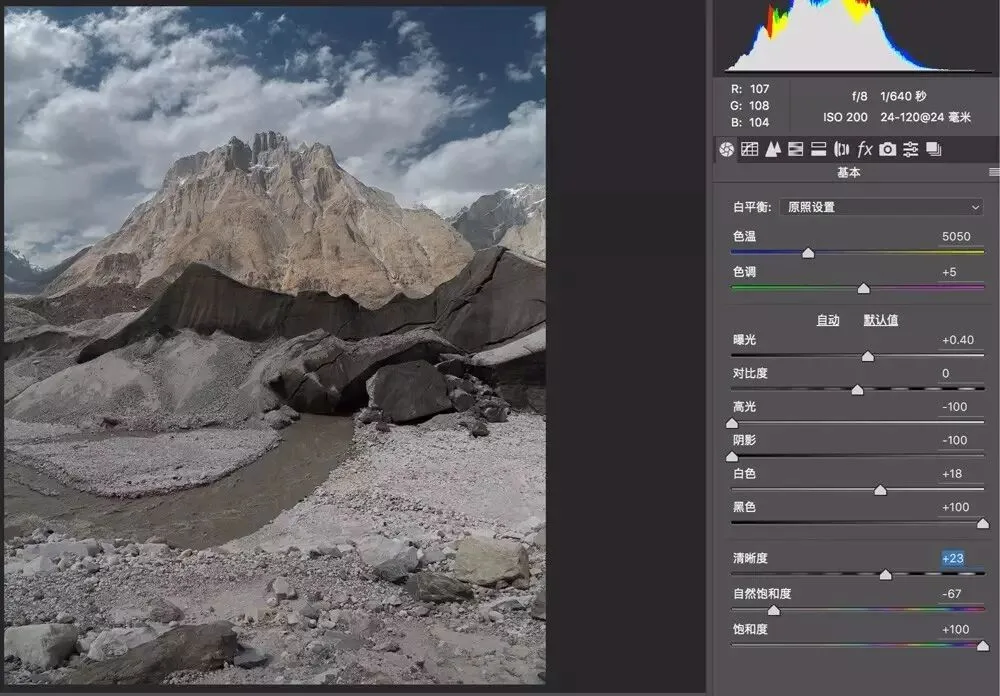
The saved photo remains a raw (DNG) file, ready for further lossless adjustment in ACR.
Summary
1. When shooting panoramas, mind the overlap, parallax, distortion, levelness, and consistent exposure, white balance, and focus.
2. Generally, scenes shot from a high vantage point with clean foregrounds, enchanting light, and interrelated elements suit panoramas best.
3. The built-in stitching in Lightroom and ACR covers most of our post-processing needs.
Follow @Thomas Chu Photo, and learn one photography skill every Sunday.