Photography Tutorial · 2023-10-29
Bird Photos Can Be Graded Like This? Recreating the Instagram Teal Look
Bird photography cultivates patience and sensibility — a beloved subject among photography enthusiasts.
But after seeing enough of these photos, aesthetic fatigue sets in. How can we grade wildlife photos with more personality?
In today's tutorial, Thomas works from a photo taken by Canon R5 Club member Yang Ke in Sanjiangyuan National Park.
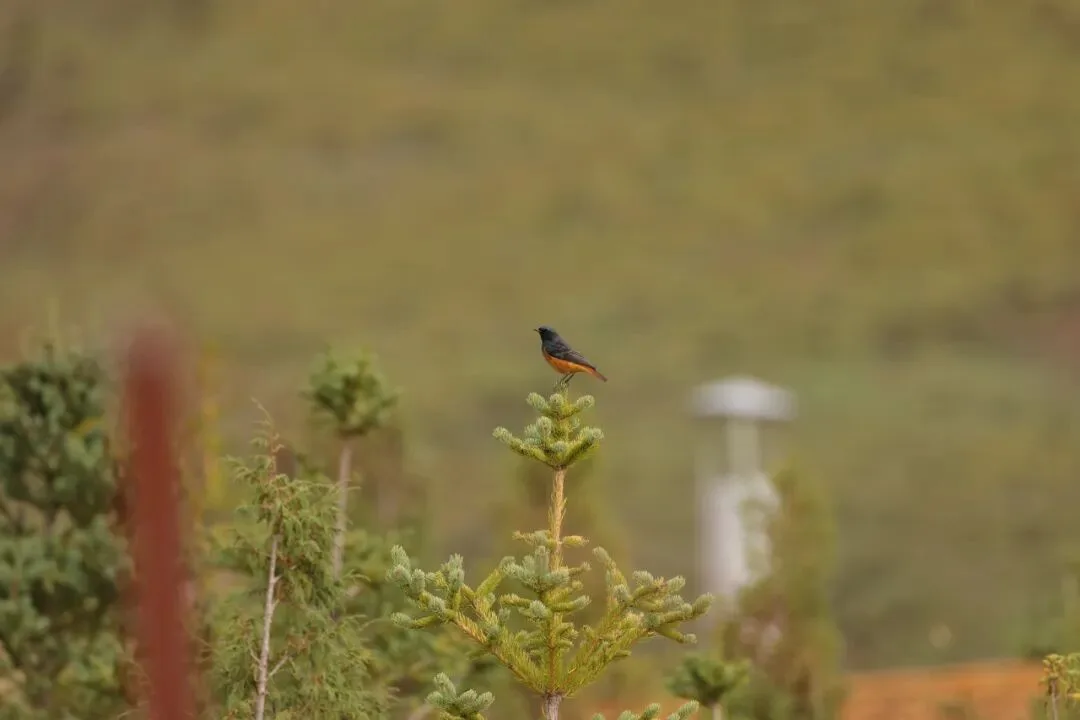
Camera: Canon EOS R5
Lens: Canon RF100-500mm F4.5-7.1 L IS USM
Settings: ISO500 f/7.1 1/500s 500mm
Referencing the styles of Instagram-favorite photographers Fursty and mankeyfoto, we'll grade this photo into a more stylized, popular dark-teal tone, giving the bird photo a different mood and character.
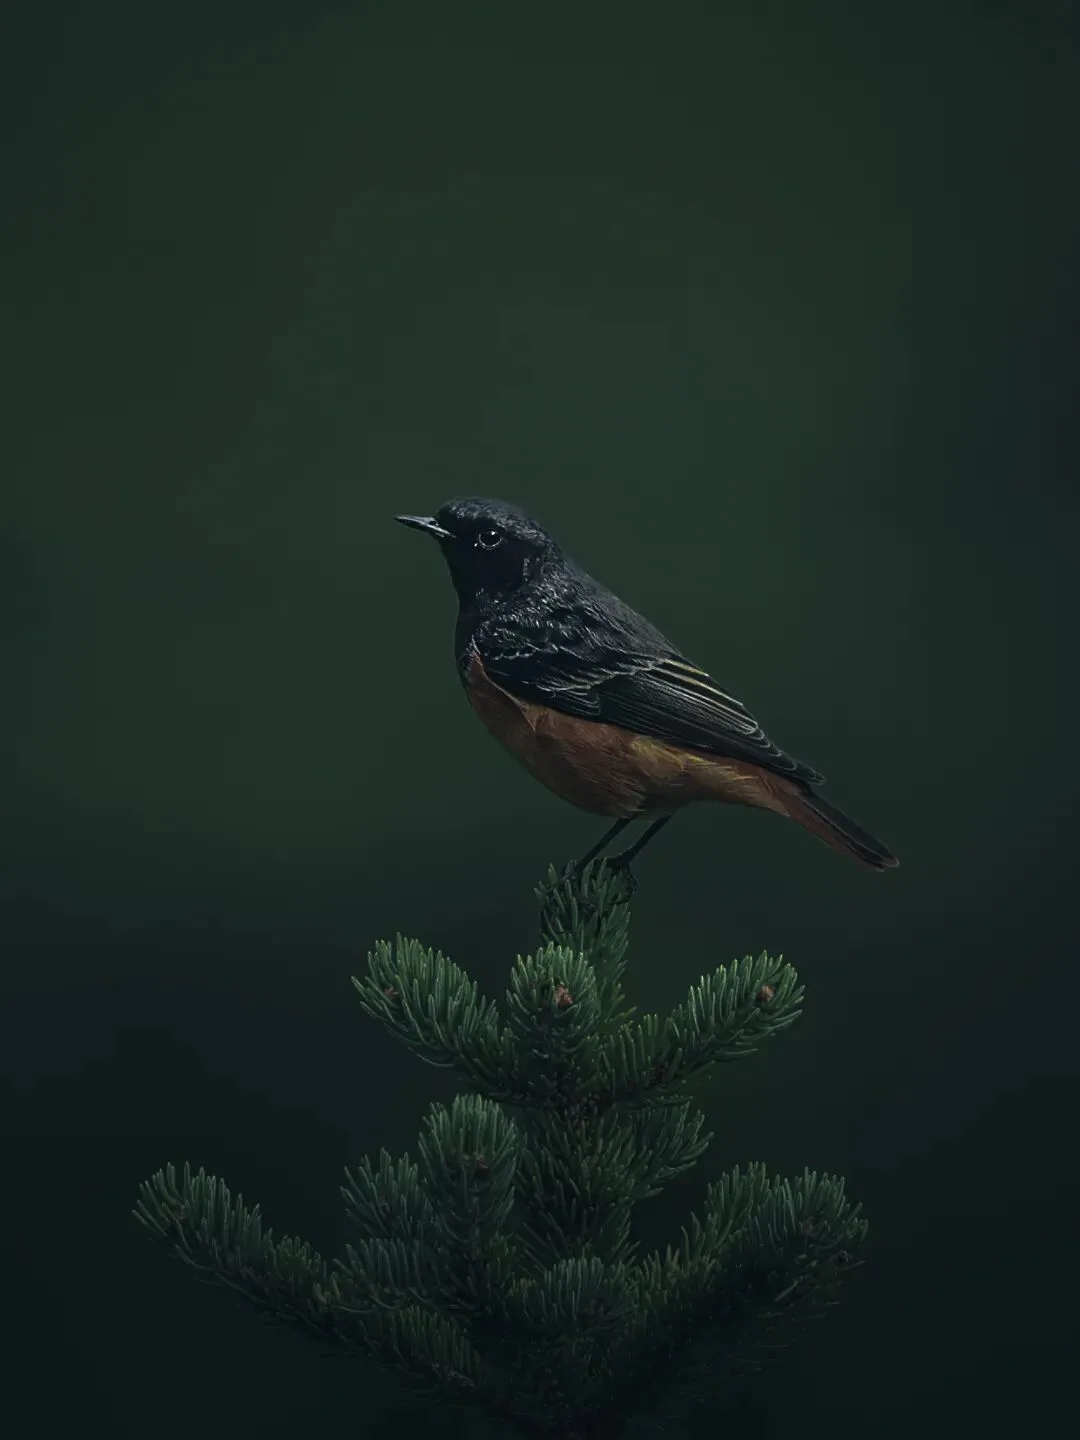
You're also welcome to submit your wildlife photos in the "Canon Club" mini-program!

Video
▶ Watch the video tutorial on Bilibili
This is the fully illustrated companion to the video above. Working from a bird frame shot by Yang Ke, a Canon R5 Club member, in Sanjiangyuan National Park, Thomas shows how to turn it into the moody teal look trending on Instagram — from reference styles and crop/tone setup to local refinements and split toning in Camera Raw, each step paired with keyframe screenshots. Skim it here for the framework, then head back to the video for the details.
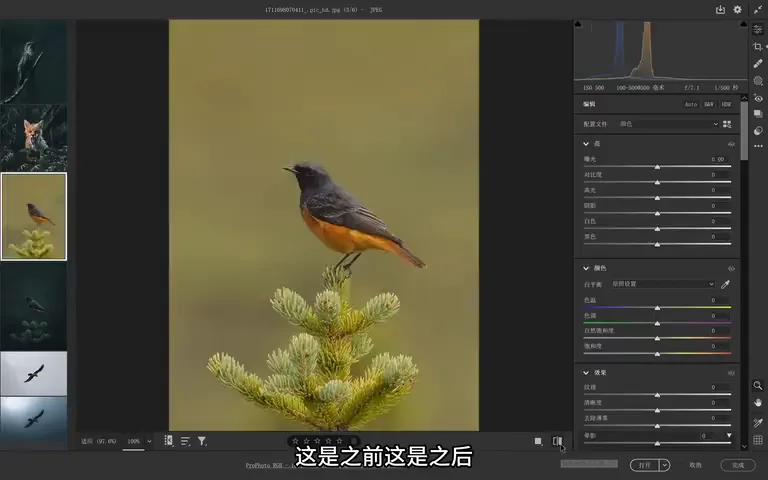
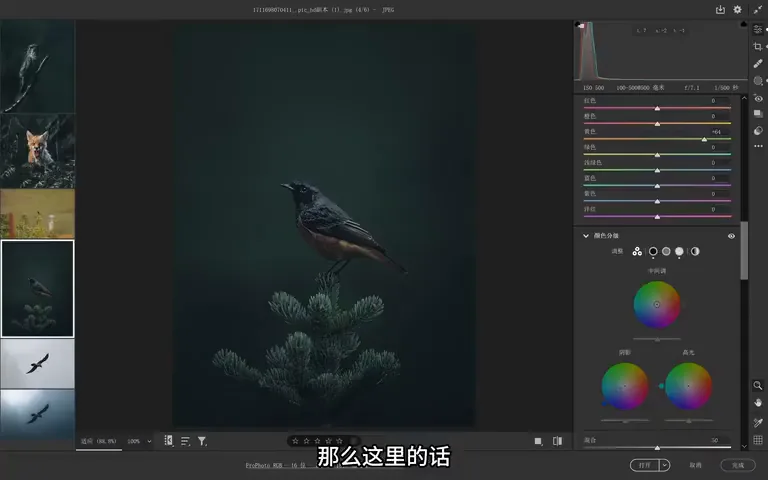
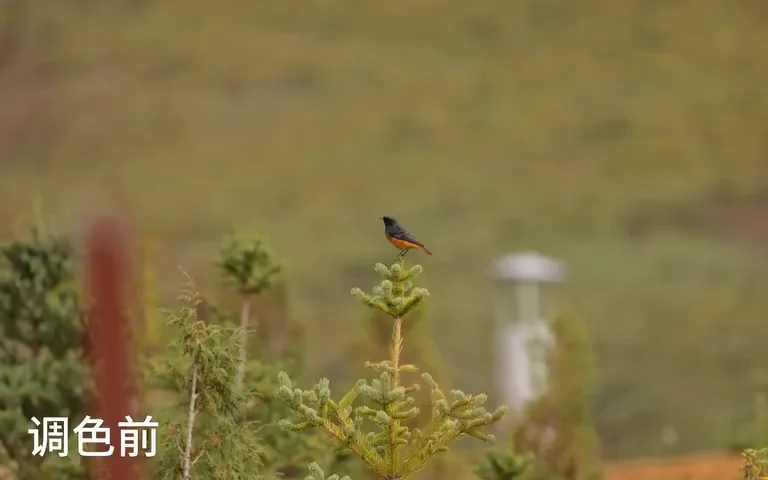
Start with the overview. This frame, captured at 10:52 in the video, lands right on the "this is before, this is after" moment: the bird has gone from a cluttered, yellowish record shot to a low-key, deeply teal stylized image. The whole tutorial is the walk between those two points.
01 The References: Two Dark-Tone Wildlife Photographers
This dark teal look is not Thomas's invention. Both photographers he references come from Lesson 4, "Color and Style," of his color course for photography lovers. The first is Fursty, who shoots eagles and other birds in a cold blue-teal register and adapts it per subject: greener birds get a warmer, more harmonious treatment, while a cute subject like a fox gets plenty of orange warmth layered over the cool base to reveal its other side (at 1:19 in the video).
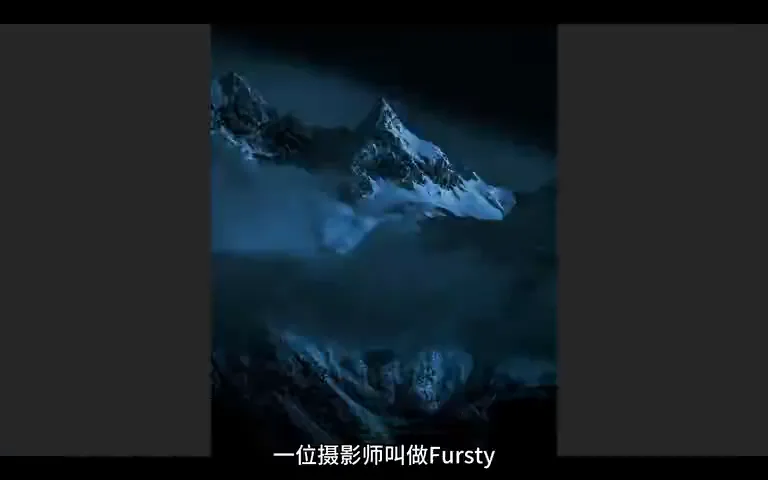
The second is Mankeyfoto, also teal-blue and highly stylized. Subjects many of us have photographed countless times — owls, eagles — instantly stand out after this kind of personal grading (at 1:50 in the video). The dark tone also reveals the bird's other side: finding it cute is a human projection, but as a predator in the food chain it has a calm, cold-blooded streak that this palette captures perfectly.
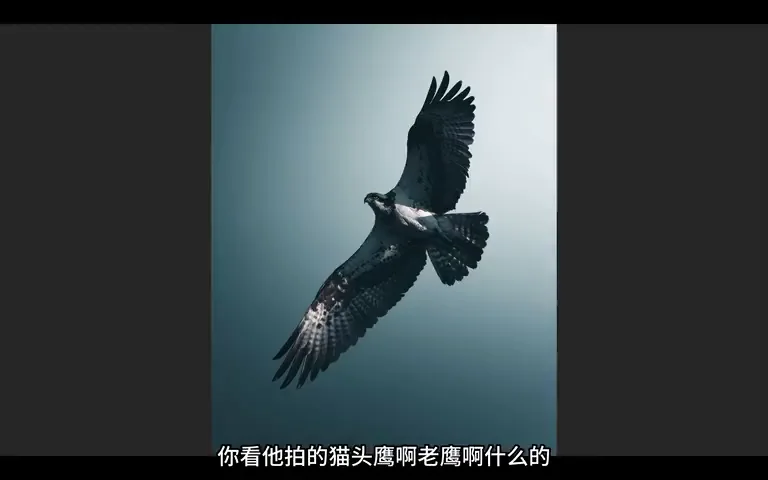
Before touching a slider, Thomas opens four files in Camera Raw: the first two are screenshots of Fursty's work to use as grading references, followed by the original and the target look — the before/after gap is huge (at 2:08 in the video). Every adjustment from here on is a step toward those references.
02 Crop and Base Tone: Building the Low-Key Scale
Step one is the crop. Thanks to the R5's 45 megapixels, Thomas crops dramatically — the final image discards roughly 90% of the pixels and still holds up (at 2:38 in the video). The subject sits near a rule-of-thirds intersection, just right of center, and the bird immediately stands out (at 2:46 in the video).
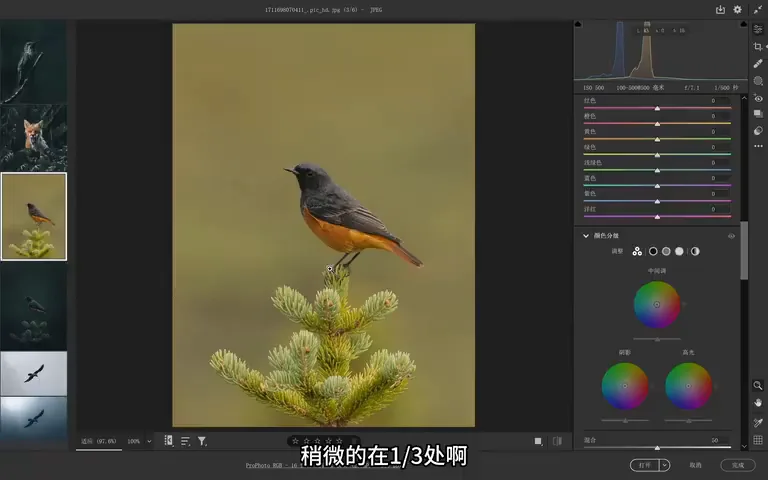
The tonal key: read both the references and the target as "low-key with a long scale" — dark overall, yet rich in tonal gradation. Pull the global exposure down first; once it gets too dark, restore some Whites (at 3:05 in the video). Then, in the curve tool, lift the shadow point, keep the mids down and let the highlights rise a touch — a contrast-stretching curve in one move (at 3:11 in the video).
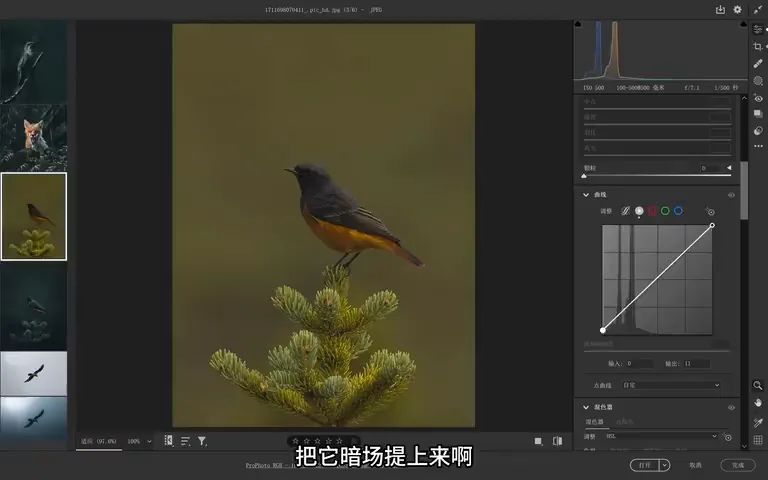
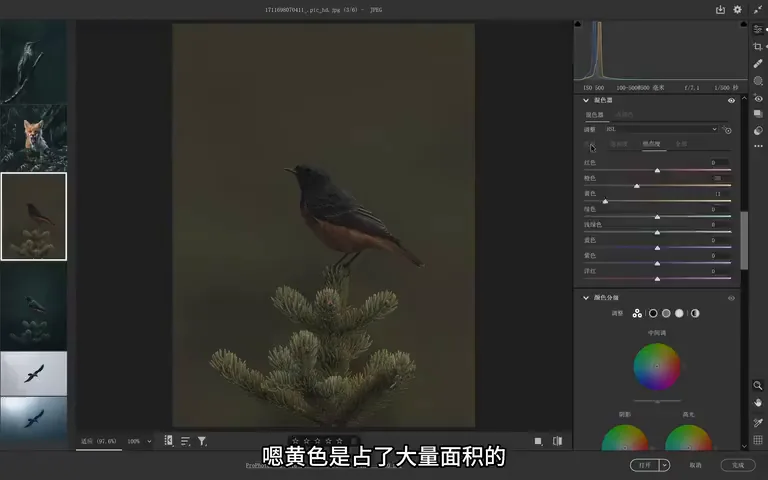
For color: the background is largely yellow, so drop Yellow luminance straight in the HSL panel; as yellow darkens, orange starts to shout, so nudge Orange luminance down a little too (at 3:28 in the video). To make further grading easier, pull global saturation down 50 first (at 3:53 in the video), then use the Hue sliders to push yellow toward cyan and steer the frame toward teal (at 4:06 in the video). The bird looks dim at this stage — local tools will lift it later.
03 Local Refinements: Subject, Eye and Gradients
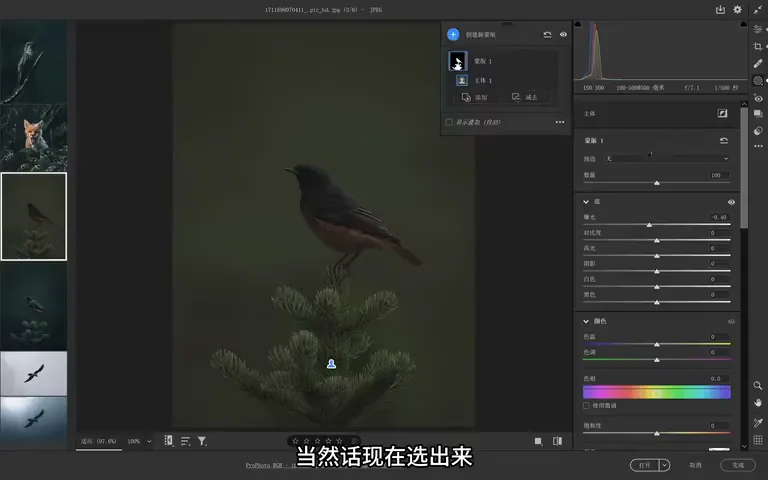
With the base tone set, move to local work. First a vignette to pull the eye inward: midpoint at center, feather slightly raised, and the bird's surroundings fall off to frame the subject (at 4:45 in the video). Then Select Subject grabs the bird and the surrounding vegetation in one click; to verify the selection, drop that mask's exposure by 4 and the coverage is unmistakable (at 5:15 in the video). Since the AI edge transition is not surgical and halos lurk around the bird, run a Subtract brush with Auto Mask enabled to pull the spill back in (at 5:24 in the video).
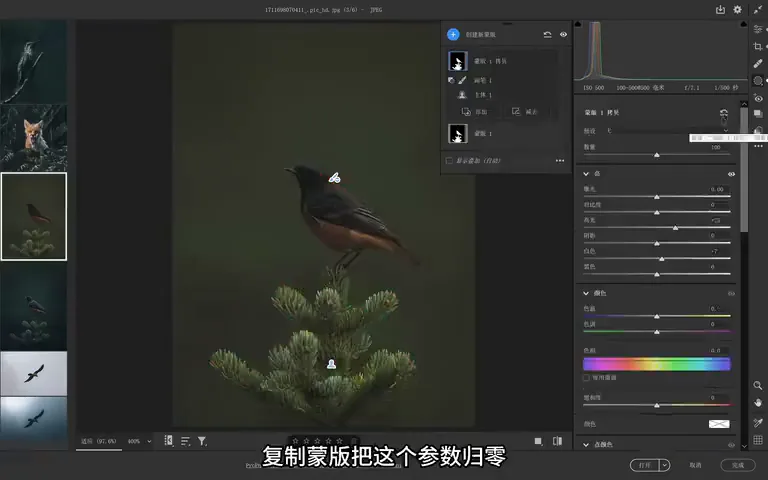
Reset that mask's sliders and adjust for real: raise the plants' highlights, with a touch of Whites and Texture, and the subject snaps into clarity (at 6:07 in the video). Still not enough — duplicate the mask, zero its parameters, then Subtract a radial gradient so only the bird remains, its lower body affected even less; on this layer lift Highlights and Whites, and the bird takes on that distinctive glow (at 6:27 in the video).
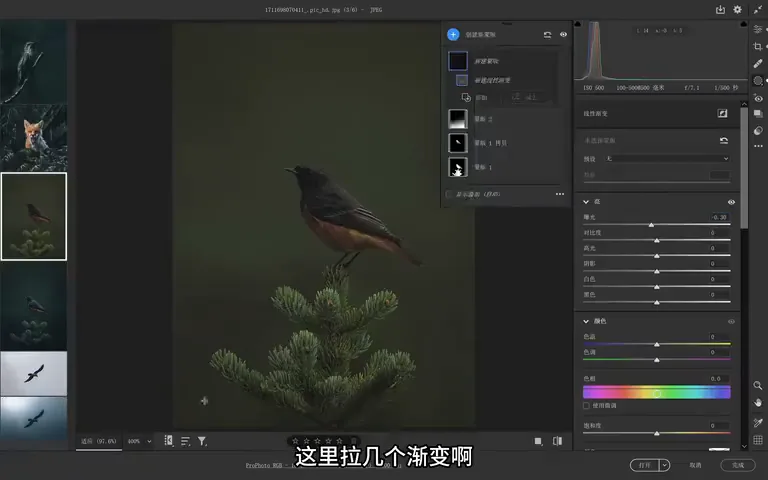
A photo should not be evenly lit top to bottom. Pull a few linear gradients at -0.3 exposure so the lower part of the frame sits slightly darker — with that tonal variation, the image gains mood (at 6:57 in the video).
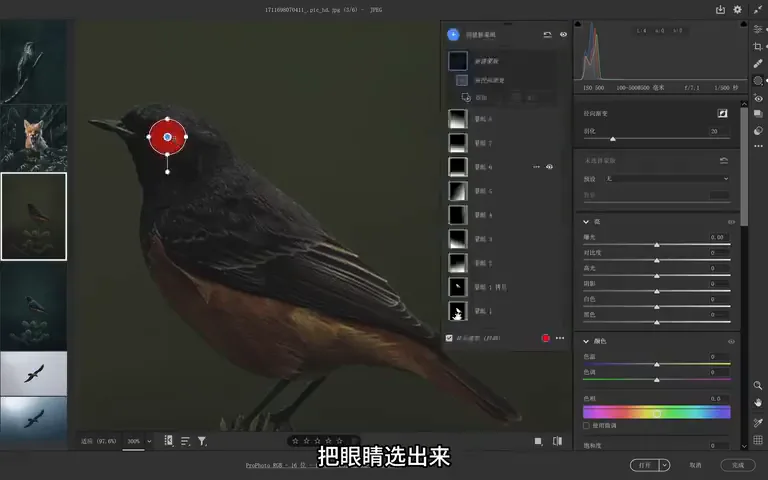
Now the eye. Zoom the radial filter to 300%, select just the eye, add Highlights, Whites and some Texture, and it instantly sparks with life (at 7:47 in the video); another radial gradient sharpens the wing texture. The beak needs a carefully painted brush stroke with a touch of exposure (at 8:14 in the video). Finally, duplicate the original bird mask and subtract a radial gradient to keep only the head — the key point of interest — and lift its brightness back up, making the whole bird read clearer and more three-dimensional (at 8:46 in the video).
04 Split Toning: The Final Layer of Teal-Blue
At this point the image is already a pleasant teal-green, but it lacks the depth of Fursty's look. Open Split Toning: add cyan to the highlights and teal-blue to the shadows, and the vibe lands immediately (at 9:35 in the video). Drop Yellow luminance a bit more and lower overall brightness slightly, and the deep, dark teal look is complete (at 9:46 in the video).
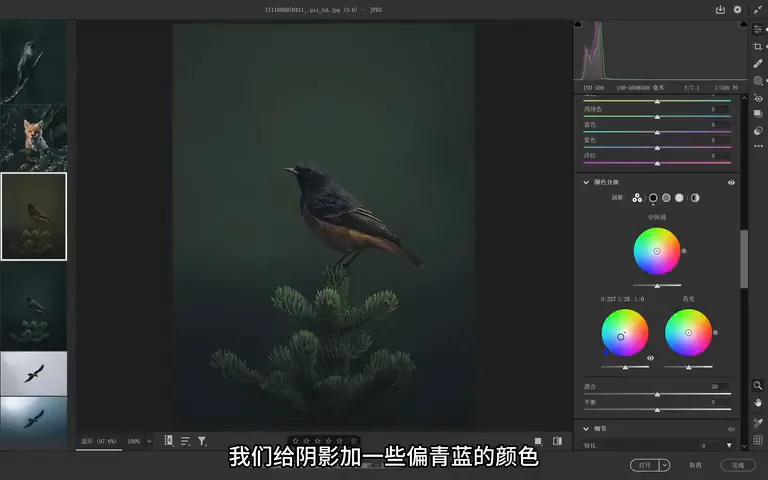
Before wrapping up, lift global Whites slightly and add a touch of Clarity to the bird and vegetation so they leap off the background (at 10:28 in the video). Thomas then compares this version with one he graded earlier: today's version leans greener and more natural, with calmer color — the one he prefers (at 10:03 in the video).
05 Before and After: From Record Shot to Final Frame
The final comparison: from a yellowish, cluttered record shot to a low-key, deeply teal stylized image (at 10:48 in the video). And grading is not the whole story — between the two sits a drastic re-crop that discarded roughly 90% of the pixels, feasible only on the R5's high-resolution sensor (at 10:58 in the video).
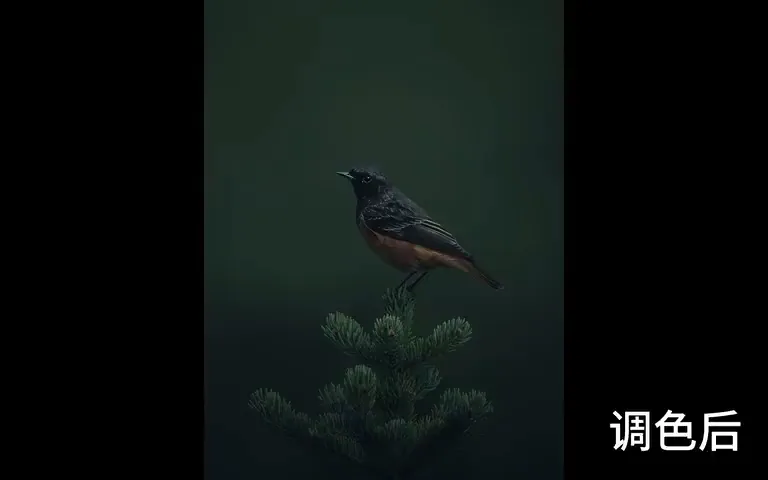
The photographer's second submission got the same treatment, regraded into a more evocative style (at 11:06 in the video). The recipe is easy to replicate: find a reference, build the low-key scale, reinforce the subject layer by layer locally, then glaze a final layer of teal-blue over everything — and your bird photos take on a whole new character.
1. Start from references: the dark-teal looks of Fursty and Mankeyfoto rest on a low-key long scale plus a teal-blue cast — a palette that also suits the predator side of birds; 2. Set the tone in three moves: pull exposure down, lift the black point with a curve, and push yellow toward cyan in HSL after cutting global saturation; 3. Go all-in on locals: a vignette to focus the eye, then duplicated masks minus radial gradients to spotlight the body, the eye and the head; 4. Split toning — cyan in highlights, teal-blue in shadows — is the final touch.
Personalized grading gives bird photos a distinct mood and character — and recording and sharing the wildlife we encounter is itself a powerful way to awaken people's desire to protect nature.