Photography Tutorial · 2019-12-08
City Nights with Both Sunset Glow and Lights: How Rooftop Shots Are Made
Thomas Chu Photo
City nightscapes are a subject everyone can shoot anytime.
But we often hit a dilemma: when the sky is rich in detail (sunset glow, blue hour), the city lights haven't come on yet.
By the time all the lights are on, the sky has gone pitch black and lost its detail.
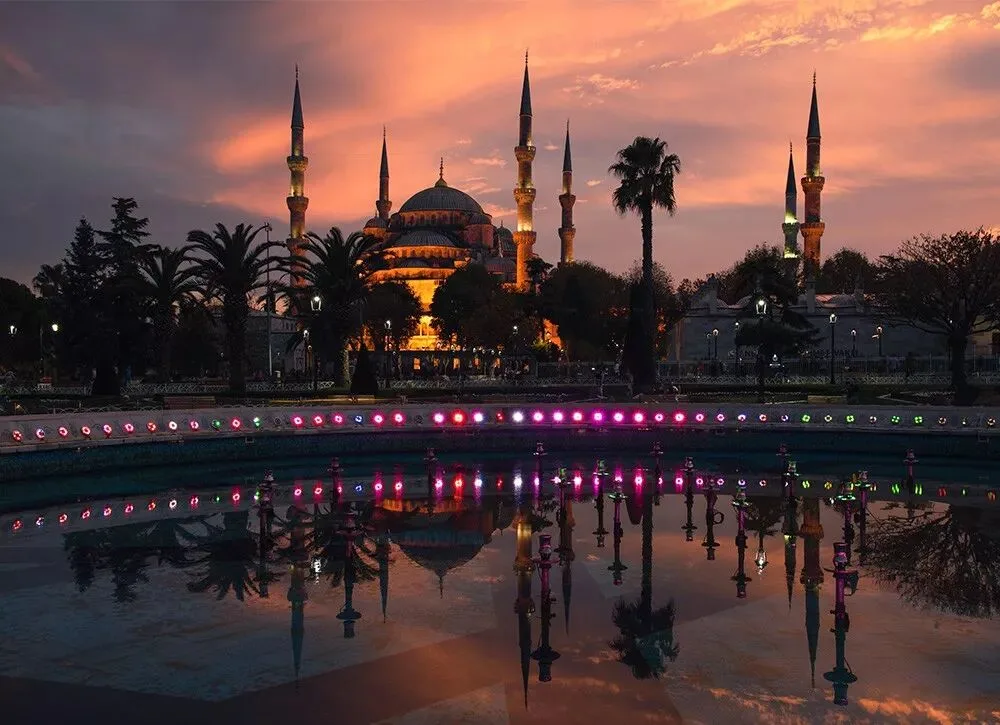
Many friends ask how a photo like the one above — with both a dramatic sunset glow and full city lights — is made.
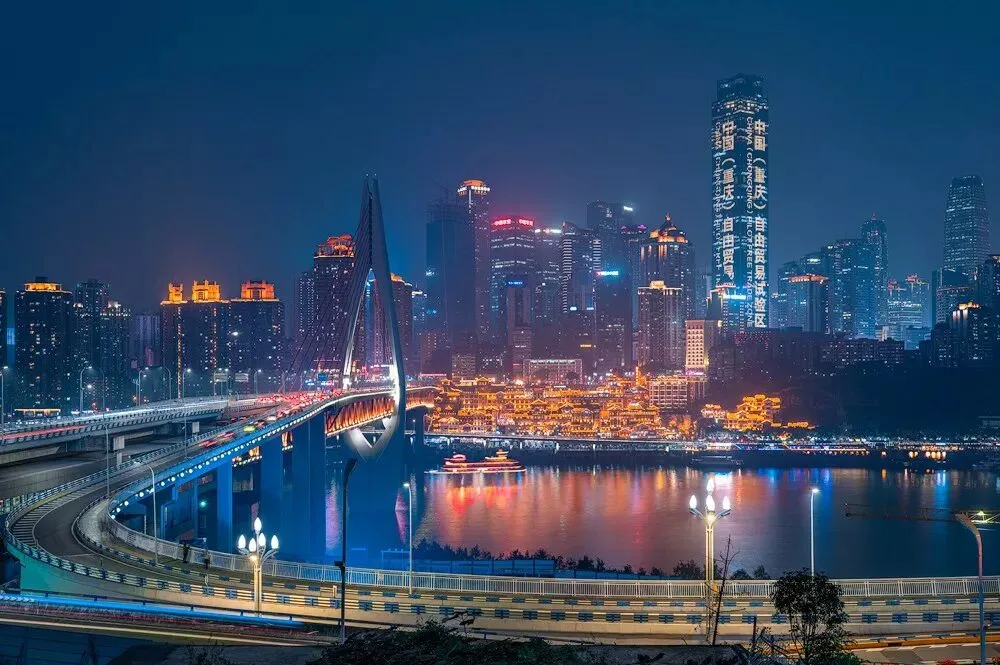
Today Thomas reveals the secret, showing time blending applied to night photography in a video.
Video Tutorial
▶ Watch the video tutorial on Bilibili
This is the fully illustrated companion to the video above. City night shots face a classic conflict: when the sky has its best color — sunset glow and the blue hour — the city lights are still off; once the lights come on, the sky has turned black. Thomas demonstrates the 'time blend' technique from Chongqing: two frames from the same vantage, merging a blue-hour sky with late-night lights. The video covers gear through the full Photoshop workflow; this article breaks it down with keyframe screenshots.
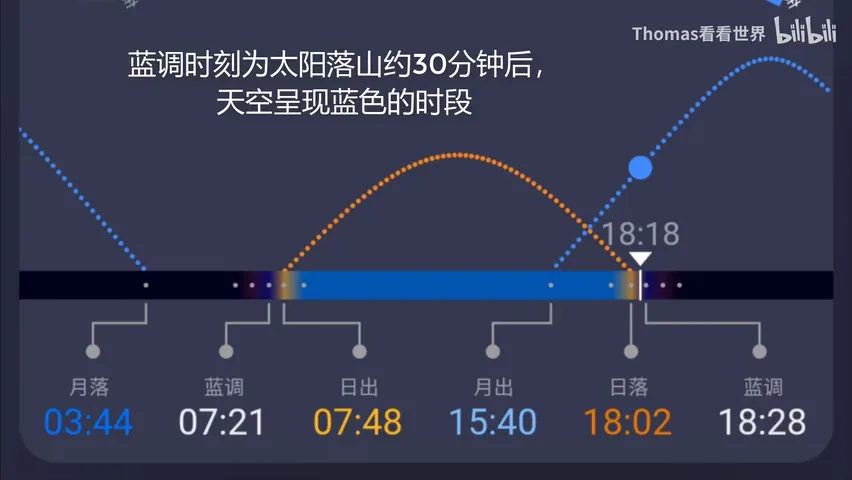
Start with the overview: the blue hour — roughly 30 minutes after sunset, when the sky turns blue — is the video's core concept and the prime window for city nightscapes. Everything below builds on it.
01 The Prime Window: The Blue Hour
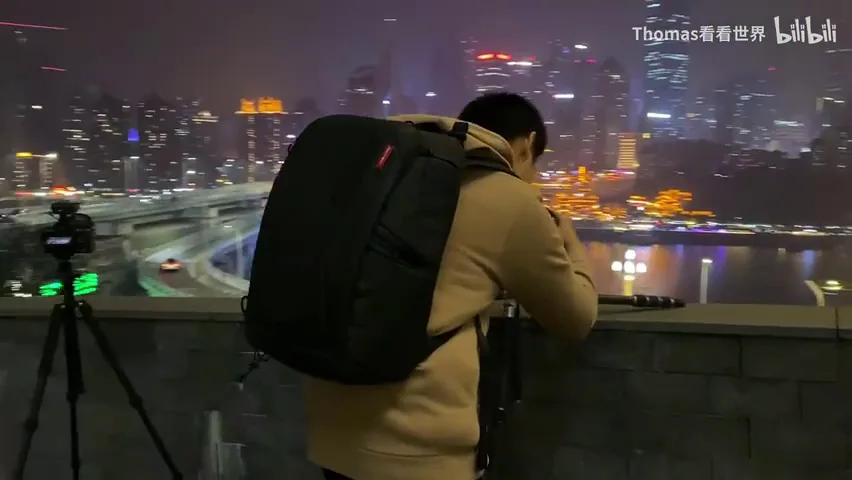
For city outings Thomas travels light: a Sony A7R3 with a 24-105mm (a flexible range), wide and telephoto primes as backup, Haida polarizer and ND filters — the ND turns water silky on long exposures — a tripod and head for stability, all carried in PGYTECH's new OneMo backpack, easy on the eyes and capacious (at 0:16 in the video).
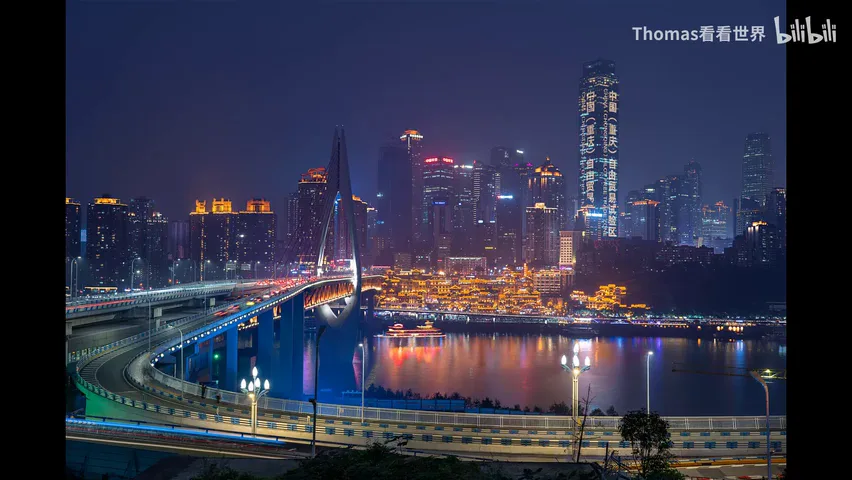
The blue hour typically arrives half an hour after sunset: the reds and yellows have faded into blue, yet the sky is not black — faint skylight keeps ground detail visible and the color clean. It is the best window for city nightscapes. In summer, lights come on at seven or eight while the sky is still blue — the two meet naturally. But in winter Chongqing the sun sets at 5:30 and the blue hour starts at six, while the Qiansimen Bridge only lights up around 7:30-8:00 — hence the conflict (at 1:07 in the video).
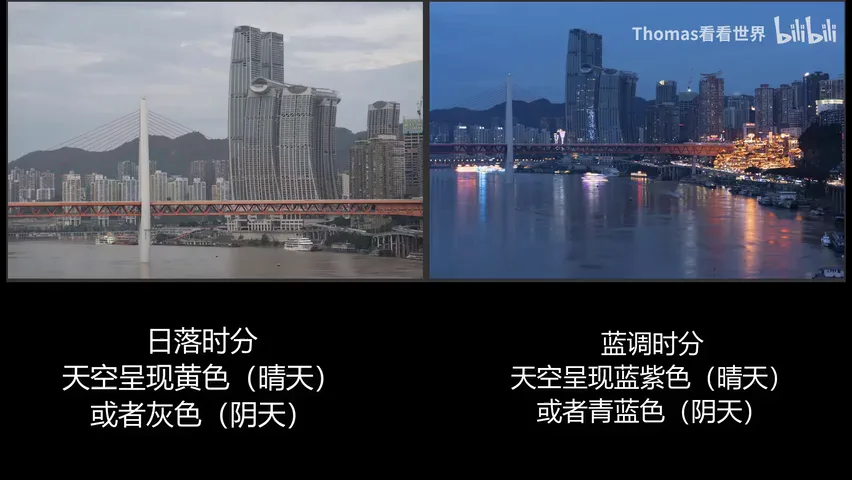
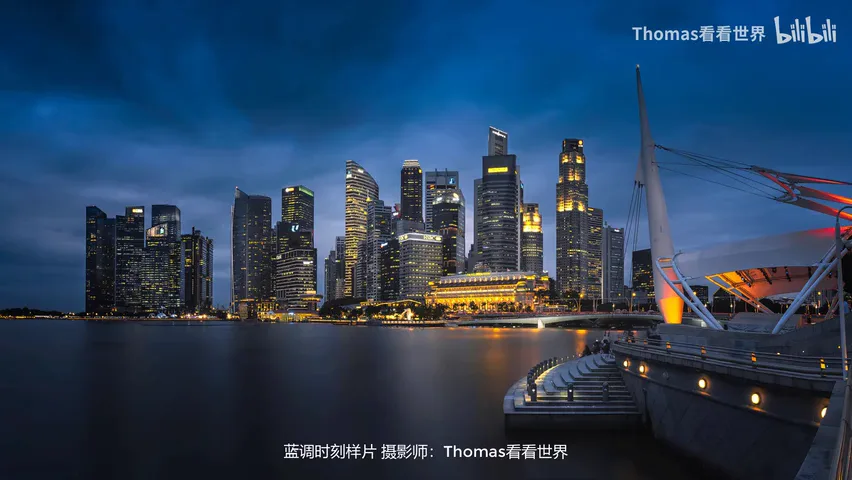
02 The Time Blend: Ground at Blue Hour, Lights at Night
The fix is the time blend: shoot one frame at the blue hour for the landscape and atmosphere, another after dark when every light is on, then merge them in post — a photo with both a blue sky and brilliant lights. It is called a time blend because the tripod, vantage and lens never move: the two frames share an identical composition, and only the shooting time changes (at 2:15 in the video).
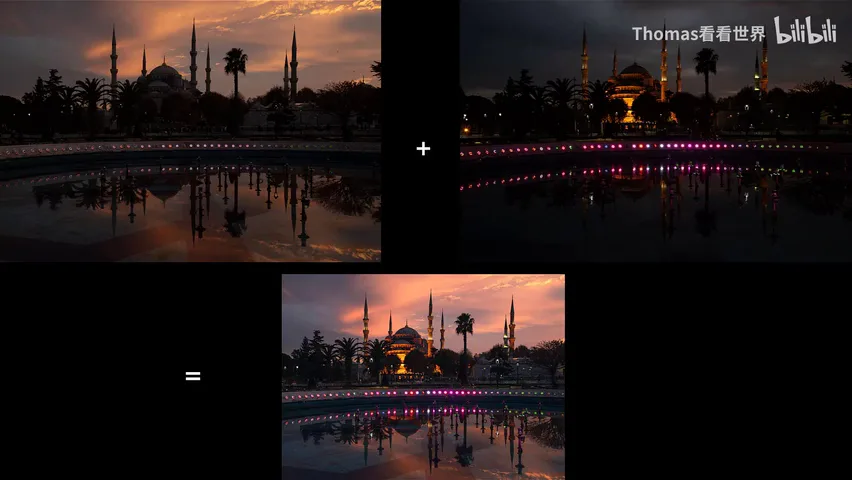
Those spectacular images combining sunset glow with city lights are mostly made the same way — the video demos it with Istanbul's Blue Mosque: sunset base frame plus a lights frame, and the result after the equals sign. It is the open secret of city night photography: how to get more lights into your picture (at 2:41 in the video).
That night produced a full set of frames, from which two were picked: one blue hour, one after the lights came on. Thomas admits the blue-hour frame was shot a bit late — the sky had darkened more than intended; and while the night frame loses ground detail and has no sky gradation at all, every light is on — which is its one, decisive value (at 3:20 in the video).
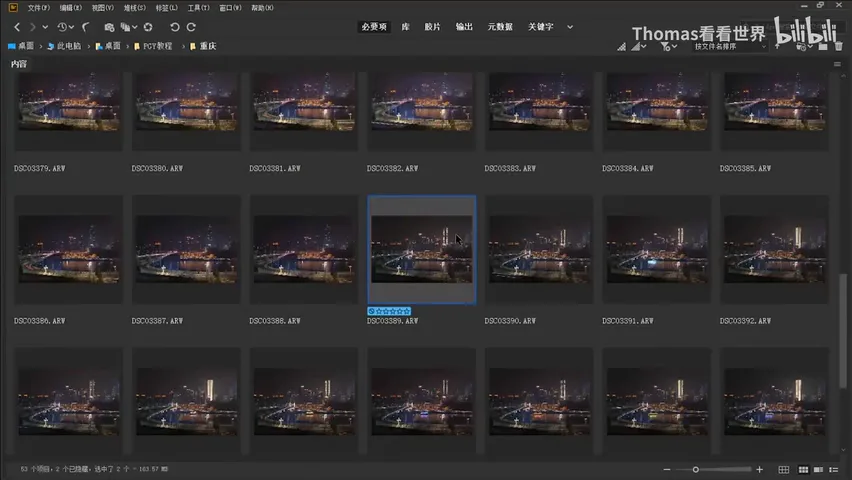
03 Align and Lighten: The Blend in Two Steps
Step one in Photoshop: bring both frames into one document (copy the layer across to the other open document). For blends Thomas always merges first, then grades and adjusts exposure on the merged result to preserve maximum quality. Although the tripod never moved, pressing the shutter shifts the camera by a few pixels, so run Edit > Auto-Align Layers first; if it fails, flip the top layer's blend mode to Difference and nudge manually — alignment is perfect when the preview is at its blackest (at 4:30 in the video).
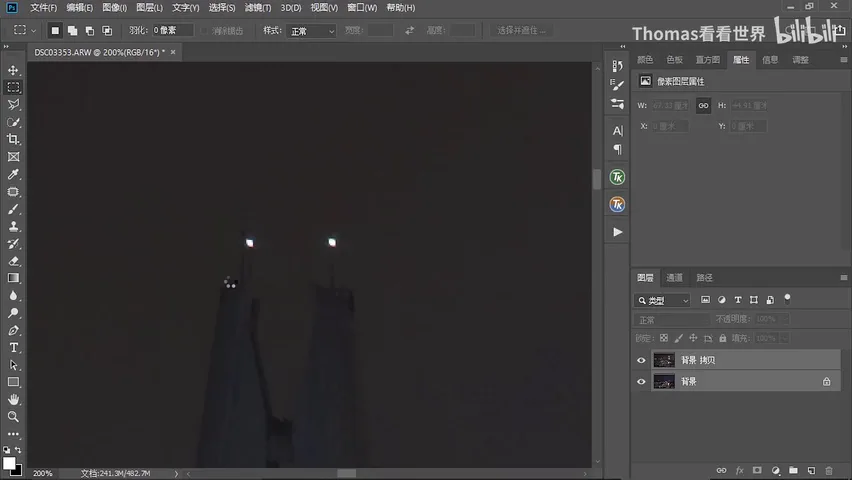
Step two is the soul of the trick: switch the top layer (the lit frame) from Normal to Lighten. Lighten compares pixels and keeps the brighter of the two — the already-bright ground stays untouched while every light brighter than the blue-hour base shines through, fusing the layers instantly into one image with a blue sky and a glowing city (at 6:44 in the video).
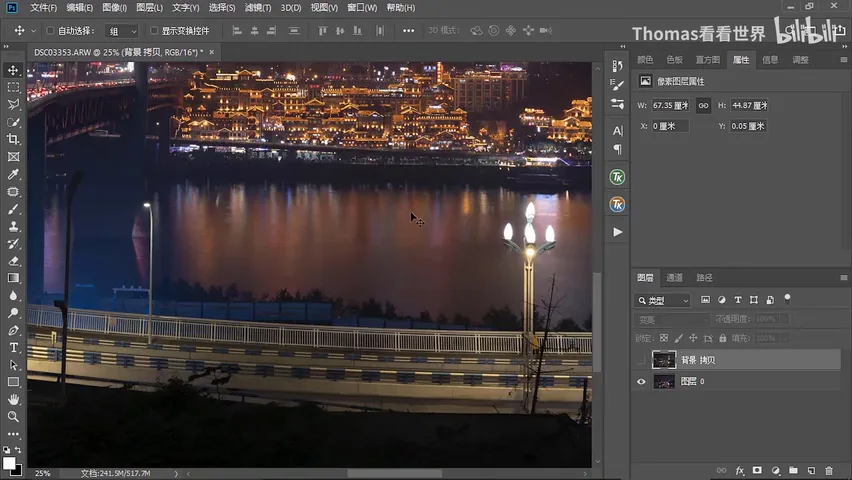
04 A Curve to Hide the Sky — No Masking Needed
A problem appears: with Lighten picking whichever sky is brighter, the result becomes a shallow, dirty patchwork — the upper left takes the lower sky, a yellow patch takes the upper one. Pixel-level masking is tedious; Thomas instead exploits Lighten again: simply make the upper sky darker than the lower. Add a Curves adjustment layer, right-click Create Clipping Mask so it affects only the top layer, then drag the sky's brightness down with the on-image tool — the upper sky vanishes entirely, leaving the clean blue hour beneath (at 7:38 in the video).
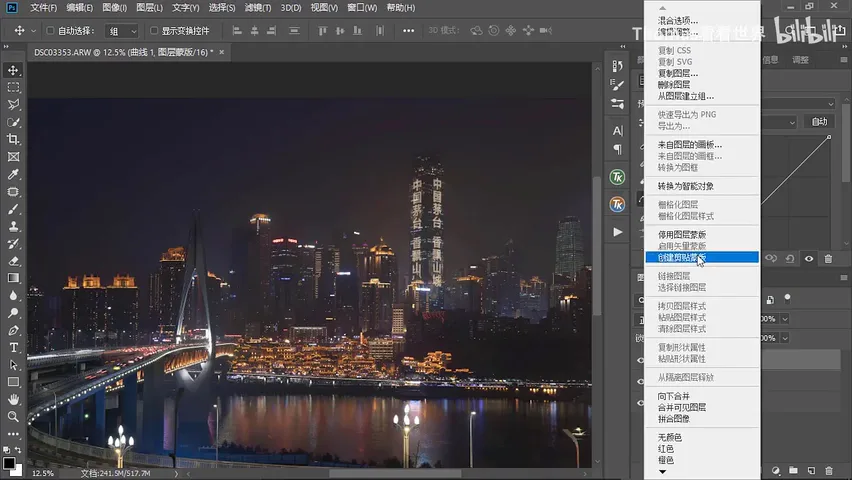
The cost: the lights darken and dull along with the sky. So select the lights on the upper layer and lift them back on the curve — the upper sky stays fully hidden while the lights pass through unchanged. Toggle the curve layer on and off to compare: the sky is swapped without ever tracing building outlines, which is exactly the magic of the Lighten blend (at 9:24 in the video).
05 Mask Refinement: Lights Wherever You Want Them
Add a layer mask to the top layer and paint with a 100%-opacity black brush to remove unwanted lights one by one: the street lamp that suddenly glares at the frame's edge, lit-up branches that distract, the messy light reflections on the water — keep only a hint — the ghosted double image of two walkers caught differently in the two exposures, even the 'Moutai' and 'Welcome to Chongqing' signs on a tower, wiped with one brushstroke — carefully near edges, so you don't erase the lights beneath. That is the beauty of the time blend: lights appear exactly where you want them, and vanish where you don't (at 10:21 in the video).
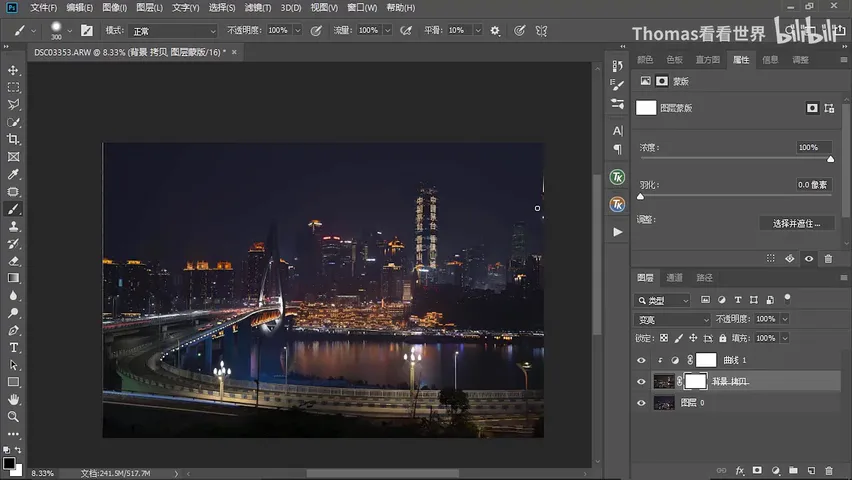
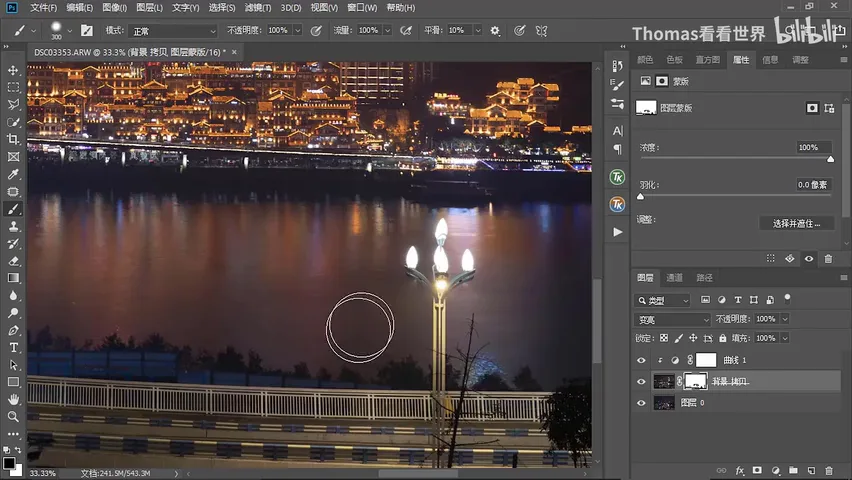
The before-and-after says it all: without the blended lights the blue-hour city is pitch dark; with them, the 'lights coming on' feeling emerges. The technique scales beyond two frames: shoot a third with a 20-second exposure for light trails, align, set Lighten, and brush the trails in through a mask for an extra layer of richness. Stamp the result into one layer and grade it as a whole. The two source frames are shared in the comments — try your own grade and post it to Weibo or Tuchong @Thomas看看世界 (at 12:35 in the video).
1. The prime window is the blue hour — half an hour after sunset, with skylight, ground detail and a clean sky; 2. When lights lag behind, time blend: shoot blue-hour and lit frames from one vantage, merge before grading, auto-align and set the top layer to Lighten; 3. Fix a patchy sky without masking — a clipped Curves layer darkens the upper sky, then the lights are lifted back selectively; 4. A mask and black brush put lights wherever you want — erase stray lamps, water reflections, ghosts and signage, and stack a long-exposure car-trail frame for extra depth.