Photography Tutorial · 2020-06-28
Advanced Uses of the Clone Stamp Tool in Landscape Retouching
Thomas Chu Photo
Author: Miller姚明来
The Clone Stamp tool is one of the most basic tools in Photoshop — even complete beginners know how to use it. Most of us only reach for it to patch up or remove distracting objects and keep an image clean.
But this seriously underrated tool is a regular part of my advanced landscape workflow. In this article, let me show you its powerful hidden uses!
1. Parting the Clouds to Reveal the Peak
The image below was shot in the Karakoram region of Pakistan and is an unprocessed raw frame. While trekking, our guide mentioned that the distant snow peak was actually a famous mountain — but at that moment it blended into the same-toned white clouds behind it and was barely visible.
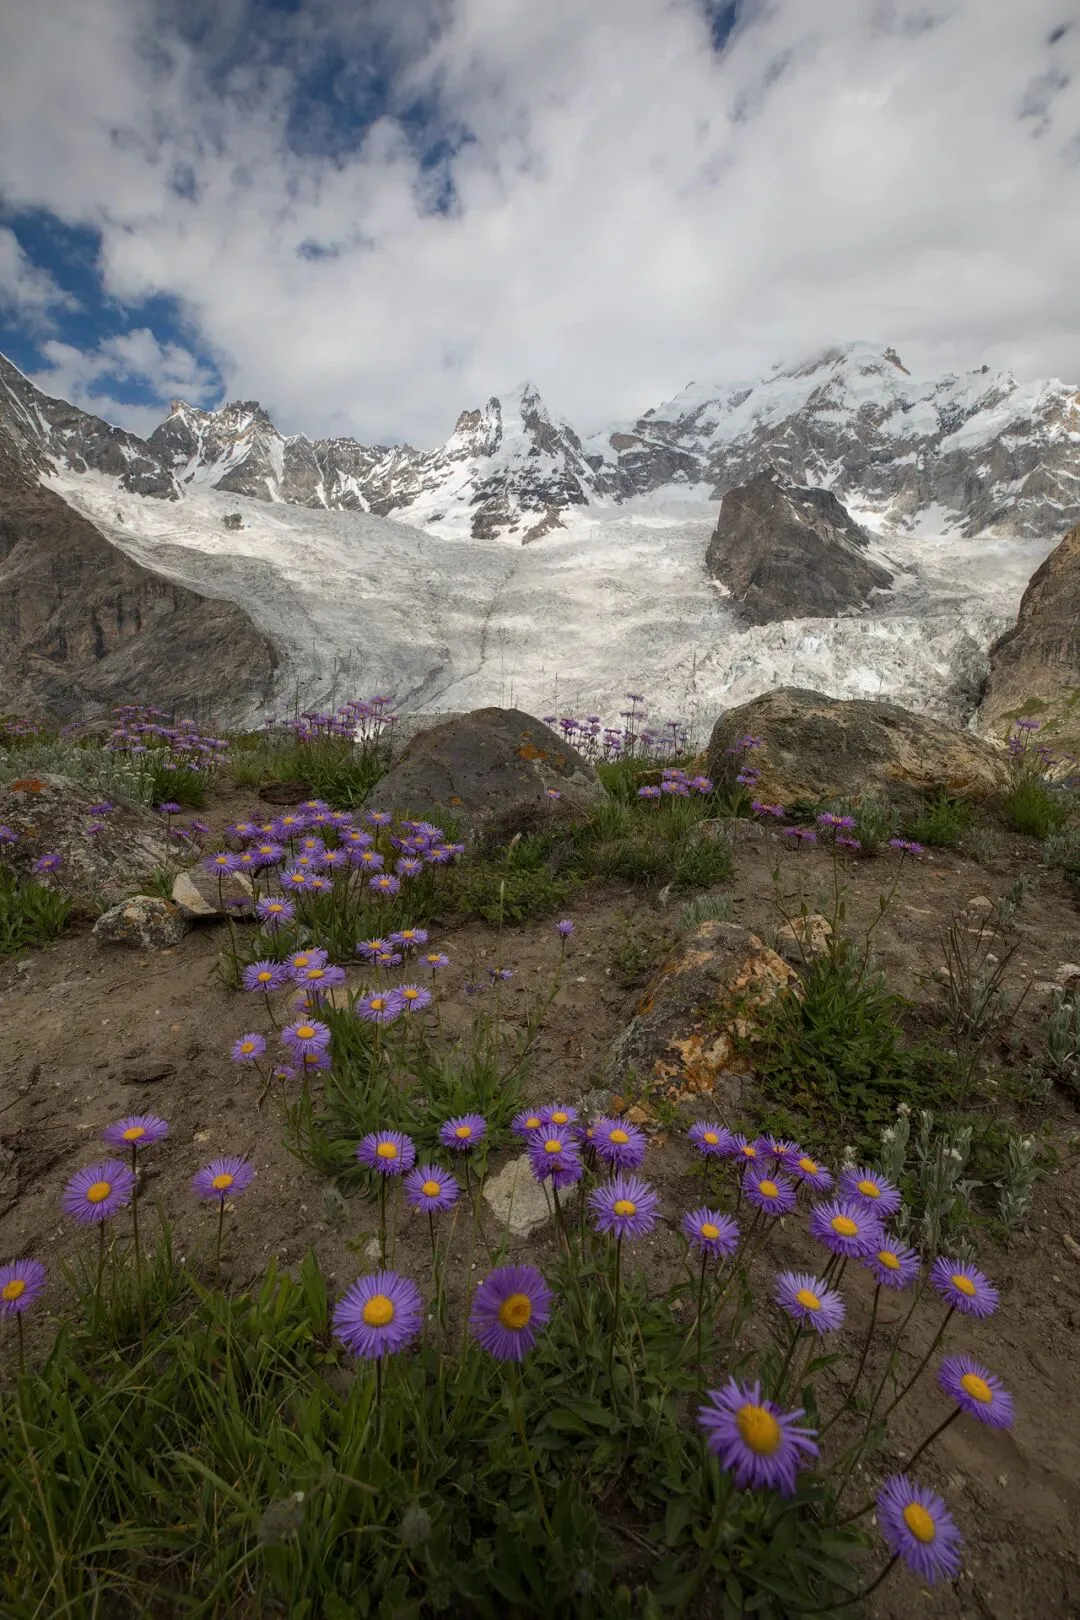
This is where the Clone Stamp comes in — we can use it to separate the main summit from the cloud layer, parting the clouds to reveal the mountain.
First, duplicate the background layer, then select the Clone Stamp tool and sample a blue-sky area.
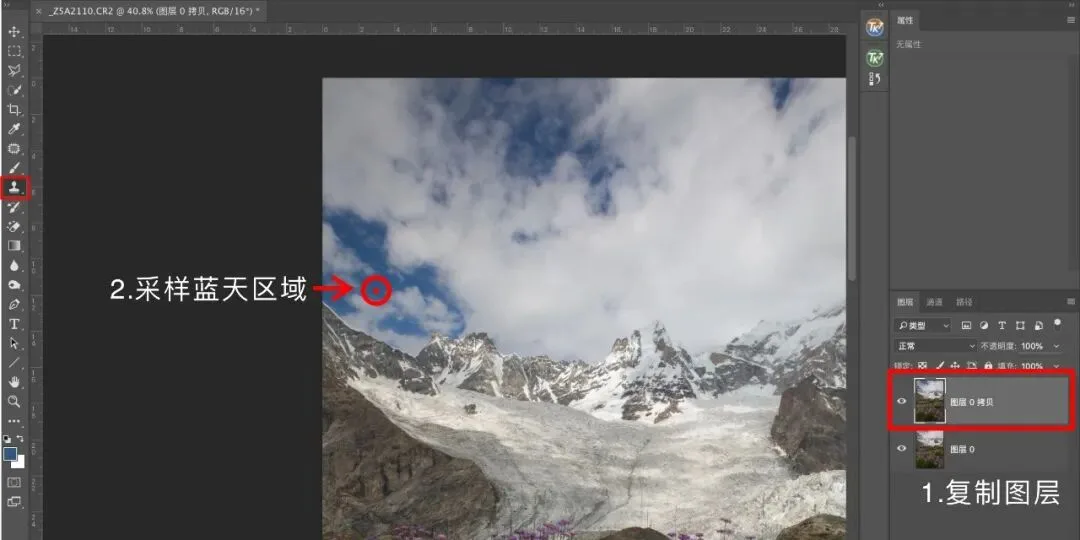
Then paint along the boundary between the peak and the clouds, re-sampling the blue sky every few strokes so the cloned areas don't look identical to the source. This pass doesn't need to be precise — just make sure you fully cover the transition zone between mountain and cloud.
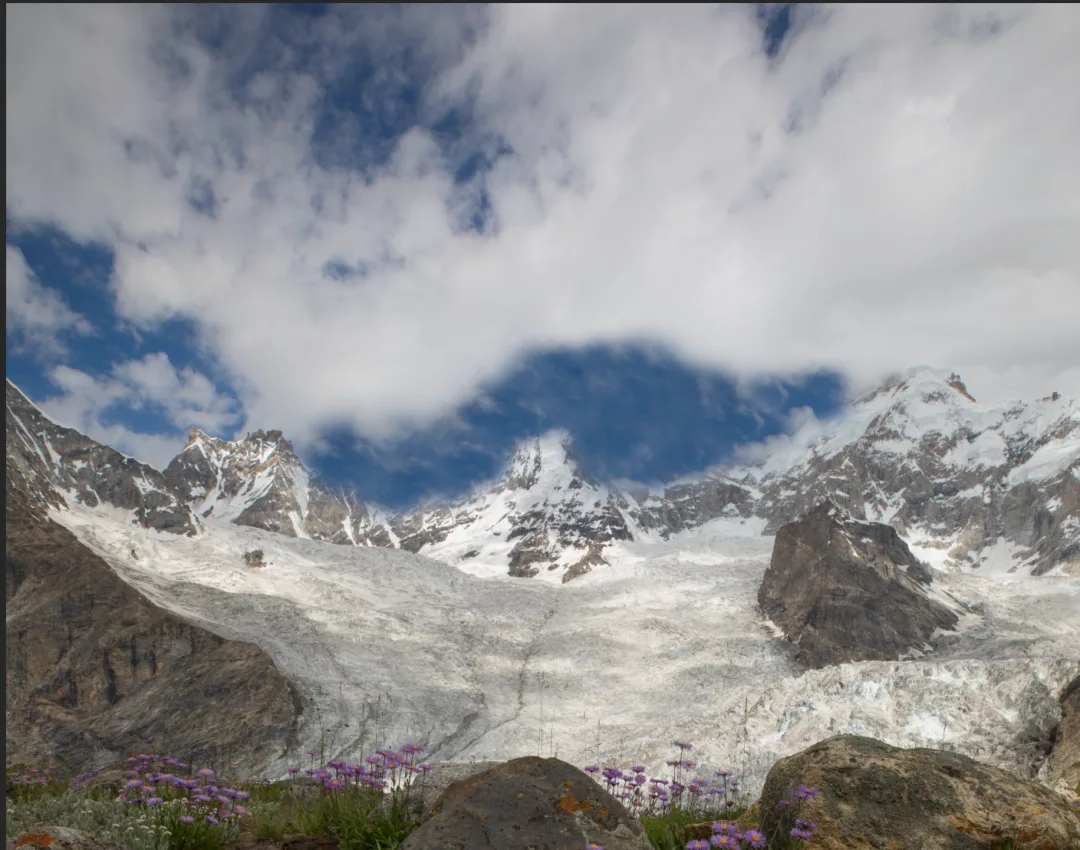
Next, add a black mask to the layer to hide the entire effect. With a white brush (0 feather), carefully paint back the boundary between the peak and the blue sky (see below).
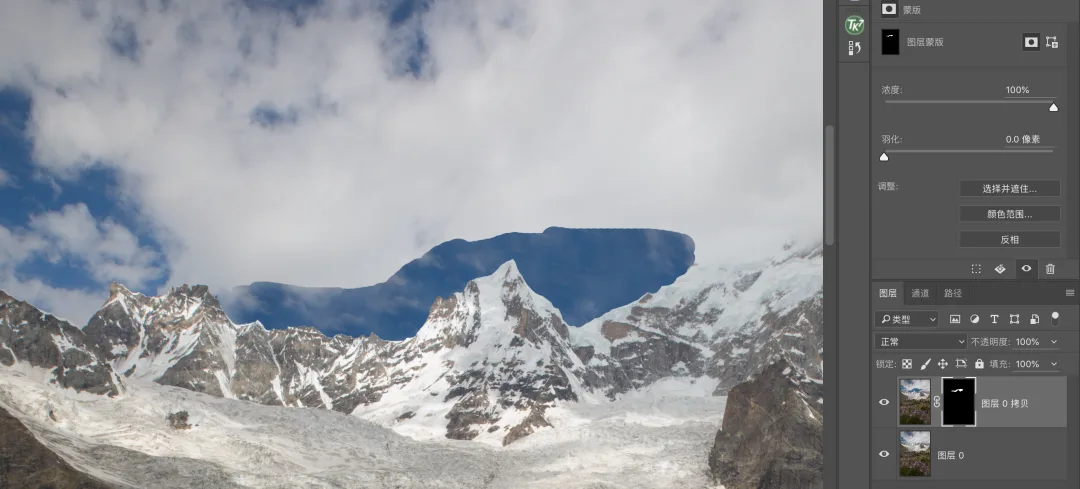
Then use a soft brush at 20% opacity (100 feather) to refine the transition between the blue sky and the clouds above, making the blend look natural.
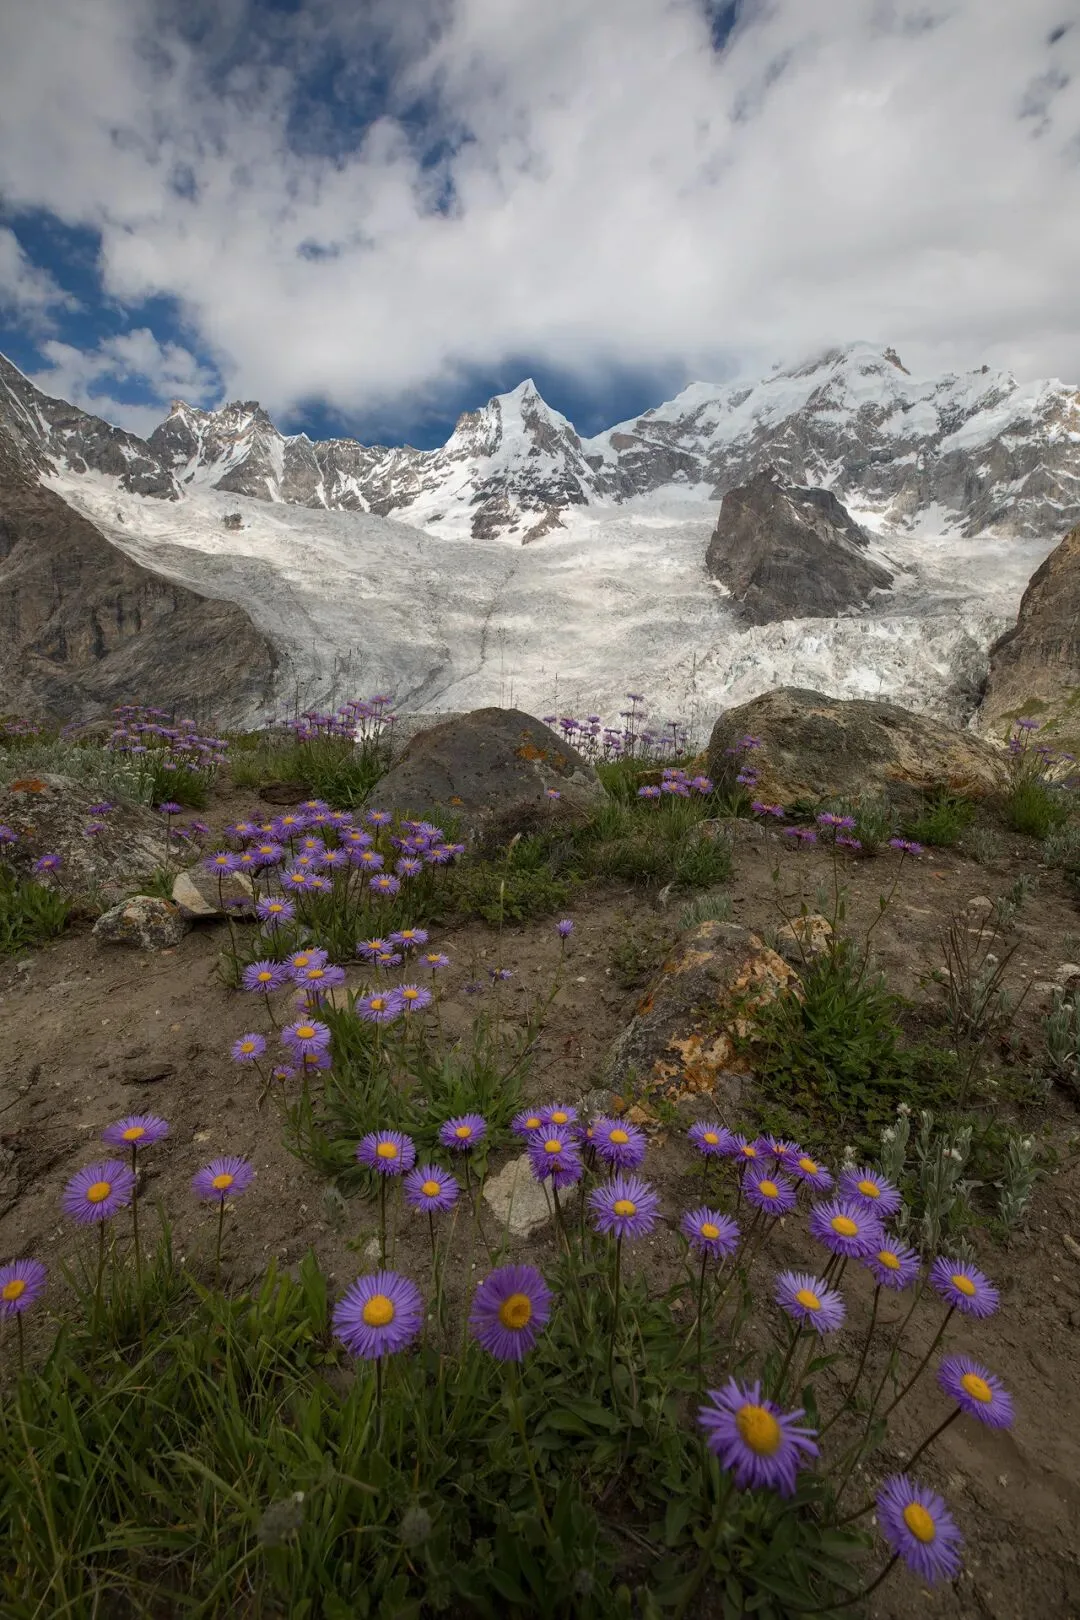
And here is the final result: the main summit is completely separated from the clouds behind it, and the snow peak stands out far more.
2. Wrapping the Peak in Mist
If the Clone Stamp can pull a mountain out of the clouds, it can just as easily tuck one back into the mist.
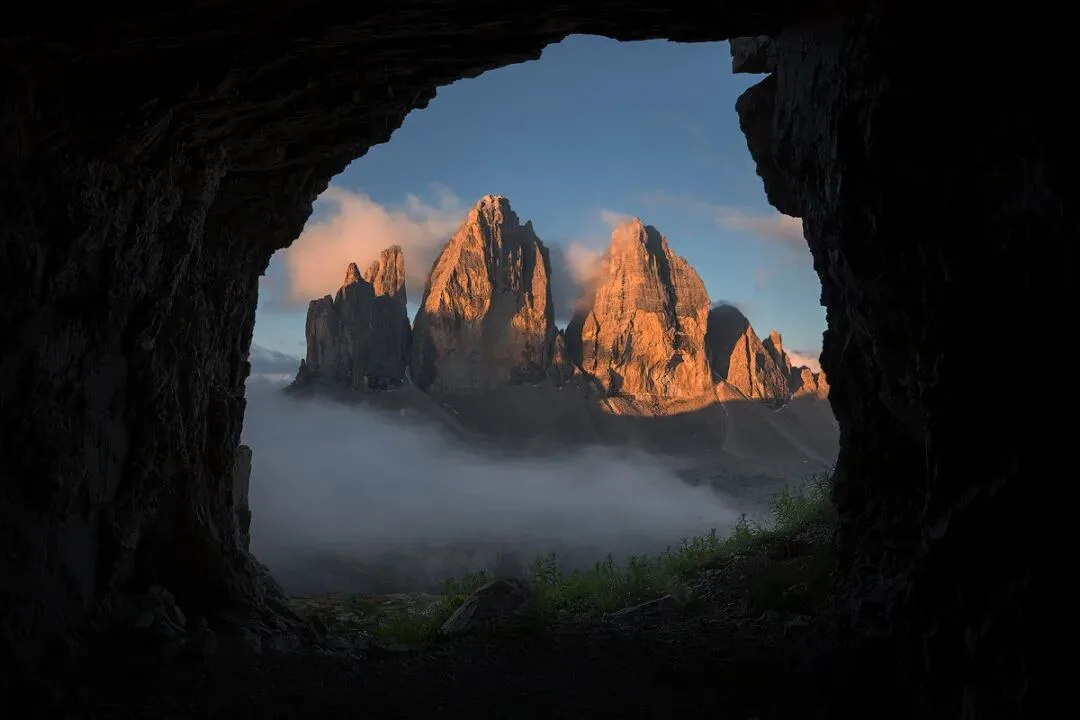
In the image above, the peak is surrounded by drifting clouds, but the mist only clings to one side of the mountain. Here we can use the Clone Stamp to let the mist cover more of the slopes, enhancing the dreamy, now-you-see-it-now-you-don't atmosphere.
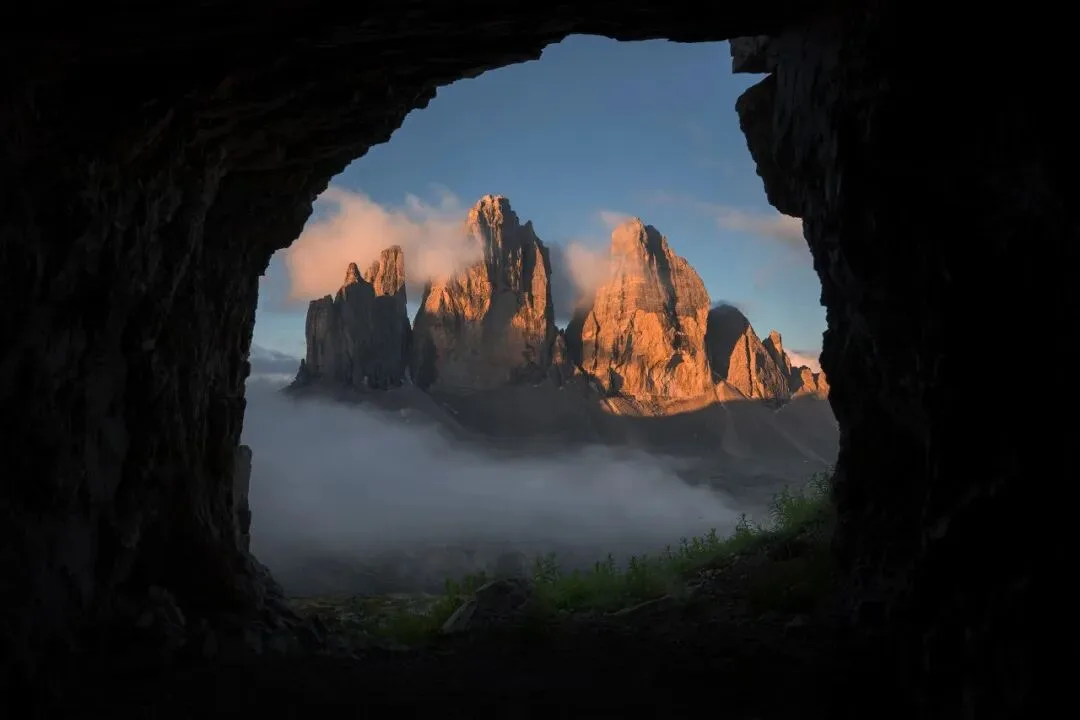
Sample a cloudy-mist area with the Clone Stamp, then do a simple paint pass with a mask — and you've created the effect of clouds spilling over the summit.
This kind of mood and atmosphere building is considered fairly advanced in landscape post-processing — yet we achieved a high-end result with the simplest of tools.
3. Recovering Shadow Detail
When shooting very high-contrast scenes — backlit situations, for example — we often find shadows in post that are underexposed to pure black. Even dragging the Shadows slider all the way up in the raw file reveals no detail at all. That's when the Clone Stamp becomes a last resort — not ideal, but the only way to save the shot.
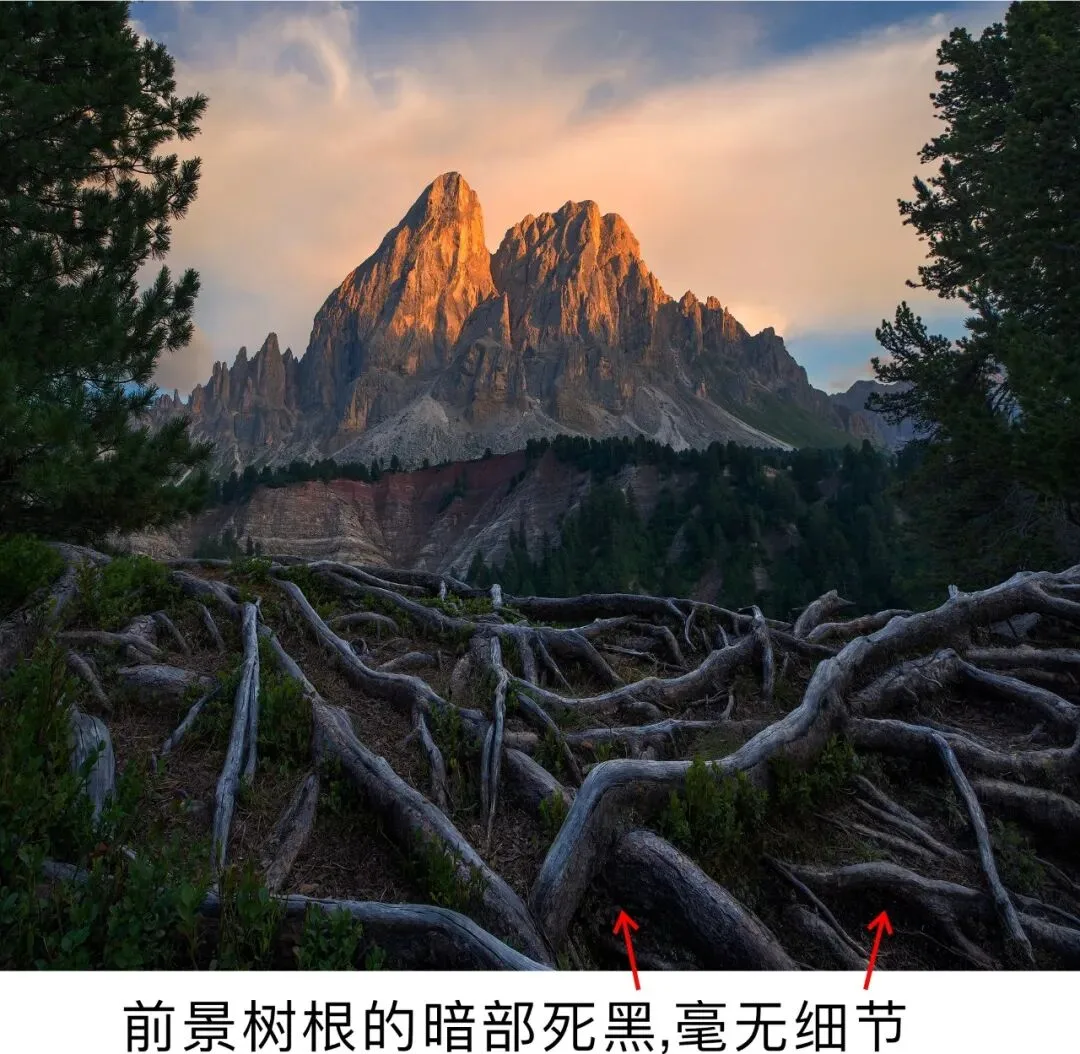
The shot above was captured using focus stacking. Bracketing exposures for the foreground at the same time would have meant a huge post-processing workload, so I usually skip exposure blending for the foreground and rely on the camera's dynamic range instead. But in post I found the shadows under the foreground tree roots were pitch black with zero detail — and that could only be fixed with the Clone Stamp.
Set the Clone Stamp opacity to 20% and sample the well-lit, detailed part of the tree roots.
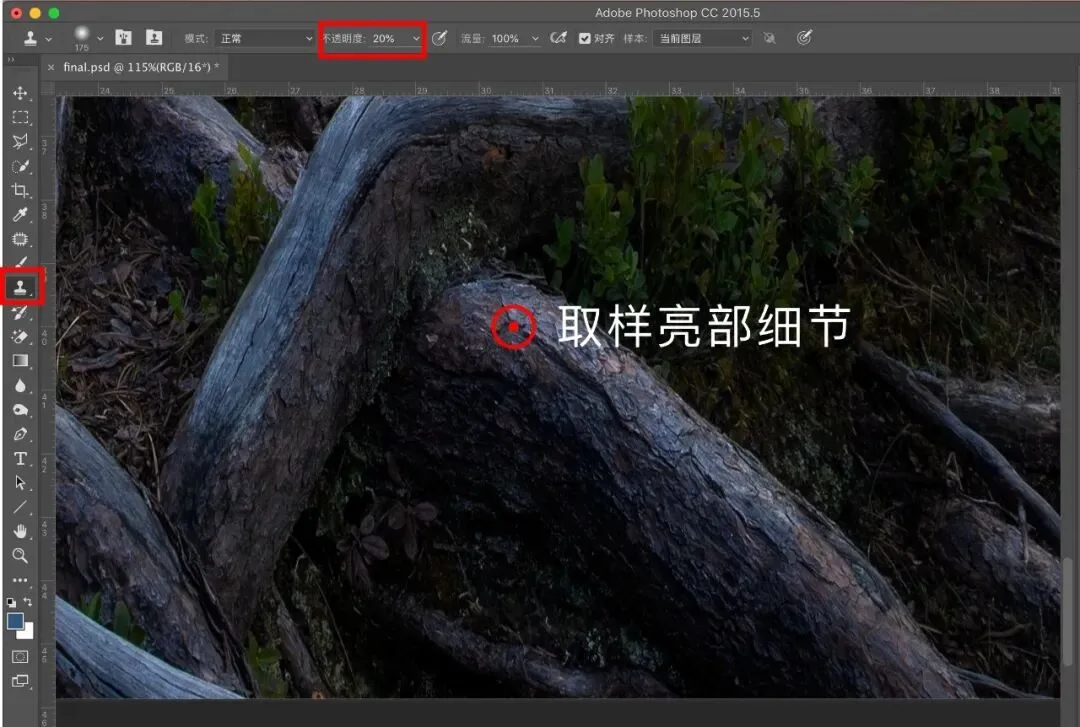
Then paint over the pitch-black shadow areas. This clones detail into the shadows, so the dead blacks now carry a faint hint of texture:
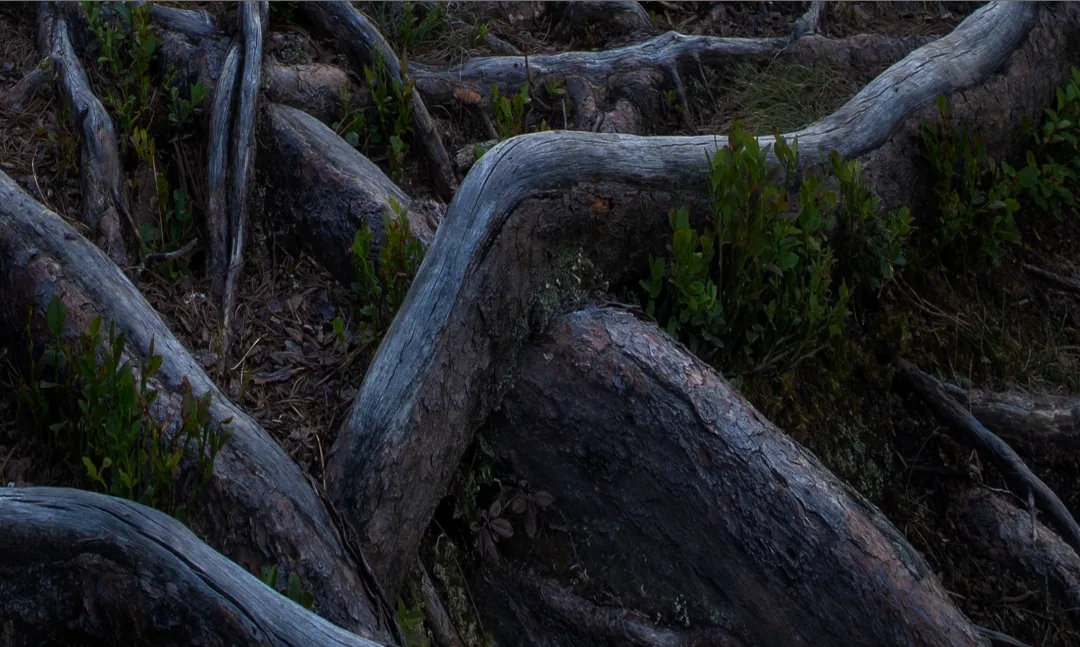
PS: For complex areas, it's best to first select the shadow regions with TKactions, then clone within the selection — that way you don't have to worry about affecting anything else.
4. Restoring Highlight Detail
Since the Clone Stamp can create shadow detail, it can of course also fill in blown-out, dead-white highlights. The only difference: when fixing highlights, set the opacity higher — usually 50% to 100% (versus 20% for shadow repair).
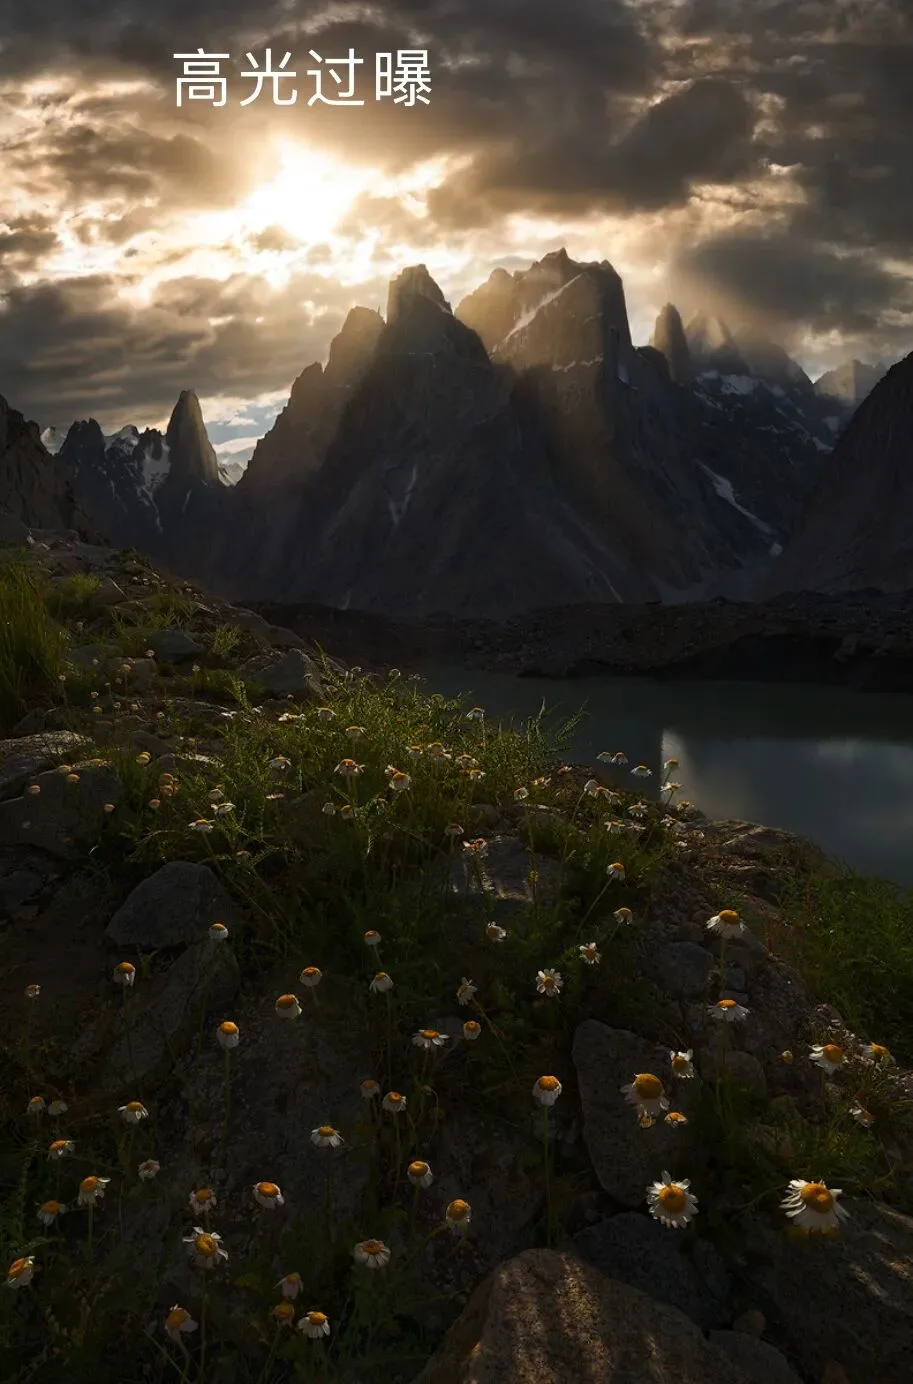
The highlights in the image above are blown to pure white — beyond rescue by any other method. Time for the Clone Stamp to step in.
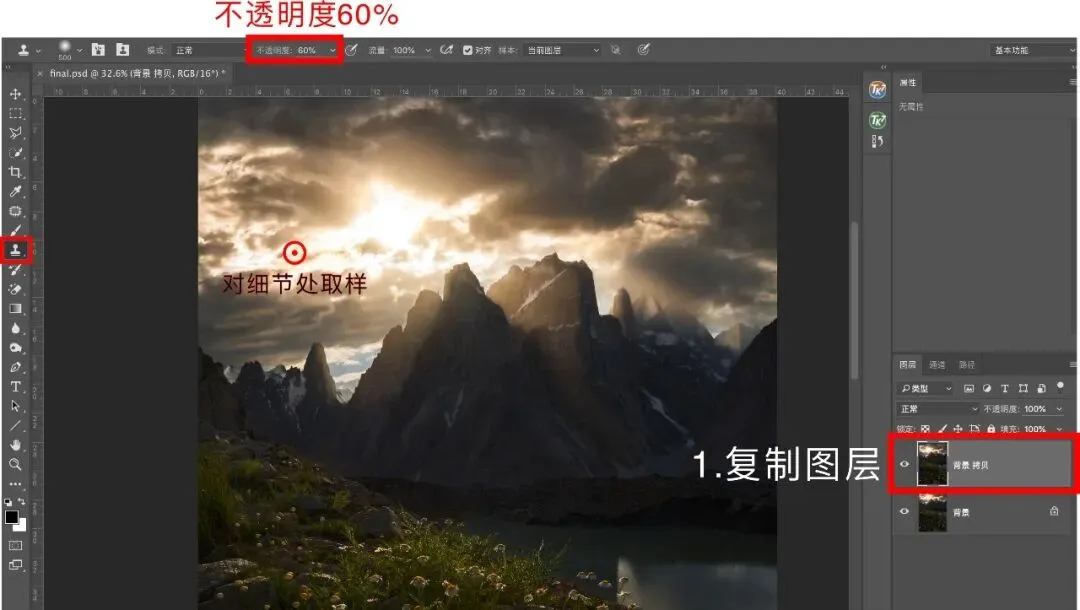
Duplicate the background layer, sample the detailed clouds surrounding the blown area with the Clone Stamp, then paint over the highlights.
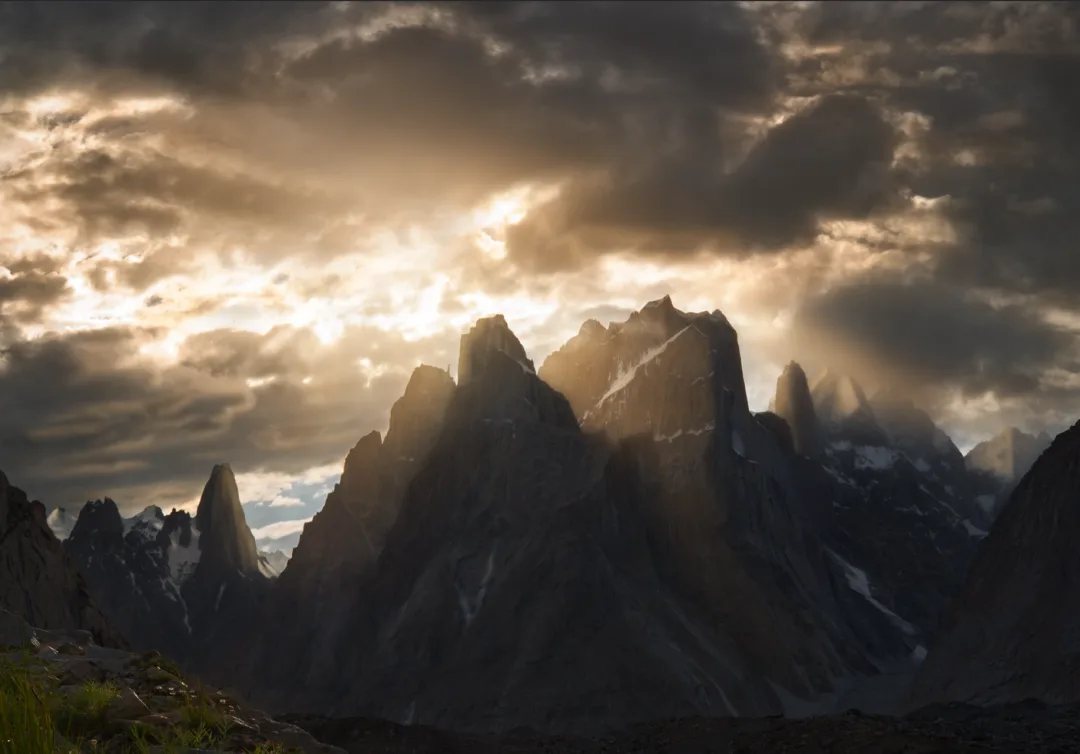
As you can see, the large area of dead white is repaired with ease.
5. Removing White Edges
Sloppy post-processing — over-sharpening, perhaps, or a poorly brushed mask — often leaves ugly white edges along the outlines of subjects in a photo.
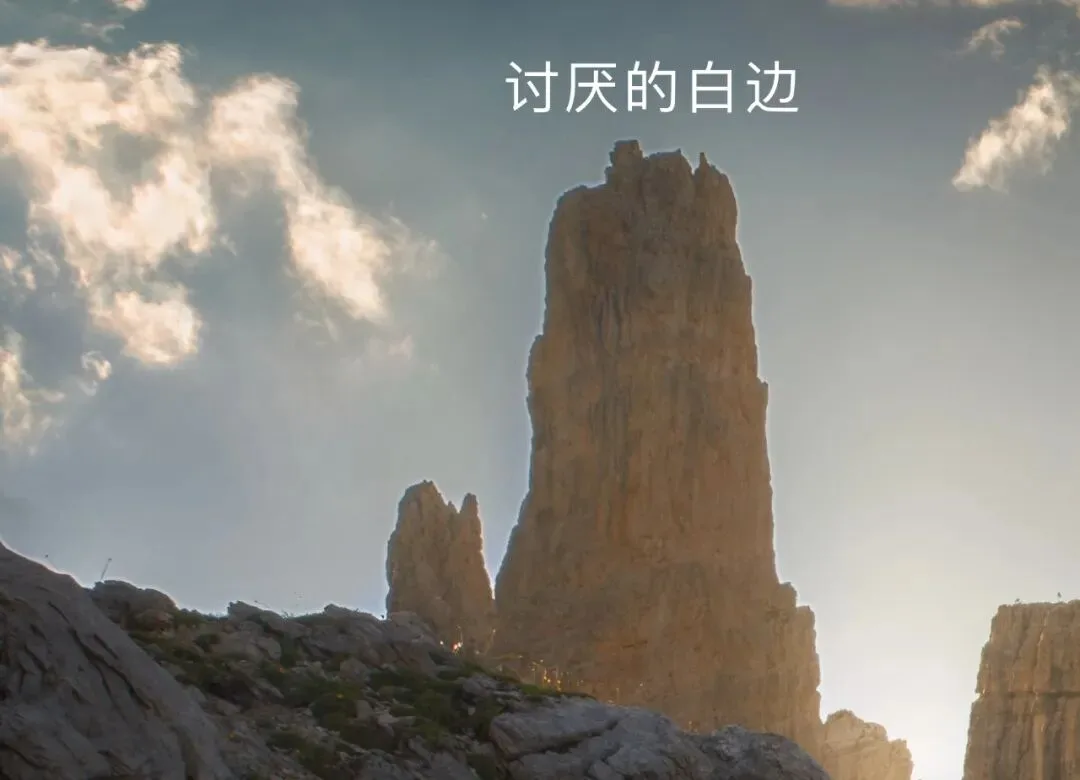
These white edges are extremely hard to remove with ordinary methods, but the Clone Stamp handles them effortlessly.
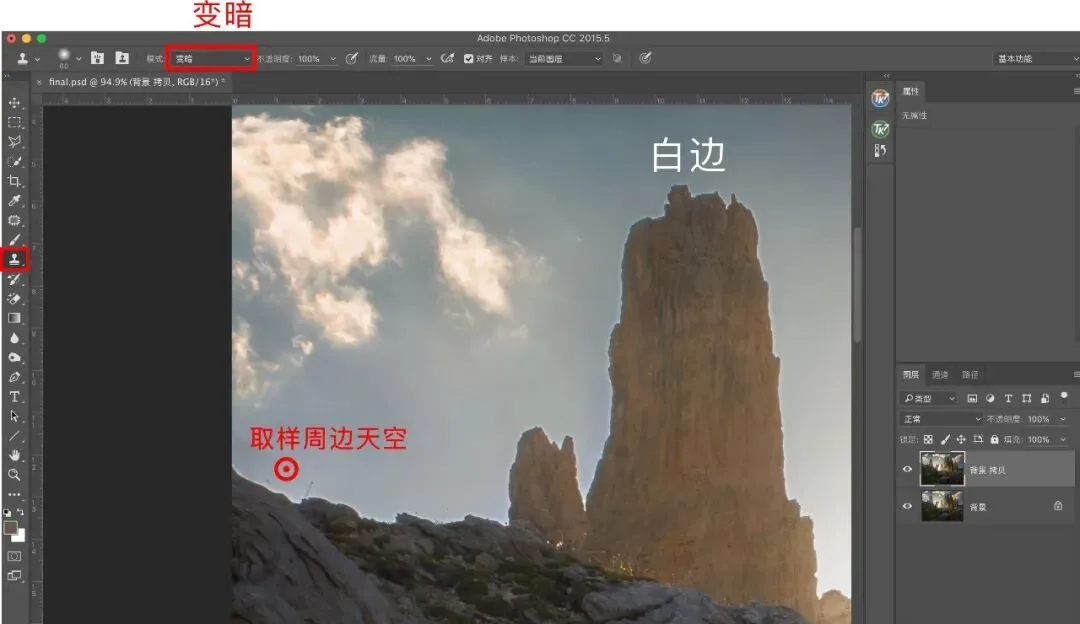
Select the Clone Stamp tool and set its mode to "Darken." Sample the sky around the white edge, then paint along the edge's outline so the sky pixels cover the white fringe. Because the mode is "Darken," only the brighter white edge is affected — the darker mountain stays untouched. This means even fairly sloppy brushing still yields a precise result.
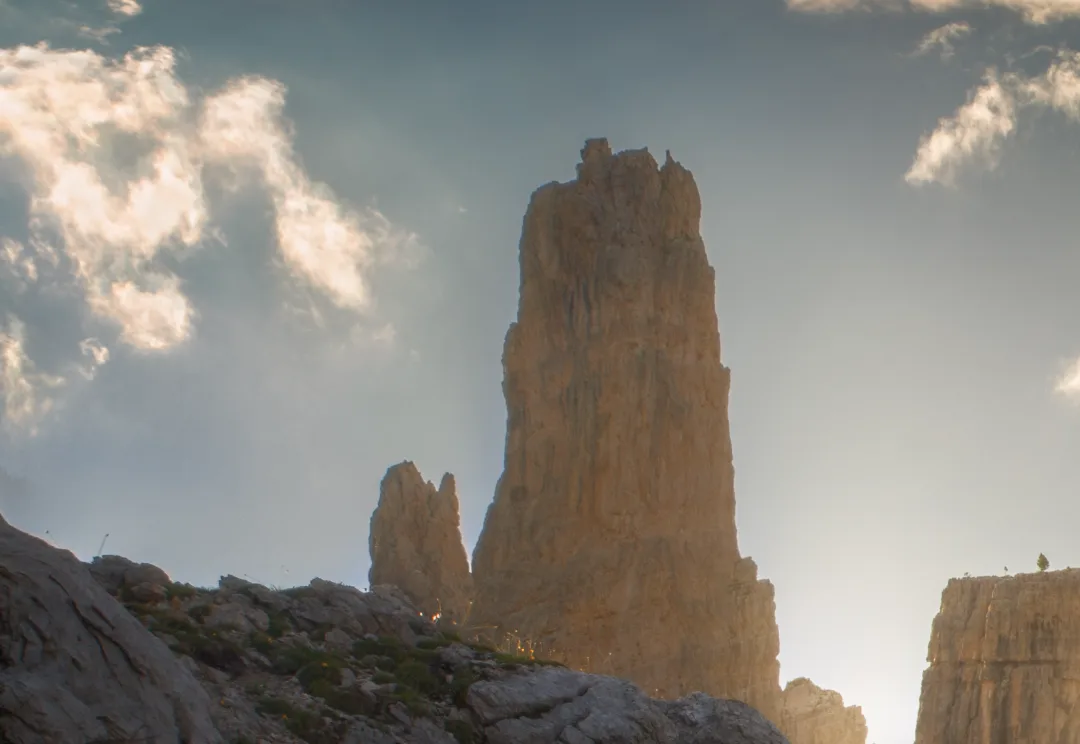
The image above shows the finished result: the annoying white edges are gone, and the whole operation took just one minute.
6. Reshaping the Sun and Moon
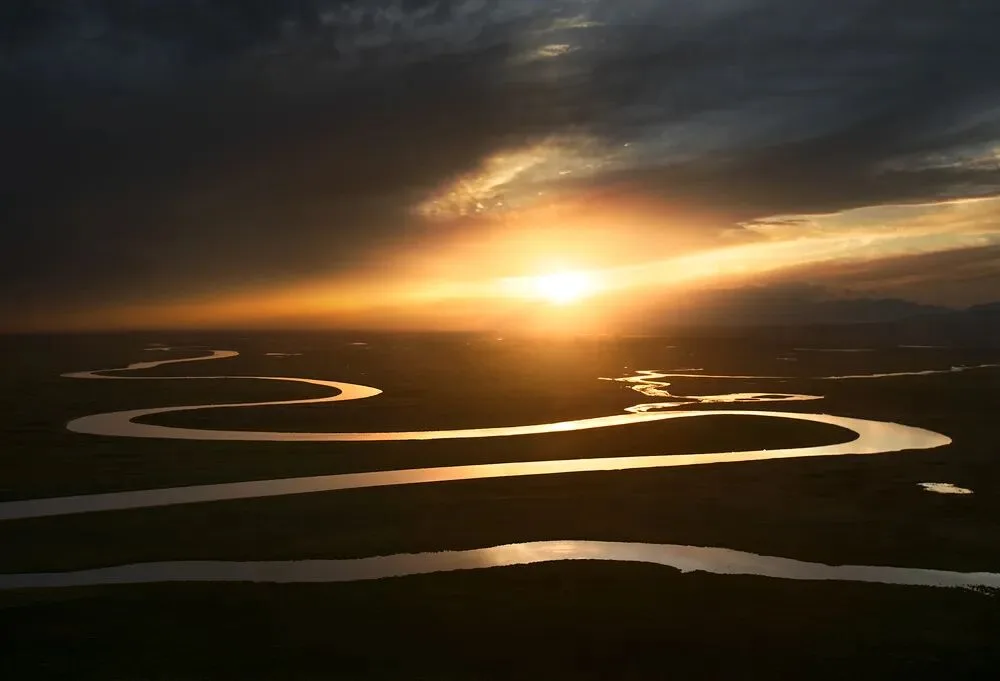
The sun is at its dimmest at sunrise and sunset — the classic moments when we want to include it in the frame, like a round setting sun over a long river. But if exposure isn't handled well, the sun blows out together with the bright area around it, and its shape is lost.
What to do? Time once again for the all-purpose Clone Stamp.
First, use the Elliptical Marquee tool to draw a circle around the blown-out sun.
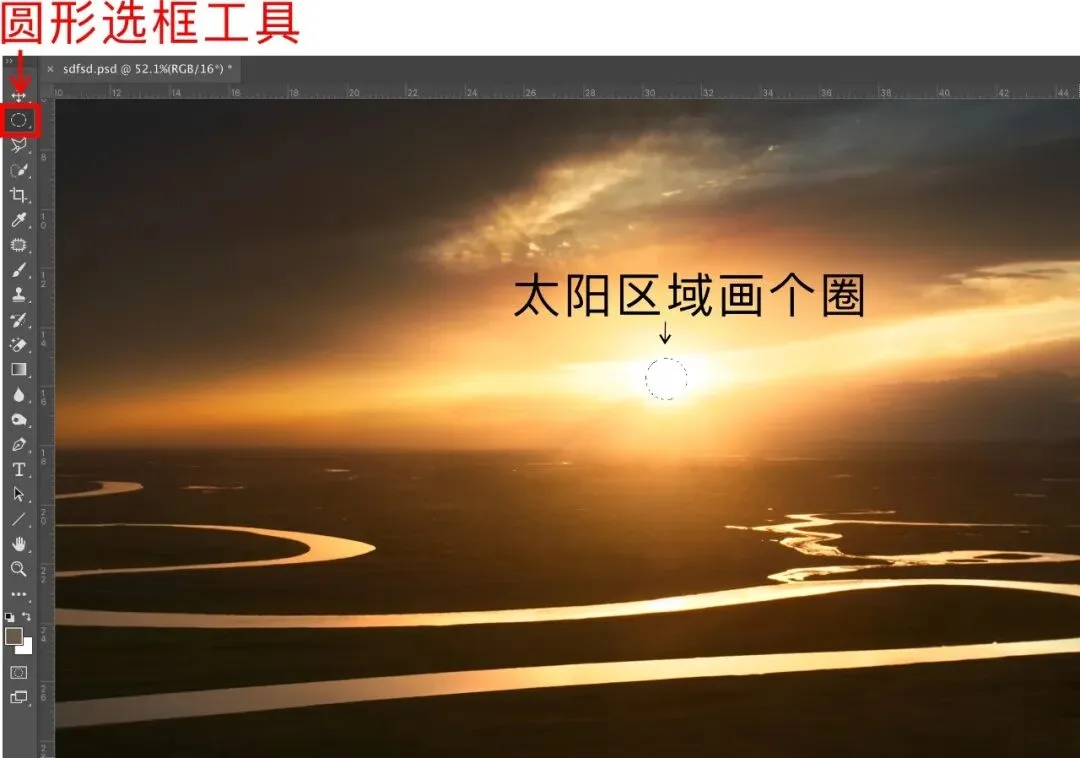
Then press Ctrl+Shift+I to invert the selection. Take the Clone Stamp, sample a properly exposed area around the sun, and paint around the circle.
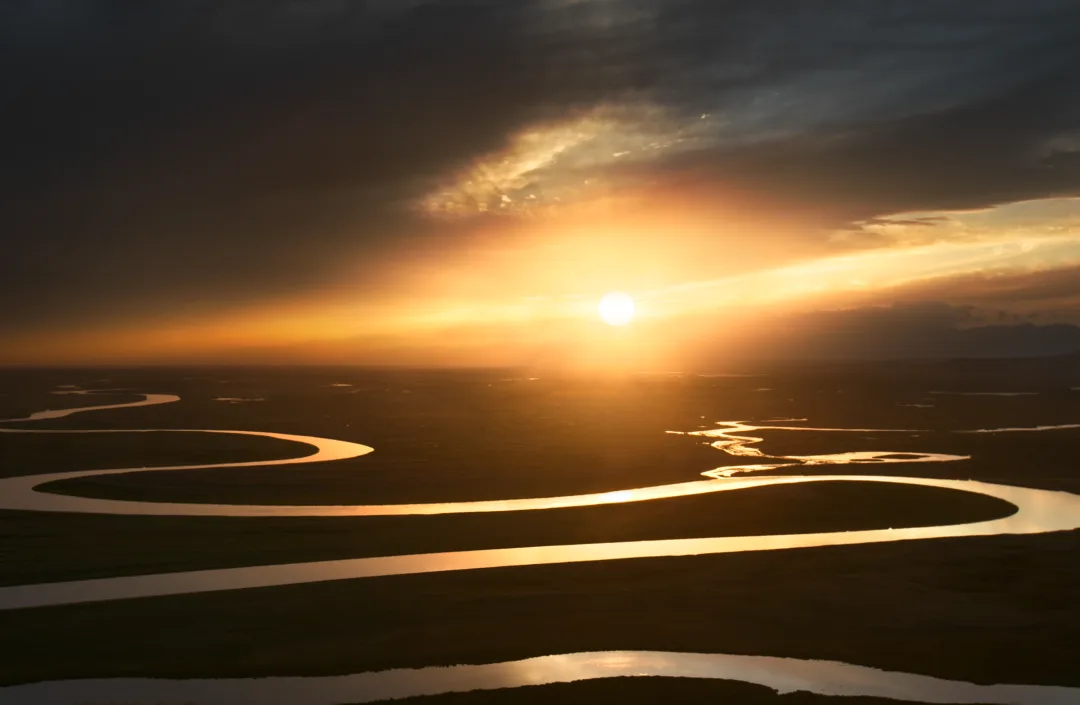
The sun's round shape is restored in no time. The same trick works for night long-exposures of starry skies, where the moon's motion leaves it misshapen.
And those are the hidden powers of the Clone Stamp. From advanced atmosphere building to patching all kinds of image flaws, it truly is the Swiss Army knife of landscape post-processing!