Photography Tutorial · 2018-03-04
From Camera to Output: Color Management Across the Whole Post Workflow
Thomas Chu Photo
One piece of know-how per week — making photography easy to learn
Thomas previously wrote an article, 'Color Gamut and Bit Depth Settings in Post — More Knowledge Than You'd Think', sharing the basics of color settings.
In today's tutorial, Thomas uses detailed screenshots to demonstrate color settings in the camera, Camera Raw, Photoshop and other software.
Note: this article mainly discusses color management for web photos. Color management for prints is more complex and will be covered in a future tutorial.
1
Color settings in the camera
First, understand that a RAW file itself has no color space. A RAW file records the complex raw data from the camera's sensor.
So the AdobeRGB vs sRGB color space setting in the camera only affects photos shot in JPEG, or the JPEG preview embedded in the RAW file. The information stored in the RAW file itself is not affected at all.
For convenient straight-out-of-camera photos, it's generally recommended to set the camera to sRGB.

Photos that will be further processed in post can still have all the RAW file's information parsed completely and losslessly, unaffected by the camera's color space setting (i.e., the RAW preview's color setting). A RAW file's bit depth is generally 12-16 bits depending on the sensor.
The same logic applies to the camera's sharpness, contrast and saturation settings — they only affect JPEG shots or the RAW file's preview; the RAW data itself is unaffected.
This is why, with high in-camera sharpness and saturation settings, the RAW (preview) on the camera screen and in vendor software looks brilliant — but the moment you open it in Camera Raw/Lightroom, the photo immediately turns flat.
That's because Camera Raw reads the raw data inside the RAW file and renders a brand-new preview; those camera settings that only affect the preview are, of course, all discarded.
2
Color settings in Camera Raw
RAW processors — including Adobe Camera Raw (ACR), Lightroom, Capture One and others — interpret the camera's raw data and render it into a digital image file.
At this point we need to set which color space the rendered image will use. To maximize image quality and rendering precision during post, I recommend processing in the ProPhoto color space at 16-bit depth.
At the bottom of the ACR panel there's a line of small text — click it to open the settings panel.
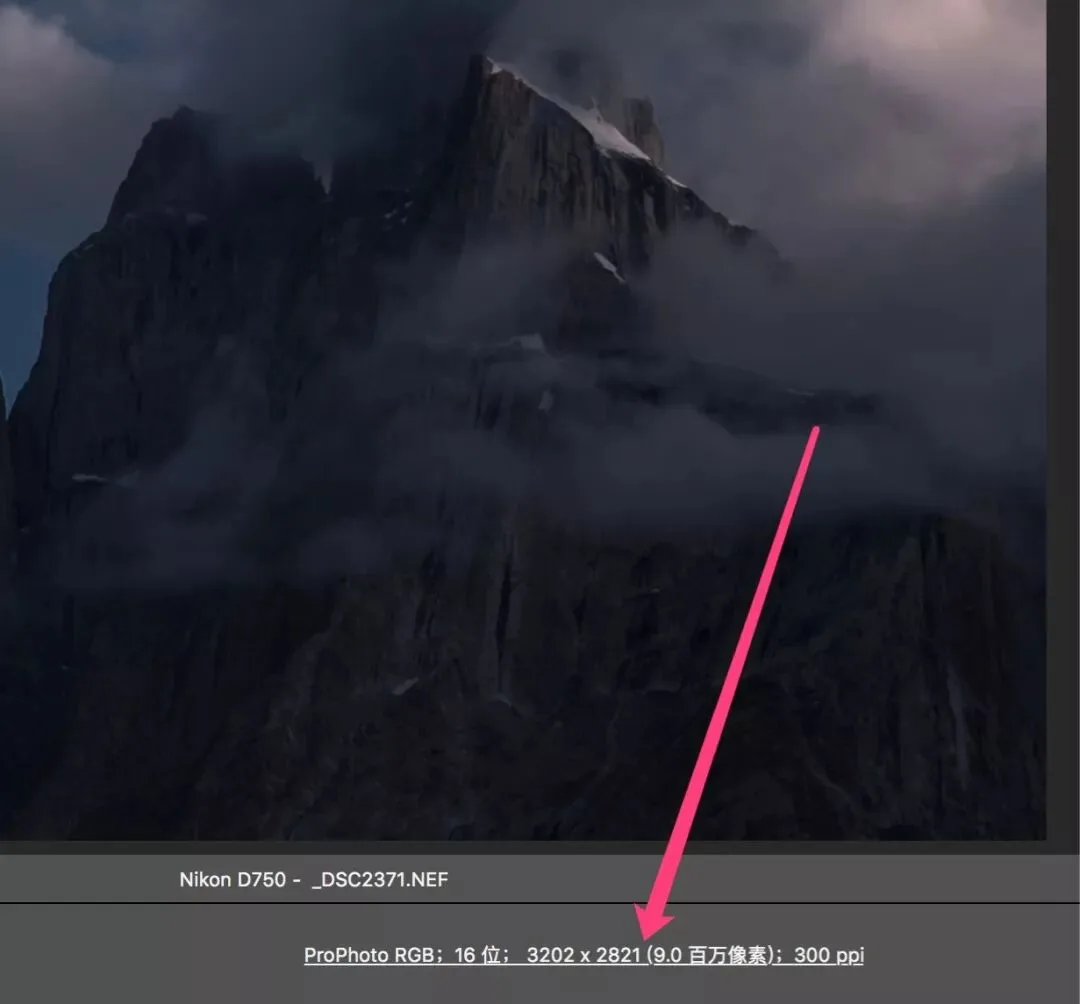
Set the color space to 'ProPhoto RGB' and the bit depth to '16 Bits/Channel'.
That way, once the photo is rendered from Camera Raw and enters Photoshop for further processing, it is exported as a 16-bit ProPhoto image for editing.
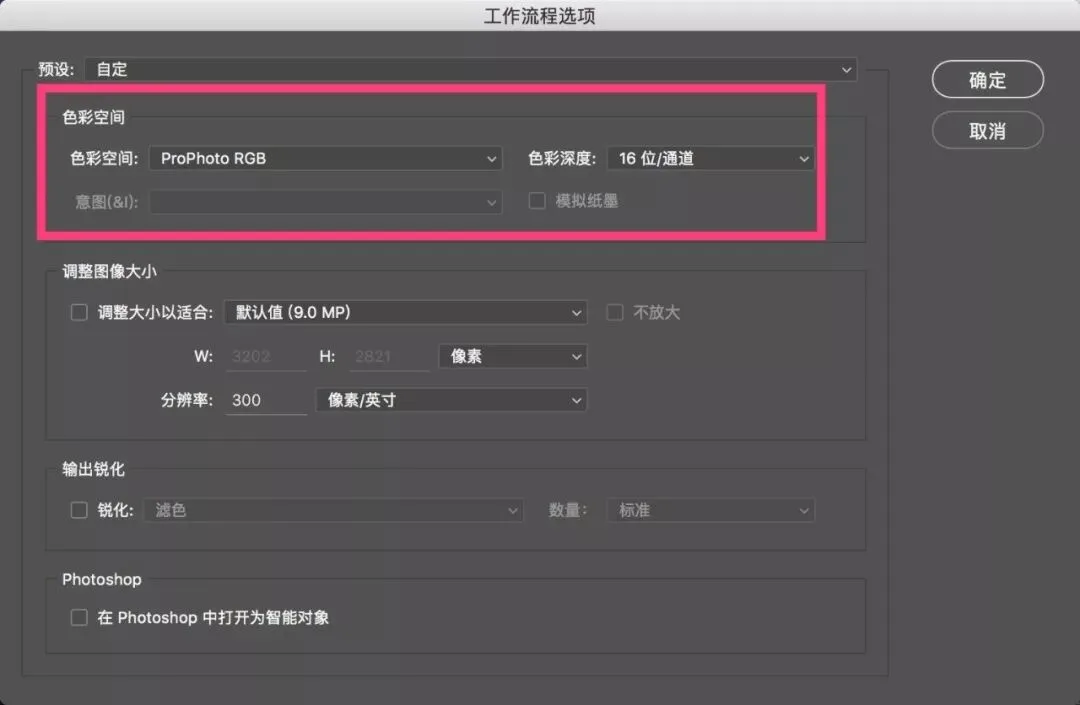
If you're using the camera maker's own RAW processor and can't open directly into Photoshop, first render and save the RAW as a 16-bit ProPhoto TIFF, then open that TIFF in PS for further processing.
3
Color settings in Photoshop
Then in Photoshop, we should also set the default working space to ProPhoto.
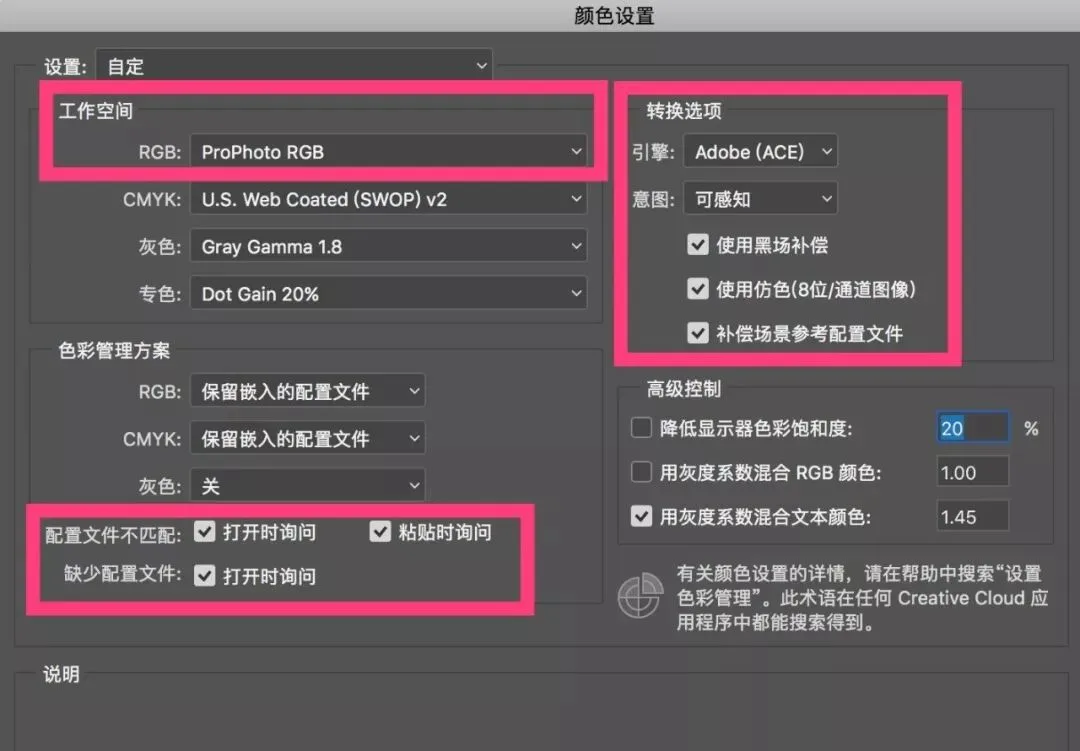
First open 'Edit - Color Settings'.
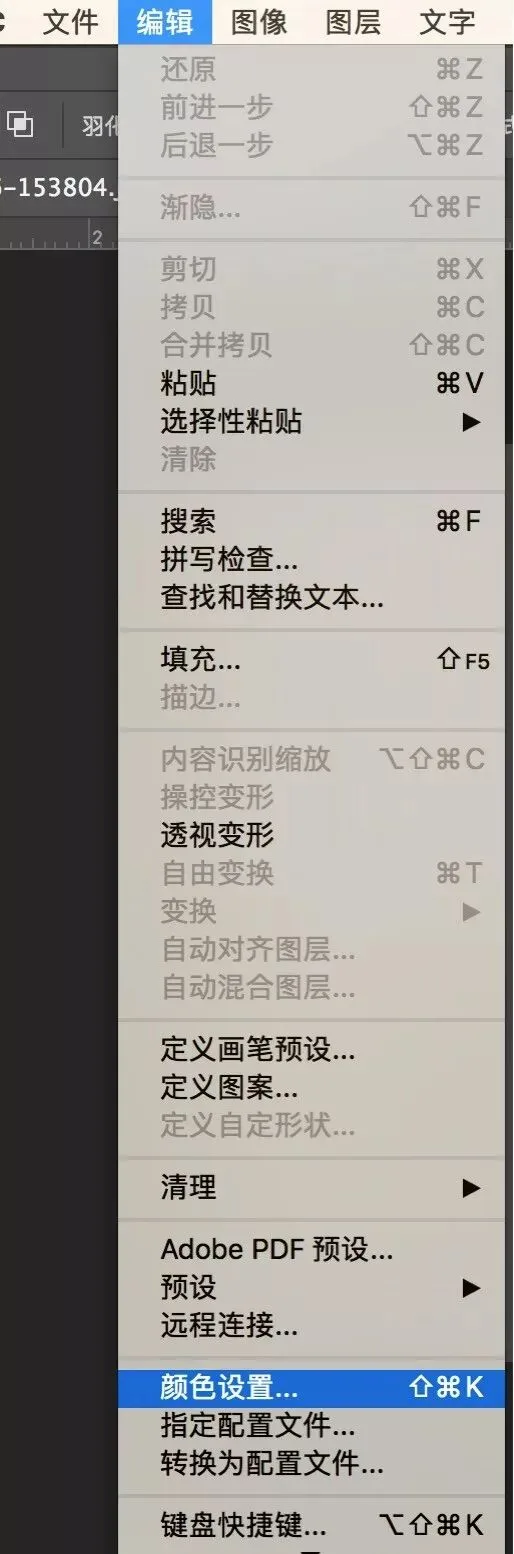
Then configure as shown in the screenshot below — most importantly, set 'Working Spaces - RGB' to ProPhoto RGB.
Also tick 'Profile Mismatches' and 'Missing Profiles'. That way, when we bring an sRGB photo into PS, it asks whether to keep the photo's sRGB space or first losslessly convert sRGB to ProPhoto RGB before editing.
In addition, set the 'Conversion Options' — i.e., which algorithm to use when I finally convert a ProPhoto RGB image to sRGB for export.
In most cases, set Engine to 'Adobe (ACE)', Intent to 'Perceptual', and tick all three boxes below.
4
Color settings when exporting photos
During post we process in 16-bit ProPhoto for the best rendering. But when sharing photos online, most browsers and displays only support 8-bit sRGB JPEG. So when exporting, we need a color space conversion.
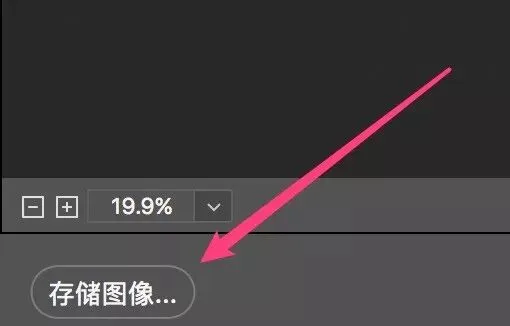
To output directly from ACR, choose 'Save Image' at the bottom left of the ACR workspace.
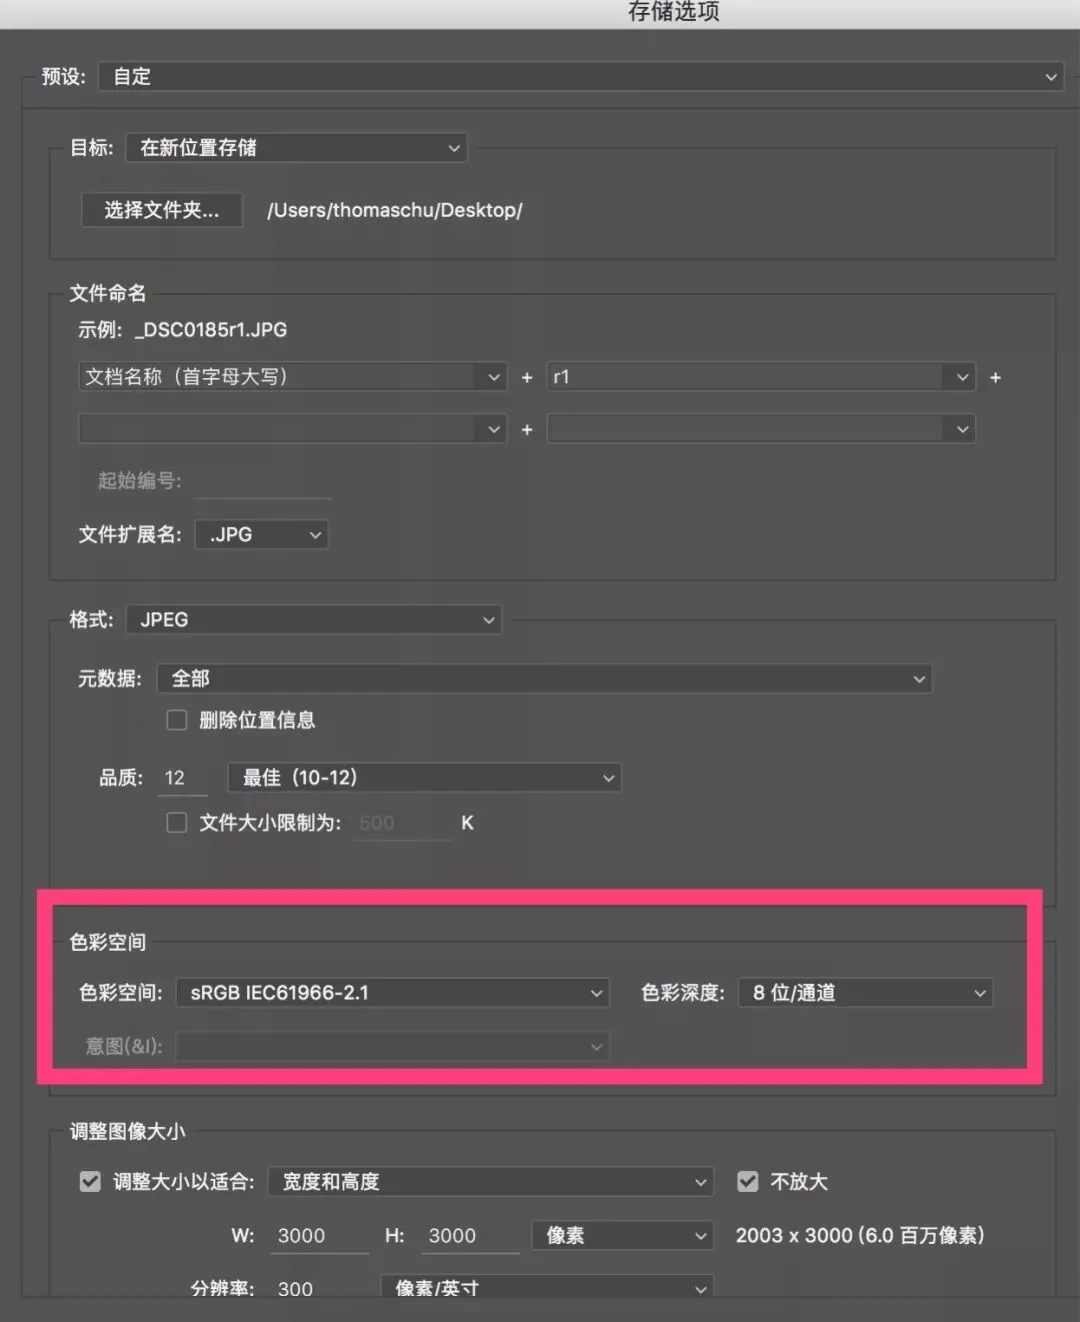
Then set the output format to 'JPEG'.
Metadata refers to the camera's EXIF data, author copyright data and ACR edit data — set according to your needs.
Quality is generally fine at 8-10.
Most importantly, choose sRGB color space and 8 Bits/Channel for web sharing.
Most websites limit upload size, and to protect photographers' copyright, web-shared photos are generally output at 1600-3000px on the long edge — I usually set 1600.
If exporting from Photoshop, it's generally not recommended to save directly via 'File - Save As', since that requires manually converting the color profile — cumbersome.
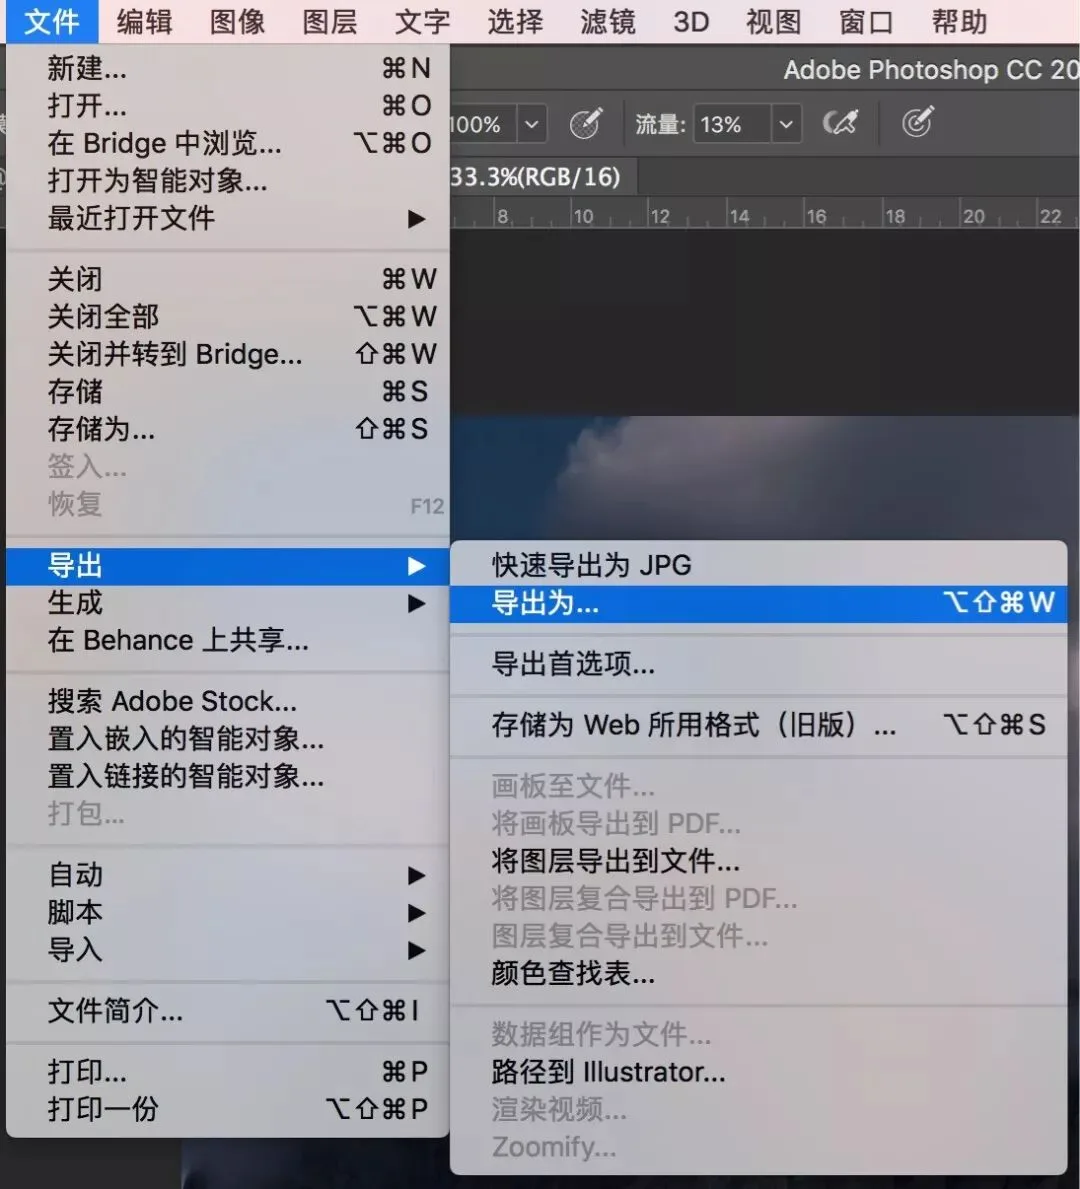
Photoshop specifically provides 'Save for Web (Legacy)' and the newer 'Export As' options for quickly outputting web-sharing photos.
We can use 'File - Export - Export As'.
In the export panel, set the JPEG output parameters. Since JPEG only supports 8 bits/channel, the bit depth is converted automatically when exporting JPEG.
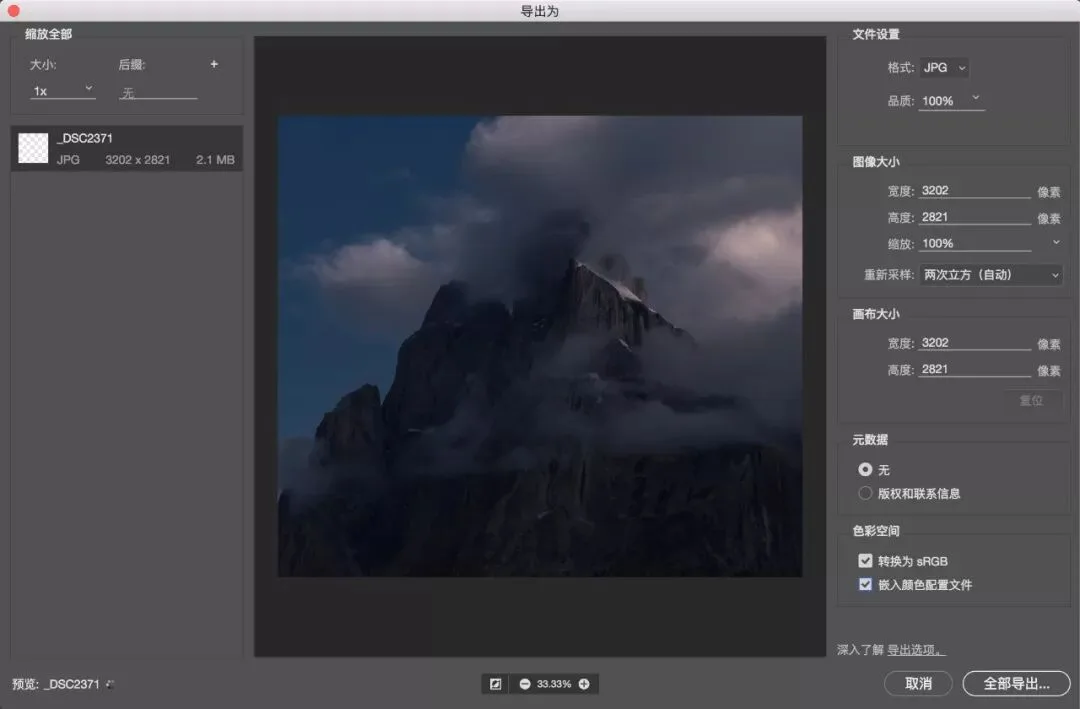
Pay special attention to ticking these two options: 'Convert to sRGB' and 'Embed Color Profile' — otherwise serious color shifts may appear when viewing the image on other computers.

'Export As' has one drawback: it doesn't export the camera's EXIF metadata. If you like keeping EXIF, use 'Save for Web (Legacy)'.
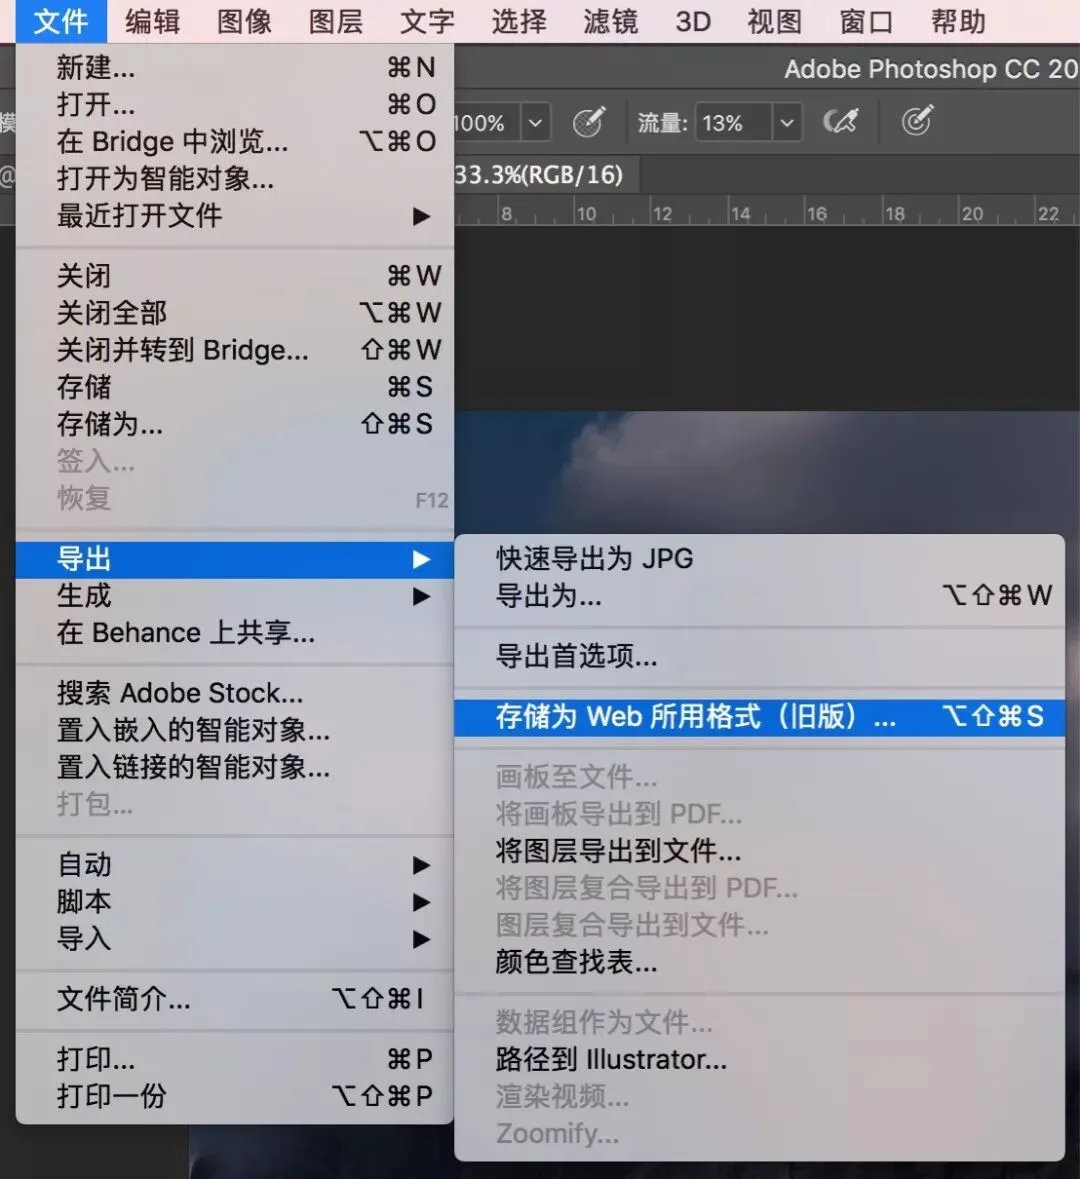
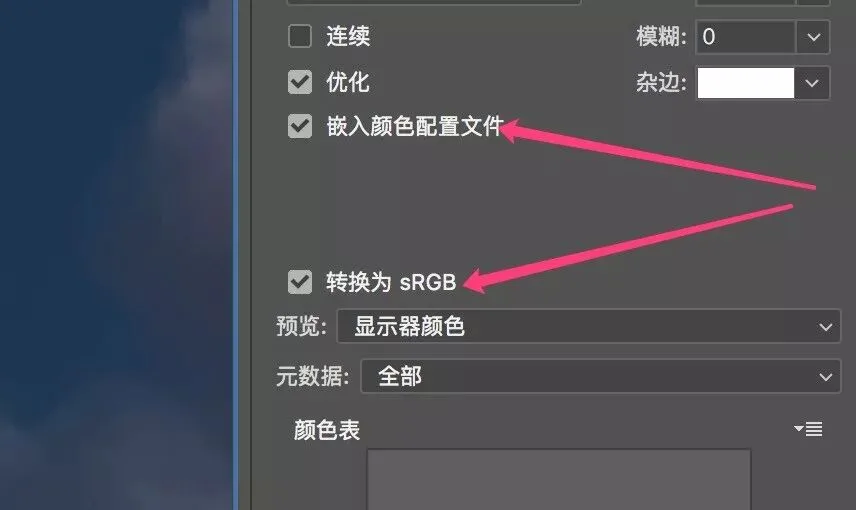
Its panel is very similar to 'Export As' — be sure to tick 'Embed Color Profile' and 'Convert to sRGB'. With this output method, all metadata can be exported.
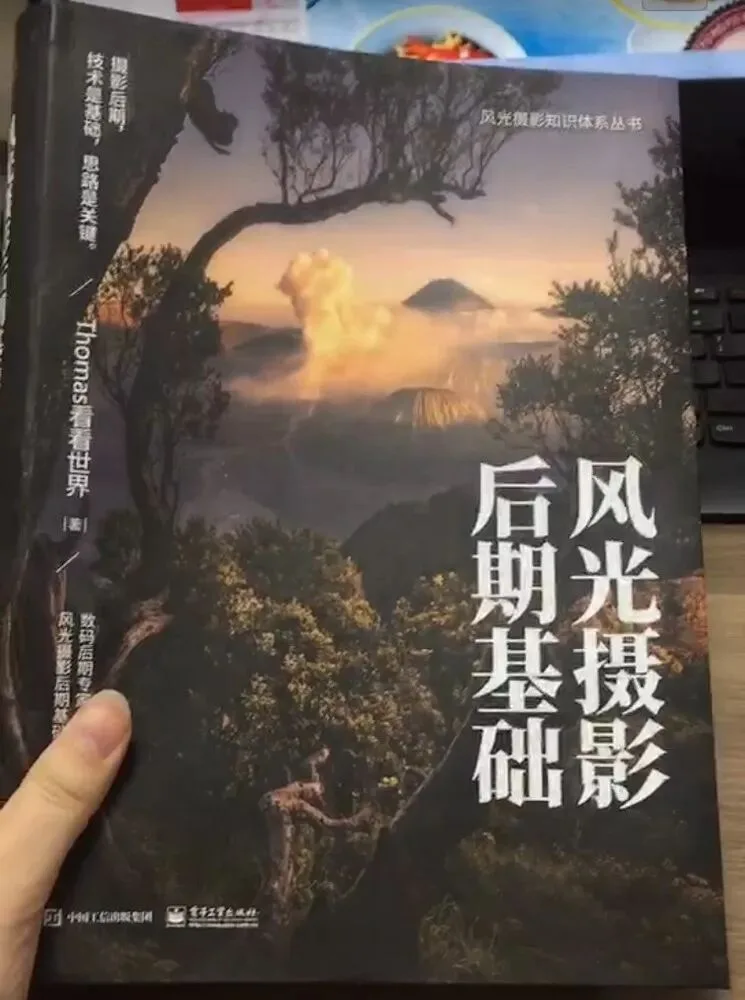
The content of this article is excerpted from Thomas's upcoming book 'Foundations of Landscape Photography Post-Processing' — stay tuned!