Photography Tutorial · 2016-10-30
How to Expose Correctly in the Digital Age
Traditional photography textbooks, such as the New York Institute of Photography course, define correct exposure based on '18% gray' and complex light-meter systems.
With today's rapid advances in camera hardware and post-processing, that exposure theory is far less practical — and often not the best approach. How should we expose in the digital age? Why can 'underexpose rather than over' and 'expose to the right' both be true? That's today's topic.
Key concepts: histogram, dynamic range, exposure latitude, exposure bracketing, digital underexposure, digital overexposure, expose to the right, underexpose rather than over
1
The Limits of Traditional Exposure Theory
Traditional exposure theory asks the photographer to meter specific areas of the scene, ensuring that an 18%-reflectance gray object — or an important area like a face — is rendered at its true brightness in the photo.
This theory, which emphasizes faithful and accurate brightness, is somewhat outdated today, for the following reasons:
1) Advances in sensor technology, RAW digital negatives and post-processing mean inaccurately exposed frames can be easily corrected afterward. On this basis, two opposing schools emerged — 'underexpose rather than over' and 'expose to the right' — advocating deliberate under- or overexposure. (Thomas will explain these contradictory claims in detail later; they share one trait: neither wants you to expose 'accurately'…)
2) The rise of exposure bracketing, HDR and luminosity masks means more and more people shoot multiple frames — each exposed for a different part of the scene — and blend them in post.
3) People no longer simply want to reproduce a scene's true exposure; they want personalized brightness adjustments that give photos different tones, moods and artistic effects.
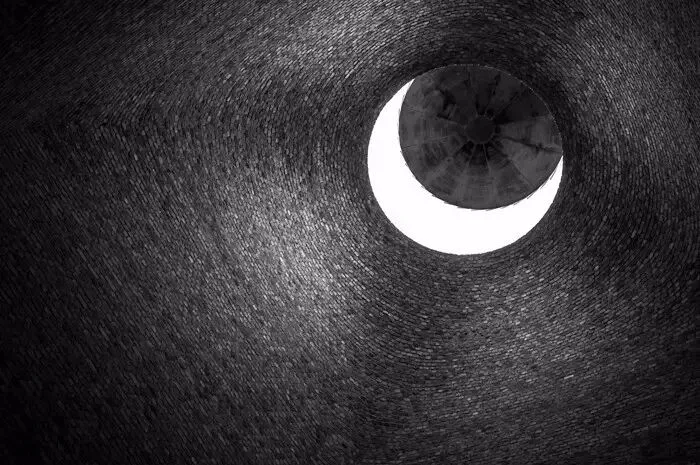
So in the digital age, we no longer need 'accurate' exposure — we only need to record the maximum amount of light information from the scene.
2
What Is Correct Exposure in the Digital Age
Thomas proposes three definitions here, each prefixed with 'digital' to distinguish them from traditional theory.
Digital correct exposure: when one or more digital negatives record ALL the brightness information visible to the naked eye in a scene, we call it digitally correct exposure.
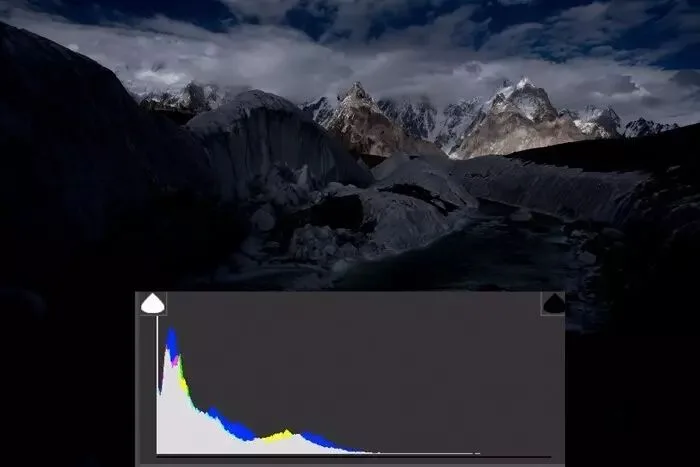
Digital underexposure: when insufficient exposure causes shadow detail in the final image to be lost beyond recovery, we call it digital underexposure.
Digital overexposure: when excessive exposure causes the highlights to blow out to detail-less white, we call it digital overexposure.
In short, digital exposure theory emphasizes recording as much of the scene's brightness information as possible — not reproducing it accurately.
As long as the light information is recorded in your negative, even if the frame looks too bright or too dark at first, post-processing can restore it to accurate brightness.
Once information is recorded, you can dodge and burn in post — even discard unneeded information and detail — to achieve the artistic effect you want. But if information was never recorded, no amount of post can bring it back.
Traditionally 'accurate' exposure may fail to record all detail and information; whereas recording all visible brightness information guarantees accurate brightness can be restored in post. So 'digital correct exposure' has a far wider application than traditional accuracy.
3
How to Expose Correctly in the Digital Age
How do you ensure shadow and highlight information are both fully recorded? You can judge by eye: if the highlights aren't a featureless dead white and the shadows aren't pitch black, the photo is probably 'digitally correctly exposed'.
But there's a tool in your camera's playback, in post software, and even in some cameras' live view that enables a more scientific judgment: the histogram.
3.1
The Histogram
Brightness is divided into 256 values from 0 to 255, where 0 is pure black, 255 is pure white, and the numbers in between are grays of different brightness.
Plot the 0-255 brightness values on the horizontal axis and the pixel count at each brightness on the vertical axis — that graph is the luminance histogram.
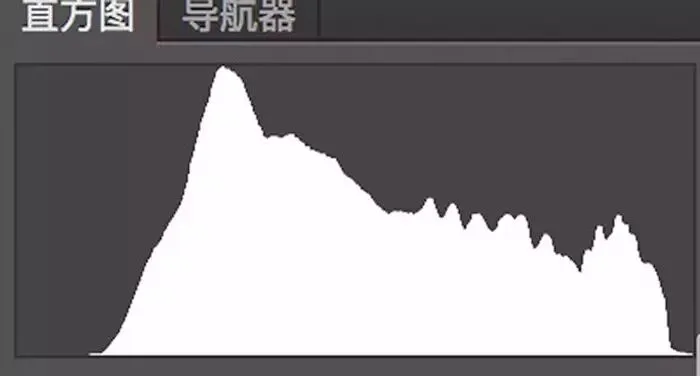
For a JPEG file, the histogram represents all the brightness information recorded in the photo. Large piles of pixels at either end mean large areas of dead white or dead black — much detail is lost.
A RAW file records a wider range than the histogram shows: some highlights and shadows that appear clipped can be pulled back in post. But how much can be recovered depends on the scene's contrast and the sensor's ability — somewhat a matter of luck — so I don't recommend relying on it.
With the histogram, we can restate our three definitions.
Digital correct exposure: when neither end of the photo's histogram is cut off, all the scene's information has been recorded — the photo is 'digitally correctly exposed'.
So both photos below are 'digitally correctly exposed'.
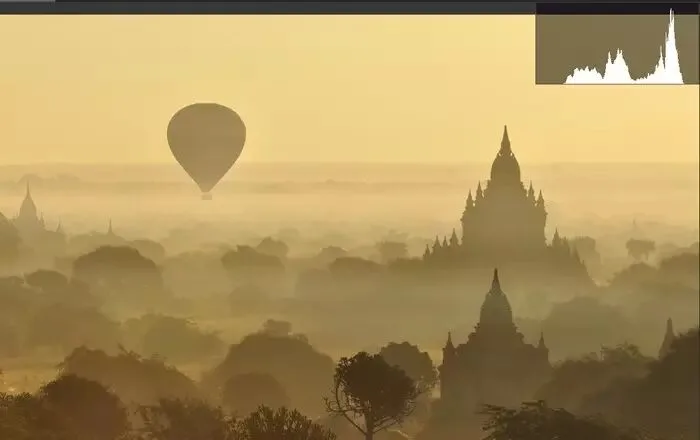
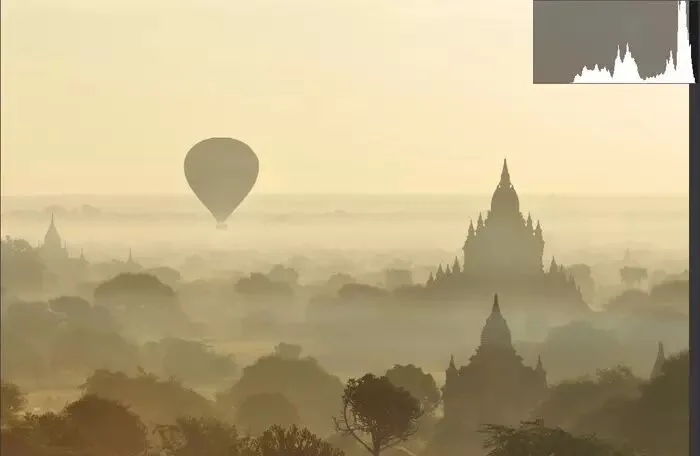
Of course, modern 'expose to the right' (ETTR) theory confirms that the more light the camera captures, the more detail and less noise you get. So the second histogram is better than the first: darkened in post, it yields less noise. But note — ETTR's precondition is avoiding 'digital overexposure'.
Digital overexposure: excessive exposure blows the highlights to unrecoverable white, shown as a large pile of pixels cut off at the histogram's right edge — that's digital overexposure.
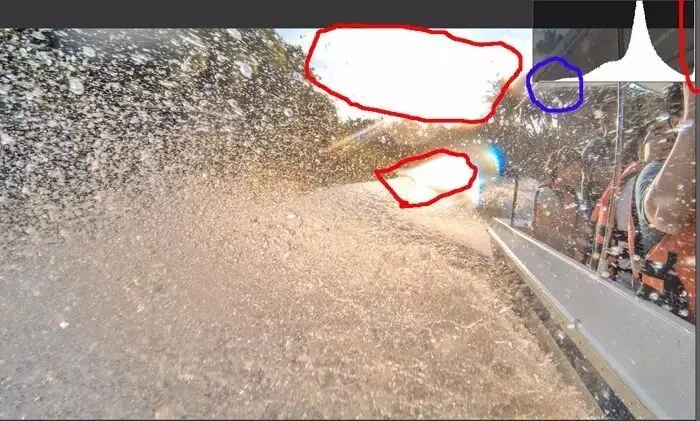
Likewise, digital underexposure shows as a large pile of pixels cut off at the histogram's left edge.
3.2
High-Contrast Scenes and 'Underexpose Rather Than Over'
So far we've assumed a photo is either under- or overexposed. But in reality — for example when shooting against the light — the contrast can be so great that a photo is simultaneously underexposed AND overexposed.
That's because the ratio between the brightest and darkest light in nature can be enormous (the logarithm of this ratio is called dynamic range, or simply contrast ratio).
The range between the brightest and darkest light a camera can record is limited. The ratio of brightest to darkest brightness a camera can capture is called exposure latitude.
When the scene's contrast exceeds the camera's latitude, we call it a high-contrast scene. A single frame cannot achieve 'digital correct exposure' there: even at a middling exposure, both ends of the histogram get clipped.
As mentioned, RAW negatives record a wider range than the histogram shows. Modern digital cameras recover clipped shadows far better than clipped highlights (especially Sony and Nikon bodies).
Hence the 'underexpose rather than over' school: in high-contrast scenes, prefer digital underexposure with the histogram's left edge overflowing, over digital overexposure with the right edge massively clipped — more detail can be recovered in post.
Note the bolded parts: both 'expose to the right' and 'underexpose rather than over' have their own preconditions:
In normal-contrast scenes, expose to the right; in high-contrast scenes, underexpose rather than over.
3.3
The Best Solution for High-Contrast Scenes
Although exploiting the camera's shadow latitude via 'underexpose rather than over' partially solves the high-contrast problem, it neither yields the best image quality nor copes with extreme contrast.
High-contrast scenes have both on-location and post-production solutions.
For balancing contrast on location, portrait photography's most common and effective method is artificial fill light. In landscape photography, graduated ND filters and black-card dodging were the old solutions.
In modern landscape photography, exposure blending is a mature technique. The simplest method: bracket exposures and blend them in post.
Exposure bracketing, as the name suggests, means deliberately shooting over- and underexposed frames alongside the normal one. The highlight information lost in the normal frame is preserved in the underexposed one; the shadow information lost in the normal frame is preserved in the overexposed one.
Finally, blend the series with automatic HDR software, manual masking or luminosity masks — and you get a scene where every detail is preserved.
The core idea of bracketing: when one RAW negative can't record the whole scene, use several negatives to record the highlights, midtones and shadows separately — achieving 'digital correct exposure' across multiple frames and maximizing the recorded information.
Most digital cameras have a built-in bracketing function where you set the frame count and the EV difference between frames. How many frames and what step to use? Again, refer to the histogram:
In a bracketed series, if the darkest frame's histogram isn't clipped on the right and the brightest frame's isn't clipped on the left, the set has recorded the scene's full brightness range — satisfying 'digital correct exposure'.
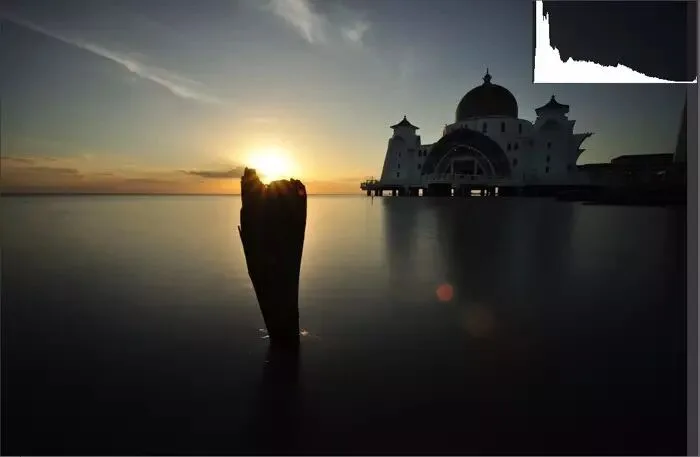
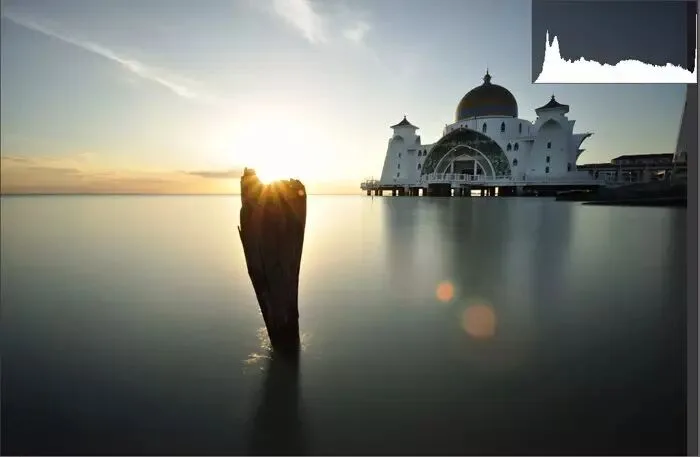

The third, well-formed histogram above was produced by blending the first (underexposed) and second (overexposed) frames.
How to blend frames of different exposures in post will be covered in detail in future tutorials.
Summary
1. In the digital age, we don't need 'accurate' exposure — we need to record the scene's full brightness information with one or multiple frames, and the histogram helps confirm nothing is missing. 2. In normal contrast, 'expose to the right'; in high contrast, remember 'underexpose rather than over'. 3. Fill light for portraits, exposure blending for landscapes — the best solutions for high-contrast scenes.
Follow @Thomas Chu Photo,
and learn one photography skill every Sunday.