Photography Tutorial · 2017-06-15
Too Much Saturation Turns a Great Shot into a Waste!
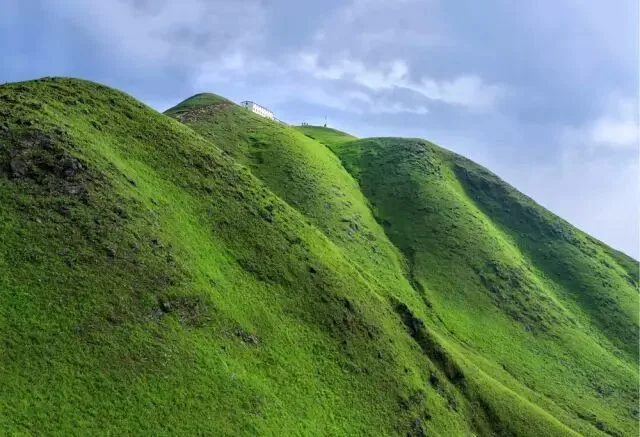
"Alpine Meadow" (《高山草甸》). Photographer: 小柯皓
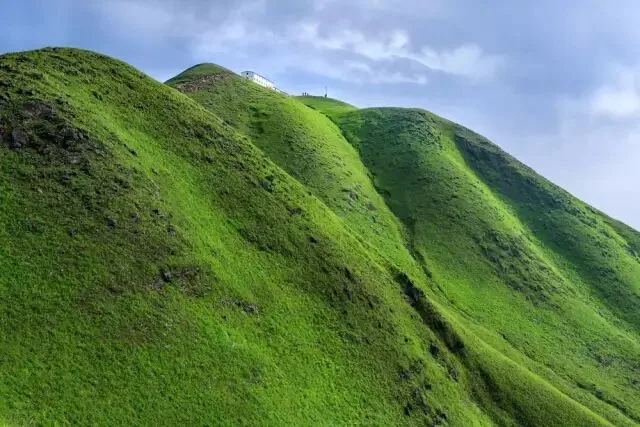
The photographer's description:
In terms of shooting approach, I chose the alpine meadow with its sense of line as the subject, using the white house and people on the mountain to accent its vastness, with blue sky and white clouds to set off the atmosphere. I learned Thomas's concepts of "selection and omission" (取舍) and "focusing on the subject" (聚焦主体) from his composition lessons, but I still feel I haven't grasped the essence.
The photos came out gray overall, so I restored the colors faithfully, emphasizing the meadow's colors globally, highlighting the lines in the highlights, and enhancing texture in the shadows. I learned dodging and burning and light-and-dark treatment from the tutorials of 姚明来 and 帅姚, then tried to control the tone and the expression of light and dark.
Thomas's review:
The composition of this photo is very good, focusing on the layering and light-and-shadow of the meadow, with the house as a point of interest. However, I personally feel the house is too close to the edge, creating some imbalance in the composition, and the mountain feels too oppressive.
It's commendable that the author applied what he learned in post-processing, using the techniques taught by the various teachers of Jiying. Truly rare!
However, this photo makes a typical post-processing mistake: the overall saturation is too high. When the entire image is filled with eye-catching highlights, the result can only be mutual conflict, making it seem to have no highlight at all.
Thomas has said before that the secret to a great photo is contrast. To make an object stand out, you can not only increase its brightness and saturation, but also decrease the brightness and saturation of other objects, using contrast to highlight it.
Below, Thomas will briefly process this photo to show the final effect:
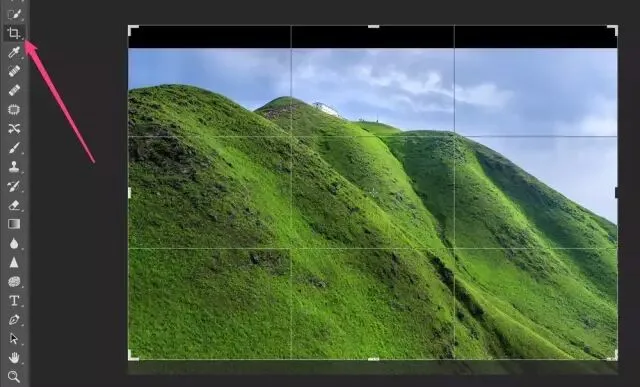
1) The first step is to use the crop tool to cut off some of the bottom and add some space for the sky.
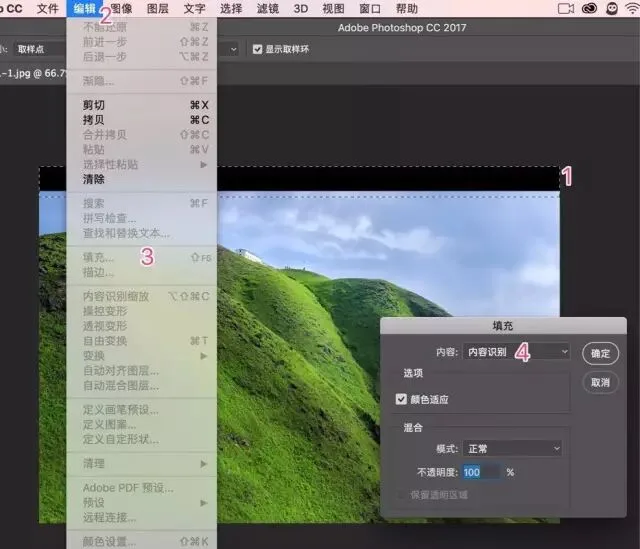
2) After cropping, some blank space appeared at the top of the photo. I selected the blank area and used "Edit - Fill - Content-Aware" to automatically fill in the sky.
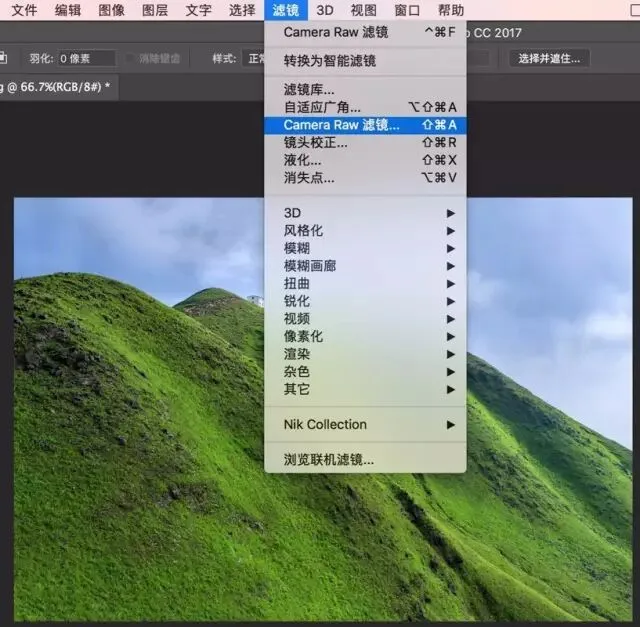
3) Next, enter "Filter - Camera Raw Filter" for further processing.
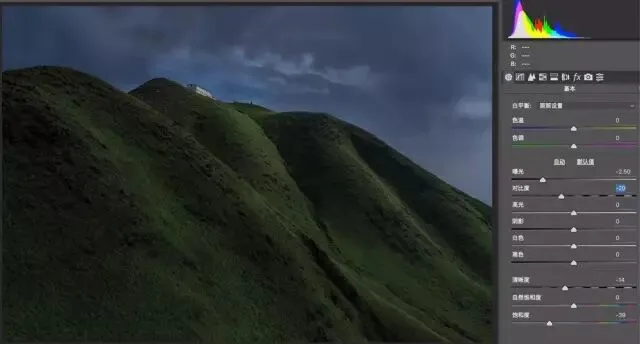
4) In the ACR Basic panel, directly set exposure to -2.5, contrast to -20, clarity to -14, and saturation to -39.
This step may be counterintuitive. But as always, the secret to a great photo is contrast and conflict. To make an object's saturation stand out, many times you don't need to increase its saturation - you can also reduce the saturation of the surrounding objects.
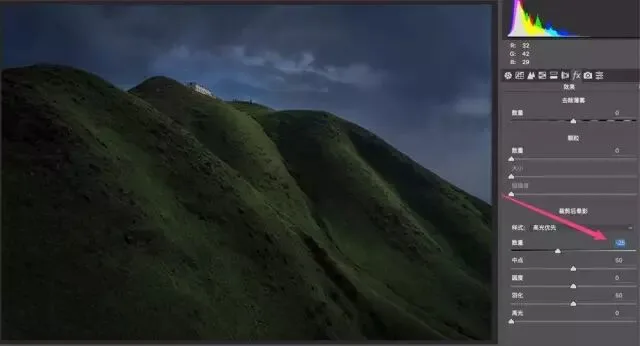
5) Use "Effects - Post-Crop Vignetting" to add a vignette to the photo, darkening the edges to highlight the light-and-shadow of the meadow in the center.
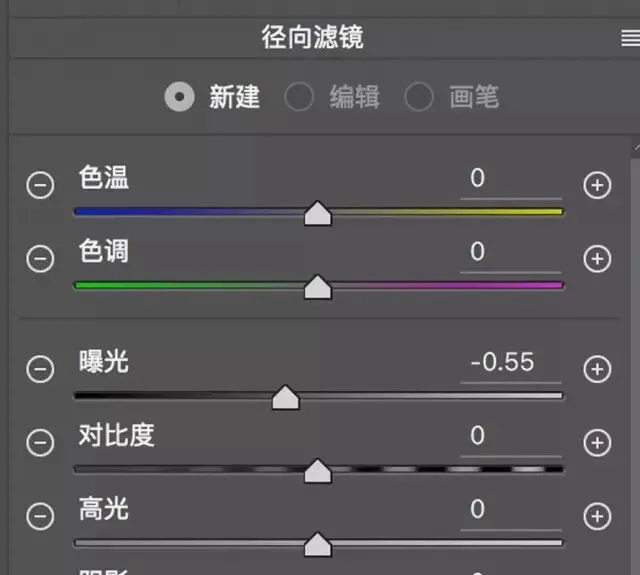
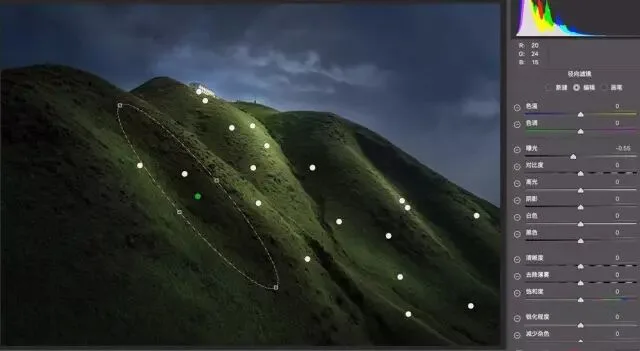
6) The author had already done some dodging and burning, but it's still not enough, so Thomas will strengthen it further. Here I used a radial filter instead of a brush, mainly to save time. For finer work, I recommend using a brush.
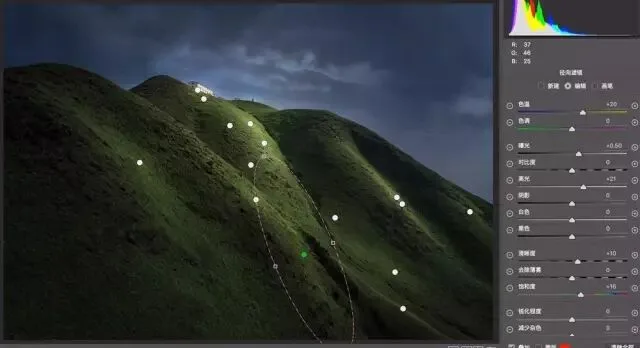
The radial filter parameters are set to temperature +20, exposure +0.5, highlights +21, clarity +10, and saturation +10, to restore the details of the illuminated meadow.
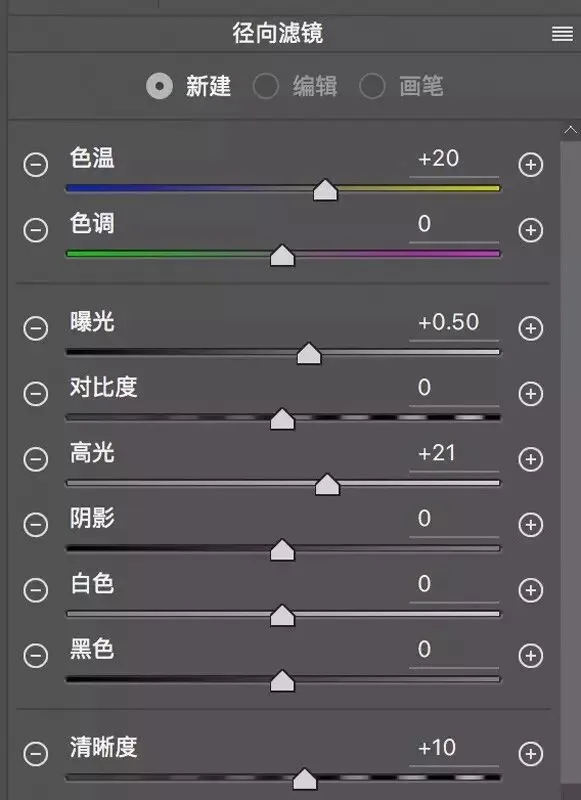
On the illuminated parts of the meadow, use the radial filter above to perform a dodging effect.
7) Create another radial filter with exposure -0.55 to darken the shadowed parts of the meadow.
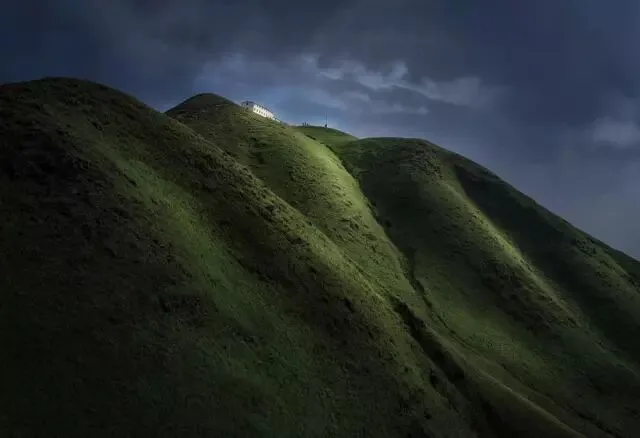
The dodging and burning strengthened the light-and-shadow effect and three-dimensionality of the meadow. Thomas's post-processing ends here.
Let's compare before and after the ACR filter processing.
Before:
After:
Isn't it true that after reducing saturation and brightness overall, the highlights stand out even more?
#极影评片# How to submit:
Method 1: Post the image on Sina Weibo, write your shooting approach or the confusion you encountered in the description, and add the #极影评片# hashtag. It's best to also @Thomas看看世界 and @Joyous周游.
Method 2: Send the image to [email protected] with "评片" as the email subject. Remember to write your shooting approach or the confusion you encountered in the email body.
Friends who weren't reviewed this time don't need to resubmit - we will continue to provide suggestions for everyone!