Photography Tutorial · 2016-08-14
Dehazing Photos: The Essential Steps
Last week's "Remove Haze for Clearer Photos" covered the 6 essential elements of a clear photo. This week, Thomas demonstrates with an example how to analyze those 6 elements and prescribe the right fix to dehaze a photo.

First, a review: when we say a photo lacks clarity, we really mean two things — it looks gray, and it looks dull. Gray means impure, undersaturated colors with too many stray casts; dull means murky tones — an indistinct subject, poor detail, insufficient contrast.
To remove the haze from a photo, we need these 6 things:
1) Rich detail
2) Sufficient contrast and black-and-white points
3) A crisp subject
4) Accurate white balance
5) Pure colors free of casts
6) Sensible saturation
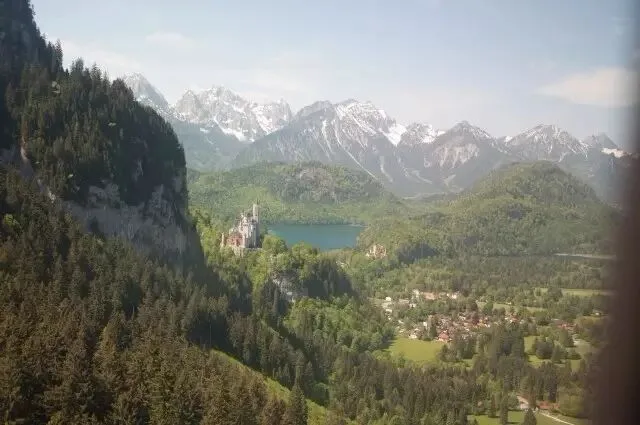
Next, Thomas will use this very unclear photo — shot through the frosted glass of a cable car — and remove its haze step by step.
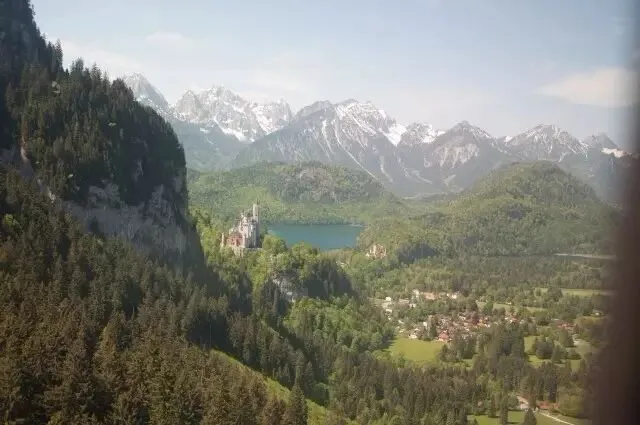
1. Basic Corrections
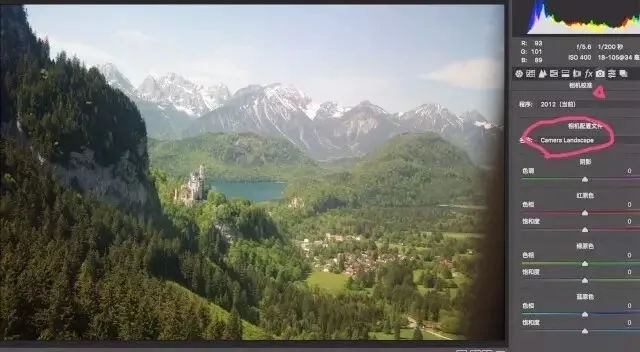
Basic corrections fix the camera and lens's color casts, perspective, vignetting, and so on — the first step of post-processing.
First, in Camera Calibration, change the profile to "Camera Landscape." This gives us a contrast and primary-color standard suited to landscape photos, helping further adjustments.
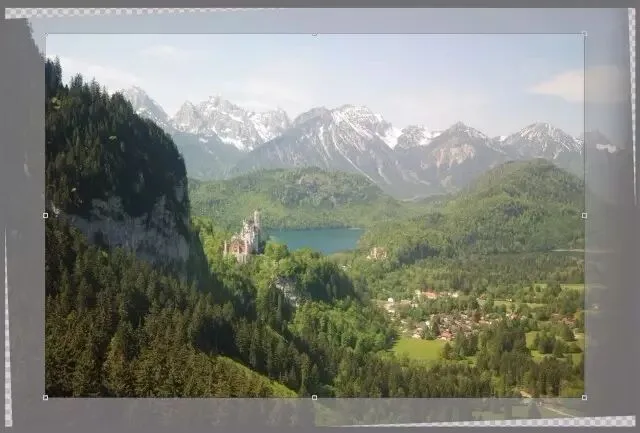
The raw frame isn't level — the castle tilts — so rotate the photo in ACR's Transform panel. Then crop out the cable-car window frame and the excess sky and forest.
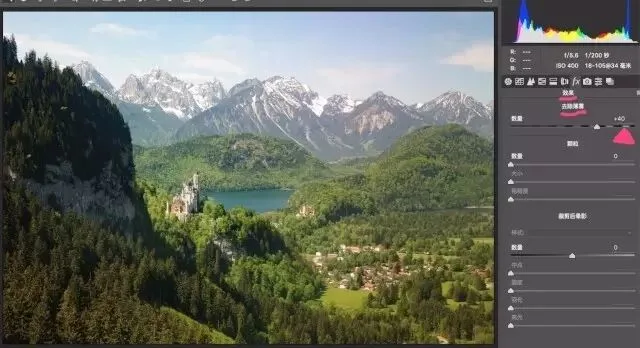
Next comes a bit of "black magic" in Lightroom/ACR: the Dehaze slider in the Effects panel. (It's a relatively new tool — update your Lightroom/Adobe Camera Raw if you don't see it.)
Dehaze actually adjusts the saturation, contrast, and clarity we've been discussing — slide left to add haze, right to remove it. Unlike directly adjusting each parameter, its algorithm focuses on the hazy, gray areas while protecting already-clear parts. It has some intelligence.
So for an unclear photo, we can start with Dehaze for an initial pass, then refine further. Here I pushed Dehaze to +40.
2. Tonal Adjustments
Tonal adjustments cover the first three of the 6 clarity elements:
1) Rich detail
2) Sufficient contrast and black-and-white points
3) A crisp subject
First, recover detail in the highlights and shadows. Here I set Highlights -100 and Shadows +100, bringing back much of the detail lost to over- and underexposure.
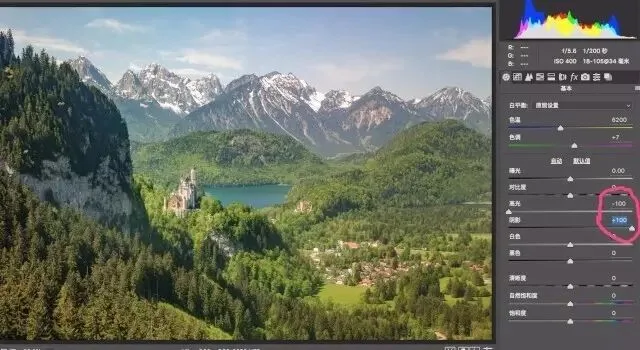
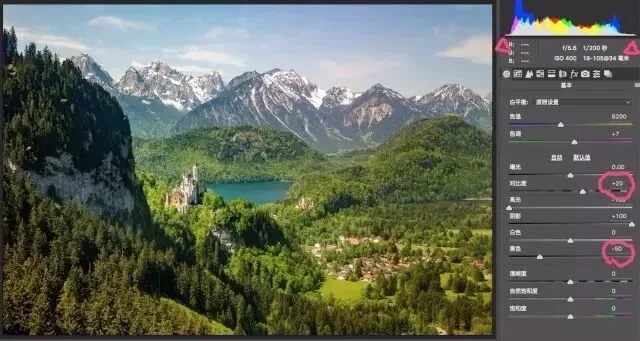
A photo needs sufficient contrast and black-and-white points to feel clear. So Contrast +20 makes separation more obvious, while Blacks -60 drives the darkest areas to true black. When the darkest part of a photo is still dark gray, it feels veiled in haze; only when blacks are truly black and whites truly white does that haze disappear.
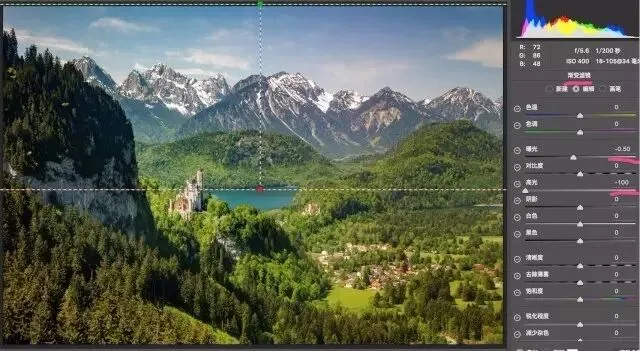
The sky and distant mountains were too bright and looked foggy. That adds a sense of layering, but also reduces clarity. So I dragged a Graduated Filter from top down over the sky and far mountains with Exposure -0.5 and Highlights -100, lowering exposure in the distance and making the snow mountain and sky detail clearer.
A clear photo should be crisp, especially the subject. I raised Clarity to +8 for a small overall boost first.
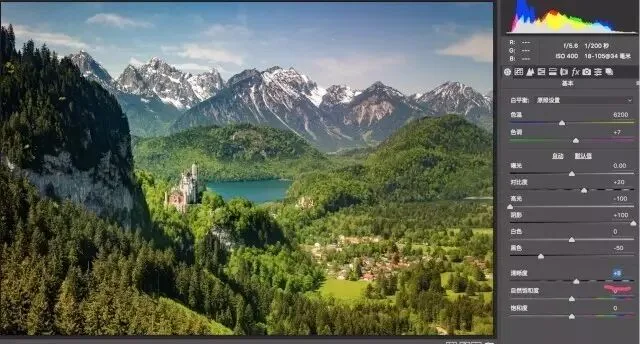
Then with a Radial Filter I isolated the area around our subject — Neuschwanstein Castle — and pushed Clarity a further +25, making the subject crisp and prominent.
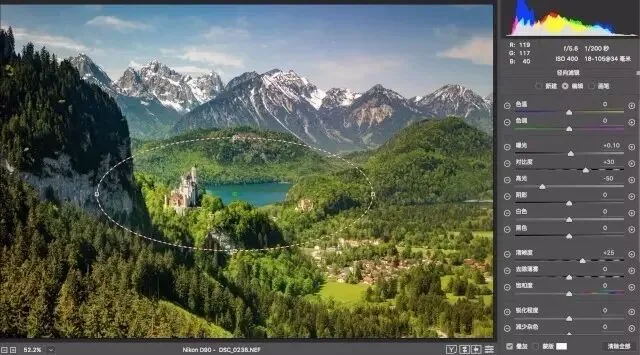
After these tonal adjustments in ACR, the photo is clearly improved, but the colors still aren't clear enough. Next, I'll adjust the colors in Photoshop.
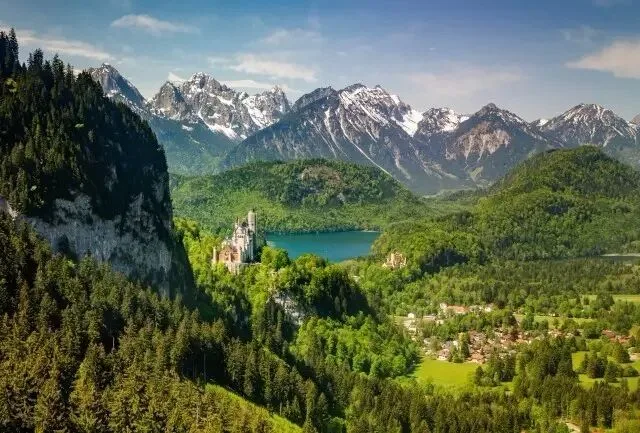
3. Color Adjustments
Color adjustments cover the last three of the 6 clarity elements:
4) Accurate white balance
5) Pure colors free of casts
6) Sensible saturation
First, the photo's base color — the white balance — must be accurate, or everything looks veiled in blue fog (too blue) or yellow fog (too yellow). This photo's white balance is accurate, so no correction needed.
Next, use the Selective Color tool to purify each object's color — the sky should be blue, clouds white, trees green, grass teal. We start with the sky.
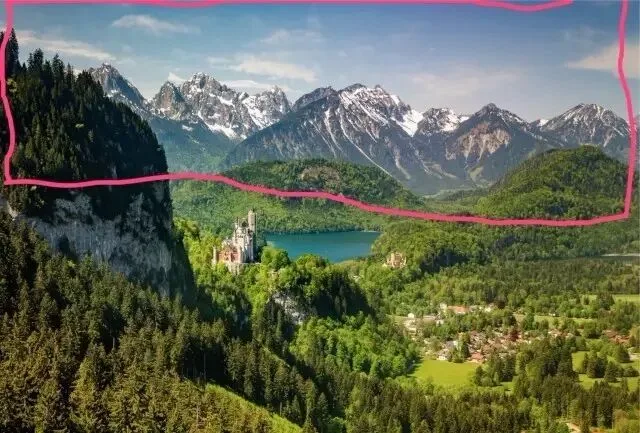
Let's review analogous and complementary colors once more.
A color's purity depends on the ratio of supporting to subtractive components in it. Colors often look gray because they're contaminated by large amounts of subtractive components. To understand this, we first need the three primary pigment colors: Cyan, Magenta, Yellow. Cyan + Yellow = Green; Cyan + Magenta = Blue; Yellow + Magenta = Red.
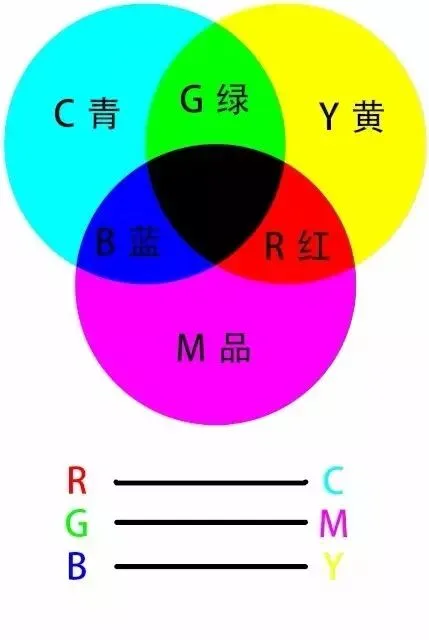
In the color wheel above, the colors adjacent to a given color are its analogous colors. Blue's analogous colors are cyan and magenta; red's are yellow and magenta. A color's analogous colors are its supporting components — to boost blue, add cyan and magenta; to reduce red, subtract yellow and magenta.
The color opposite a given color on the wheel is its complementary color — a subtractive component. Blue's complement is yellow: add yellow and the original blue fades toward gray. So to strengthen the blue of sky and water, boost cyan and magenta and reduce yellow.
So to restore the blue sky, I use Selective Color on the blues: add blue's analogous cyan +100%, and reduce its complementary yellow -100% — bringing back a cyan-blue sky.
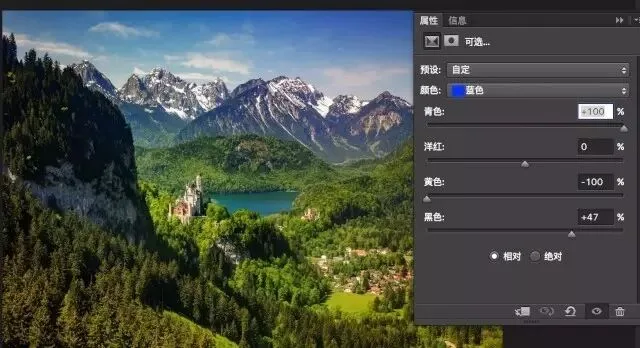
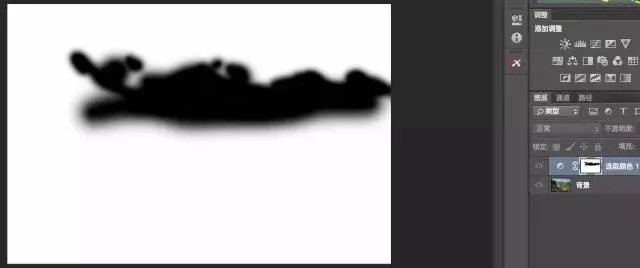
Since the snow mountain also carries some blue light, the previous boost turned its ridges an alarming blue. So on that Selective Color adjustment layer, I paint black on the mask to hide the mountain area.
Because the cable-car glass was uneven, the left sky leans cyan while the right leans purple-red.
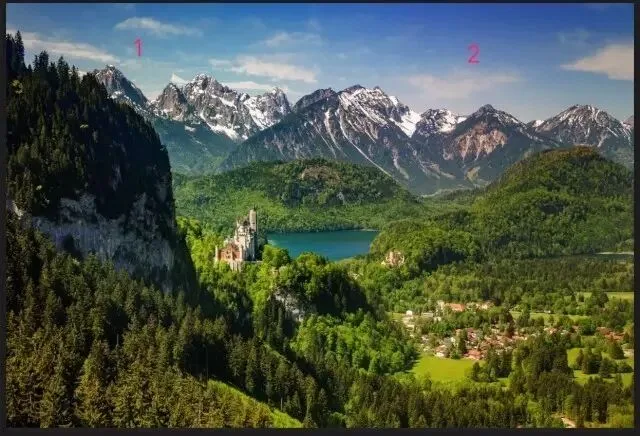
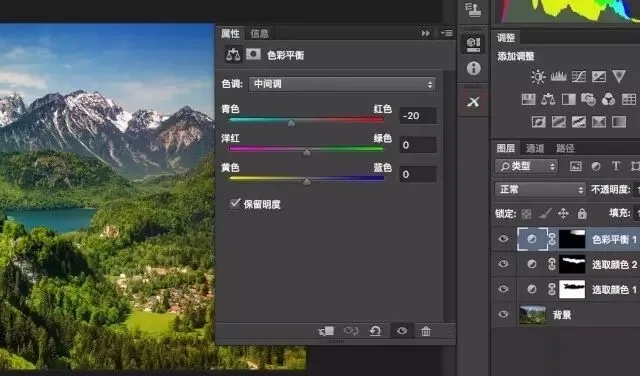
So I use Color Balance with a mask painted to expose only the right sky — adding cyan and reducing red — to unify the sky color on both sides.
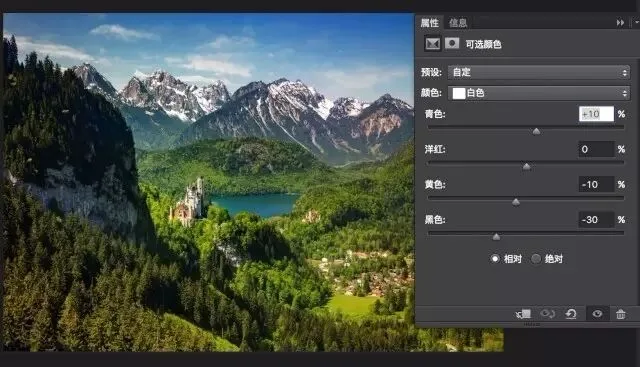
Clouds should be white, but these lean warm. So in Selective Color I choose Whites: cyan +10% (adding cyan means reducing red), yellow -10%. I also set black -30%, which brightens the clouds. After this step the clouds are much brighter and whiter.
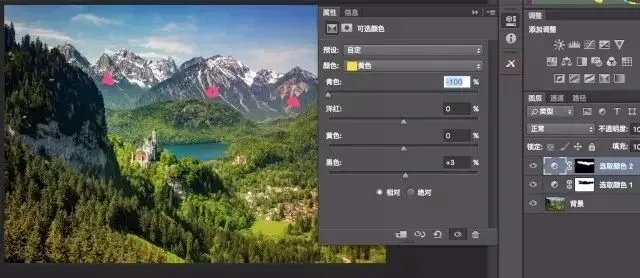
Mountain rock is usually reddish, so I want to restore the rock's red. I choose Reds and Yellows in Selective Color, reduce cyan and add red, and use a mask to reveal only the rock areas.
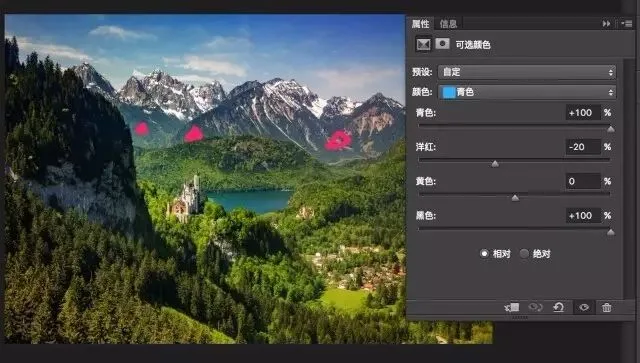
The trees on the mountain should be teal-green. Select Cyans in Selective Color, then paint the mountain area with a white brush on a black mask to isolate the distant forest. Add cyan, reduce magenta (i.e. add its complement, green), and add black (lowering brightness) — the distant trees now show a purer deep green.
Now the foreground forest: because of the cable car's red glass, the green trees are contaminated with many red speckles and look dirty.
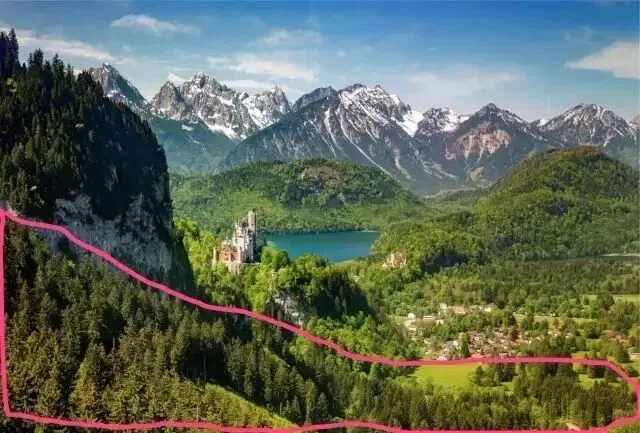
In Selective Color choose Reds: add cyan +100% (i.e. reduce red) and reduce magenta — the red speckles in the trees disappear.
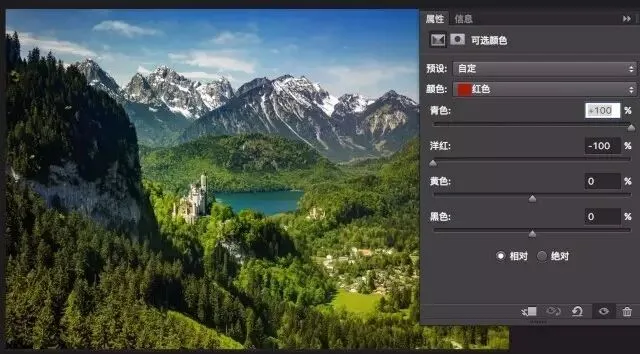
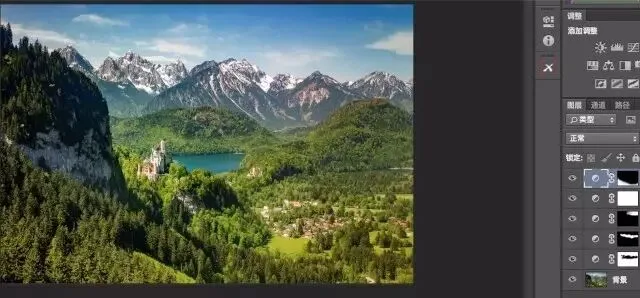
Since the buildings carry a lot of red paint, the previous red reduction affected them too. So I mask out just the foreground trees, confining the de-red layer to them.
Red objects pop against green trees, so I can strengthen the reds of the castle and rooftops to make them stand out. In Selective Color choose Reds: reduce cyan (add red), black +65% (lower brightness) — and again, a mask confines the effect to the buildings.
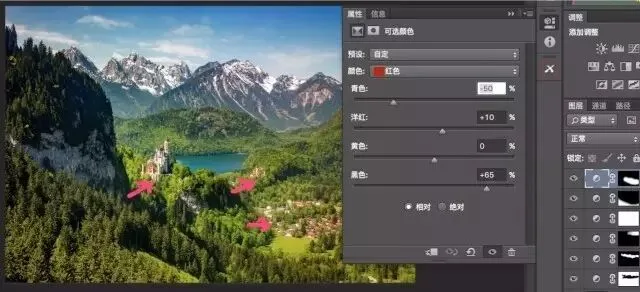
In short, purifying object colors means using Selective Color with masks: isolate each object in the photo, add analogous colors, reduce complementary colors, and every object's color becomes pure and vivid.
Finally, Vibrance +20 makes the photo more vivid.
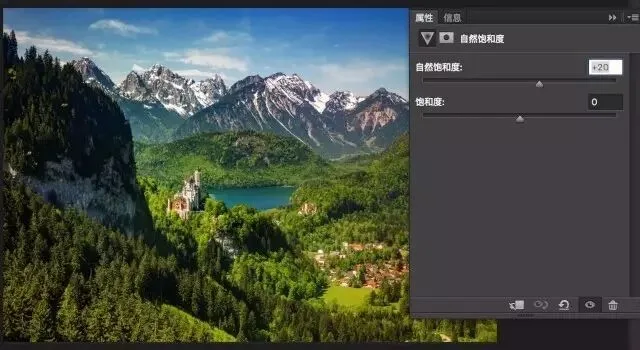
Ta-da — a bit of noise reduction and sharpening, and the photo is done.
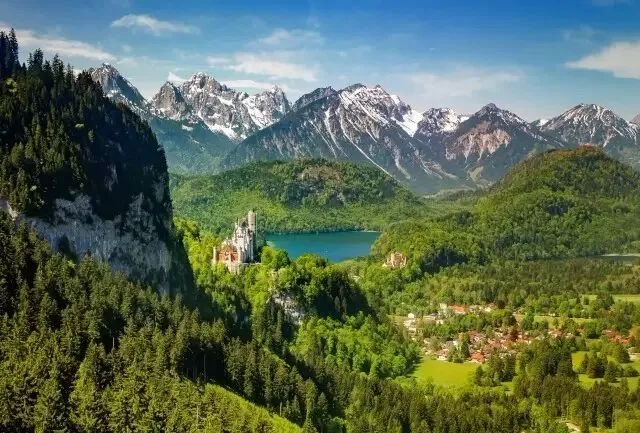
Compared with the super-hazy original, isn't it much clearer now?
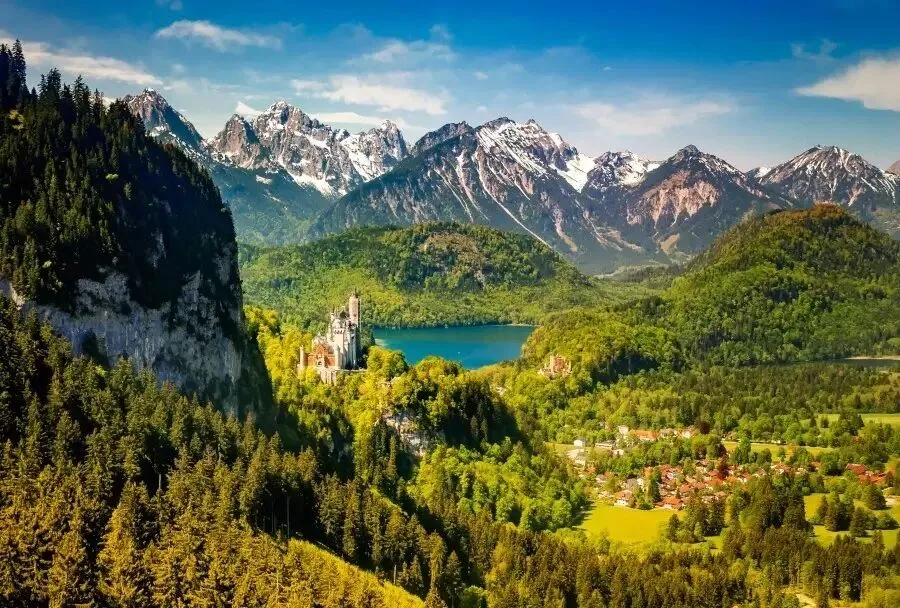
Afterwards Thomas made a few more tweaks for a springtime feel — that's a matter of personal taste.
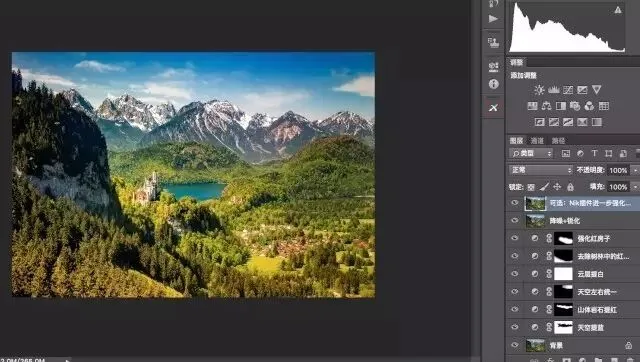
The PSD and source files are on my cloud drive (about 400 MB — please download over Wi-Fi) https://pan.baidu.com/s/1nvhJBp3
Weekly Summary
The 6 elements of a clear photo and their corresponding tools:
1) Rich detail (ACR Basic panel — Highlights, Shadows)
2) Sufficient contrast and black-and-white points (ACR Basic panel — Contrast, Blacks, Whites)
3) Crisp subject (ACR Basic panel — Clarity; Radial Filter — Clarity)
4) Accurate white balance (ACR Basic panel — Temperature)
5) Pure colors free of casts (Photoshop — Selective Color with masks)
6) Sensible saturation (ACR/Photoshop — Vibrance, Saturation)