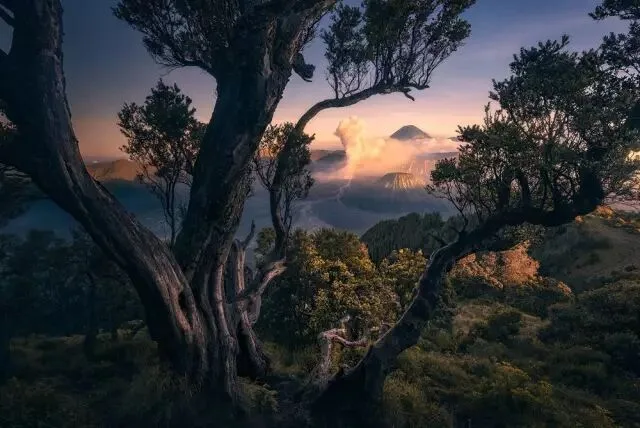
Photography Tutorial · 2017-11-12
Five Tricks to Give Your Photos Depth and Dimension
Thomas's new book "A Knowledge System for Landscape Photography — Post-Processing Fundamentals" (《风光摄影知识体系-后期基础》) will be published this December.
In the new book, I not only detail the important functions of Camera Raw and Photoshop, but also devote nearly half the book to a systematic introduction to the common thinking of modern landscape post-processing — such as the four angles for analyzing a work, the five principles of color grading, and the six non-fictional compositing techniques of landscape photography.
The content of this article is excerpted from the new book, systematically introducing the origins of layered three-dimensionality in photographic works.
The world is three-dimensional, but a photo is two-dimensional. Countless explorations have been made across thousands of years of painting to express three-dimensional layering on a flat surface. We photographers can also draw on painting theory for ways to express layering and three-dimensionality.
To express three-dimensional space, a photo needs a sense of layering and a sense of three-dimensionality — and these two terms are different.
Layering refers to the near-far, front-back relationships shown between objects. Three-dimensionality refers to the solid realism displayed by each object itself.
In fine art and photography, the "three major planes" and "five tones" help us sculpt three-dimensionality, while layering mainly comes from occlusion, vertical perspective, linear perspective, and aerial atmosphere.
1
The Three Major Planes
The three major planes and five tones originate from the Western sketching system, describing how an object's light-and-shadow zones are divided after being lit — an important means of expressing three-dimensionality.
The three major planes are the light plane, the dark plane, and the gray plane.
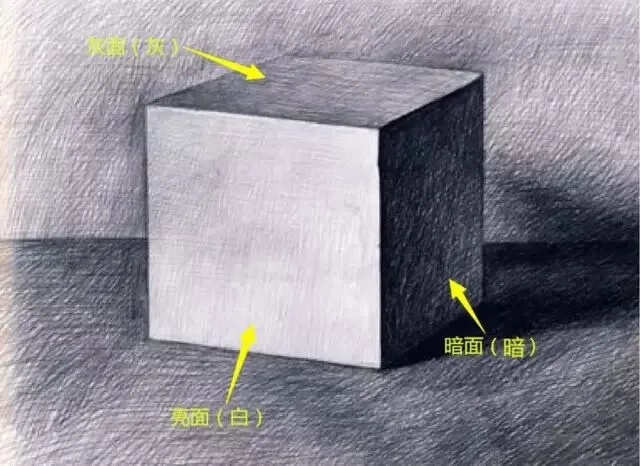
The light plane is the side of the object directly struck by light — usually the brightest light gray or white in the image. The dark plane is the side facing away from the light — usually the darkest part of the object, showing black or deep gray. The gray plane lies between the light and dark planes — usually the part lit by side light or indirect light, appearing medium gray in the image.
Once an object has the three planes — light, dark, and gray — its three-dimensionality greatly improves. And the stronger the brightness contrast between the light and dark planes, the stronger the sense of light and three-dimensionality.
When shooting in the field, we find that objects lit fully frontally or fully backlit have relatively poor three-dimensionality.
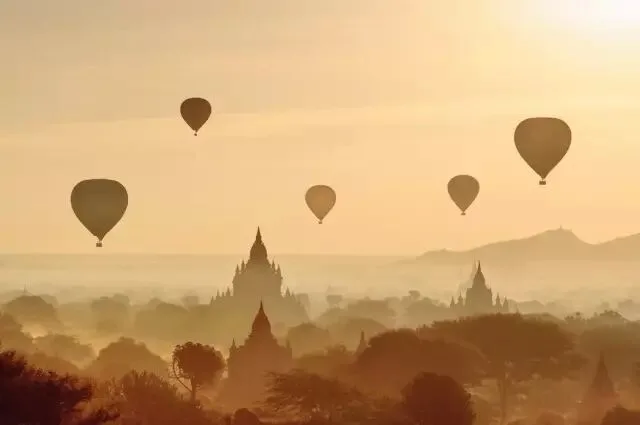
Objects in side light, side-backlight, or side-front light, by contrast, show strong three-dimensionality.
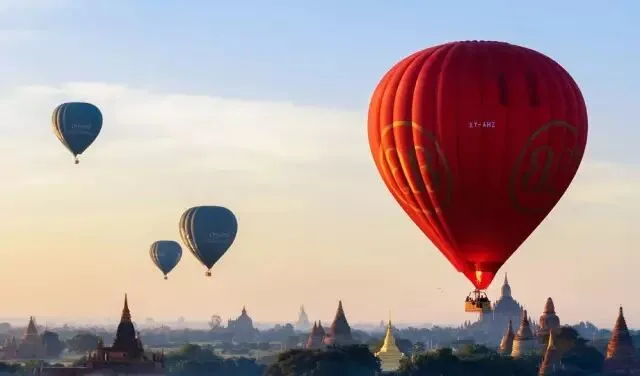
With the same hot-air balloons, why does a backlit balloon look very flat, while a side-lit balloon is full of three-dimensionality?
It's because in front-lit and backlit photos, the objects in the frame have only one plane with no tonal variation. In side-lit photos, however, the object shows a combination of light, gray, and dark planes — the three-dimensionality is much more obvious.
So to express an object's three-dimensionality, we should try to shoot with side light.
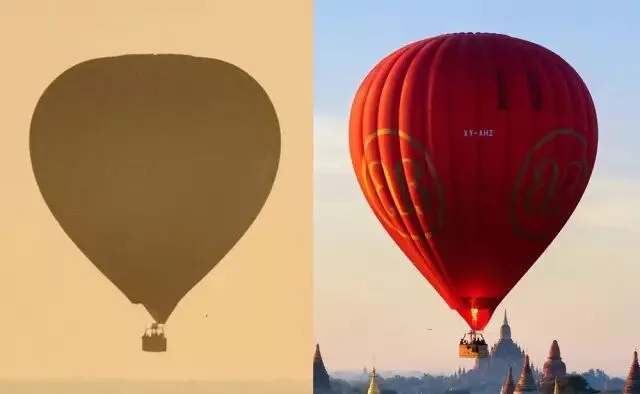
Beyond shooting in the field, we can also apply the knowledge of the three major planes in post-processing, to strengthen or even create an object's three-dimensionality.
For example, the image below is a ball. Since every region of the ball has the same brightness, it looks very flat.

To increase its three-dimensionality in post, we only need to use the dodge-and-burn tools to create the three major planes inside the ball. (Dodge and burn are introduced in detail in Chapter 5 of this book.)
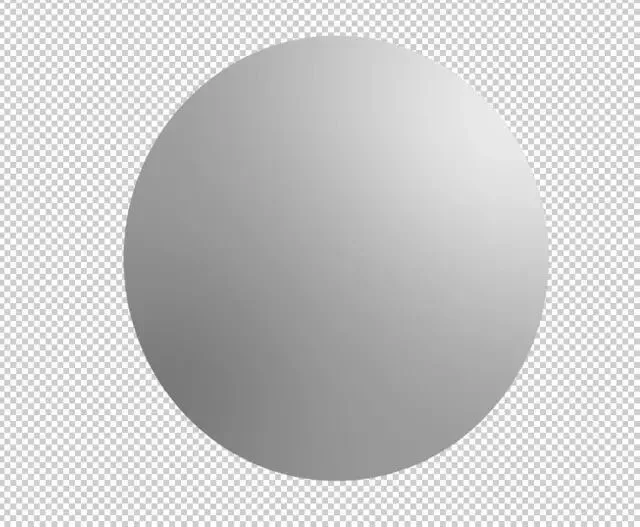
We can use the burn tool to darken the ball's lower-left, giving it a dark plane; use the dodge tool to brighten the ball's upper-right, giving it a light plane. Where the light and dark planes meet, a natural transition forms the gray plane.
After painting the three major planes in post, the ball finally has three-dimensionality.
We can further brighten the upper-right and darken the lower-left, increasing the tonal contrast between the light and dark planes, thereby strengthening the ball's light-and-shadow three-dimensionality.
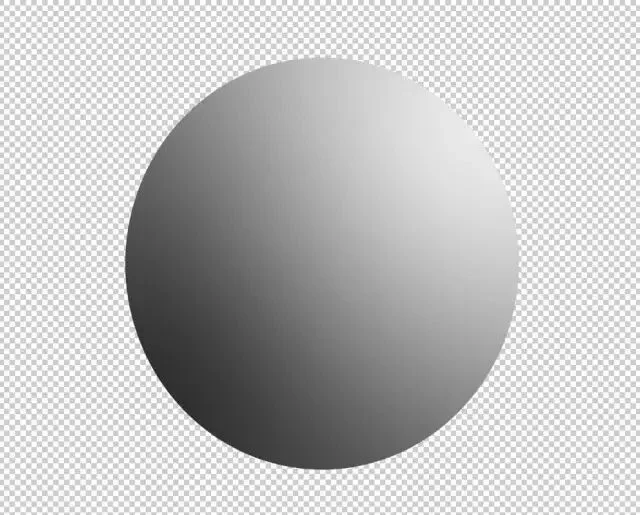
So increasing three-dimensionality in post is technically very simple: just use dodging and burning to paint out or strengthen the object's light, gray, and dark planes.
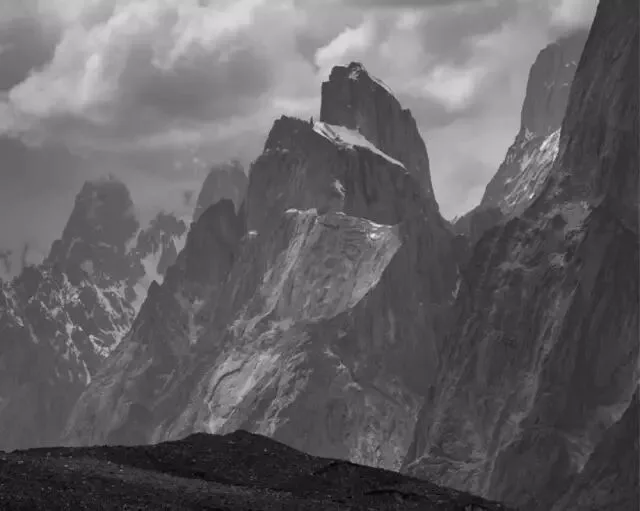
The photo below shows Pakistan's famous Trango Towers, but the photo's three-dimensionality is not yet strong enough.
So in post I used dodge-and-burn to brighten the places marked "1" in the image below — strengthening or even creating the objects' light planes — and to darken the area marked "3," further lowering the dark plane's brightness in post. The area marked "2" was naturally processed into the gray plane.
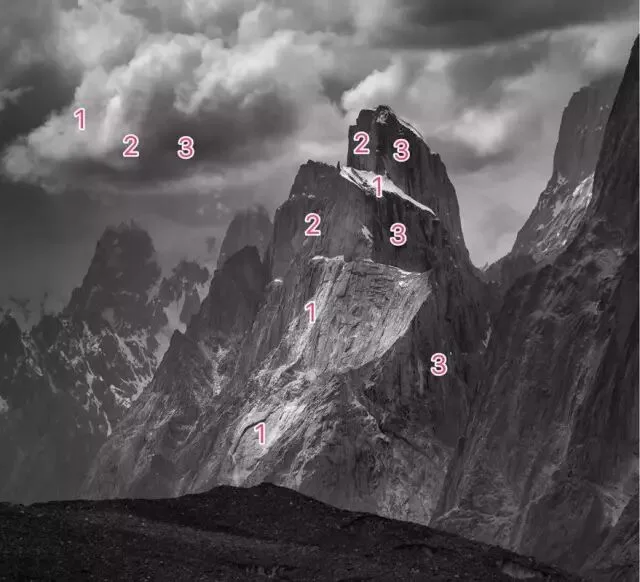
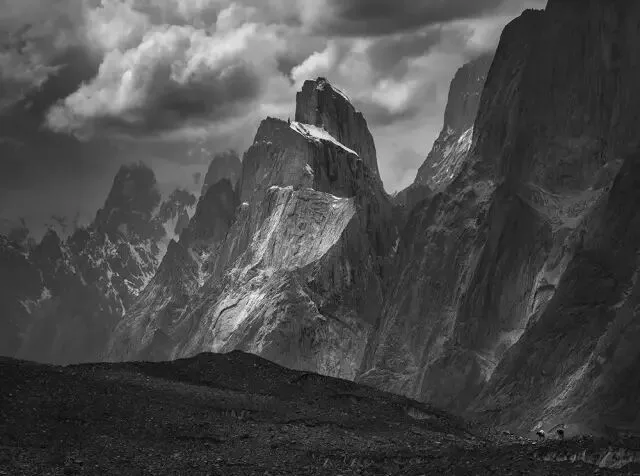
With the three major planes now more strongly contrasted, both the clouds and the snowy mountains gained greatly enhanced three-dimensionality.
2
The Five Tones
The three major planes above consider only a single object itself. In many cases, an object also interacts with surrounding objects — so beyond the three planes, an object has richer tonal gradations: the five tones.
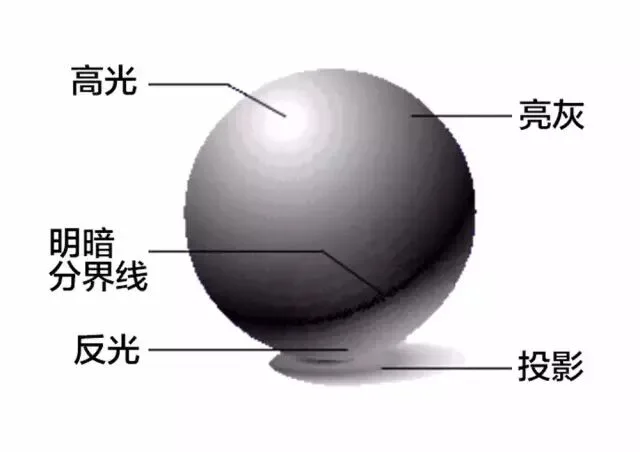
Among the five tones, the highlight is the object's brightest point — the part directly reflecting the light source, similar to the light plane of the three planes. On smooth object surfaces, the highlight is especially prominent. Emphasizing an object's highlights not only strengthens three-dimensionality but also adds texture.
Light gray is similar to the gray plane of the three planes — the indirectly lit part.
As for the object's backlit part, it divides into reflected light and the boundary line between light and dark. Although the reflected-light area is on the backlit side, it still has some brightness because of light reflected from surrounding objects. In post, reasonably adding reflected light into the dark areas can make an object appear more volumetric.
The boundary line between light and dark is the transition zone from the lit to the unlit part — usually a dark band, appearing as the darkest place on the object.
Beyond the object itself, the five tones also add the cast shadow. A cast shadow is the shadow an object casts onto other objects when it blocks the light.
A cast shadow actually uses other objects in the frame to explain the three-dimensionality of the object itself, making it appear steadier and more real. Under strong light, if an object casts no shadow on the nearby ground or wall, it will look especially floaty and very fake.
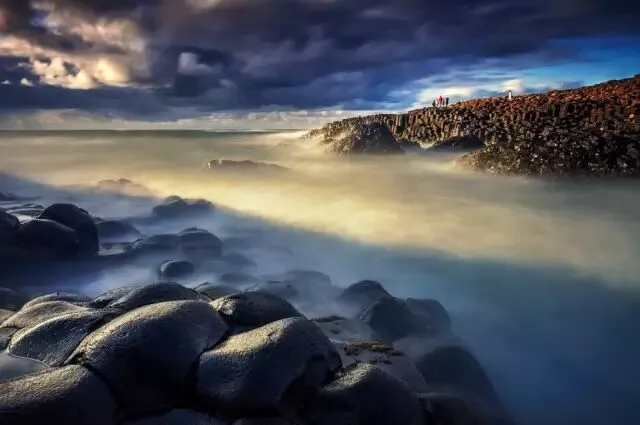
In this photo of the Giant's Causeway in England below, you will feel that the foreground stones are very three-dimensional — far more so than the sample images for the three major planes earlier. That is because these stones are more finely rendered with the five tones.
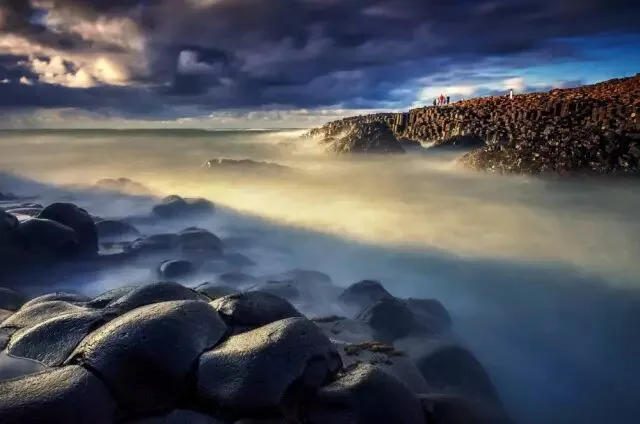
The area marked "1" on the stone is its highlight. The wet stone has excellent reflective properties, so even though the highlight was greatly brightened in post, it still looks natural. The part marked "2," since it does not receive direct light, belongs to the stone's light-gray part.
The marks "3" and "4" in the image indicate the stone's unlit dark planes.
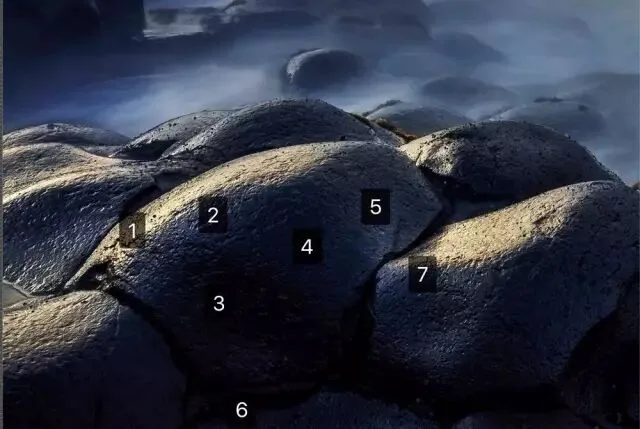
What truly further enhanced the stones' three-dimensionality in the image above is the reflected light and cast shadows. Area "5" on the stone has some slight reflected light because it is close to the bright plane of the neighboring stone. Further strengthening the reflected light can make the stone's three-dimensionality stand out even more.
And what "6" and "7" mark are the stone's cast shadows on neighboring stones — the presence of cast shadows greatly enhances three-dimensionality.
Once you understand the three major planes and five tones, you hold the key to enhancing a photo's three-dimensionality. Using the dodge-and-burn tools, sculpting a photo's three-dimensionality in post is actually quite simple.
3
Occlusion
Three-dimensionality is the embodiment of an object's own three-dimensional attributes. Layering is more complex: it requires the relationships between objects to express their front-back and near-far order — thereby expressing the three-dimensional attributes among objects.
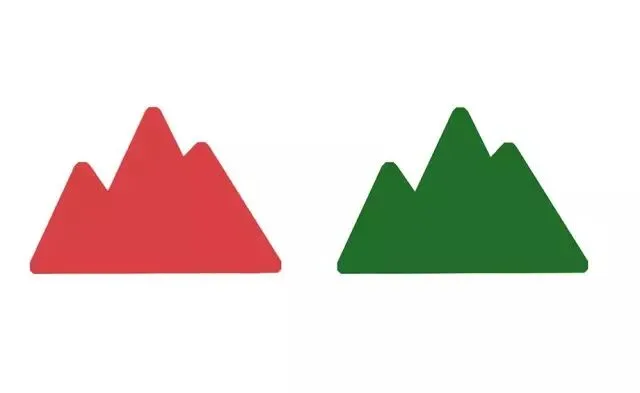
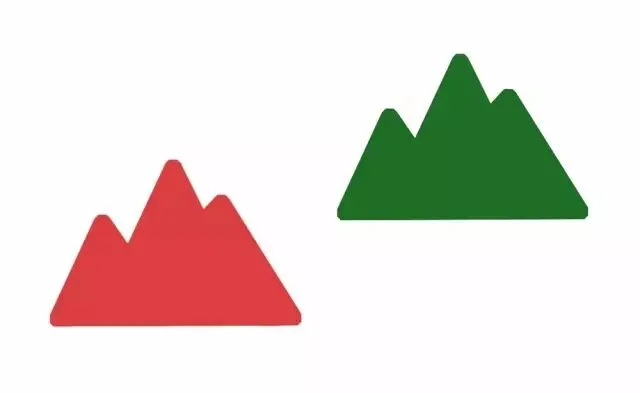
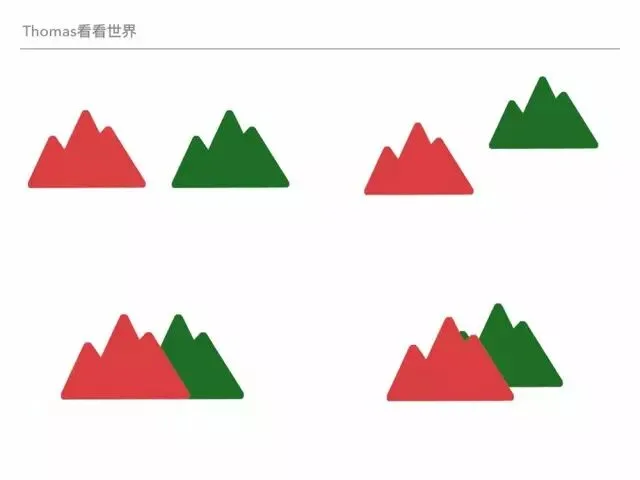
Suppose the simplified diagram below is a photo I took. If I tell you the green mountain on the right is actually farther away, you would probably find it baffling.
This is a typical photo lacking a sense of layering. If we take no measures when composing in the field, we can easily end up with such a flat photo.
So what techniques can express a sense of space?
The first method is very simple: it's called "occlusion" — using one object to block another. This way the viewer understands that the blocked object, whose outline and whole are incomplete, must be in a farther position.
For the situation above, for instance, I could walk a few kilometers to the left; then the red mountain blocks the green mountain. In the photo I take this way, the layering relationship between the mountains becomes obvious.

In telephoto photography, since the linear-perspective effect discussed later is very weak, occlusion becomes the key technique for expressing spatial depth.
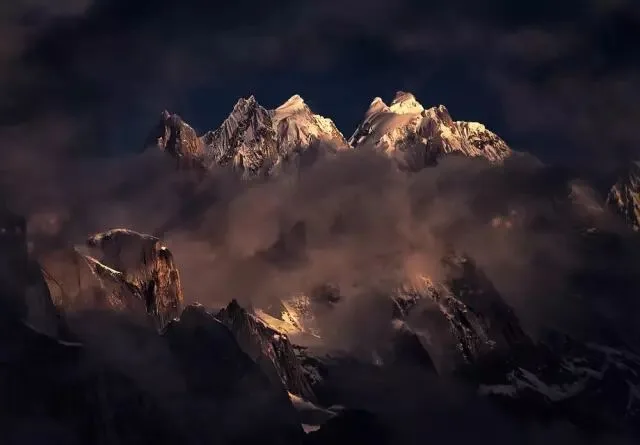
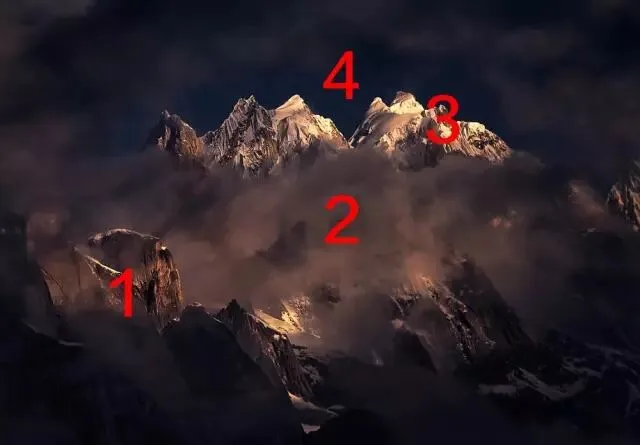
This telephoto snow-mountain photo above is a very typical example of expressing spatial relationships through "layered occlusion." The rock marked 1 blocks the cloud and mist at 2; the cloud and mist in turn veil the snow mountain at 3; and the snow mountain blocks the blue sky behind it. Rock, mist, snow mountain, blue sky — through progressive mutual occlusion, the front-back order is very clear.
4
Vertical Perspective
Besides occlusion, classical painters also often used vertical perspective to express layering.
Vertical perspective means placing near objects low in the frame and far objects high in the frame. In photography, achieving vertical perspective is simple: just climb to a high place and raise the camera position.
For the earlier situation, for example, I could climb up the mountain or fly a drone — in the resulting image the red mountain is below and the green mountain above, also letting the viewer understand the front-back order of the two mountains.
The photo below of a Santorini church with a distant island, for instance, uses vertical perspective: the vertical distribution of scenery brought by the higher vantage point increases the sense of space.

Of course, since both occlusion and vertical perspective can express a sense of space, if we combine the two, the photo's three-dimensional order becomes unmistakably clear.

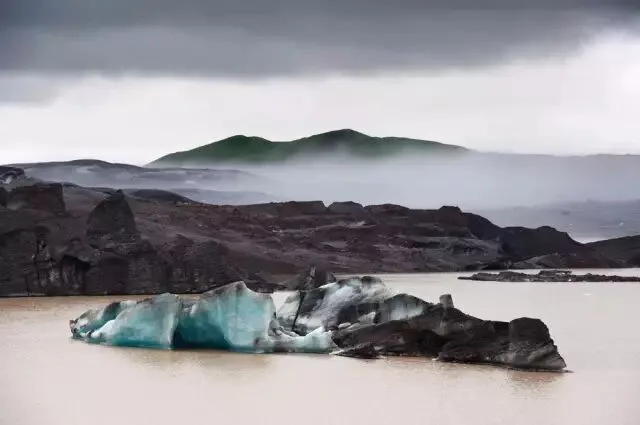
In the image below, for example, blue ice, black glacier, thin mist, distant mountains, and sky are arranged in depth from bottom to top, with layers occluding one another. Although it is a flat image, we can read the scene's three-dimensional space from the vertical perspective and occlusion relationships.
Both occlusion and vertical perspective can be achieved in the field by changing the camera position — photographers might as well think more about this when composing.
For example, to photograph a forest with a hill behind it: if we shoot on flat ground, the low vantage point causes the objects to occlude each other, showing some front-back relationship — but the sense of depth is insufficiently expressed.
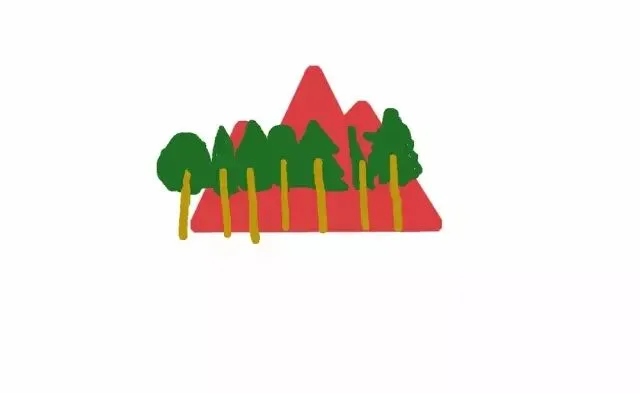
If we climb to the hilltop, the forest and the peak come out one below and one above — the depth relationship is there, but with completely separated scenery, the sense of space is still a bit lacking.

The best camera position may be halfway up the hill — neither high nor low — capturing both occlusion and vertical perspective, raising the layering of forest and hill by a level.

In photography, a lower or higher camera position is not necessarily better. An apt composition that uses multiple spatial expression techniques to enhance layering tests the photographer's skill in the field.
Now compare and observe the image below carefully — perhaps you will understand the exquisite effect of occlusion and vertical perspective in photography and painting.
5
Linear Perspective
In Western art after the Renaissance, linear perspective was heavily applied in painting — which directly led foreign photographers to favor wide-angle compositions when shooting, highlighting linear perspective to express spatial layering.
Linear perspective, in short, is "near big, far small": originally parallel lines keep converging as they extend into the distance, until they meet as a small point at the vanishing point.
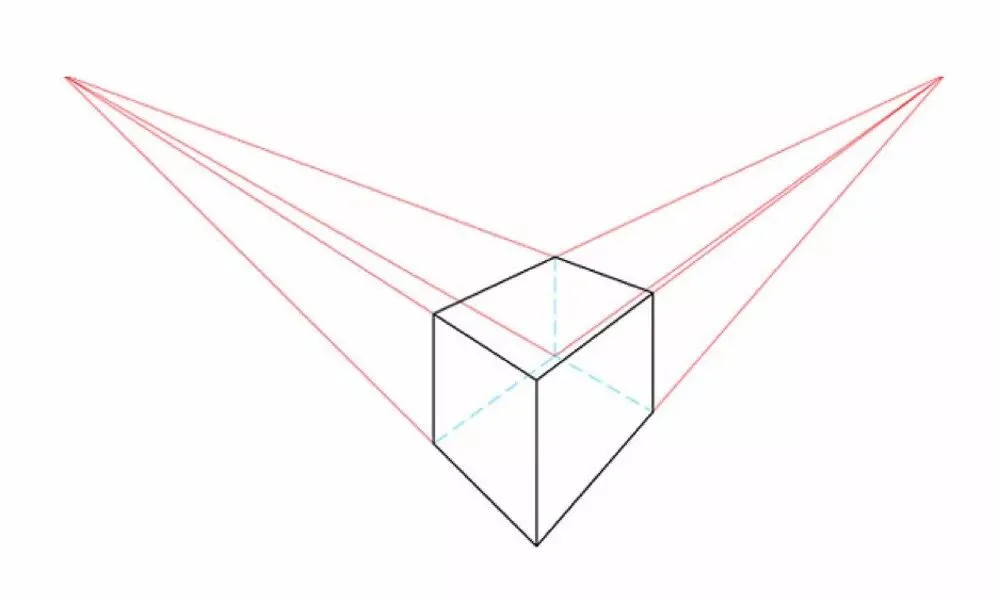
In photography, we commonly use three methods — converging lines, repeating diminution, and exaggerated foreground — using lenses (especially wide-angle lenses) to emphasize the foreground-middle-background layering of linear perspective.
5.1
Converging Lines
Shooting converging lines means using linear objects in the scene that extend and converge into the distance to emphasize the sense of space.
For example, in the image below — shot in broad daylight with front light — although the light-and-shadow three-dimensionality is not strong, this path extending and converging into the distance brings a sense of depth to the photo.
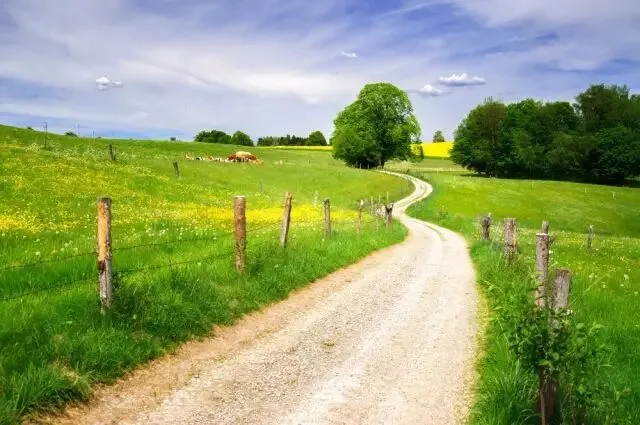
Roads, rivers, bridges, and so on are all natural converging lines. Including them when composing in the field not only creates leading lines, but also greatly improves the photo's layering.
5.2
Repeating Diminution
A major manifestation of linear perspective is near-big-far-small. So when composing — especially when shooting a foreground with a wide-angle lens — if we can find some repeating objects, those repeating objects will shrink continuously from near to far in the frame, expressing the sense of space.
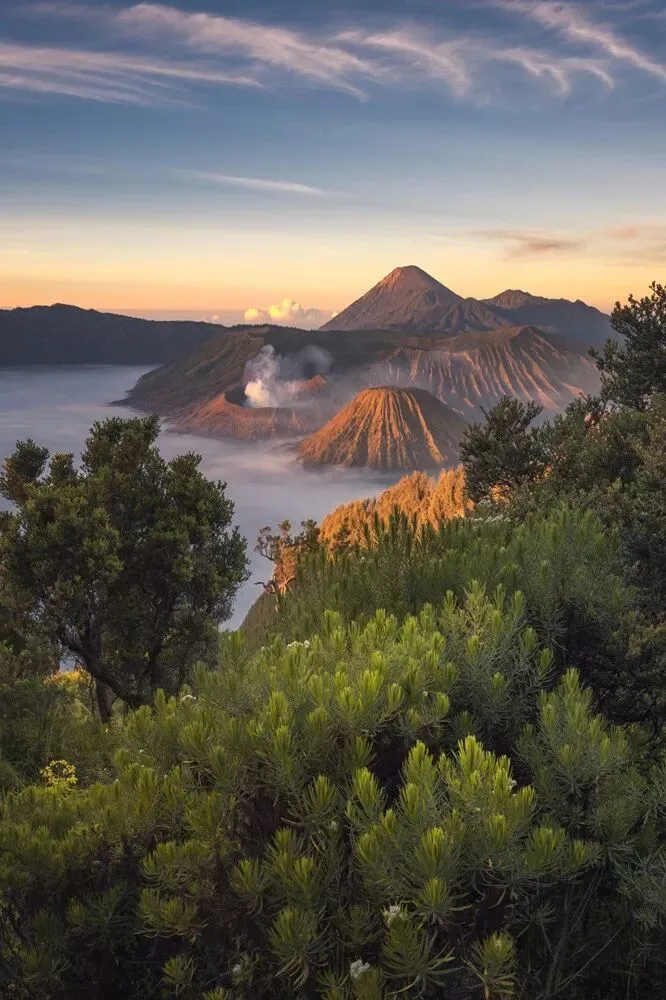
In the image below, for example, I included a large patch of shrubs in the composition: these branches and leaves, originally similar in size, keep shrinking in the frame — so the viewer can feel the three-dimensional space continuously extending into the distance.
In the image below, the actual distance between foreground and background is only a dozen meters, but under the effect of the wide angle, the repeating square torii gates keep shrinking. Using the method of repeating diminution combined with the torii's mutual occlusion and the converging-line effect of the path, I well expressed the photo's sense of space.
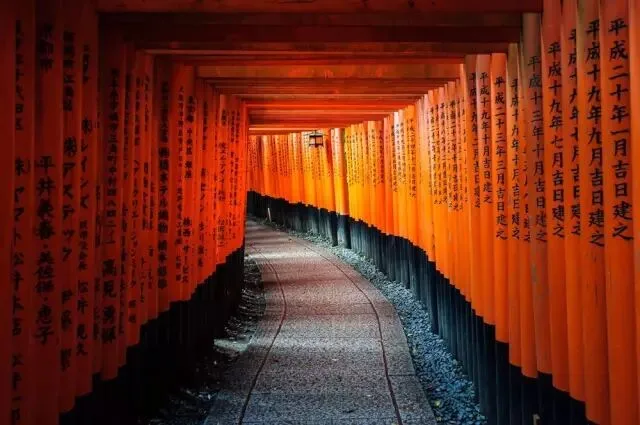
As long as you are good at discovering, there are many continuously repeating objects in nature and in life scenes. Make use of them in the foreground, and the sense of space is naturally expressed.
5.3
Exaggerated Foreground
In photography, photographers often shoot from a low angle up close, using the near-big-far-small of linear perspective to exaggerate the size of foreground objects — thereby letting the audience understand the front-back relationships between objects.
In the image below, for example, the foreground reef shot from a low angle is actually bigger than the person in the upper right of the frame. This misplaced size relationship lets the viewer immediately understand their front-back spatial order.
The key to an exaggerated foreground is finding an originally relatively small object and, through perspective, making it appear in the frame as large as — or larger than — an originally larger object in the background. Only through the mismatch between the picture's presentation and human cognition can the perspective sense of space be expressed.
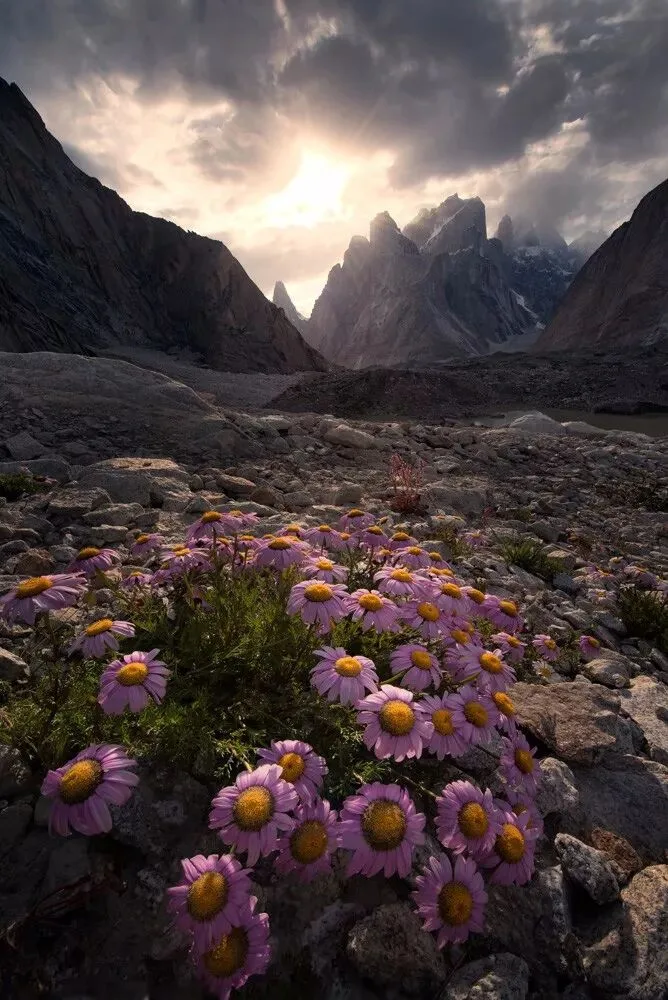
If in your photo the buildings are big and the cars small — matching human cognition — then this relationship can hardly let people perceive their front-back distance.
Only when, as in the image below, objects of vastly different sizes — tent, snow mountain, Milky Way — appear in the frame at similar or even reversed size proportions can people recognize their spatial front-back order.
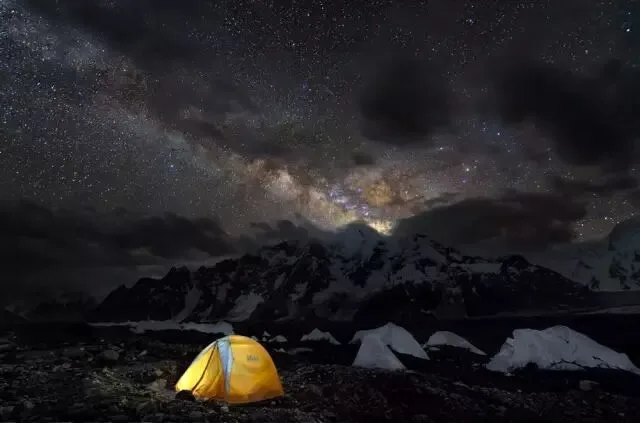
"Night of the Glacier," author: Thomas, thomaskksj.tuchong.com
6
Aerial Atmosphere
In painting, painters also often use something called aerial atmosphere to express layering. For example, nearby objects are painted clearer, more vivid, and sharper, while distant objects are painted hazier, softer, and more blurred.
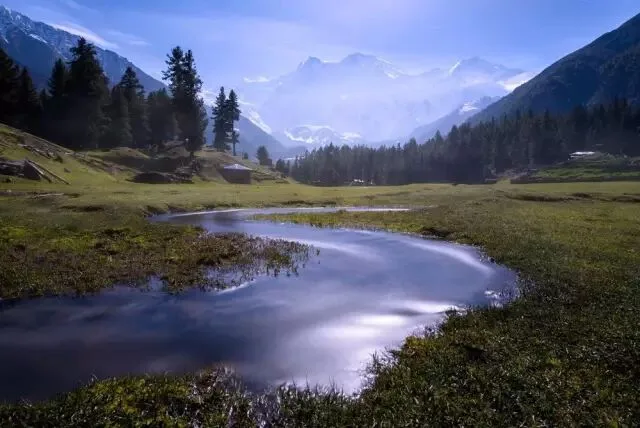
When shooting in the field, we can use natural particles in the air — morning mist, midday mountain vapor, urban haze, and so on — to naturally capture aerial atmosphere.
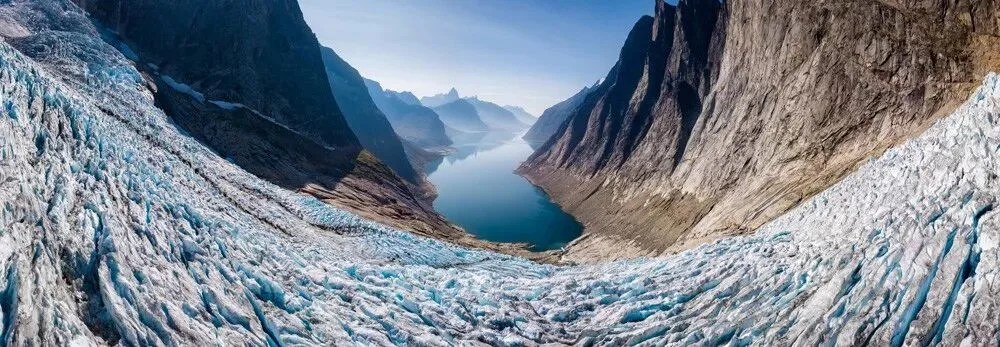
In post, we also often reduce clarity on distant scenery, apply classic softening or Gaussian blur, or even add clouds and mist in post, to create aerial atmosphere — thereby increasing the photo's layered, three-dimensional expressiveness.
7
Combined Application
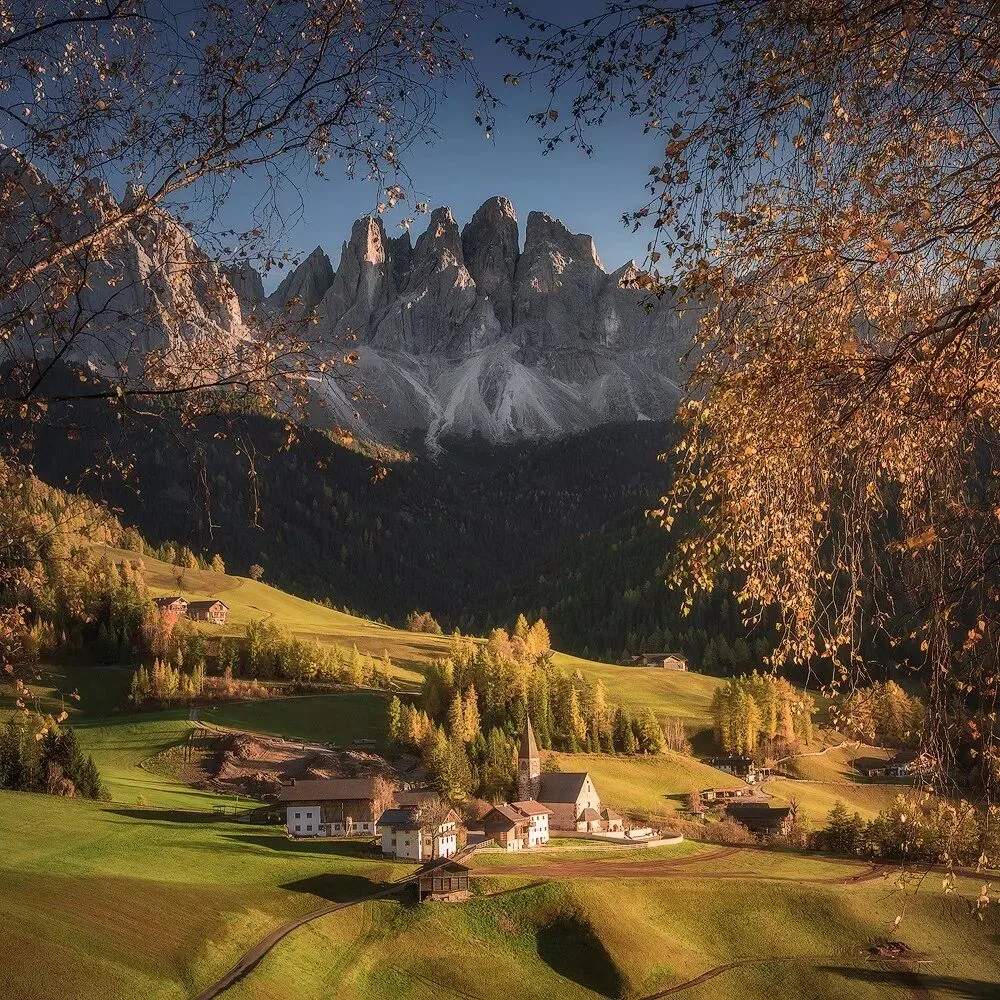
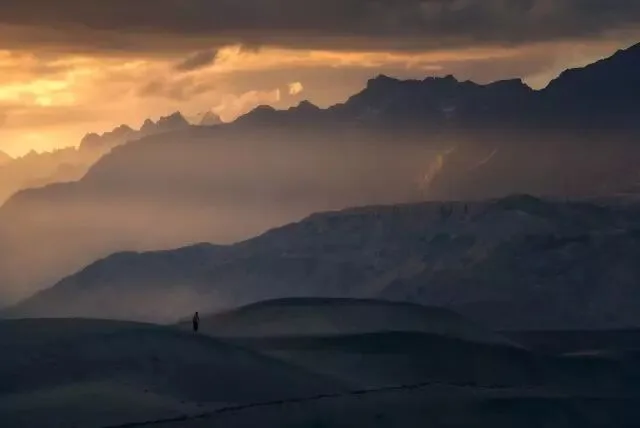
To make a photo full of spatial sense, we often combine the techniques of the three major planes, five tones, occlusion, vertical perspective, linear perspective, and aerial atmosphere.
In the photos below, can you tell which methods were used? Feel free to leave a comment and discuss.
1
2
3