Photography Tutorial · 2022-06-17
Viewpoints Are Just for Snapshots? A Drone Found a Stunning Composition 3km Away
For landscape photographers, how to find fresh compositions at well-known locations is always a challenge.
Drones not only unlock many new perspectives — they are also extremely useful for exploration and discovery.
Today Thomas shares how I used a drone to discover a stunning composition in Aba, Sichuan.
Video
▶ Watch the video tutorial on Bilibili
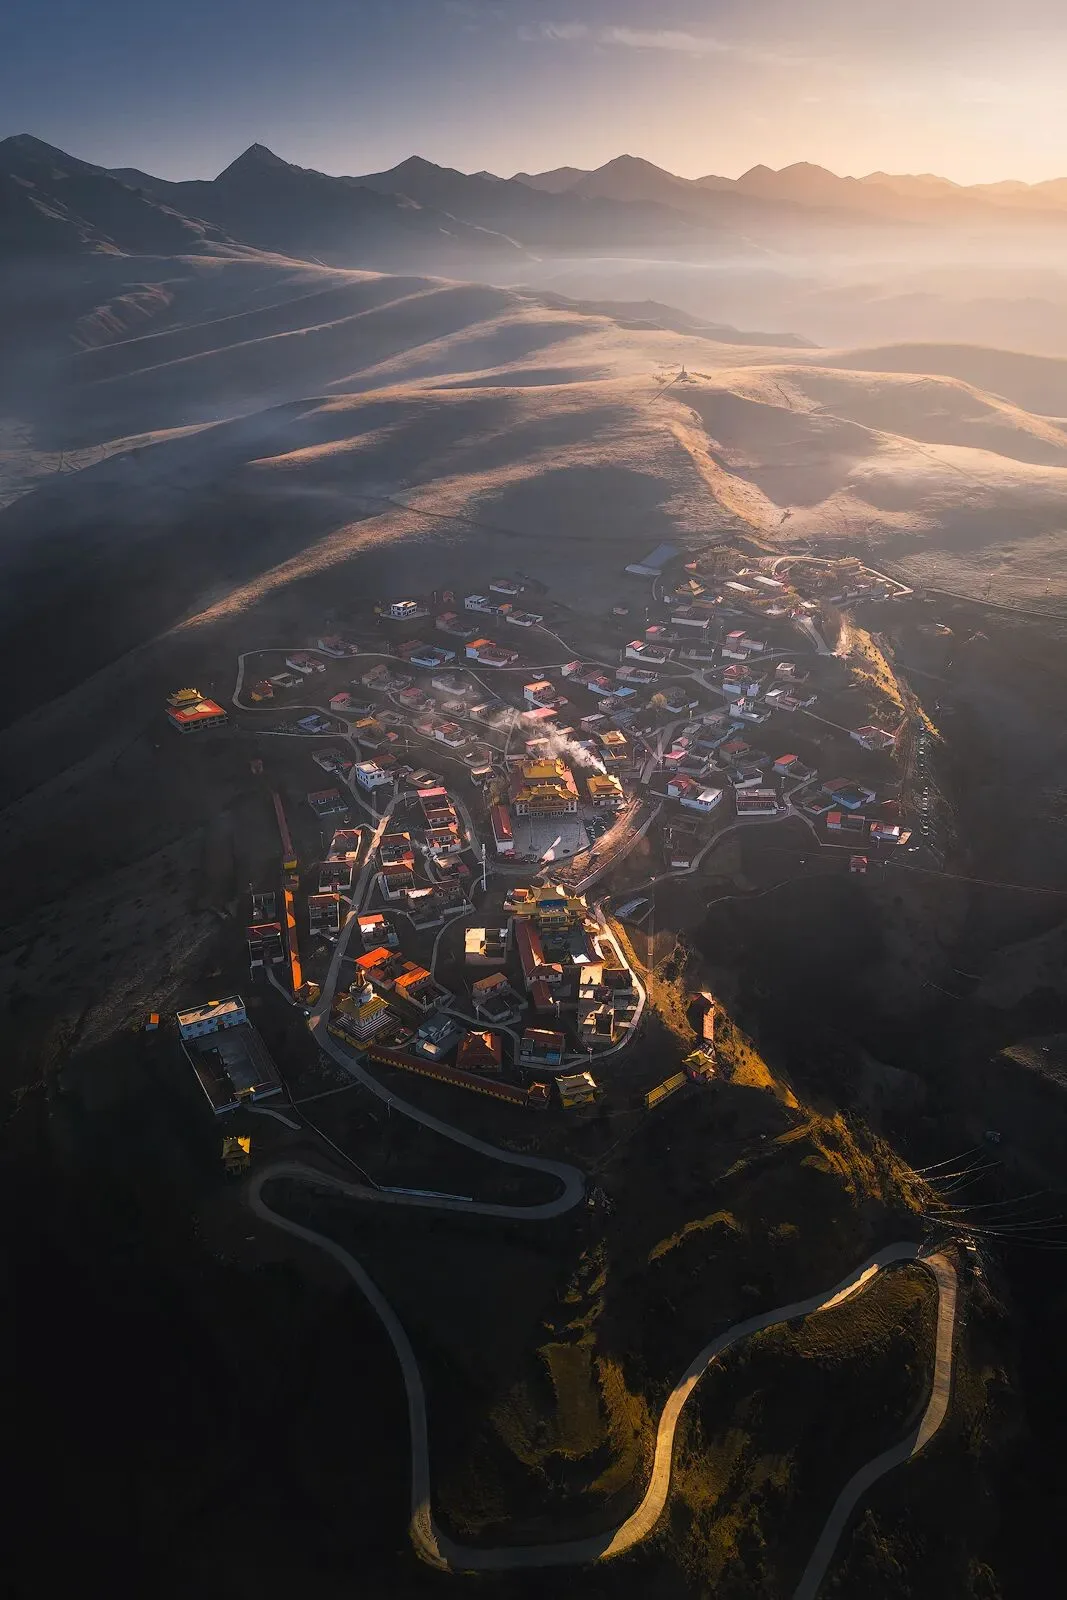
The video above is Thomas's full behind-the-scenes tutorial for his popular aerial photo of Langyi Monastery in Aba: how to get the most from gear and focal length at a crowded viewing platform, how the drone discovered a stunning composition three kilometers away, and the complete editing workflow from Camera Raw to Photoshop. This article is the illustrated write-up, with screenshots of every key panel and parameter so you can follow along.
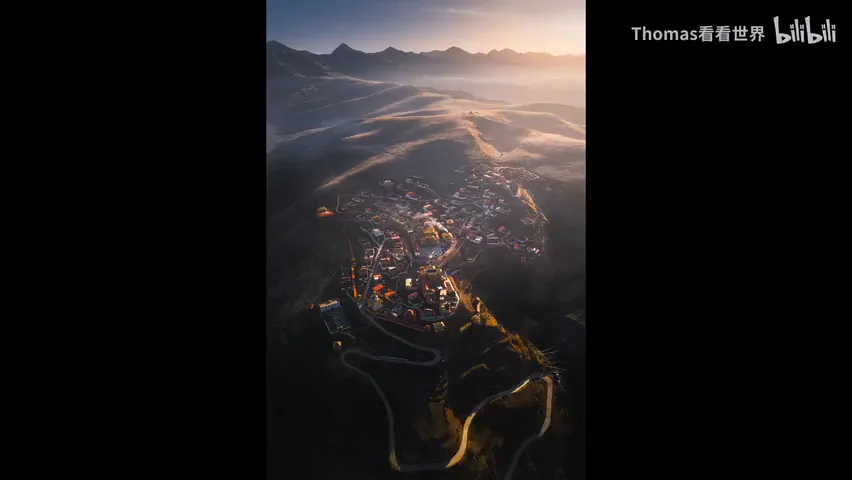
Start with the final image: morning light rakes across the folded hillsides, the village and monastery glow warm and bright on the slope, and the far mountains recede into layers of grey-blue. You cannot make this picture from the viewing platform alone — it takes the platform, a drone, and a systematic edit working together.
01 Above the platform: gear and focal length
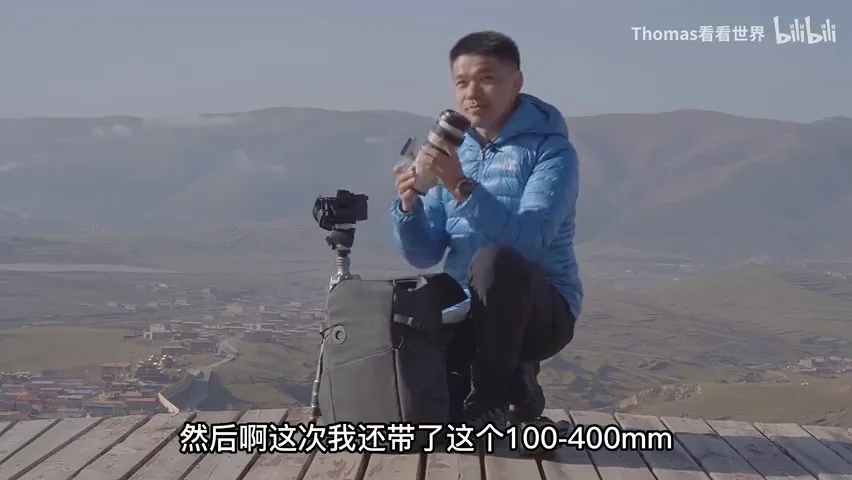
The location is the Langyi Monastery viewing platform, and Thomas's main body is a Sony A7R4 with a 24-70mm lens. After testing on site he found the sweet spot to be 40-70mm: long enough to exclude the messy grass in the foreground, yet wide enough to take in everything in the distance (around 1:16 in the video).
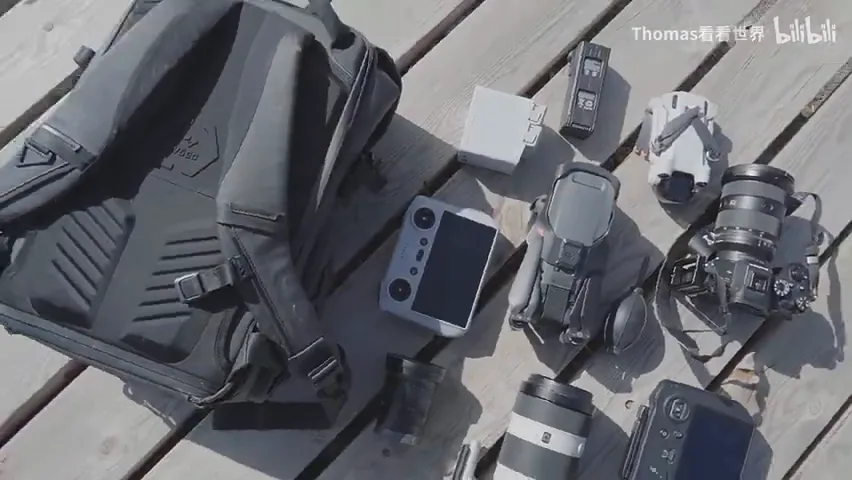
A viewing platform is a crowd-pleaser of a location, and the key to a different angle is the drone. The packing logic here is practical: the Mavic 3, his main aircraft, rides in the quick-release side pocket of the camera bag so it can deploy in seconds; the tripod hangs off one side, body and lenses sit on top, and a 20L pack is just right for a road trip (1:45-2:26).
02 The find three kilometers out: scouting by drone
Once airborne, the first pass is elimination. The conventional frame matching the viewing platform is out; turning to shoot with the sun leaves flat light on plains and villages that look mediocre. The good direction is side light — the folded hills behind are rich in texture, and once the sun climbs, raking light reveals their layered relief (3:11-3:35).
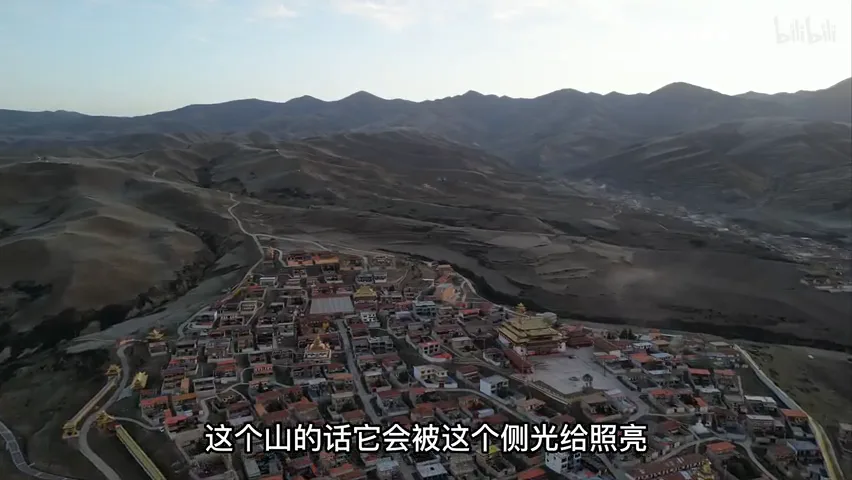
Then he spots a village built up the slope of a distant hill with a monastery at its heart, and sends the drone three kilometers over to check it out (3:41-3:46). What makes the village work is its clear hierarchy: monastery in the middle, small houses around it — a natural focal point (around 3:55).
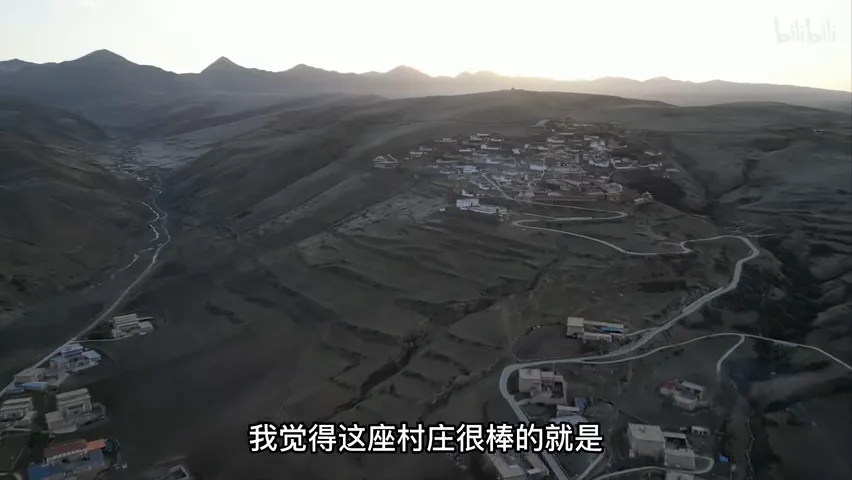
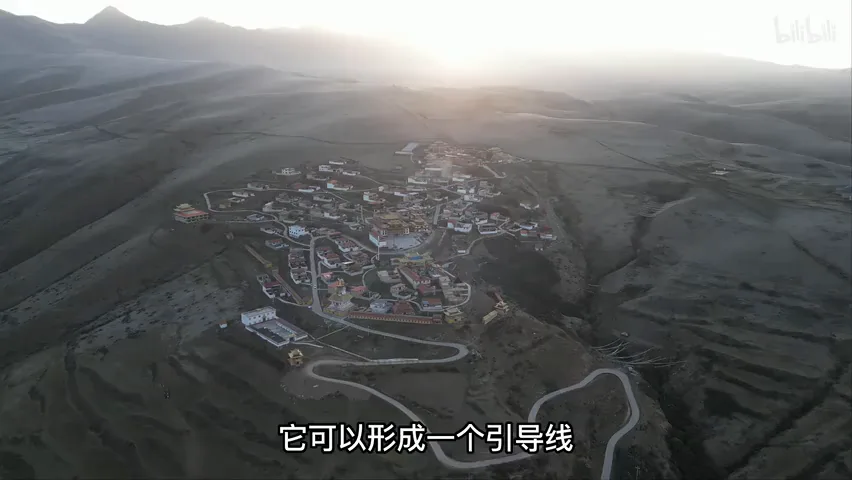
Orbiting the village to test angles, he settles on the direction where the road in the foreground forms a leading line and a sense of perspective, pulling the eye from the edge of the frame straight to the village (4:00-4:06). That find, three kilometers out, becomes the final composition.
03 Camera Raw: one frame is all it takes
The final frame was shot at ISO100, the drone's default f/1.7 aperture, and roughly 1/5000 s (around 4:15). Exposure bracketing was triggered at the time, but a single frame turned out to be enough. In Camera Raw, step one is pulling the highlights and shadows back with the Basic panel (around 4:32).
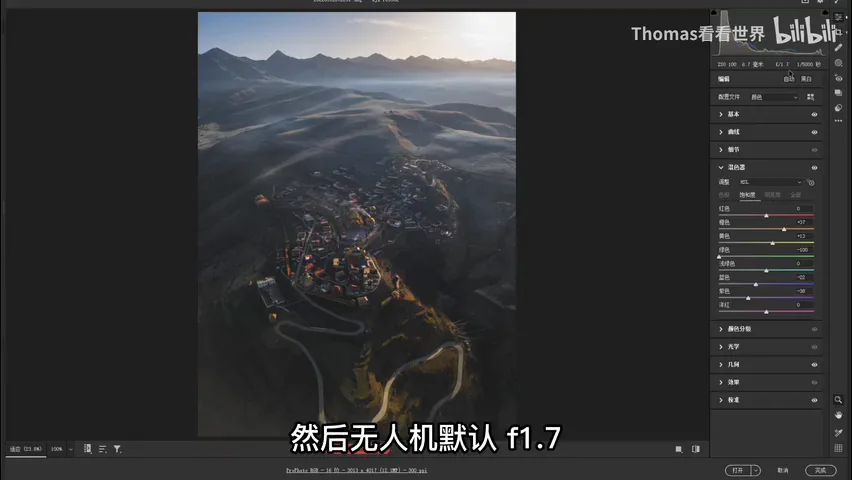
The signature color move comes next: in the Calibration panel he pushes the blue primary saturation all the way to 100, maximizing the color spread of the whole frame (around 4:41). The catch is that cool colors then run too hot, so the HSL panel rebalances: ugly greens are shifted toward yellow and desaturated, while blue, cyan and purple saturation are pulled back down (4:48-5:02).
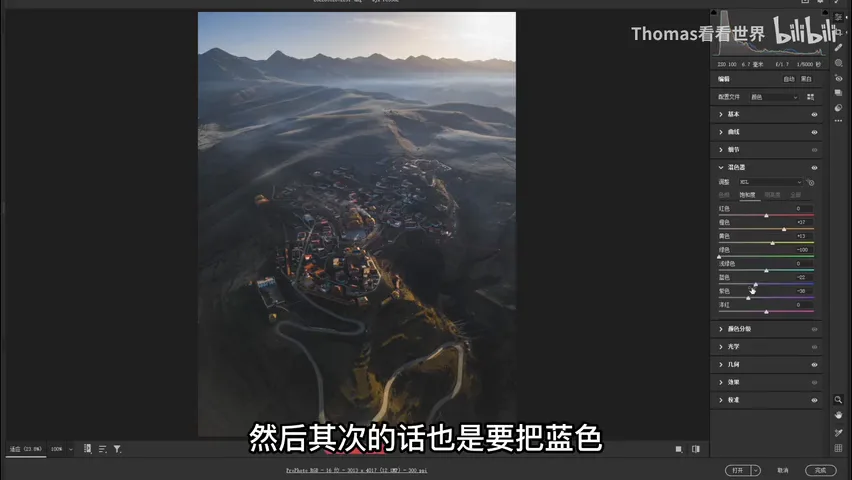
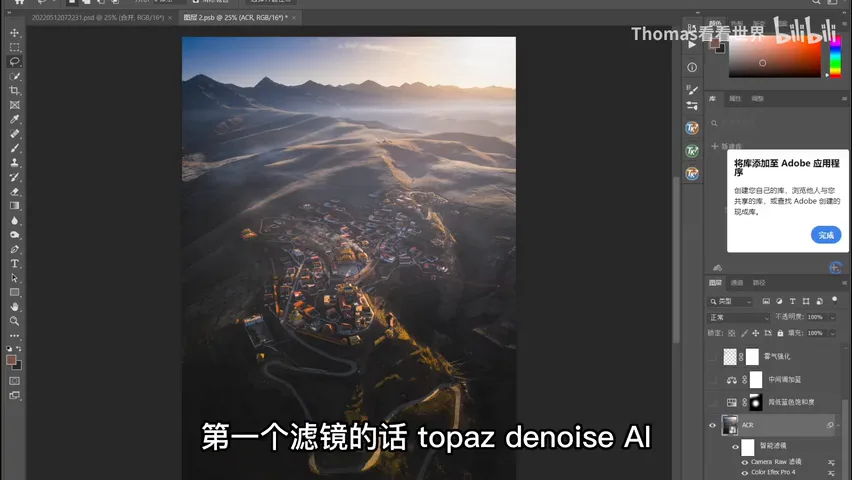
04 The Photoshop filter chain: denoise and atmosphere
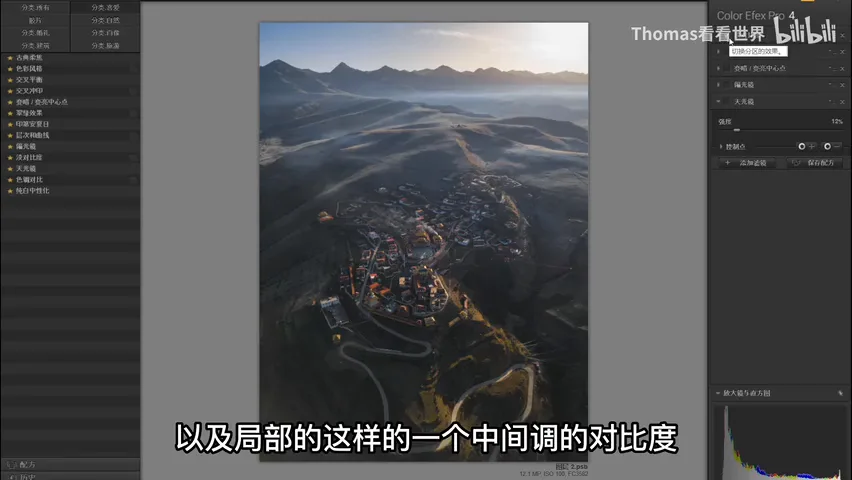
In Photoshop the Camera Raw file is opened as a Smart Object, then three filter passes stack up (5:09-5:22). First, Topaz Denoise AI for noise reduction; then a contrast filter from Nik Color Efex that behaves like Clarity, boosting overall sharpness and local midtone contrast (around 5:24).
Classical Soft Focus adds overall softening and glow, and its brighten/darken center pulls the light toward the middle of the frame while the edges sink back (5:32-5:45); the Polarizer darkens blues and brightens and saturates the warm tones; and the Skylight filter lays a faint magenta cast over everything (5:46-5:56). After this chain, the atmospheric foundation is in place.
05 Graduated filters: painting light into the frame
A Camera Raw filter pass comes next, and its core is a stack of graduated filters inside the masking workspace (5:58-6:10). The darkening side is deliberately restrained: temperature minus 1 — equivalent to adding a touch of blue — and exposure minus 0.2. Each stroke moves the sliders only slightly, but covers a different area, so the combined gradation stays even (6:11-6:28).
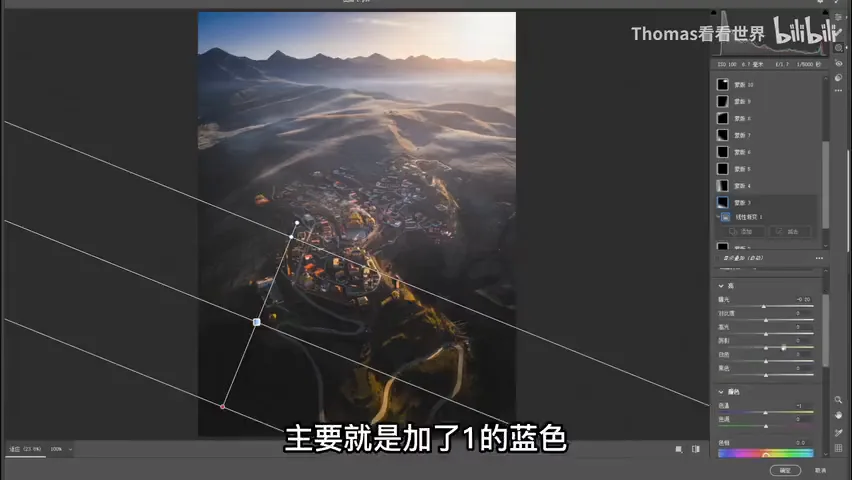
Then the direction flips: several more gradients are pulled, this time raising exposure, shadows and blacks while warming temperature and tint, lifting the dark zones and rendering a warm-yellow glow — each layer adding one more pass of light (6:31-6:48). Toggling the layer shows the result: everything that should be dark is darkened, and the warm-light areas have been built (6:50-6:58). From there: a Hue/Saturation pull-down of blue limited by a mask (7:07), Color Balance adding blue to the midtones to offset the warmth (7:17), a blank layer with fog brushes thickening the natural mist (7:29), and Brightness/Contrast plus Curves, masked to the edges, to press the corners down (7:43) — the frame keeps getting more complete.
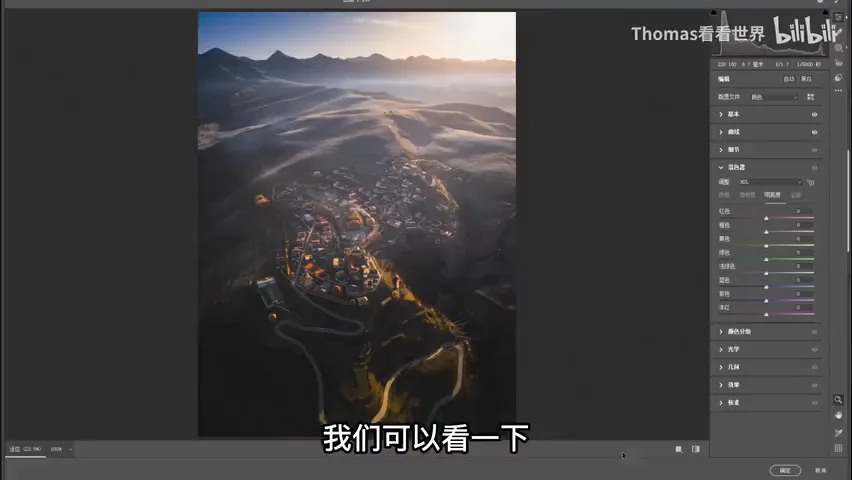
06 Warm slopes and aerial perspective
After stamping a layer and converting it to a Smart Object — the equivalent of Ctrl+Alt+Shift+E (around 8:03) — comes the most transformative step: warm light on the slopes. Create a blank layer set to Overlay, sample the warm yellow of the sunlight with the eyedropper, paint along the hillsides, then attach a luminosity mask as a limiter — the paint now lands almost exclusively on the already-lit slopes, and those areas grow brighter and warmer (8:16-8:44).
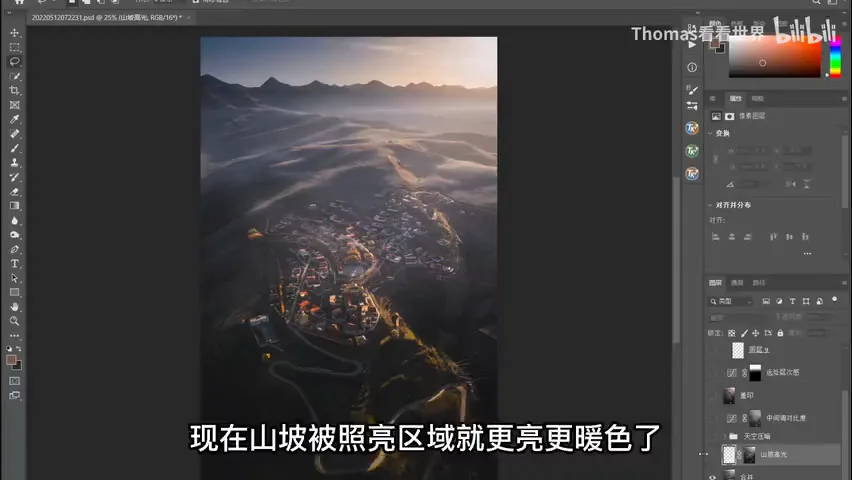
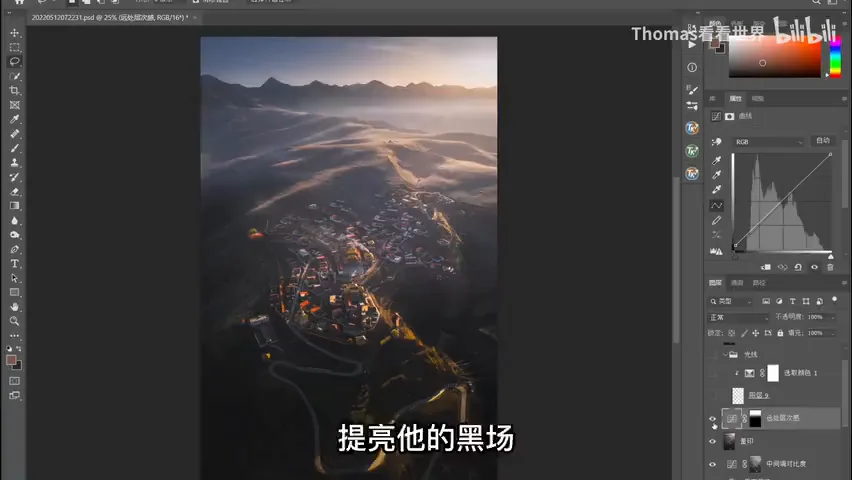
The closing moves are all feather-light: the sky is darkened in several small steps so it reads more even (8:45); midtone contrast gives the whole frame one more pass of punch and color (8:51); and for distance, Curves lifts the black point — raising the deepest shadows — but a mask confines the lift to the far end of the frame, and the near-dark-to-far-bright aerial perspective clicks into place (8:59-9:13). Finally a normal layer brushed at roughly 5% opacity adds a last breath of hazy glow, the midtones get a slight lift, and the photo is done (9:16-9:33).
1. At a crowded location, divide the labor clearly: the camera holds the classic view at 40-70mm, while the drone does the exploring — a Mavic 3 main body, a Mini 3 backup, and a quick-release side pocket for instant deployment. 2. Scout by elimination: flat light is mediocre, side light builds layers, then fly in to confirm the subject has a clear hierarchy and the foreground offers a leading line — that is how the find three kilometers out happened. 3. The editing backbone is blue-primary saturation +100 balanced by HSL taming the cool tones; the filter chain builds atmosphere, and many small graduated filters paint shadow and warm light into the frame layer by layer. 4. Limit the warm slope light with a luminosity mask and lift the distant blacks with Curves — once near-dark, far-bright aerial perspective appears, the photo gains true depth.