Photography Tutorial · 2024-03-17
Drone Night Photography: Camera Settings + Noise Reduction in Post
Can a drone really capture night shots that are sharp, low-noise, and properly exposed?
In today's tutorial, Thomas systematically shares his drone night-aerial experience across three areas: timing, camera settings, and post-processing.
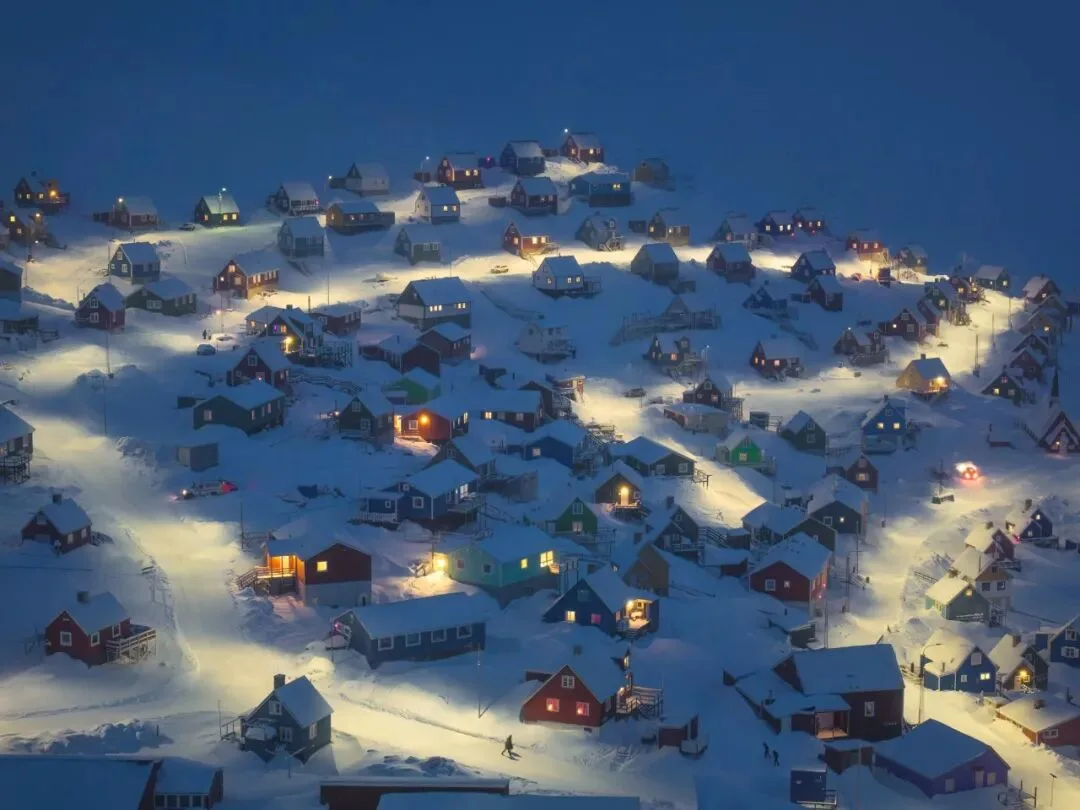
Video
▶ Watch the video tutorial on Bilibili
This is the fully illustrated companion to the video above: Thomas turned the 12-minute walkthrough into text and paired it with keyframe screenshots — blue-hour timing, live DJI Fly parameter screens, region-based Topaz Denoise AI, and the complete time-blend workflow in Photoshop. Skim it here for the framework, then dive into the video for the details.
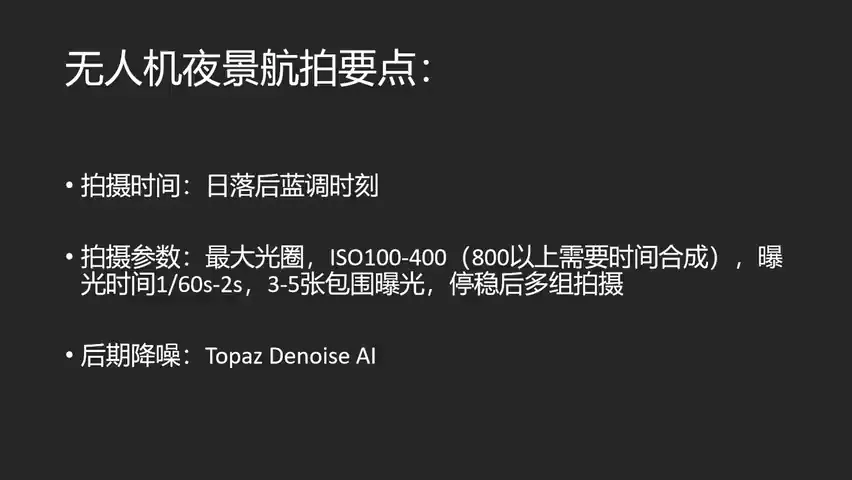
Start with the overview: this summary slide, captured at 6:25 in the video, lays out the three threads of the whole tutorial — timing, camera settings, and noise reduction in post. Each is unpacked below.
01 Timing: the Blue Hour After Sunset
For drone night photography, Thomas considers timing the single most important decision — and the blue hour is the only window he recommends. It is the period after the sun has set and the city lights are on, when a faint glow still remains in the sky and darkness has not fully fallen.
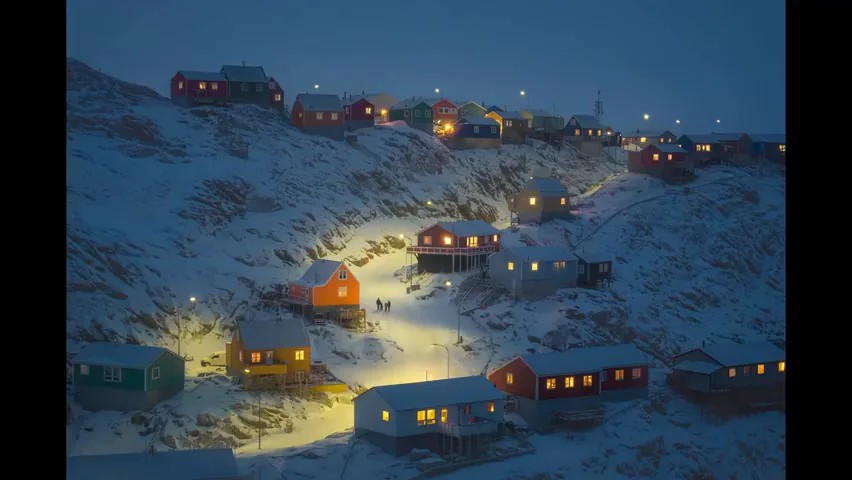
That faint skylight does two jobs: it lifts ground detail so snow, streets and houses never fall into pure black, and it narrows the contrast between areas lit by artificial light and those without — everything gets "padded" to a base brightness. The result is the clean, dreamlike look with moderate contrast.
There are actually two blue hours a day: after sunset and before sunrise. Thomas strongly prefers the evening one — around six or seven in the evening people are home cooking or still at work, so building lights are all on. At five or six in the morning many lights are still off, and the scene suffers for it.
02 Camera Settings: AEB Burst and In-Field Adaptations
The foundation is AEB burst: set the still mode to AEB — usually 5 frames — with the base exposure compensation pulled to -1, giving you a -3/-2/-1/0/+1 set. The darkest frame (-3) protects the brightest lights, the brightest frame (+1) protects the shadows, leaving plenty of headroom for blending later (demonstrated at 2:58 in the video). Shoot several sets once the drone is hovering steady.
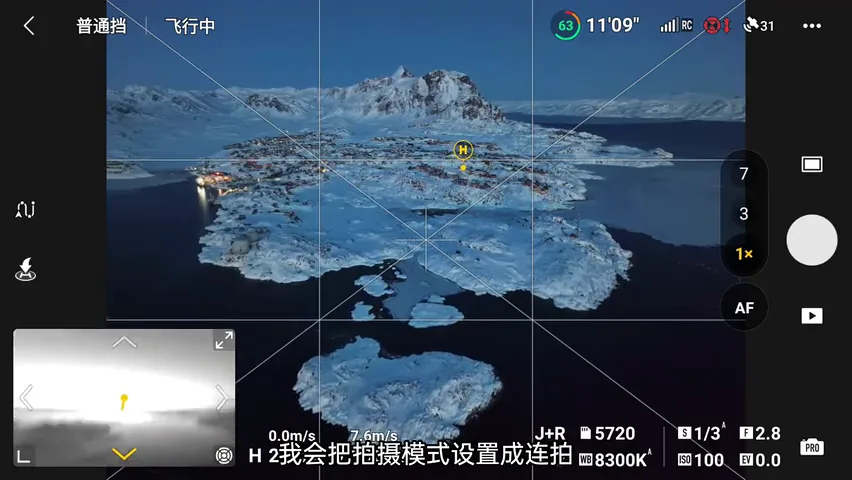
When the blue hour is still early and light is plentiful, drop back to single-shot mode: ISO 100, f/2.8, 1/3 s (at 4:04 in the video). Fire several frames within a second and one of them will land in a lull — sharp and clean.
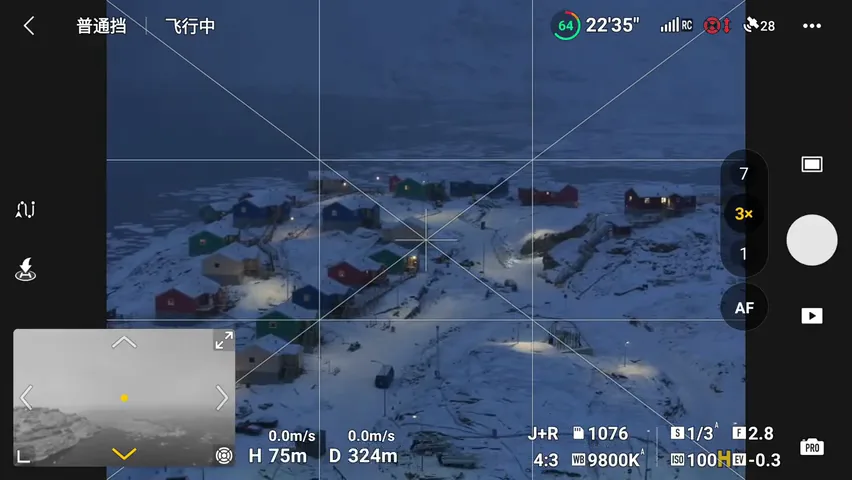
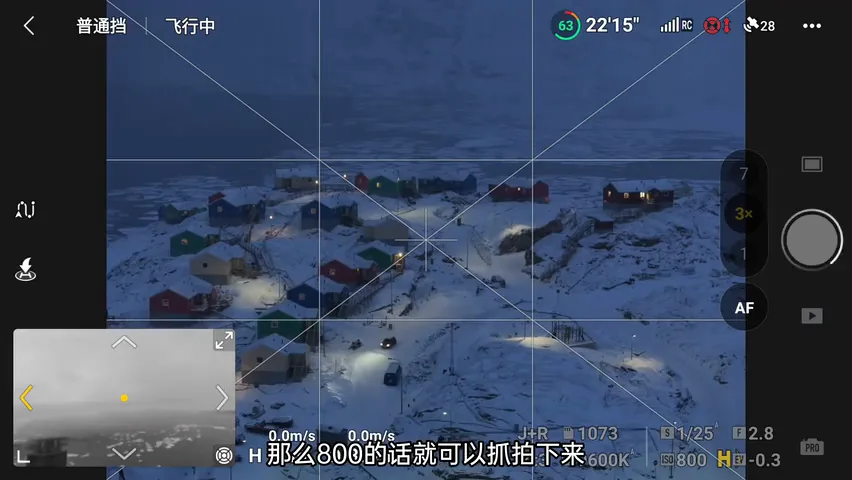
Adaptation one: when a car drives through, push ISO up to 800 quickly and freeze it at around 1/25 s; then drop back to ISO 100 and take several clean frames — this pair of materials feeds the "time blend" technique later (at 4:22 in the video).
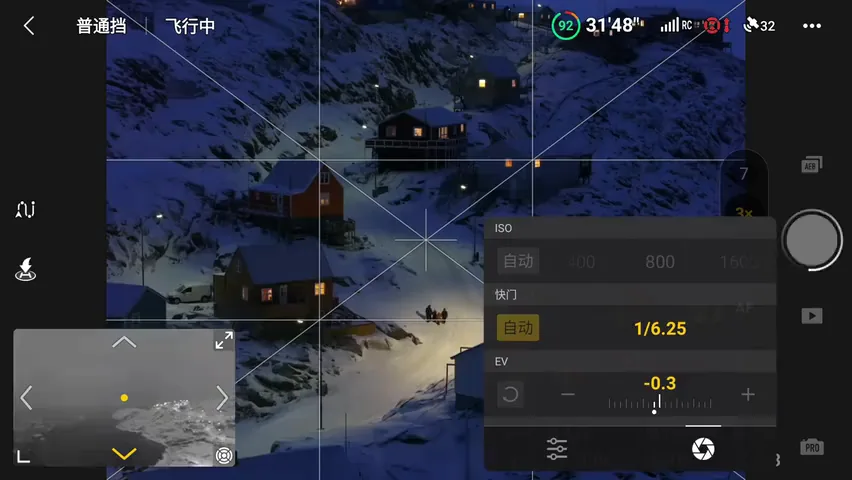
Adaptation two: when people walk into a good composition, pull back quickly and switch to 3X zoom (about 70mm equivalent), raise ISO to 800, and run AEB with a 1/6 s base — the +1 frame at 1/4 s is enough for people; for extra safety drop the base to -1 (1/10 s), which puts the -2 frame at 1/40 s, freezing walkers almost completely (at 5:40 in the video).
A fallback: light wind ruins single-shot success rates, so switch to a 7-frame burst at identical settings — there will always be a moment when the wind eases and you land one sharp, clean, high-quality frame.
03 Noise Reduction: Lightroom and Topaz, Each to Its Strength
Over 90% of Thomas's photos go through Lightroom's AI Denoise with great results; but on small-sensor drone night frames at ISO 400 the noise is so heavy that LR leaves mosaic artifacts across flat areas like the sky — time for a different tool (at 7:22 in the video).
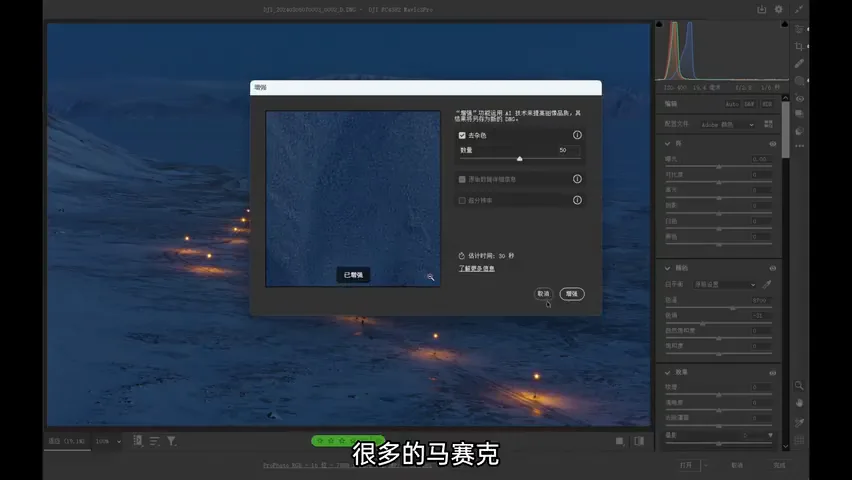
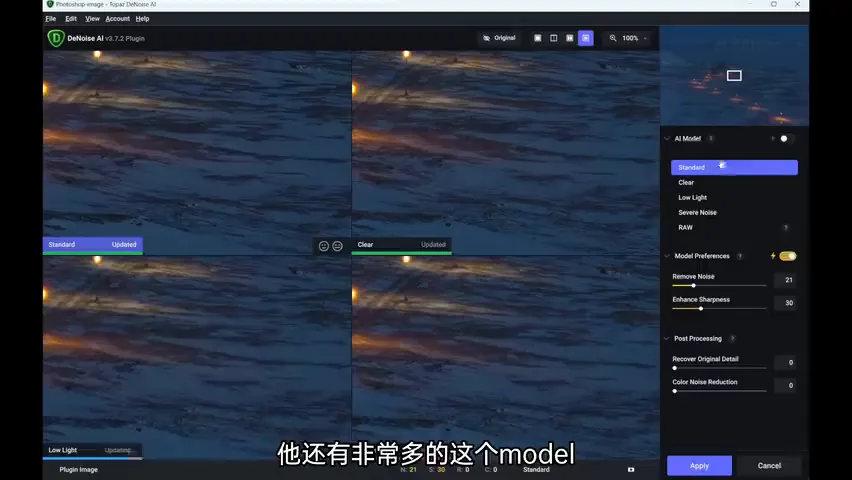
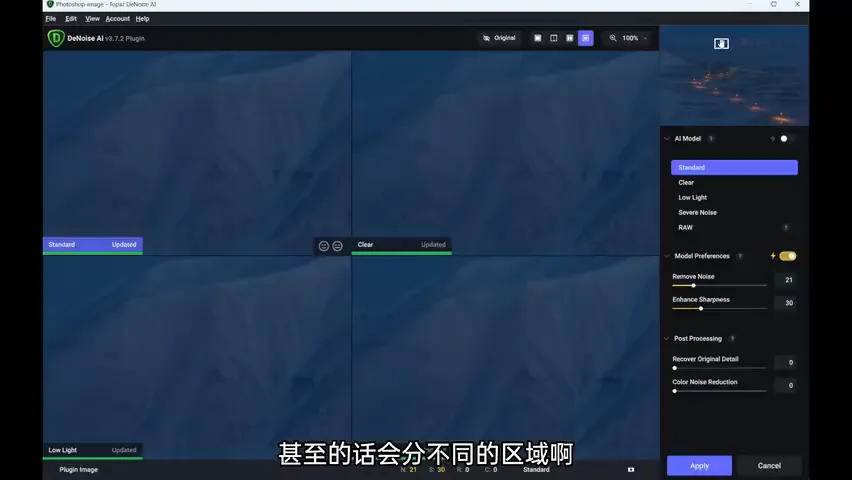
That's when he opens Photoshop and calls in the Topaz Denoise AI plugin. It offers several models: Standard cleans snow and sky remarkably well but costs real detail on textured objects, while Low Light preserves much more detail yet leaves snow slightly dirty. The right move is to use each where it wins — Low Light on distant mountains for detail, Standard on snowy ground for cleanliness — and combine them with masks (at 7:45 and 8:25 in the video).
04 The Time Blend: Clean Background Plus a Frozen Subject
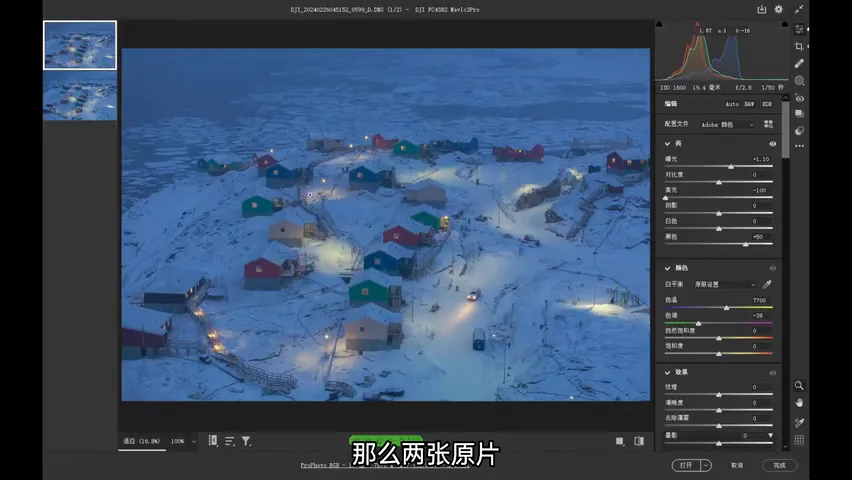
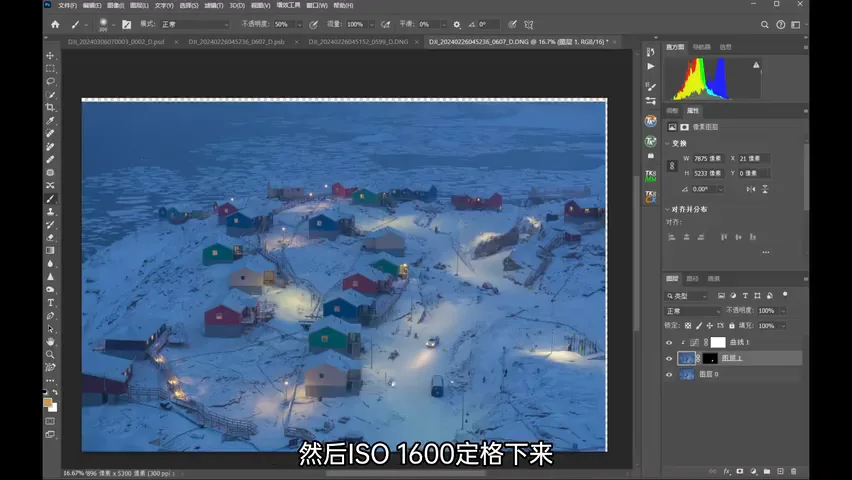
On a small drone sensor, "clean image quality" and "a frozen moving subject" rarely coexist in one night frame — the time blend solves it. In the example, one source frame at ISO 200, f/2.8, 0.2 s gives a clean, blur-free background; another at ISO 1600, f/2.8, 1/50 s freezes the moving car but is extremely noisy (at 9:18 in the video).
The Photoshop workflow: Shift-drag the car frame into the clean frame's document; run Edit → Auto-Align Layers to correct the drone's slight drift; denoise each layer with Topaz — Low Light on the clean base, Standard or Severe Noise on the ISO 1600 frame (it cuts deeper); add a mask to the top layer and invert it (Ctrl+I), then paint the car back in with a soft white brush at 100% opacity, fine-tune the blend at 5%, and even out brightness and color between the two with Curves (at 11:22 in the video).
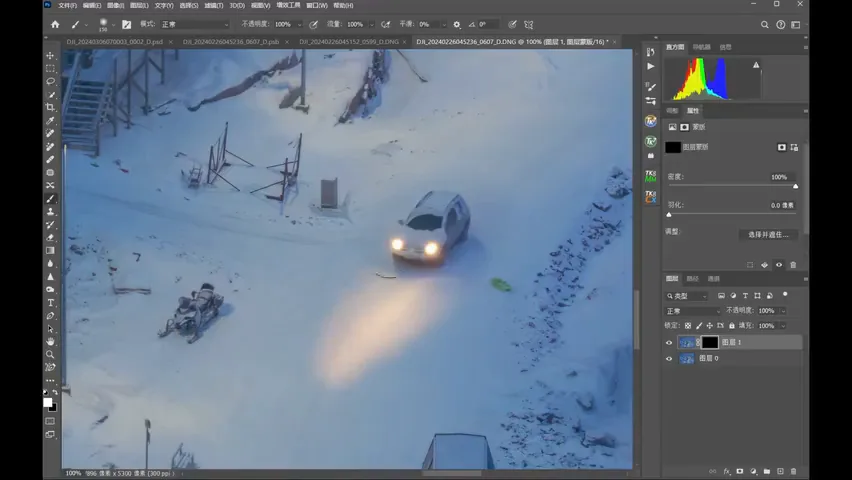
The final image holds both: a background shot at ISO 100-200, and the moving car frozen at ISO 1600 — two things a single frame could never deliver, captured in one pass with the time blend (at 12:03 in the video).
1. Shoot drone nights in the blue hour after sunset — the skylight lifts detail and tames contrast; 2. Shoot multiple steady sets — 3-5 AEB frames or identical bursts, adapting ISO and zoom for cars and people; 3. Hand heavy small-sensor noise to Topaz Denoise AI, combining Standard and Low Light region by region with masks; 4. When a clean background and a frozen subject can't coexist, run the time blend with a low-ISO and a high-ISO frame.