Photography Tutorial · 2021-03-28
Photos Lacking Depth? Try the Edge Separation Technique in Post
Thomas Chu Photo
Unclear edges between objects in a photo cost it detail and depth.
In today's post-processing tutorial, I'll explain the edge separation technique — using PS selections plus Dodge and Burn to quickly strengthen a photo's sense of depth.
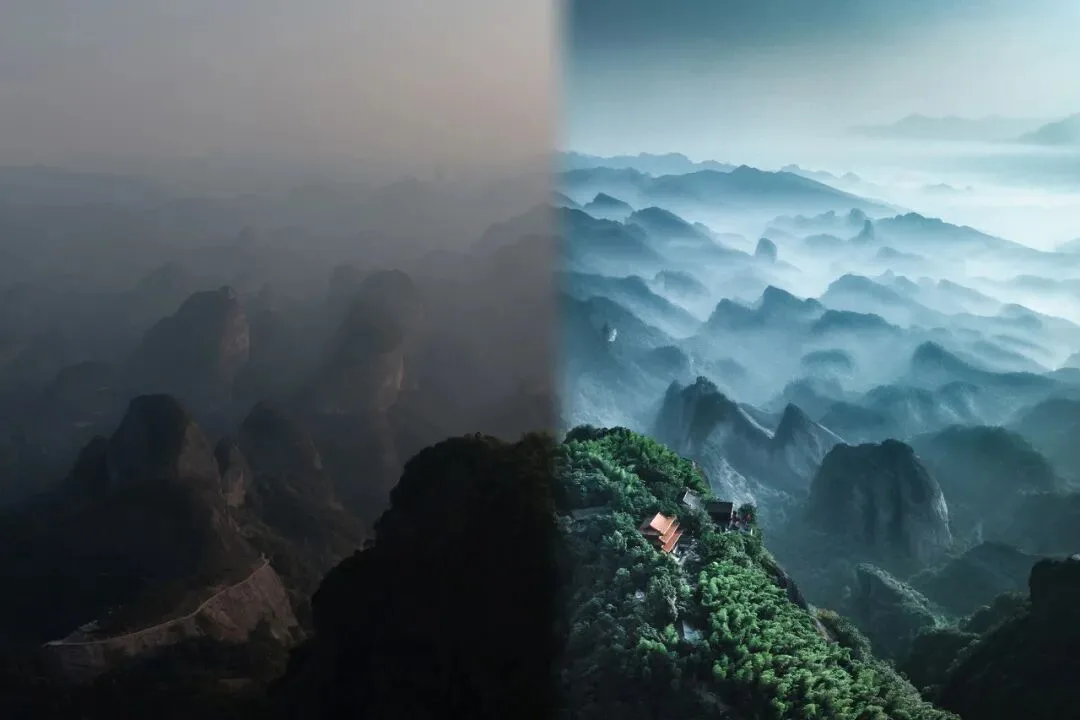
Video Tutorial
▶ Watch the video tutorial on Bilibili
This is the fully illustrated companion to the video above. In this tutorial, Thomas breaks down the single most important source of depth in his sea-of-clouds mountain photo — the edge separation technique: using nothing but Photoshop selections plus the Burn and Dodge tools to re-establish crisp, well-defined edges between mountains. Read it here for the workflow and settings, then dive into the video for the details.
Start with the result: this frame is captured at 0:47 in the video, with the edge-separation layer highlighted in the Layers panel. Toggle before and after, and the merged edges pull apart — the layers of the scene instantly read as distinct. The whole tutorial unpacks this one move, step by step, below.
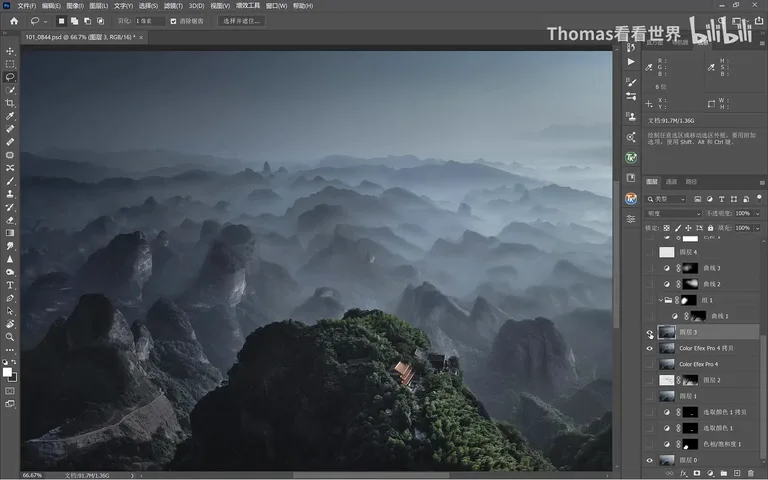
01 What Makes Depth: Layers Plus Crisp Edges
Depth, in plain terms, means splitting the frame into many layers: foreground and background each shift in brightness and color so the eye can instantly tell which layer sits in front. But separation alone is not enough — there is one more requirement: the edges must be crisp. Only when the contour lines between objects are well defined do the layers truly stand apart (at 0:56 in the video).
The trouble is that many edges in landscape photos are naturally soft. Take the boundary between the ridge and the mist shown at 1:11 in the video — the camera did record it, but it is extremely mushy. Global contrast boosts and even local-contrast plugins struggle with edges like this, and that is exactly where edge separation comes in.
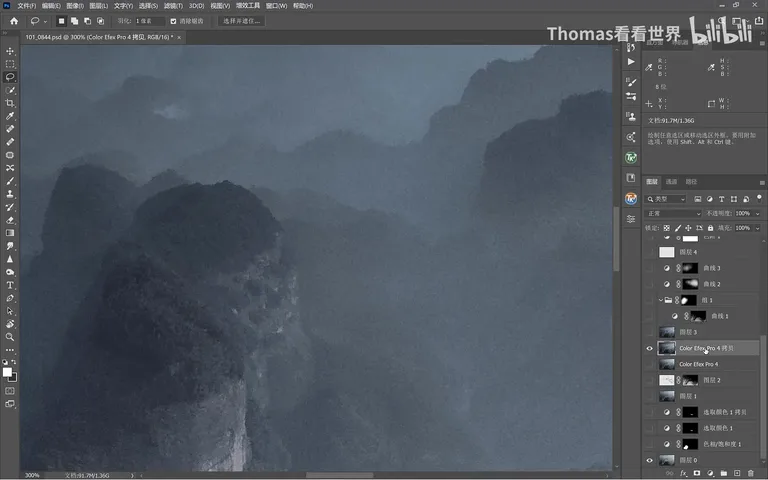
02 Setup: Stamped Layer and a Feathered Selection
The whole technique needs only two tools: selections, and Dodge & Burn. Step one — press Ctrl+Alt+Shift+E to stamp everything below into a single merged layer (at 1:37 in the video). All edge separation happens on this stamped layer, leaving the original layers untouched.
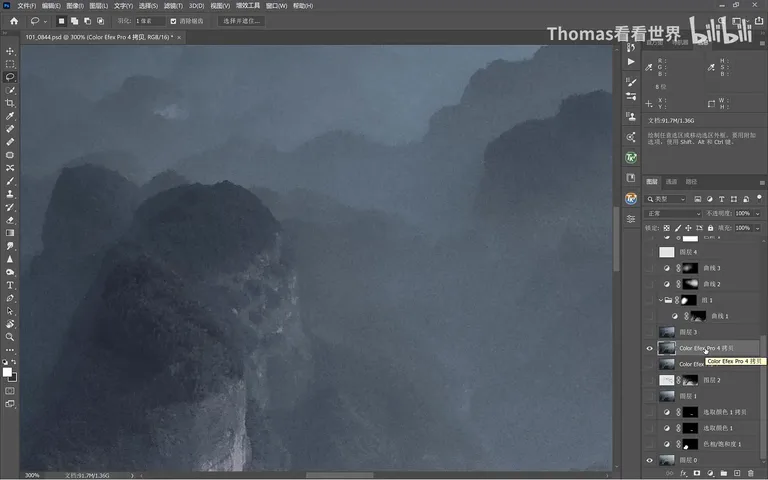
One key tip for the selection tools: set the feather to 1-2 pixels (at 1:53 in the video). Without feathering the selection edge is razor-hard — the moment you finish burning and deselect, a stiff artificial border shows up. With feather set, trace the mountain you want to enhance with the Lasso along the ridge (at 2:21 in the video); hold Shift to add to the selection and Alt to subtract from it (at 2:34 in the video).
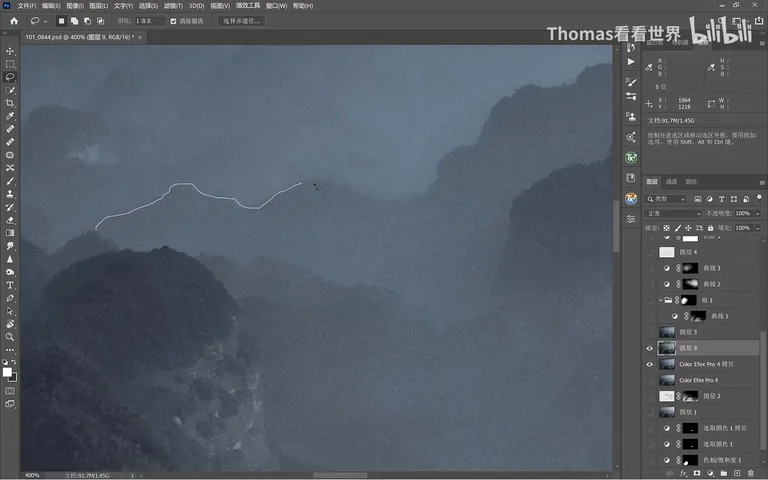
03 Dodge and Burn: Darken the Dark, Brighten the Bright
The principle is simple: the lower side of a mountain is darker, the upper side brighter — so push the dark side darker with the Burn tool and lift the bright side with Dodge, and the edge gets pried open. Set the Burn tool's range to Midtones, keep the exposure low — under 10% — and paint slowly along the selection (at 3:01 in the video).
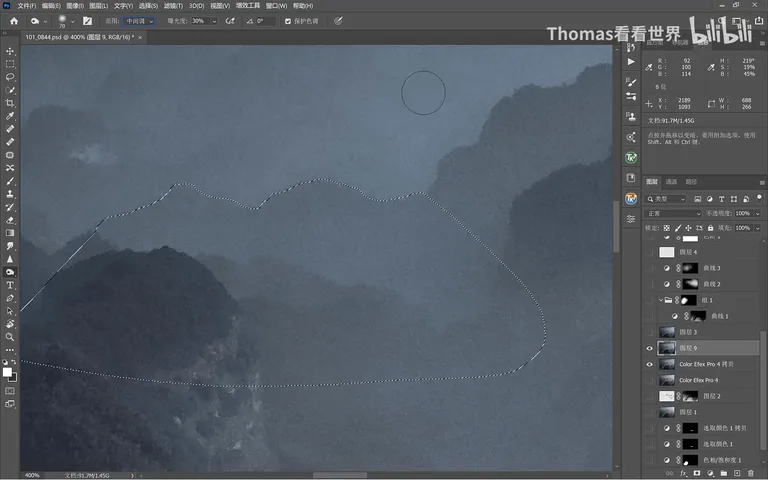
After burning the lower side, keep the selection: right-click and choose Select Inverse, then lift the upper half with the Dodge tool — and one full edge separation is done (at 3:38 in the video). The demonstration applies a deliberately heavy hand; in practice, lower the layer opacity until the effect sits at a believable level (at 4:02 in the video).
One more detail: to keep colors unchanged, switch this layer's blend mode to Luminosity (at 4:08 in the video). Burning and dodging then act on brightness only, and the color of the layers below stays exactly as it was — edge separation is about structure, and it should never drag the palette along.
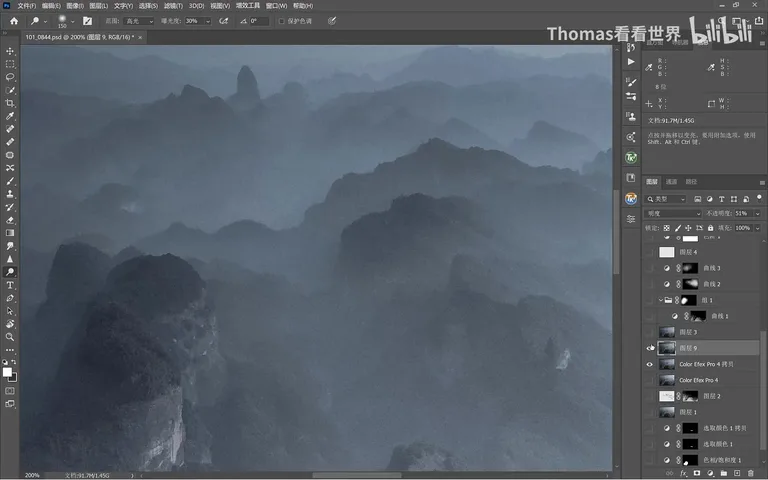
04 Obvious Edges: Quick Selection Is Faster
Not every edge needs a hand-drawn Lasso path. For a boundary this well defined — like the ridgeline in the video — the Quick Selection tool brushes along it and grabs it in a few strokes (at 4:32 in the video); then right-click and Feather, again by just 1 pixel (at 4:38 in the video).
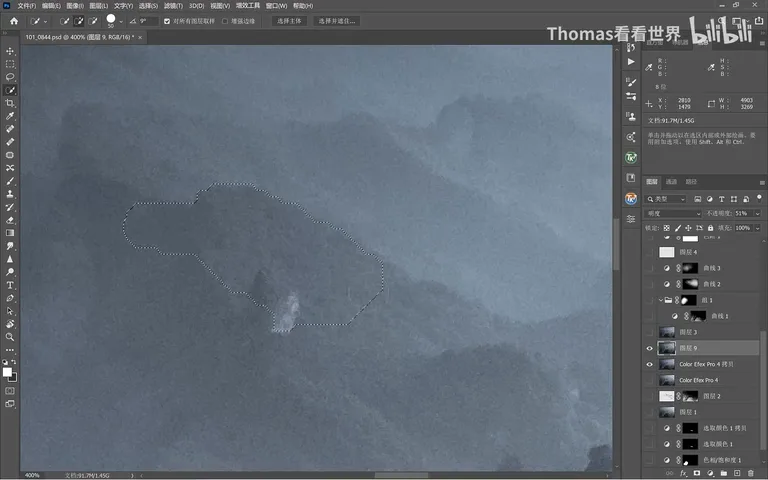
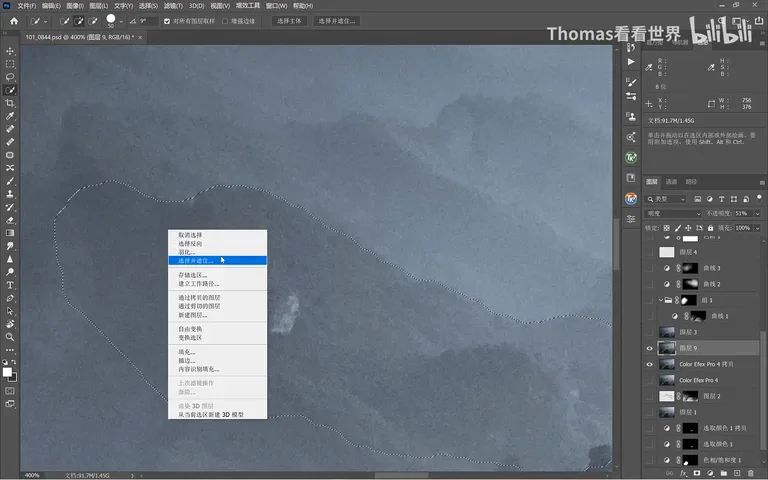
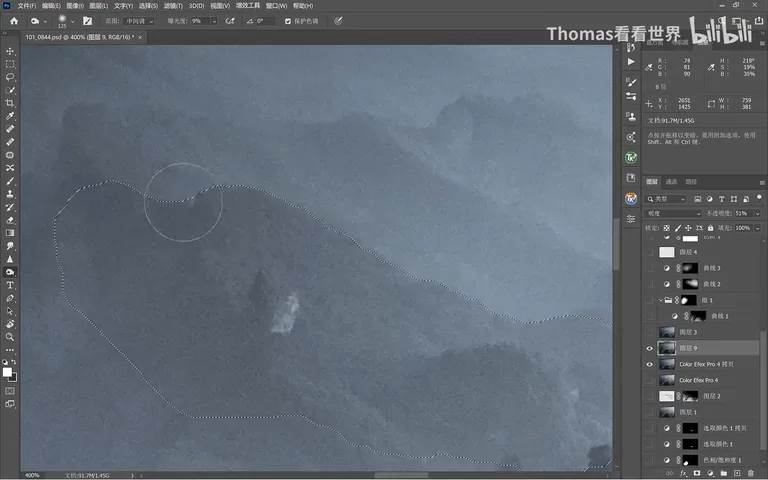
The routine is the same: Burn the lower side first — Midtones range, this time with an even lighter touch than the previous peak for a more natural result; then invert the selection and Dodge the outer side — Midtones again, exposure around 6%, keeping the lift gentle (at 5:11 in the video). Press Ctrl+D to deselect, and the edge reads noticeably more separated.
05 One Mountain, Two Brightness Relations
Edge separation is not an assembly line. The main peak in the video is a textbook case: its upper-left face is darker than the background, while its lower-right face is brighter (at 5:45 in the video). The brightness relations along one edge run in opposite directions — apply one treatment and you strengthen half the edge while canceling the other, so select and process it in segments.
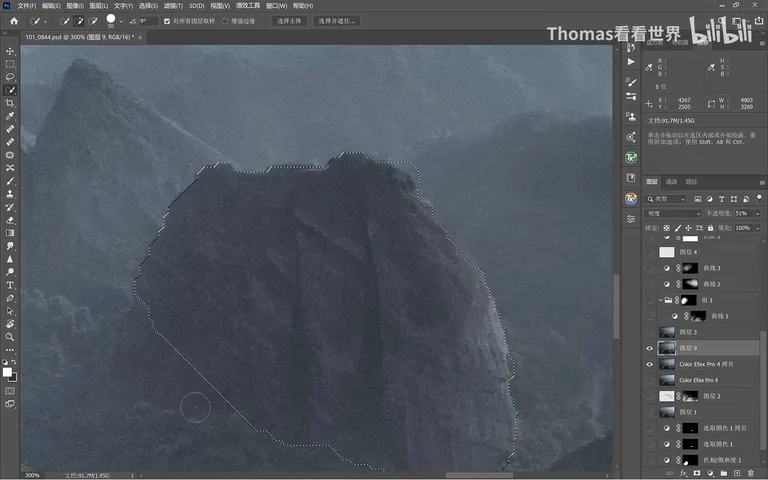
The thinking, segment by segment: where the mountain is darker than the background, use the Burn tool to sink the side facing the background a little further, widening the brightness gap (at 6:07 in the video); where it is brighter, use Dodge to strengthen its highlight zone (at 6:15 in the video). After each pass, zoom out and judge the whole — has the mountain separated from the background any better?
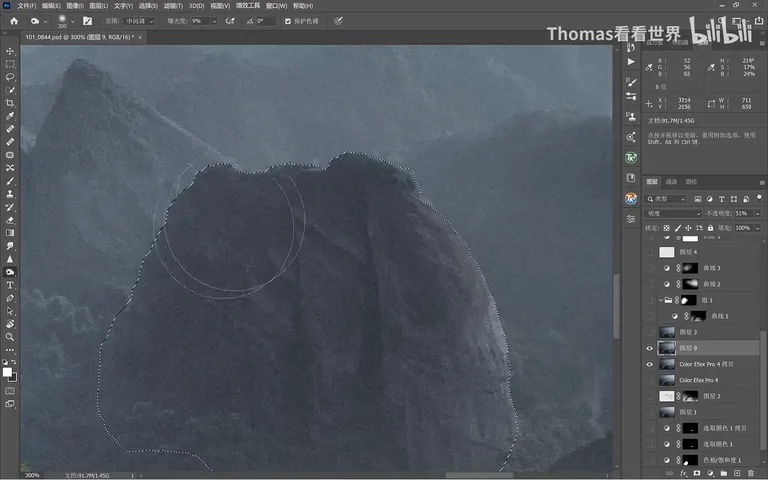
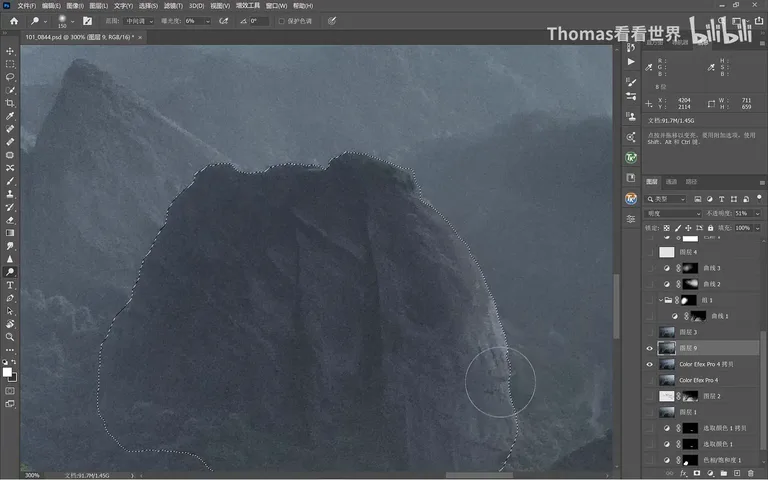
The on-video strokes run deliberately heavy, and Thomas flags it himself: in real work you must keep the amplitude reasonable (at 6:31 in the video). Edge separation is fine surgery — push it a notch too far and it reads fake; the ideal is an edge that separates beautifully yet shows no trace of editing.
06 Repeat Across the Frame, Then Finish
The depth of the final image is bought by running this dodge-here-burn-there pass along every important edge in the frame (at 6:39 in the video). It does take time — that is precisely the distance between "decent depth" and "powerful depth."
Edge separation resolves the fine structure of depth; the finish is business as usual — curves, a Camera Raw polish, and noise reduction (at 6:56 in the video), and both the layering and the texture of the frame lock into place. It is the keystone step in the post-processing of this photo.
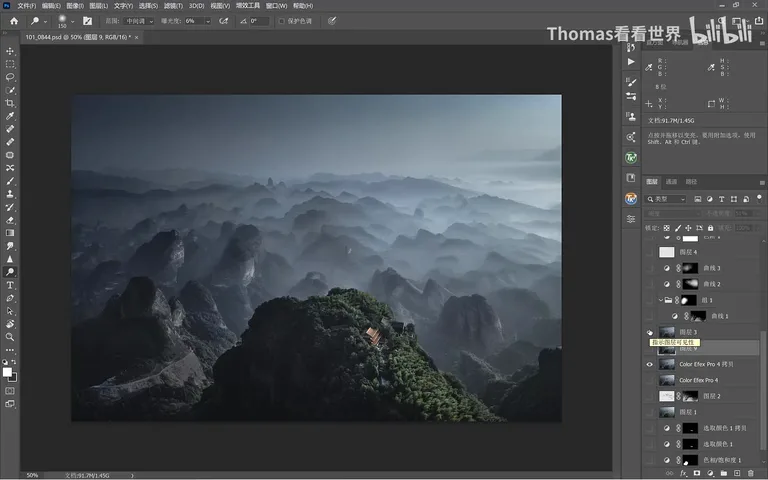
1. Depth = separated layers plus crisp edges: soft, mushy edges won't respond to global contrast or plugins — use edge separation; 2. Stamp the layers with Ctrl+Alt+Shift+E, feather selections 1-2 px, Shift to add and Alt to subtract; 3. Burn the dark side, dodge the bright side — Midtones range, exposure under 10%, Luminosity blend mode to protect color; 4. Trace obvious boundaries with the Quick Selection tool, and process segments of the same mountain separately when their brightness relation to the background flips.