Photography Tutorial · 2017-04-20
This Trick Perfectly Eliminates Lens Flare
Hi everyone, I'm AdventureX photographer Miller Yao (Yao Minglai)
Today I'm bringing you a practical little trick.
I'm sure many of you have shot backlit photos. Backlight adds glow and atmosphere, but if you include the sun itself in the frame, one thing is bound to happen — lens flare. Flare shows up as ghosting or streaks. It can occasionally be used creatively, but for landscape photography it lowers contrast, distracts the eye, and seriously hurts the final image.
I've shot many photos that include the sun, and the trick below is my killer move for eliminating flare!

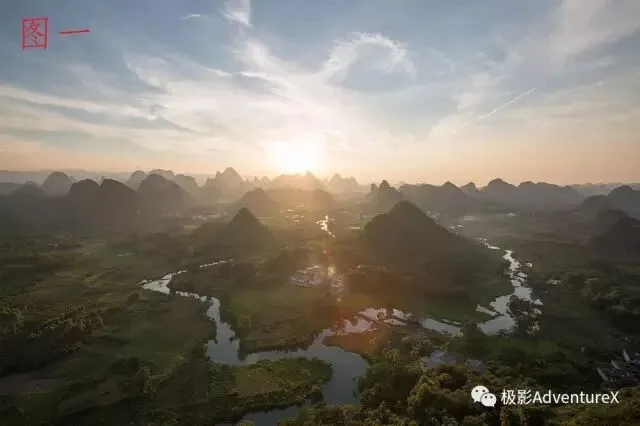
Image one is a straight-out-of-camera sunset shot from Guangxi last year. Because the sun shone directly into the lens, an ugly large orange-red flare appeared in the lower half. Flare like this is very hard to remove in Photoshop, and it badly degrades image quality in that area.
So what do we do?
The method is simple: after capturing your into-the-sun shot, take a second frame with your hand blocking just the sun. With the light source covered, the strong light can't hit the lens elements directly, so no flare is produced.
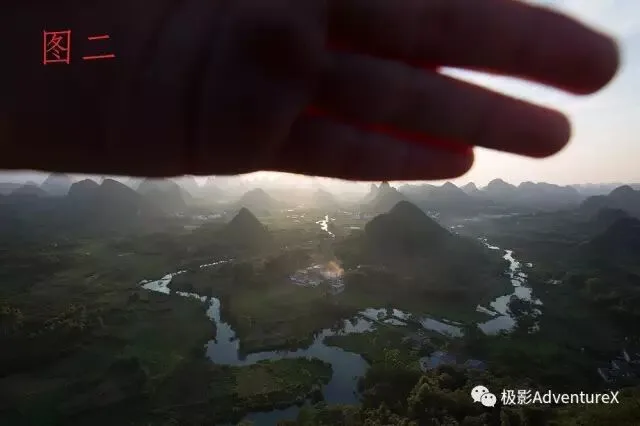
Two things to watch in this step:
1. Blocking with your hand greatly reduces brightness and may cause underexposure — adjust exposure compensation so the two frames match in brightness, making the later blend easier.
2. Watch your focus point: if it lands where your hand is, the camera may fail to focus.
Next, import both photos into Lightroom and adjust them to look as consistent as possible, so the blend goes smoothly.
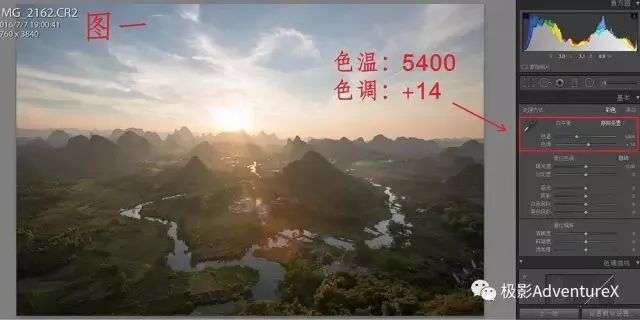
(We can see image one's white balance is 5400, tint +14.)
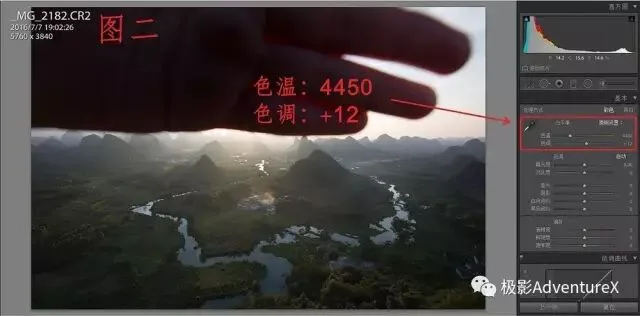
(Image two is 4450, tint +12.) That's because blocking the light source cools the image down.

Enter the same white balance and tint values from image one into image two.
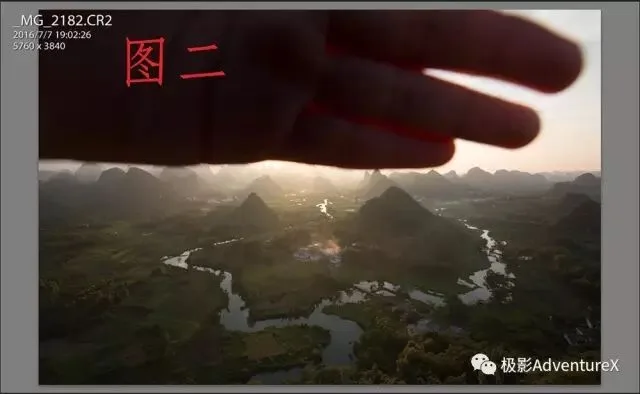
Now image two visibly warms up, and the two match in color temperature.
Next, bring both images into Photoshop for compositing:
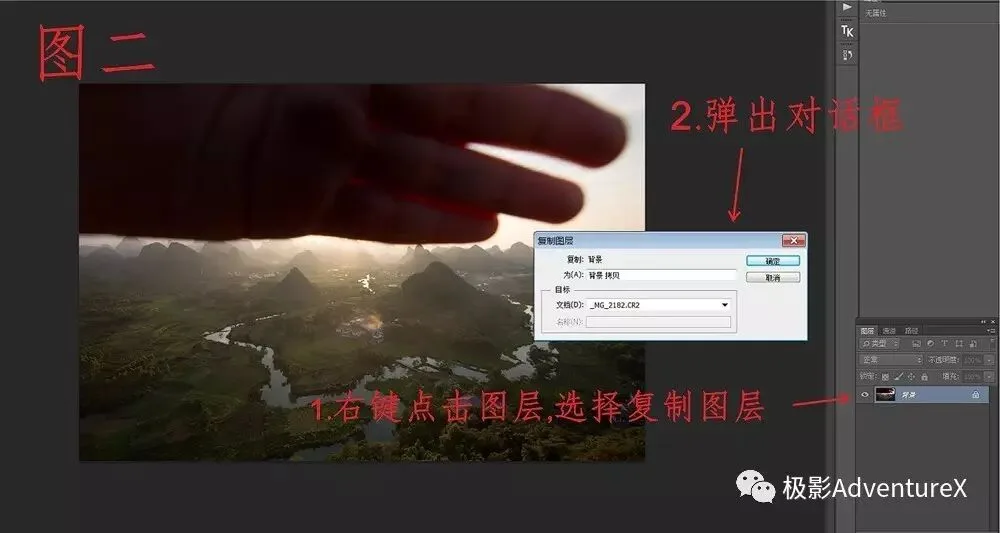
Select image two, right-click its layer in the Layers panel, and choose 'Duplicate Layer' — a dialog pops up.
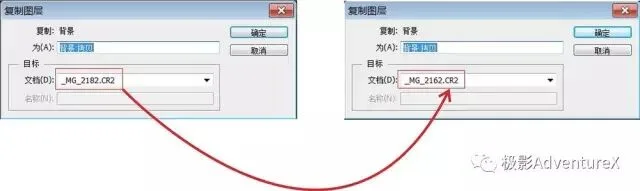
Click the small triangle next to 'Document' in the dialog, choose image one's filename, and hit OK. Image two is now pasted in place above image one's layer. (If the camera shifted between frames, auto-align the layers after this step.)
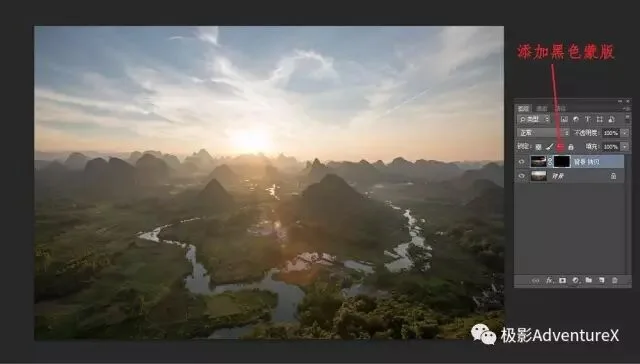
Then add a black mask to image two and paint with a white brush to reveal the flare-free areas.
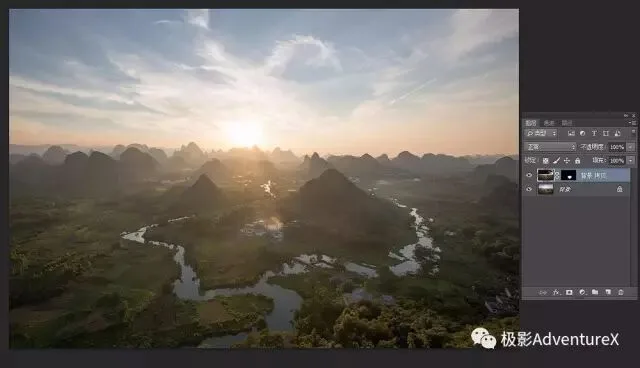
As you can see, the flare is gone. Simple and practical!
Here is the final image after further refinement:

Follow @Thomas Chu Photo and learn one photography skill every week.