Photography Tutorial · 2017-05-07
No More Fear of High Contrast: Exposure Bracketing & Blending Explained
In backlit and other high-contrast situations, the brightest and darkest parts of a scene differ so much that the camera can't record both — you get either blown highlights or crushed shadows.
Exposure bracketing on location, and exposure blending in post, perfectly solve the high-dynamic-range problem.
1
On-Location Exposure Bracketing
Exposure bracketing means shooting multiple frames at evenly spaced exposure values — e.g. one stop under, normal, one stop over. It was originally used in tricky lighting where the camera's metering might fail: shoot several exposures and keep the correct one.
Today, with post-processing advancing rapidly, bracketing mainly serves to overcome the camera's dynamic-range limit. (If terms like dynamic range and contrast ratio are unfamiliar, read my earlier article 'How to Expose Correctly in the Digital Age'.)
For example, if the scene spans 20 stops but your camera covers only 12, no exposure setting can avoid clipping somewhere in a single frame. Bracketing solves exactly this problem.
Set the camera to AEB (auto exposure bracketing) with 5 frames at 2 EV steps. Five consecutive frames then record the full scene brightness in windows of 0-12, 2-14, 4-16, 6-18 and 8-20 stops.
In post, blend the five frames with HDR or luminosity masks, and you get one super-high-contrast image. Like the example below.
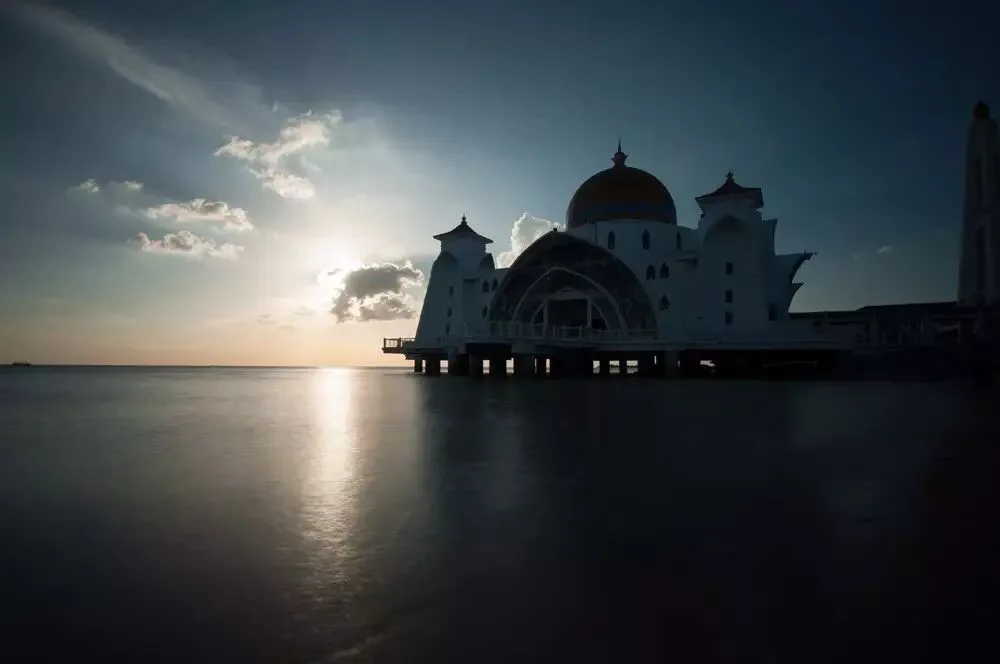
Bracket frame 1: ISO 200, f/16, 3 seconds — overall underexposed but preserving highlight detail
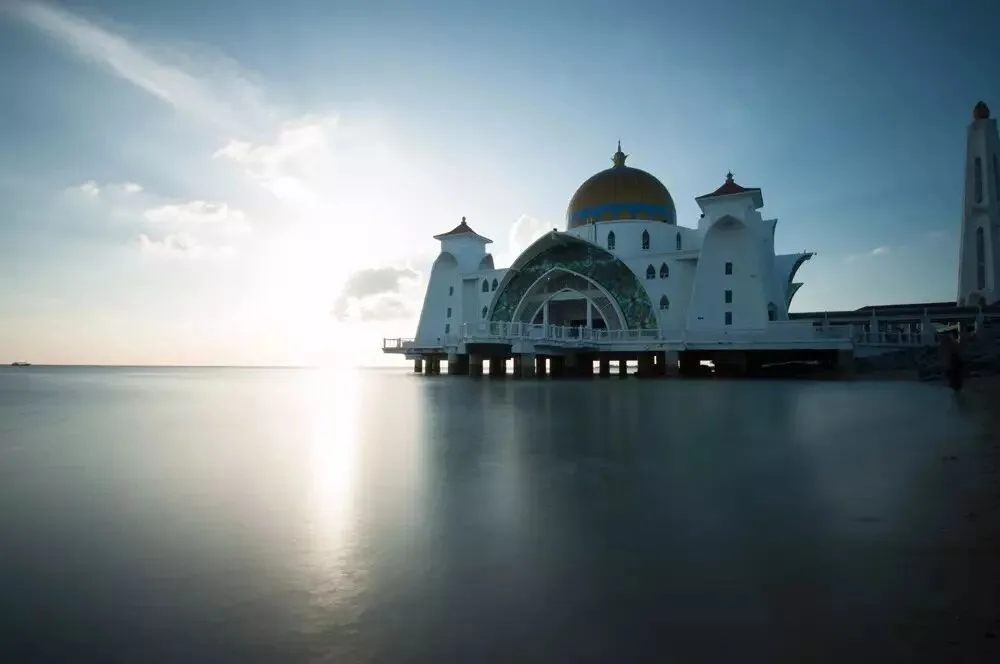
Bracket frame 2: ISO 200, f/16, 13 seconds (+2 EV) — overall overexposed but recording shadow detail
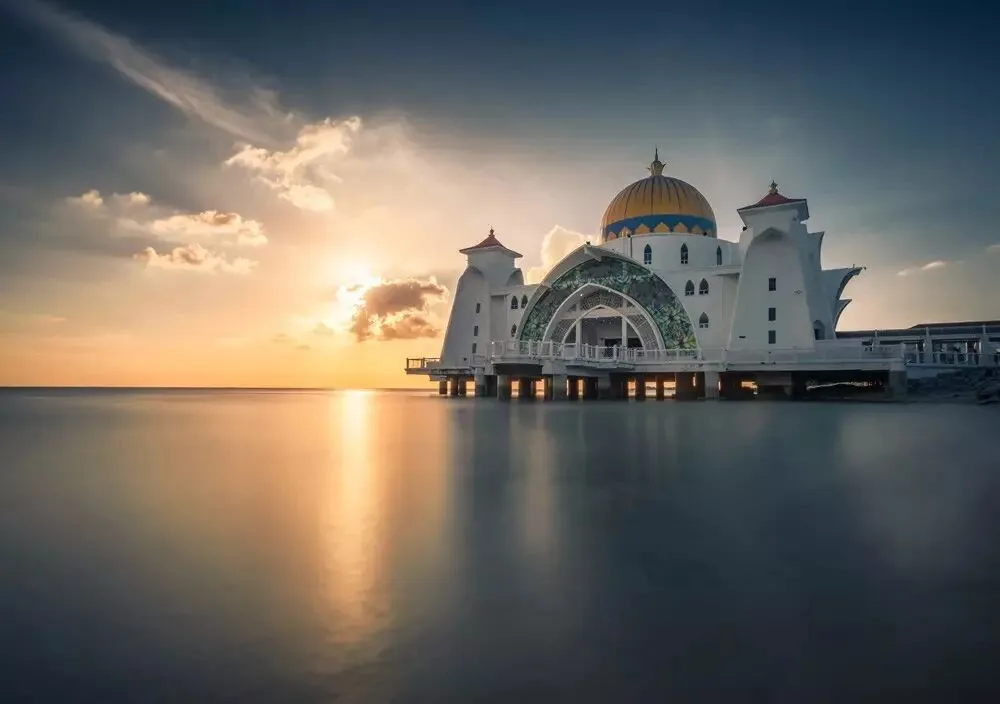
The result after blending and processing in Adobe Camera Raw (ACR):
When bracketing on location, you can adjust exposure compensation manually for each frame, or use the camera's built-in AEB mode.
In AEB mode you set the number of frames, the EV step, and the direction; when you press the shutter, the camera changes the exposure settings automatically. (With single-shot drive, you must press the shutter multiple times. In high- or low-speed continuous drive, holding the shutter down fires the whole bracketed sequence.)
How to configure AEB varies by camera model: some require the shooting menu, others have a dedicated BKT (bracketing) button.
The BKT button works with the main and sub command dials to set the frame count and EV step. Consult your camera manual's AEB/BKT/bracketing chapter for specifics.
Bracketing generally offers three parameters.
The first is the EV step — the exposure difference between frames, commonly 0.3, 0.7, 1, 2 or 3. Choosing 1 means each frame differs by one stop (1 EV); in aperture-priority mode, that means the shutter speed doubles between frames.
My most-used setting is 2 EV. Differences under 1 EV are unnecessary — ACR can recover that with one exposure slider — and too small a step means more frames to shoot, which complicates post and, with any camera shake (or moving objects like clouds), reduces sharpness and creates ghosting after blending.
Steps of 3-4 EV are too wide, risking detail loss and extra noise after blending. Two stops (2 EV) is just right.
The second parameter is the frame count — commonly 2, 3, 5 or 7. My strategy is test first, then adjust: make sure that in the darkest frame, the histogram's right edge isn't clipped (meaning the scene's brightest area is recorded).
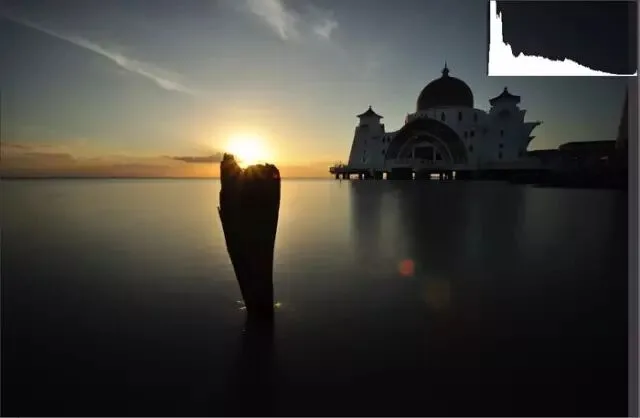
And in the brightest frame, the histogram's left edge isn't clipped (meaning the scene's darkest area is recorded).
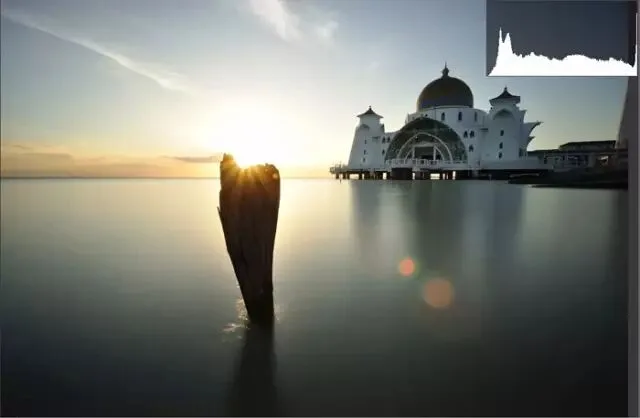
For instance, I start with 2 EV × 3 frames, then check the histograms of the darkest and brightest frames. If either edge is clipped, I increase the count to 5 or 7.
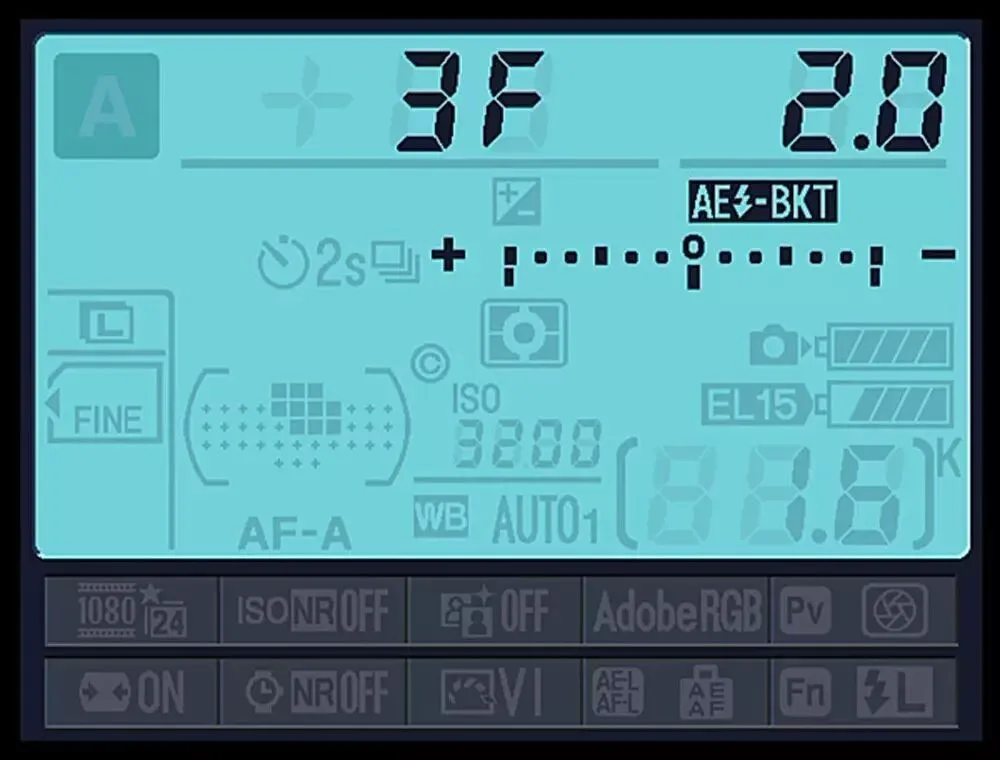
The third parameter is direction. With the same 2 EV × 3 frames: bidirectional (−+) captures −2 EV, 0, +2 EV; positive-only captures 0, +2 EV, +4 EV; negative-only captures 0, −2 EV, −4 EV.
In the screenshot of the camera's top LCD below, '3F' means 3 frames and '2.0' means a 2 EV step. The direction indicator spans + to −, meaning bidirectional bracketing: the camera shoots +2 EV over, 0 EV normal and −2 EV under — three frames.
2
Exposure Blending in Post
On location we recorded the scene's full brightness range across multiple frames. In post, exposure-blending techniques merge them into one image.
Blending divides into manual and automatic methods. Manual methods — brushes, mask groups, luminosity masks — will be covered in future tutorials. Automatic methods are represented by the auto-HDR features in ACR, Photoshop, Photomatix, Nik HDR and similar software.
Here Thomas introduces HDR merging in ACR (and the similar Lightroom). It's very simple, and it outputs a DNG digital negative (like a raw file) packed with information — offering endless room for further adjustment.
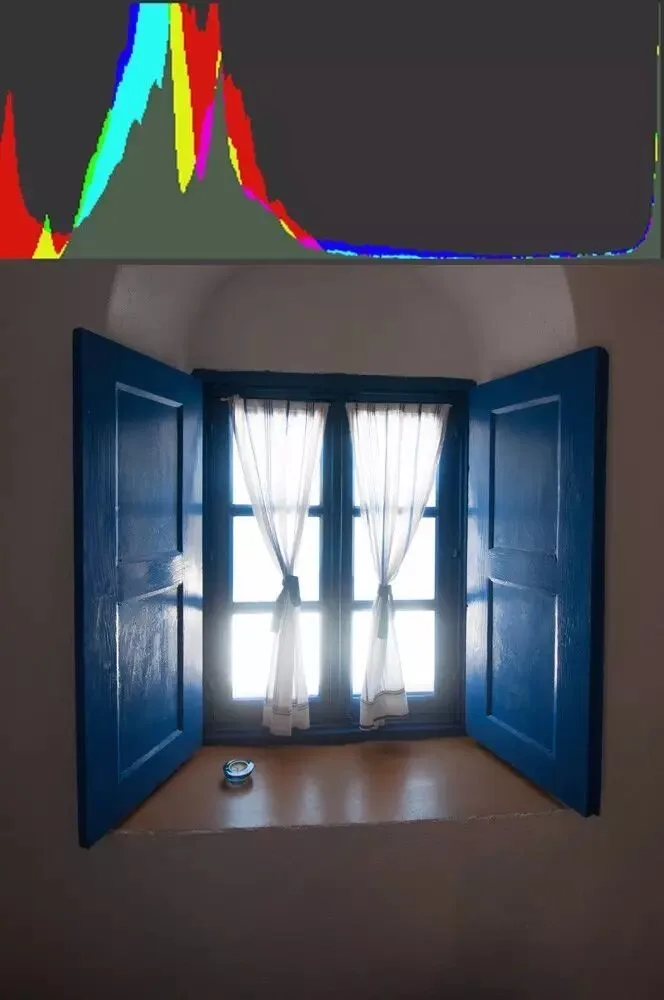
In the example below, I'll merge three bracketed frames spaced 2 EV apart using ACR's HDR.
Bracket frame 1, 0 EV: the window view is completely blown, but the interior shadow detail is captured
Bracket frame 2, −2 EV: captures detail in the brighter areas.
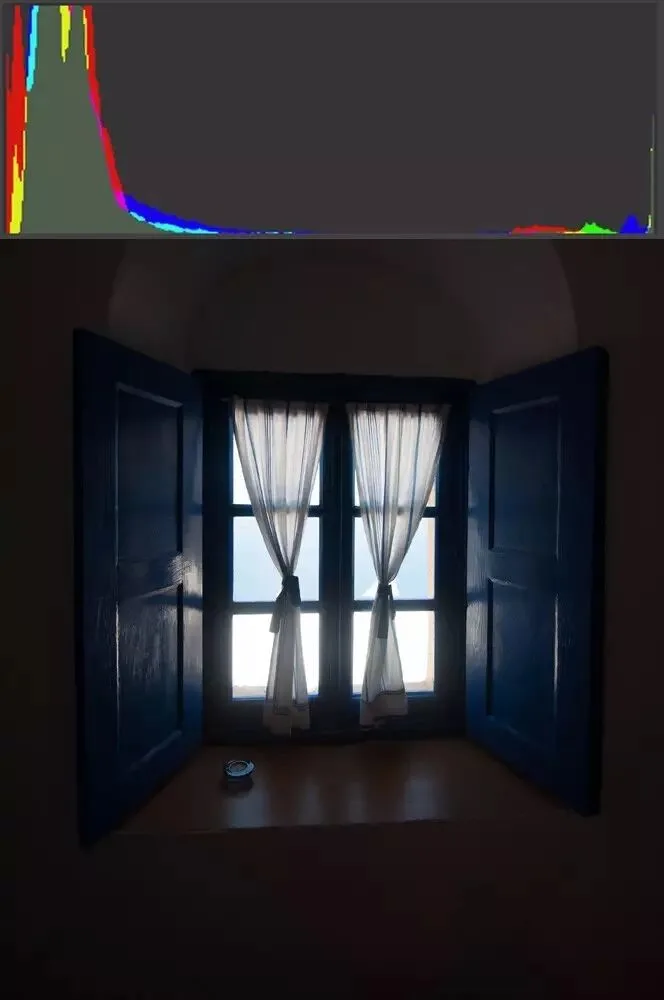
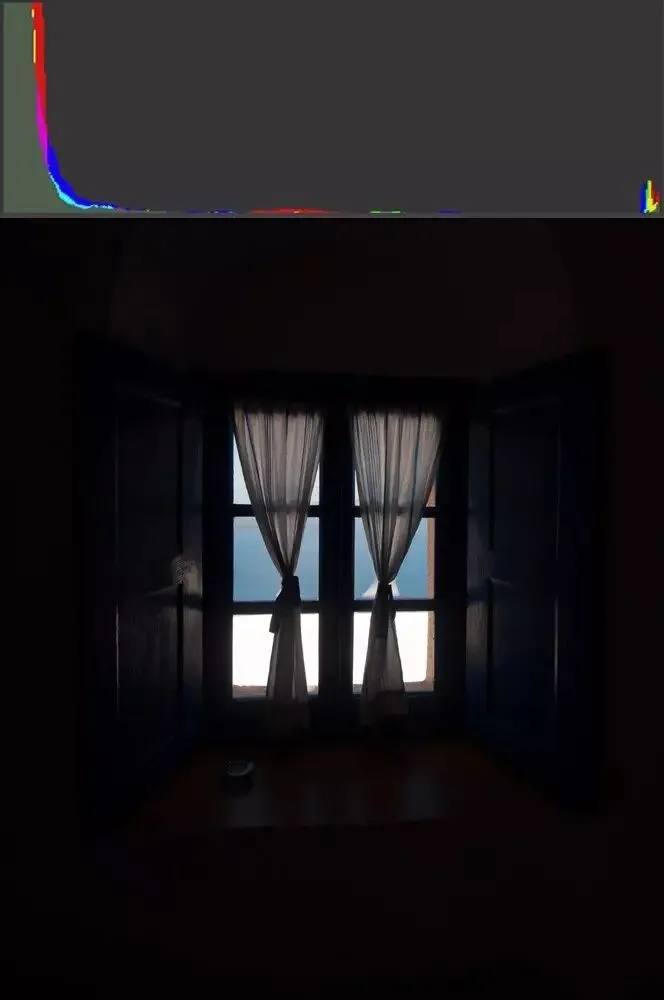
Bracket frame 3, −4 EV: records detail in the scene's brightest parts.
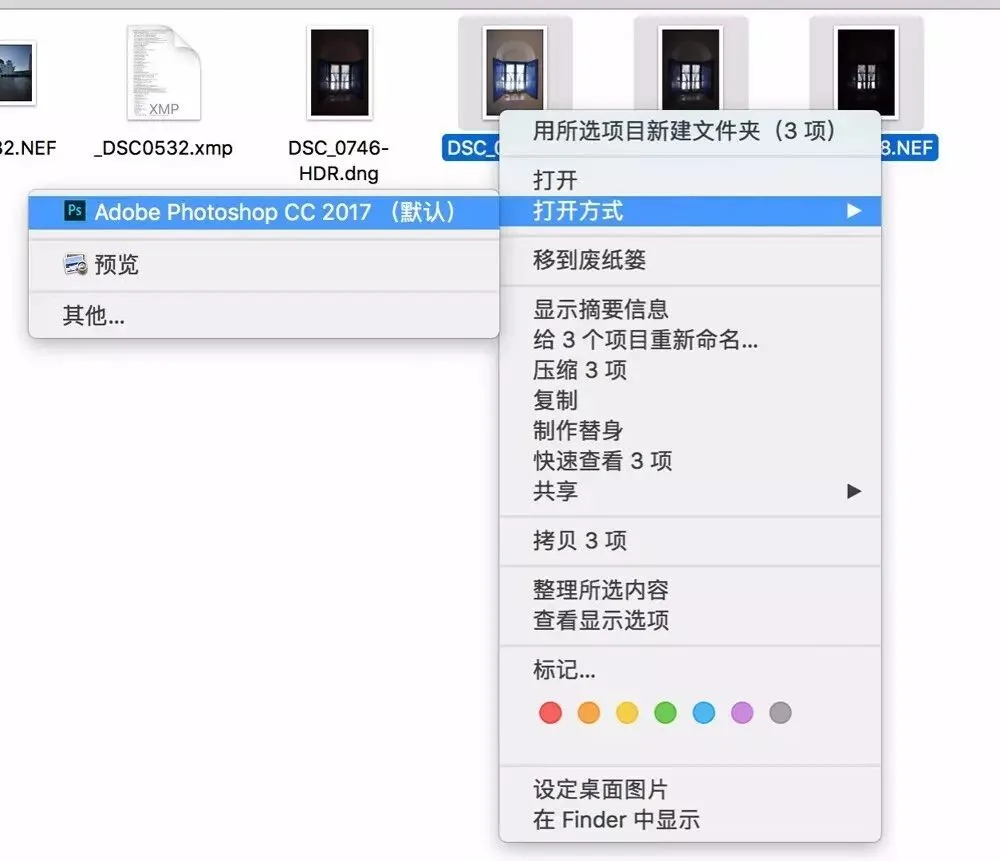
First, open all three photos together in ACR. From a folder, select the three, right-click, and choose 'Open with — Adobe Photoshop'.
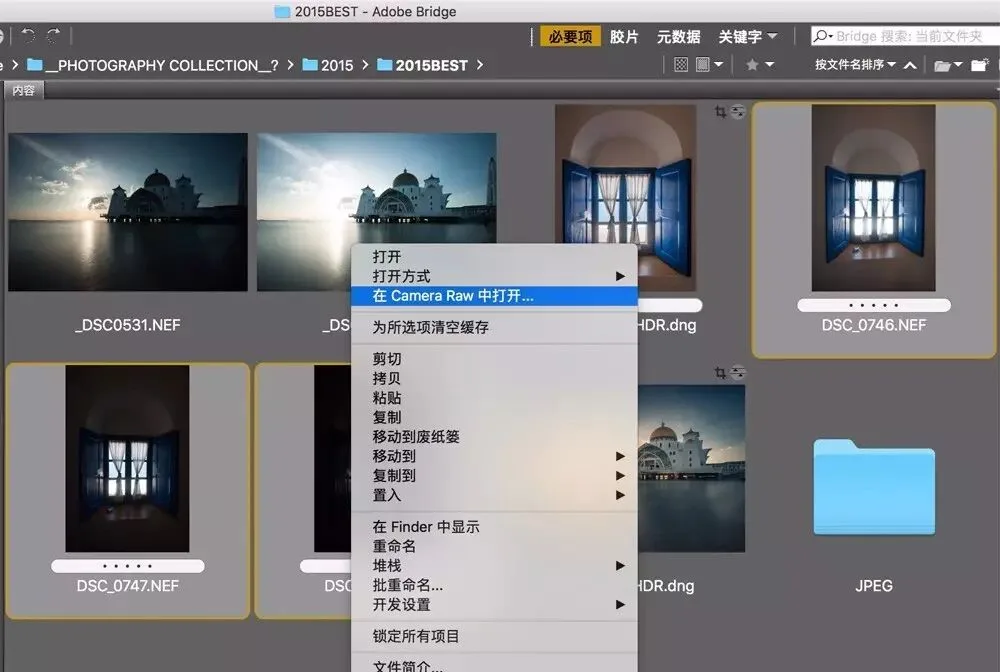
If you browse with Bridge, likewise select the three photos, right-click and choose 'Open in Camera Raw'.
Once open in ACR, you'll see three thumbnails on the left. Right-click any thumbnail and choose 'Select All'.
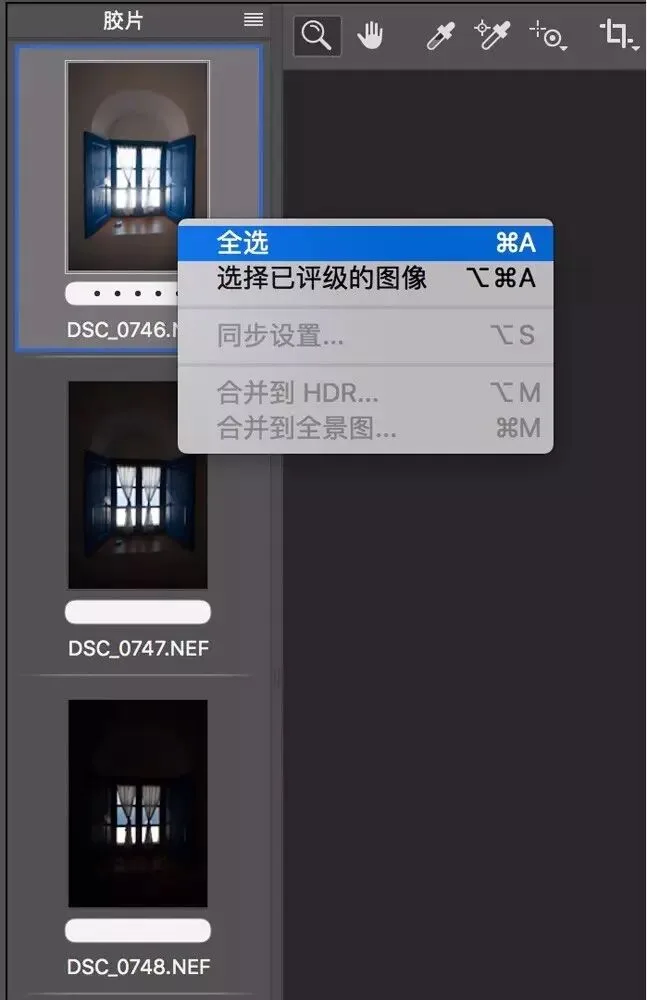
With all selected, right-click again — the menu now shows 'Merge to HDR'. Choose it.
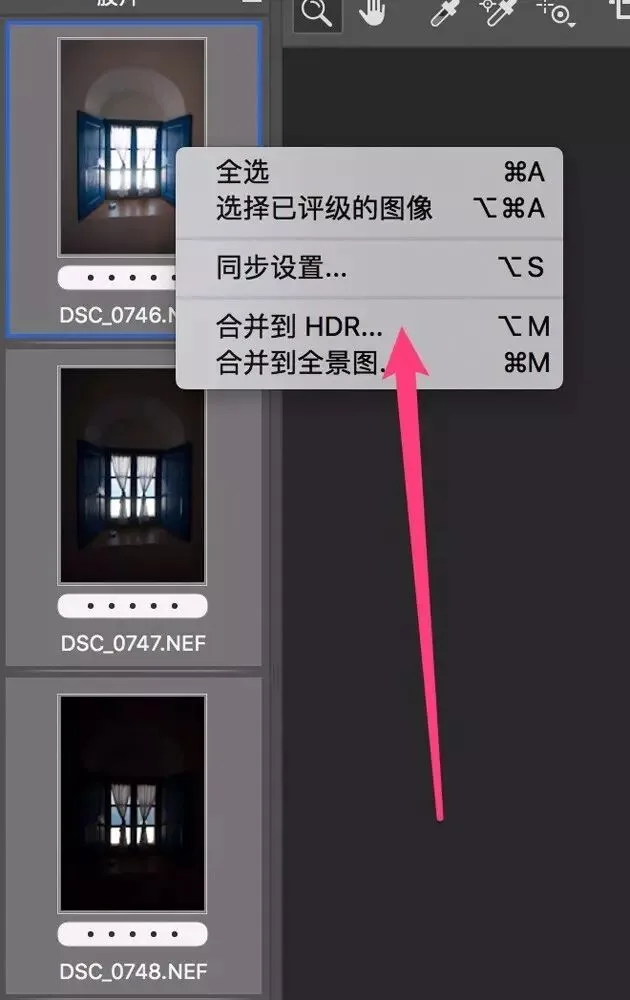
A moment later you enter the HDR merge panel, which has three main settings.
The first is 'Align Images' — usually keep it checked, because even on a tripod, pressing the shutter causes tiny shifts. Without alignment, the merged result loses a lot of sharpness.
The second is 'Auto Tone', also usually checked. With it on, ACR automatically sets the Exposure, Highlights, Shadows, Whites and Blacks sliders for a recommended level of detail and contrast. These adjustments are non-destructive and can be reset later in the Basic panel.
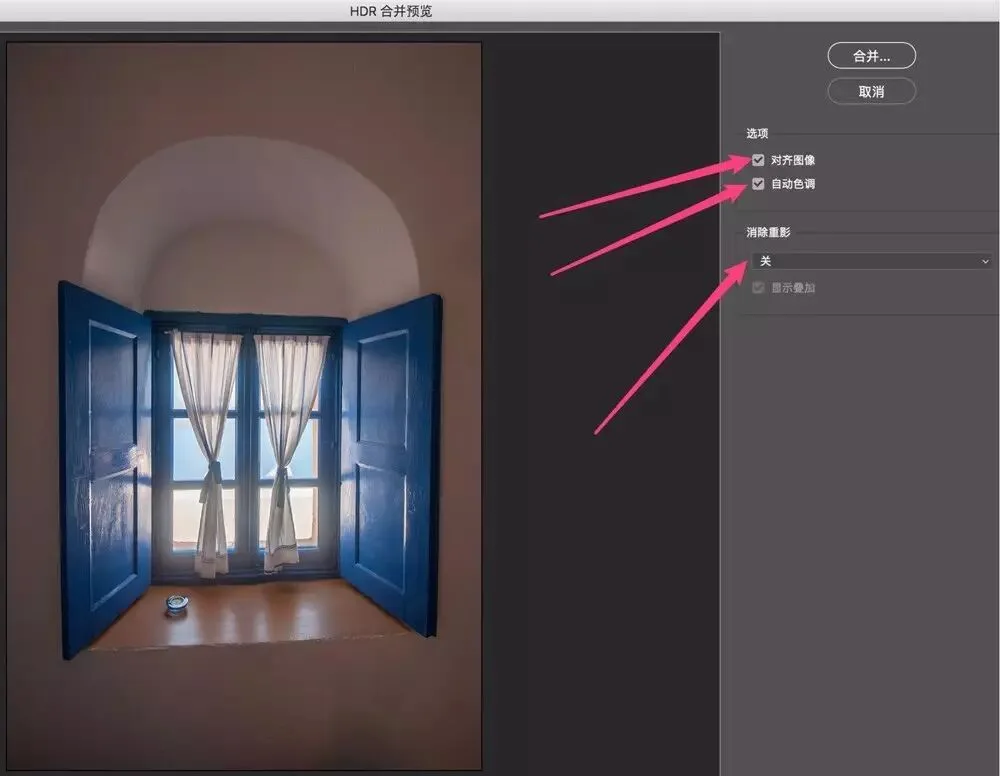
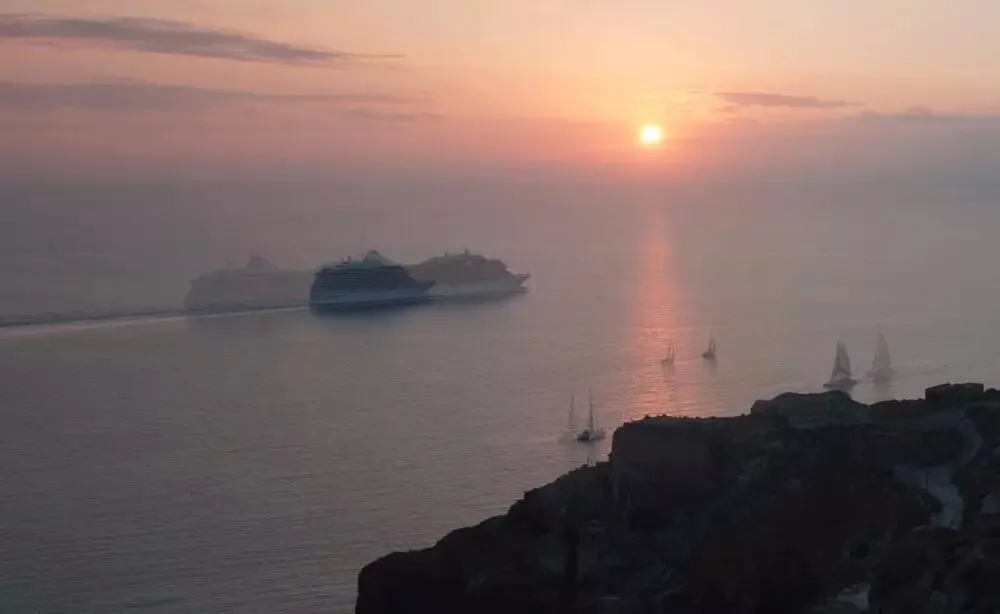
At the bottom is the 'Deghost' dropdown with Off / Low / Medium / High. I usually choose Off; only when the scene contains moving objects that produce ghosts after merging do I pick Low, Medium or High according to severity. (In the example below, the boat moved between frames, leaving a translucent ghost after merging.)
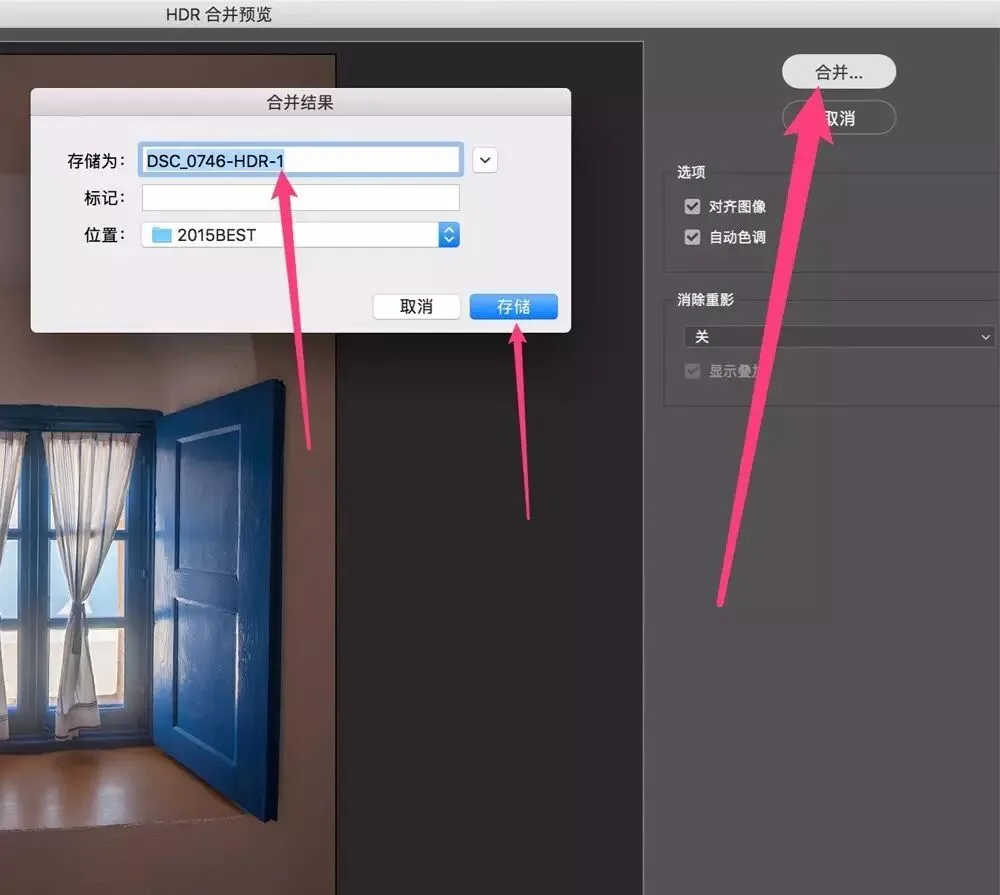
With settings done, ACR has automatically performed the HDR blend. Click 'Merge' to save the new combined file to disk.
You then re-enter ACR and see the new merged negative (DNG). It contains all the information from the three original raw files, leaving huge room for adjustment. (A single raw file allows only ±5 stops on the exposure slider; an HDR-merged file allows ±10 stops in ACR.)
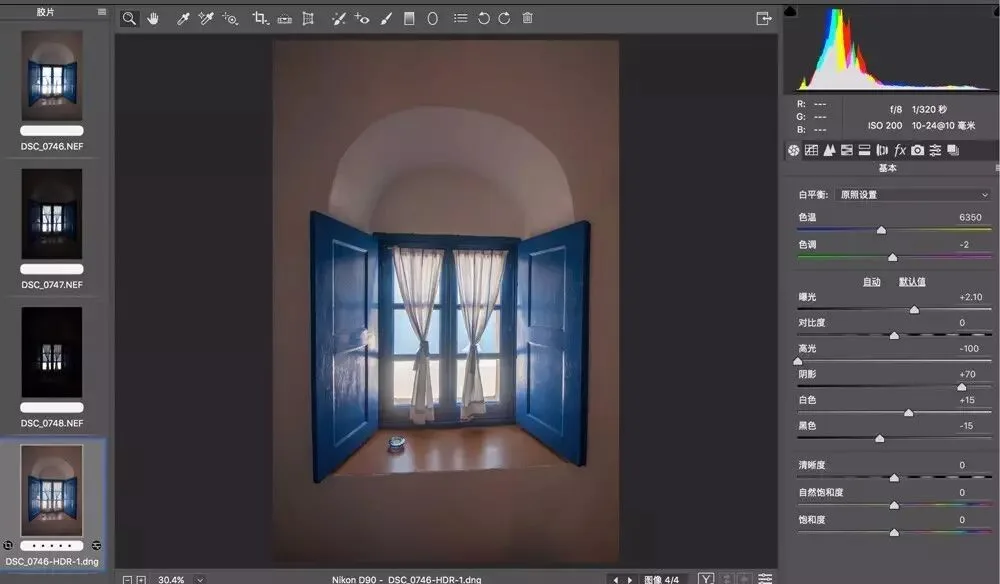
Because we checked 'Auto Tone' during the merge, ACR has already adjusted exposure, highlights, blacks and so on. These are non-destructive — if you're not satisfied, simply re-adjust the sliders.
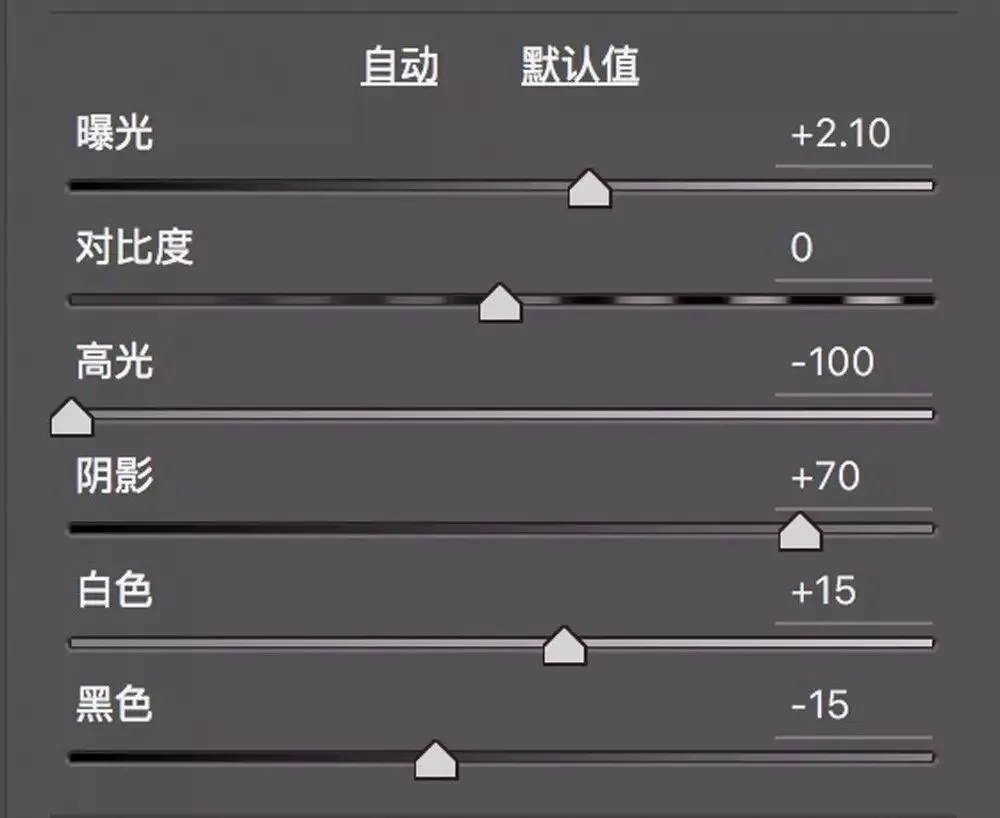
On this photo, for example, I raised the contrast again and lowered the blacks further to increase the punch.
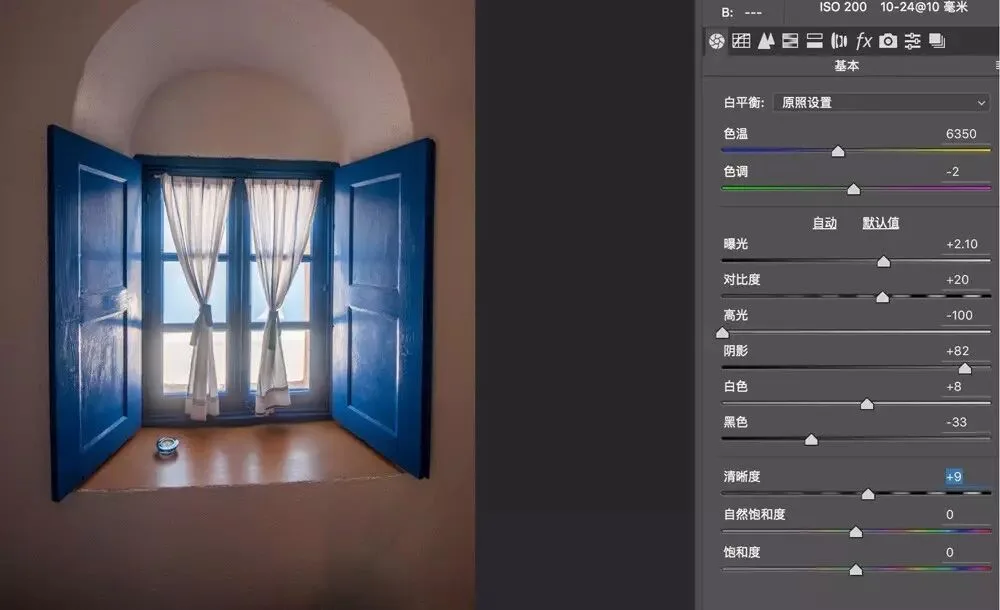
From here on, adjustments are the same as for any raw file — lens corrections, transforms, grading, local work — so I won't go through them one by one.
(Since the HDR algorithm discards some of your adjustments during the merge, it's recommended to merge HDR first, then do exposure, grading and local adjustments.)
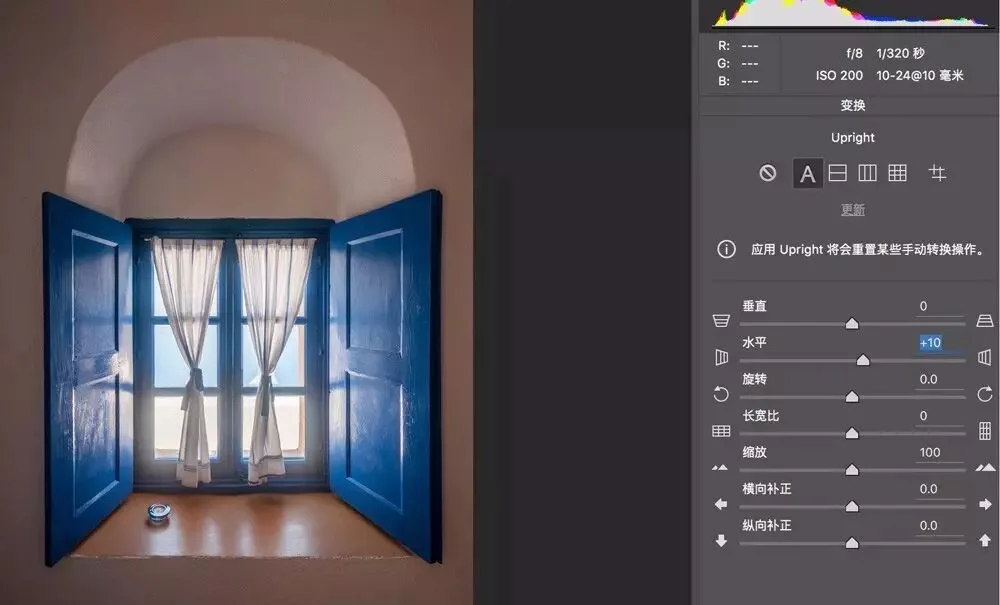
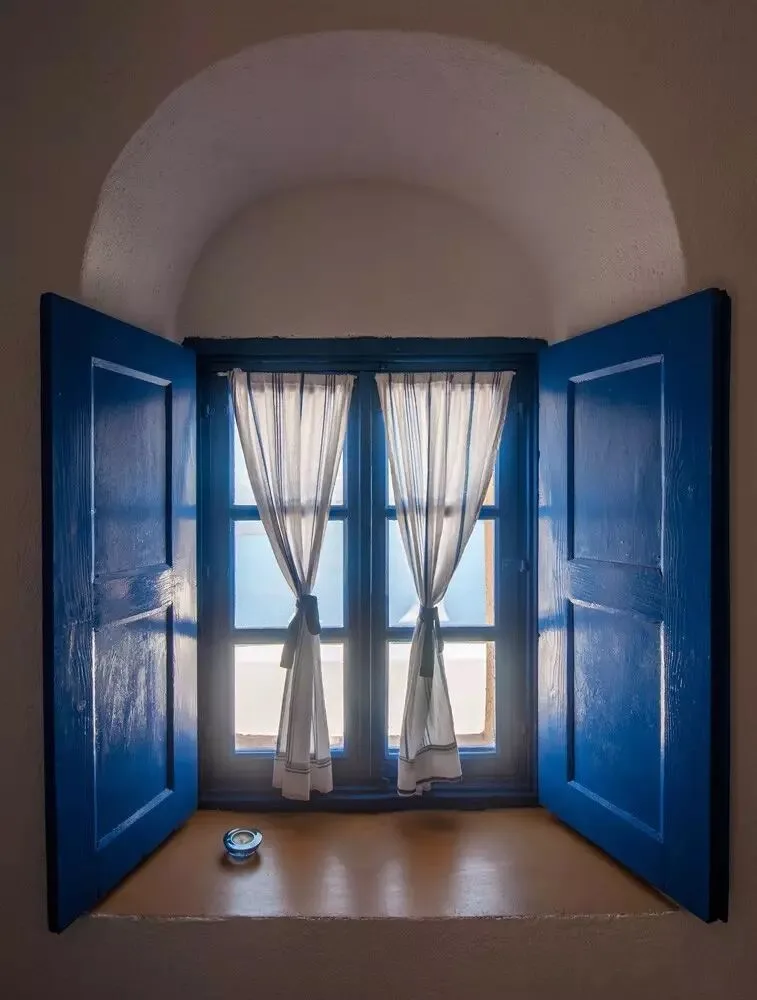
In the final image, details inside and outside the window are crystal clear. Thanks to bracketing and exposure blending, a complex high-contrast scene becomes a piece of cake.
Follow @Thomas Chu Photo,
and learn one photography skill every week.