Photography Tutorial · 2019-06-02
Focus Stacking in Photography: Everything You Want to Know
Thomas Chu Photo
Focus stacking is a capture-and-post technique widely used in modern landscape, still-life and macro photography, delivering photos that are tack-sharp from front to back even in difficult conditions.
In the article below, AdventureX's teacher Miller (Yao Minglai) gives a detailed, systematic summary of focus stacking.
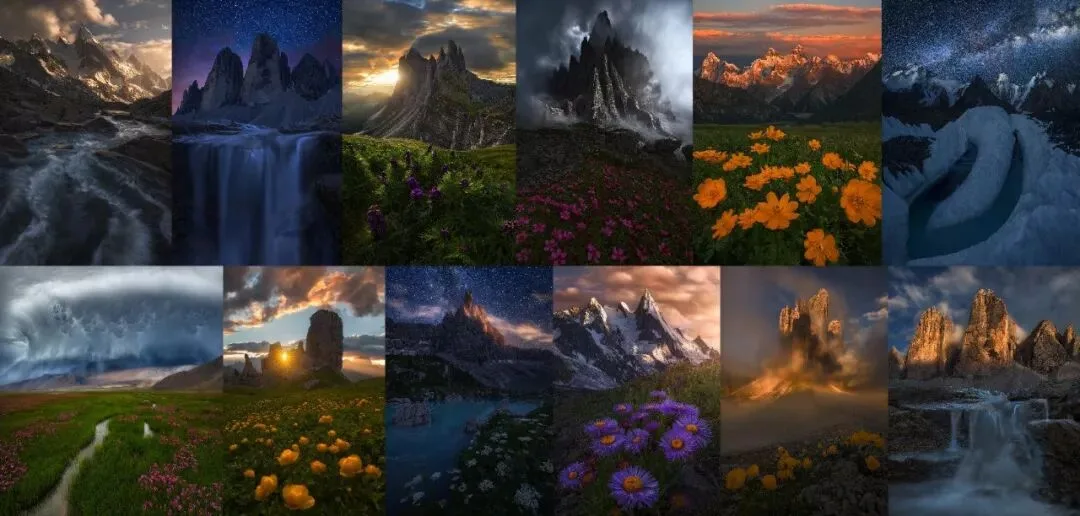
The series of images above all come from AdventureX member Miller (Yao Minglai).
Such dramatic ultra-wide images require placing the wide-angle lens very close to the foreground, creating depth and exaggerated distortion.
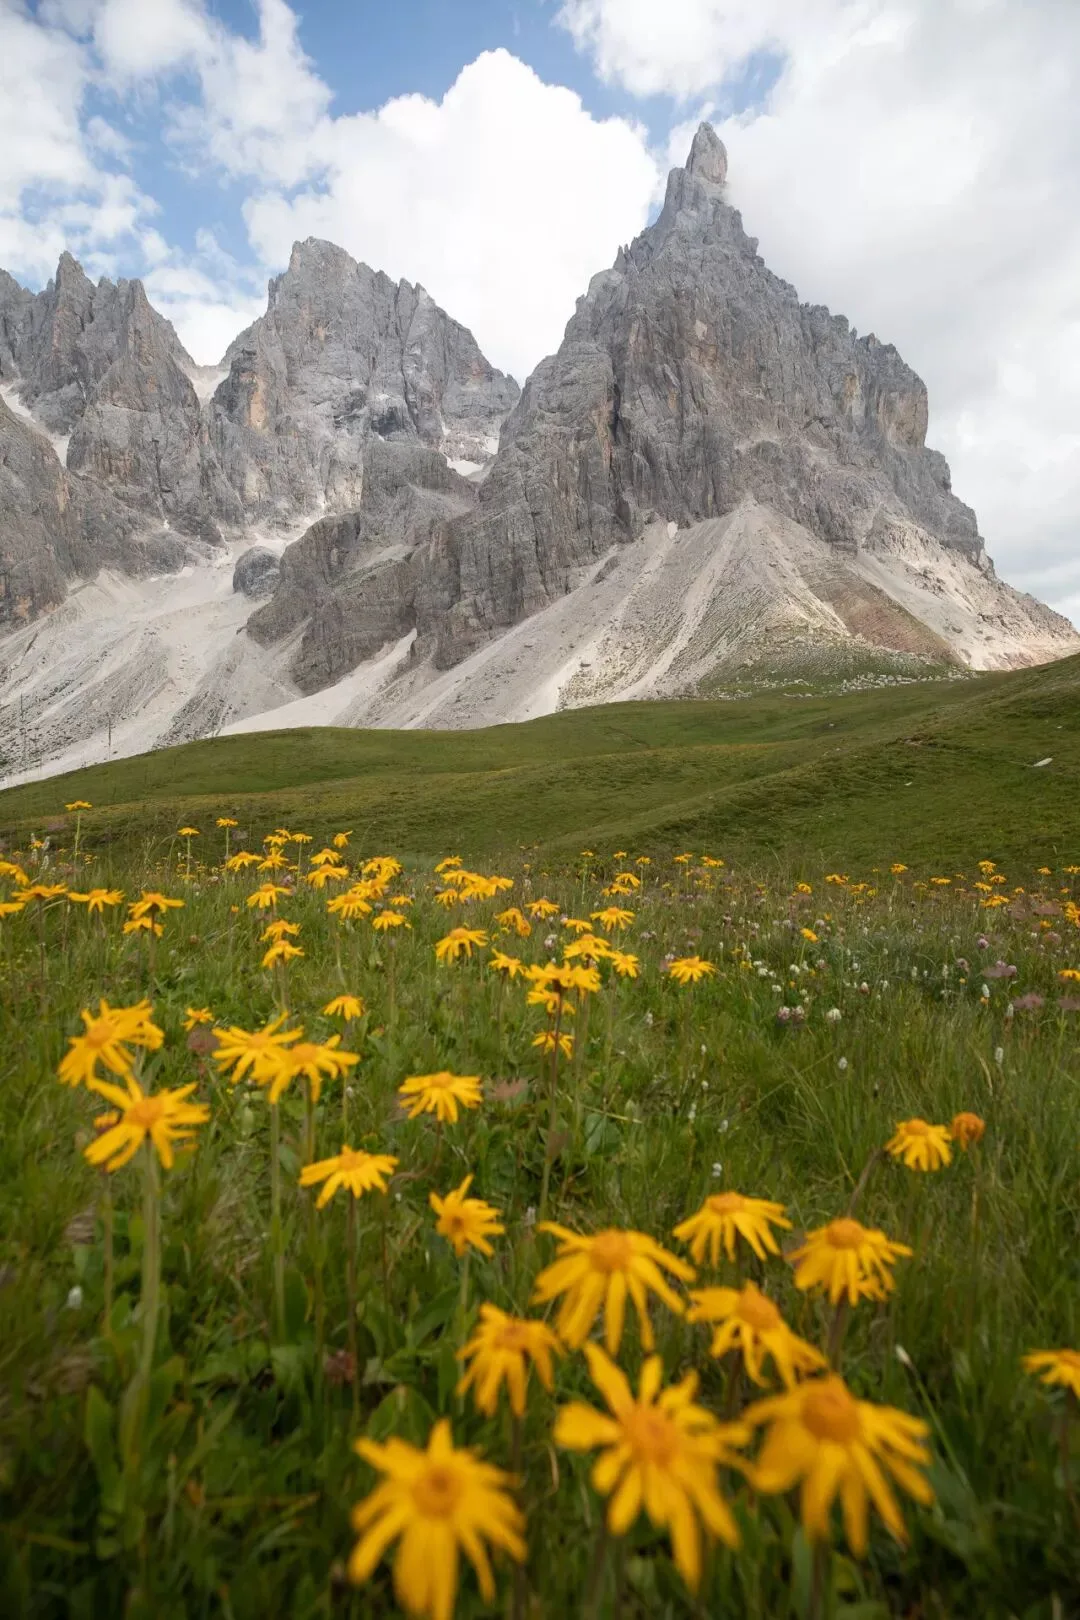
That creates a problem: even stopping down to f/64, you can't get a frame that's sharp from the nearest foreground to the distant background (as above).
This is where focus stacking becomes essential. What follows is the most complete focus-stacking guide you'll find.
1. On-Location Capture
The first step of focus stacking is capturing a set of frames whose focal planes together cover the full depth of the scene.
Case 1: Your Camera Has 'Focus Shift Shooting'
If your camera — like the Nikon D850 — has a 'focus shift shooting' function, you can use the body's built-in full-depth capture to easily get a set of frames with focal planes running from nearest to infinity.
Watch the on-location video demonstration by AdventureX member Zhou You below.
Case 2: Your Camera Lacks 'Focus Shift Shooting'
If your camera can't automatically bracket focus, you need to shoot the series manually.
(1) Preparation:
First, bring a sturdy tripod — even slight camera movement complicates the later blend. A reliable shutter release cable is also needed to avoid shake when pressing the shutter.
(Using the self-timer instead of a cable release is not recommended: in fast-changing light, those 2 seconds of delay may cost you the only moment.)
(2) Settings:
Once your composition is set, configure the camera before shooting.
1. Set the camera to aperture-priority mode.
Some ask: why not Manual mode, locking the exposure so the blend is easier?
Manual does keep the series perfectly consistent, but aperture priority instantly computes a reasonable exposure for changing light. When conditions shift fast and light is fleeting, speed matters more.
2. Set image quality to RAW, preserving more highlight and shadow detail for greater editing latitude.
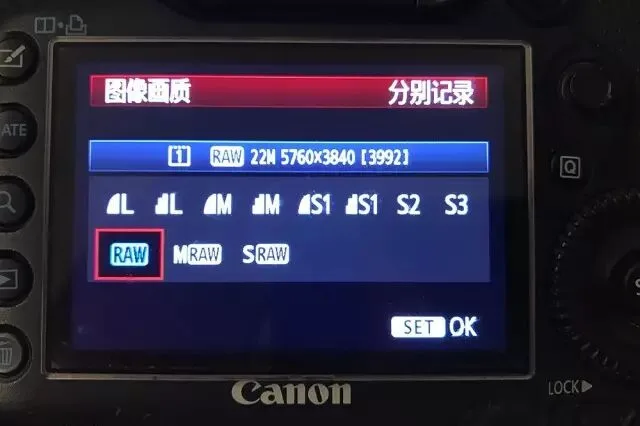
3. Switch the lens from autofocus to manual focus — AF to MF.
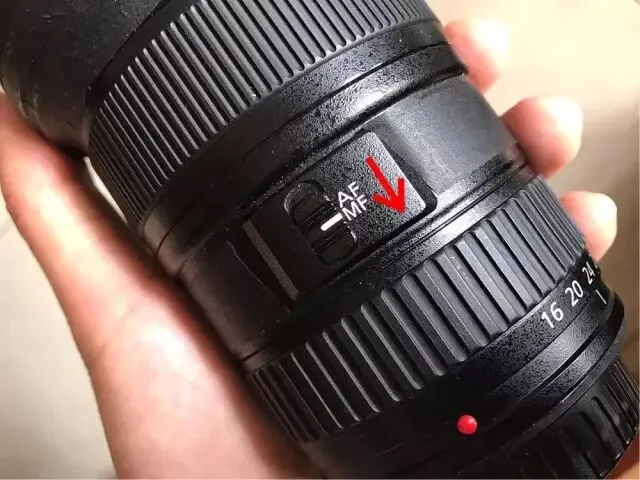
4. If your wide-angle lens has stabilization, turn it off: on a tripod it can misfire and actually blur the photos.
5. Set the metering mode to evaluative/matrix (called average or 3D metering on some cameras).

6. Set the aperture.
In strong wind with a dim foreground, use a larger aperture with higher ISO — e.g. f/4 at ISO 800 — to keep the shutter fast enough to freeze the foreground.
With little wind and decent light, stop down further — f/11, f/16. The smaller the aperture, the deeper the depth of field, so fewer frames are needed and efficiency rises.
(3) Shooting Procedure:
First, turn the lens focus ring to the nearest position. The small transparent window on the barrel shows the focus distance change directly.
On mirrorless cameras like Sony, you can read the real-time focus distance on the camera screen.
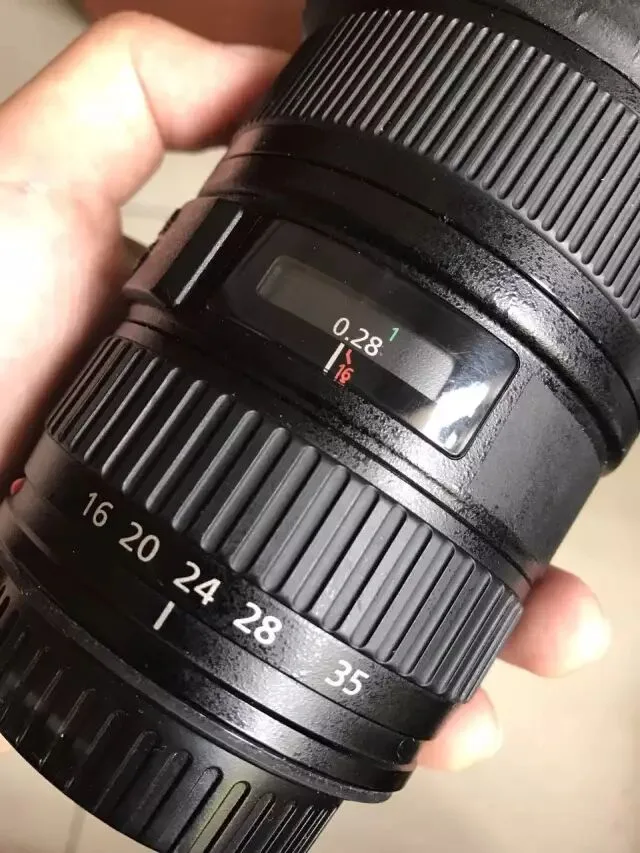
The example here is the Canon 16-35mm lens: turn to its minimum focus distance, 0.28 m.
Then press the shutter for the first frame.
Next, turn the focus ring slightly toward larger distances and shoot the second frame.
Keep turning slightly further and shoot the third… and so on, until the ring reaches infinity for the final frame.
For example: focus at 0.28 m, 0.35 m, 0.5 m, 1 m, 3 m and infinity, one frame each.
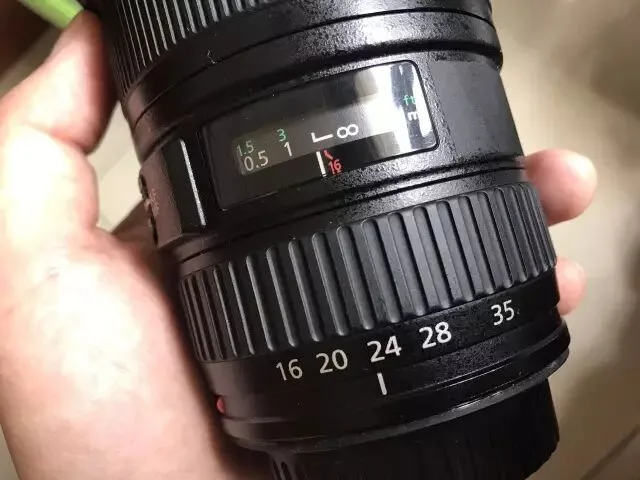
On Canon, Nikon and Sony wide-angles, infinity is usually NOT at the very end of the ring's travel. On Canon lenses, as shown above, turn to infinity then back slightly so the mark aligns with the vertical line of the L-shaped mark just before the infinity symbol — that's true infinity.
How far to turn between frames takes experience. On your first attempt, with a wide aperture, or for a very important scene, turn less and shoot more frames — safer. Generally, 7-8 frames cover the full depth from nearest to farthest.
With ample light and a small aperture, you can turn further between frames — sometimes 3-4 frames cover the full depth.
Tip:
After finishing one focus series, shoot a second full series as insurance — better safe than sorry.
For a video of manual focus stacking, watch AdventureX member Miller's on-location demonstration in the mountains below.
2. Post-Processing
Method 1: Automatic Blending in Photoshop
1. Culling
First import your focus-stacking sets into Lightroom for culling. Compare the sets and zoom into details to decide which set to keep — that becomes your stacking material.
Then examine each frame in the chosen set, comparing focus positions and the sharp zones of each.
When turning the focus ring, some frames inevitably have similar, overlapping sharp zones. Delete the frames whose focal planes overlap heavily, keeping only those whose planes complement each other.
This not only reduces the computer's blending time — more importantly, if it was windy and the foreground flowers or grass moved, too many frames confuse the blending algorithm, causing misalignment and ghosting.
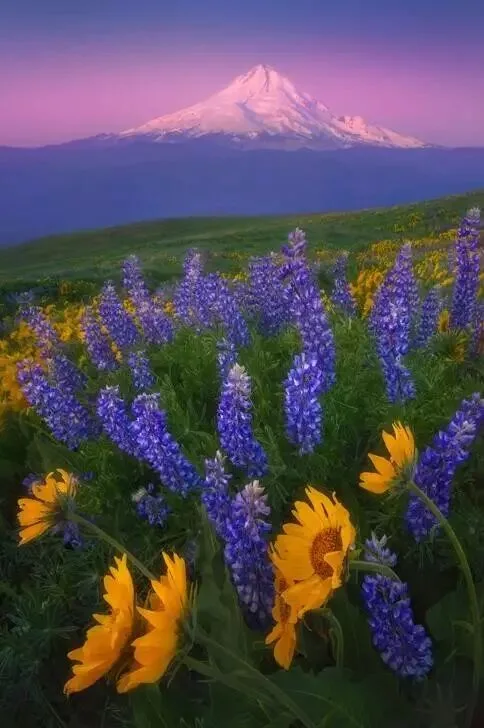
The image above is by AdventureX member Shi Yanbing, shot in exactly the windy conditions I described — strong wind, heavy foreground movement. Below is his description under the work, so you can feel how hard the shooting and blending were:

2. Adjusting
Make basic adjustments in Lightroom to lay the groundwork for blending in Photoshop.
Typically: correct exposure, apply basic grading, denoise and sharpen. After adjusting one photo, apply the same settings to the entire set.
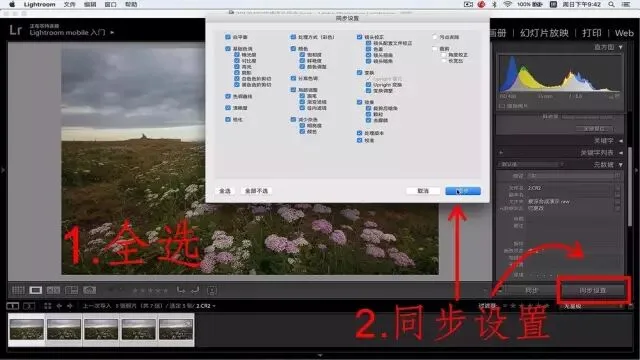
Select all the photos, click 'Sync Settings', check every option, then 'Synchronize'. All adjustments from the one photo are copied to the whole set, keeping their appearance consistent.
Tip:
If the light changed quickly during shooting, exposures may differ between frames. After syncing, fine-tune each frame individually so brightness and white balance are roughly equal.
3. Blending
With basic adjustments done in Lightroom, import all the images into Photoshop.
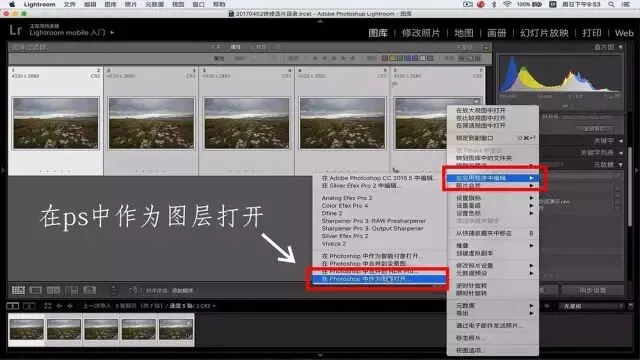
Select all photos, right-click, choose 'Edit In' → 'Open as Layers in Photoshop'.
All images now load into Photoshop automatically, stacked as layers in one document.
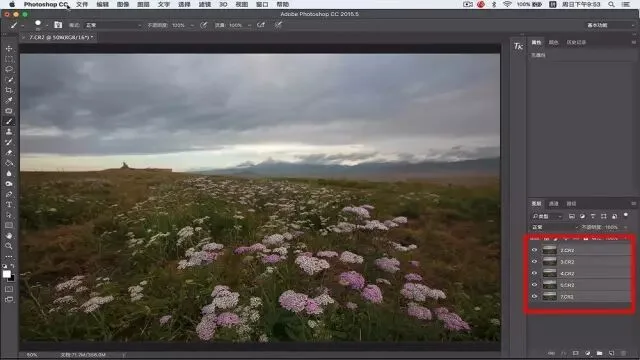
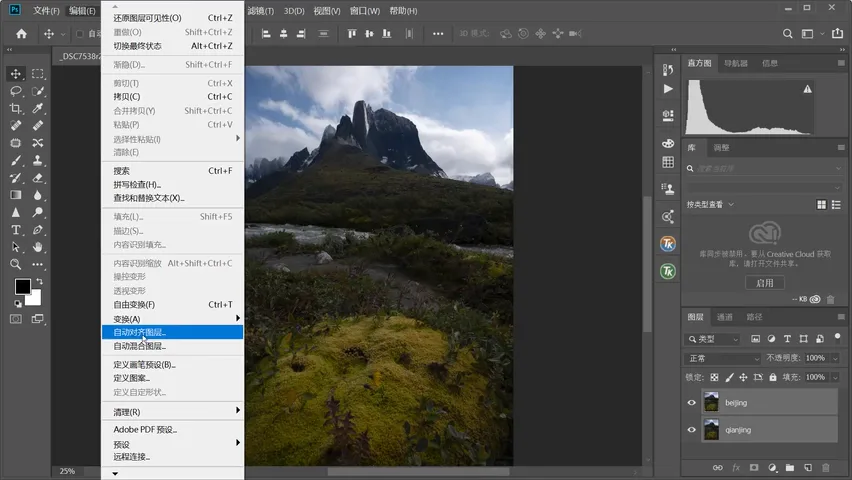
Then select all layers and click Edit → Auto-Align Layers — the software aligns them for you.
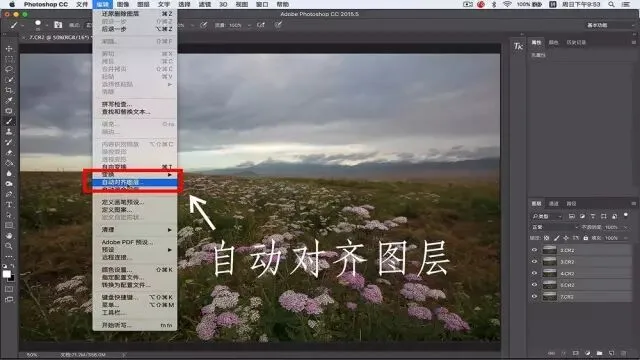
This alignment counteracts lens breathing.
When you turn the focus ring, the lens moves its floating elements to focus, and that movement necessarily changes the optical structure — so the focal length shifts slightly.
So even with the camera fixed, the frames show slight distortion and displacement — which is where Photoshop's powerful alignment comes in.
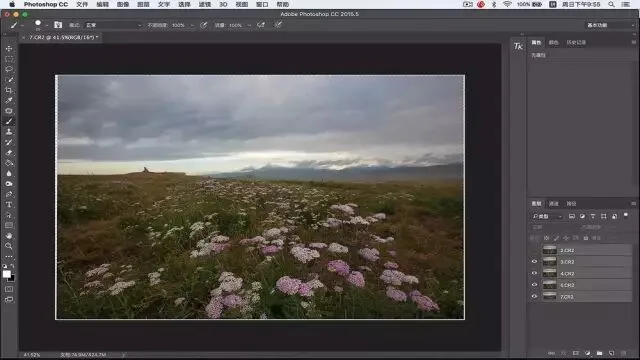
After auto-alignment, white edges appear around the frame — blank extra pixels from the program stretching images to match.
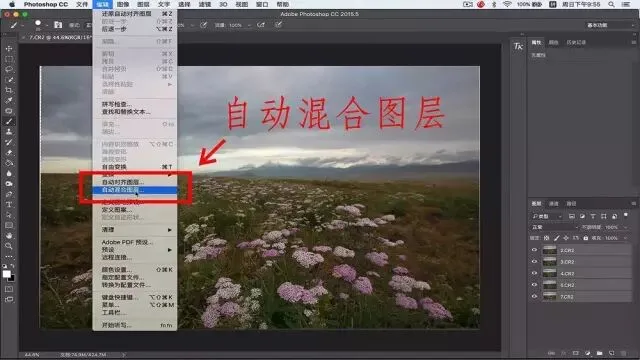
Next, blend the images: still with all layers selected, click Edit → Auto-Blend Layers.
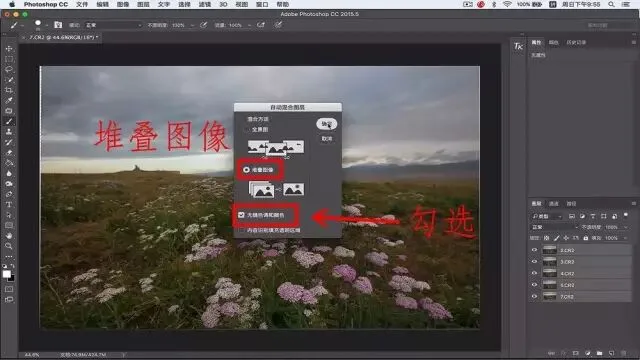
In the dialog, choose 'Stack Images' and check 'Seamless Tones and Colors', then OK — the software starts blending automatically.
Below is the blended result. Each layer now carries a mask, computed automatically: the function finds and keeps the sharpest part of every layer.
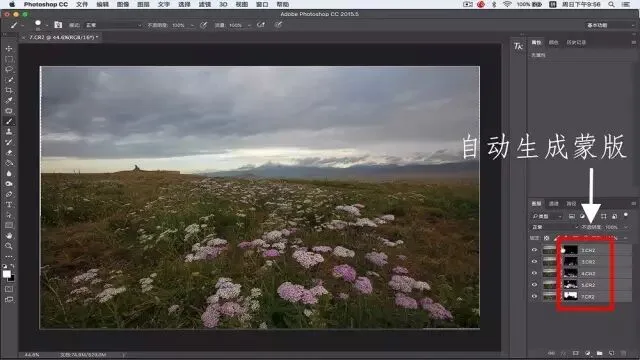
Flatten the layers and you have one blended image that's sharp from front to back.
If you shot without a tripod or in strong wind, elements will have shifted — you can't rely entirely on auto-blending. Before this merge step, add one manual step: adjust each layer's mask by hand, painting in the sharp areas with a brush. It takes skill and time.
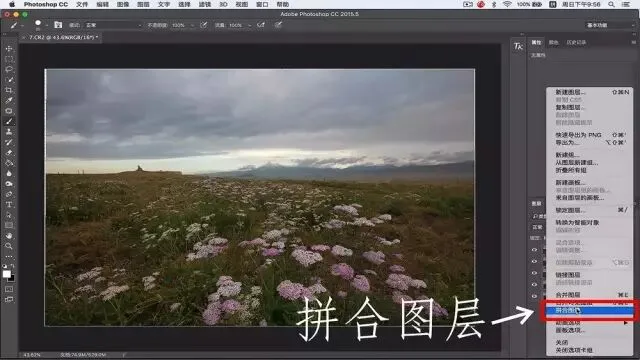
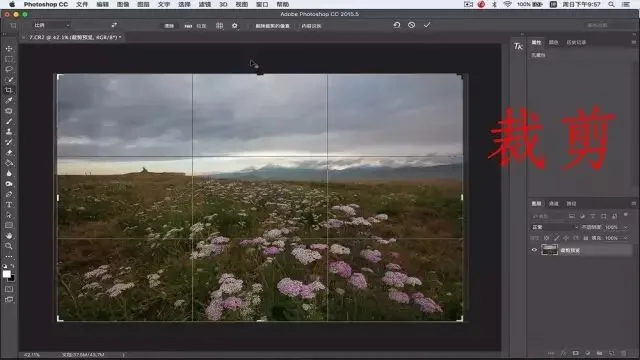
After flattening, crop away the blank and blurred edges with the Crop tool. So leave breathing room in your composition when shooting — space for the post-crop.
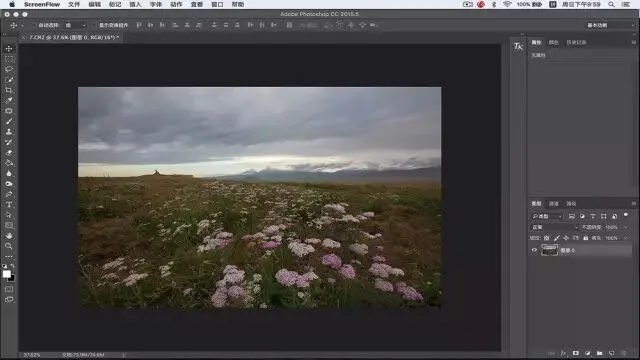
Here's the final cropped photo — sharp from the nearest to the farthest element, as you can see.
Method 2: Dedicated Software — Helicon Focus 6
Photoshop is versatile, but its algorithms have weaknesses in specific applications — hence specialized tools: PTGui, for example, stitches panoramas far better than Photoshop.
For focus stacking, there's likewise a more powerful option — Helicon Focus, whose optimized algorithms often produce more perfect blends than Photoshop. Here's the workflow.
1. In Lightroom, make basic adjustments, sync them across the set, and export as TIFF.
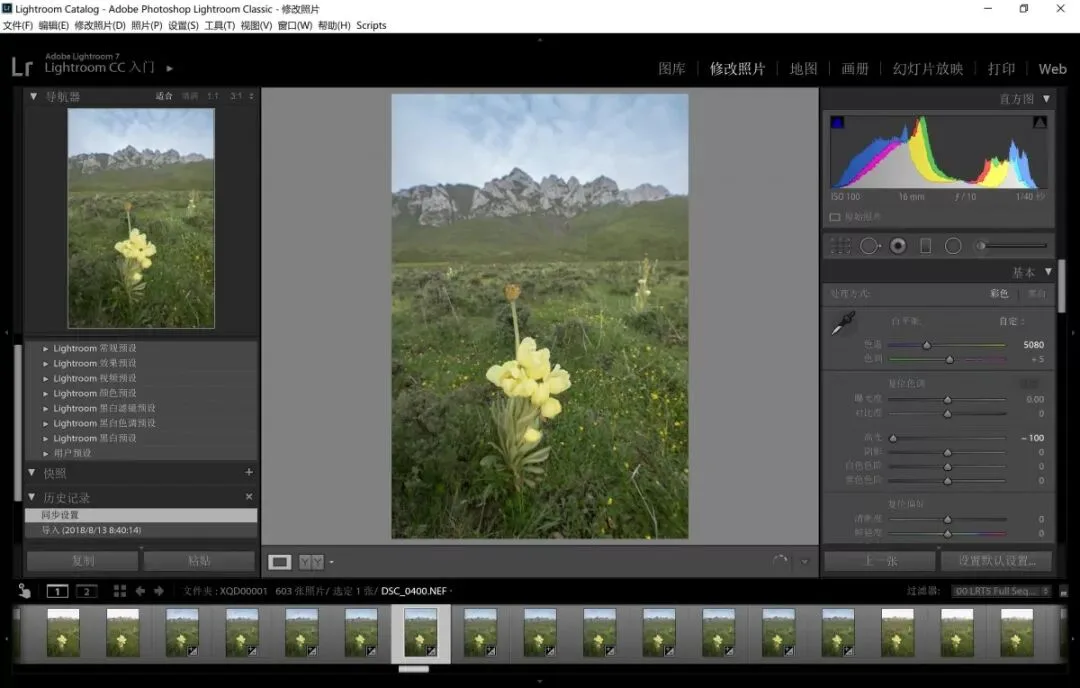
2. Load all the stacking frames into Helicon Focus 6.
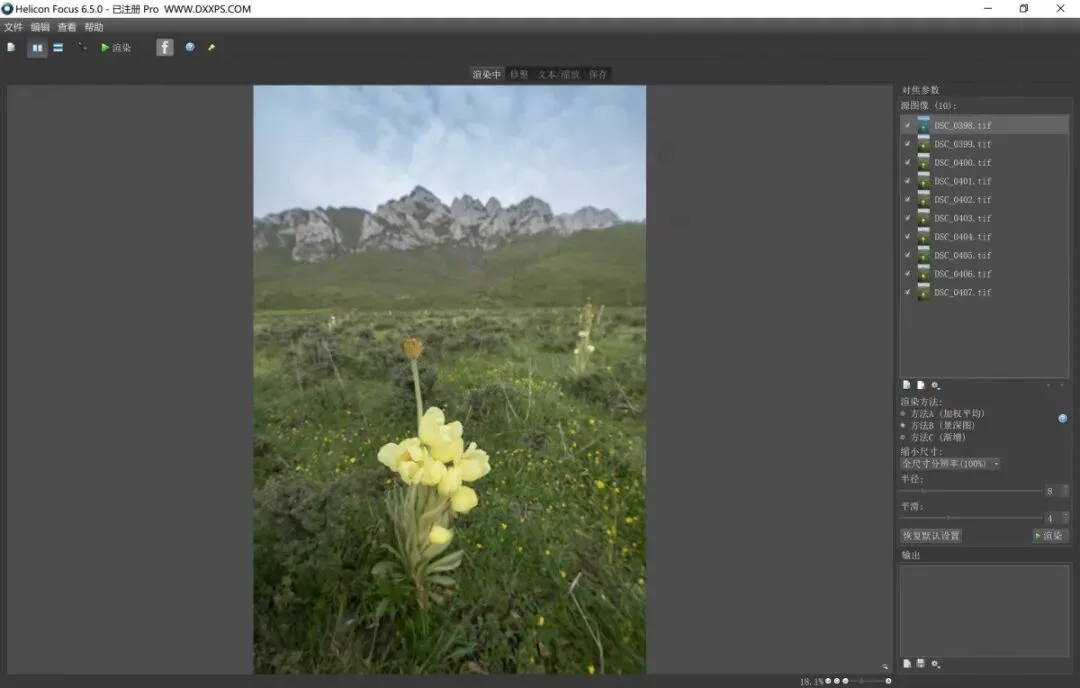
3. Choose render method B: Depth Map, then click Render.
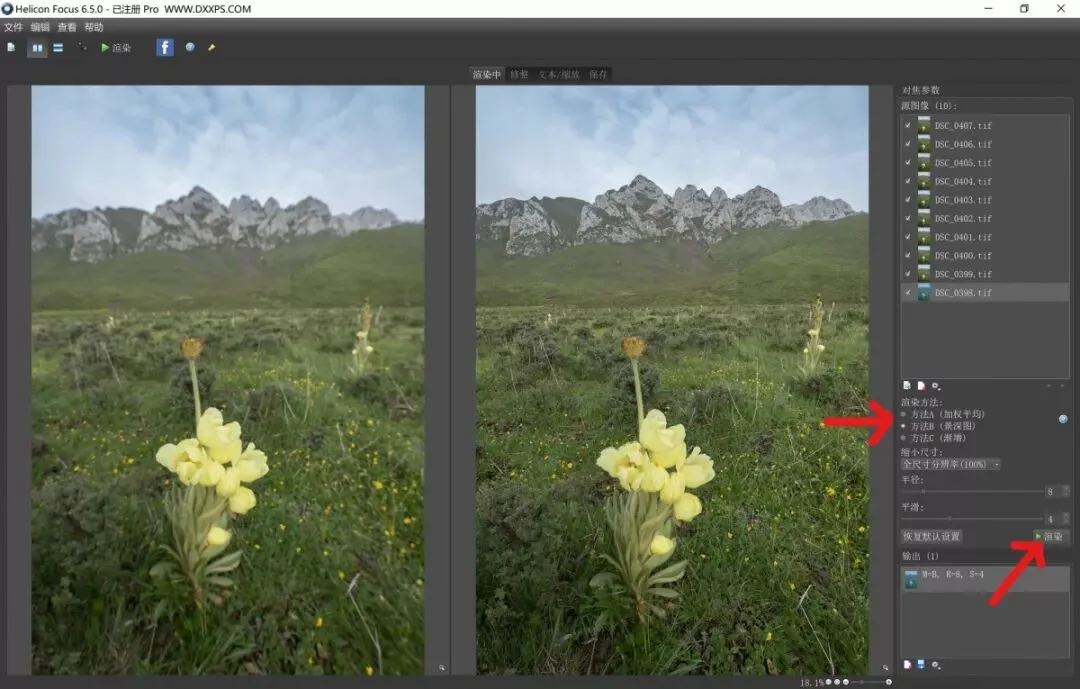
One click generates the stacked image (right, preview) — then save the result file.
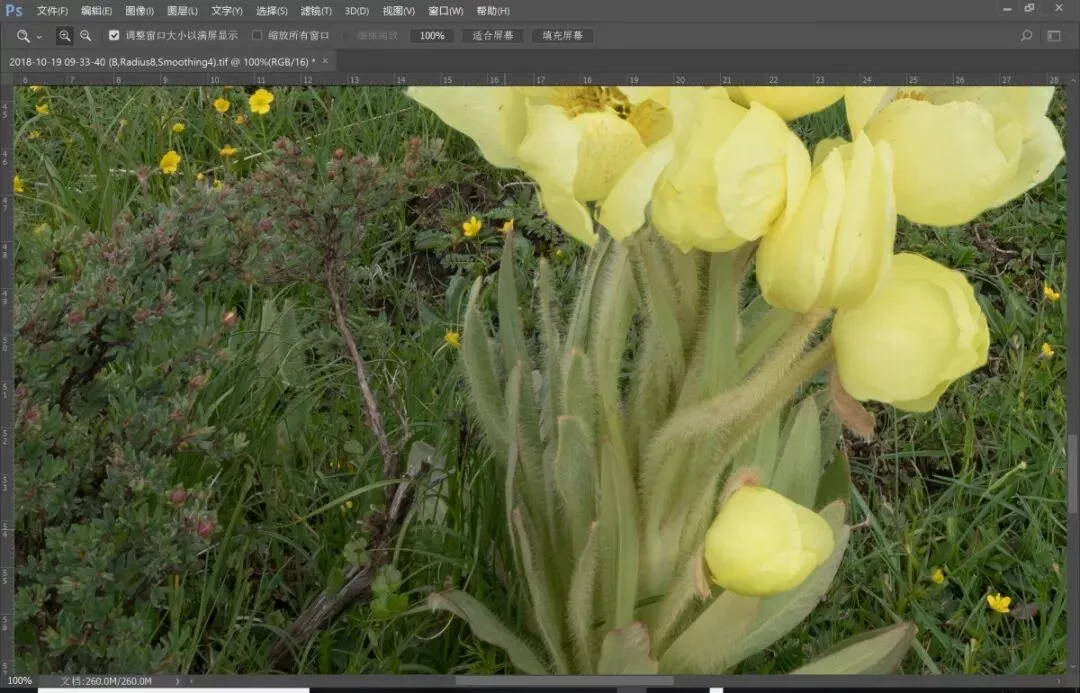
Zoom in to inspect the blend: even the fuzz on the flower stems is razor-sharp, and the tiny distant flowers on the ground are sharp too.
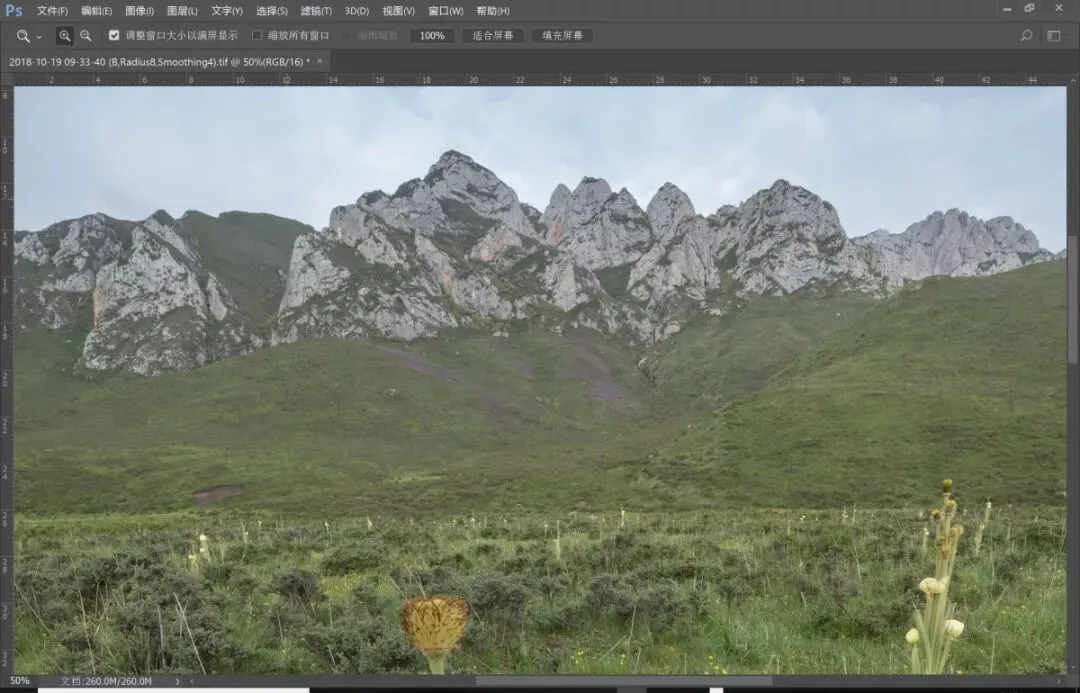
Zoomed in, the distant peak and the nearby bud are equally crisp. Helicon Focus's brute-force stacking is excellent — but it's paid software.
Method 3: Manual Mask Blending in Photoshop
For most photos, manual mask blending is convenient and precise, with no paid software needed. The video below demonstrates the exact procedure.
▶ Watch the video tutorial on Bilibili
This video is the hands-on companion to the focus-stacking tutorial above. The text already covers field technique and three blending methods in full; this 17-minute video runs the entire Photoshop pass on a real pair of frames — snow peaks over foreground blossoms — including the focus-breathing trap of auto-alignment, repairing the black blotches auto-blend leaves in its masks, and the brush craft of fully manual stacking. The practical points are transcribed below in video order.
Start with the result: once the two frames are blended, the near blossoms and the distant snow peaks are sharp at the same time (the finished blend at 16:29 in the video).
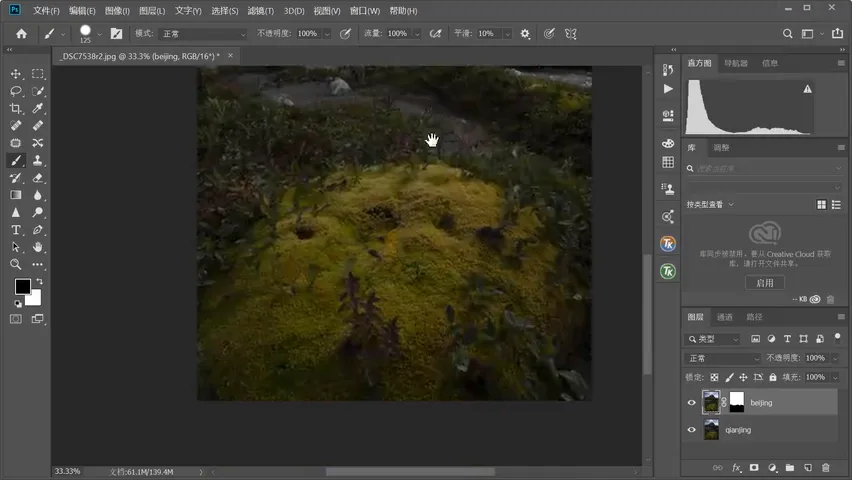
01 The Frames: Dividing the Focusing Work
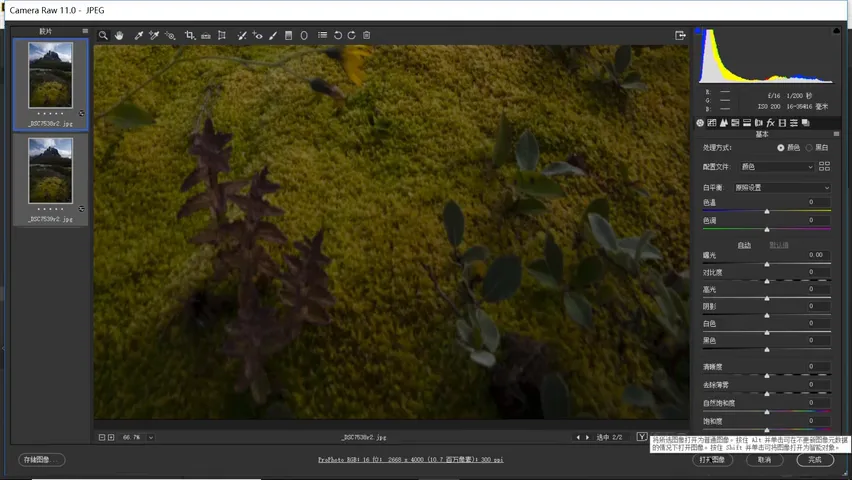
The settings deserve note: F16, ISO 200, 1/250 s (at 0:33 in the video). Unless wind forces a tiny aperture for a faster shutter, Thomas stacks at small apertures of F8-F16 — the wide focus range means two frames cover the scene, whereas F4 would take three or four. ISO 200 buys a faster shutter so wind-blown grass does not smear into streaks (at 1:44).
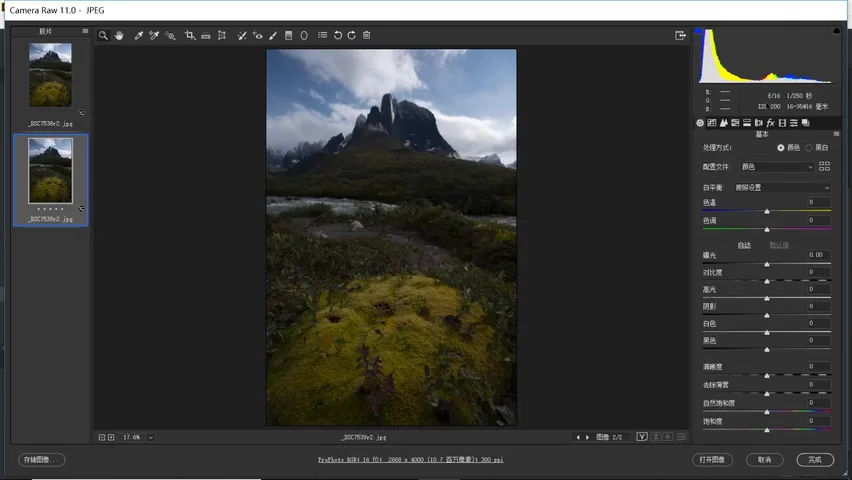
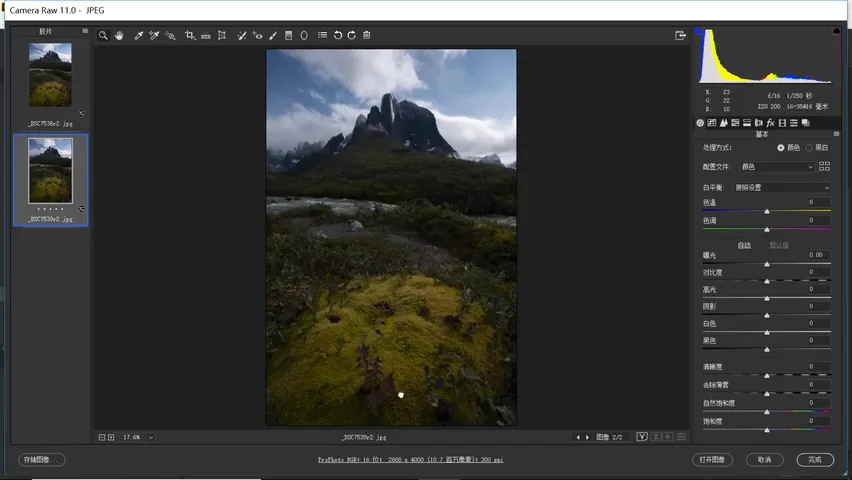
The two frames split the work: the first focuses on the foreground blossoms — at 16mm the flowers sit only 40cm away and the peaks melt into mush; the second focuses not on the peaks but on the midground vegetation, letting F16's depth hold both midground and mountains sharp. Together they tile the scene perfectly (at 2:36 in the video).
02 Before Blending: Align and Label
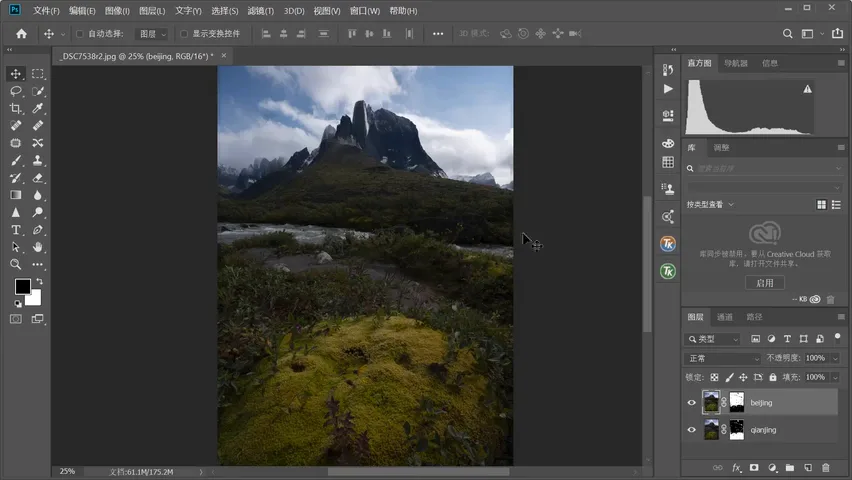
In Photoshop, drag one image into the other's document with the Move tool while holding Shift (it centers automatically), then rename the layers — "foreground" on top, "background" below — so nothing gets mixed up later (at 3:33 in the video). The crucial step is Edit → Auto-Align Layers first: lenses "breathe" as focus distance changes, shifting focal length slightly, and skipping alignment poisons every later step (at 4:24; the Auto option is fine).
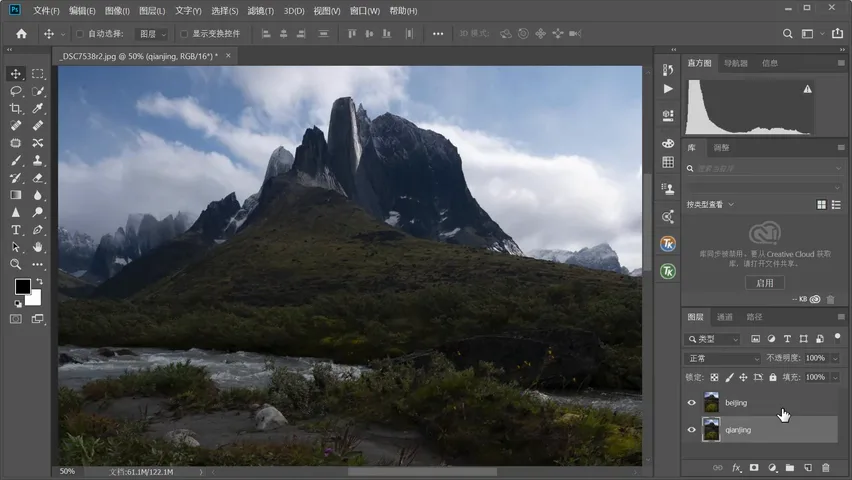
03 Auto-Blend: Fast but Blotchy
The automatic route is one step: Edit → Auto-Blend Layers, choosing "Stack Images" (at 5:16 in the video). Skip "Seamless Tones and Colors" when exposure matches, and generally leave "Content-Aware Fill Transparent Areas" unchecked. Photoshop writes a mask per layer — white reveals, black conceals — and within seconds produces an edge-to-edge sharp frame (at 6:27).
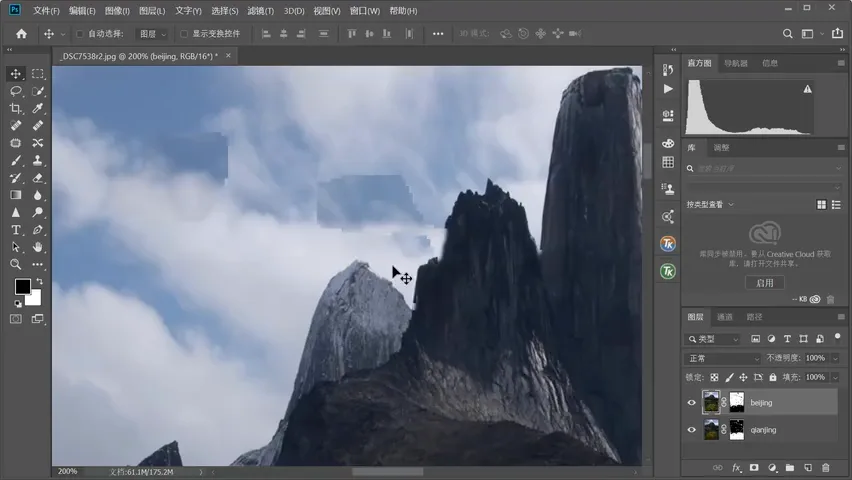
But the computer cannot really tell what is in focus: the background layer's mask should be white across the peaks, yet black blotches appear, exposing the blurry layer beneath and speckling the mountains with focus failures (at 7:10 in the video). The fix is easy: press X to swap colors, paint the mask white where it should be white, black where blurred; and if a transparent hole opens up — both masks are black there — flip the lower mask back to white and continue (at 7:52).
04 Manual Blend: Brush Hardness 70-80
Thomas actually blends most photos by hand: back at the post-alignment stage, give the background layer a white mask and paint black over where the background should hide — the sharp foreground reappears (at 10:00 in the video). Technique matters: brush hardness should not be 0 (too soft, and the transition band blurs) nor 100% (too hard, no transition) — 70-80 is the sweet spot. Hold Alt and click the mask anytime to inspect its black-and-white state and spot missed patches.
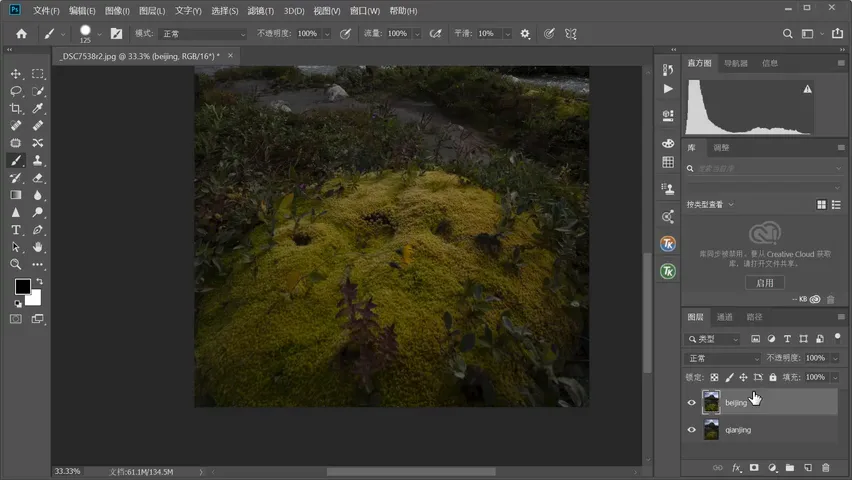
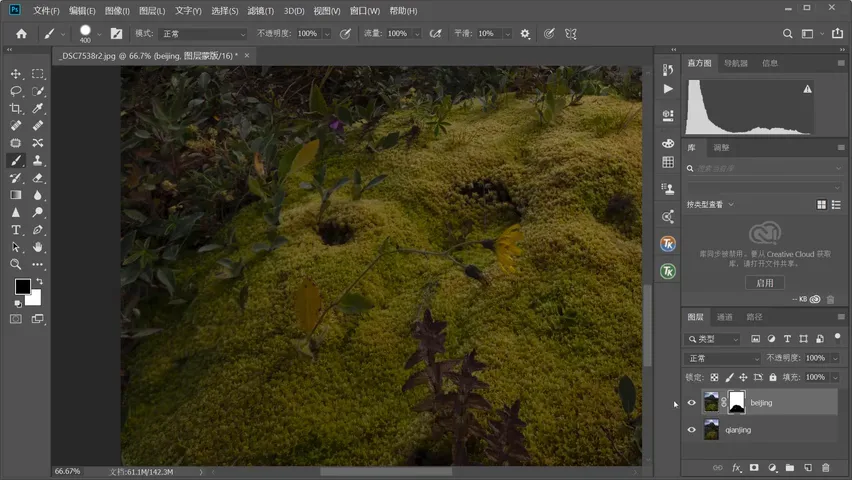
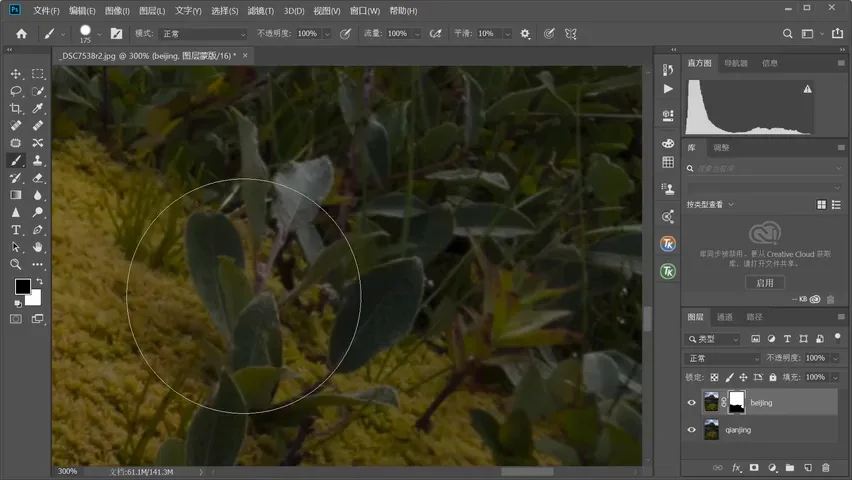
Choose blend boundaries in natural transition zones: sand texture, flowing water, tangled bushes — repetitive, easily fused regions where the seam disappears. Watch objects that cross the boundary: a branch or flower cut mid-way will misalign, so trace it whole back onto one layer with a white brush; toggle layer visibility repeatedly to check alignment, and never leave one grass stem half on each layer (at 15:40 in the video).
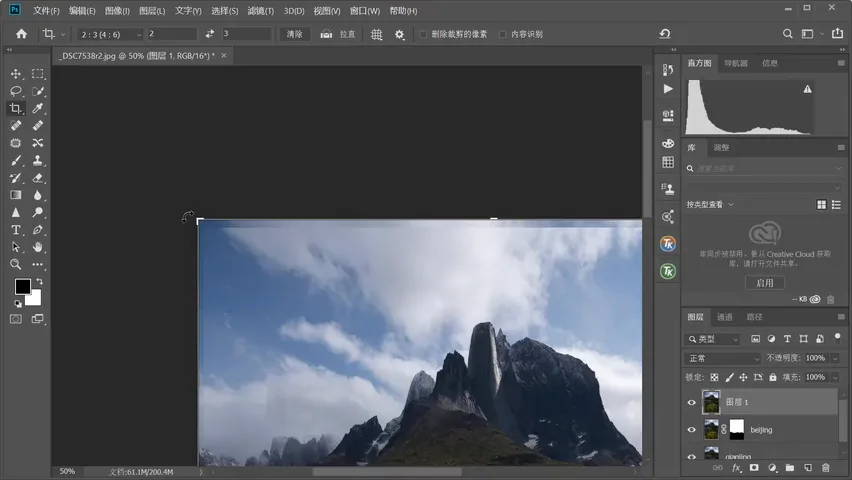
05 Finishing: Stamp and Crop
Once blended, press Ctrl+Alt+Shift+E to stamp the layers into one and proceed to normal grading. The final step is cropping: focus breathing leaves blank pixels around the aligned frame, and trimming them restores a clean, complete image (at 16:50 in the video).
1. Small apertures save frames — at F8-F16 two shots suffice, paired with a faster shutter to freeze wind-blown grass; 2. Always Auto-Align Layers first: focus breathing shifts focal length slightly, and skipping it seeds flaws everywhere; 3. Repair auto-blend's black blotches by painting the masks — a transparent hole means both masks are black; 4. For manual blends keep brush hardness at 70-80, inspect masks with Alt-click, hide seams in natural textures like sand and water, and keep any flower or branch that crosses the boundary on one layer.
And we often shoot outdoors in wind. If the foreground is flowers on slender stems, they WILL sway, no matter how fast you shoot.
When the foreground shifts within a focus series, even the smartest algorithm can't blend it perfectly — that's when you fuse the frames manually with hand-painted masks.