Photography Tutorial · 2019-10-20
Greenland Raw Files Revealed: Front-and-Back-End Ideas for Landscape Photography
Thomas Chu Photo
In post-processing, ideas matter more than techniques.
Today Thomas uses 3 recently shot photos as examples, sharing the thinking behind the capture and the ideas behind the post-processing.
Image 1 (before / after):
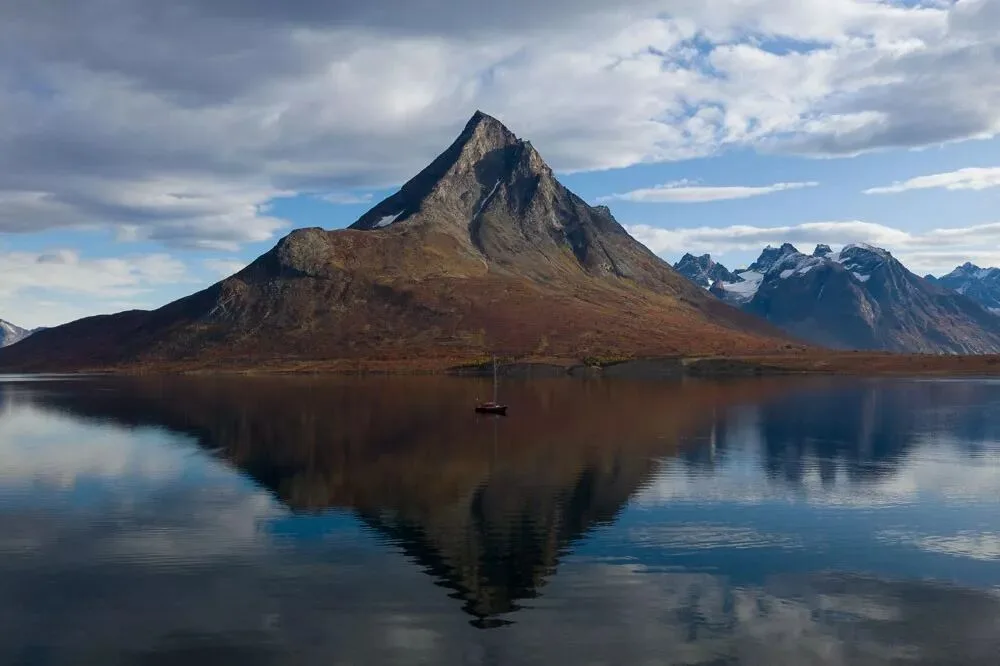
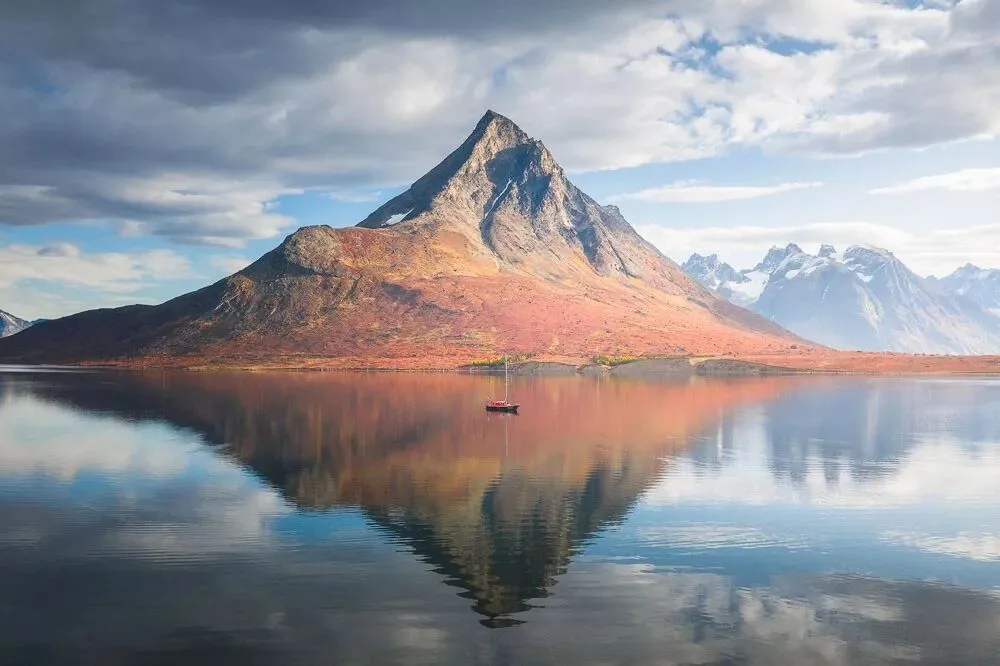
Image 2 (before / after):
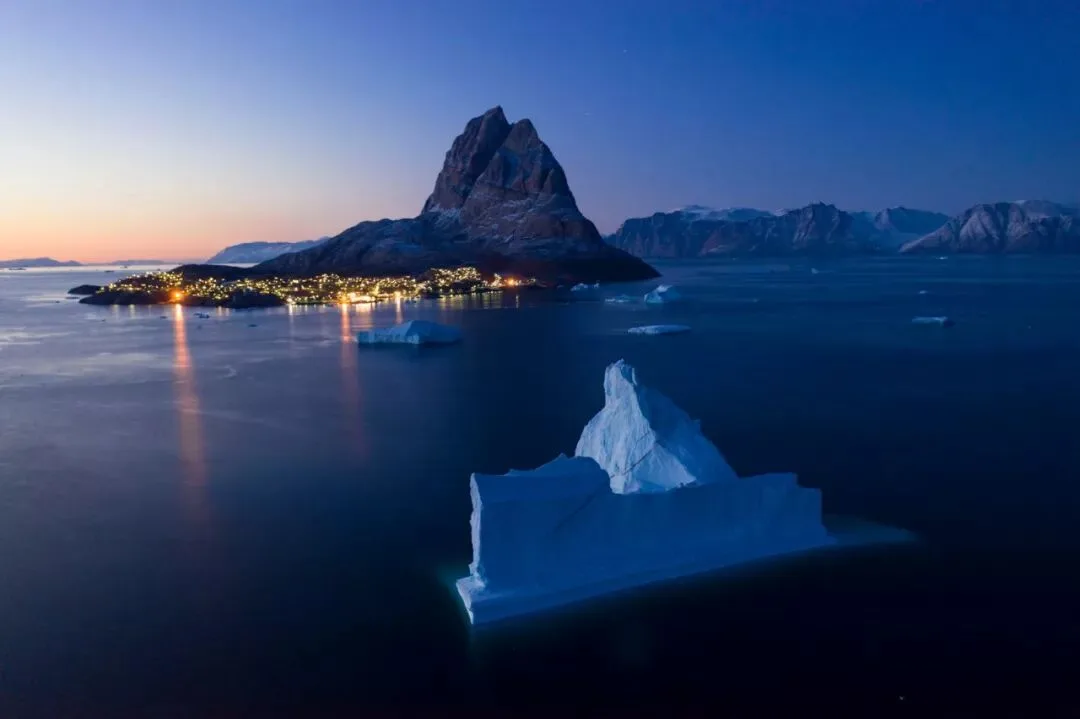
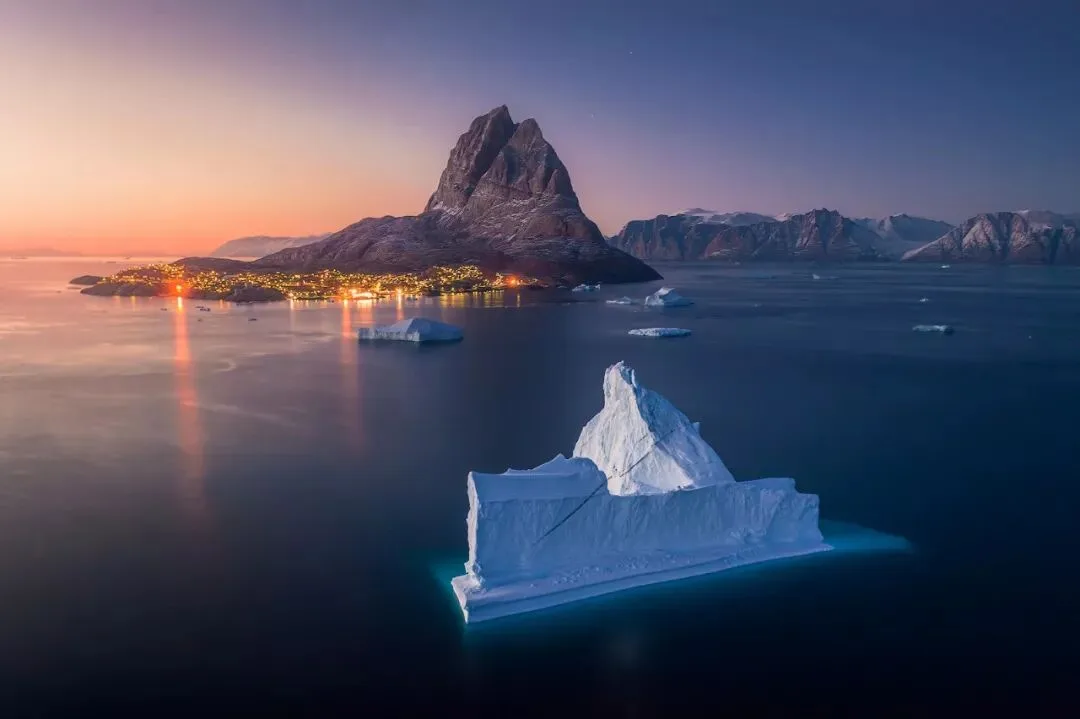
Video Tutorial
▶ Watch the video tutorial on Bilibili
This is the fully illustrated companion to the video above. Using three photographs from Greenland — a Mavic 2 Pro fjord aerial, a Uummannaq village scene with an iceberg, and a blue-hour night frame — Thomas lays out the RAW file, the shooting idea, and the editing logic behind each. Ideas matter more than techniques: why you shoot it this way and why you present it that way is what this video is really about. The text follows the video's order, with keyframe screenshots taken from the footage.
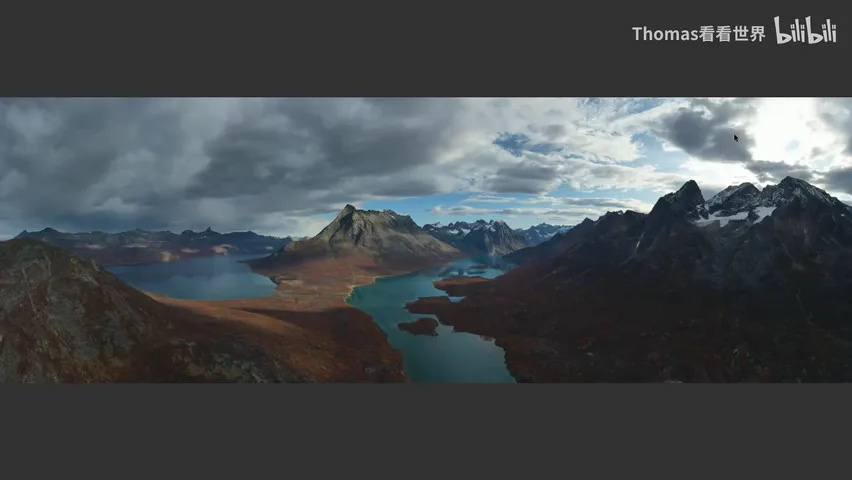
01 From Cluttered Panorama to the Heart-Shaped Island
In outdoor landscape shooting we often hit this: the scene before you is spectacular and a joy to behold, yet the photo you bring home looks worse than the memory (at 0:58-1:03 in the video). The reason: standing inside a grand scene is a 3D, immersive experience, but flatten it into a 2D photograph and the content becomes rather cluttered — your job is to extract the interesting parts from that clutter and emphasize them (at 1:03-1:27 in the video).
This Mavic 2 Pro aerial panorama is a textbook case. The mountains on both sides are bare rock — a large mass of black with no layers or detail, purely distracting — while at the center of the frame sits a heart-shaped island with a lake, mountains and clouds. Cropping to just the middle section gives a much stronger composition (at 1:28-1:54 in the video).
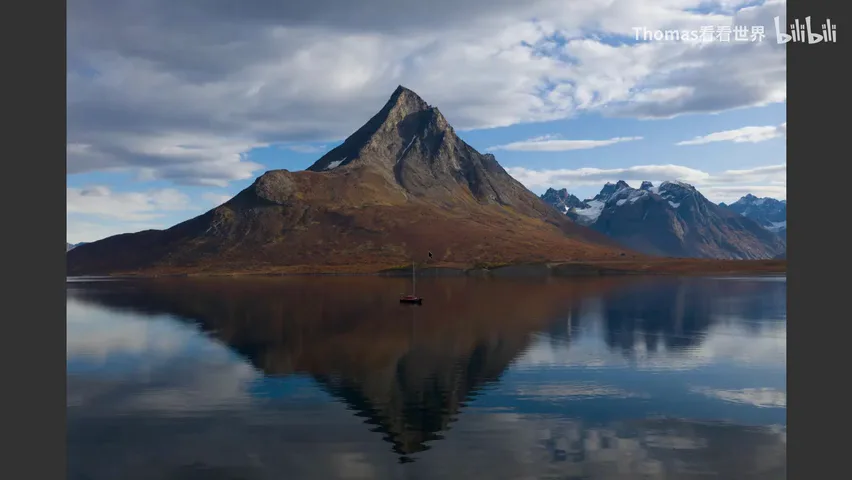
02 The Sailboat: an Anchor of Scale and Story
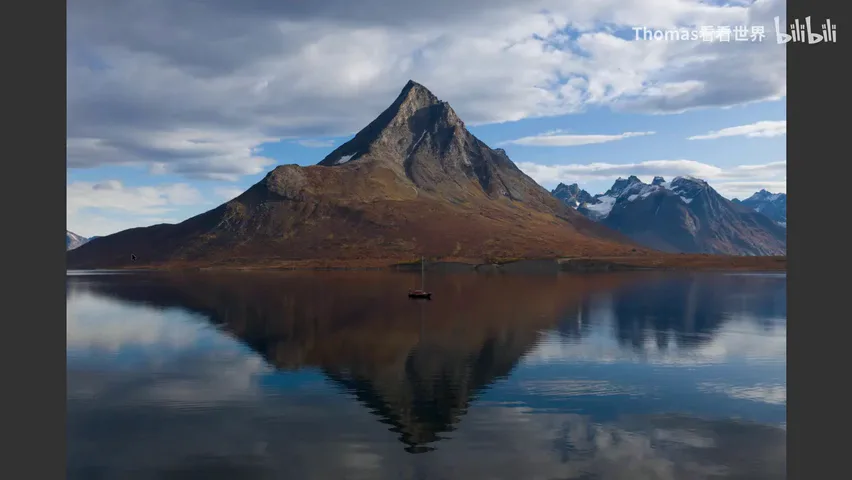
Thomas later flew the drone to a lower angle. A sailboat happened to be sailing in the middle of the fjord, and it became a key compositional element (at 1:57-2:27 in the video). Without the sailboat, the photo has no reference — you cannot tell whether the mountain is a 100-meter hill or a 1,000-meter giant; with a scale anchor, the sense of size emerges (at 2:28-2:45 in the video). A sailboat also makes the picture livelier and more story-rich (at 2:45-2:50 in the video).
Shooting the full panorama would drag in the dark scree on both sides — cluttered, with no clear subject. So he flew the drone forward instead, letting the reflection reach into the lower half of the frame — a symmetrical scene (at 2:56-3:14 in the video). A reflection scene usually invites a 50/50 split, but that reads a bit flat; with a thirds composition, the horizon at one-third leaves too much empty sky. In the end he placed the horizon at one-half, slightly lower, and the boat dead center — a pleasing symmetry (at 3:20-3:44 in the video).
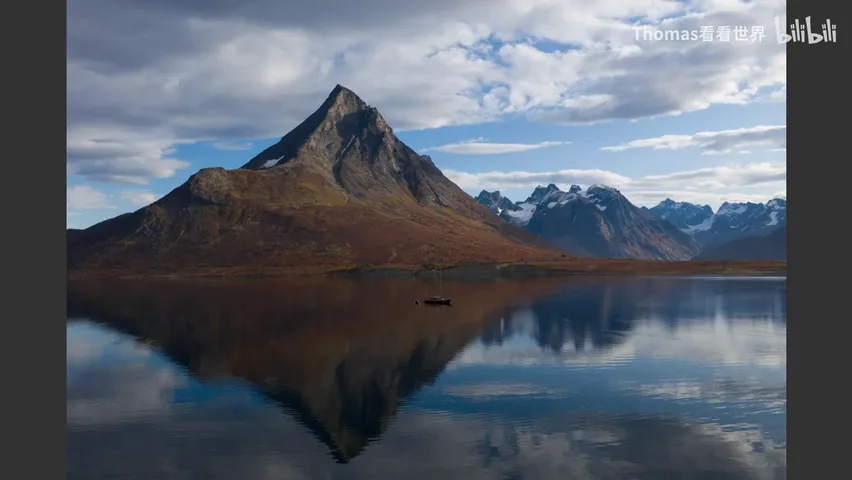
He also tried letting the boat drift slightly off center — and the balance collapsed: the mountain on the left clearly outweighed the right, and visual balance was lost (at 3:46-4:00 in the video). The final pick was this symmetrical frame, the base file for all the editing that followed (at 4:03-4:06 in the video).
03 Editing: Light Rendering and Layer Separation
The RAW file had one quirk: the drone is 100% level, but the fjord's geometry makes the far shore look tilted. In post he nudged that side up slightly with the warp tool, restoring the feeling of a level horizon (at 4:09-4:52 in the video).
The core edit here is rendering light and atmosphere. The RAW is side-lit and already fairly layered, but not enough, and the feeling of sunrise light is missing. He brightened the whole right side and warmed it, pushing it forward (at 4:53-5:28 in the video); he also simplified the blues to let the autumn tones and the red boat stand out — as he wrote in his book: if everything in a photo is bright and saturated, nothing stands out (at 5:29-6:02 in the video).
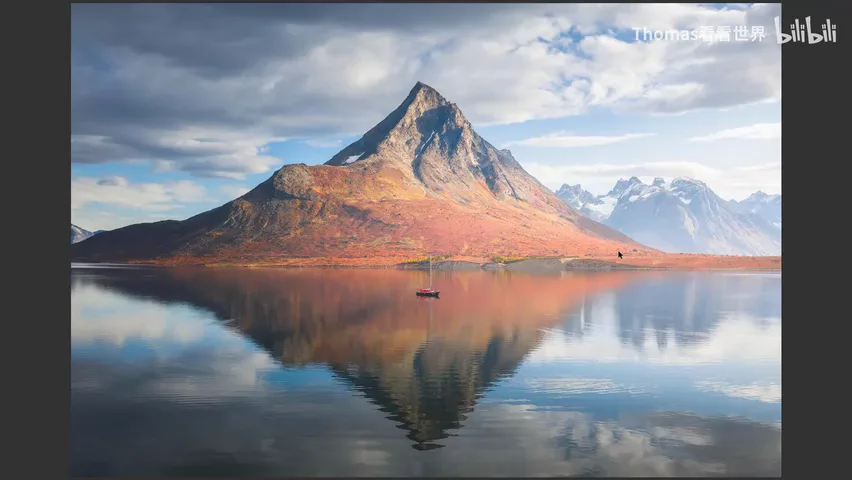
Then comes layer separation. In the RAW, both mountains are dark and read as one layer; after editing there are clearly two — below the dividing line everything is saturated, crisp and bright (leaning warm), while the peaks above are hazed: brighter, softer, less defined, with much lower saturation (leaning cool). The two layers split cleanly, and the photo's sense of depth improves dramatically (at 6:07-6:52 in the video).
04 The Iceberg: Framing an Arctic Identity
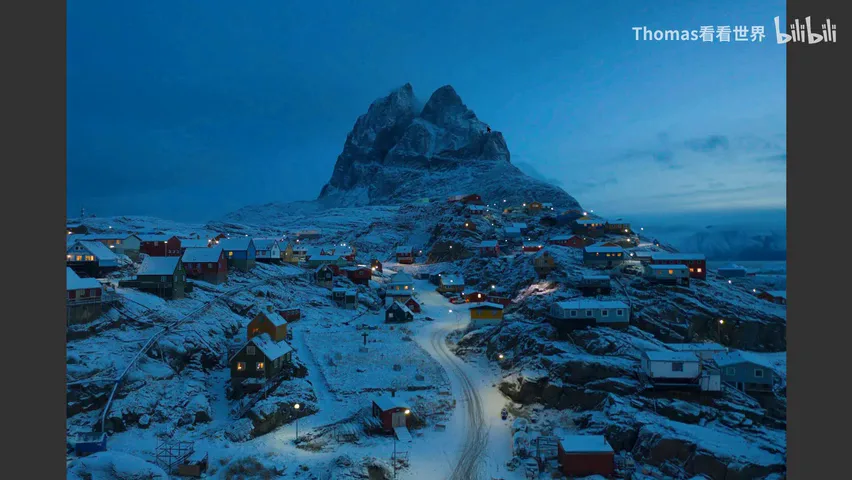
The second set was shot in the small fishing village of Uummannaq, Greenland, with a very lofty peak behind it. First he used a road as a leading line flanked by layered houses — a fairly clean composition; then a higher-angle panorama showing the town as a whole (at 7:06-7:31 in the video). But neither says "Arctic": a snowy island like this could just as well be in northeast China or Russia. He needed something with polar identity — an iceberg, say — as a compositional element to carry the geography (at 7:32-7:58 in the video).
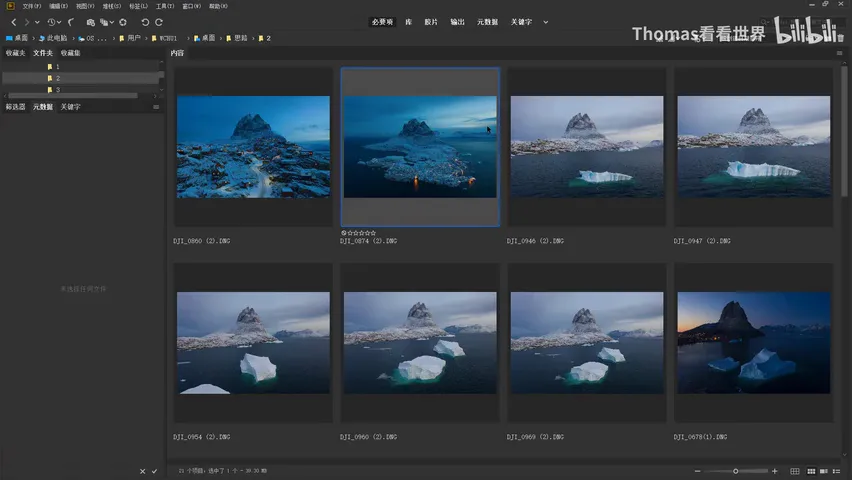
So he flew the drone out hunting for icebergs to serve as a foreground echoing the village. The ones he found along the way were decent, but he kept circling, changing angles, auditioning different bergs to find the best one for the final composition (at 7:59-8:21 in the video). Eventually the drone spotted a distinctive iceberg in the distance — a central protrusion that gives it real dimension, rich in detail. He flew behind it and brought it into the frame together with the village (at 8:25-8:44 in the video).
Then came a discovery: viewed from behind, the iceberg's silhouette closely mirrors the shape formed by the village plus the snowy peak behind it — the mountain shows a spike with a broad left flank, and so does the iceberg. Similar forms create a formal echo in the frame, making the photo more interesting and more comfortable to look at (at 8:47-9:18 in the video). He decided to shoot with this iceberg as the foreground.
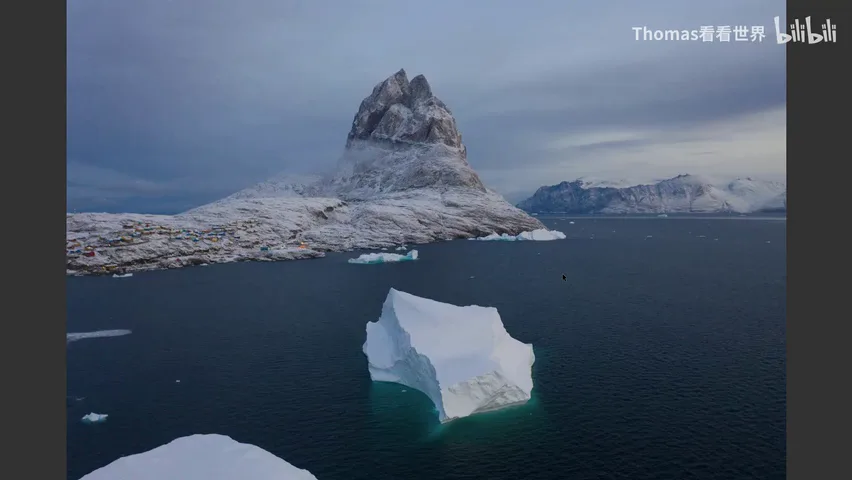
Where to put the iceberg took trial and error. First, at the right third — a textbook rule-of-thirds — but then the iceberg and the island felt separated, the echo weakened (at 9:31-9:57 in the video). Grouping them together made the echo complete but read as static and dull (at 9:58-10:11 in the video). The final composition: both near the center yet off it — the island center-left, the iceberg center-right — a dynamic balance that is neither rigid nor disconnected, and because the two sit close together in the 2D plane, the echo works beautifully (at 10:12-10:46 in the video).
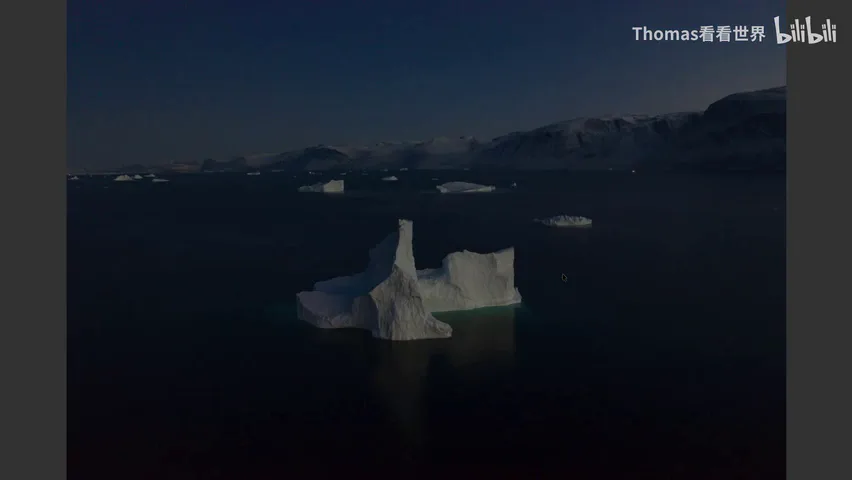
05 Blue-Hour Night: Burst for Safety, Warm-Cool for Texture
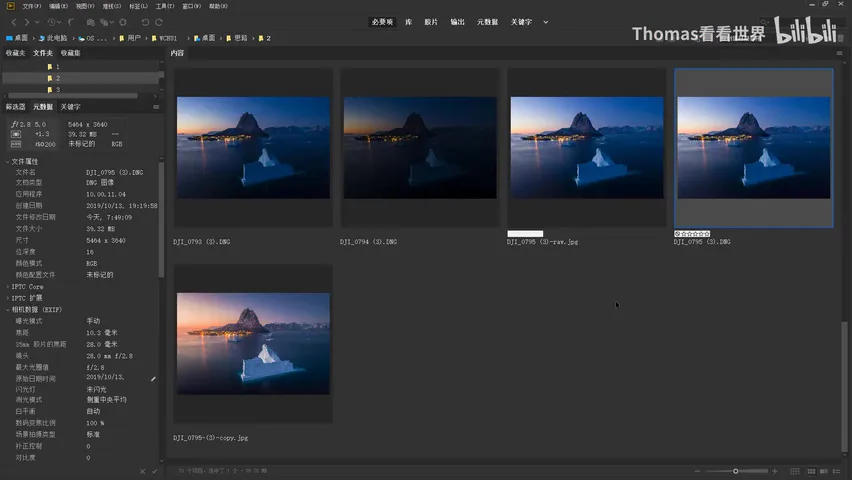
Blue hour is fleeting, so the strategy is to shoot bursts and screen for sharp, effective frames later (at 10:50-10:59 in the video). Unsure at first whether he would need detail in the lights, he also fired a bracketed set — more material in the field means more latitude later (at 11:00-11:16 in the video). In the end he used a single frame: the brightest of the bracket, ISO 200 with a 5-second exposure. Five seconds usually means motion blur, but the wind was light that evening and, across several sets, this one came out sharp; brightening the darker frames would have brought heavy noise, so the brightest frame became the base for a single-file edit (at 11:18-11:55 in the video).
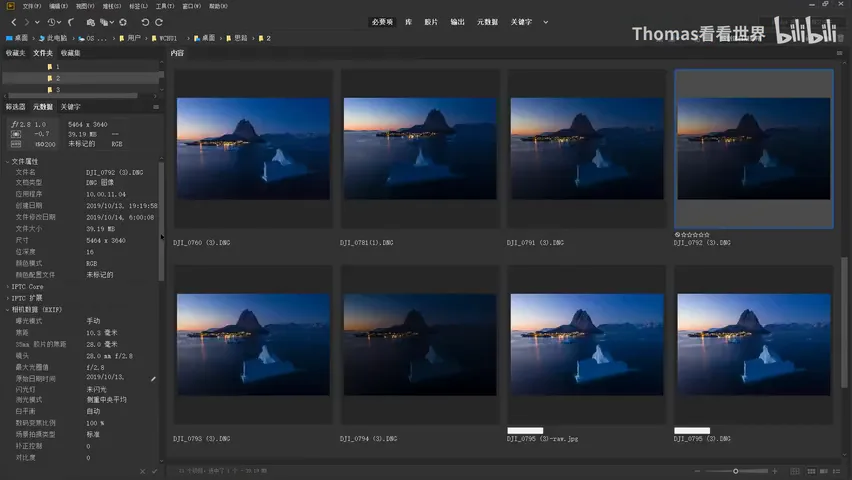
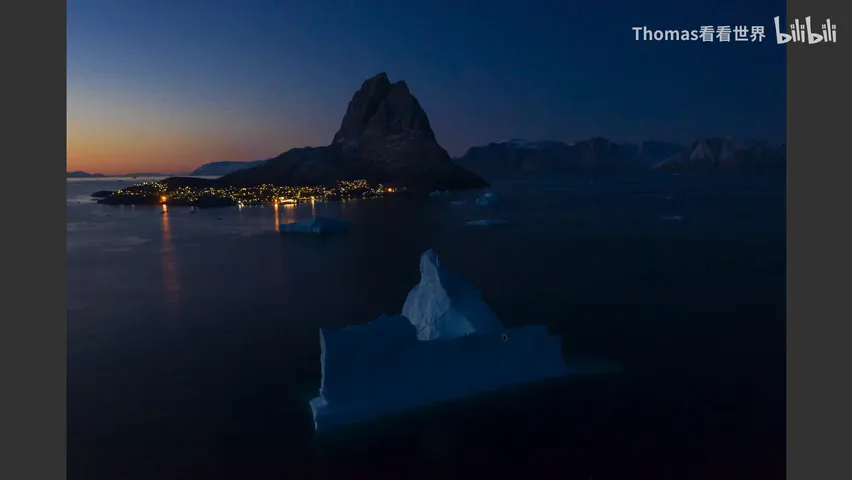
The edit again leans on warm-cool contrast. The RAW's white balance leans blue, and apart from the lights everything is a cold mass — too blue to convey tranquility. He strengthened the warmth of the lights and added a gradient in the sky, so the sky itself carries a warm-cool layering (at 11:57-12:33 in the video). The foreground ice was uniformly cold; through white balance and local adjustments he warmed its lit side with a hint of pale yellow — giving the ice dimension instead of one flat blue lump (at 12:34-12:55 in the video).
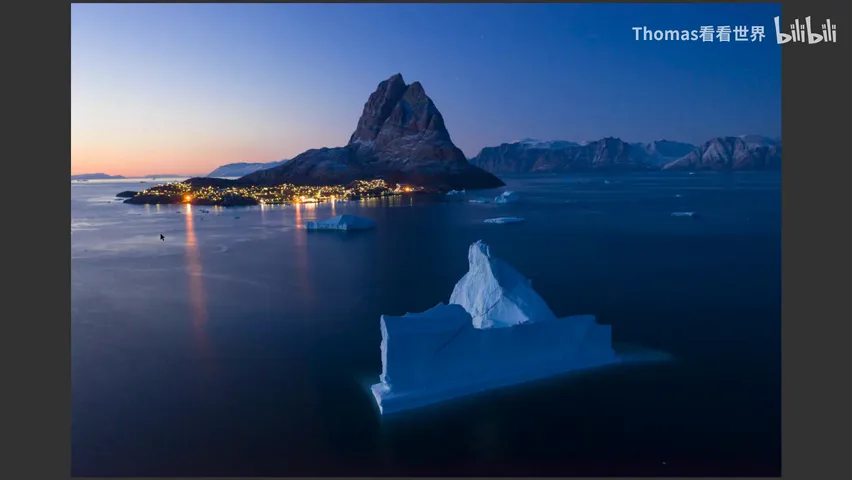
The night frame also received heavy — and local — noise reduction: he masked out the ice, then dragged the water's noise reduction straight to 100 inside the RAW processor. Detail is lost, but water is naturally soft; he doesn't want detail there — he wants it quieter and cleaner (at 12:56-13:39 in the video). The iceberg gets the opposite treatment: local processing to boost its dimensionality and texture. A textured iceberg floating in soft, textureless water becomes yet another fine contrast (at 13:39-13:58 in the video).
1. Grand scenes fail because 2D photos are cluttered: extract the most interesting subject from the panorama first, then refine; 2. Give the frame a reference — a sailboat brings scale and story; in a symmetrical scene put the horizon at one-half and the subject dead center, any offset breaks the balance; 3. Editing is not global saturation: lift the warm tones, simplify the blues, split foreground and background into warm and cool layers, and depth emerges; 4. Find a foreground with regional identity (an iceberg for the Arctic) and place it through formal echo and dynamic balance; for night scenes, burst and bracket for safety, then render warm-cool contrast, denoise the water heavily and boost the iceberg's texture.