Photography Tutorial · 2018-02-11
HDR Equals Fake-Looking Images? How to Use HDR the Right Way
Thomas Chu Photo
One practical tutorial every week, making photography easy to learn
HDR is widely used by photography enthusiasts — and just as often abused or misapplied. The dirty-looking, oddly toned HDR photos all over the internet once gave the technique a notoriously bad name.
In this article, I'll use several examples to share the right way to process HDR.
1
What Is HDR? What Are the Typical Mistakes?
HDR stands for high dynamic range image blending. In short, it merges several photos taken at different exposures to recover highlight and shadow detail in high-contrast scenes.
In a sunset scene, for example, a single exposure is bound to be under- or overexposed somewhere.
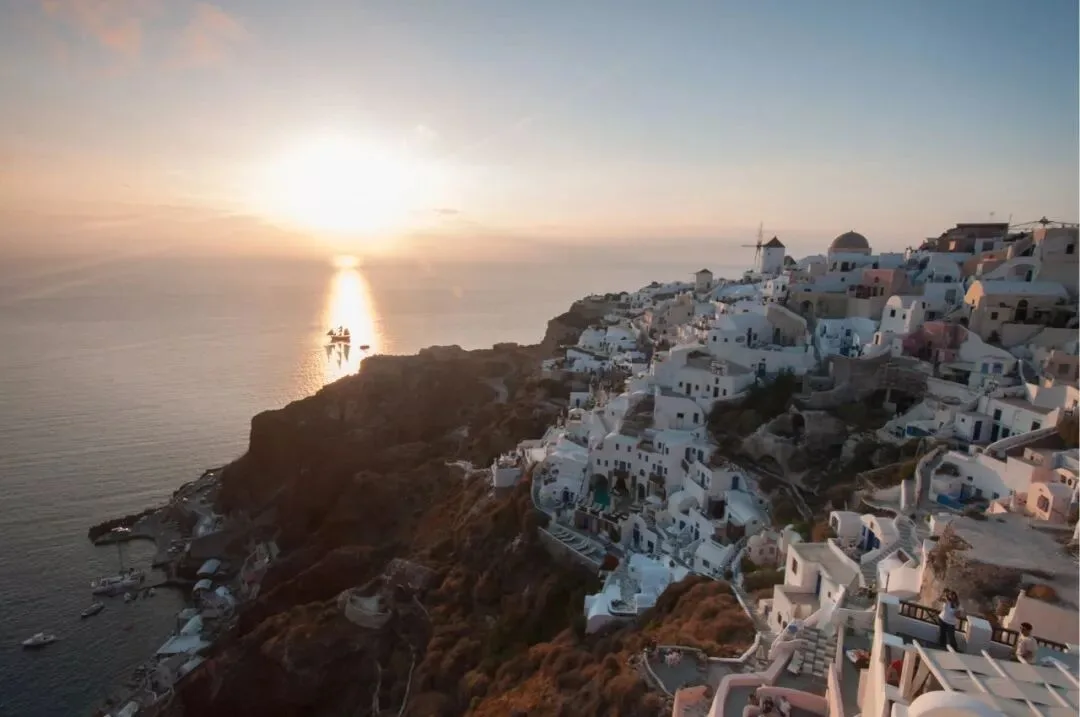
Shooting with exposure bracketing and blending in post produces a photo with detail in both the highlights and the shadows.
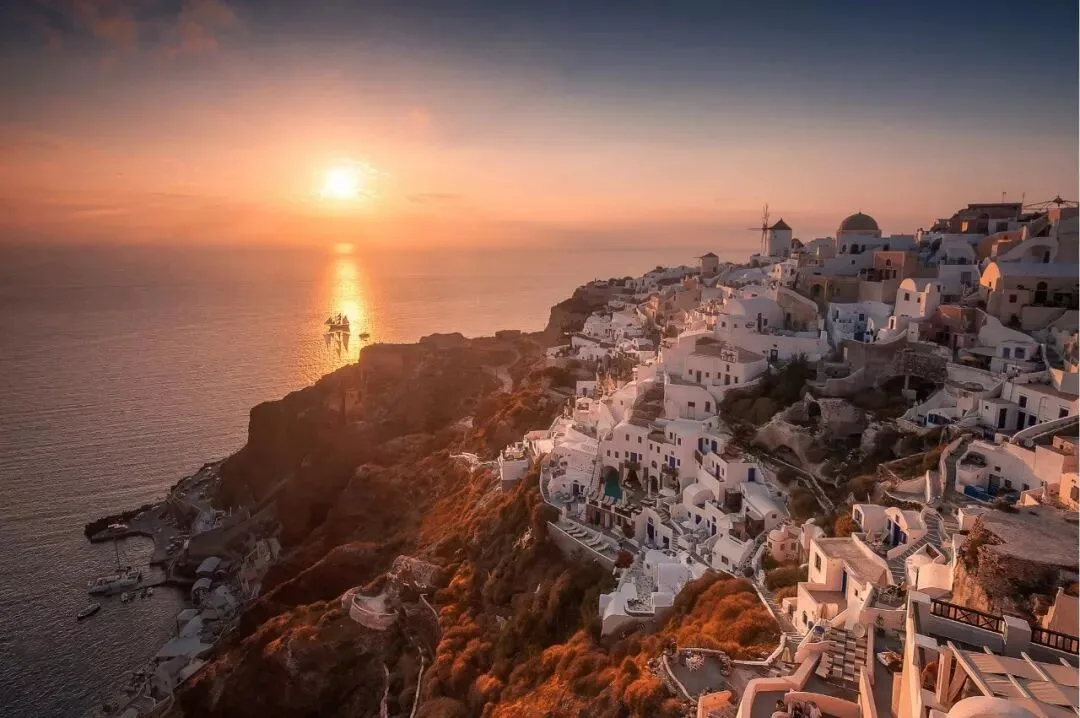
Shooting for HDR requires exposure bracketing, which I explain in detail in this article: "No More Fearing Extreme Contrast — A Detailed Guide to Exposure Bracketing and Blending."
As the saying goes, too much of a good thing. Although HDR helps us capture highlight and shadow detail, recovering too much of that detail in post makes an image look distinctly unnatural.
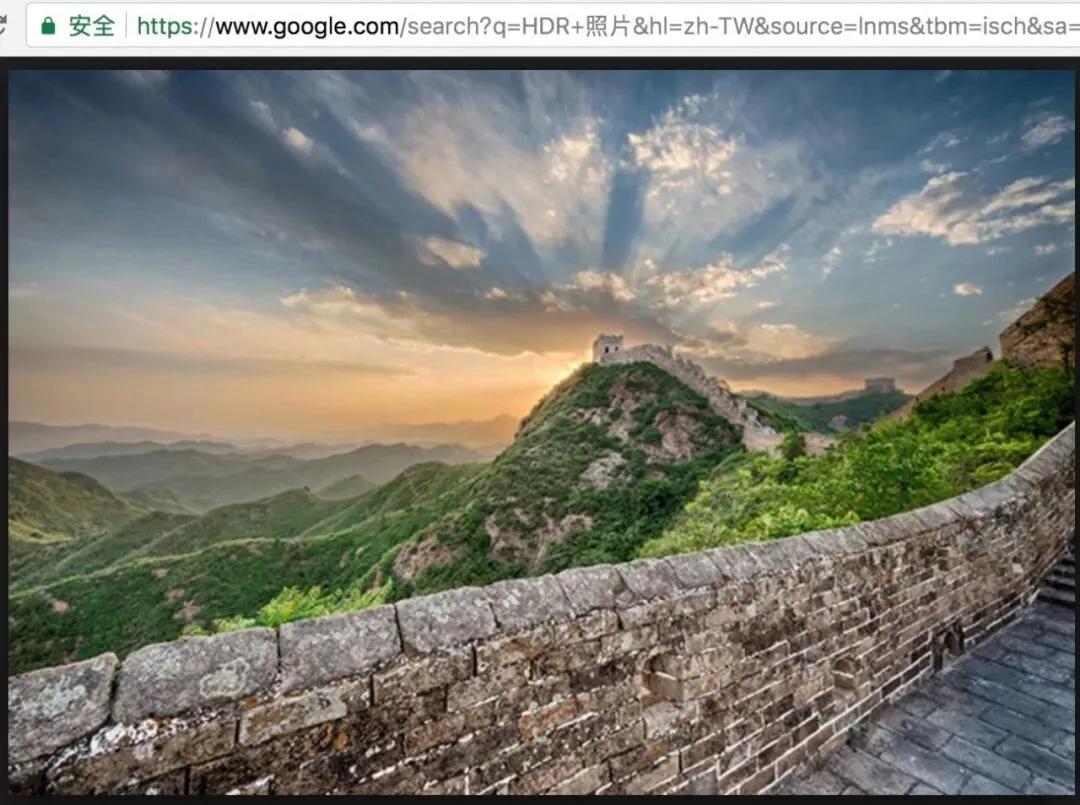
Take this image — a typical result I found by searching "HDR" on a search engine. The highlight detail in the distance is over-recovered; the distant sun has lost all its brilliance and looks strange. The shadow detail in the foreground is lifted too much as well, robbing the photo of its sense of depth.
The image below is a signature work by Dutch photographer Max Rive. While HDR preserves the detail in the sun, the photo remains rich in tonal depth and reads as a perfectly natural sunset.
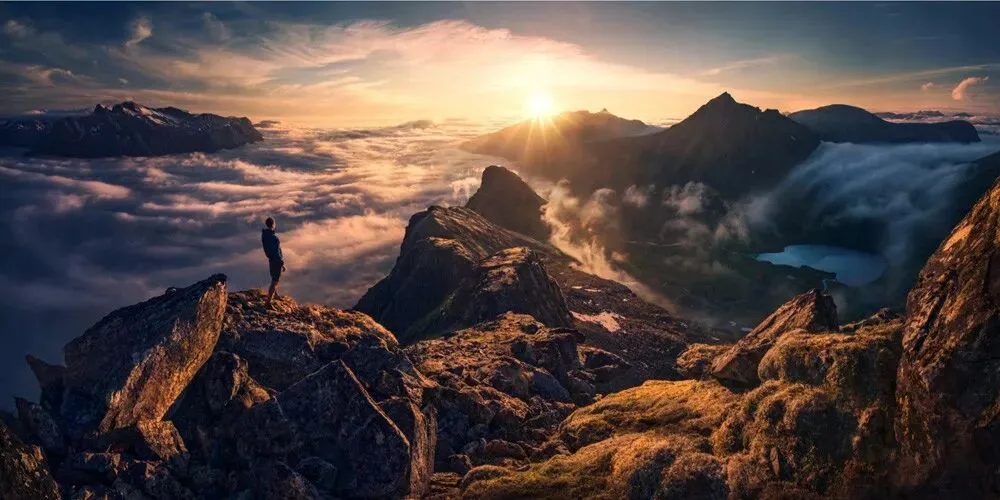
Photos that misuse HDR usually result from automatic HDR merge settings, with no subsequent rework of the image's tonal distribution.
The key to using HDR correctly is reworking the tonal distribution after the merge: hiding unnecessary detail, letting what should be bright be bright and what should be dark go dark, and restoring the photo's natural contrast.
2
The Right Way to Use HDR
I'll use the photo below to demonstrate the HDR merge process and — most importantly — the tonal recovery process that follows it.
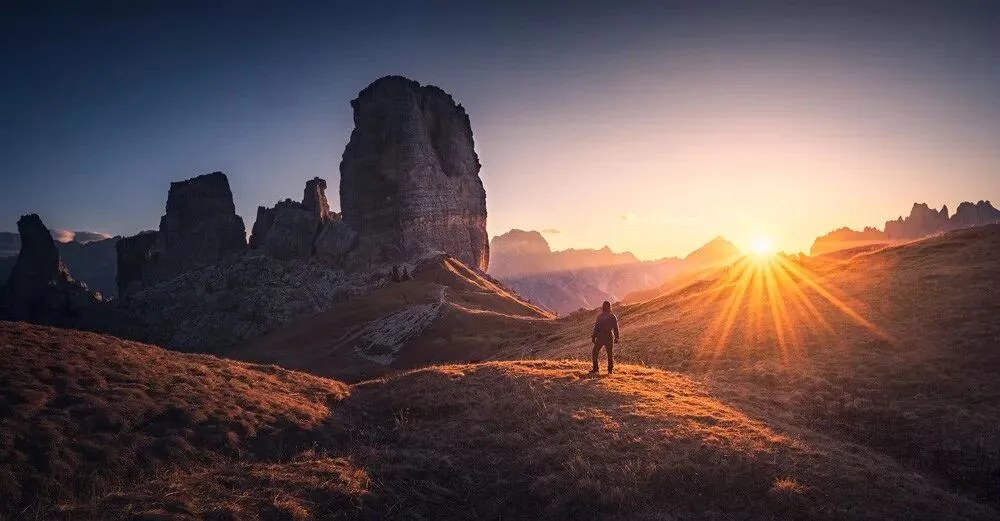
This final image comes from three source frames. The first was shot 2 stops under, recording highlight detail in the sun:
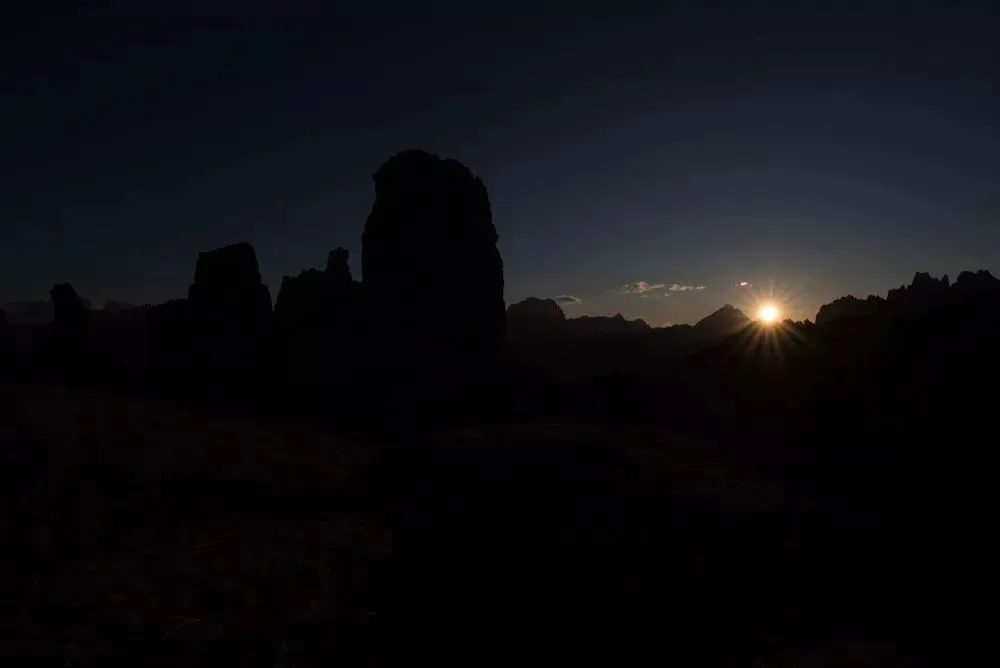
The normally exposed frame:
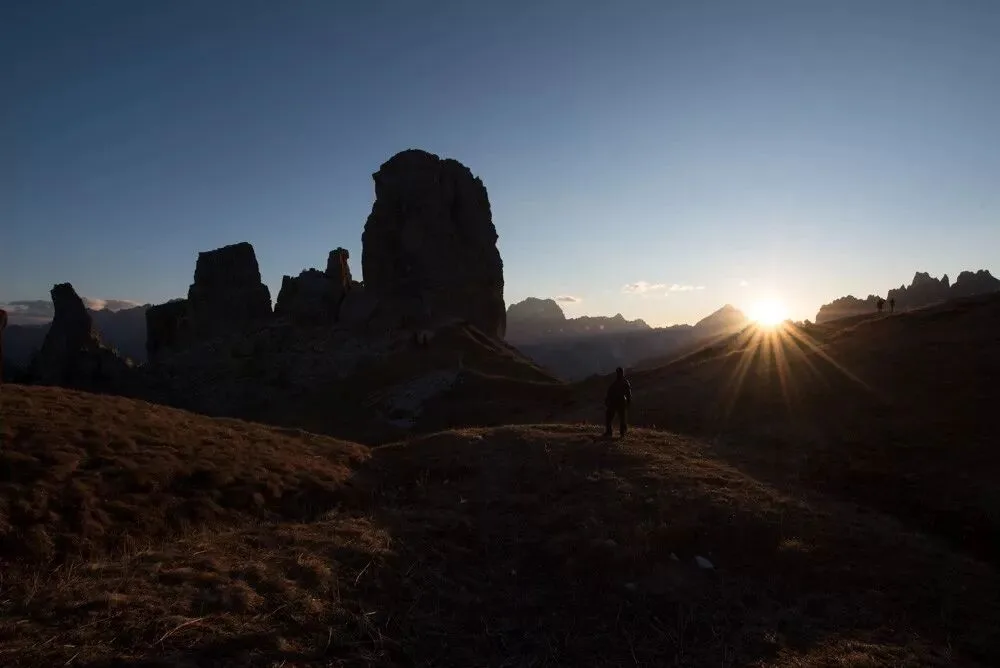
And a frame 2 stops over, recording shadow detail on the ground:
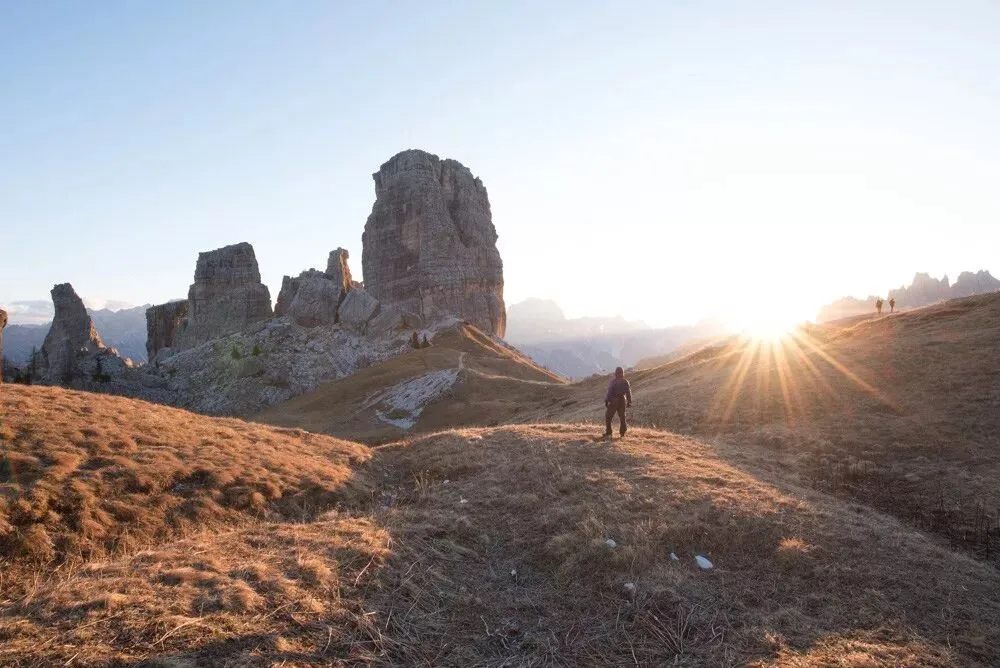
In post, we can use Photoshop's built-in Camera Raw processor for the HDR merge. In Photoshop, choose File > Open.
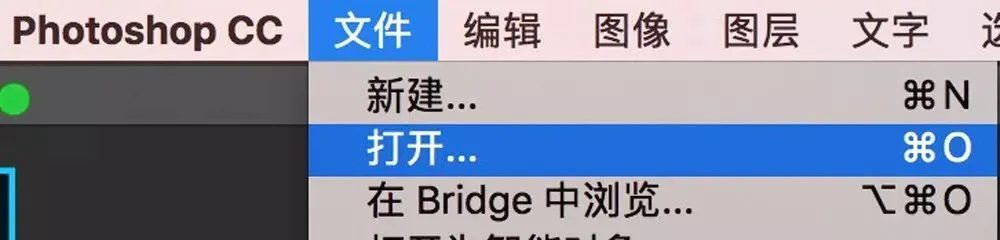
Hold Ctrl and click all three source frames to select them, then confirm.
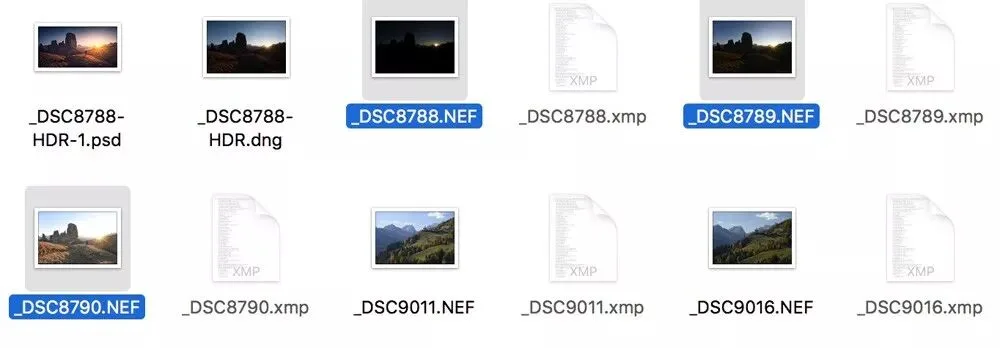
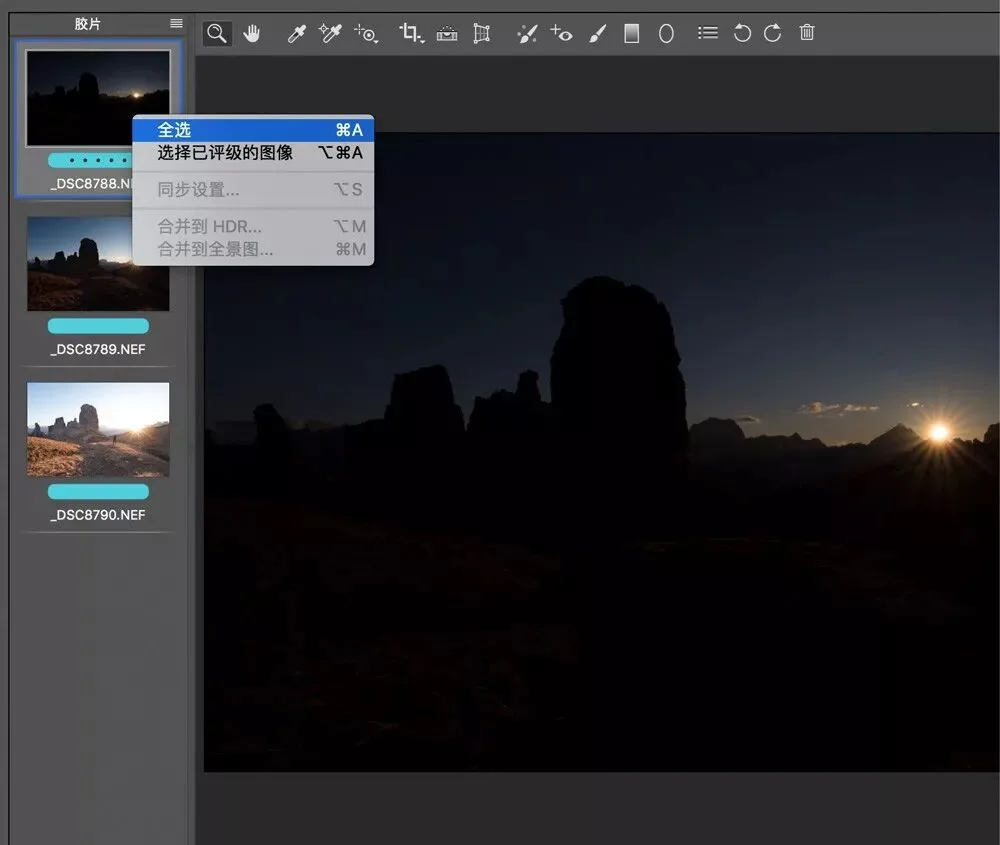
Photoshop loads the three raw files into Camera Raw. On the left side of the Camera Raw panel you can see their thumbnails; right-click and choose Select All.
With all selected, right-click again and choose "Merge to HDR."
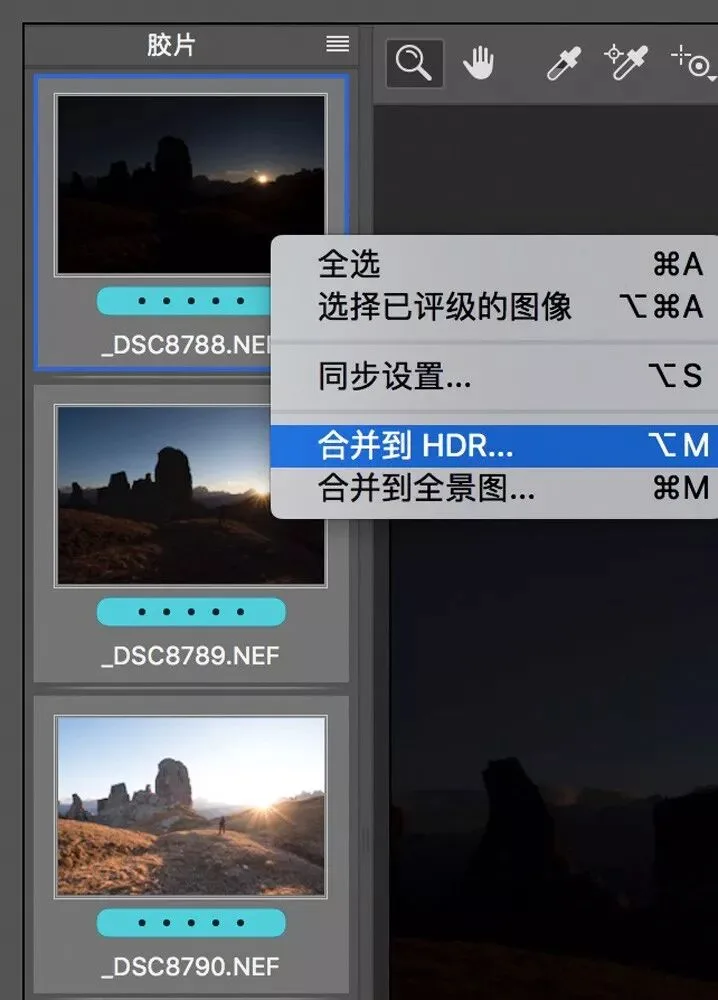
In the dialog that opens, check "Align Images" and "Apply Auto Tone and Color Adjustments." Align Images corrects the slight shifts between the three frames, while the auto tone option recovers highlight and shadow detail in the merged file for us.
Click Merge, and the information from all three photos is saved into a single DNG file.
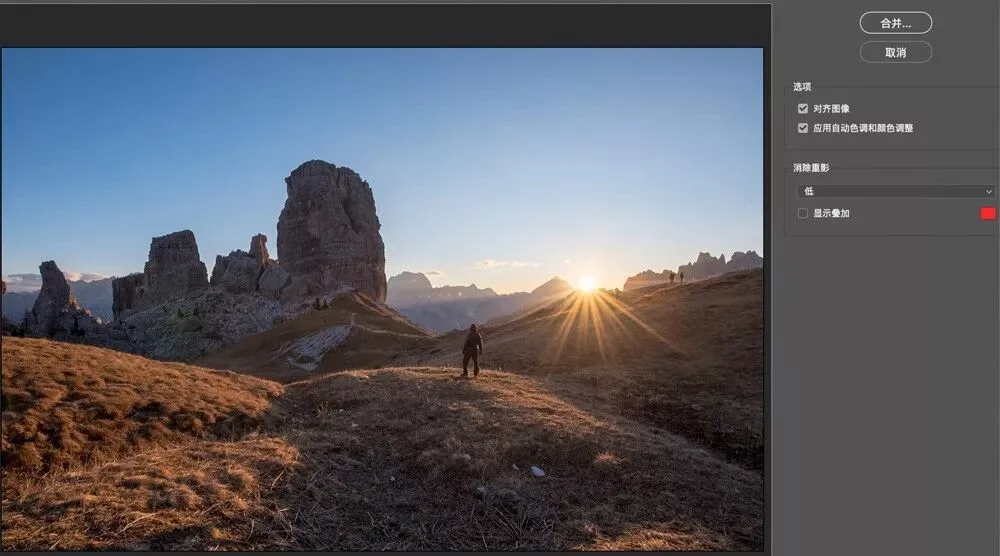
Because we enabled "Apply Auto Tone and Color Adjustments," the software adjusted exposure, highlights, shadows and other parameters for us automatically.
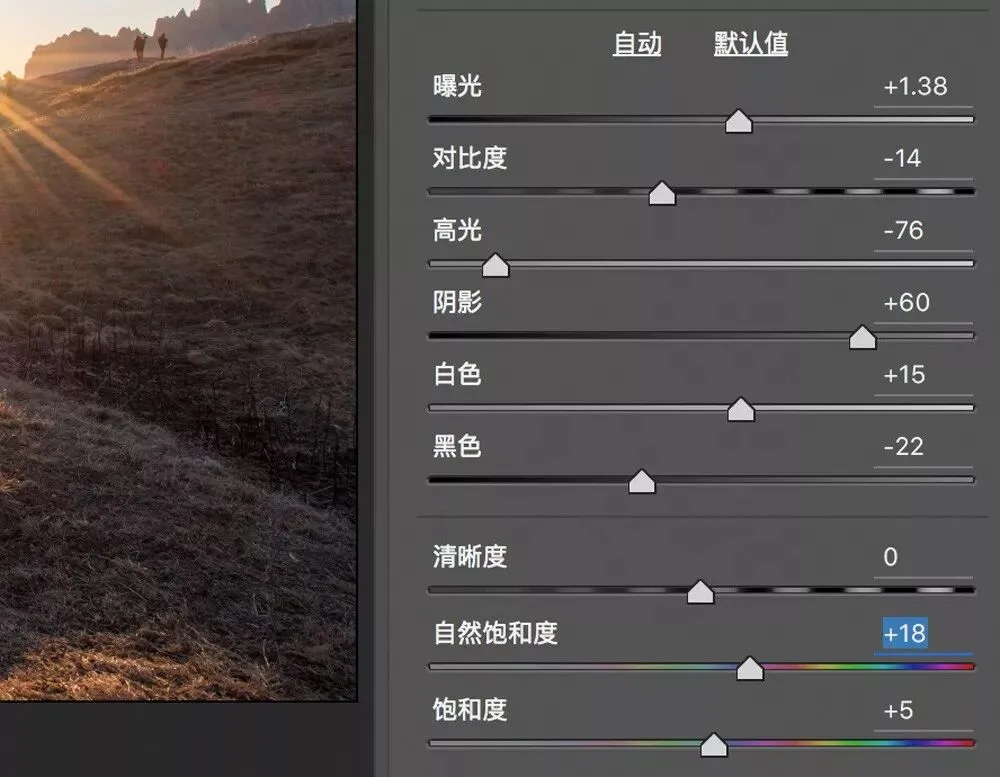
But the software's automatic result is a typical fake-looking HDR photo: every detail is there, yet it looks artificial and strange. Next we need to repair its tonal distribution.
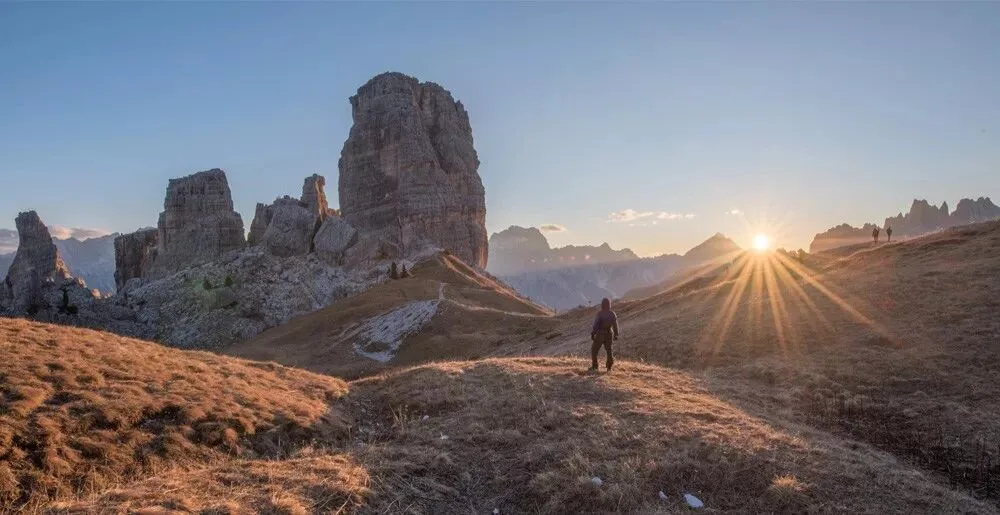
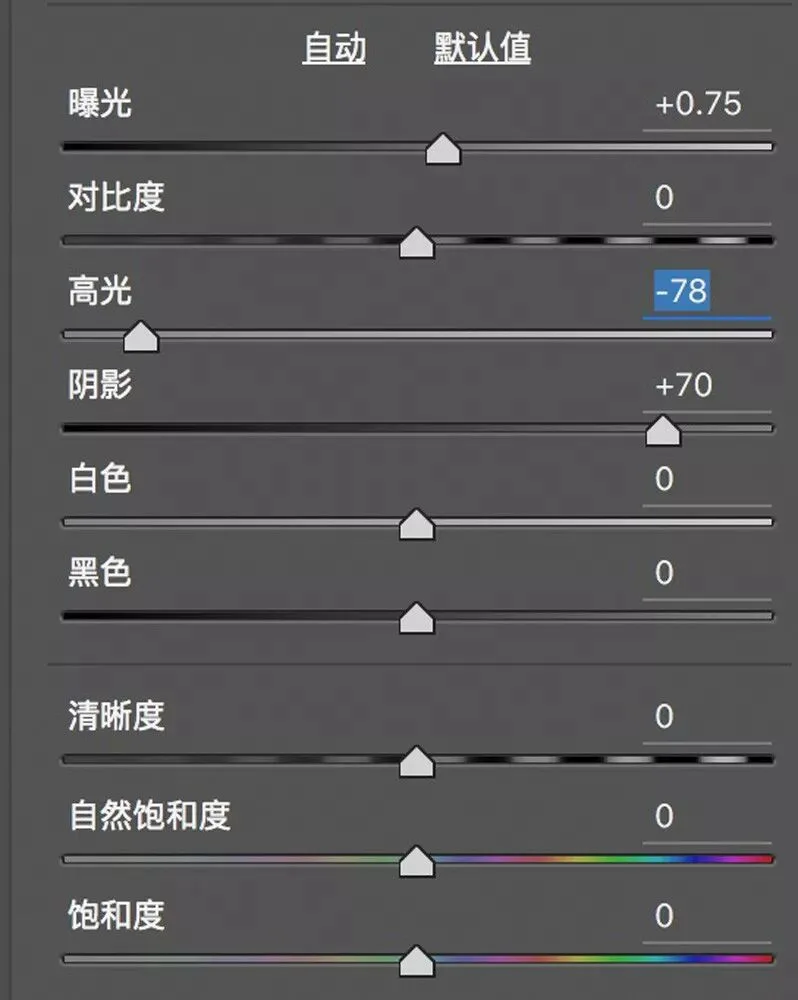
First, manually readjust the exposure parameters so the highlight/shadow recovery isn't so exaggerated. And since a sunset is inherently a low-light scene, I lowered the exposure from the automatic +1.38 to +0.75 to restore a sense of realism.
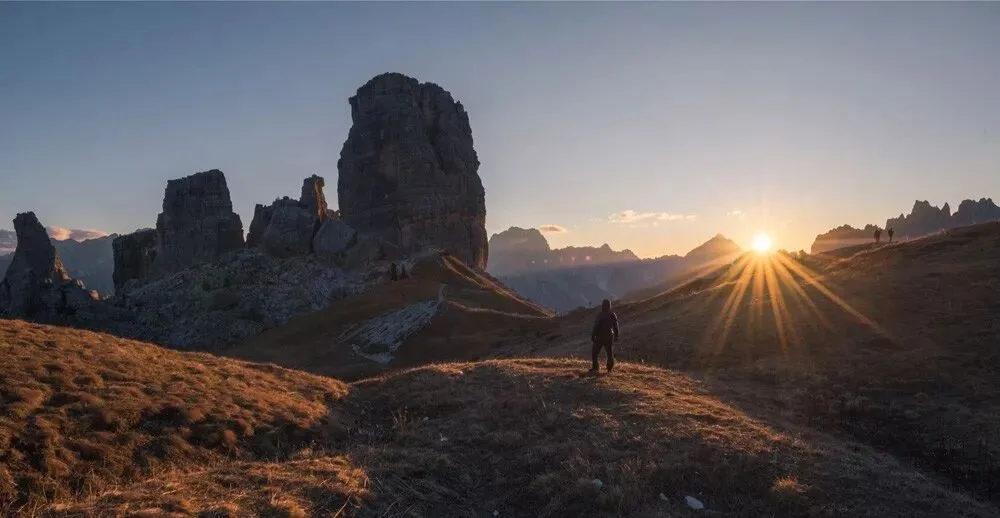
The image already looks much better after this step. Next I'll apply Radial and Graduated Filters to further refine local areas.
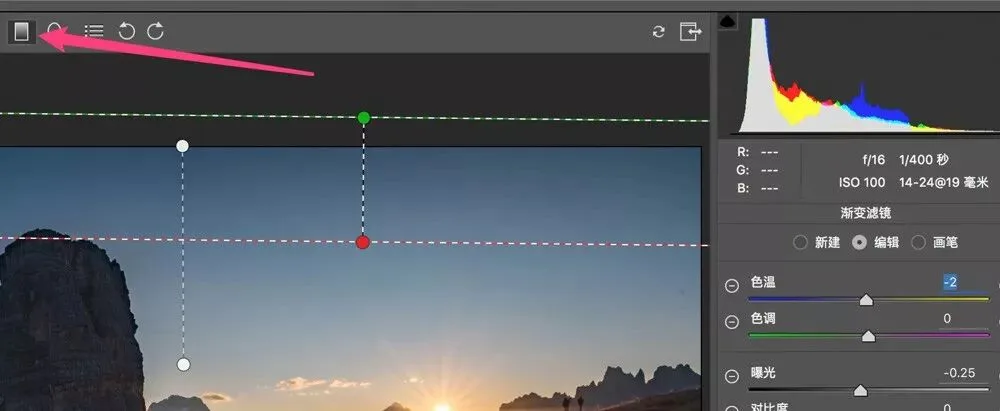
First, create a Graduated Filter with Exposure -0.25 and Temp -2 — darkening while adding a touch of cool color.
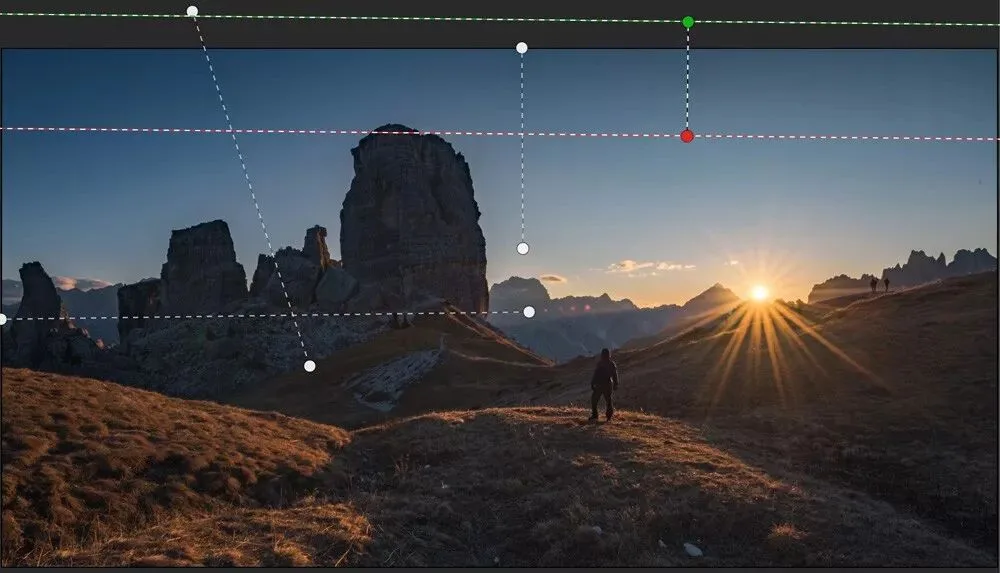
Then drag a few gradients across the sky to restore its tonal transitions.
Next I set up a Radial Filter with Temp +6 and Tint +3, adding a layer of golden sunlight to the affected area, plus Exposure +0.2 to brighten it.
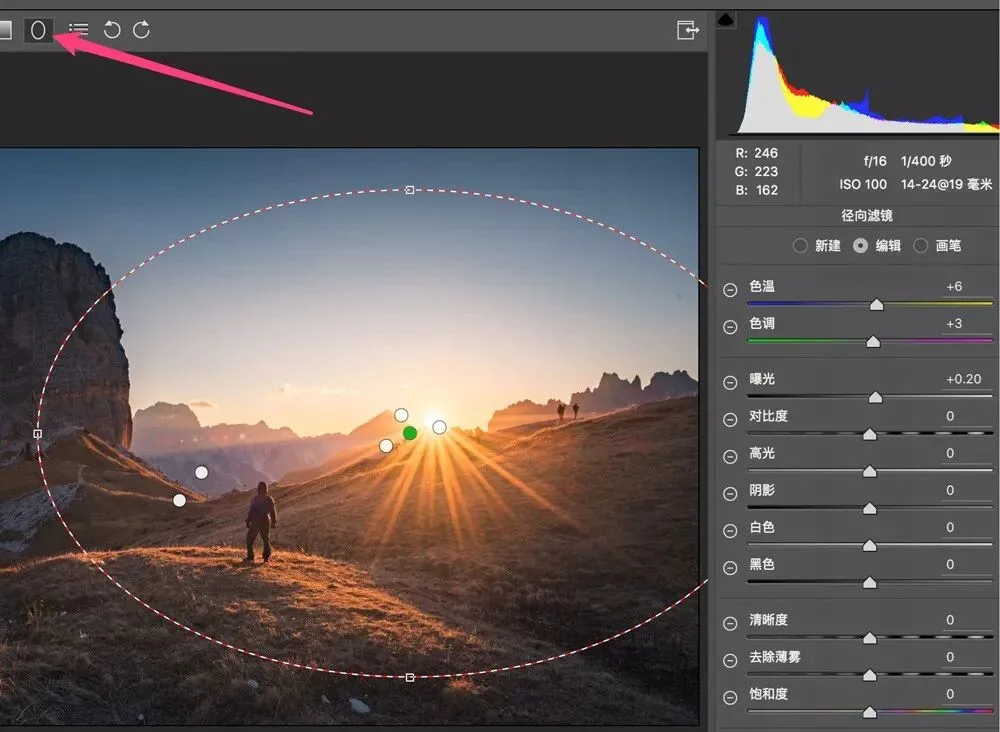
With these settings, I built several Radial Filters near the sun, on the lit side of the grass, and around the person, making the bright parts of the photo glow again.
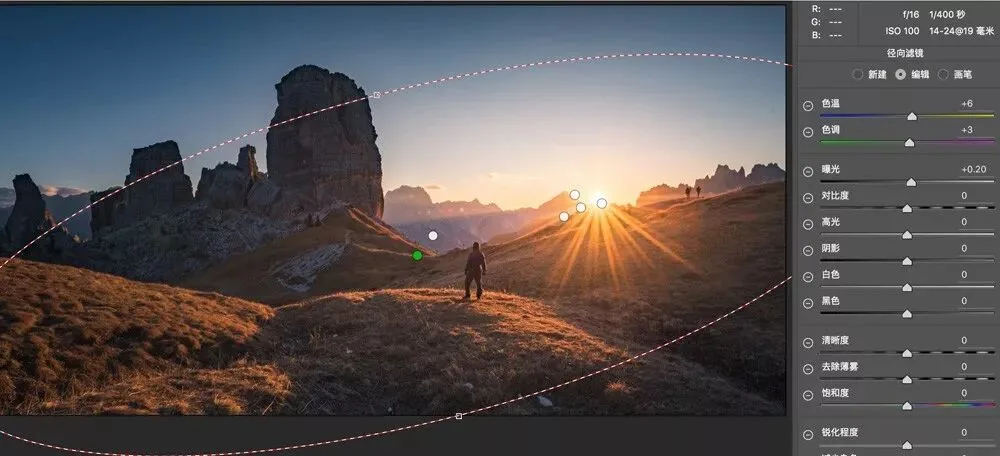
After the local adjustments, doesn't the photo better match how we actually perceive a sunset?
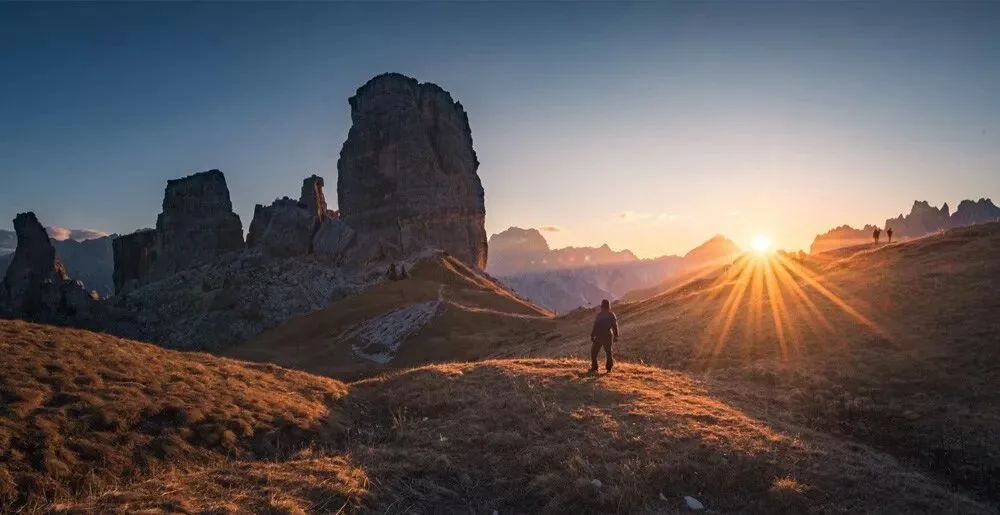
Finally, I used Nik's Pro Contrast and Darken/Lighten Center filters to strengthen the contrast. After some simple color grading, we arrive at a brilliant, glorious sunset HDR photo.
3
More HDR Examples
The key to realistic, refined HDR photos is the tonal recovery step after the merge. Skip it or do it carelessly, and you'll end up with the distorted look seen at the start of this article.
The Hang Son Doong cave photo I posted yesterday also used HDR, with three bracketed exposures 2 stops apart.
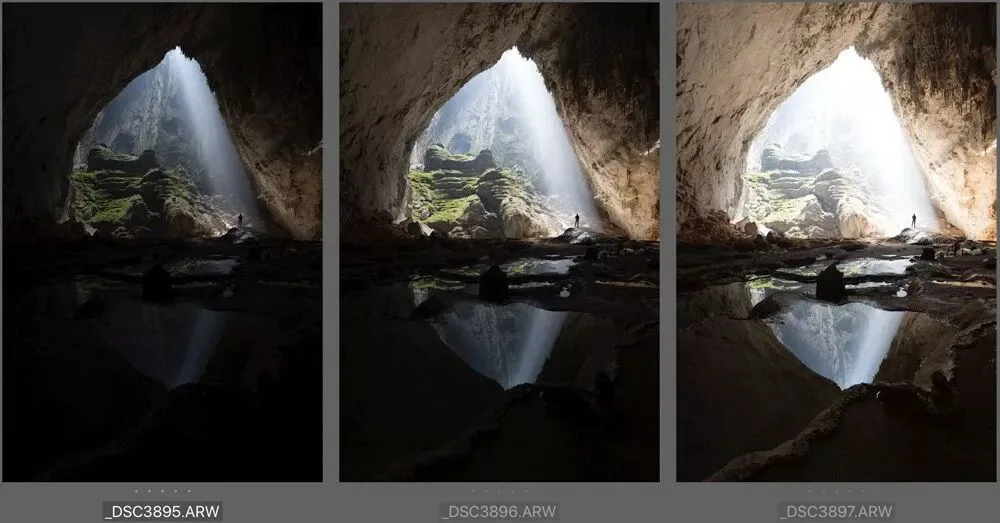
The automatic HDR merge with all detail recovered:
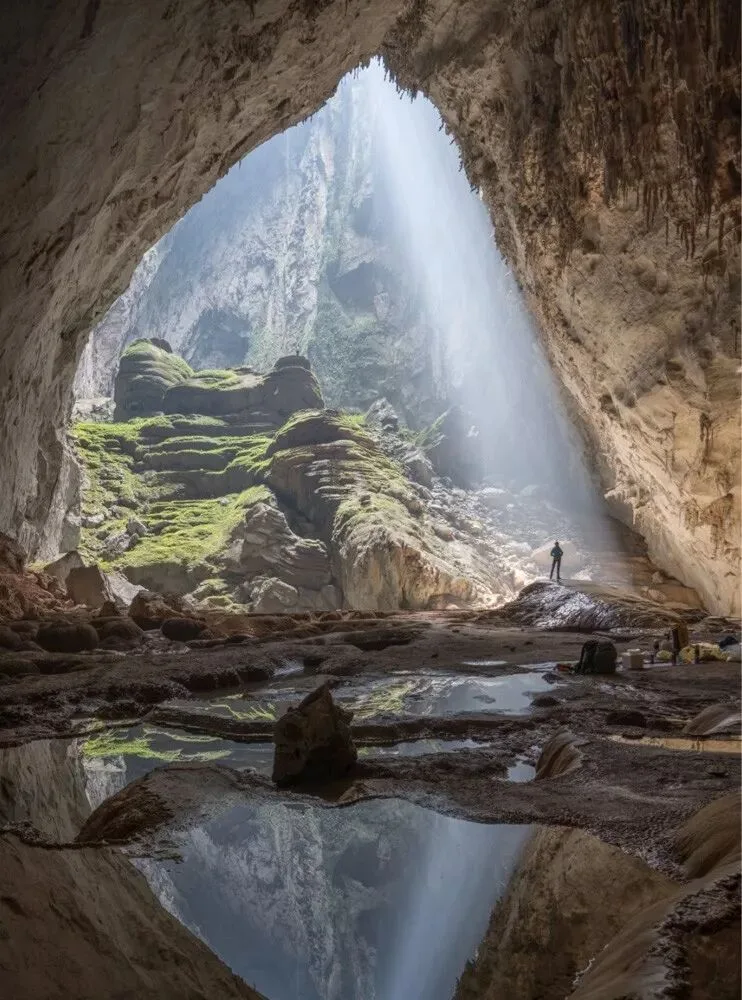
And after further tonal recovery:
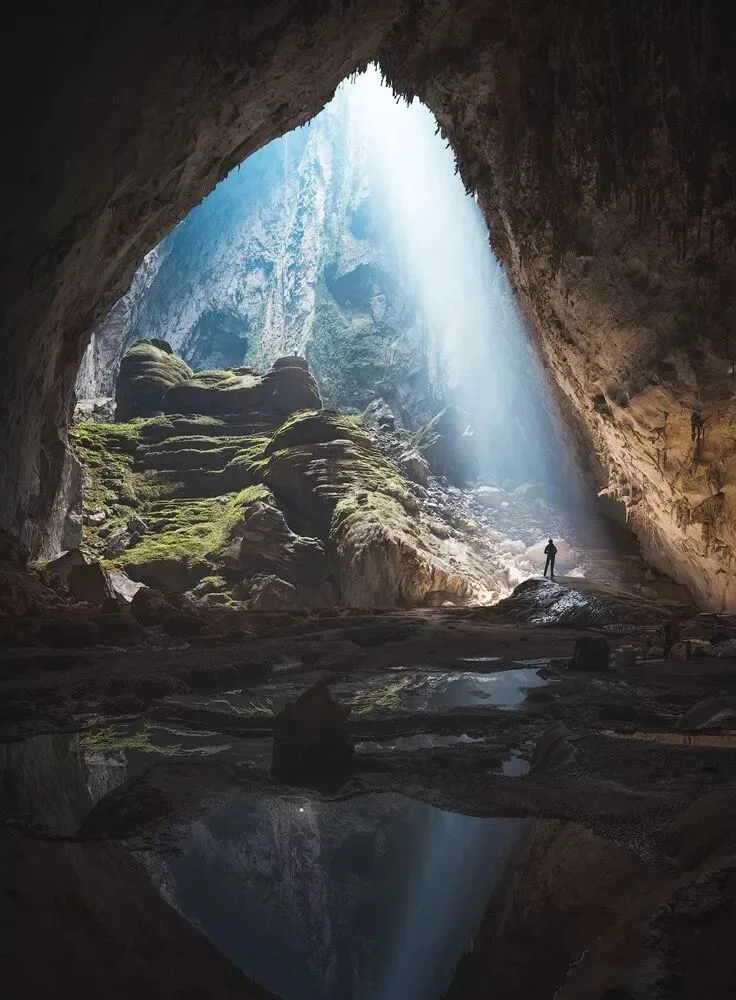
Some of you may wonder: after the tonal rework, why do over- and underexposed areas reappear in the photo?
My intention was to let the upper part of the light beams blow out slightly — it gives the light more depth and realism — and to let the ground go slightly dark, hiding the messy mud details. Controlled over- and underexposure is nothing to fear; what matters is conveying the scene's information and atmosphere to the viewer, not blindly recovering every last detail.
The next photo is similar — three bracketed exposures in the field.
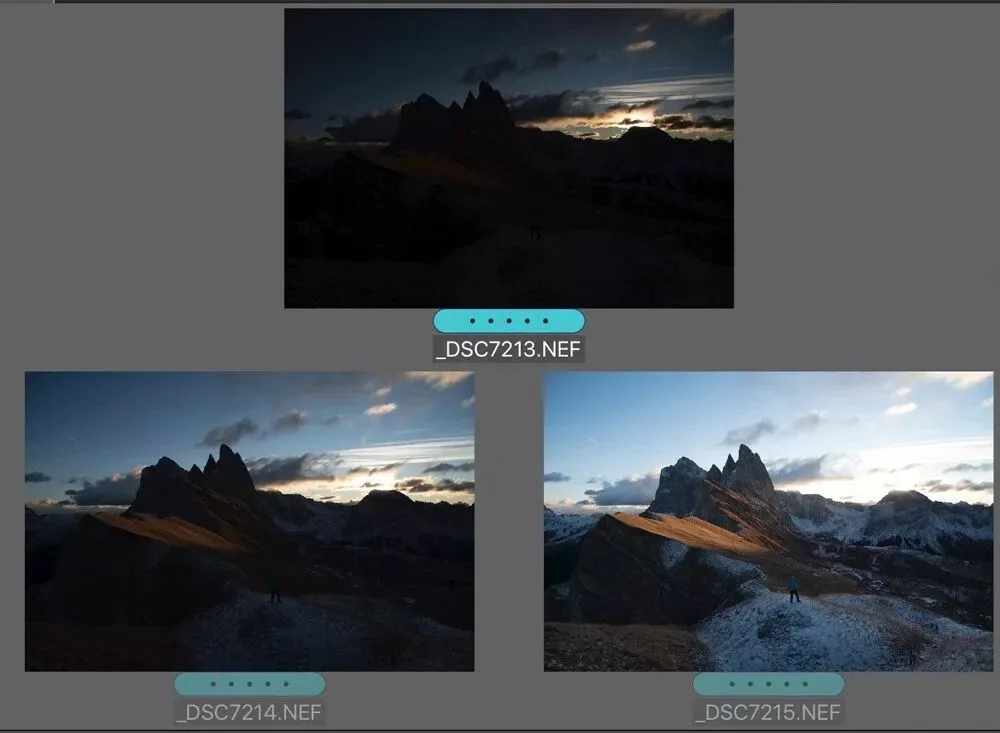
HDR merge in post recovered the highlight and shadow detail.
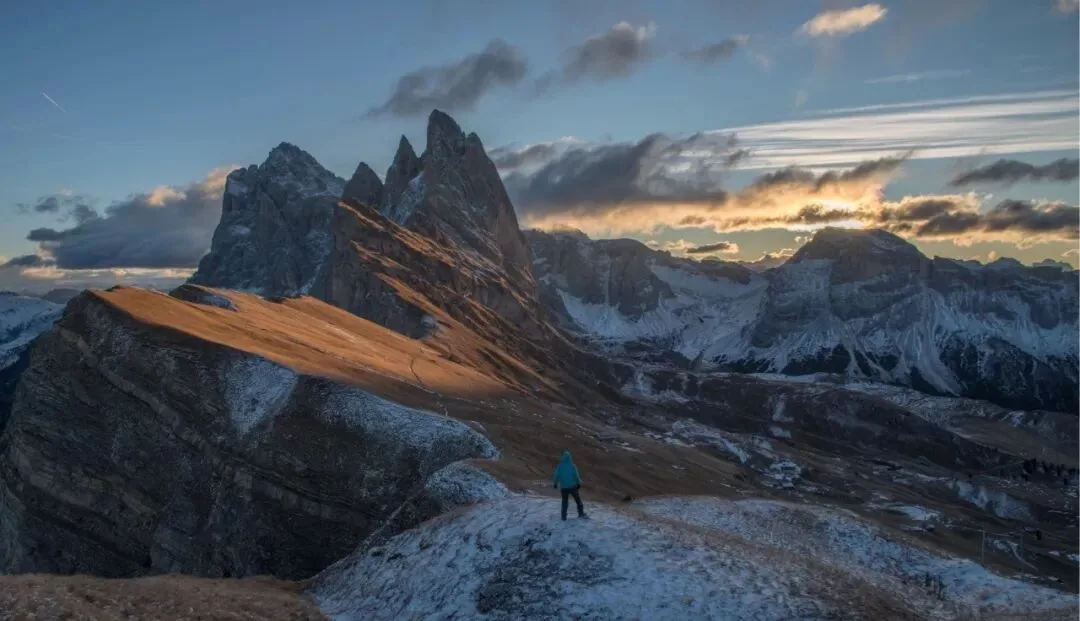
Manual tonal recovery restored the photo's sense of light and depth.
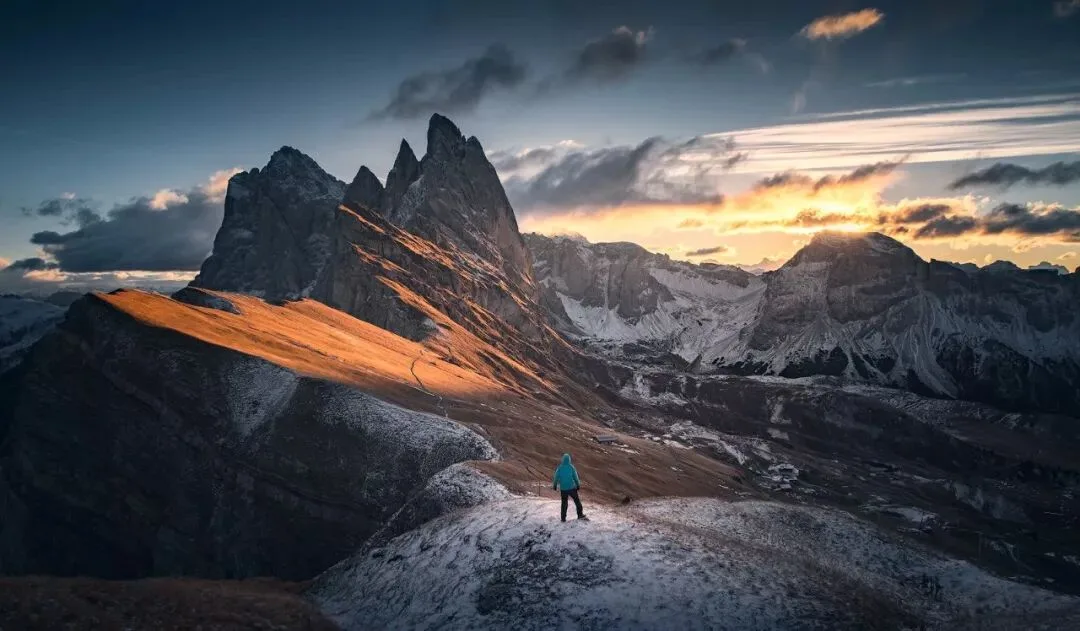
Landscape photography is above all about conveying scene and atmosphere. HDR helps us record every detail in a scene, while manual tonal recovery lets us selectively hide what isn't needed — restoring depth and realism to the photo.
Comparing the three approaches below, have you learned the right way to apply HDR?
No HDR: detail lost everywhere
Automatic HDR merge: detail everywhere, yet distorted
HDR merge + manual tonal recovery: keeps the detail that matters, hides what doesn't — realistic and refined