Photography Tutorial · 2025-01-05
Full Landscape Post-Processing Workflow: Huangshan Ice-and-Snow Panorama Practice
In today's photography tutorial, Thomas shares my complete landscape post-processing workflow, with hands-on grading practice on an ice-and-snow panorama from Huangshan!
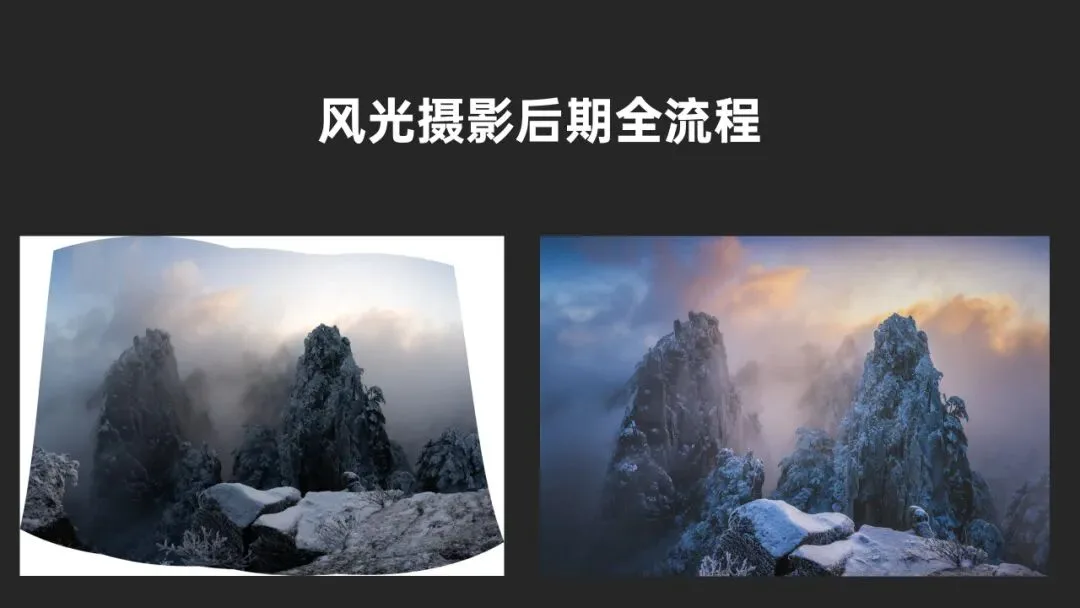
Video
▶ Watch the video tutorial on Bilibili
This is the fully illustrated companion to the video above: a 47-minute BenQ Color Workshop special in which Thomas, for the first time, lays out his complete professional landscape post-processing workflow — from the philosophy of why we post-process, through Bridge culling and Camera Raw panorama stitching, to warp corrections, Nik filters and luminosity-mask light sculpting in Photoshop, closing with a hands-on grading demo of an ice-and-snow Huangshan panorama. Read it here for the framework, then dive into the video for the details.
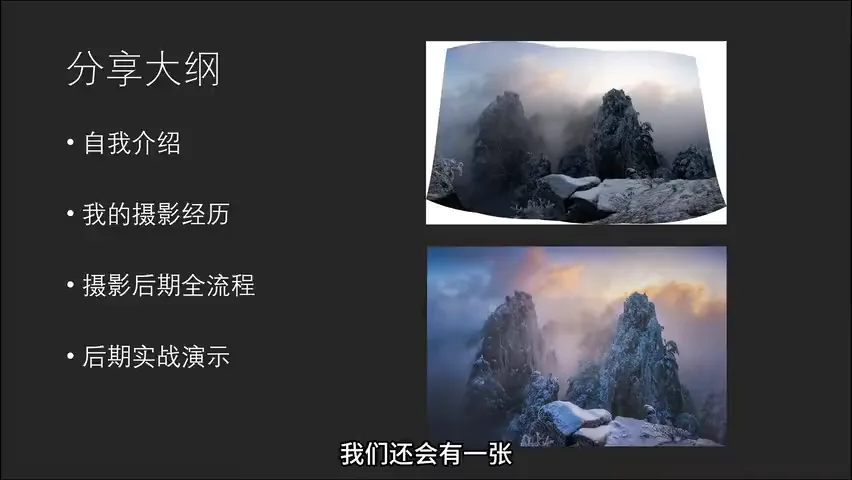
Start with the overview: this summary slide from the opening of the video (at 0:26) lays out the four-part structure — self-introduction, photography journey, the full post-processing pipeline, and the hands-on demo. Each is unpacked below.
01 Why Post-Process: The Four Roles
Thomas opens with the fundamental question: why do we post-process at all (at 12:57 in the video)? He sums it up in four points. First, to strengthen visual beauty — a compelling image needs tonal contrast and harmonious, echoing colors, while real landscapes are often messy; without darkening and unifying, there is no beauty. Second, to build mood and atmosphere — turn a gray frame blue with one white-balance move and it instantly feels calm and cold; different colors and tonalities carry different emotions. Third and fourth, to form a personal style and to realize artistic expression — post-processing is how a professional photographer puts personal vision on screen; his "Faint Light" series, for instance, leans on grading to amplify emotional impact.
That said, a great photo is never post-processing alone. In the 12-minute portfolio review: a gnarled tree framing Indonesia's Mount Bromo taught him how vital foregrounds and frames are; the blue-hour glow of Upernavik, Greenland (Grand Prize and 1st place, City category, 2019 National Geographic Travel Photo Contest) plays warm lights against cold snow to echo the theme of humans braving a harsh environment; and his "Trainscape China" series — shot inside and outside the same train window, then blended — won the Hasselblad Masters. Pre-trip planning, concept and waiting matter as much as what happens at the desk (at 1:02-12:40 in the video).

02 The Full Pipeline: Color Management to Photoshop
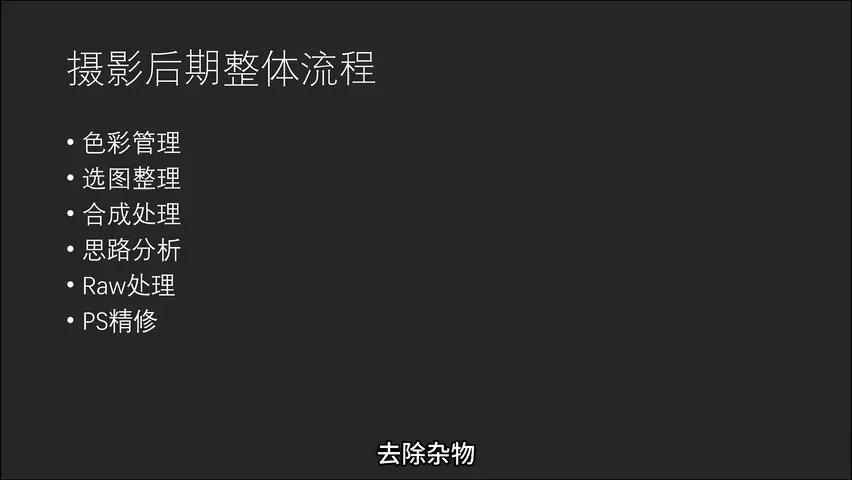
Thomas runs a fixed pipeline (at 14:33 in the video): first calibrate hardware and software so what you see is color-accurate; cull and organize in Adobe Bridge — rate, tag, and remember that out of 10,000 frames only about 100 deserve careful backup and 10 deserve fine retouching; then blending — not compositing foreign elements, but focus stacks, exposure blends and time blends that solve in-camera limits, also used to remove clutter, crowds and noise without changing the scene; next, analyze the direction of the edit, "no direction, no guidance"; finally two steps: process the RAW file in Camera Raw (or Lightroom, Capture One), then fine-tune in Photoshop.
One core idea runs through the whole pipeline — local adjustments (at 16:29 in the video): use selections and luminosity masks to isolate a region, then create or unify tonal contrast, build or echo color relationships; never drag exposure or saturation globally, or everything turns loud. Tools matter less than mastery: in Photoshop he reaches for Hue/Saturation, Selective Color, Color Balance, Curves and Levels for color; Clone Stamp, Spot Healing, Content-Aware Fill (and generative AI fill) for cleanup; Warp and Puppet Warp for structural fixes; plus one luminosity-mask panel (TK Actions) and the Nik Collection. And since local grading demands trust in what you see, a display with strong color control is essential — he uses a BenQ SW-series monitor, also trusted by the Chinese National Geography team (at 19:04 in the video).
03 Hands-On: Stitching Parameters and the Panorama Merge
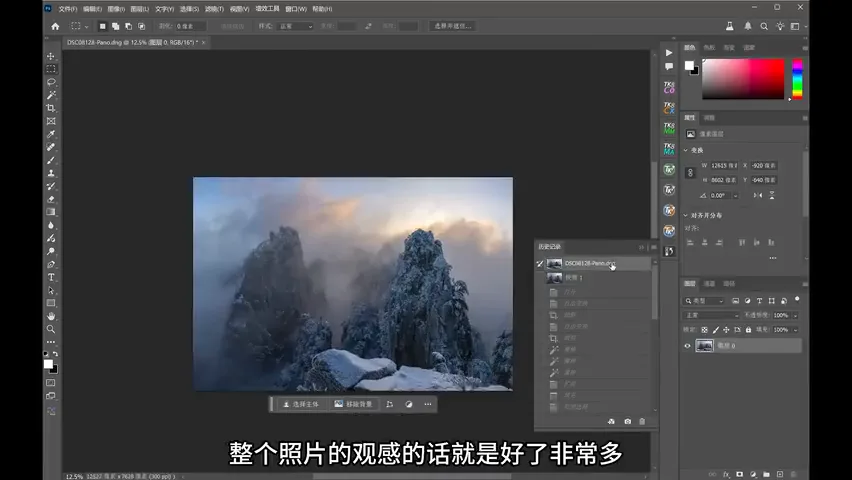
Now the Huangshan ice-and-snow panorama (at 20:05 in the video). The source is five vertical frames: Sony A7R4 with the 16-35mm F2.8 GM at 16mm, panned left to right from a low tripod. The settings are instructive — f/10 because the foreground ice is close and he didn't want focus stacking on top of stitching; with clouds shaking in the wind exposures had to stay short, so 1/200 s pushed ISO to 400; in Aperture mode he dialed -1 EV to hold highlight detail in the distance (at 20:22 in the video).
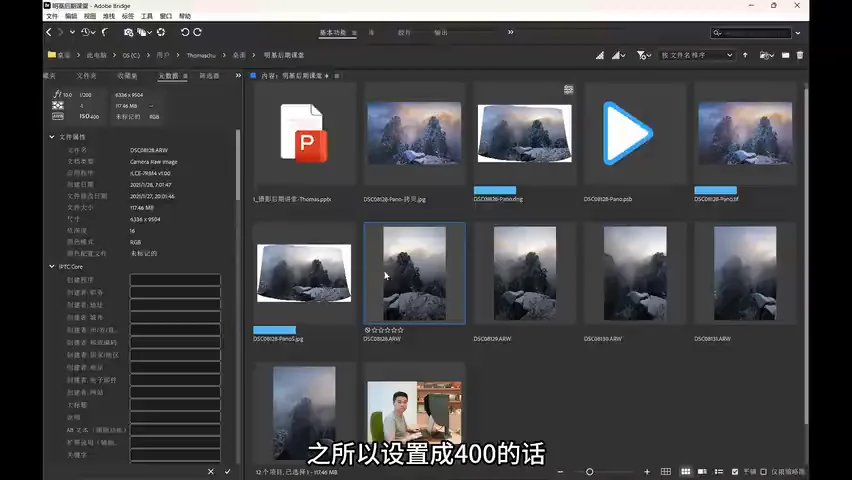
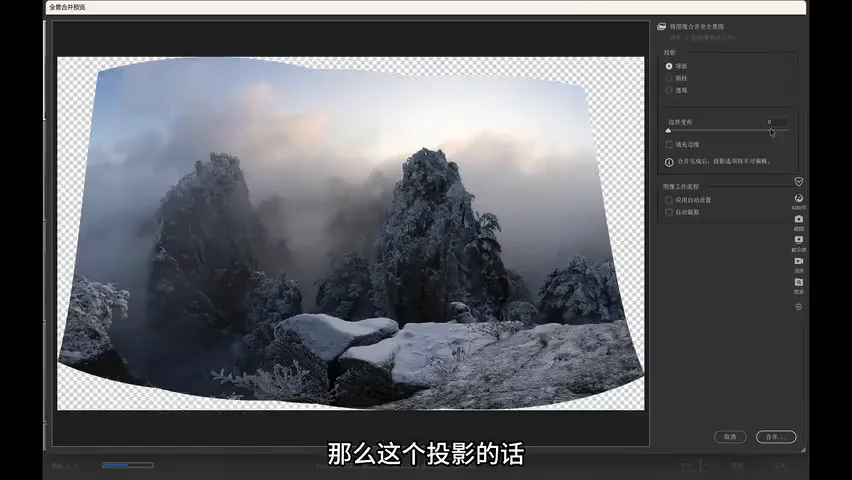
In Camera Raw, select all five frames and run Merge to Panorama (at 21:16 in the video). Try both spherical and cylindrical projections; here the spherical warp works best. If the boundary distortion bothers you, keep the default setting and hit Merge — a stitched DNG panorama comes out (at 21:27 in the video).
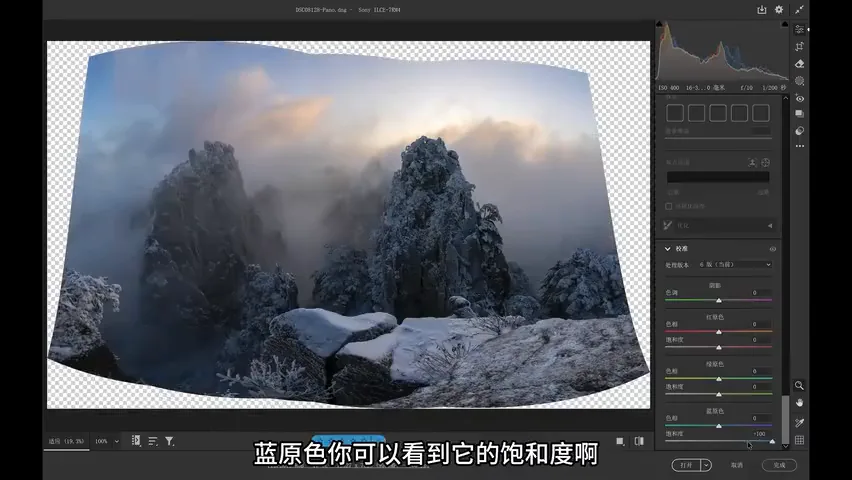
Preprocessing in RAW stays minimal (at 21:51 in the video): because warp operations come later, don't push the RAW far — pull the blown clouds back with Highlights, lift Shadows slightly for clearer detail, nudge Contrast up; and his signature move: raise the saturation of the blue primary, and the whole frame instantly turns rich and vivid (at 22:25 in the video).
04 Reshaping: Old-File Replay and Warp Corrections
Before redoing the file, Thomas opens the original PSD and replays what the published version went through (at 22:44 in the video): a gentle warp to straighten a "toppling" peak, cluttered dead branches removed, a too-slender peak widened to mirror its twin; a Nik Skylight filter to darken edges and lift the center; synthetic mist to veil a distracting black lump in the background and enrich the cloud-wrapped mood; luminosity masks with a Soft Light layer for dodge and burn that made the mountain suddenly dimensional (at 24:35 in the video); and finally Curves raising the background black point while a selection holds the foreground crisp, plus graduated filters top and bottom to unify the frame. The edit isn't complicated — the thinking is what counts (at 25:24 in the video).
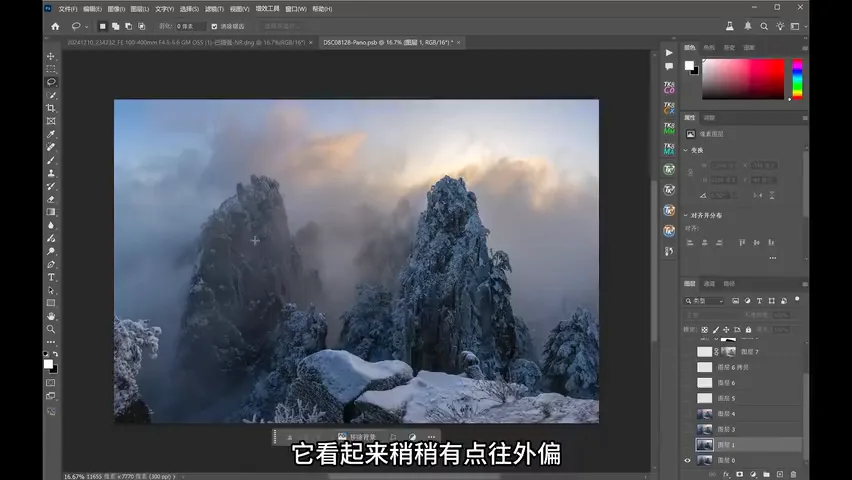
The fresh edit starts in Photoshop: rotate to level the horizon, then crop to roughly 3:2 (at 25:44 in the video). Next comes Warp: pull the visual weight toward the center, crop or suppress the awkward structures on the right, and keep the peaks from leaning outward. Remember that warping one side drags the other, so expect repeated local touch-ups (at 26:13 in the video).
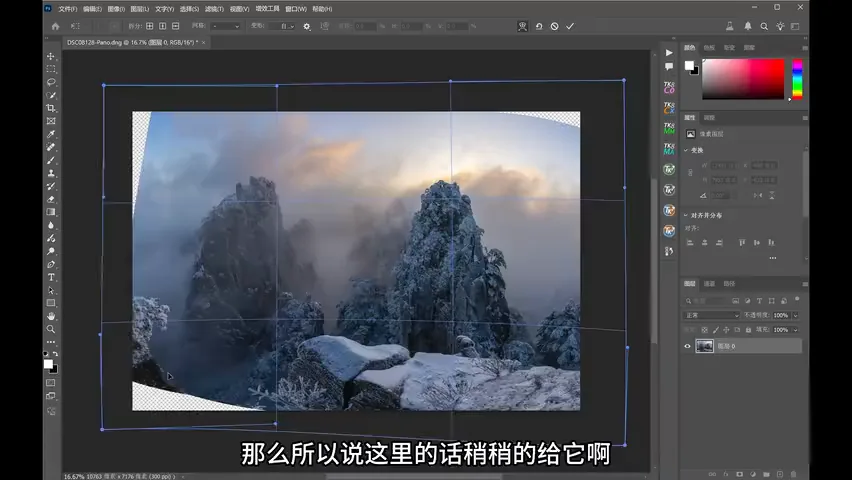
Fill the gaps Warp leaves behind: select them with the Magic Wand, run Select - Modify - Expand by 5 px, then Edit - Fill - Content-Aware (at 27:27 in the video); where the fill looks off, go straight in with the Clone Stamp at reduced opacity for a better blend (at 29:26 in the video). Finally pull the overly wide left peak back in line with the right one — panorama perspective and symmetry solved in one pass; before and after, the light of the whole image improves dramatically (at 30:40 in the video). Press Ctrl+Alt+Shift+E to stamp a merged layer and move on.
05 Nik Filters and Light Brushes: Two Keys to Depth
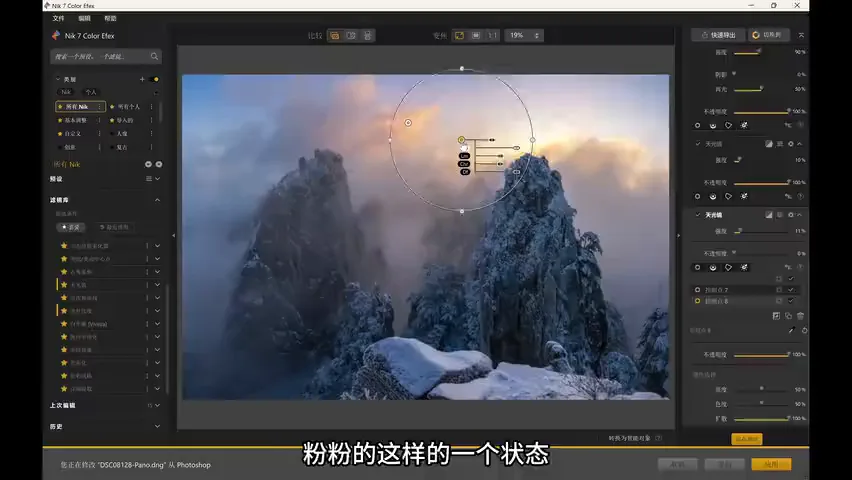
After stamping, open the Nik Collection (at 30:56 in the video). First, Pro Contrast for a big jump in texture — in two steps: a faint global lift, then another dynamic-contrast pass confined to the foreground with Control Points; Alt-drag to duplicate a point onto another area, so the contrast boost sharpens the foreground against the background (at 31:13 in the video). Next a Polarizer, which suppresses cool tones and lifts warm ones (at 31:54 in the video); then a Skylight filter at strength 10, again gated by Control Points to the clouds only — the clouds turn softly pink while the peaks stay free of purple (at 32:31 in the video). He finishes nearly every photo with Brighten/Darken Center — lift the middle, darken the edges slightly — plus a whisper of Classical Soft Focus for the dreamy touch (at 33:16 in the video).
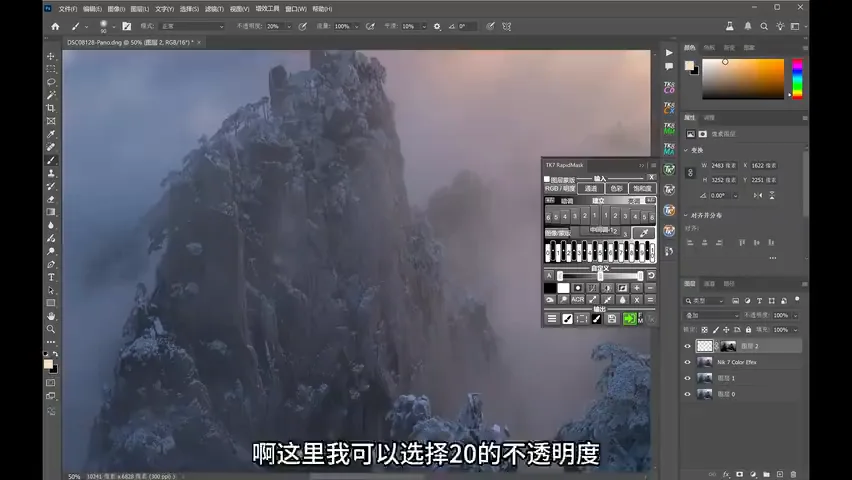
The second tool is local light sculpting (at 33:41 in the video): create an empty Overlay or Soft Light layer, then limit the brush with a luminosity mask — you want it to act only on existing highlights, so generate Lights 1 and boost its contrast for a usable mask; sample a golden, low-saturation foreground color, drop brush opacity to 10-20%, and gently paint along lit edges (at 34:36 in the video). Duplicate the layer in Overlay to stack the glow; then add one Overlay layer without any mask and trace the rim light with a 5% brush — without a mask even 5% is strong, which is exactly why luminosity masks usually pair with this move (at 36:09 in the video). Switch the brush to black at 3% to darken shadows locally too. Before and after, the depth of the image improves enormously (at 37:41 in the video).
06 Finishing: Texture, Haze and Atmosphere
Finishing starts with the texture of one rock slab (at 37:49 in the video): rough it in with the Object Selection tool, refine with Quick Selection, and fine-tune with the Lasso — Alt to subtract, Shift to add (at 38:17 in the video). With the selection ready, haze the background first: add a Curves layer and lift the black point, invert the mask (Ctrl+I), feather it about 0.6, and the background turns misty; then paint transitions on the mask with a 20% white brush and a black brush so foreground and fogged background meet naturally (at 40:08 in the video).
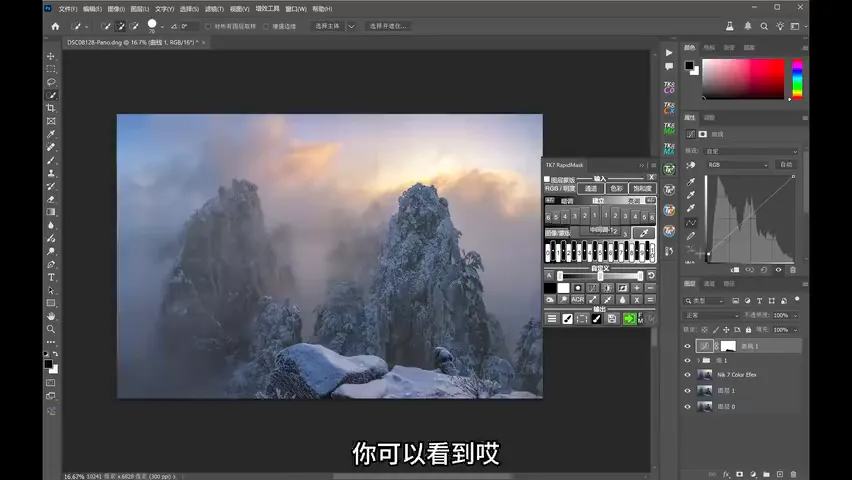
Copy that same mask, invert it, set the layer to Overlay, sample a golden low-saturation color at 10-20% opacity, group it and stack a Lights 1 luminosity mask on top — with selection plus luminosity double-gating, the brush acts only on the bright faces of the rock and the texture pops (at 41:01 in the video). Stamp again with Ctrl+Alt+Shift+E and open the Camera Raw filter: add a vignette to focus the eye (at 42:14 in the video); use linear graduated filters to pull sky and ground down about -0.25 EV while crushing blues (at 42:28 in the video); a touch of Dehaze for overall texture (at 42:58 in the video); then a radial gradient over the main peaks, lifting Texture and Clarity slightly to harden the ice-and-snow surfaces (at 43:13 in the video).
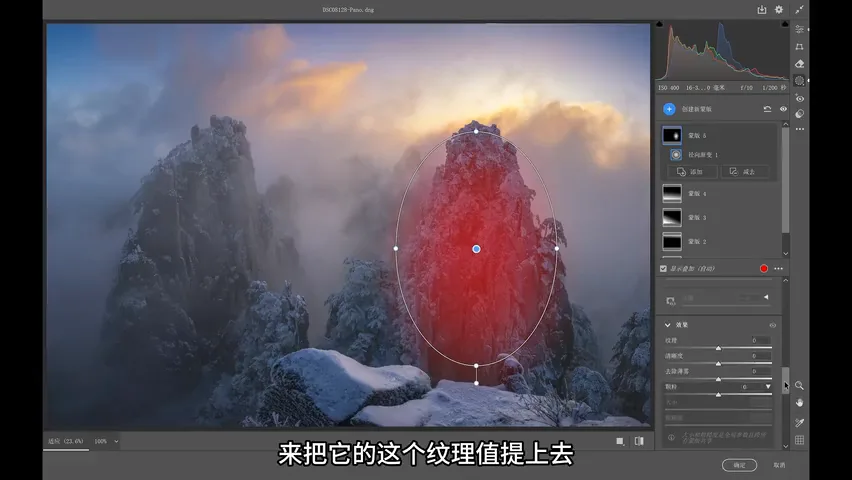
Two last polish moves (at 44:45 in the video): a midtone-only S-curve for contrast — generate a midtones luminosity mask, apply it, and at 50% layer opacity the S-curve lifts both color and texture; then a new Normal layer where a cloud brush (or a plain soft brush) at 10% opacity drifts mist across the mountains to hide clutter and add that wrapping fog — dedicated mist-texture brushes look even more real. Before and after: the raw capture was already striking, but the finished grade takes color and atmosphere one level higher (at 46:07 in the video).
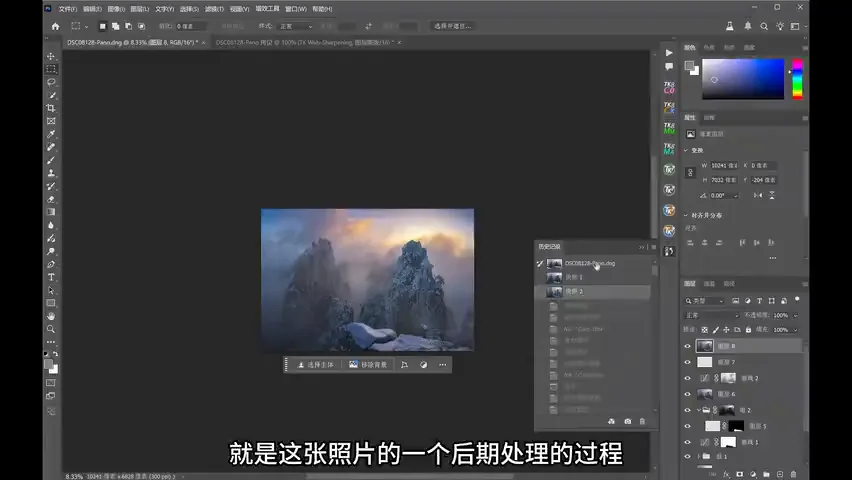
1. Post-processing serves four roles: stronger visual beauty, mood and atmosphere, personal style, and artistic expression; 2. One pipeline: color management → Bridge culling → blending → intent analysis → Camera Raw → Photoshop, with local adjustment as the ever-present core — never brighten or saturate globally; 3. The stitching chain: spherical merge in ACR → light RAW prep (highlights, shadows, blue-primary saturation) → warp fixes and content-aware fill in PS → Nik filters (Pro Contrast, Polarizer, Skylight, Brighten/Darken Center, Soft Focus); 4. Finishing touches: luminosity masks with low-opacity brushes for light, Curves haze for depth separation, graduated and radial filters plus Dehaze for texture, and cloud brushes for the final atmospheric flourish.
HD video:
https://www.bilibili.com/video/BV1sBrKYiEim/