Photography Tutorial · 2023-09-03
I Killed a Mavic 3 Pro and Captured the Alien Highlands of Iceland's Interior
I crashed a Mavic 3 Pro — and captured the magical highlands of inland Iceland!
In today's photography tutorial, I'll share the magnificent scenery of Iceland's interior highlands, along with my ideas and techniques for composition and color grading.
And of course, I'll share the lessons learned from crashing my drone while flying in the rain...
Video
▶ Watch the video tutorial on Bilibili
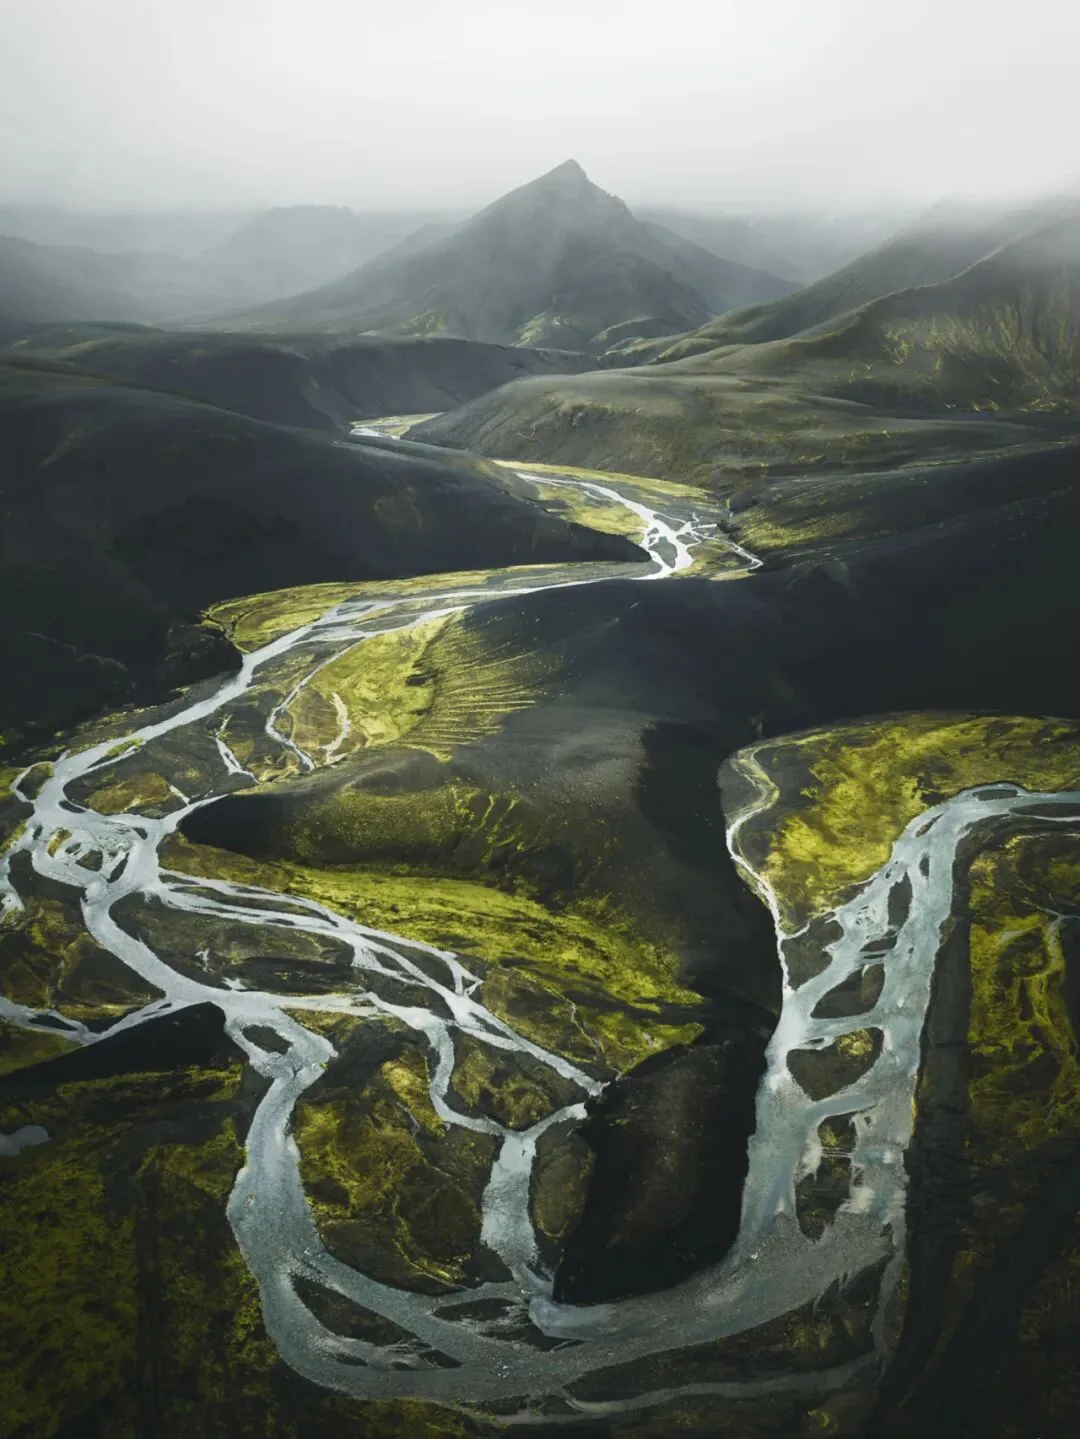
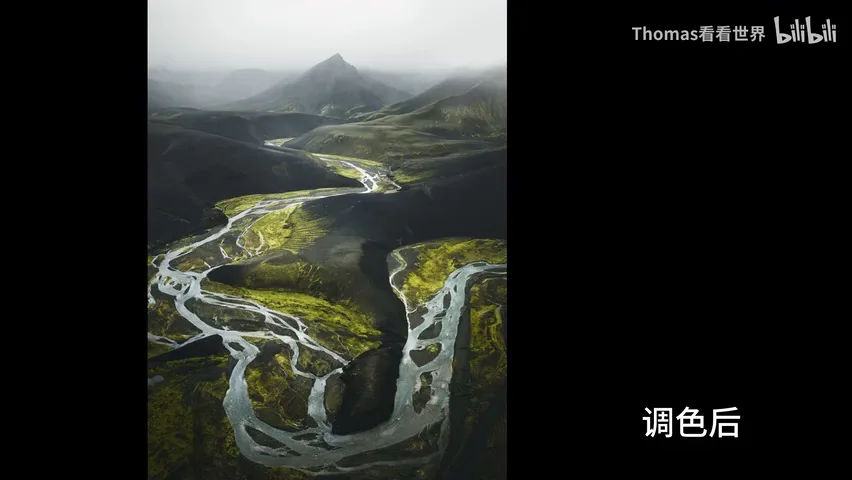
This is the full illustrated write-up of the video above. While road-tripping through Northern Europe, Thomas flew his Mavic 3 Pro in the rain over Iceland's interior highlands and captured this otherworldly river image. The article walks through the whole process — composition, hard lessons about flying in rain, color grading in ACR, and fine-tuning in Photoshop — with video timestamps noted at key moments.
01 The Alien-like Interior Highlands
The destination this time is Iceland's interior highlands, where volcanic landforms are incredibly rich and the mountains and rivers are breathtaking. To open the gate to this alien-looking world, you need a 4x4 to cover unpaved roads the whole way, plus a good amount of hiking, before you can finally stand among the mountains and take in the scenery (at 0:24 in the video).
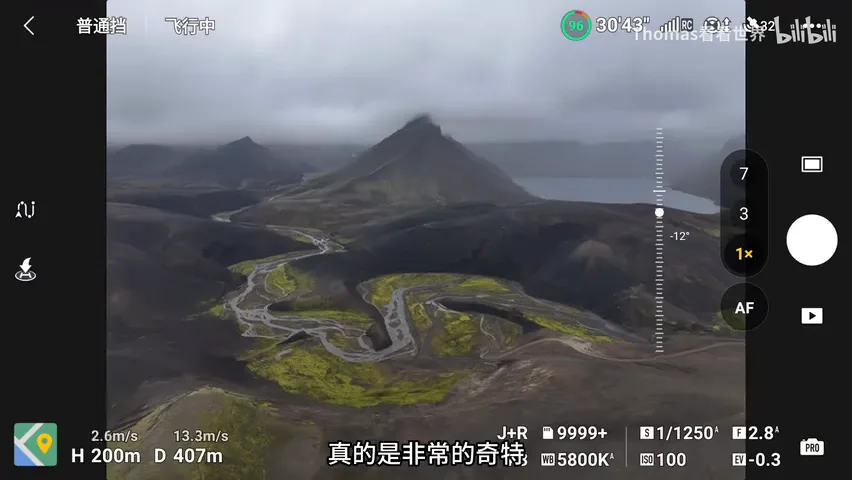
The drone took off right from this parking spot. Just after fording a river, Thomas noticed from the car how layered the river and distant mountains were, and decided to stop and launch immediately despite the rain. The main subject is that pyramid-like triangular peak, with the river and glistening, water-soaked moss and grassland in the foreground — and once airborne he discovered a hidden lake in the distance, almost too surreal to believe (at 1:13 in the video).
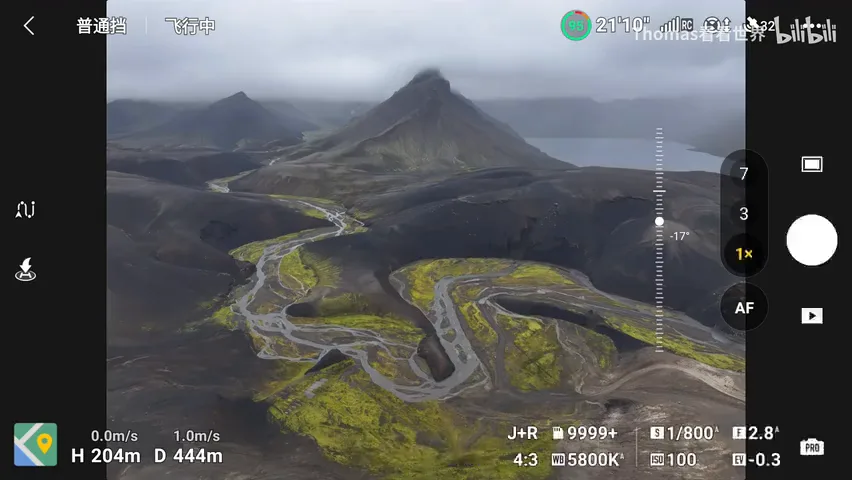
Two composition problems soon surfaced. First, the frame was clearly left-heavy, so the background peak was swapped from a taller one to a shorter one to rebalance the image. Second, the river looked too thin: from far away the perspective effect was weak. The fix was simple — fly closer. As the drone approached, the river grew thicker and thicker thanks to forced perspective, becoming a strong leading line (at 2:08 in the video).
02 Flying in the Rain: A Costly Lesson
Shooting opportunities in the rain are fleeting. After another eight or nine minutes of flying, a huge bank of rain clouds rolled in and completely swallowed the distant peaks, ending the shoot (at 2:41 in the video).
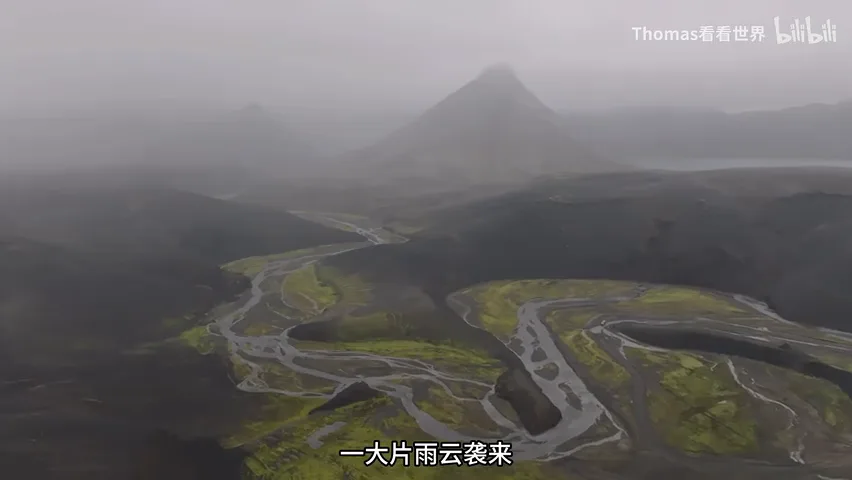
Then came a serious mistake: with 69% battery left and spectacular rivers and roads all around, he kept following the car for a good 30 minutes until the battery was drained. An hour later, the drone would no longer power on properly, spitting out a chain of error codes — gimbal abnormal, IMU errors, transmission issues. Water had reached the main board, and a Mavic 3 Pro was lost (at 3:29 in the video).

Lesson one: drones are not waterproof the way people imagine. In moderate to heavy rain, don't fly at all if you can help it; if you must, make it quick — never keep flying in the rain for 30 minutes like this, or the odds of water ingress are very high. Lesson two: right after landing, wipe off all water droplets with tissues, paying special attention to the air intake on top, the gimbal at the front, and the areas around the motors (at 4:00 in the video).
Here's a counterintuitive detail: don't power off immediately after landing. While powered on, the drone keeps radiating heat and its fans keep venting air, creating positive pressure inside that actually helps block outside moisture from getting in. If possible, keep it powered on in a sheltered, open space such as inside a building, and even let the propellers spin (without taking off) to help drain moisture; inside the confined space of a car, the same applies — let the internal cooling system keep working (at 4:29 in the video).
03 ACR: Denoise and Base Grading
Post-processing starts in ACR (Camera Raw), where most of the adjustments for this image were made. Step one: apply the AI Denoise at a moderate strength. Step two: crop — since the subject is the shorter peak, the taller mountain on the right is cropped away; otherwise the frame would look very odd. For the small bit of mountain remaining on the right edge, cloning in some fog in Photoshop — easy given the foggy weather — covers it up nicely (at 5:37 in the video).
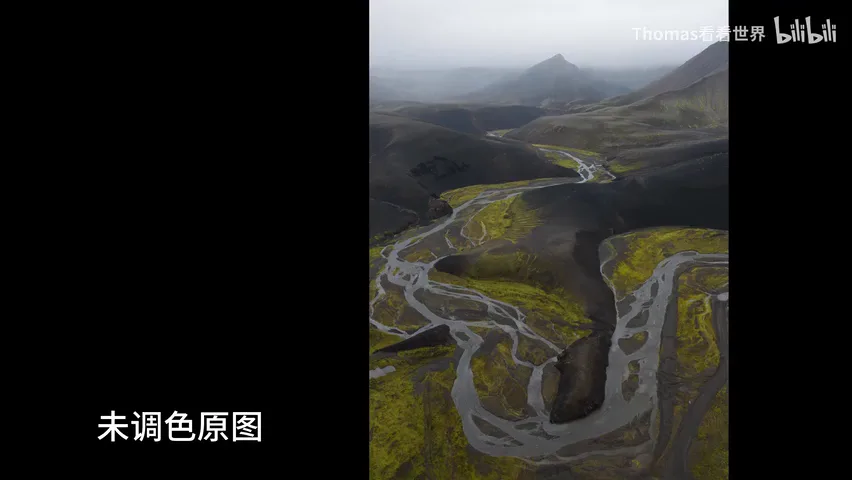
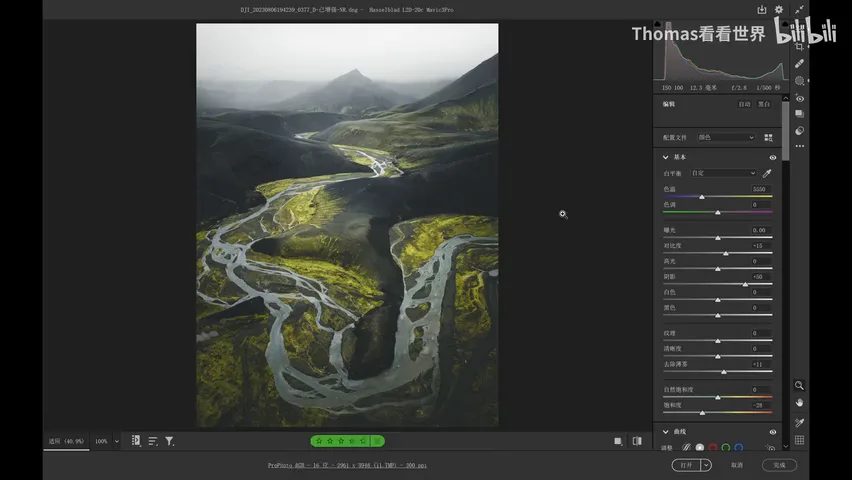
Two key tonal moves here. First, lift the shadows to recover detail while adding some contrast. Second, the curve: an S-curve for contrast, combined with a lifted black point. The raw file has plenty of shadow detail, but it's not the kind of detail he wanted — it just looked muddy. Lifting the blacks lowers contrast in the shadows and turns them gray, so the image has no true black anywhere, which suits the overcast mood much better (at 6:18 in the video).
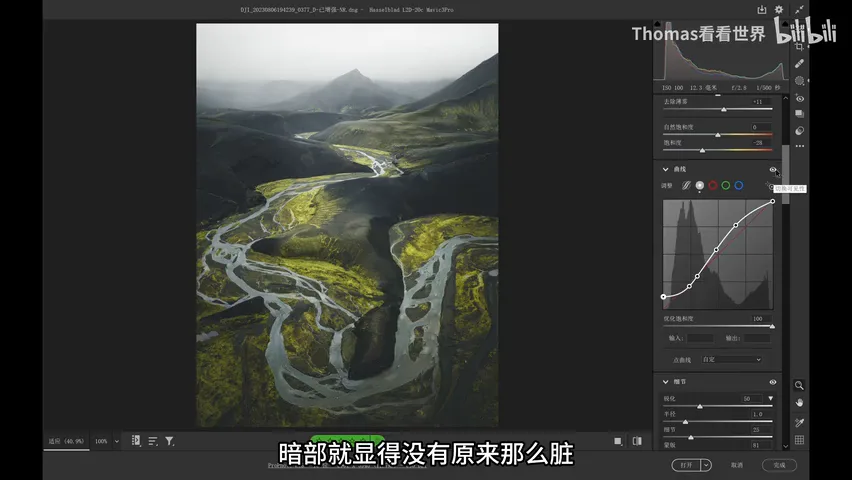
For color: global saturation is pulled down by 28; in HSL, the yellows-greens are shifted toward green while blue saturation is drastically reduced, keeping the image within a unified yellow-green palette; Color Grading then adds a touch of cyan. With this treatment the whole photo sits in a consistent yellow-green space, bringing out that rainy-wilderness feel (at 6:48 in the video).
04 Refining in Photoshop: Perspective, Fog, and Luminosity Masks
Opening the PSD in Photoshop, the image already had its basic shape. The first step is a slight perspective warp to strengthen the near-big-far-small effect, making the river look even broader, while simulating a downward-tilted lens so the peaks get a touch of convergence and feel more towering (at 7:36 in the video).
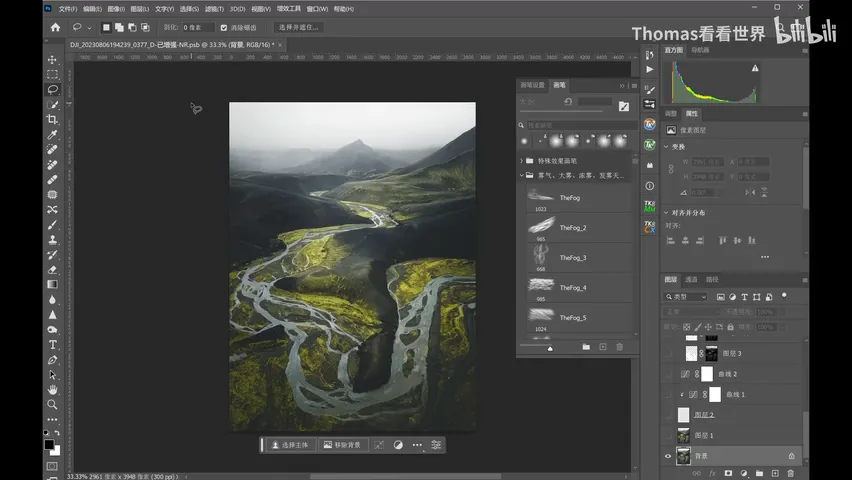
Next, cloud and fog brushes made from stock material paint in a very convincing veil of mist, as if a gust of cloud had really swept in front of the peak. This bit of fakery doesn't feel forced at all — in that kind of rain, a cloud really could roll in and swallow the mountain at any moment. After painting the fog, a gentle curve darkens the image slightly (at 7:56 in the video).
Then comes a classic move. The core point of interest in this image is the river, and it needs to be drawn out of the overall dark scene: a luminosity mask selects the bright areas first, then, combined with the Overlay blending mode and a white brush, the river is gradually brightened, stroke by stroke (at 8:39 in the video).
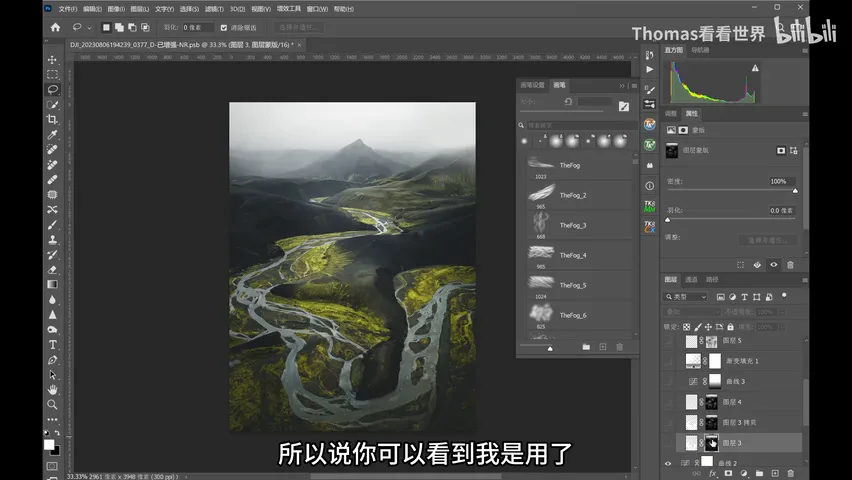
The finishing moves are all common light-rendering techniques: a slight curve tweak, then a subtle gradient from far to near so the river in front stays crisp while the distance grows hazier, adding depth. Since the peak is also a point of interest set against a bright background, it actually gets darkened slightly so it pops out of the luminous backdrop; a midtone S-curve follows, with a small tweak to vibrance and a slight desaturation (at 9:01 in the video).
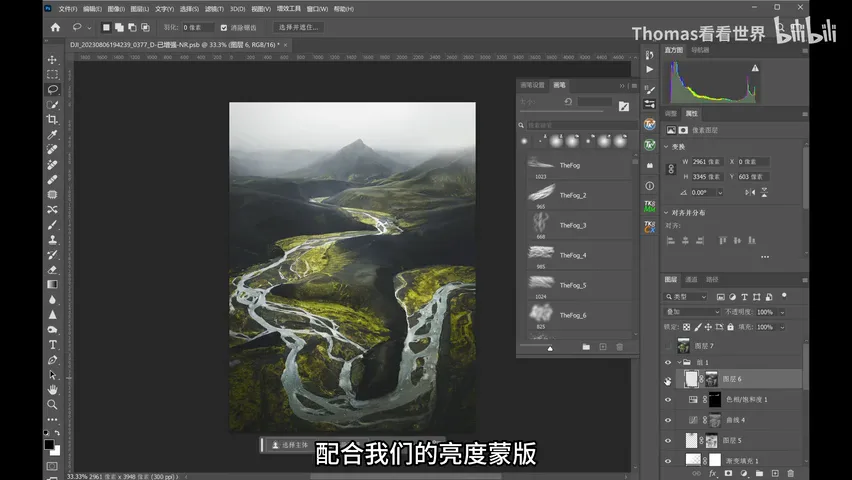
The final step: a darkening layer combined with luminosity masks gently dims the distracting, cluttered areas around the edges. Now the surroundings sit a touch darker while the center stays bright, so the eye lands naturally on the central peak and river. Stamp the layers, and this image is essentially done (at 9:47 in the video).
1. Drones are not waterproof: avoid moderate-to-heavy rain, keep flights short if you must, and after landing wipe the air intake, gimbal, and motors, keeping the drone powered on so internal positive pressure helps expel moisture; 2. Use forced perspective in aerial composition: fly closer to thicken your leading line, and rebalance the frame by swapping the background peak; 3. Overcast grading recipe: lift the blacks to remove muddy detail, cut global saturation, shift yellows-greens toward green, drastically reduce blue, and add cyan for a unified yellow-green palette; 4. Three Photoshop finishing moves: perspective warp for depth, fog brushes for atmosphere, and luminosity masks with Overlay to brighten the subject while dimming the edges.