Photography Tutorial · 2021-05-09
Deliberately Overexposing in Post? Photographers Can Do That?!
Thomas Chu Photo
Many photography enthusiasts shy away from overexposure and underexposure, immediately reaching for Highlights -100 and Shadows +100.
But what they don't know is that in some photos, to set the mood and create an effect, photographers deliberately take a normally exposed photo and make it look overexposed in post!
In today's video tutorial, Thomas will use a case study to share which photos suit this treatment, and which post-processing tools can achieve it.
Video Tutorial
▶ Watch the video tutorial on Bilibili
This is the fully illustrated companion to the video above. "Deliberate overexposure" is counter-intuitive — most photographers flinch at blown highlights, but Thomas walks through a glacier photo live: which areas to overexpose, how to shoot for it, and the exact post-processing steps. Every operation from the 7-minute video is paired with keyframe screenshots.
01 The Idea: Overexposure Serves Expression
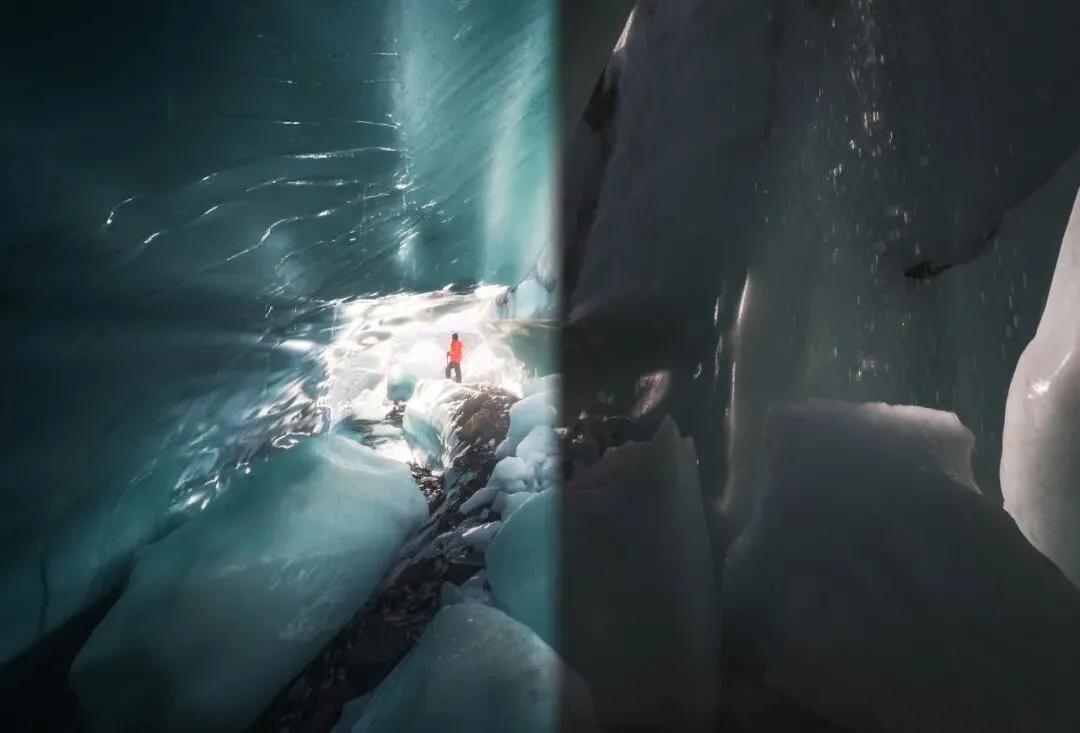
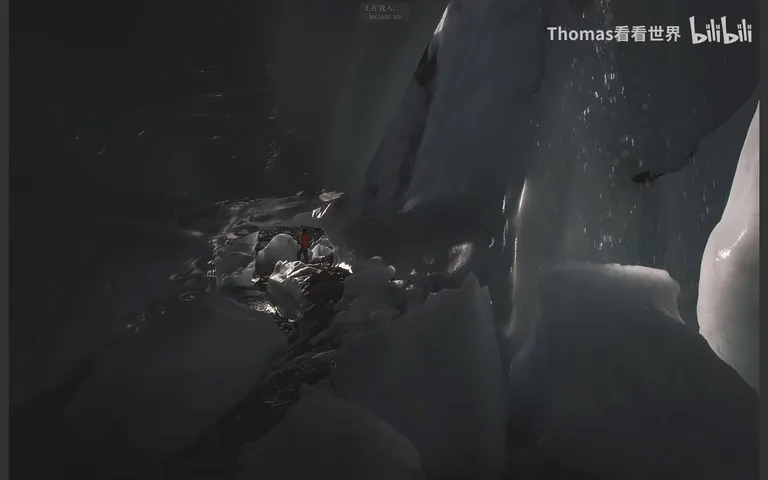
The original is a normally exposed glacier frame: a climber on the ice, with every detail of the boulders and ice walls behind intact. In the finished version, the ice reflections and the bright zone behind the figure have all been "switched on" — those blown highlights were made in post (at 0:33 in the video). Why? First, afternoon light on ice really is dazzling and translucent — that glare is the truest feel of being there. Second, the figure's dark hair and pants used to melt into the rocks; turning the whole area behind into an overexposed glow makes the subject pop instantly (at 0:58 in the video).
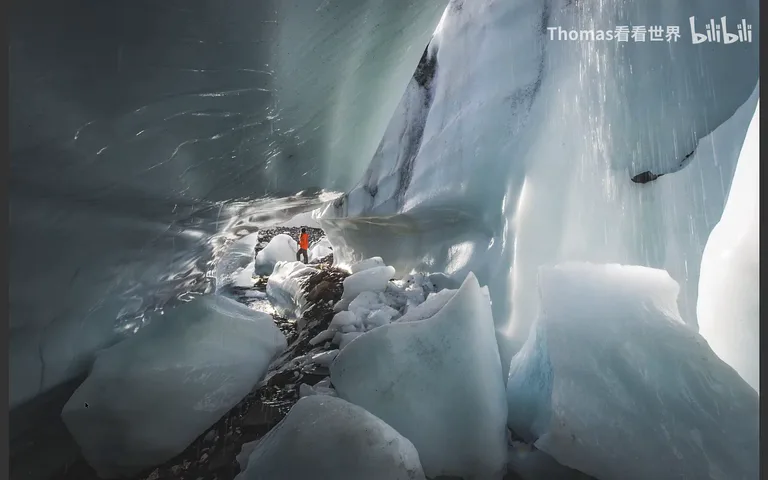
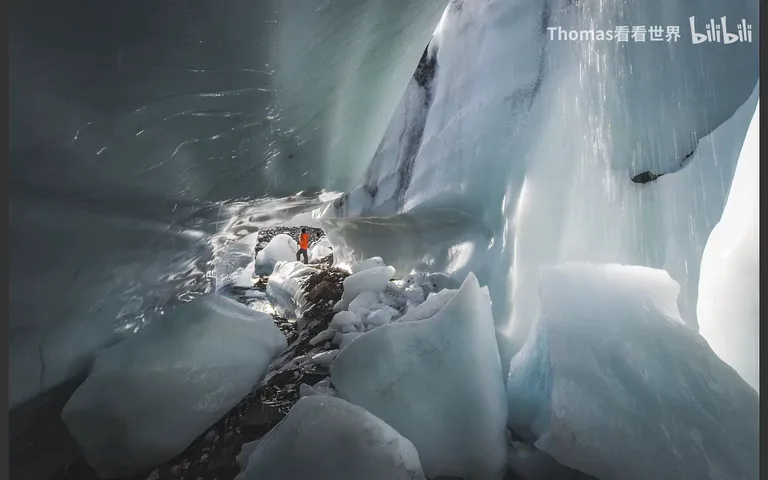
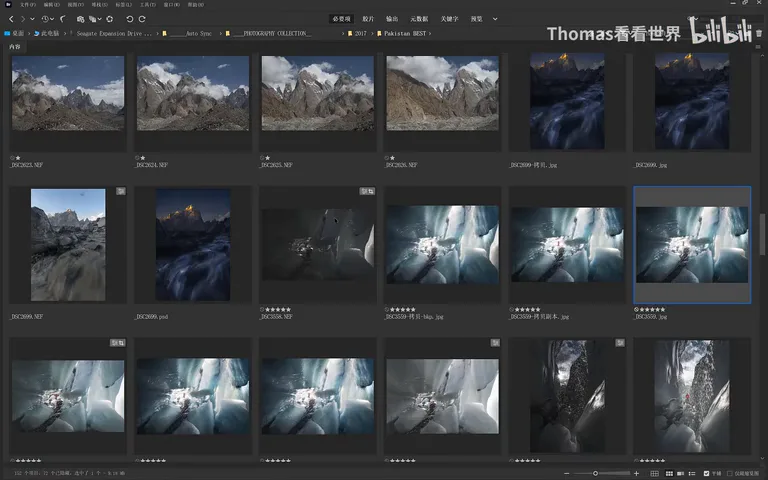
But deliberate overexposure in post does not mean being careless in the field. Thomas actually bracketed and took an extra underexposed frame to fully record the highlight detail (at 1:20 in the video). Then comes the interesting question: do you really need those details? The "rigorous" version that faithfully shows the rocks and ice is less striking than the overexposed one — which puts you inside the snowfield, squinting against the afternoon sun. Record detail as insurance, but let expression decide what to show (at 1:39 in the video).
02 Step One: Paint the Light on a Blank Layer
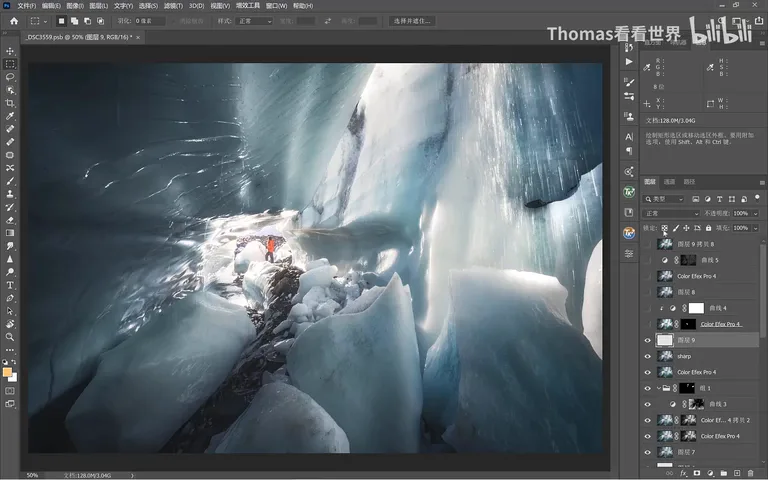
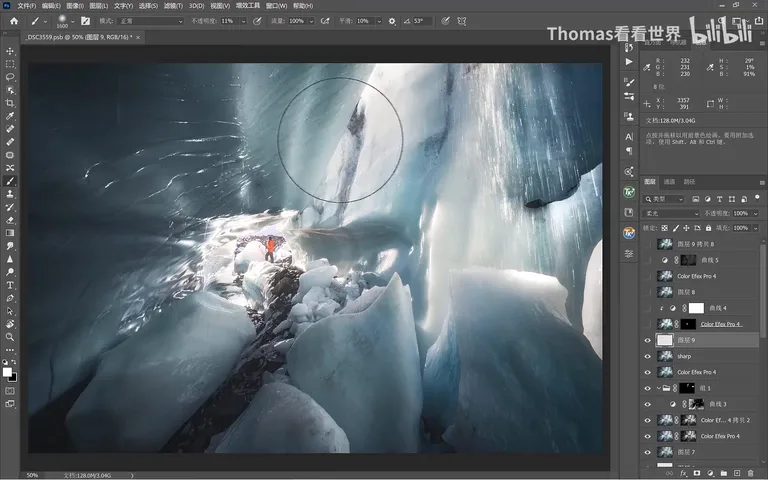
The Photoshop part is simpler than you'd think (at 2:12 in the video). Create a blank layer and set its blend mode to Overlay or Soft Light — Overlay gives the stronger light, Soft Light the gentler one; set white as the foreground color, brush opacity around 10%, and use the bracket keys to resize the brush quickly. To suggest light leaking down from the ice crevice above, paint downward along it: click in small, then enlarge the brush and sweep — the lit area keeps growing (at 2:47 in the video). A few light strokes later, the before/after already shows the glow (at 3:24 in the video).
03 Step Two: A Mask Brings Back the Shadows
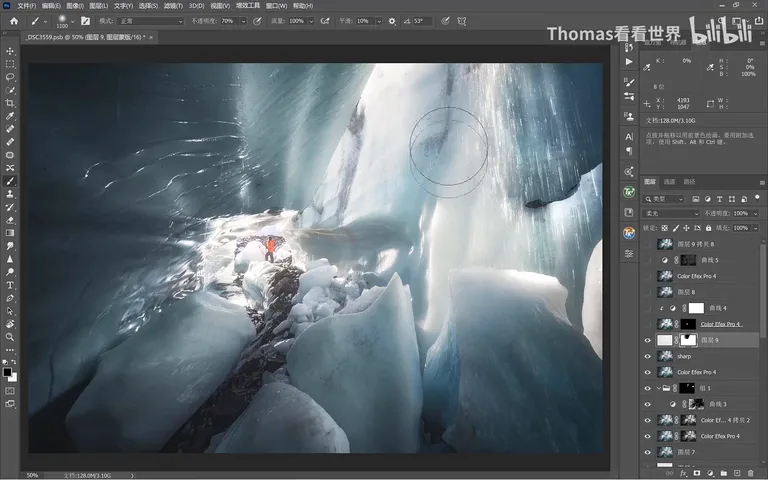
The reason painted light often looks fake is that the shadows were never restored (at 3:28 in the video): surfaces clearly facing away from the sun should not glow. Add a mask to the light layer and paint the backlit areas back with a black brush — 100% opacity where the backlit zone is obvious, around 70% for a lighter touch on the rest of the shaded ice. Masked back, the overexposed glow immediately reads as natural (at 4:15 in the video).
04 Step Three: Lift the Highlights, Blow Out the Background
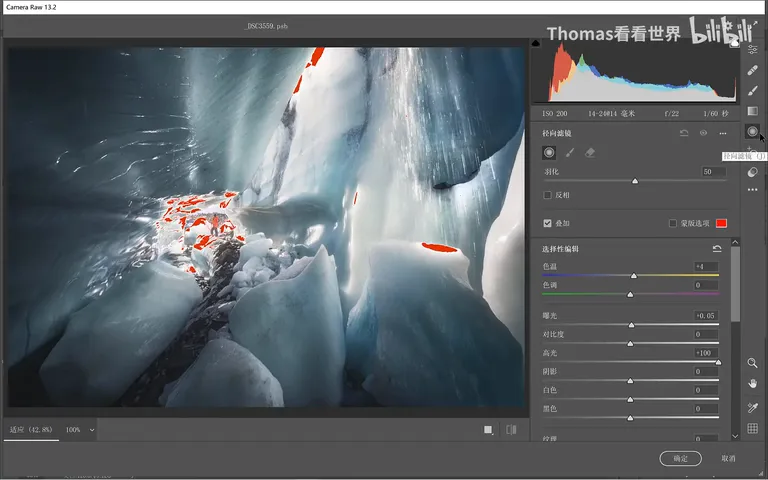
The ice already carries some highlights, and Thomas wants them brighter still (at 4:22 in the video): open Filter - Camera Raw Filter, drag out a Radial Filter over an area, and since only the highlights should brighten, push just the Highlights slider; where one filter isn't enough, add more and light the icy patches one by one. A luminosity mask could restrict the effect to highlights too, but the radial filter's built-in Highlights limit is the more convenient shortcut here (at 4:54 in the video).
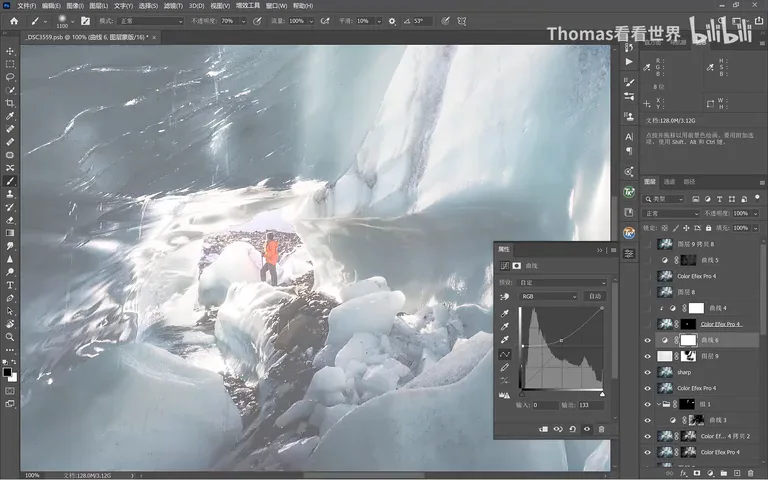
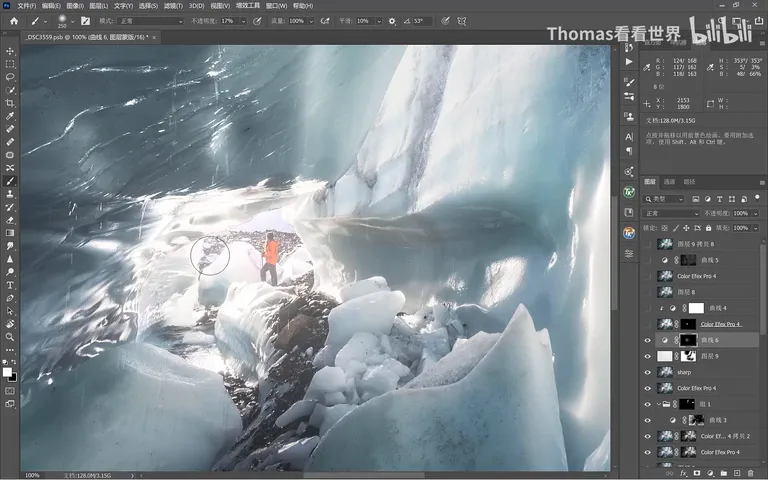
Next, the whole zone behind the figure gets blown out to suggest light pouring in from behind (at 5:09 in the video). The dark rocks there live in the shadows, so take a Curves layer and lift shadows and midtones together in a big way — effectively an overexposure behind the subject. The demo pull is exaggerated; then invert the curve's mask entirely (Ctrl+I) and rebuild the glow gradually with a white brush at about 10% opacity — a pass here, enlarge, another pass, a few rounds, covering the rocks too and letting it spill slightly below (at 5:41 in the video).
05 Step Four: Object Selection Rescues the Figure
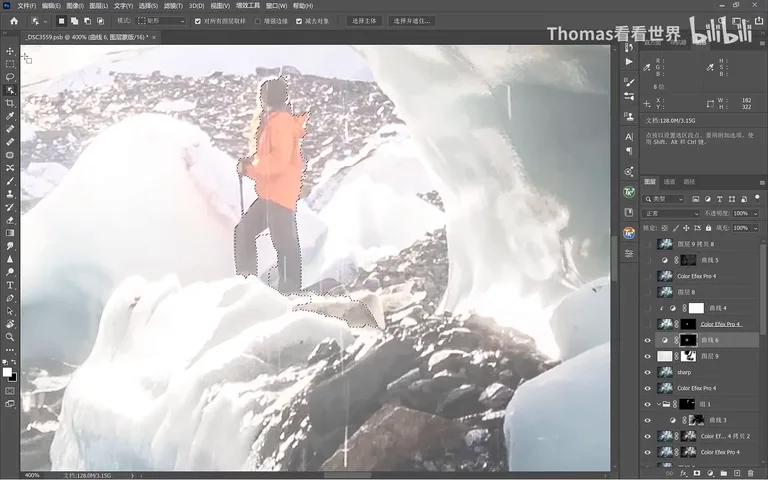
With the background bright, the figure — facing away from the light — has to be carved back out of the glow (at 6:14 in the video). The Object Selection tool grabs the person fast; stray selections are fine, just switch to the Lasso and Alt-subtract them. Then set black as the foreground color at higher opacity and paint the person straight back on the mask. With that, the deliberate overexposure and light rendering are complete (at 6:45 in the video).
Look at the final frame: with the overexposure in place, the photo actually feels more comfortable and far more immersive — afternoon sun glaring off the ice, the climber standing inside the light. A crucial job of post-processing is exactly this: making the image carry what you felt (at 6:51 in the video).
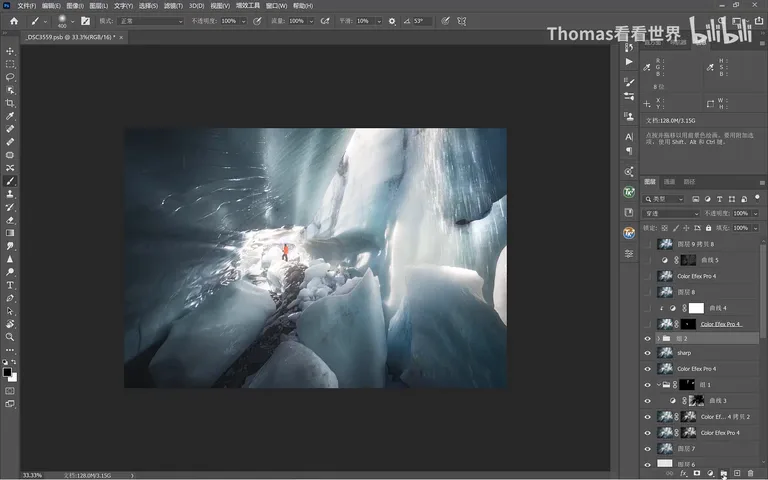
1. Blown highlights are not forbidden: deliberate overexposure creates the feel of light and isolates the subject — post-processing always serves expression; 2. Bracket in the field and keep the highlight detail as insurance, but dare to discard it when presenting; 3. The standard four steps: paint light on an Overlay/Soft Light blank layer with a 10% white brush, restore backlit areas through a black mask, boost only Highlights with a Camera Raw radial filter and blow out the background via a shadow-lifting Curves layer, then paint the backlit figure back in with Object Selection.