Photography Tutorial · 2021-04-04
No Ideas in Post-Processing? Rebuilding the Point of Interest Is the Key
Thomas Chu Photo
For many students, the hard part of post-processing is not knowing the PS tools — it is having no idea at all and adjusting by feel.
Today Thomas will share a crucial idea in post-processing: 'rebuilding the point of interest'.
This approach uses post-processing to strip away the cluttered real world, using various visual languages to guide the viewer to what the author wants to express.
Video Tutorial
▶ Watch the video tutorial on Bilibili
This is the fully illustrated companion to the video above. Thomas turned the 8-minute lesson on post-processing mindset into text and paired it with keyframe screenshots — first using an oil painting to explain why painters add while photographers subtract, then walking through four cases (a Greenland dawn cabin, a dead branch below a snow peak, a red house, and a moonlit waterfall) to show how to define the point of interest, suppress clutter and strengthen the subject. Skim it here for the framework, then go back to the video to compare the before-and-afters.
Start with the overview. This frame, captured at 0:21 in the video, is the thesis of the whole episode — the same Greenland cabin, the raw file from the camera on the left and the finished image after rebuilding the point of interest on the right. When people feel stuck in post, the problem is rarely the Photoshop tools; it is that they have not decided what they want the viewer to look at.
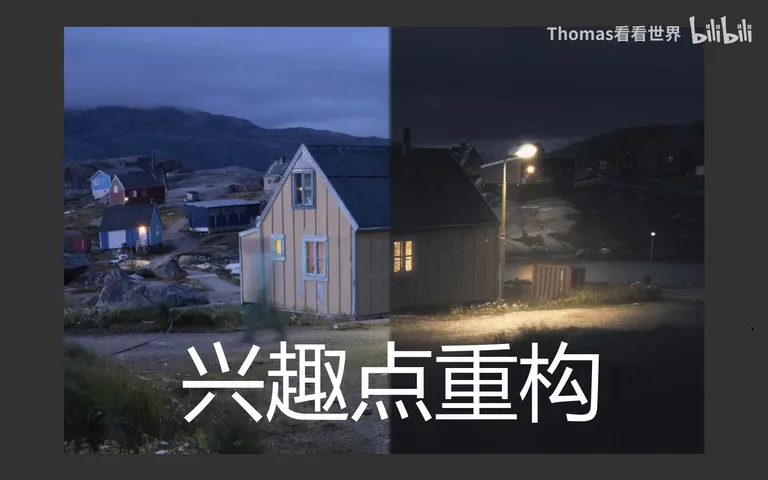
01 Painters Add, Photographers Subtract: What Rebuilding the Point of Interest Means
Look at an oil painting first. A painter works by addition, starting from nothing — the visual guidance can be designed from scratch: you notice the distant mountain, then the castle in front of it, then follow the road that emerges from the greens and yellows toward the foreground, discovering the figures on it along the way, until, led by the painter, you gradually take in the story and emotion of the scene (at 0:26 in the video). That is the painter's advantage: a blank canvas.
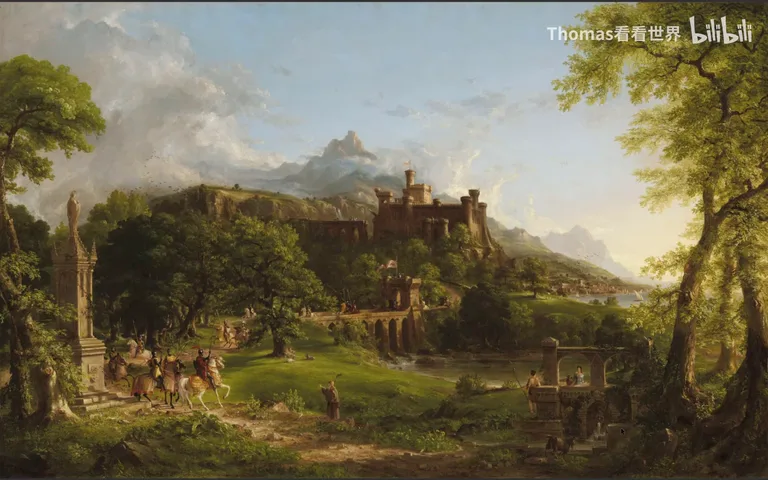
Photography has no such advantage. The real world is cluttered, and the camera records all of it. So the core idea of post-processing is to re-establish the point of interest within that chaos: play down everything you do not want to be a focal point, and use every means of visual guidance to strengthen what you do (at 1:51 in the video). That is what rebuilding the point of interest means.
02 Case One: A Cabin at Dawn in Greenland
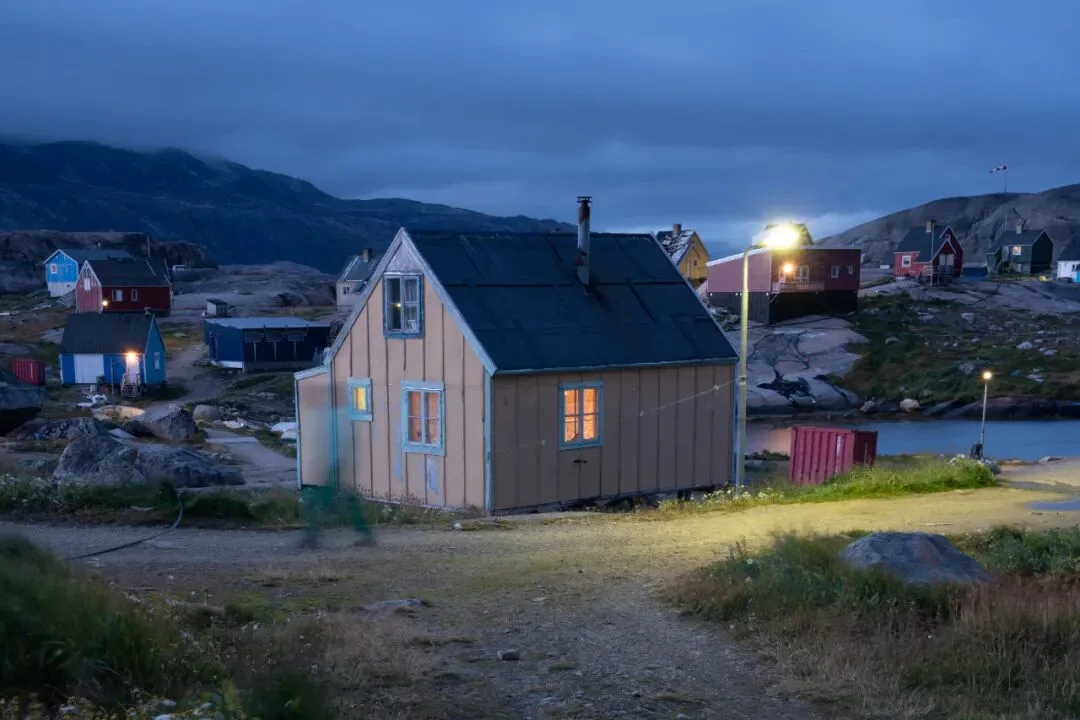
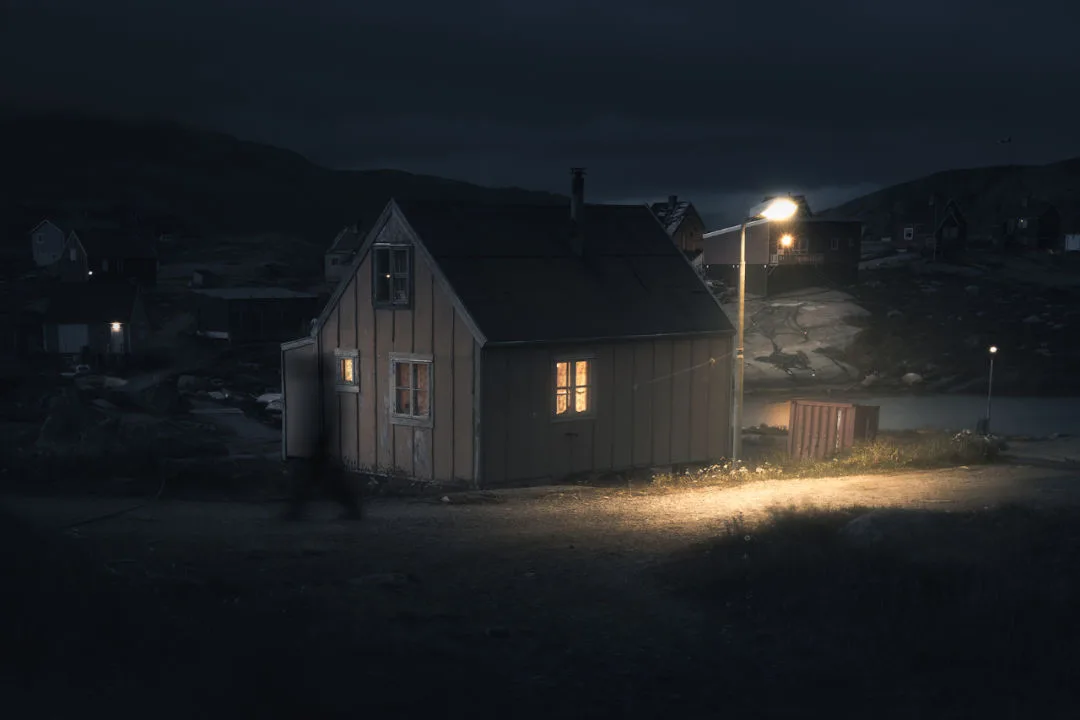
In Greenland Thomas wanted a very quiet, almost deathly still Arctic morning with a lone figure hurrying past. What the camera delivered was this: messy red shipping containers everywhere, scruffy grass, and because he used a long exposure the frame is a little overexposed and bright, so every distracting detail shows (at 1:32 in the video).
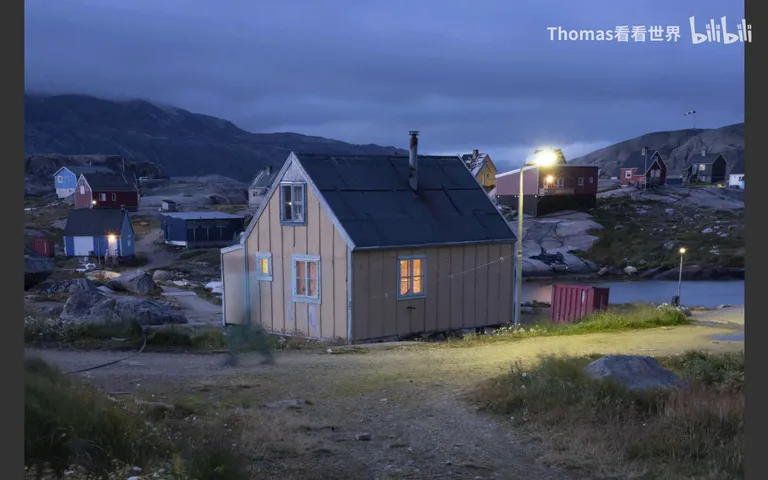
What he wanted to emphasise was the passer-by — the one element that gives the small town its early-morning bustle — plus the lights of the cabin in front and the street lamp; those are the core points of interest the edit has to establish. The result is an entirely different mood: everything else is darkened and desaturated; the person, counter-intuitively, is pushed even darker, because the wall behind him is bright and heightening that contrast makes him stand out; and the lamps become bright, saturated warm light emerging from a cold, low-saturation surround (at 2:29 in the video).
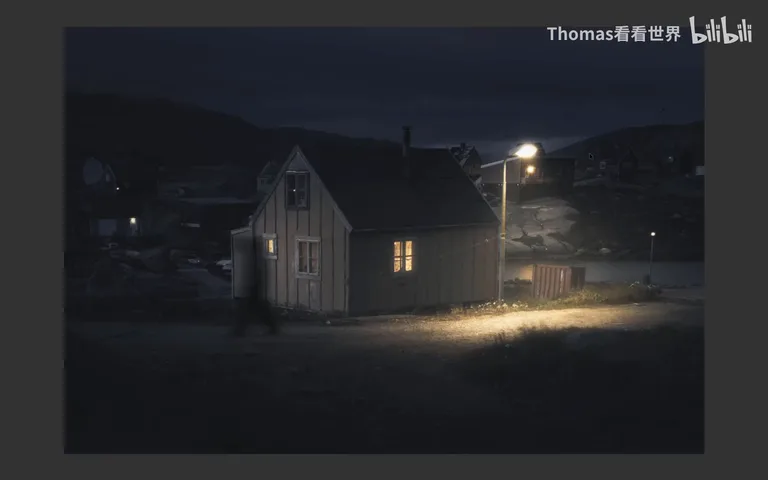
Look back at the raw file and the points of interest are all over the place: a yellow house, red containers, green grass, the person, the lights, and a huge bright sky. The edit simply peels back, layer by layer, whatever should not be a focal point — the house that originally dominated, the houses on the left (at 3:18 in the video).
03 Cases Two and Three: The Tension of a Plant and Subtracting Around a Red House
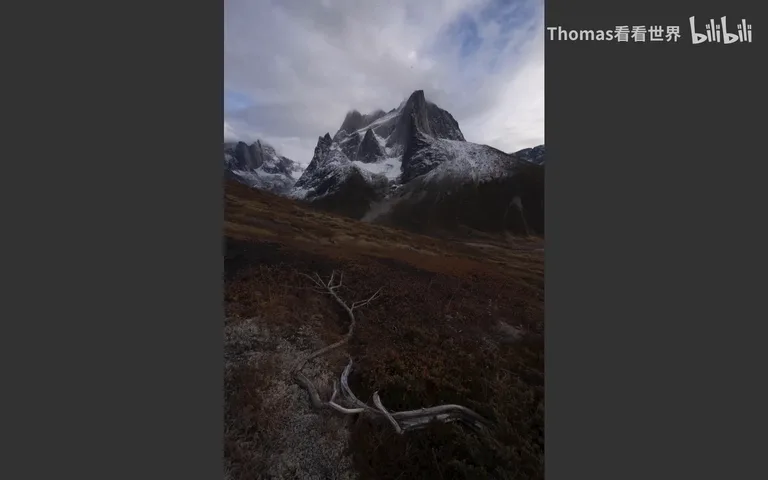
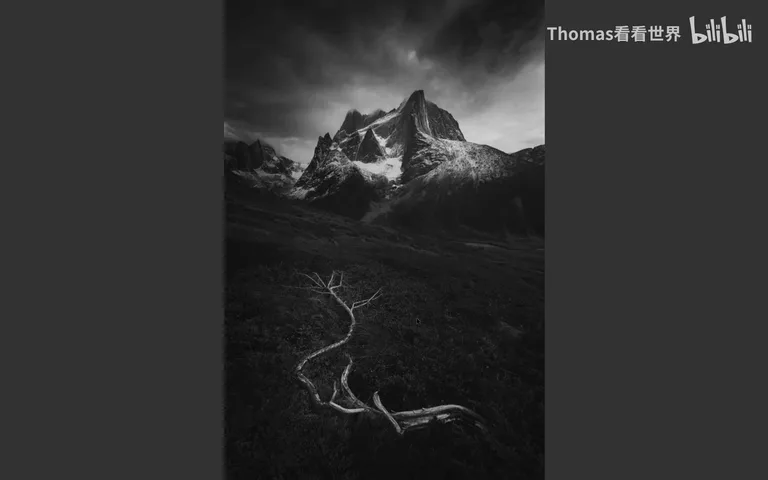
In the second photo Thomas wanted to convey the life force of the plant in the foreground and, at the same time, the harshness of the environment it survives in. The plant is obviously the point of interest, but the snow mountain and clouds behind are majestic and unmistakably polar, so they stay. The rebuild works by strengthening — brightening the dead branches, the clouds and the peak, and boosting their clarity and contrast — while everything else loses saturation: the patchy yellow-and-red weeds in the foreground are unified into a single tone so they no longer attract attention. The eye is held firmly on the taut plant and the distant mountain, and the cold of the place comes through (at 3:43 and 4:27 in the video).
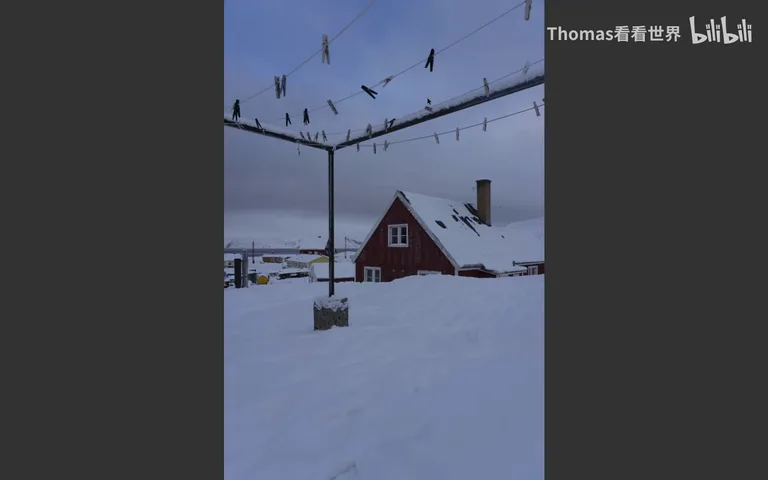
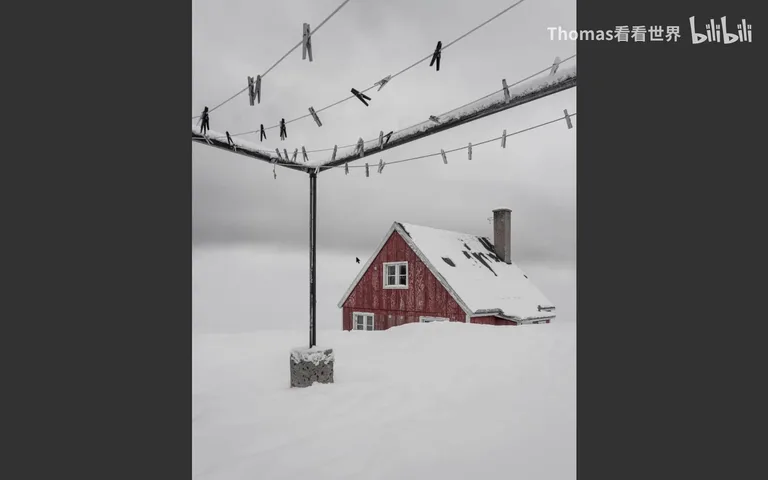
In the third, he wanted to feature one of Greenland's distinctive red houses together with the local snowscape. The frame-like structure in the foreground was included deliberately and stays — it is an important piece of information: locals use it to hang fish and to dry clothes in winter, very much a local signature. The jumble of houses behind, however, did not need to carry any information, so he removed them completely with the Clone Stamp (at 5:22 in the video). As documentary, the picture no longer reflects the exact original terrain; as expression, it is precisely the Arctic Greenland mood he wanted — every intended point of interest is in the frame, and the clutter is simply left unshown (at 5:28 in the video).
04 Case Four: A Moonlit Waterfall, and Why Detail Everywhere Is a Mistake
When a picture leaves you stuck, at least ask: what do I want to emphasise, and what do I not — and then hide the latter. Hiding matters. Take this frame: a beginner would very likely lift the shadows, pull down the highlights and recover every last detail. It is a favourite Photoshop move, but the result is detail everywhere and no point of interest — a cardinal sin in painting and photography alike (at 6:11 in the video).
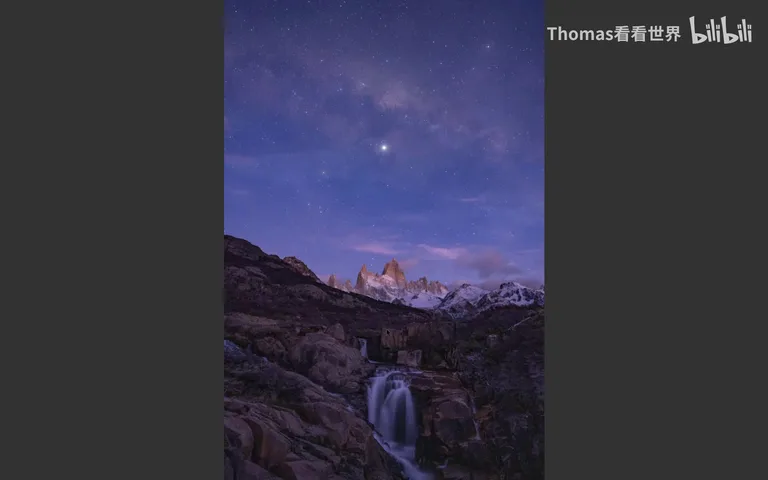
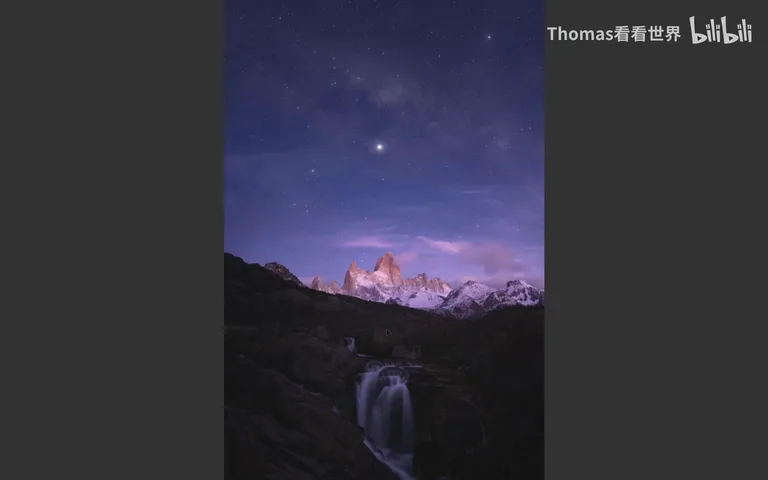
Thomas starts by asking: what is the most interesting, most beautiful, most striking part of this picture? His answer: the waterfall and the peak under moonlight. The Milky Way only needs a faint presence — it is a supporting player — so rather than making it dazzling he renders it with restraint: visible, never forced. The priorities are the snow mountain first, the waterfall second, the Milky Way third; some rock texture remains, but not every detail as in the beginner's version — unless detail is the point, too many points of interest simply means the rebuild never happened (at 6:39 in the video).
1. Painters add from a blank canvas and design the viewer's path; photographers, facing a cluttered world, can only subtract — the heart of post-processing is re-establishing the point of interest; 2. Whatever should not draw the eye gets darkened, desaturated, unified in tone, or removed outright with the Clone Stamp; 3. Whatever should draw the eye is strengthened through tonal contrast, colour contrast and clarity — a figure can be pushed darker against a bright wall, a warm lamp can emerge from a cold, low-saturation surround; 4. Lifting shadows, taming highlights and recovering every detail is the beginner's trap: detail everywhere means no point of interest, so rank your priorities — one, two, three — before you touch a slider.