Photography Tutorial · 2020-05-05
Just 5 Steps! The Magical Jungle Waterfall Post-Processing Revealed
Thomas Chu Photo
Last year I trekked through mountains and valleys, exploring many secluded forests and ravines.
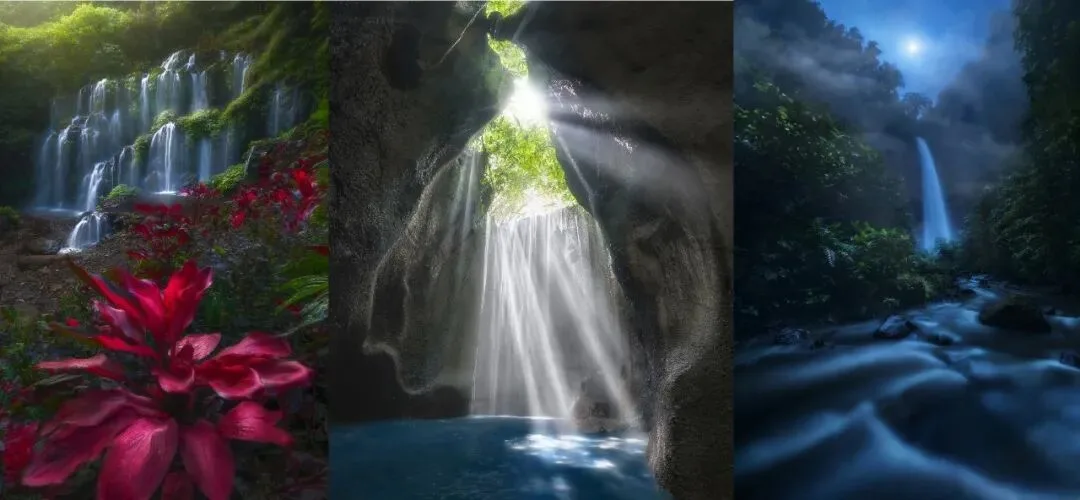
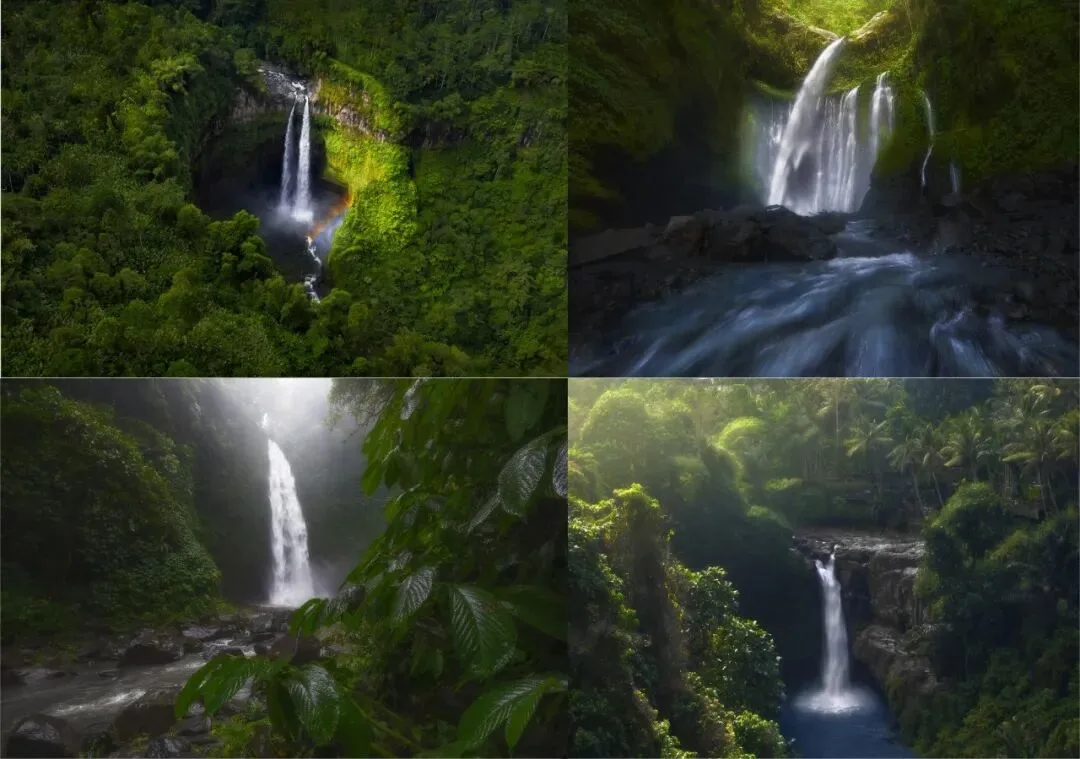
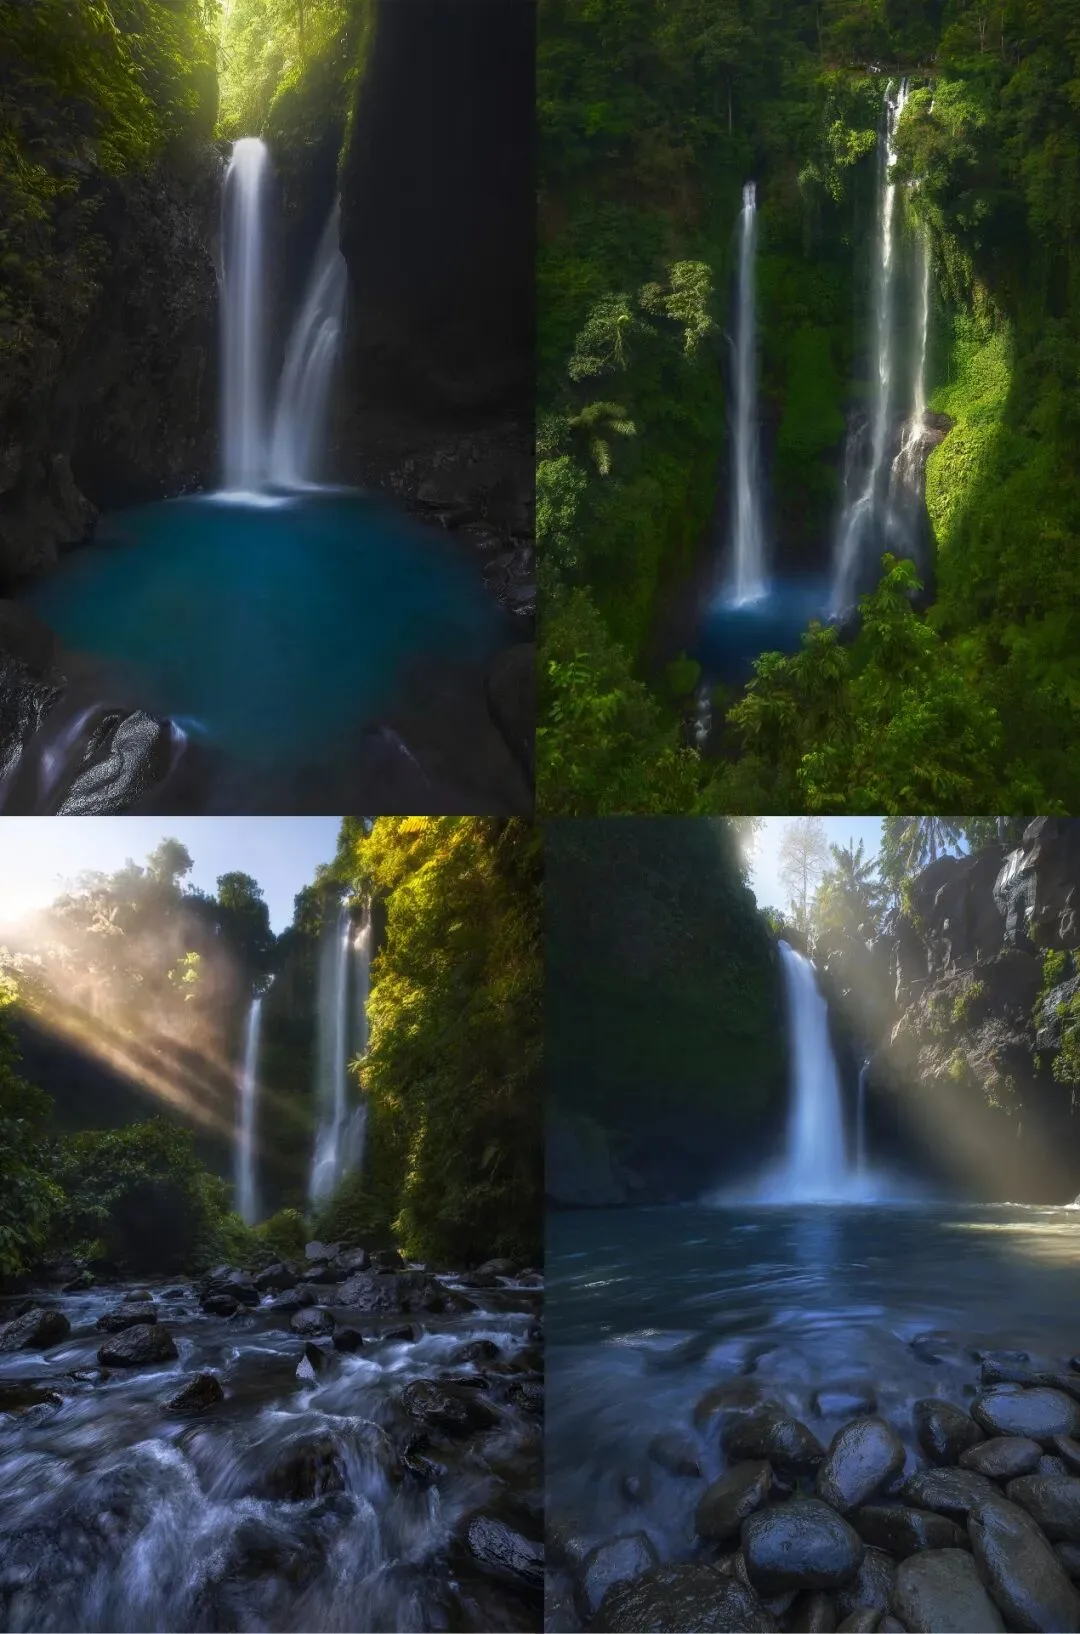
Below is a set of before/after comparisons of my post-processing.
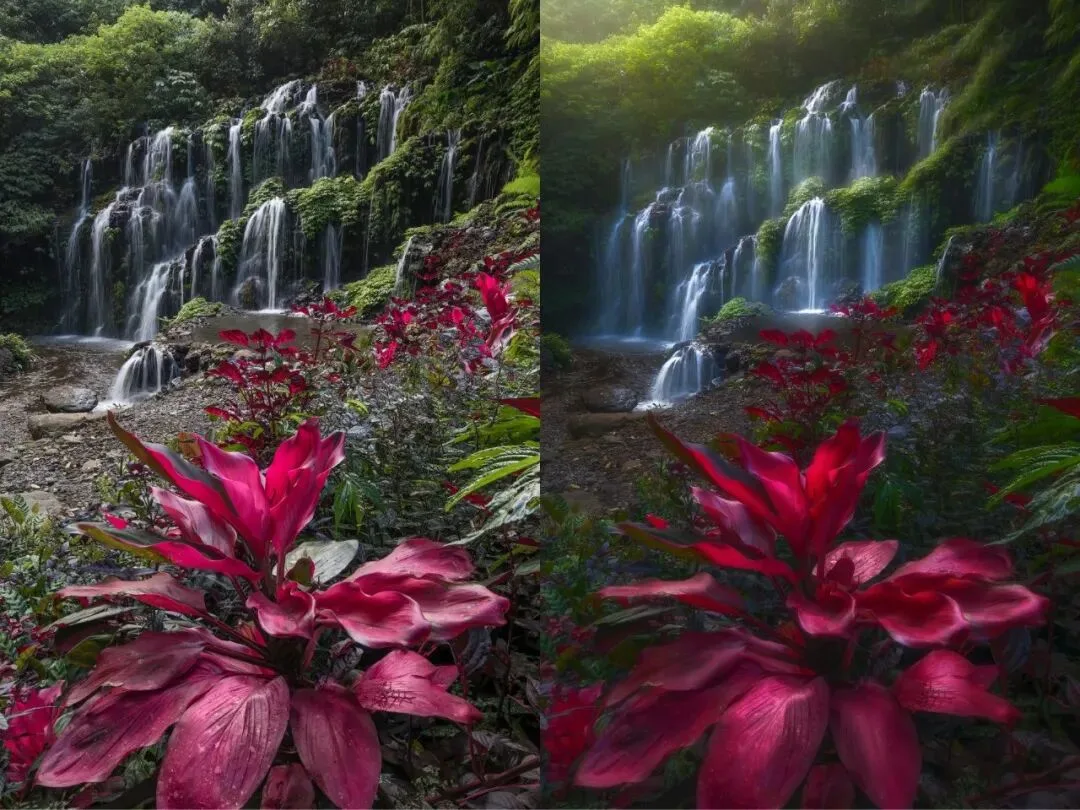
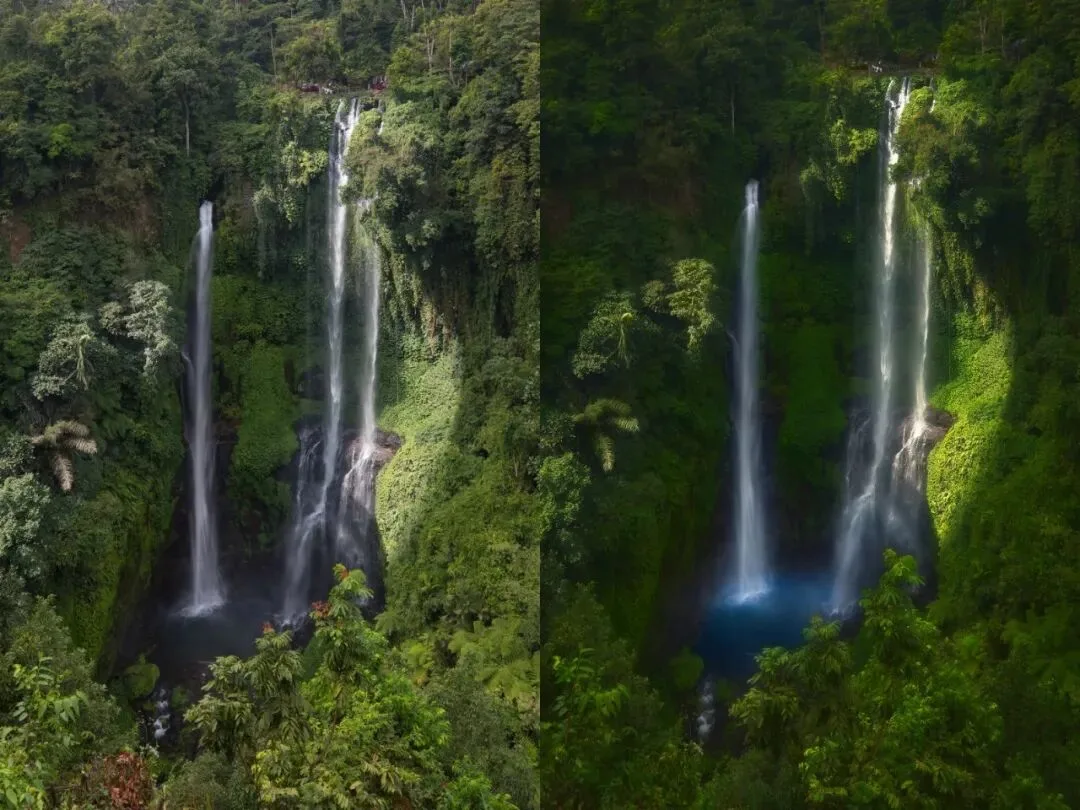
How do you transform an originally dry, plain style into a magical, Alice-in-Wonderland feel?
In this article I've summarized a post-processing workflow applicable to any waterfall-and-jungle subject — just 5 steps to create a magical masterpiece!
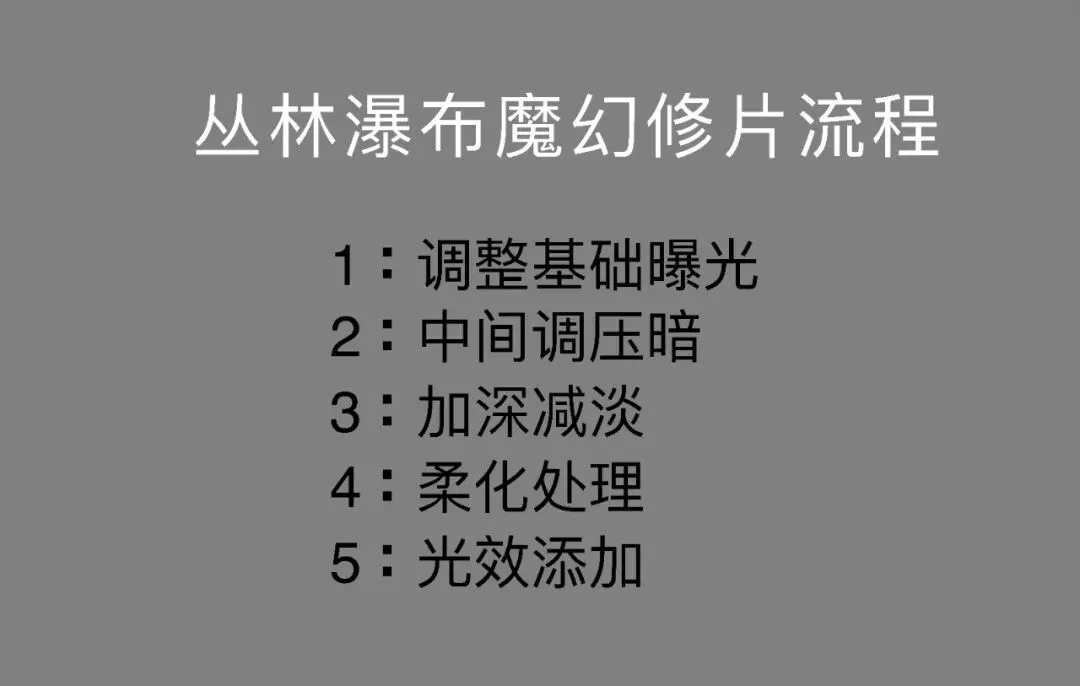

1: Adjust base exposure
For jungle waterfalls, even on overcast days there are very dark areas hidden deep among rocks and trees, and if there is light, the highlights often blow out. So to obtain enough detail, first adjust the base exposure in Lightroom or ACR to recover highlights and shadows.
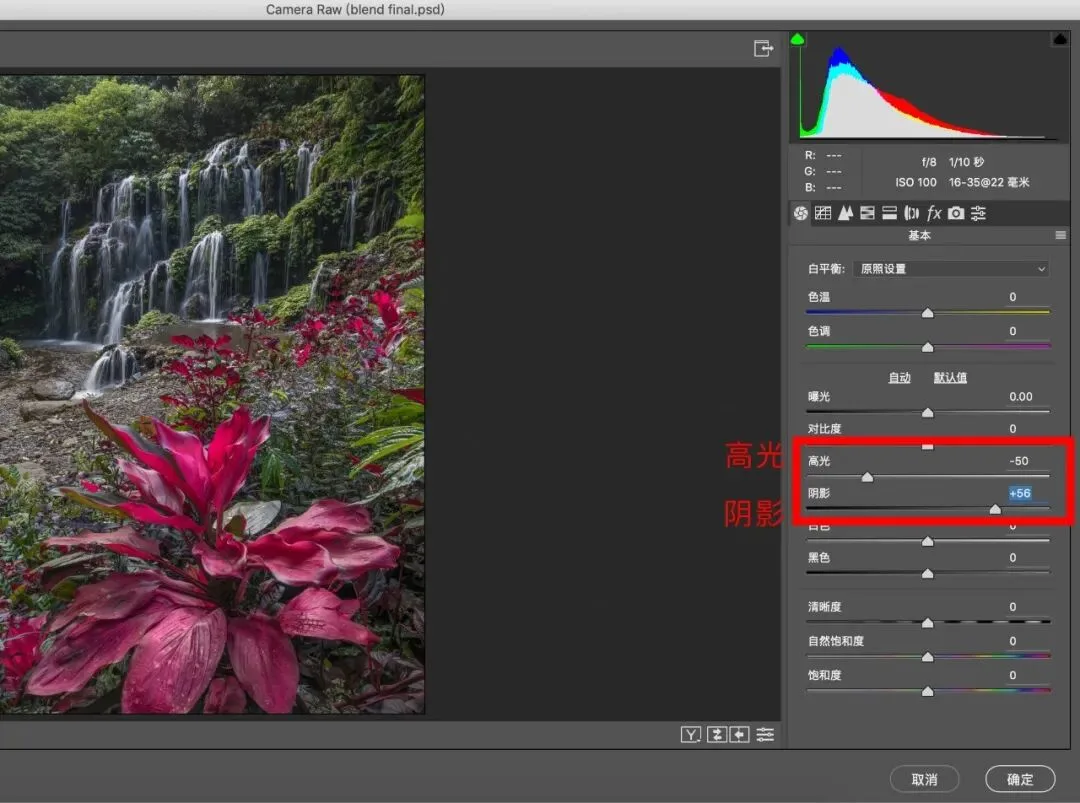
This step is simple: pull the highlight and shadow sliders to recover lost detail. Of course, if the contrast range is too large, use exposure blending with multiple frames.
2: Darken the midtones
In this step we use TKactions to darken the midtones, creating a mysterious dark tonality.
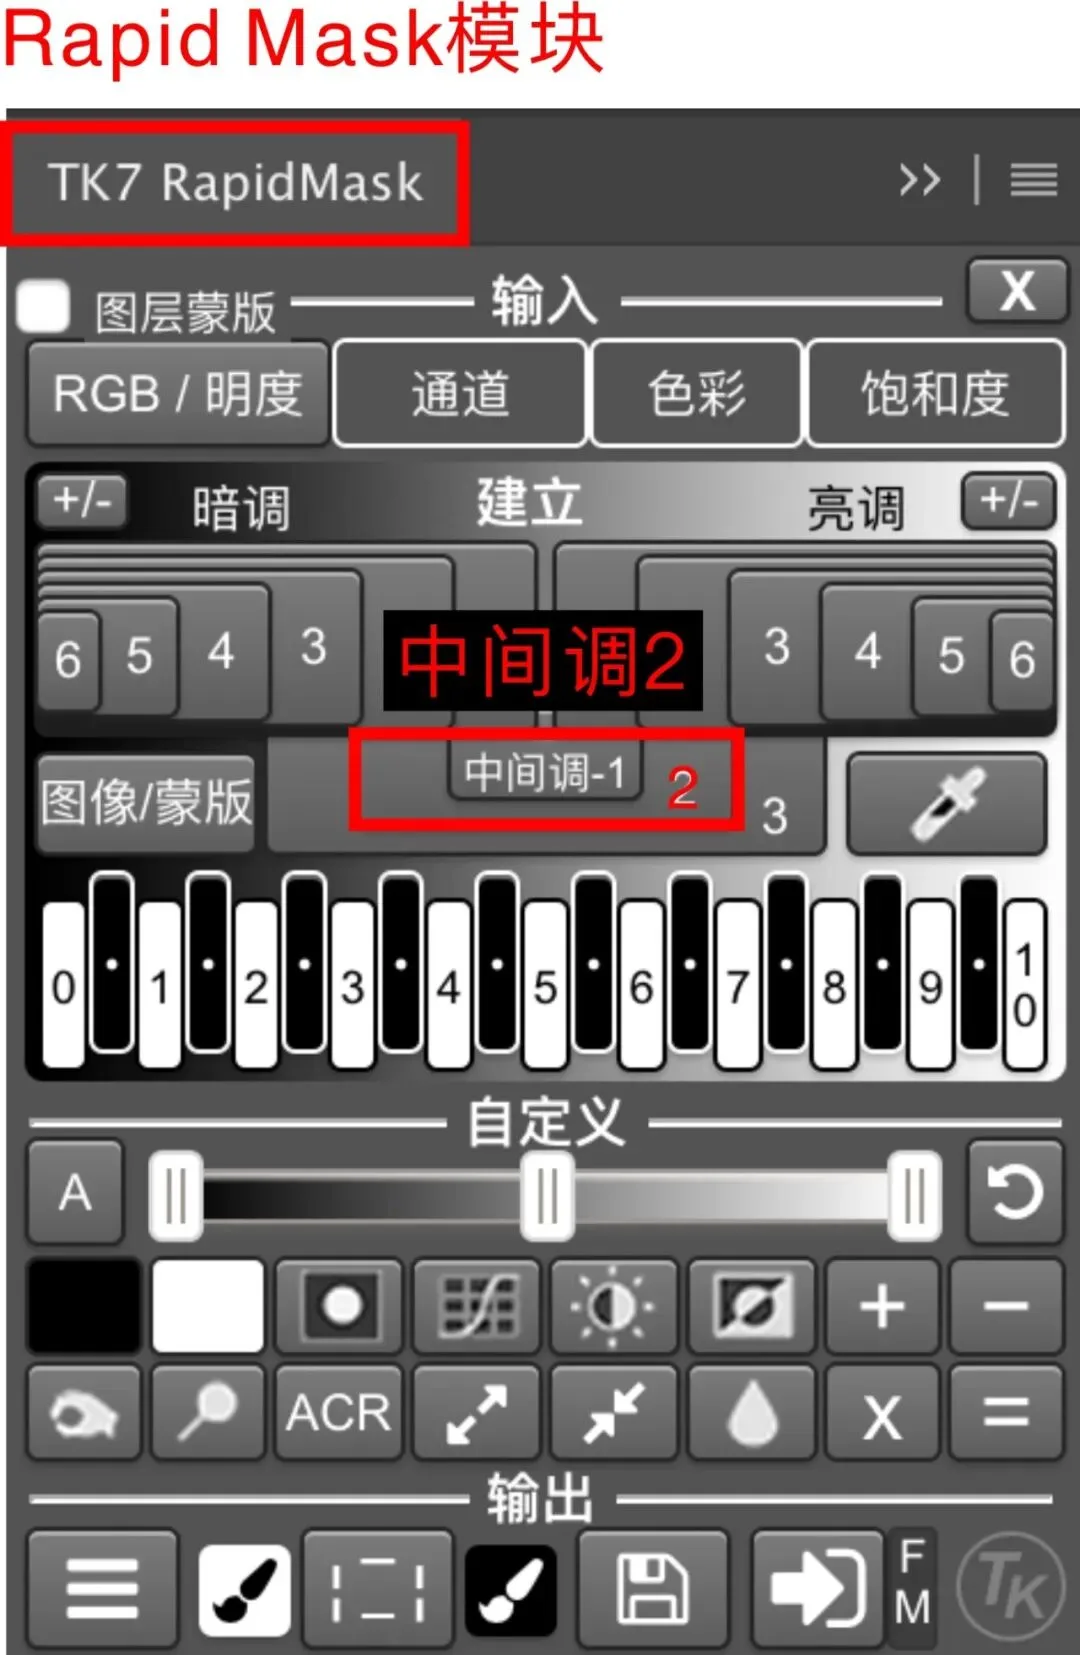
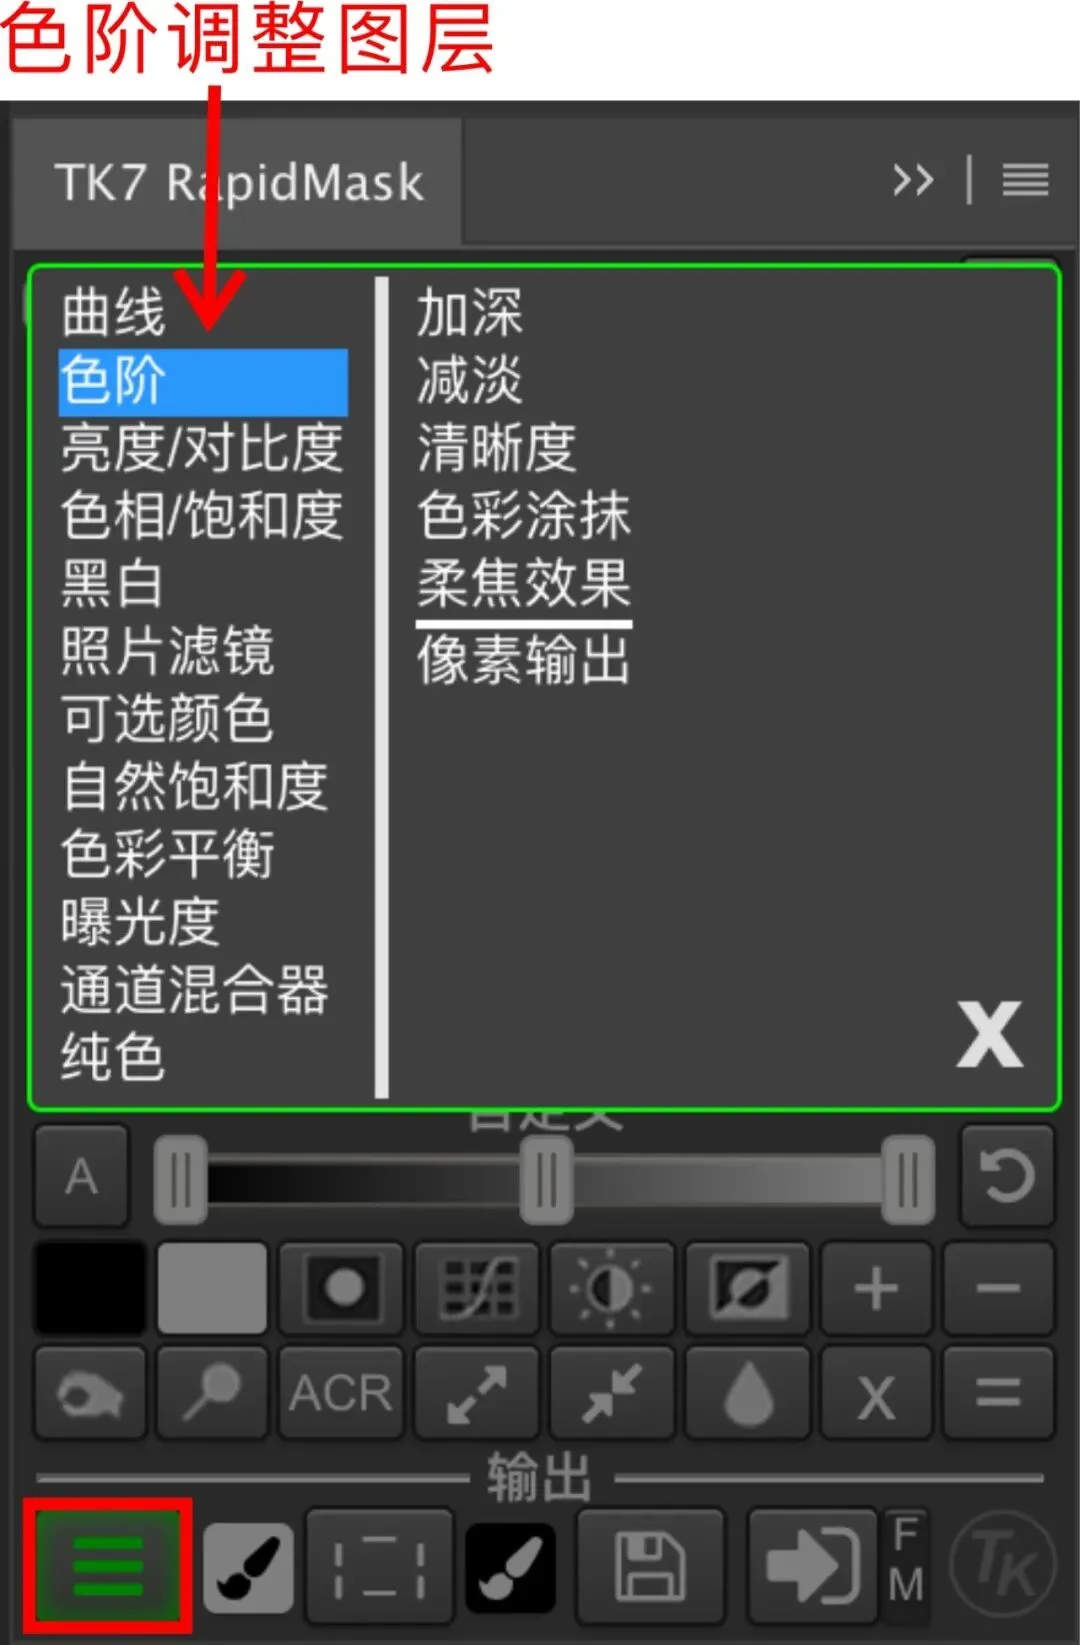
Click the midtones button in the Rapid Mask module to create the image's Midtones 2 channel, then output the channel as a Levels adjustment layer.
Move the middle slider of the Levels adjustment layer to the right to darken the midtones; the amount depends on the image.
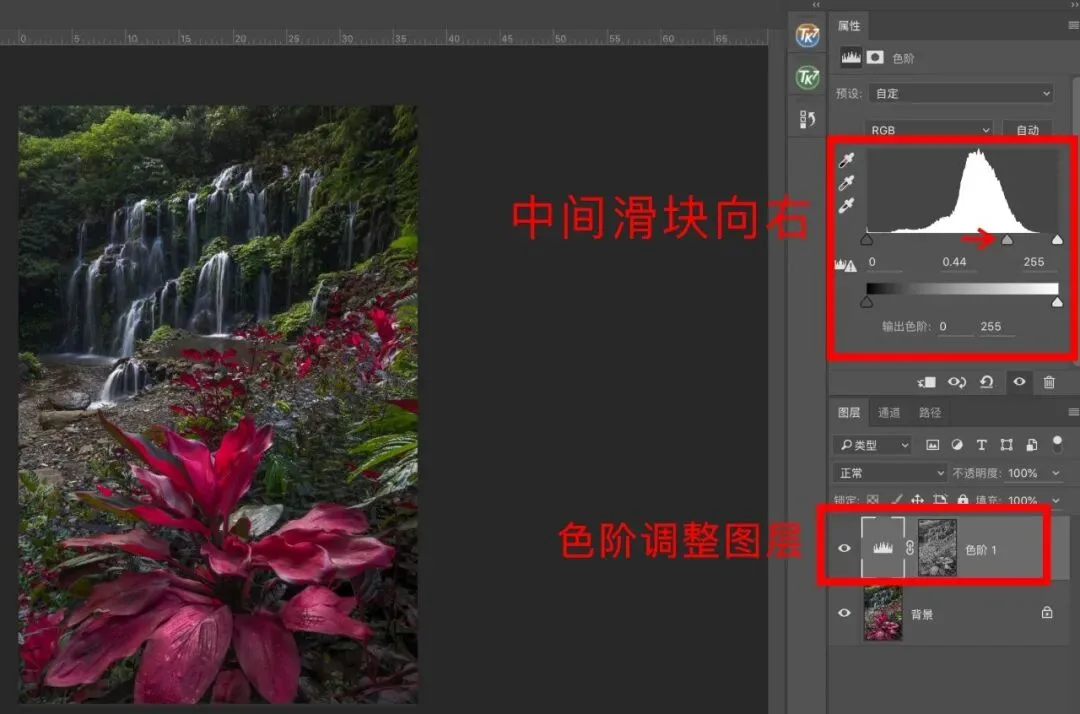
This step requires the TKactions plugin — see the tutorial 'TKactions: From Beginner to Master' for usage.
3: Dodge and burn
This step darkens the distracting bright areas of the image, reshaping the light and shadow so the eye focuses on the subject.
For the thinking behind light reshaping, refer to this article: 'The Core of Post — Light Reshaping'
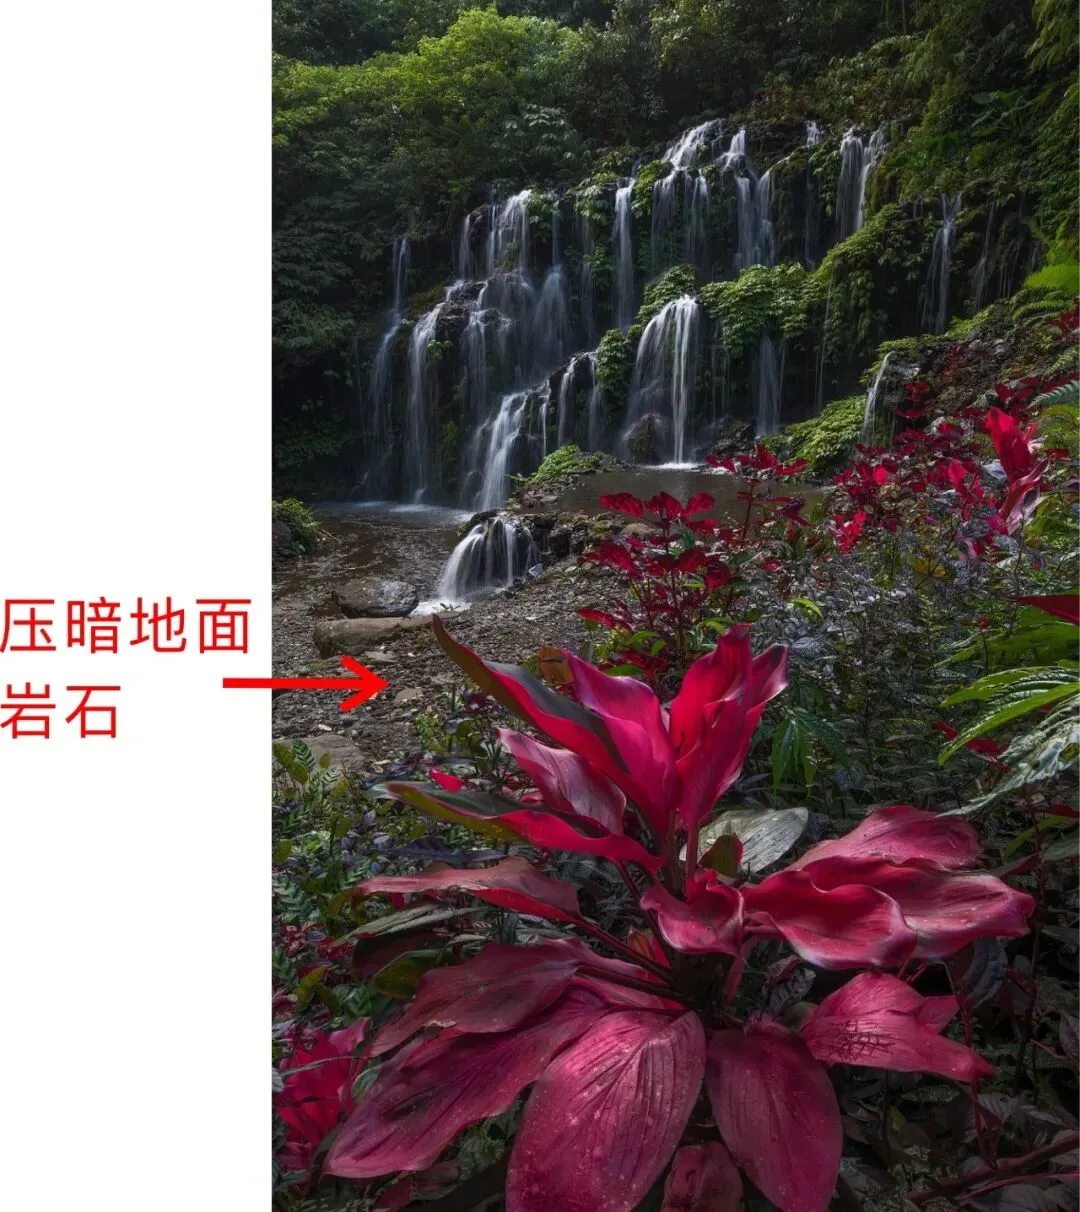
For this particular image, the mid-ground gravel felt messy and distracting, so it needed darkening.
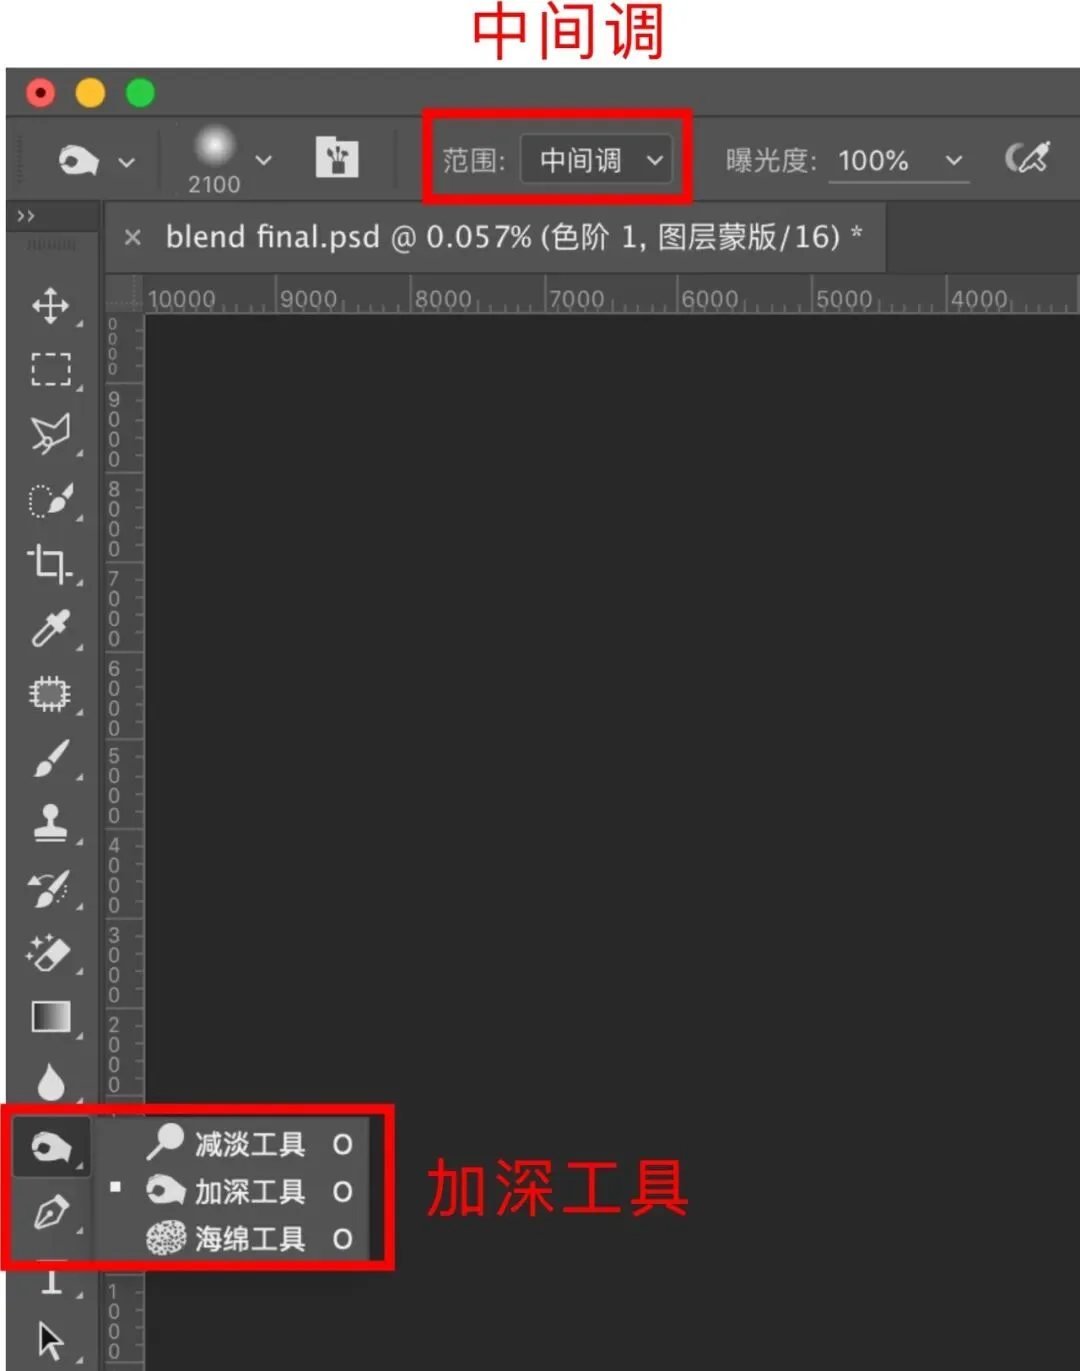
Select the Burn tool from the left toolbar, with Range usually set to Midtones (choose Highlights only for particularly bright cases). Then paint over the areas to darken. Because the range is limited to midtones, shadows are barely affected — paint boldly.
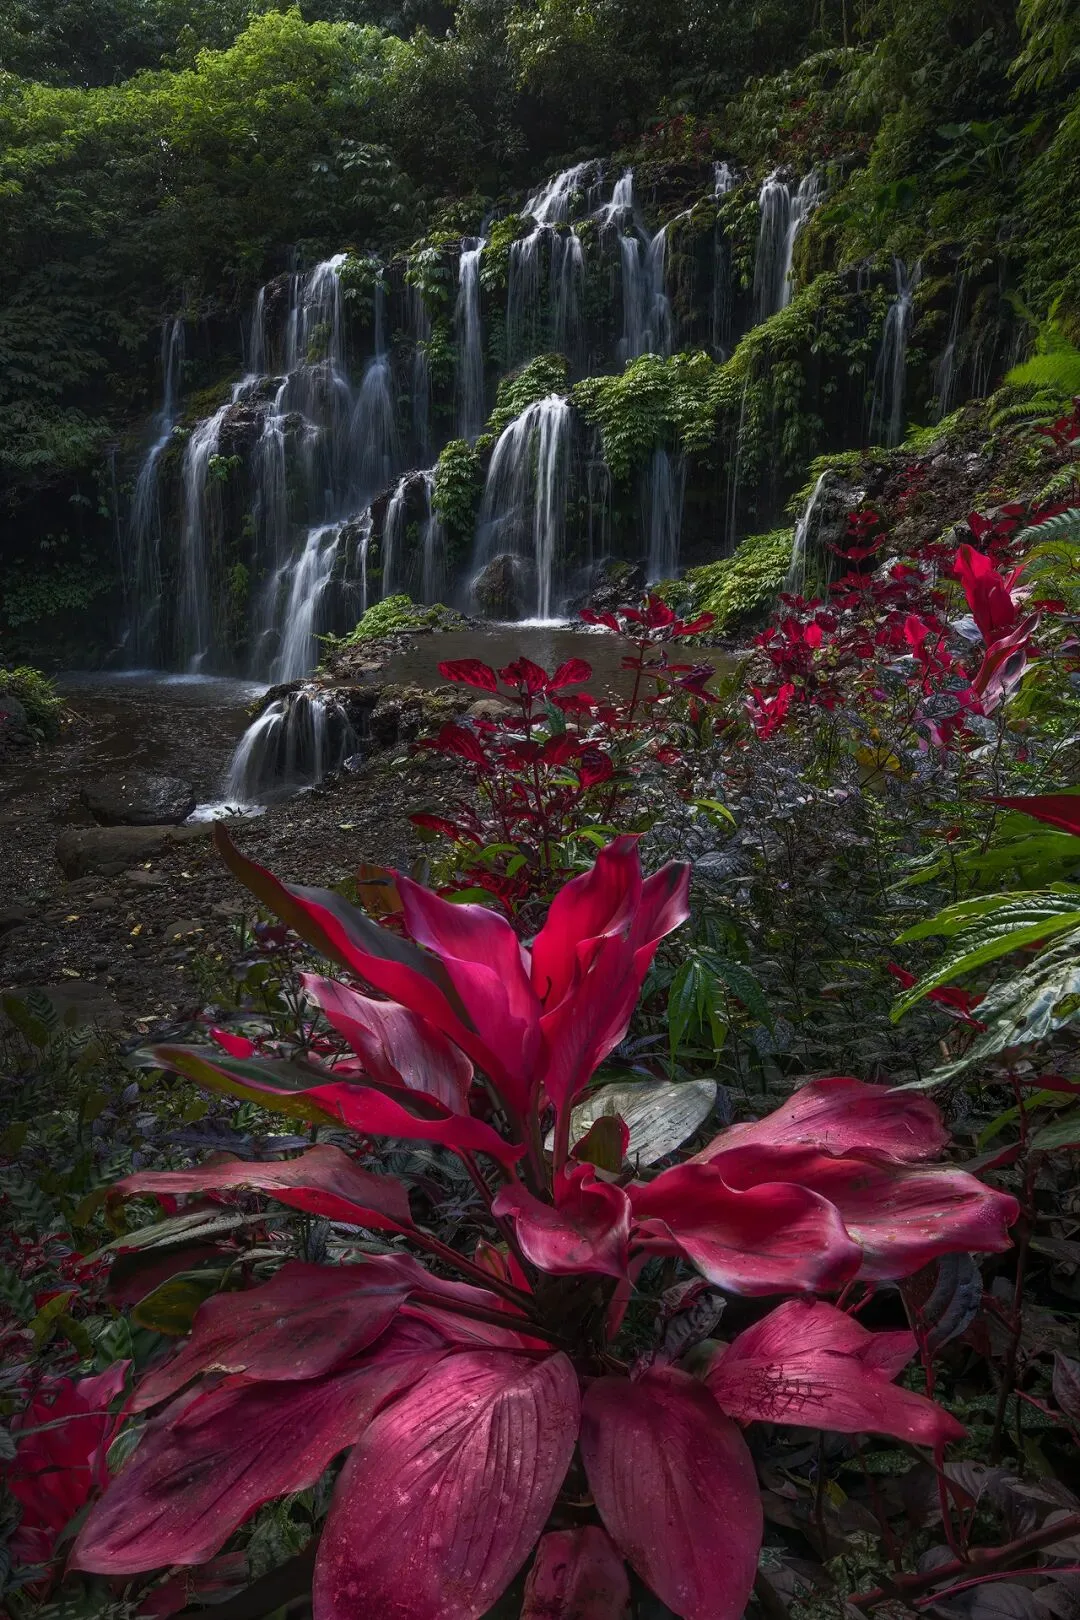
The image above shows the result after darkening — mid-ground highlight distractions removed. If, like the image below, there are many highlight areas, work patiently and darken gradually to fully eliminate the clutter.
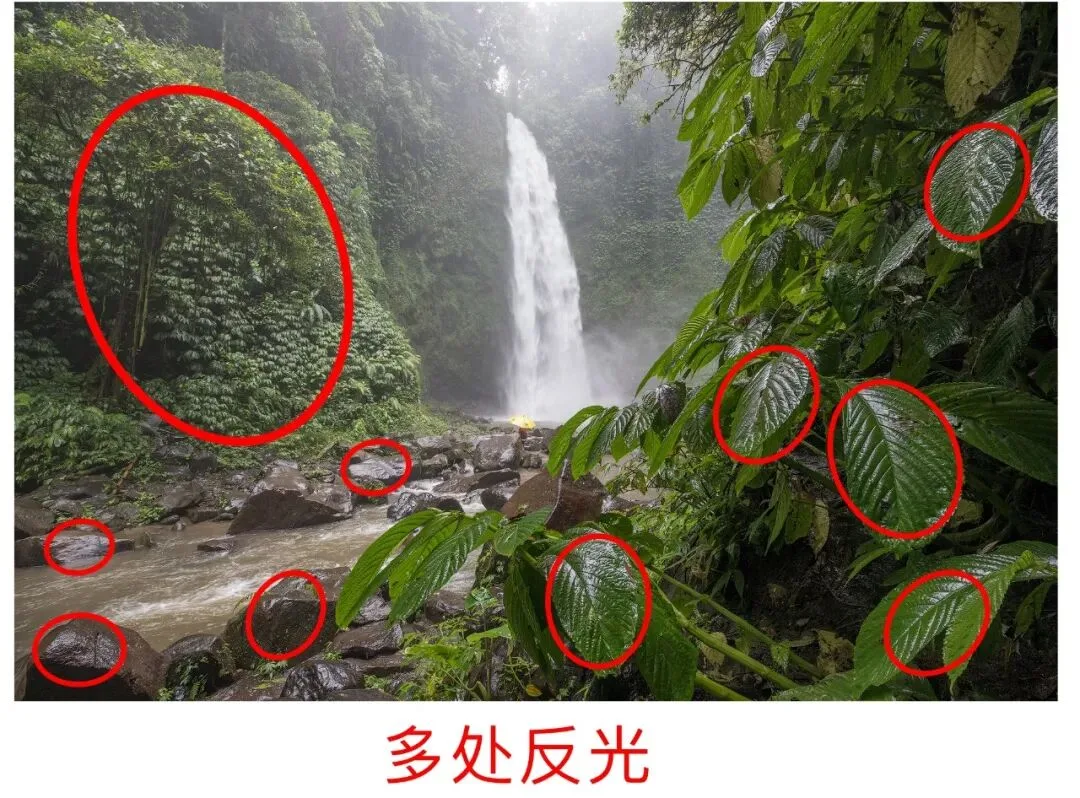
PS: for jungle waterfalls I recommend using a CPL polarizer to kill reflections. Shooting bare-lens like Teacher Yao produces lots of highlight reflections, adding to your post workload.
4: Softening
This step adds a dreamy softness to the image.
First, duplicate a layer
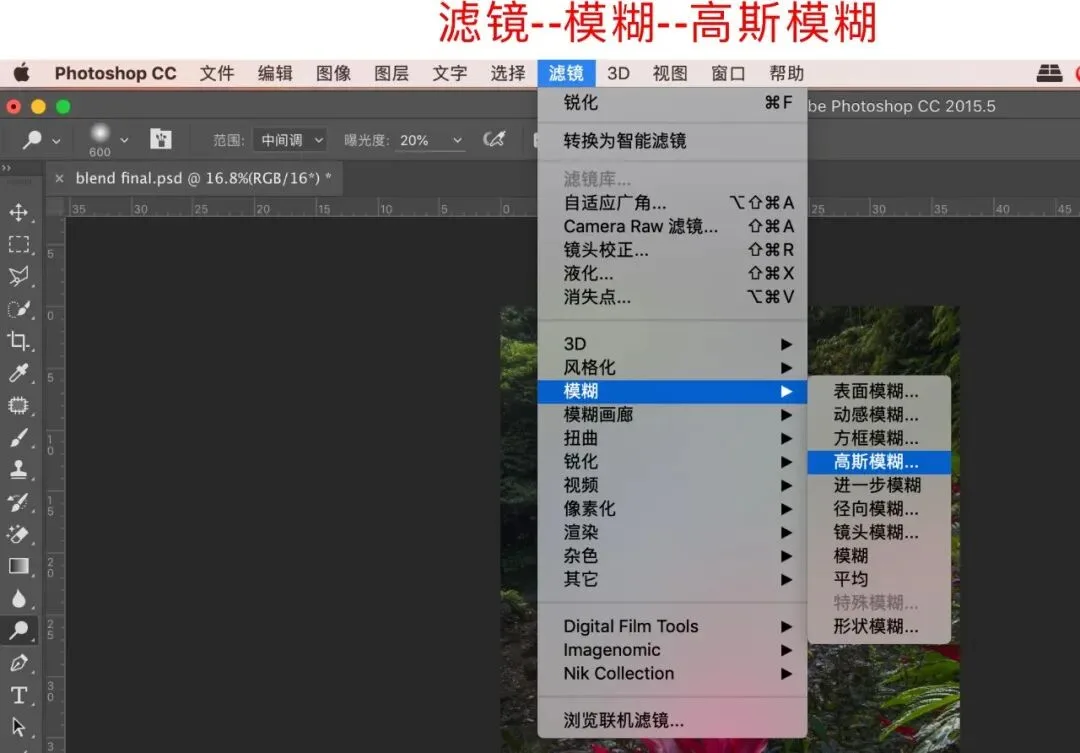
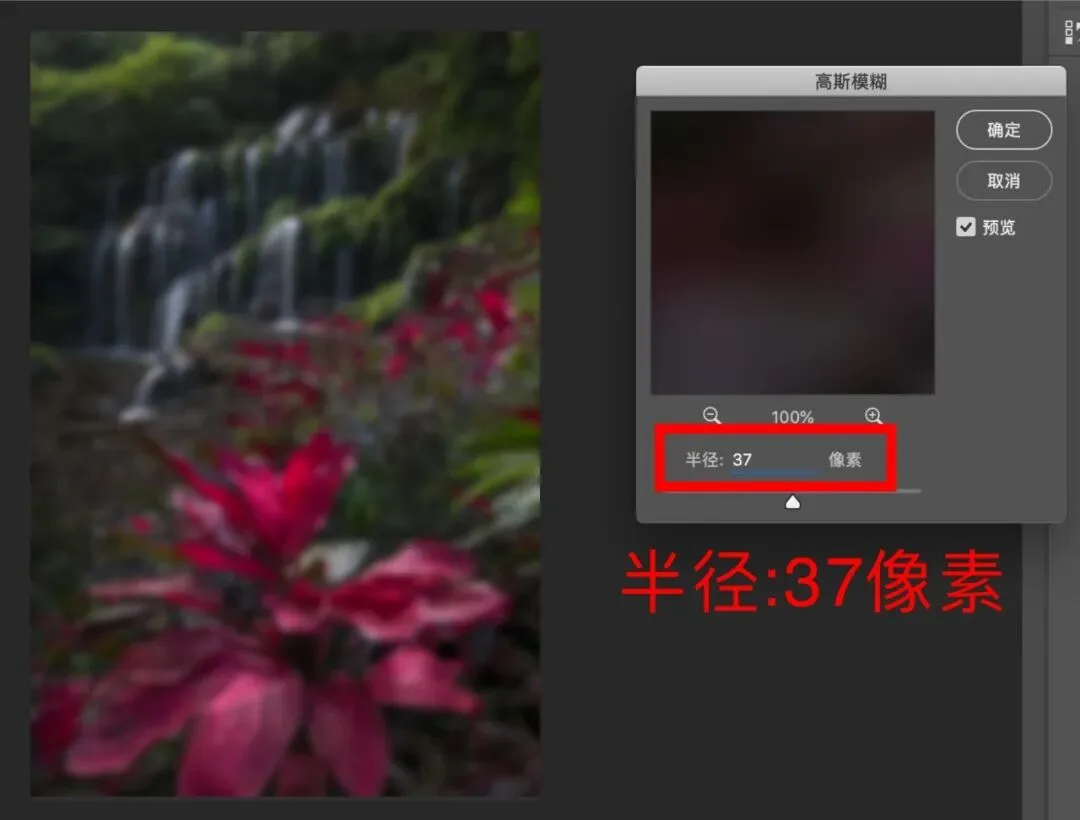
Then apply PS's Gaussian Blur filter with a radius of 37 pixels, and click OK
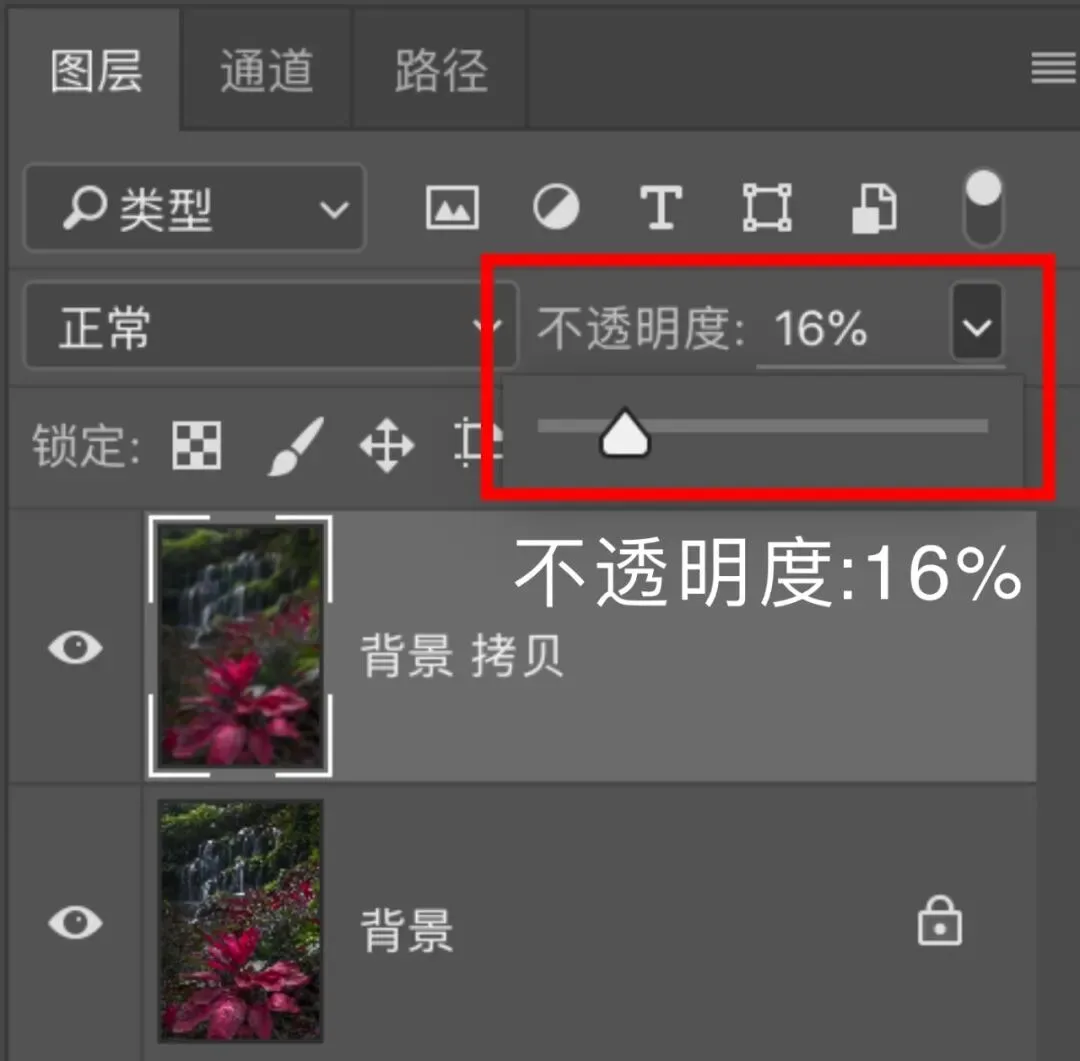
Then lower the blurred layer's opacity to 16%
Apply Levels directly on the softening layer
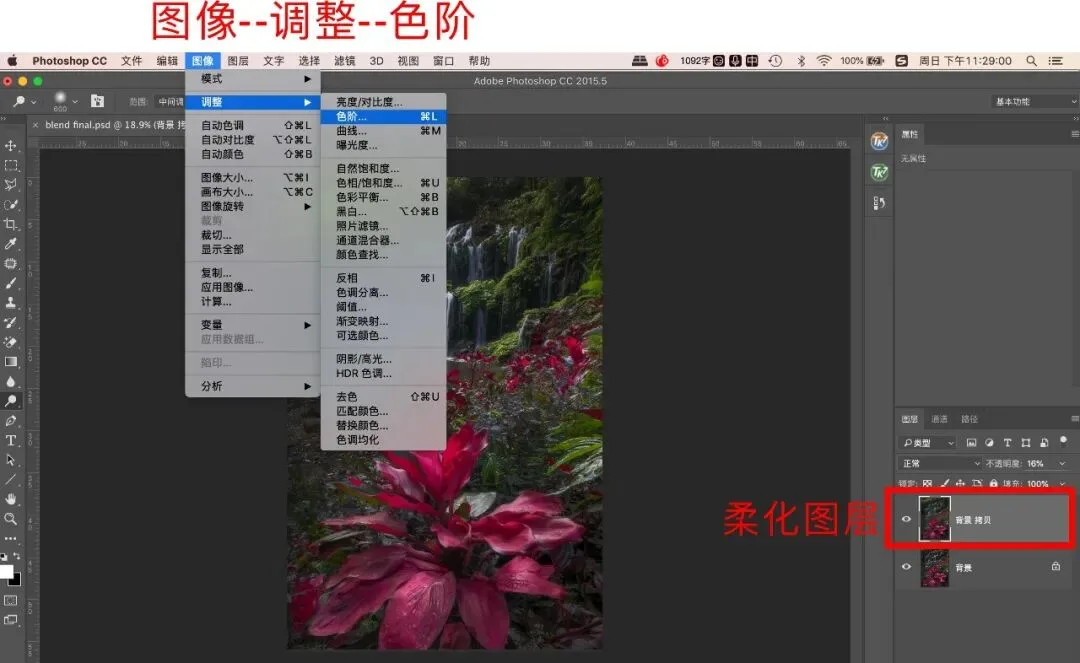
Slide the right Levels slider left and the middle slider right (you can moderately slide the leftmost slider right too). This is similar to adding contrast: the closer the three sliders, the stronger the softening. Adjust according to how much softness you want.
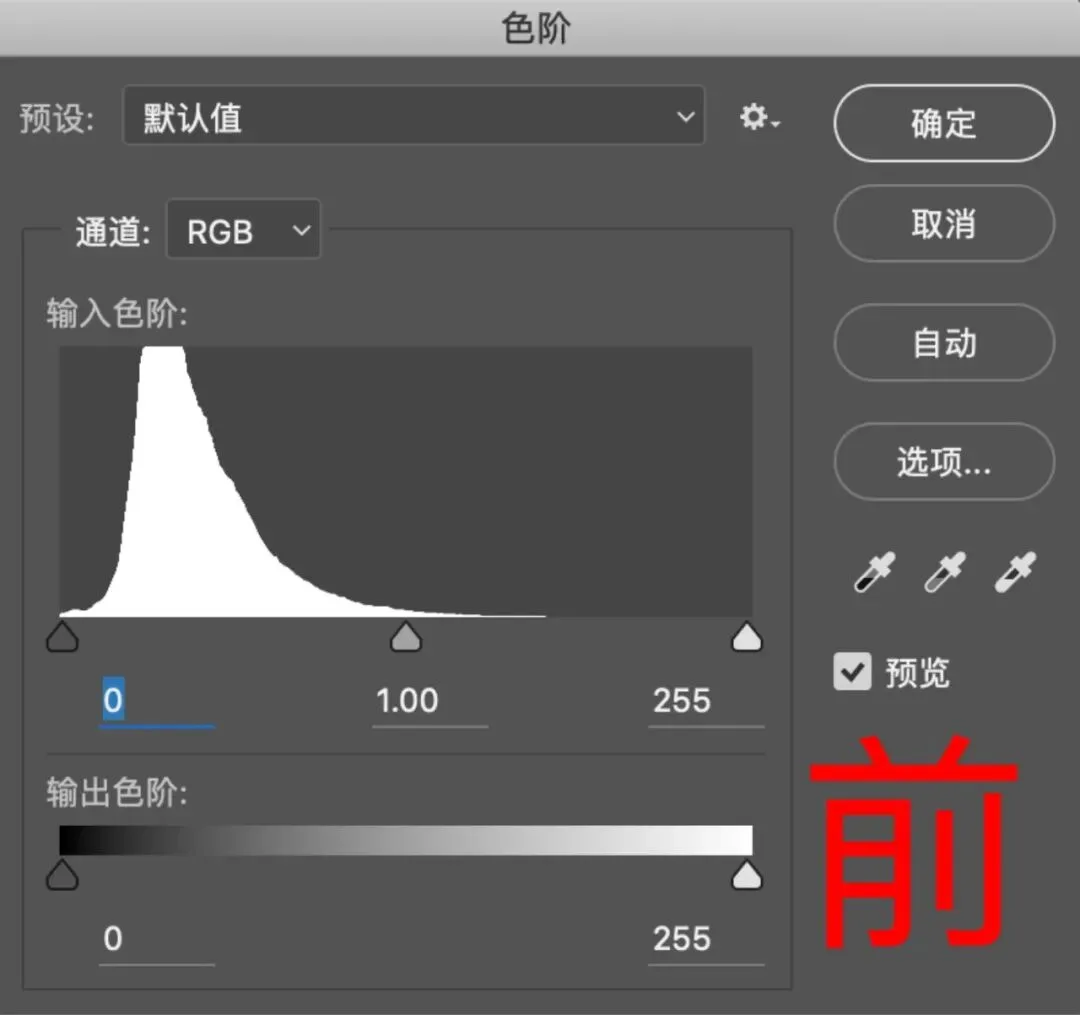
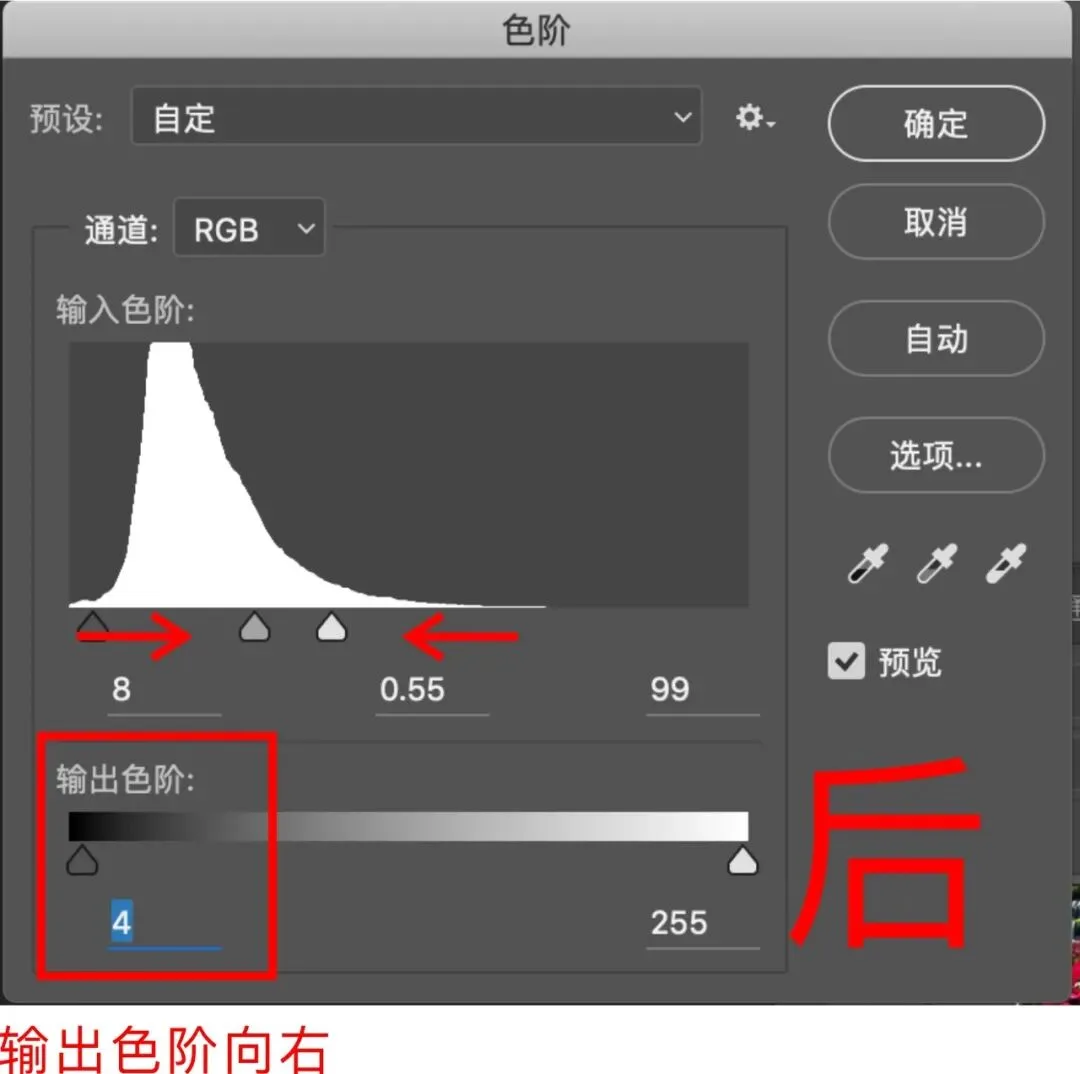
If the shadows get too dark, slightly slide the left slider under 'Output Levels' to make shadows grayer, reducing contrast and enhancing softness. (With TKactions, create a shadow selection first, then perform this graying step for even better results.)
Then merge all layers and duplicate once more.
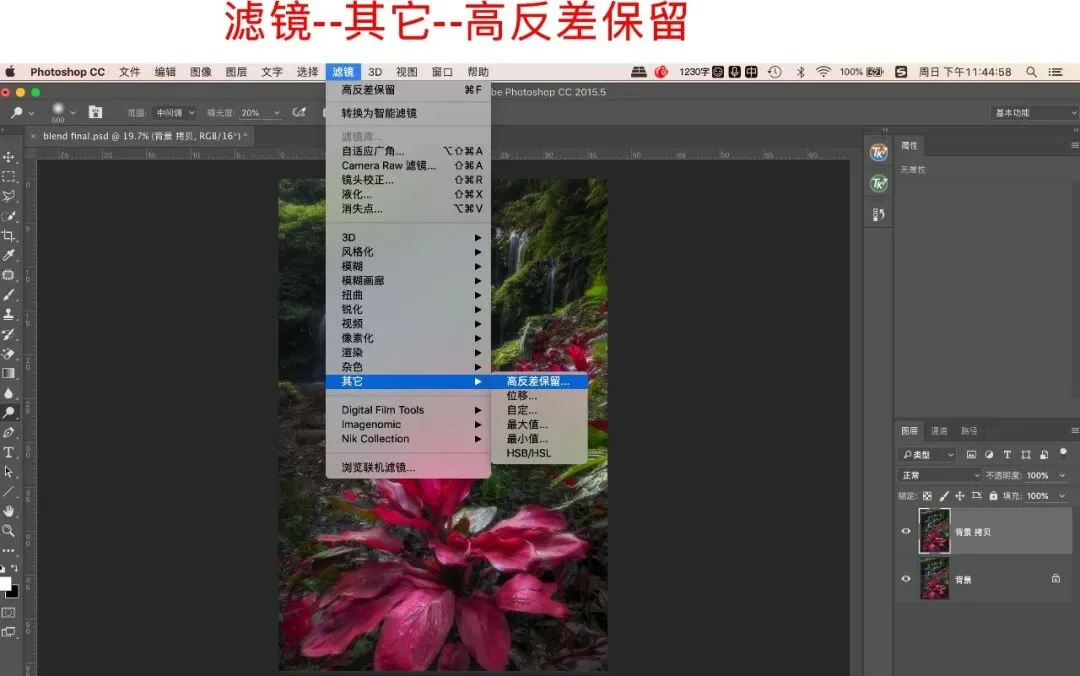
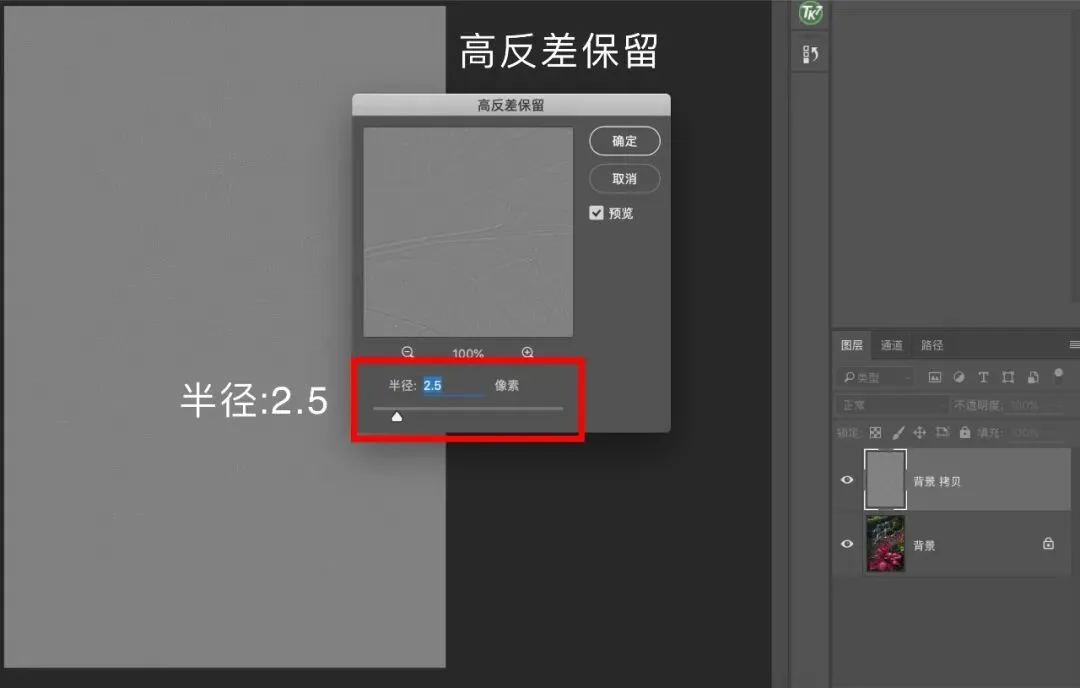
Next, apply the High Pass filter on the duplicated layer with radius 2–3, and click OK. This recovers some outline detail lost to the softening.
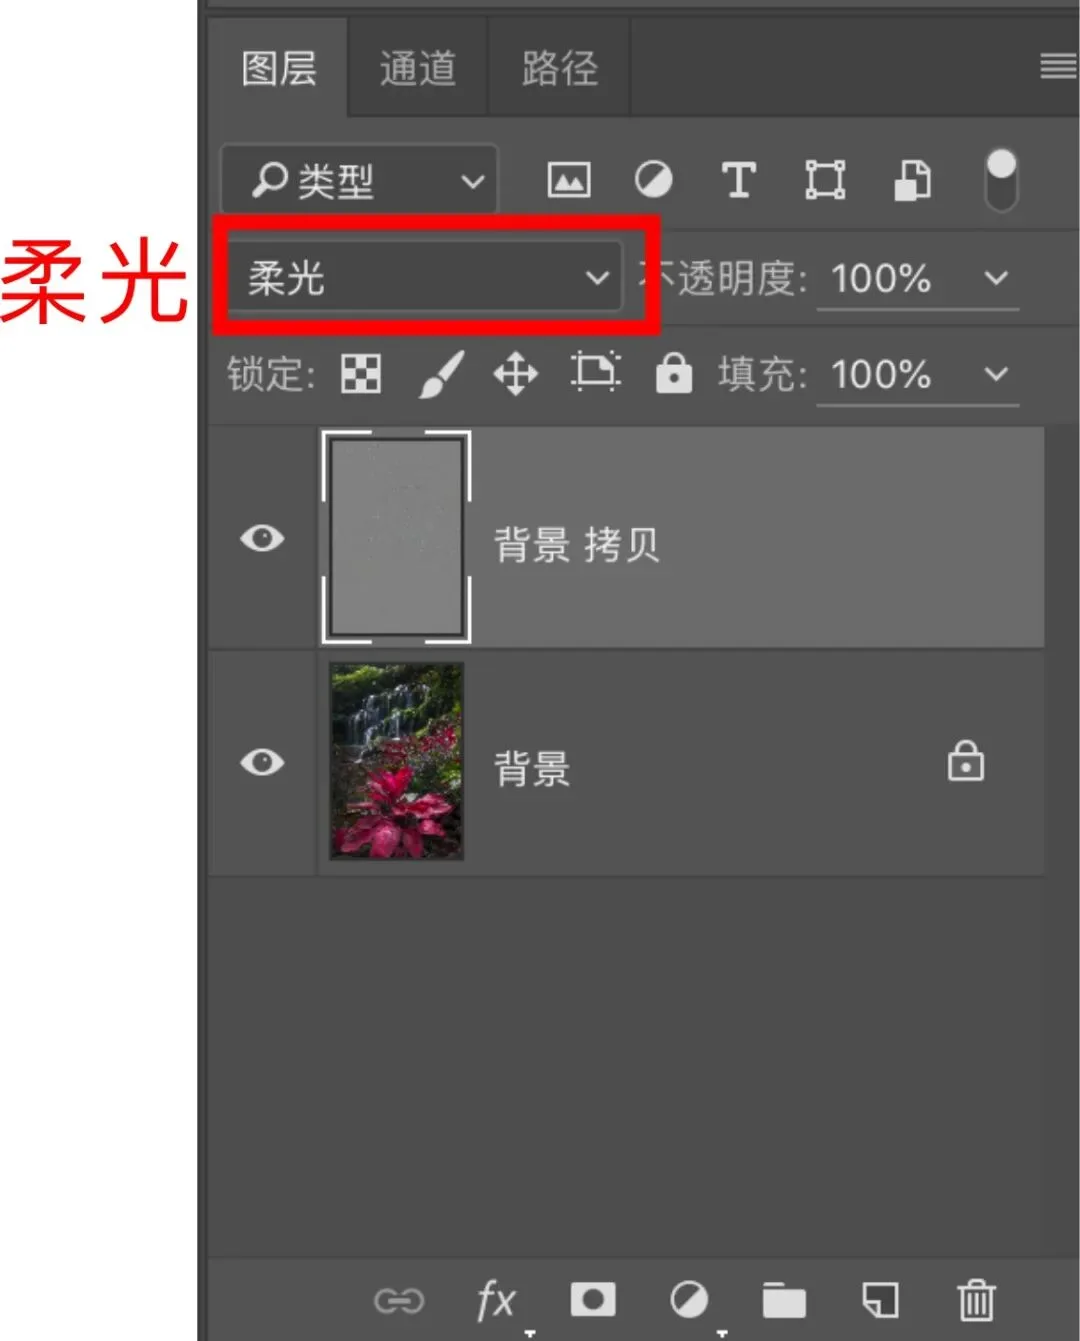
Change the High Pass layer's blend mode to: Soft Light
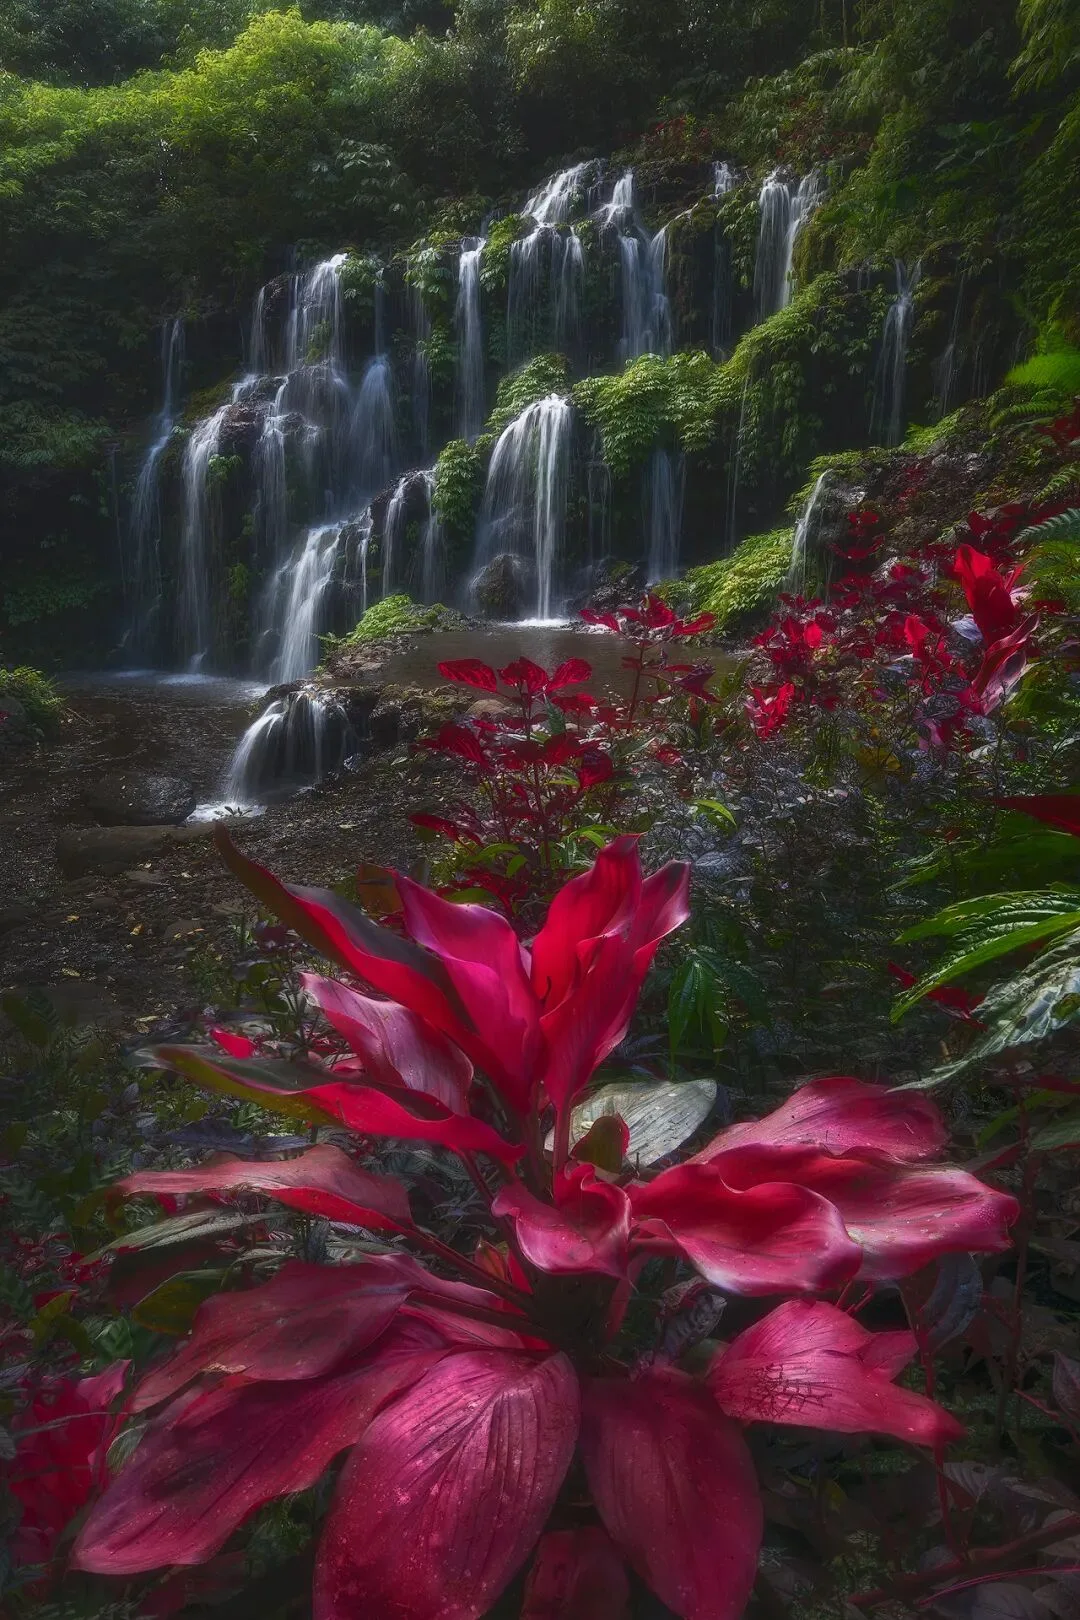
That completes the sharpening. The result now looks like this:
5: Adding light effects
This final step is the finishing touch, adding a dreamy sense of light. Based on the original image's light foundation, we set the logic that light enters from the upper left.
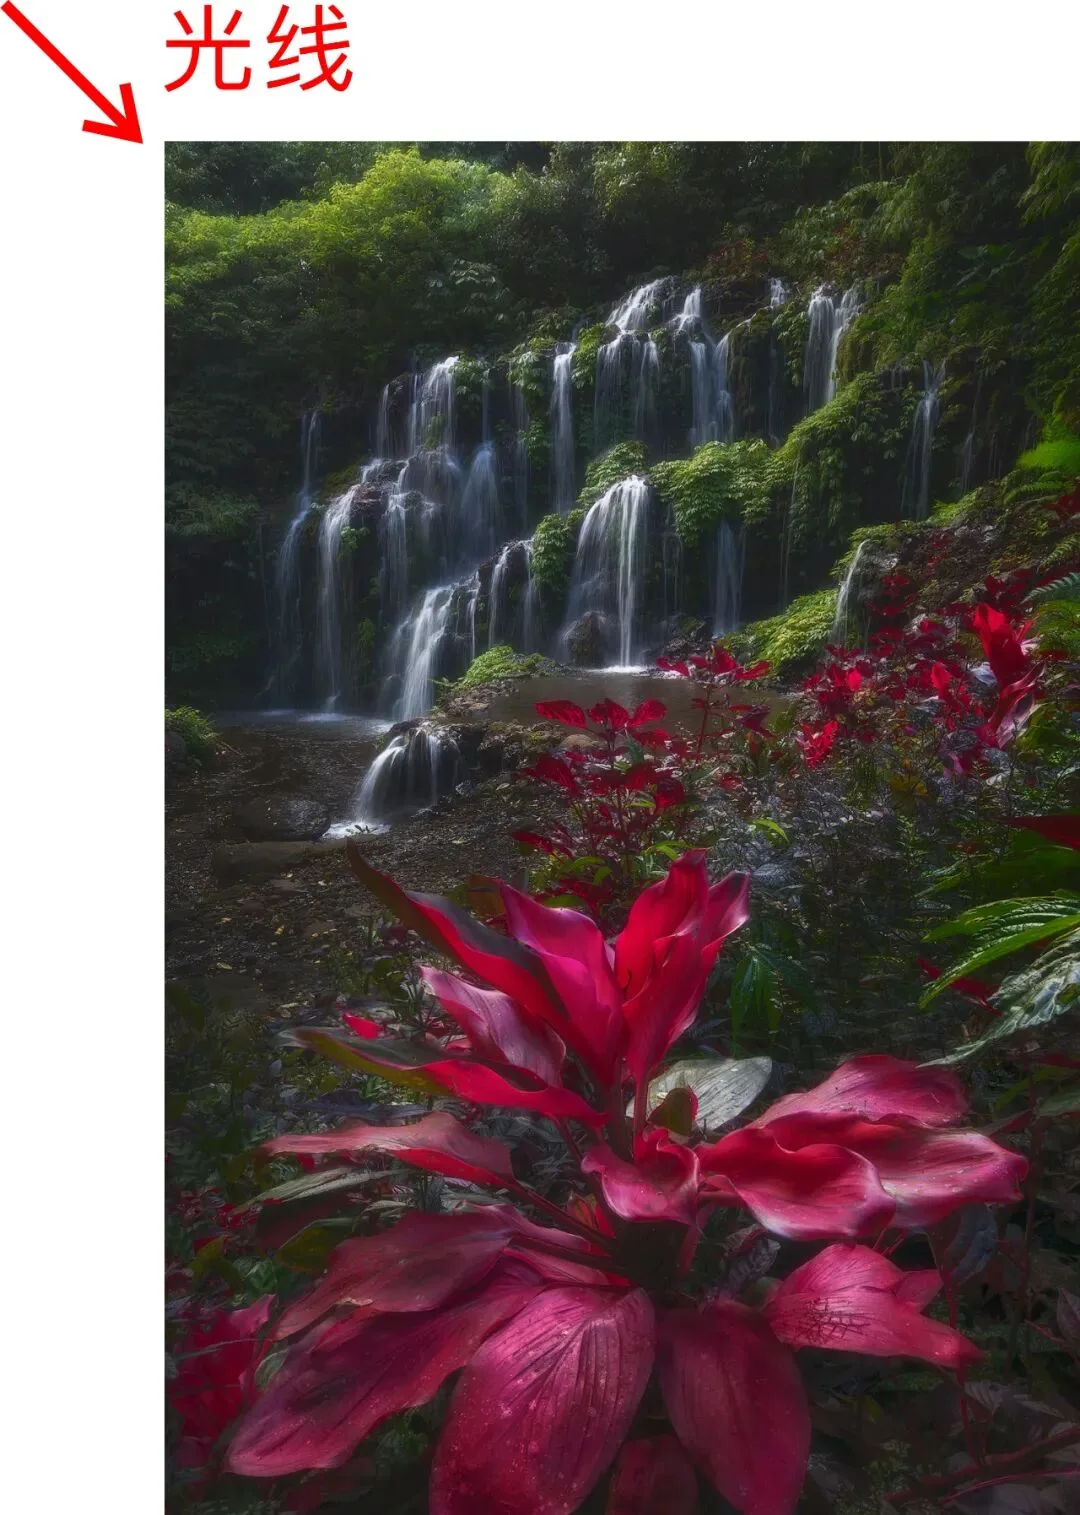
Then select the Brush tool and double-click the foreground color to choose the light's color. For jungle light we usually pick bright yellow or white.
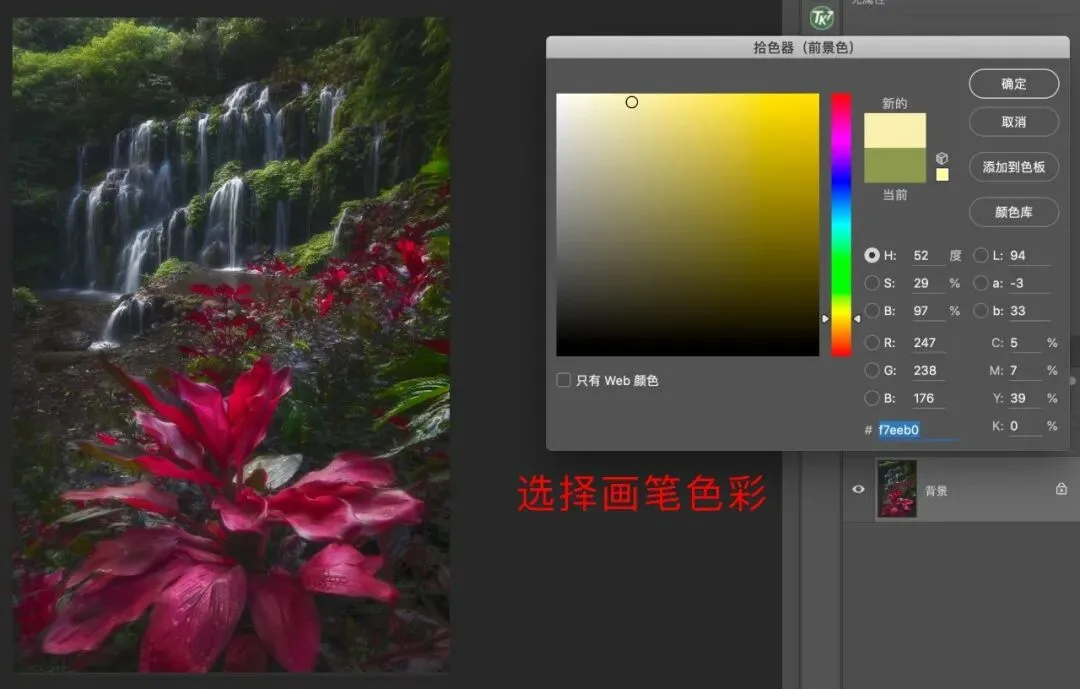
Then paint with a soft brush at 10% opacity over the areas where light enters, building the light effect. Below is the final image (with before/after comparison attached).
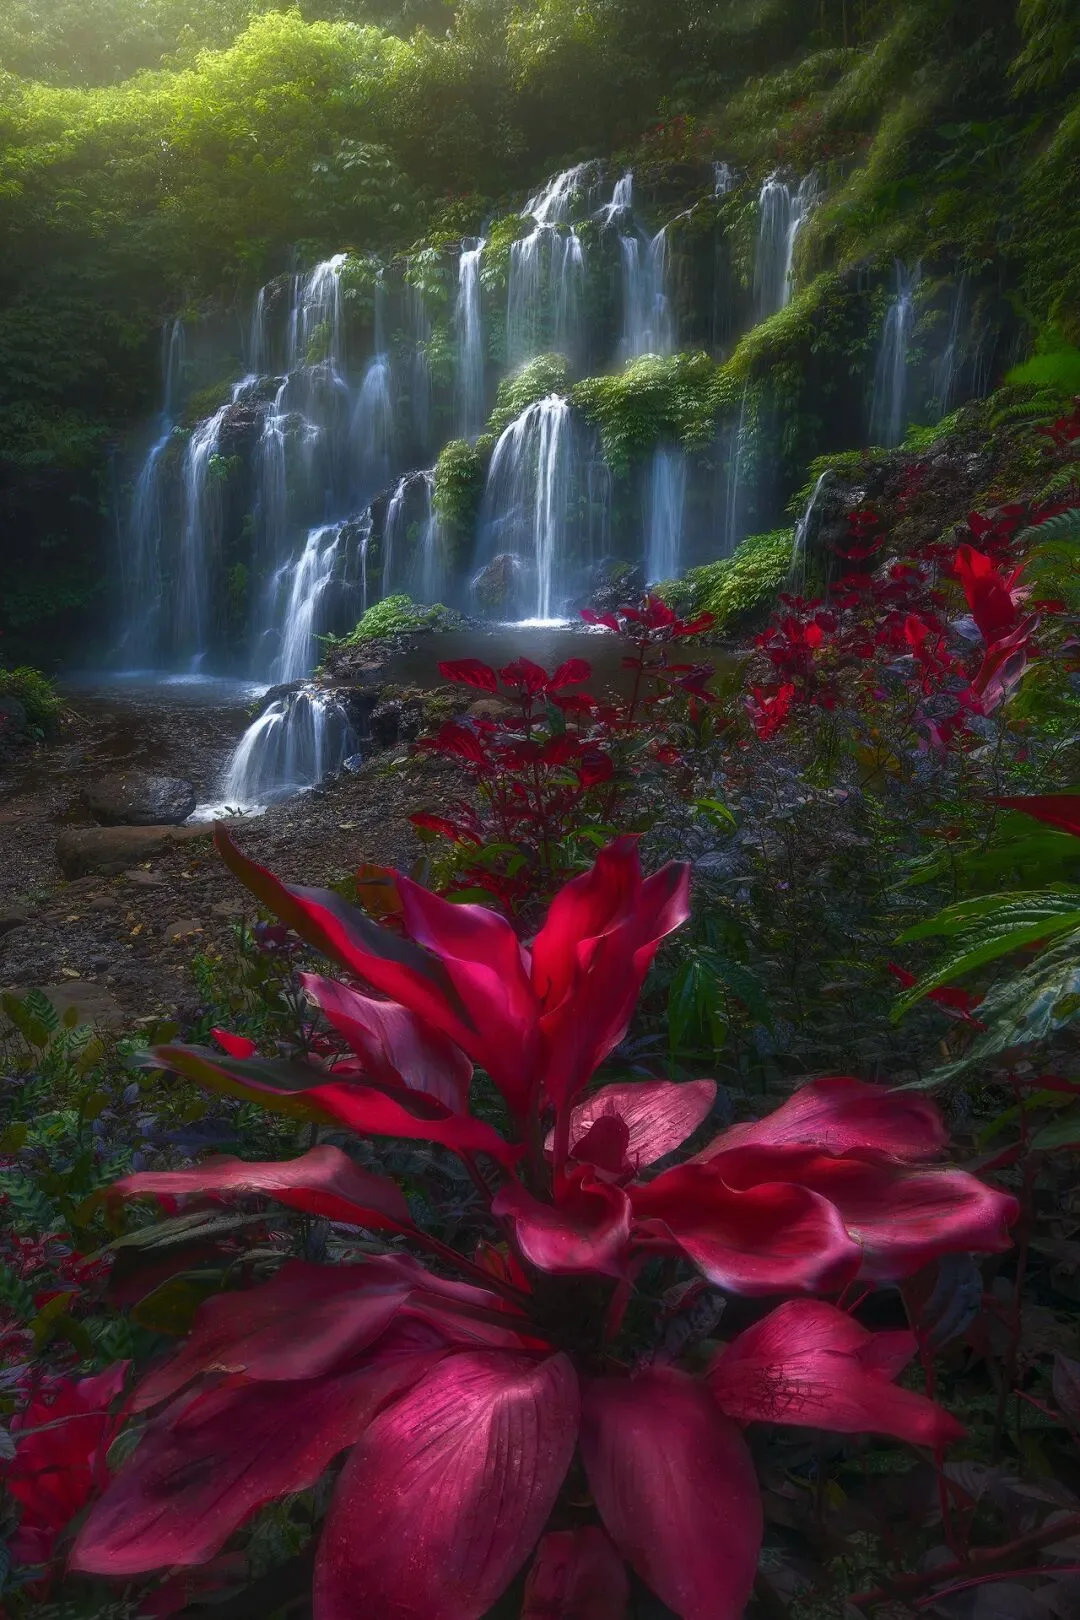
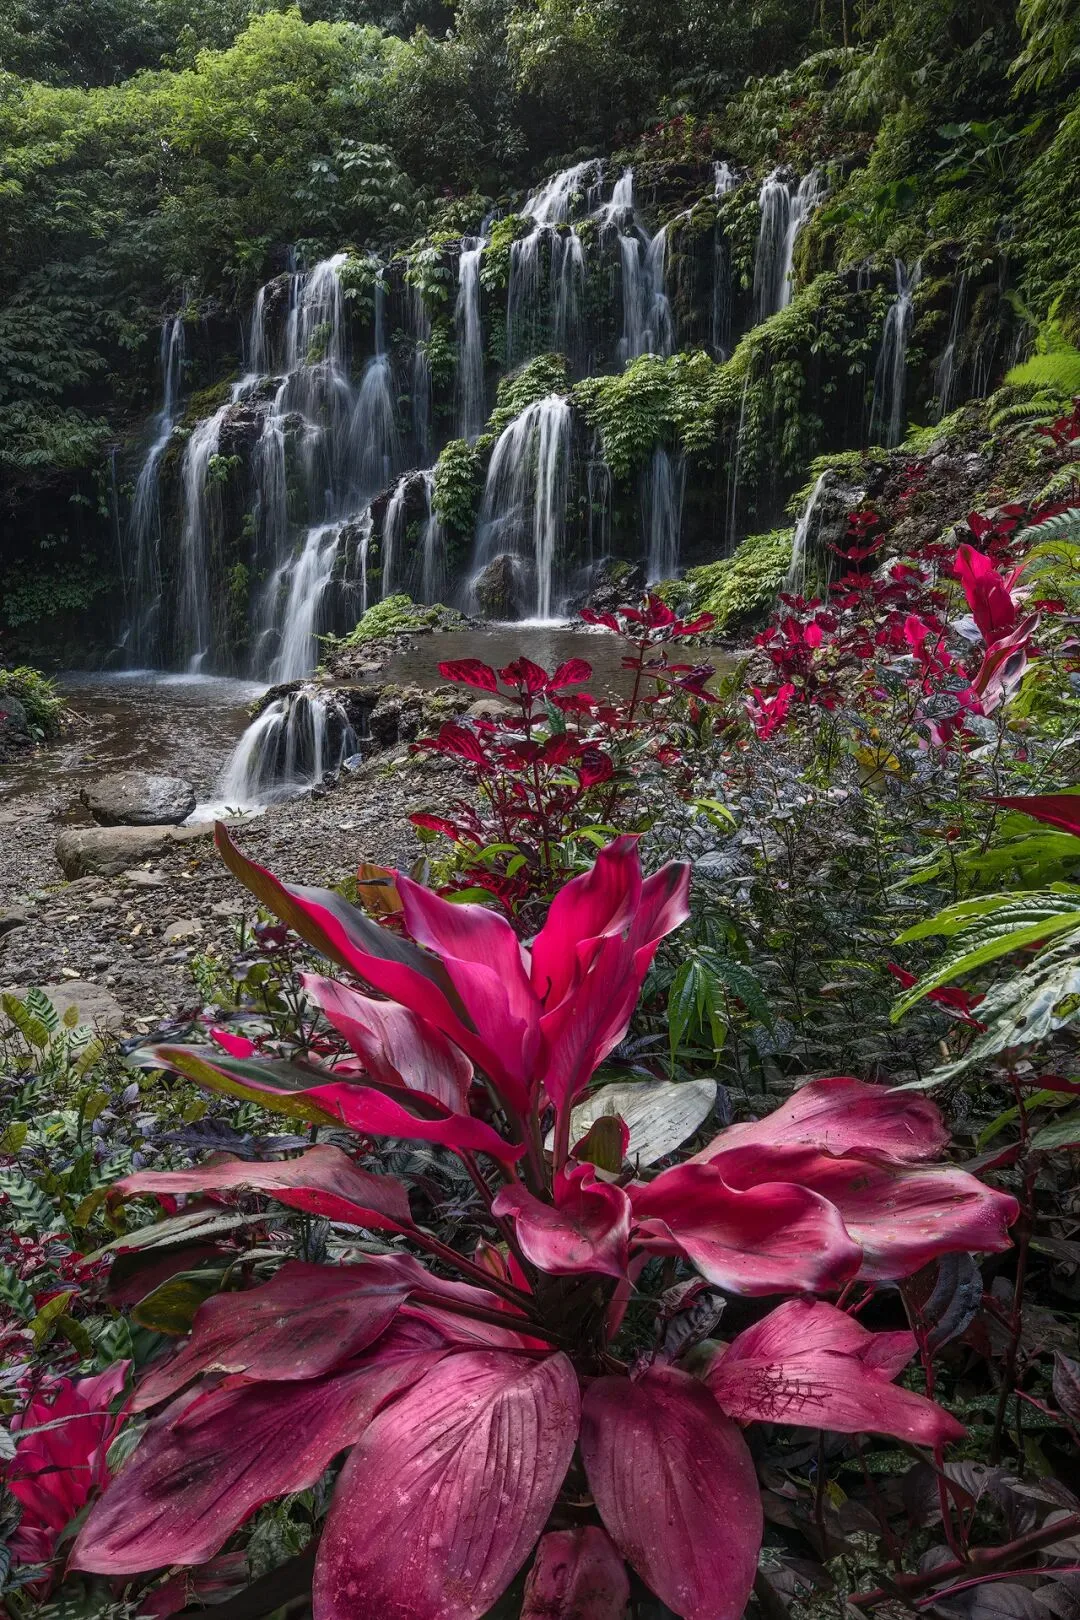
This step tests your patience — paint light carefully on the lit surfaces following the light direction. Not every image needs this step; decide case by case.
The above is the complete magical-editing workflow for jungle waterfalls — tested to work for all images of this genre.
1: Adjust base exposure
2: Darken the midtones
3: Dodge and burn
4: Softening
5: Adding light effects
Finally, for better results and easier post, I recommend noting two things when shooting jungle waterfalls:
1: Best to use a CPL polarizer to eliminate stray reflections
2: Backlight works best, followed by local light (under 15% partial illumination), then overcast — never shoot when direct frontal light fully illuminates the scene.