Photography Tutorial · 2020-04-26
Post-Processing Secrets: Every Way to Create Light Rays
Thomas Chu Photo
God rays — also called Tyndall light — are the visible beams you see when light passes through a colloid, viewed from the side of the incoming light. Clouds, fog, and smoke are all colloids, so outdoors we often witness this beautiful natural phenomenon when sunlight shines into mist or cloud.
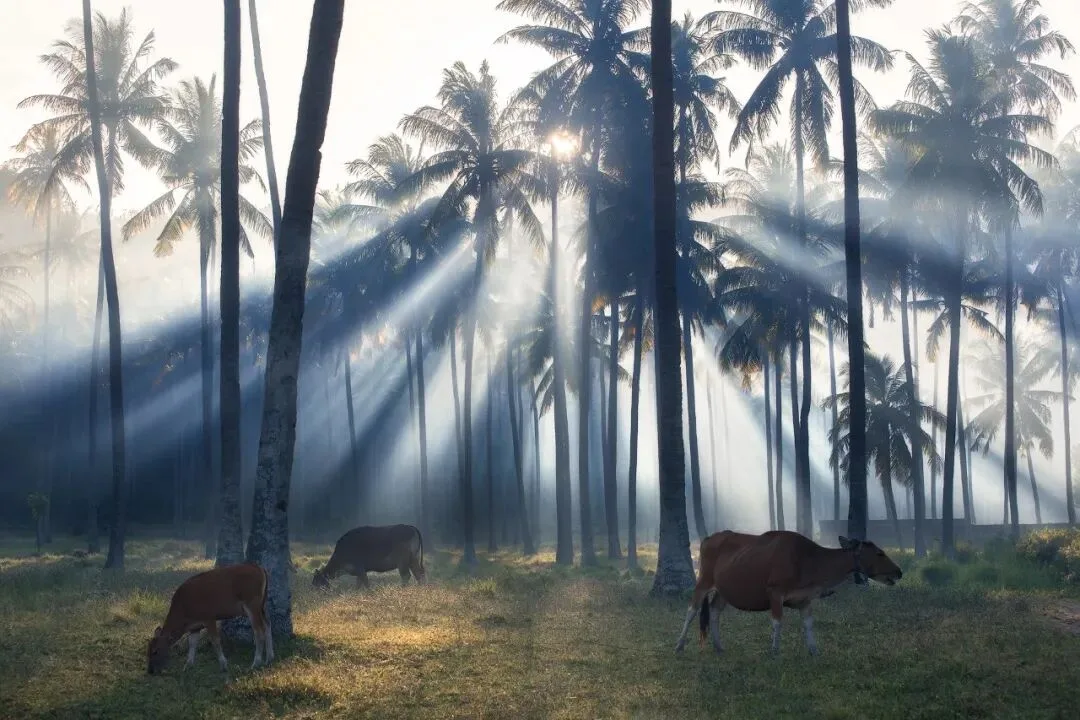
In this article, I'll round up all the methods for creating god rays in landscape post-processing.
PS: All god rays in Yao's own works are genuinely captured in-camera. The creative post techniques in this article can enrich your images' visual impact and give you new editing ideas — but use them judiciously.
1. The Brush Painting Method

This is the most flexible method — and the hardest to control. I usually use it to strengthen existing beams; creating light from nothing is very difficult, because brush direction and flow are hard to keep linear and even.
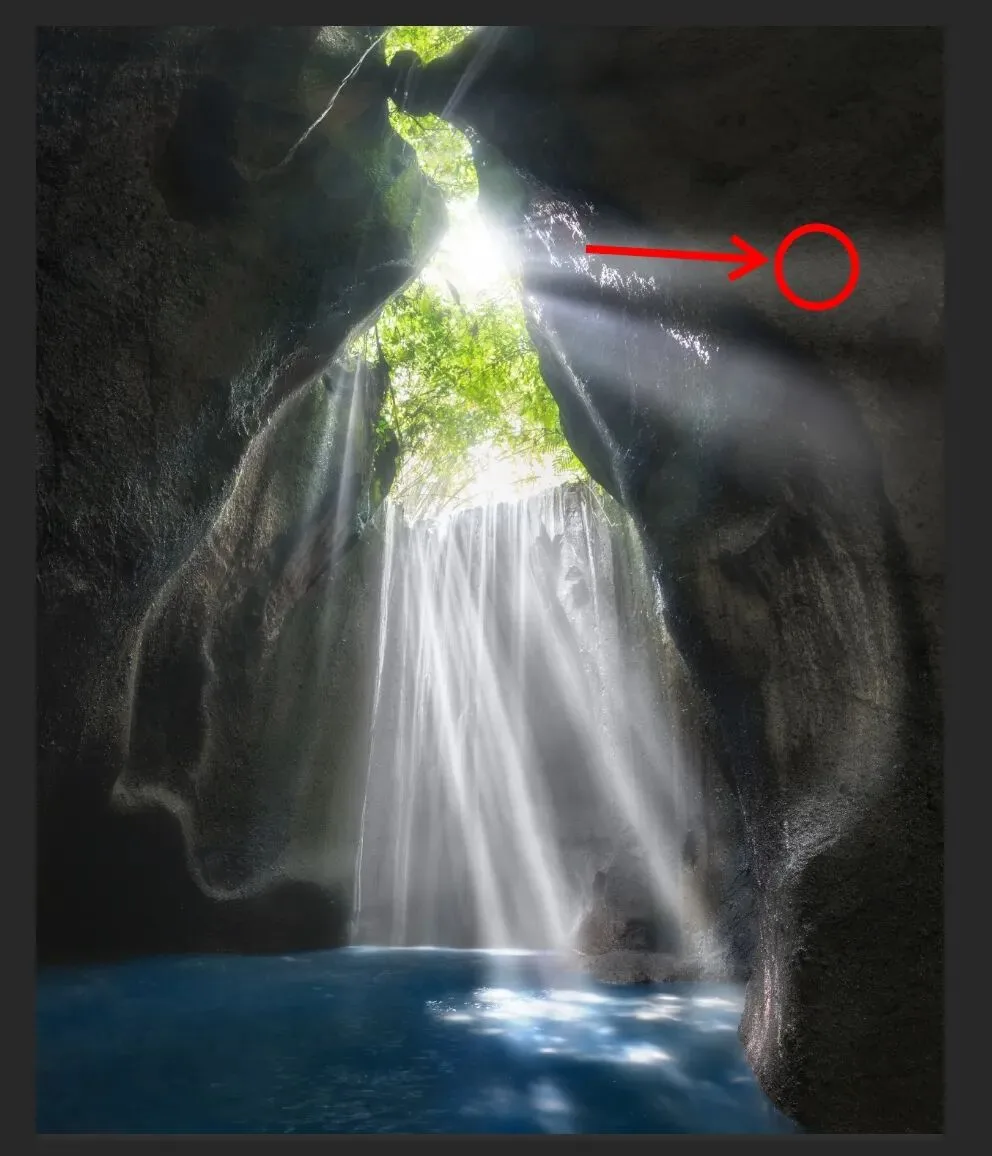
The image above is a waterfall I shot in an underground canyon in Indonesia. The god rays here are real, not added in post — sunlight passing through the waterfall's mist produces this effect easily.
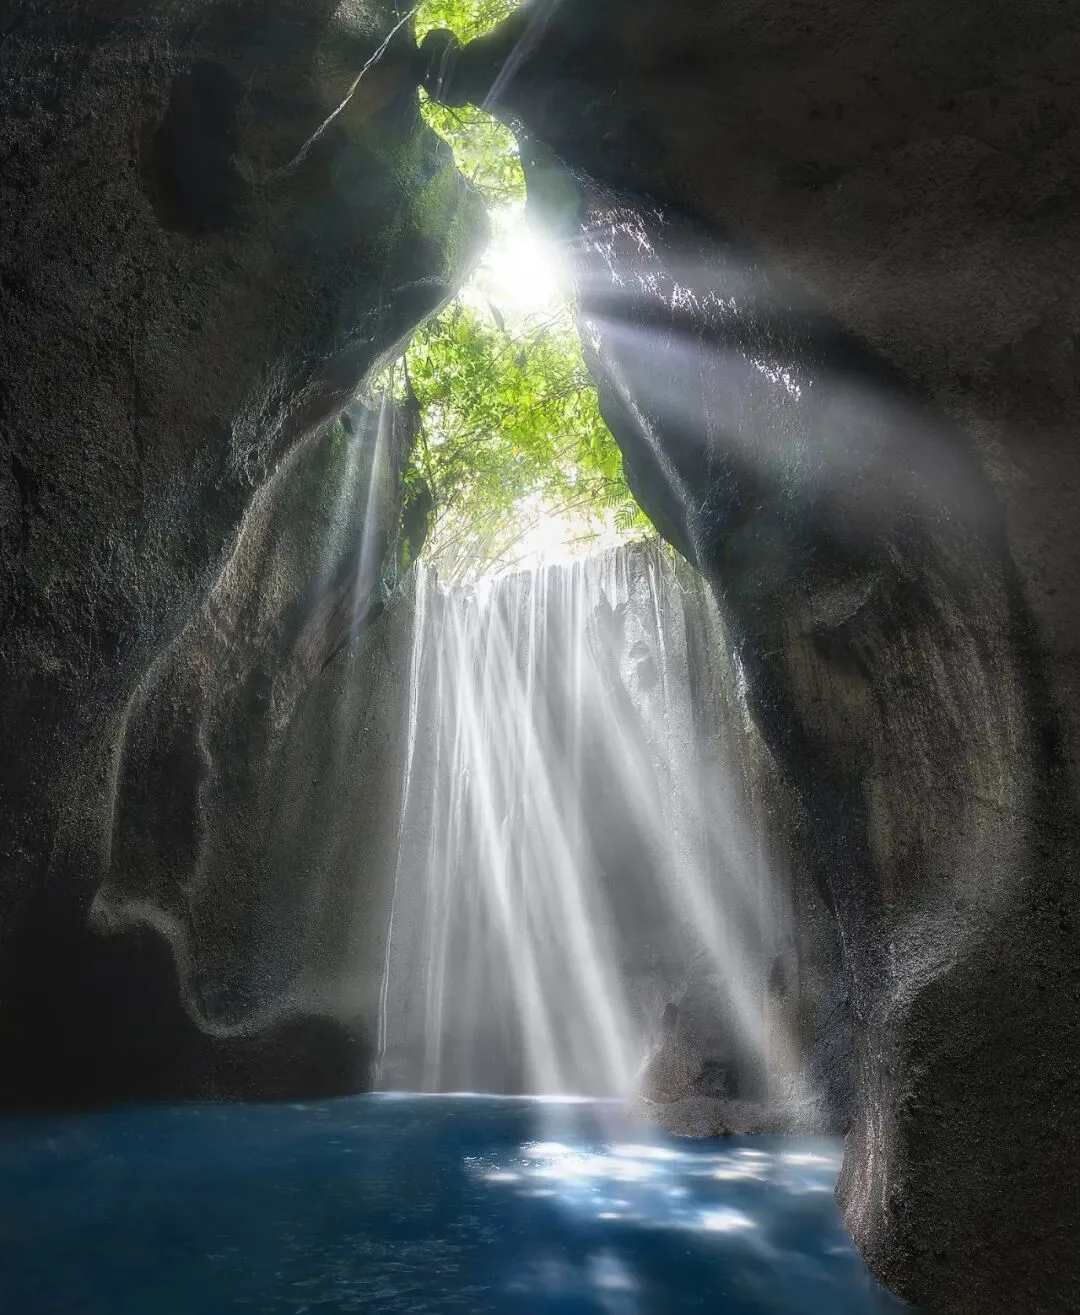
In post-processing this image, I used the brush painting method to strengthen the beams.
First, create a blank layer and set its blend mode to Soft Light.
Then take the Brush tool, hold Alt, and sample the highlight color as your brush color.
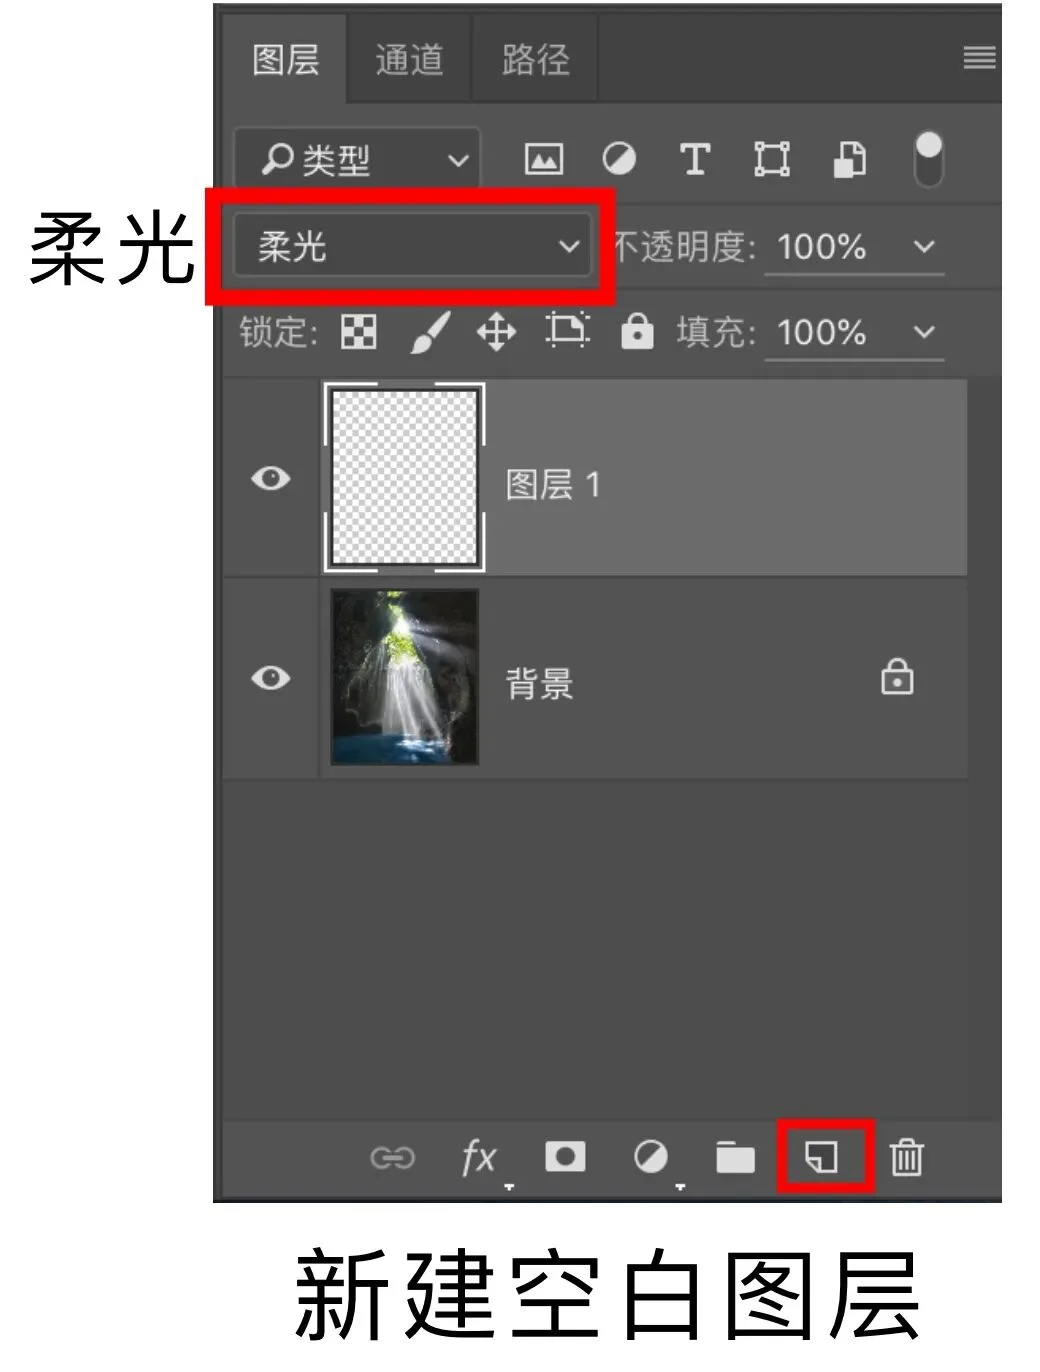
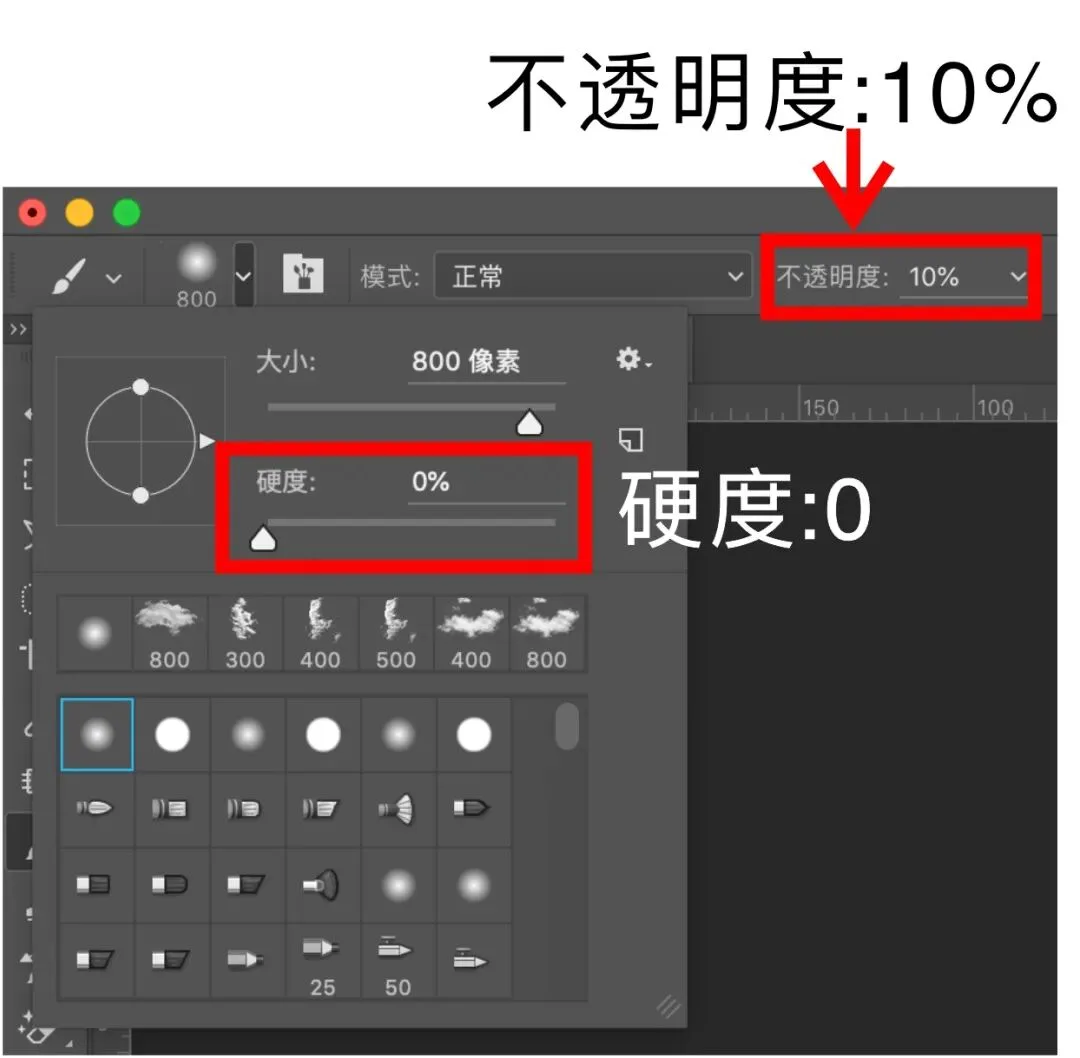
My usual brush settings are 10% opacity and minimum hardness.
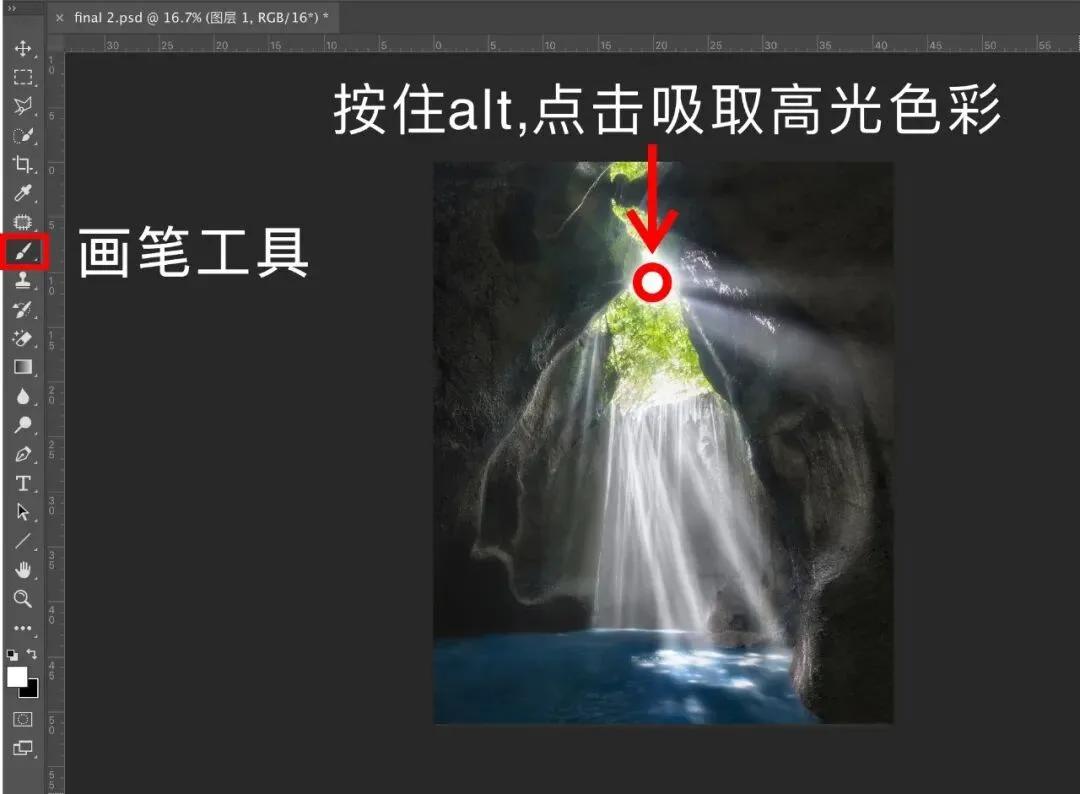
Paint along the direction of the light rays to intensify their effect.
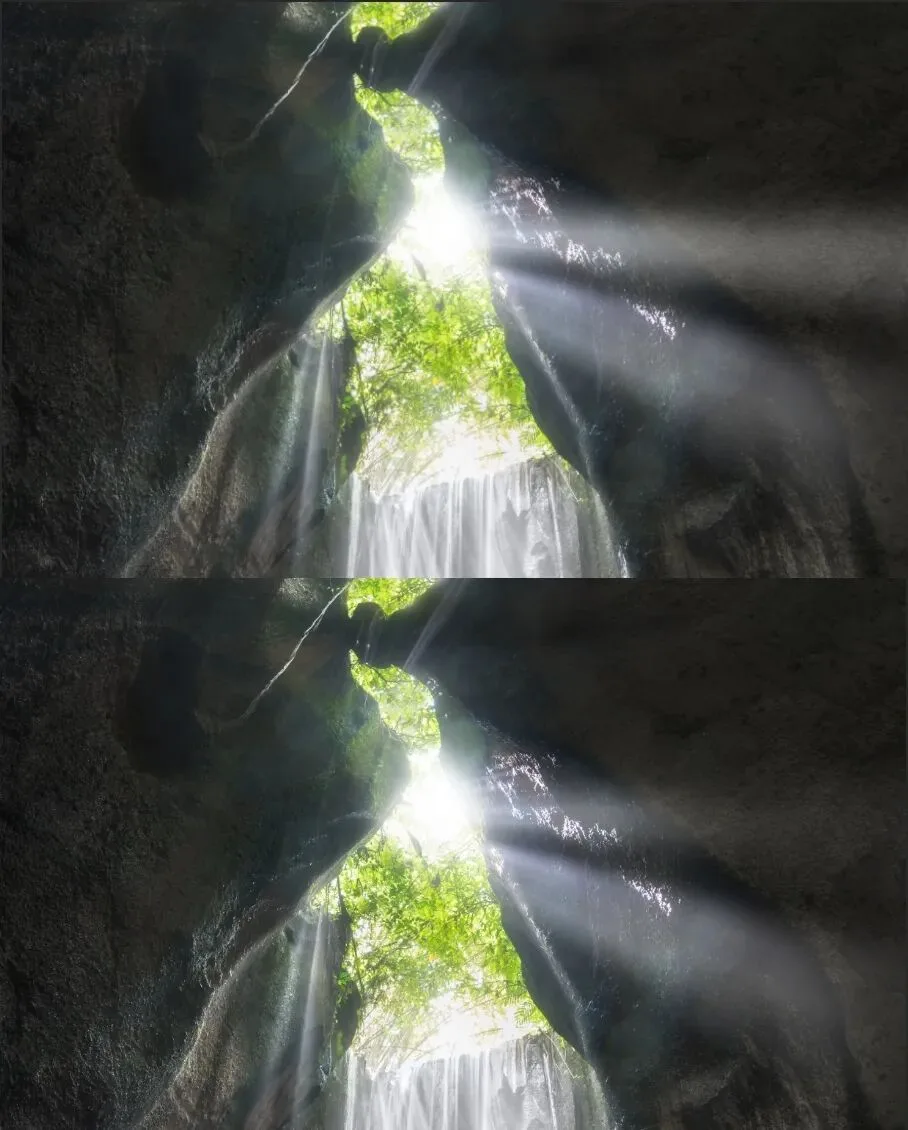
Let's compare before and after: look at this beam — it's clearly much stronger, yet still natural.
This brush-painting approach is the one I use most often, but it takes practice to master.
2. The Selection Fill Method
Compared with the first method, this one is less flexible but far more controllable, with very realistic results. It's a great way to create a single beam.
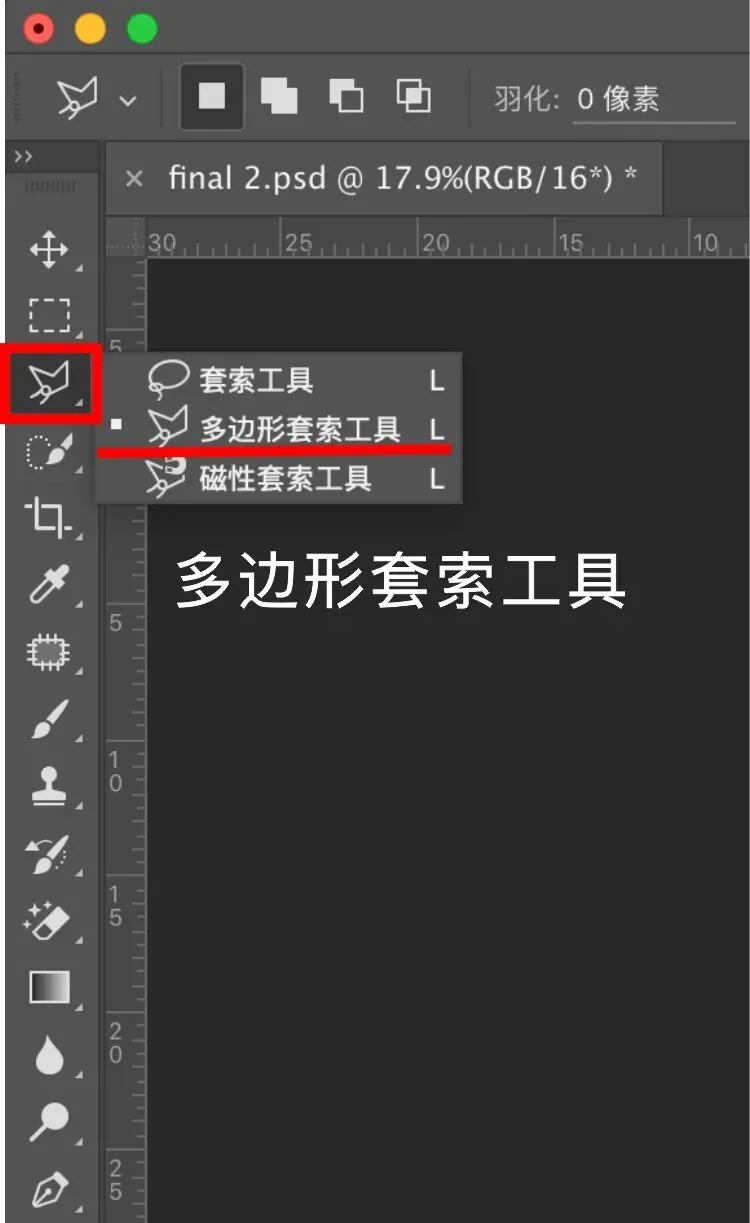
First, select the Polygonal Lasso tool — it hides in the Lasso tool group's flyout menu.
Then use the Polygonal Lasso to draw a rough rectangular area where you want the beam. Since light rays diverge, the shape should be narrower near the source and wider farther away — usually a trapezoid-like polygon.
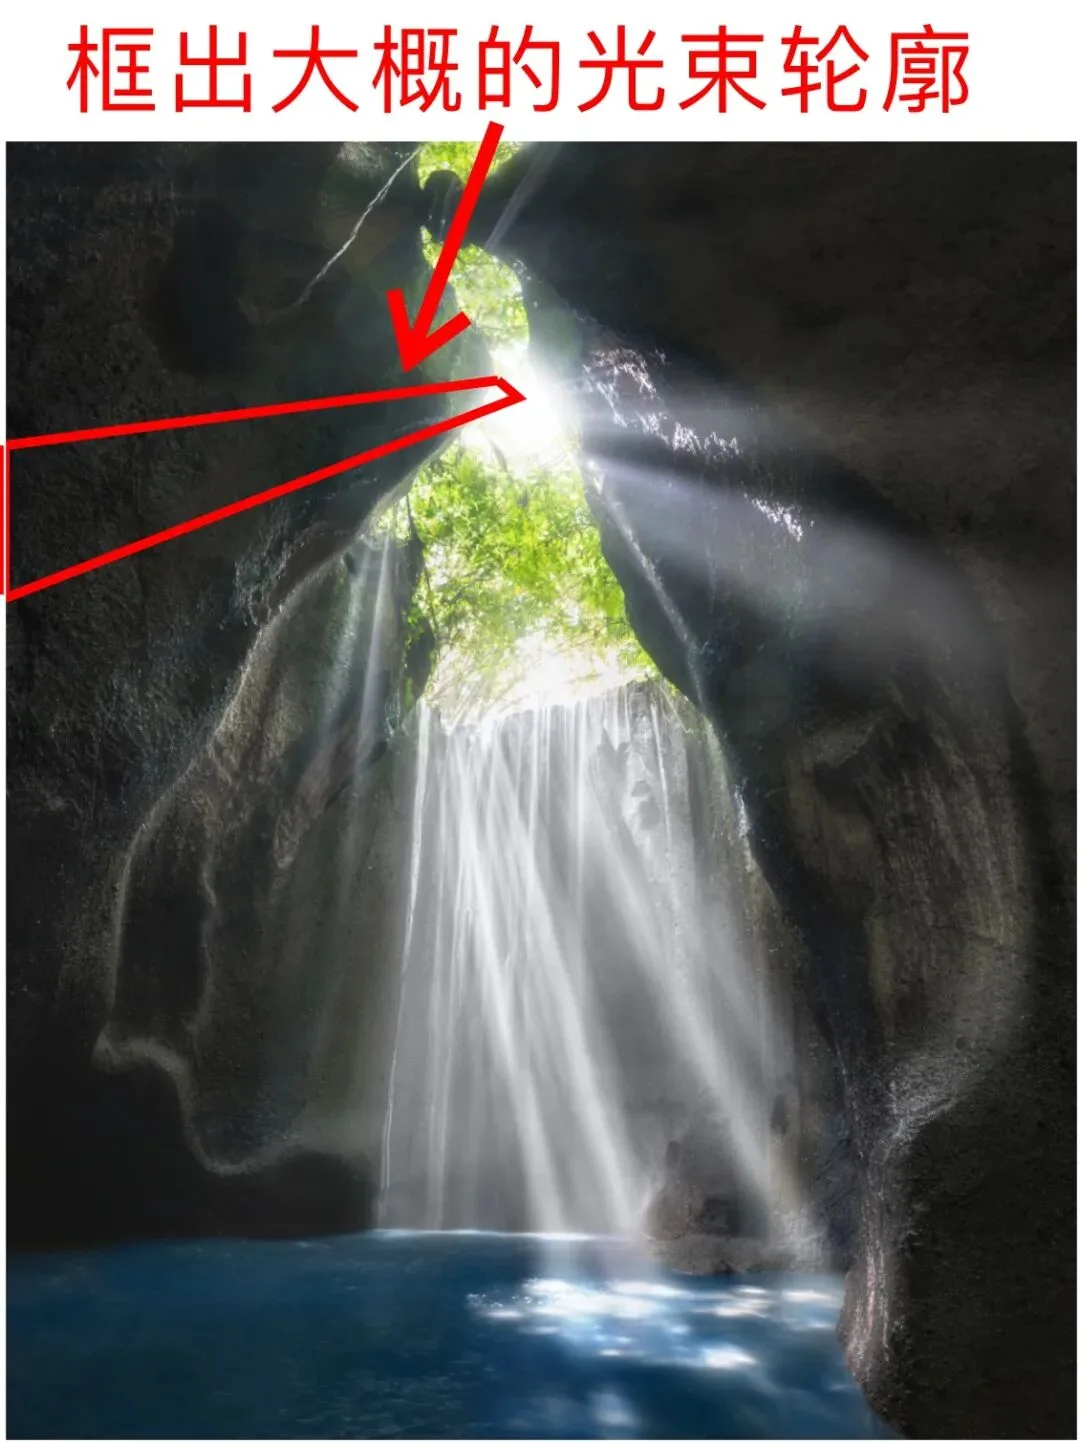
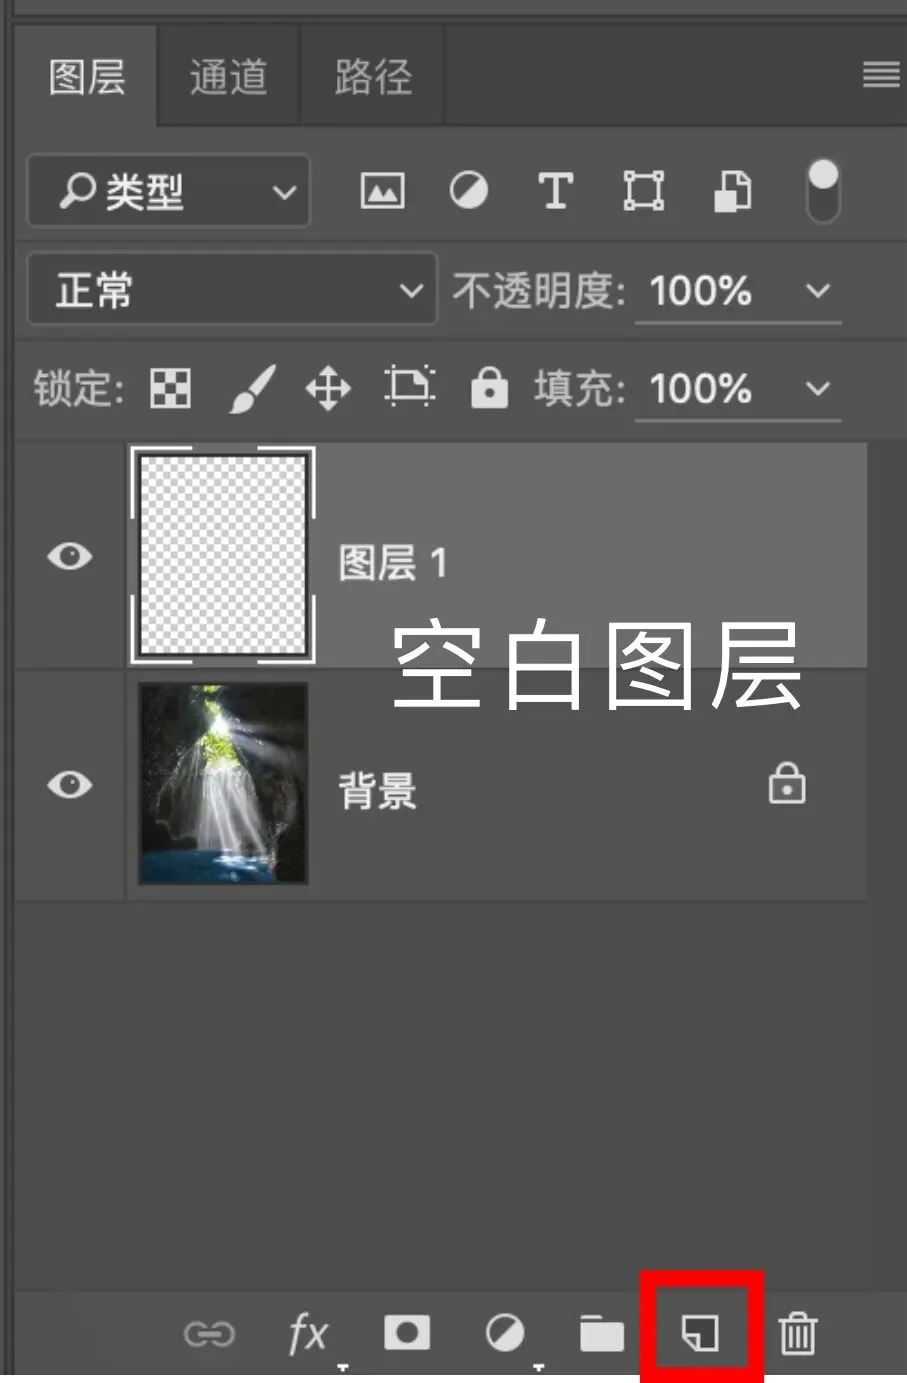
Then create a new blank layer.
Again, take the Brush tool, hold Alt to sample the highlight color, and paint inside the selection with a 5% opacity, 0 hardness brush.
Because light spreads and fades from its source, paint along the angle of divergence — more strokes near the source, fewer as you move away.
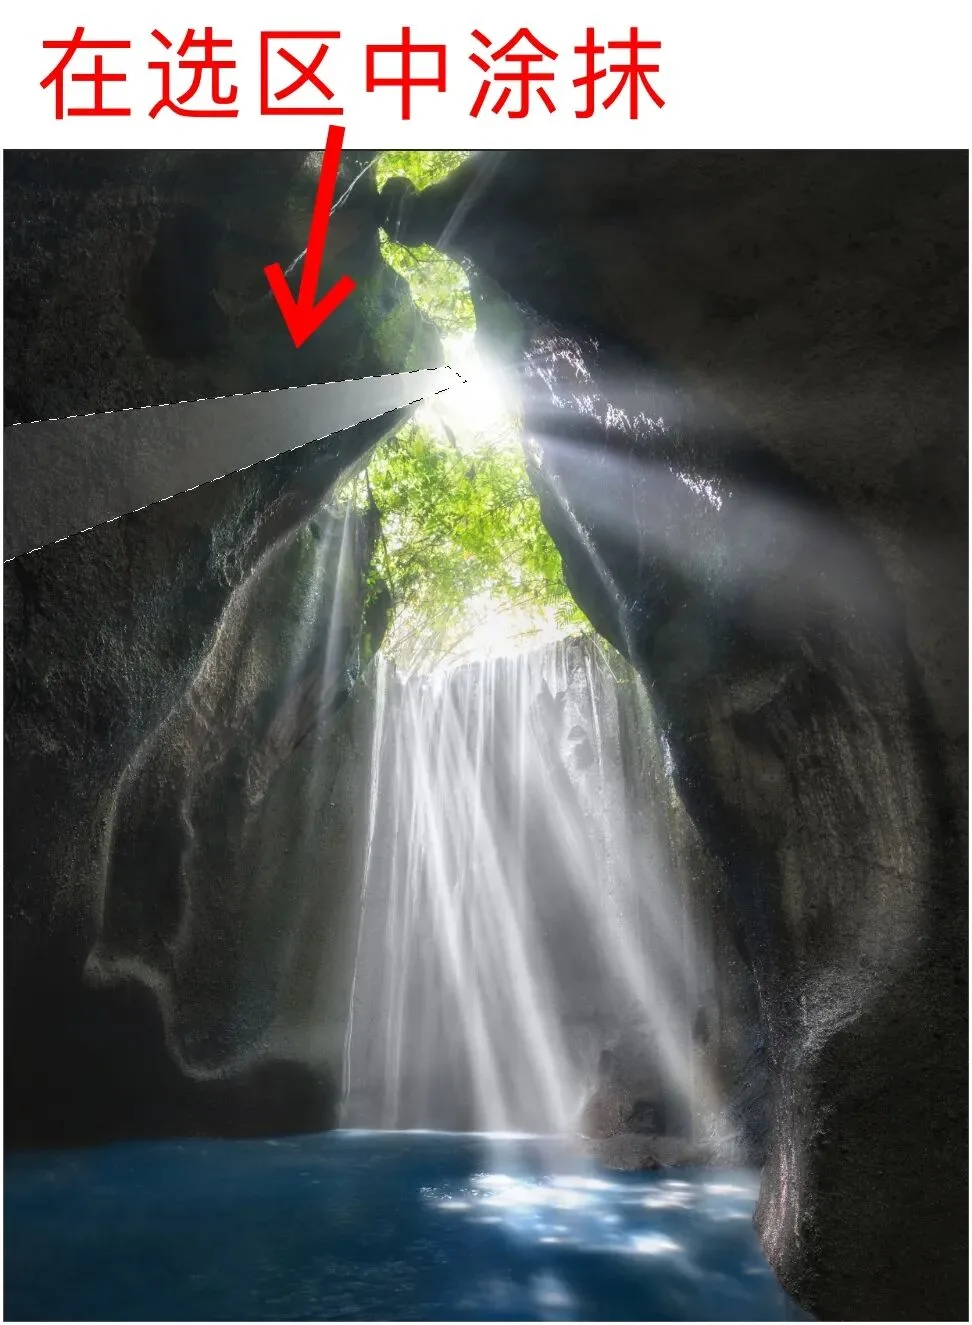
This creates the feel of light fading from strong to weak. The ultra-low 5% opacity gives you better control while painting.
When done, deselect (Ctrl+D). At this point the beam's edges look harsh and unnatural.
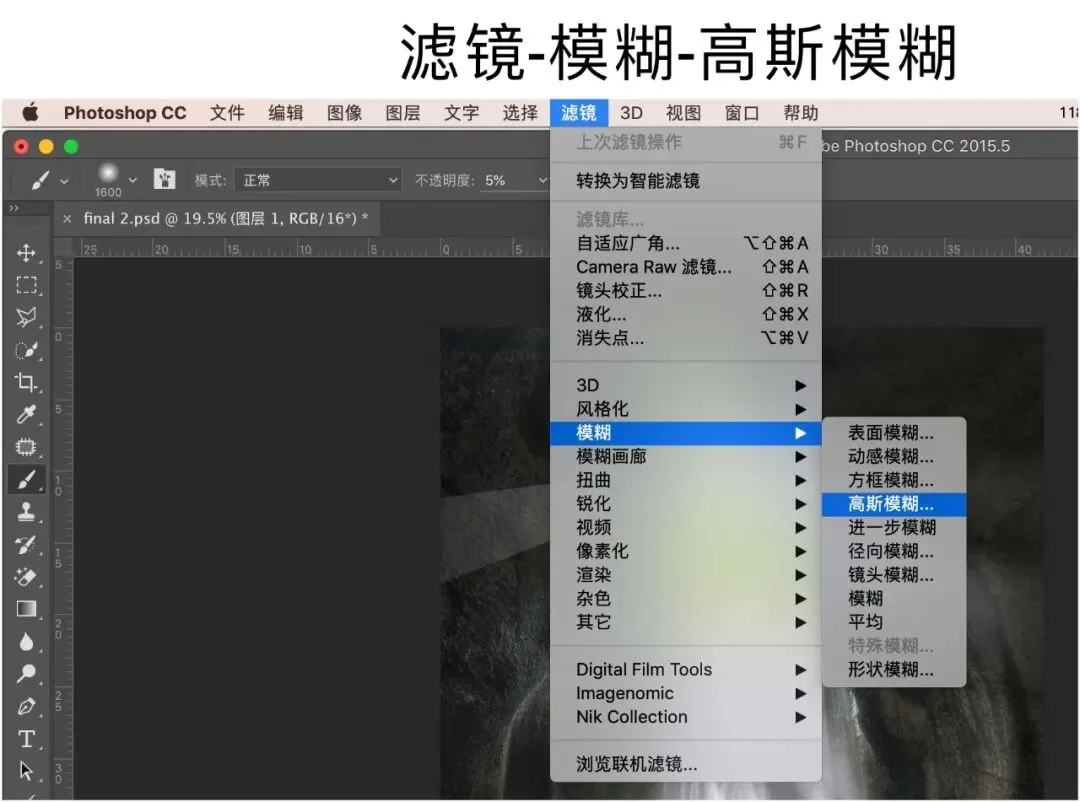
Next, apply a Gaussian Blur filter to soften the edges.
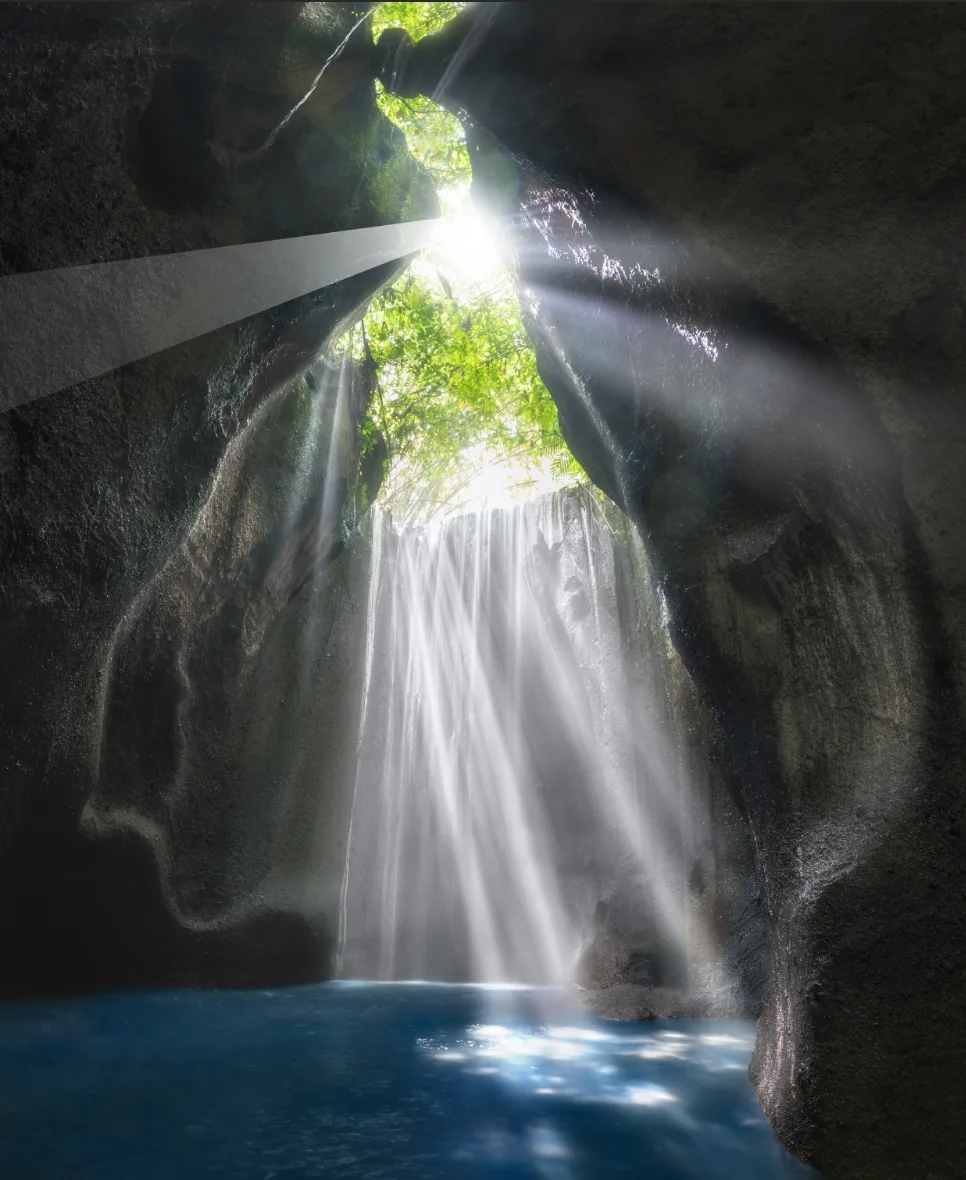
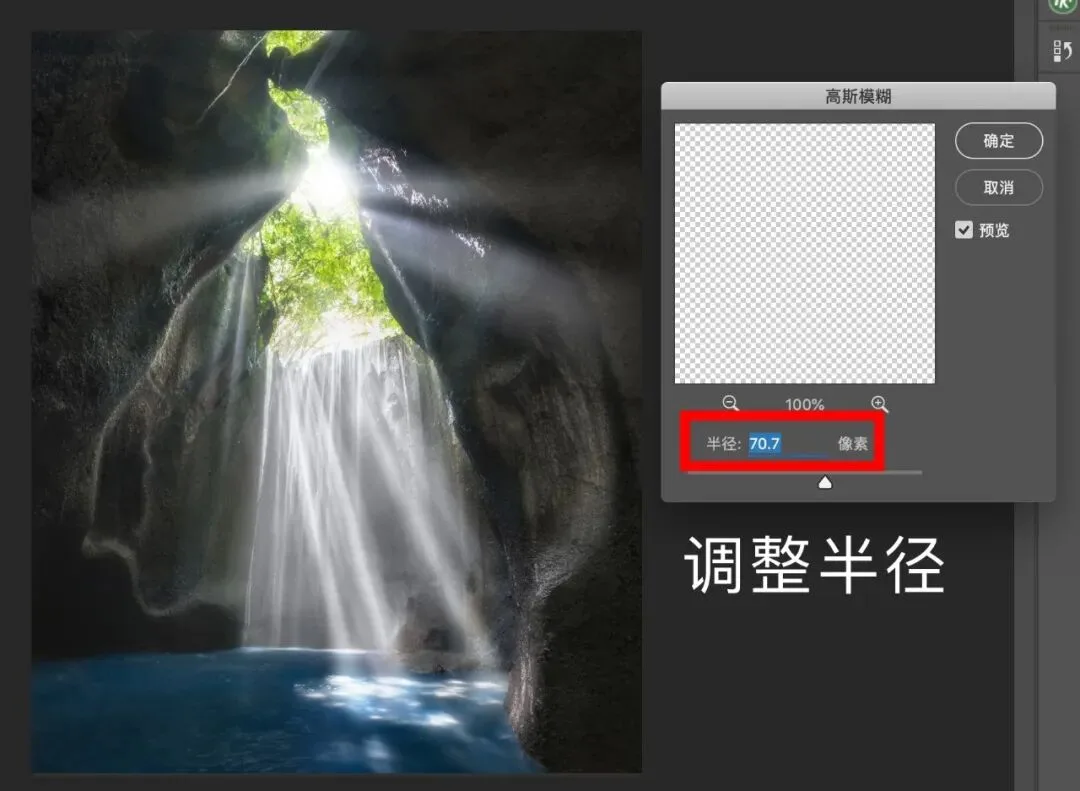
In the Gaussian Blur dialog, adjust the radius to soften the edges until the light looks natural. The right value varies from image to image — there's no fixed recommendation.
The image below shows the result after Gaussian Blur — much more natural.
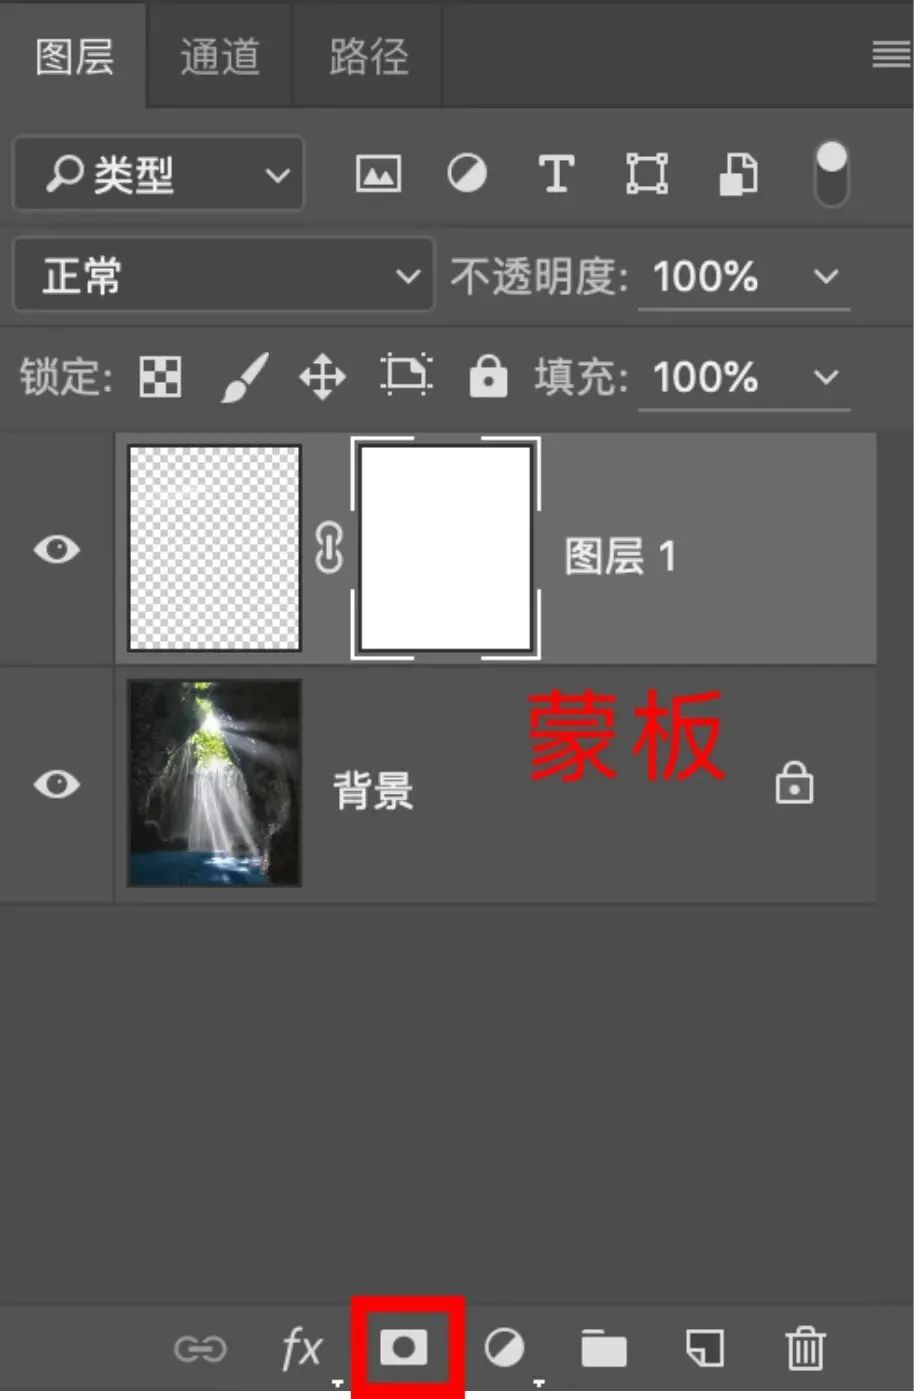
If the edges still feel off, add a mask next to the light-ray layer to refine the beam further.
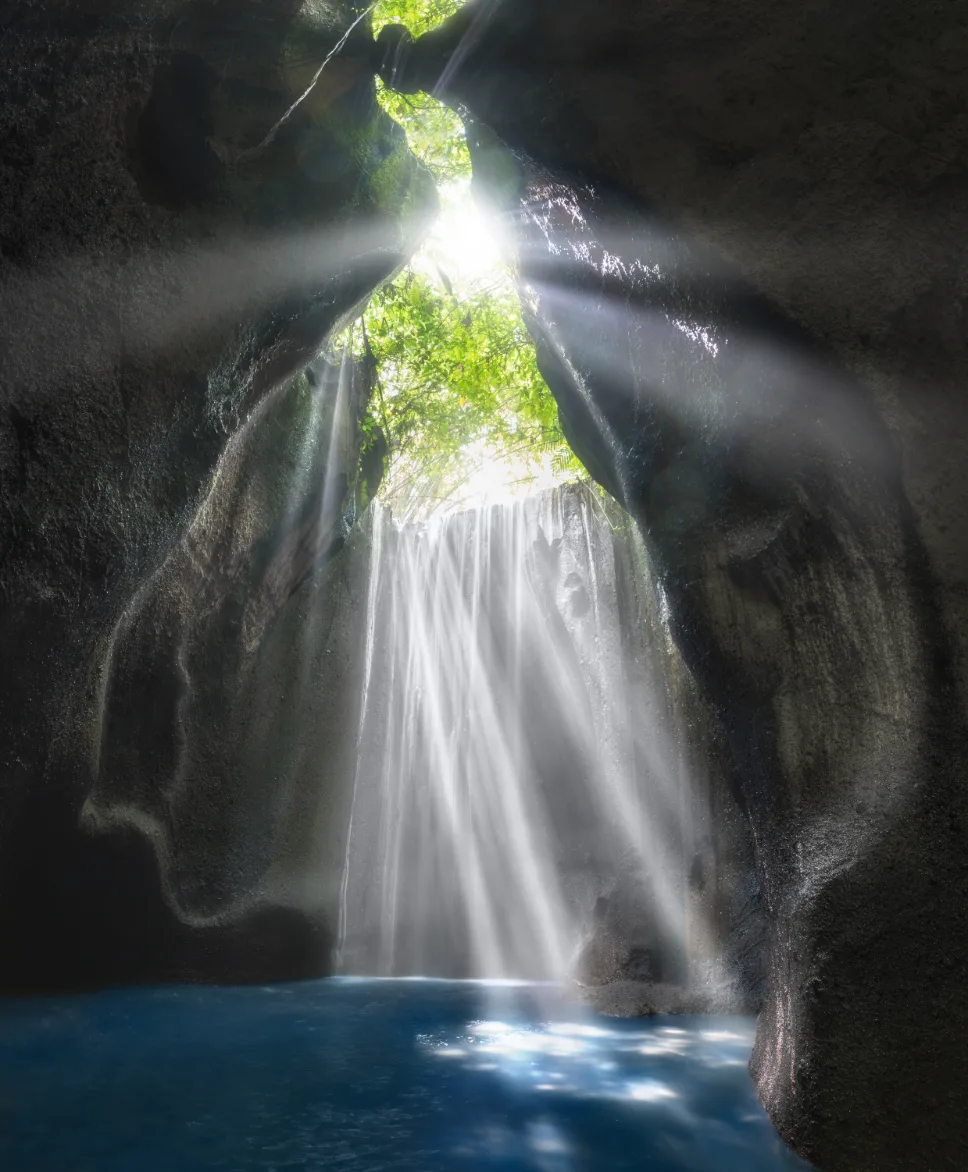
This method is fast and realistic — highly recommended too!
3. The Radial Blur Method
This technique has been around for ages — a traditional veteran method, usually used to batch-generate multiple god rays.
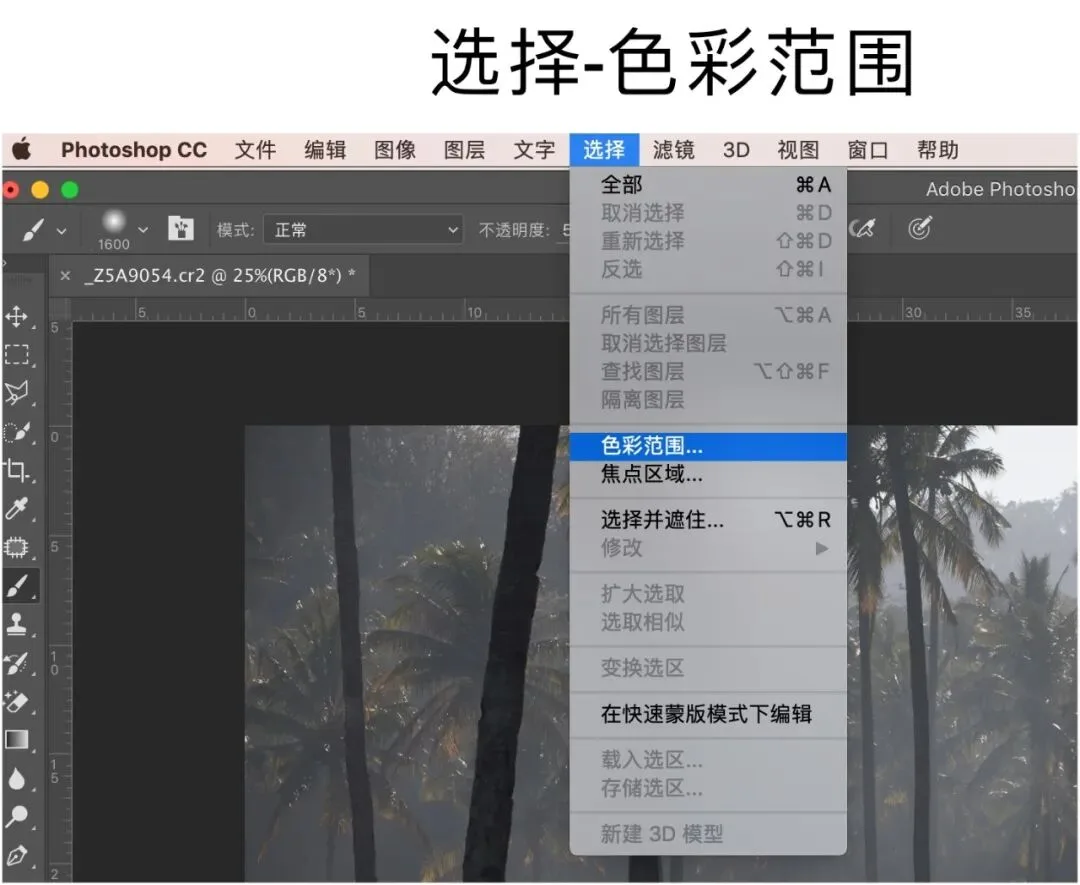
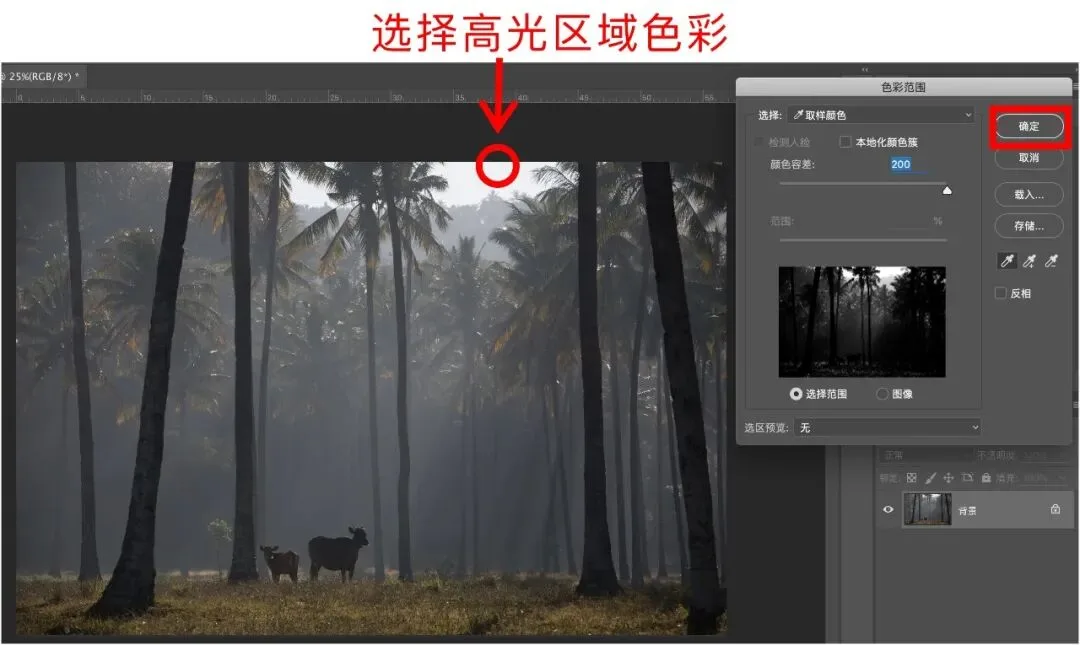
Select Photoshop's Color Range tool. The cursor turns into an eyedropper — click at the light's origin point, i.e. the highlight area of the image.
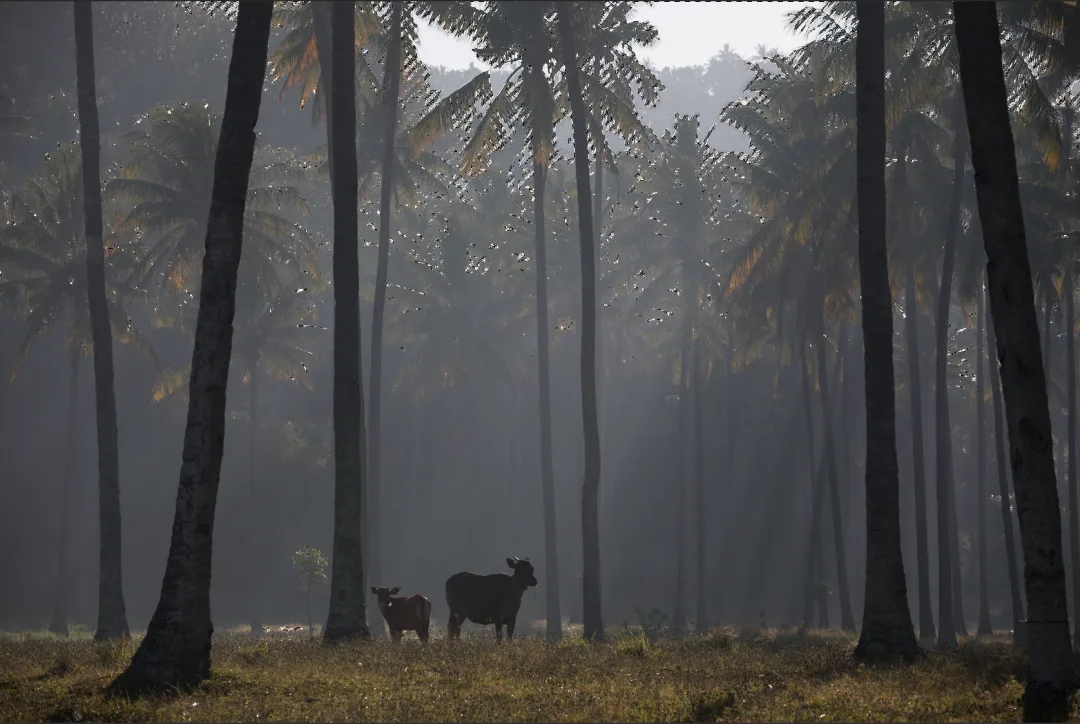
Click OK, and the highlight areas are selected — you'll see the marching ants.
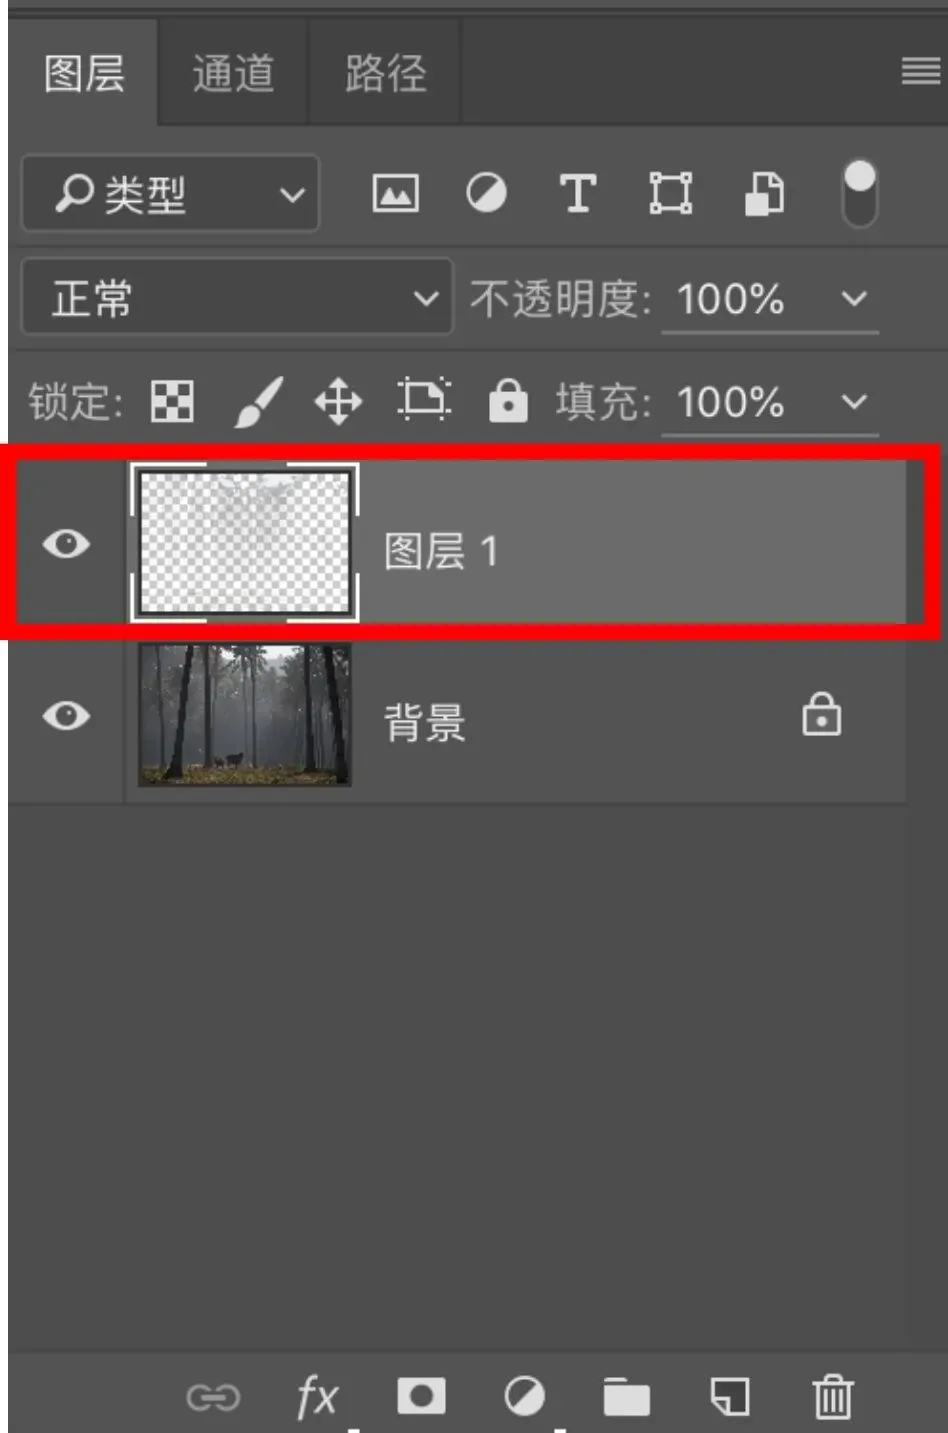
Then press Ctrl+J, which turns the highlight selection into a new layer.
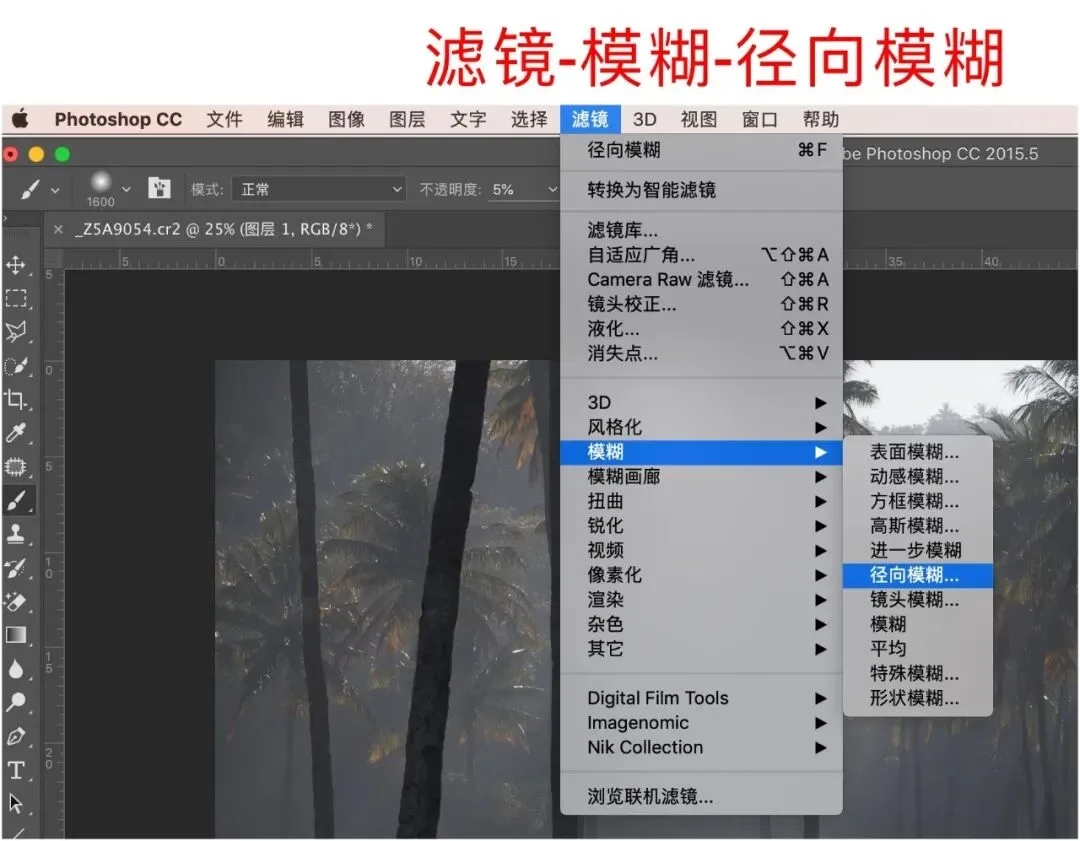
Apply the Radial Blur filter on this new layer.
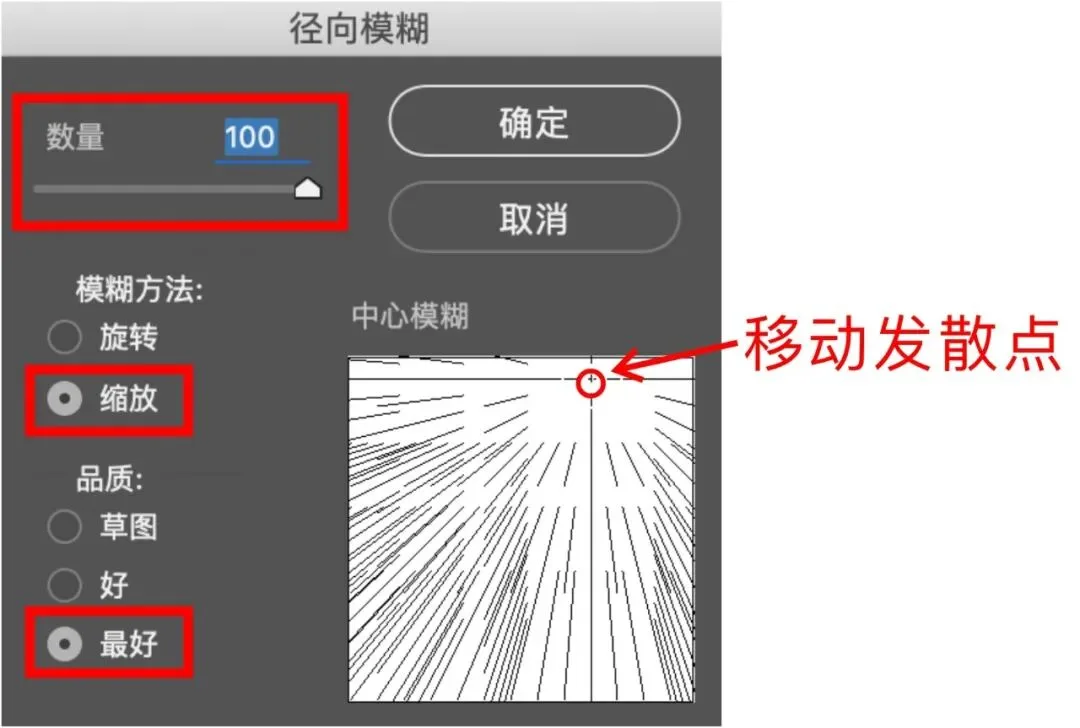
In the Radial Blur dialog, set Amount to 100, and choose "Zoom" and "Best."
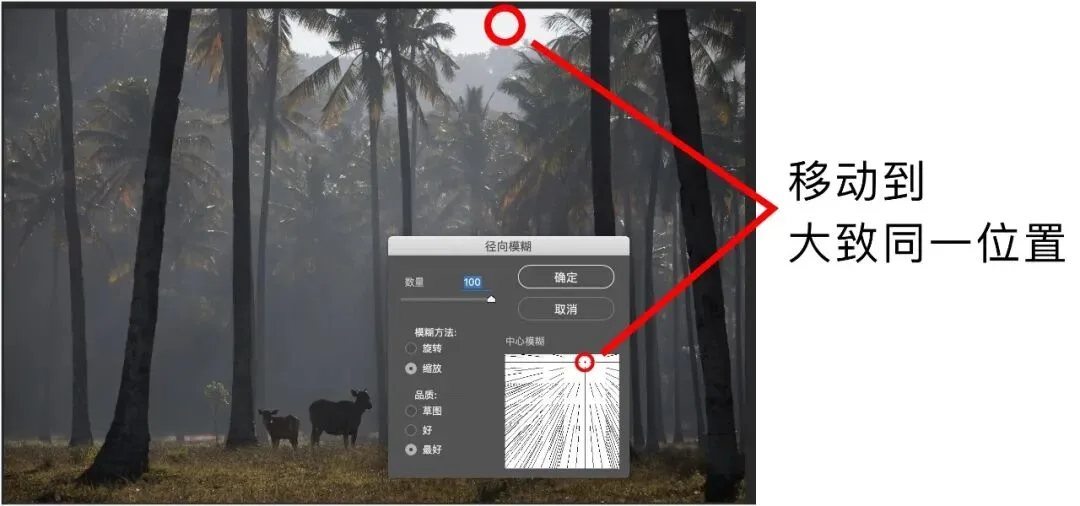
Then manually move the blur center so it roughly matches the position of the highlight area in the image.
Click OK — the light effect is done.
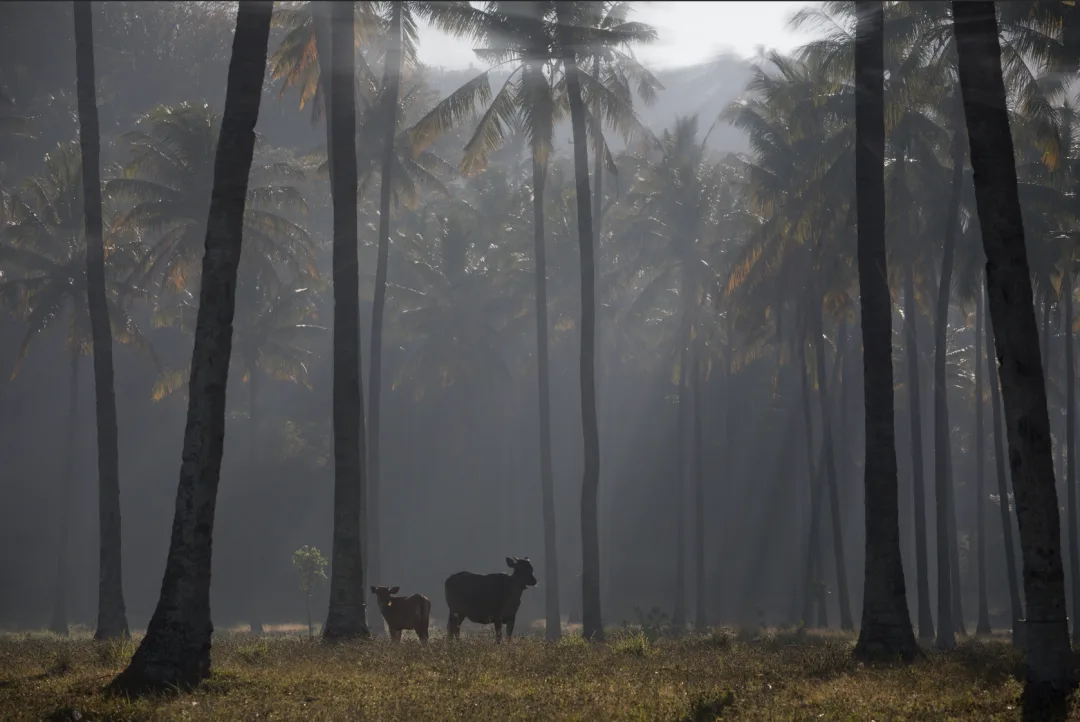
If the effect feels too weak, add a Levels adjustment layer to boost contrast. You can also add a mask to erase rays from shaded areas the light couldn't reach — like the foreground tree trunk here — for a more natural look (below).
This batch method generates many rays at once, but since it relies entirely on the Radial Blur filter, adjustability is low — you can't customize the beam shapes much. Personally, I don't recommend it.
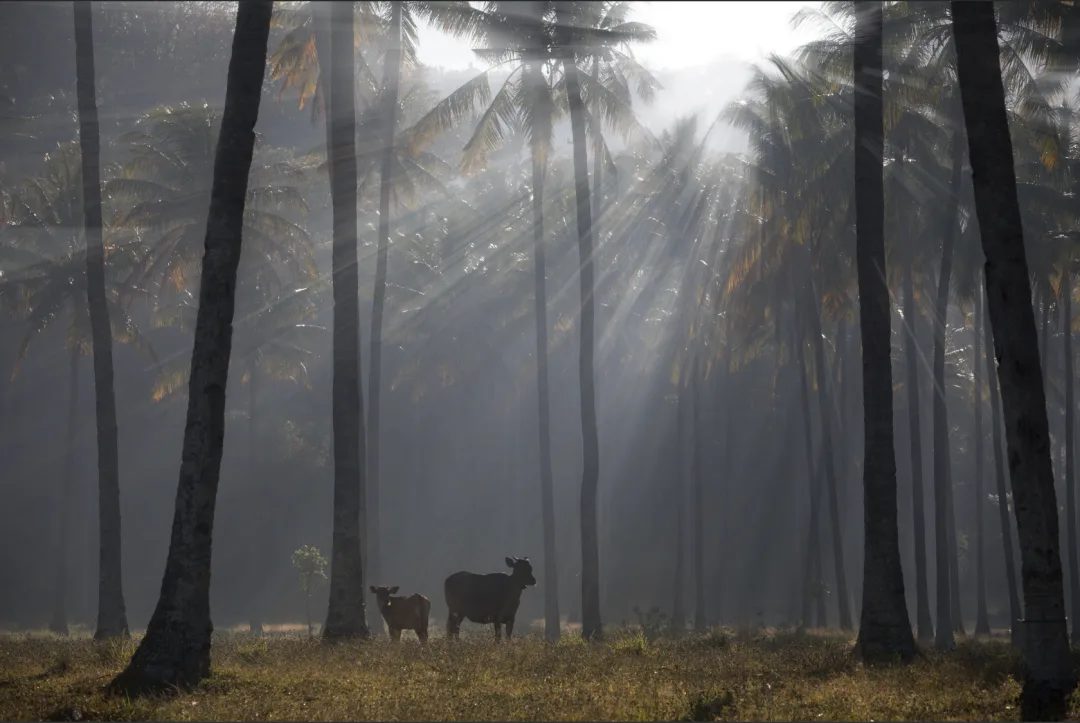
4. The DFT Rays Light Filter
This approach uses a Photoshop plug-in filter to create god rays. The filter offers rich adjustment options for shaping the light, so it has replaced the radial-blur method as the top choice for batch-creating god rays.
First, duplicate the background layer. Then launch the filter from Photoshop's Filter menu.
The filter's right panel holds all kinds of light adjustments — experiment with the parameters to refine the effect, and every slider movement previews live in the center image.
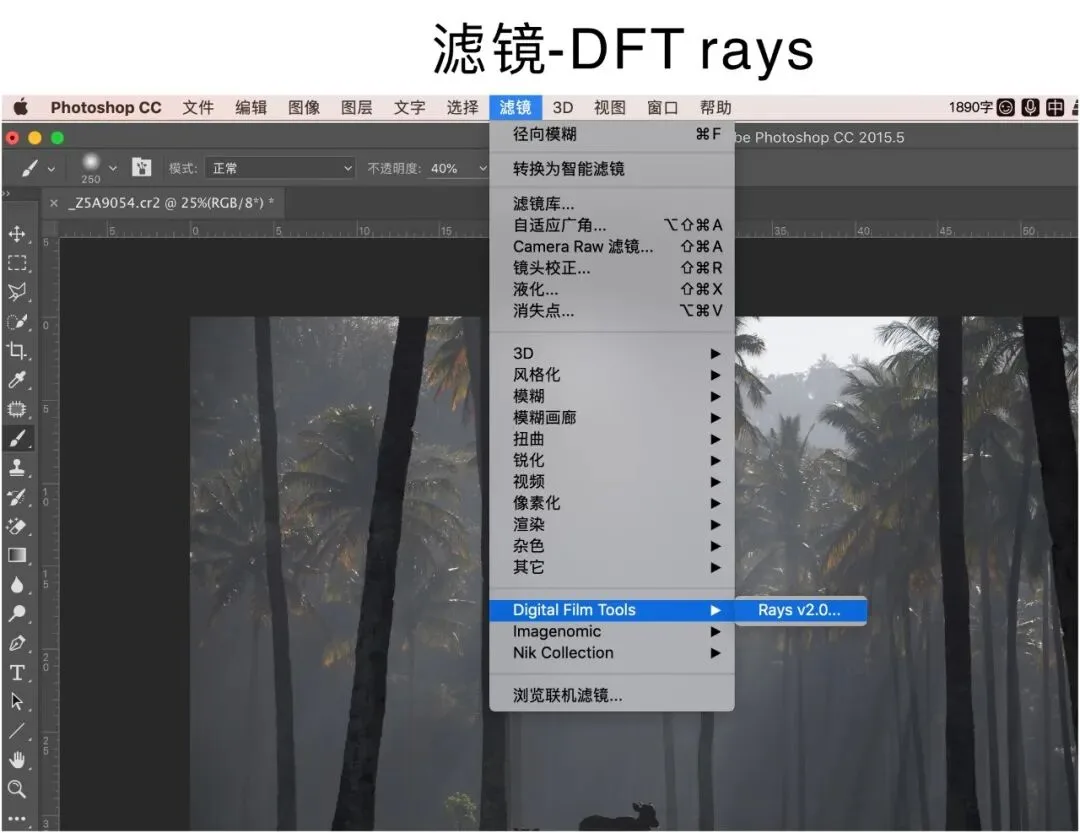
Try the sliders yourself — every image's light is different, so there are no standard values. I adjust blindly too, but I always end up with realistic light that matches the scene. This filter is quite powerful.
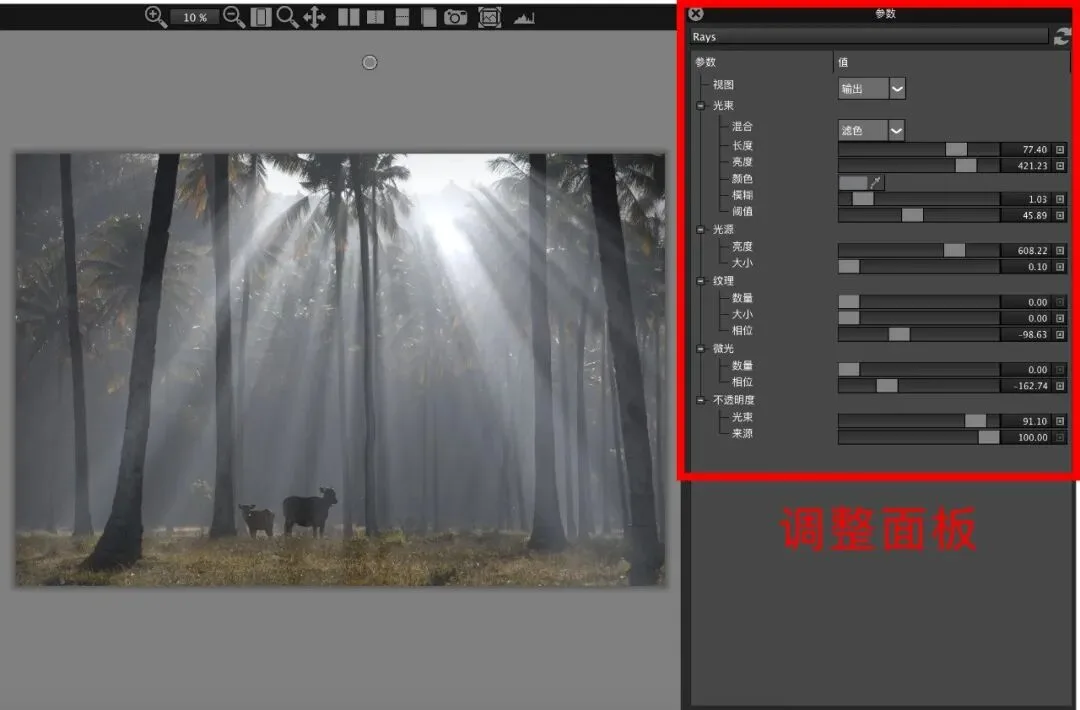
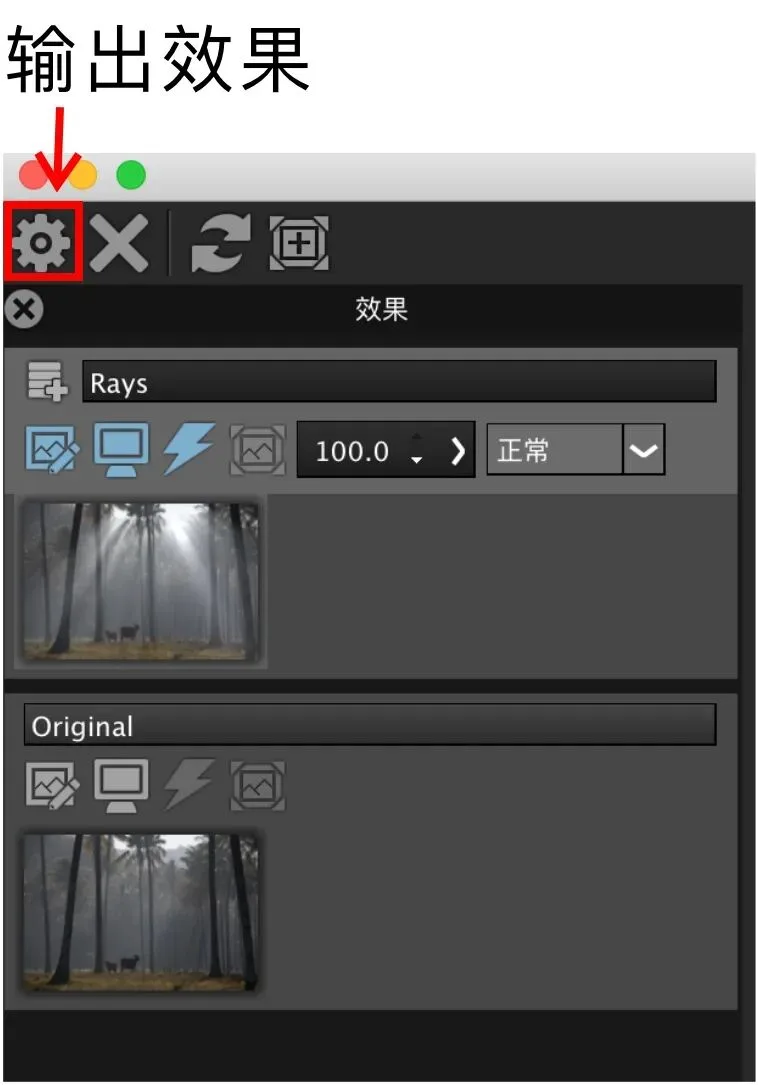
Once you're happy with the result, click the gear-shaped button on the left to output the effect.
Here are the filter-made god rays — very natural and realistic (before/after comparison).
We can also add a mask to the layer to refine the rays — for example, masking out light on shaded surfaces and overexposed areas for a subtler, more natural effect.
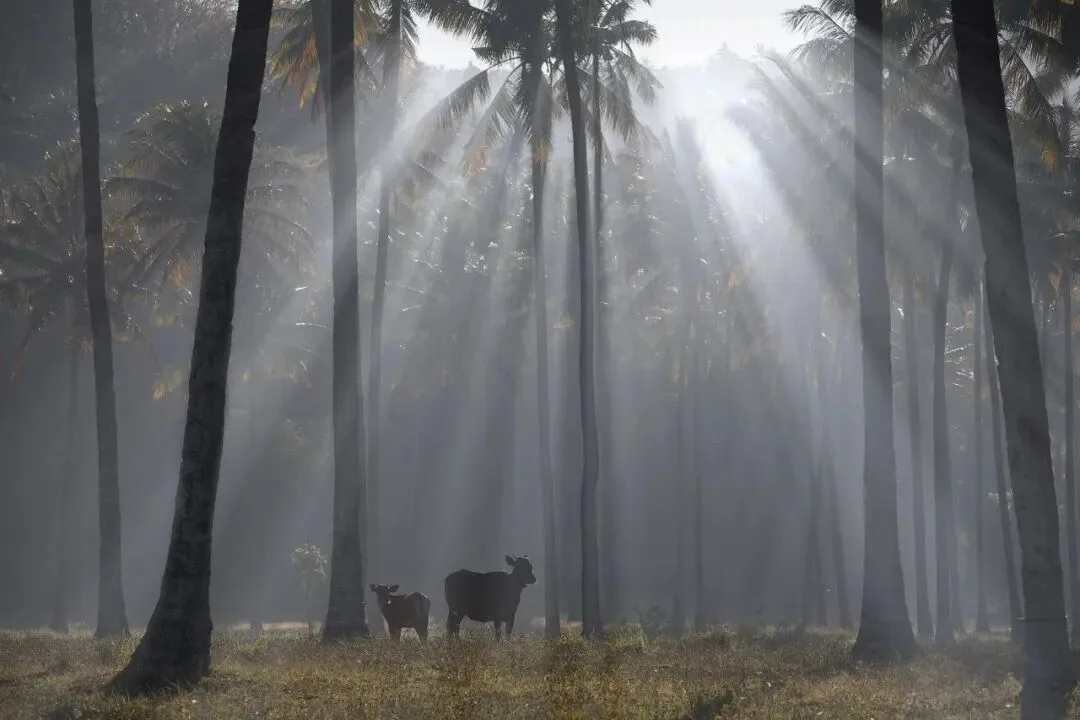
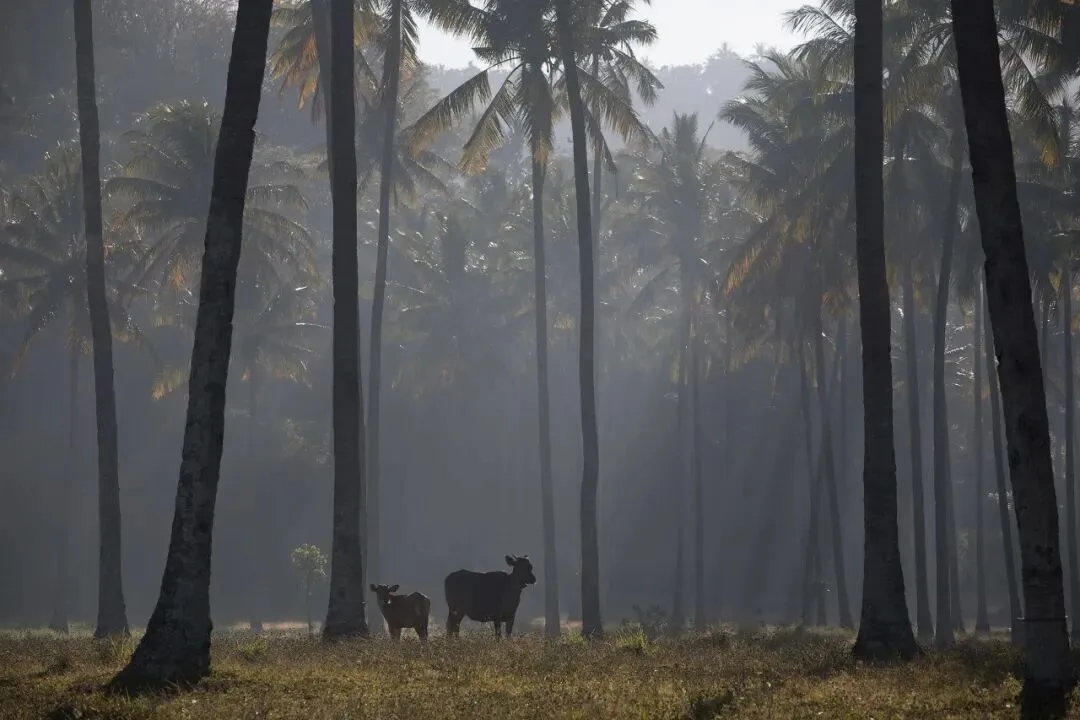
We can also add a mask to the layer to refine the rays — for example, masking out light on shaded surfaces and overexposed areas for a subtler, more natural effect.