Photography Tutorial · 2016-09-30
Local Adjustment Is the Core of Photo Post-Processing
Lightroom, Photoshop, Nik, Topaz... there are thousands of post-processing tools, but there is only one core idea in photo post-processing: local adjustment. And the essence of local adjustment lies in the elements of a photo being unified yet varying.
No matter how cool a technique is, it is just a 'trick' — the reasoning behind it is what matters!
Key points: local adjustment, unity and variation
1
Local Adjustment Is the Core of Post-Processing
Why is exposure adjustment divided into shadows, highlights, whites and other zones?
Why is color adjustment divided into red, green and blue sliders?
Why does Lightroom have graduated filters, radial filters and adjustment brushes?
And why does Photoshop have layers, masks and channels?
Because —
local adjustment is the core of photo post-processing.
Once you understand this, you will find that no matter how advanced the tool or how complex the technique, they all do only two things:
1) Select a specific part of the photo
2) Apply some effect to that part
Sometimes these two steps use different tools — for example, using a luminosity mask to select the midtones and then an S-curve to boost contrast achieves the effect of increasing contrast only in the midtones.
Sometimes the two steps are integrated into one tool — the sharpening tool mentioned in 'Do You Really Understand Sharpening?', for example, also works in two steps internally: 1. find the edges of objects in the photo; 2. strengthen the contrast of those edges.
2
Local Adjustment: Variation and Unity
The purposes of local adjustment can also be summed up in two points:
1) Give the photo variation
2) Make the photo more unified
Wait — aren't variation and unity complete opposites? Hear Thomas out.
2.1
Photos with Variation Look Better
Everyone knows photos taken at dusk look better than those taken at noon. But why?

Because the light and climate at dusk bring all kinds of contrast into the photo — bright and dark, warm and cool, sharp and soft, hard and gentle. The picture becomes far more interesting.
Photos taken at noon have almost no variation: everything is very clear, very bright, very vivid — and very... characterless.
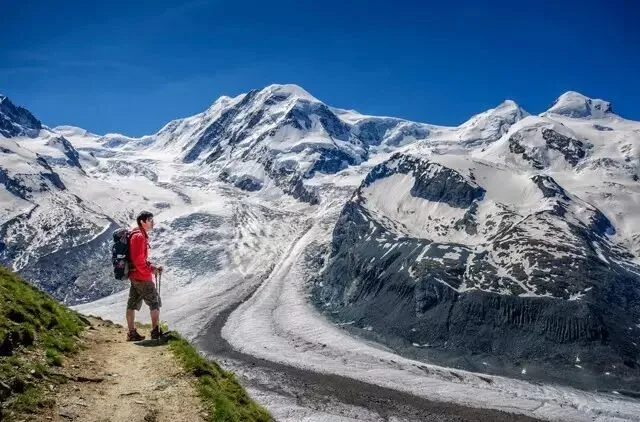
Local adjustment in post, then, is about strengthening the various kinds of variation in a photo.
Take Thomas's snow mountain starry sky: dozens of radial filters and brush tools were used in the foreground to enhance the variation of light and color there.
Every white dot in the image is a local adjustment tool in Camera Raw — a bit exaggerated, right?
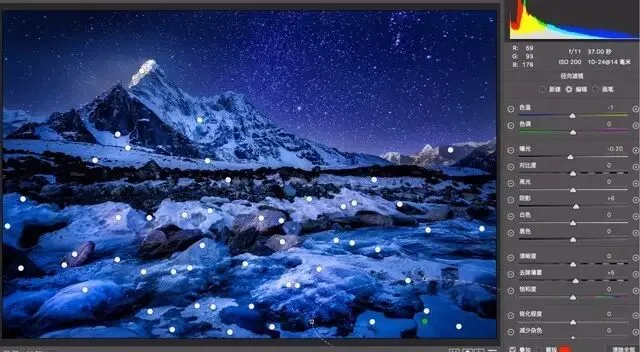
But comparing before and after, the difference is obvious.
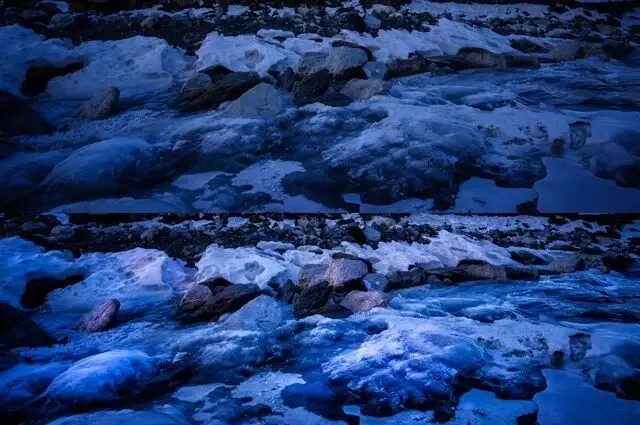
After local adjustments, the photo has more variation and looks much better.
2.2
Unified Photos Reward a Longer Look
We often say photography is an art of subtraction, and the point of subtraction is unity.
The recently popular black-and-gold style, for example, is essentially the idea of 'unifying a photo through local adjustment'.
All the colorful city lights are unified into gold, and the various colors in the dark areas are each turned to gray-black.
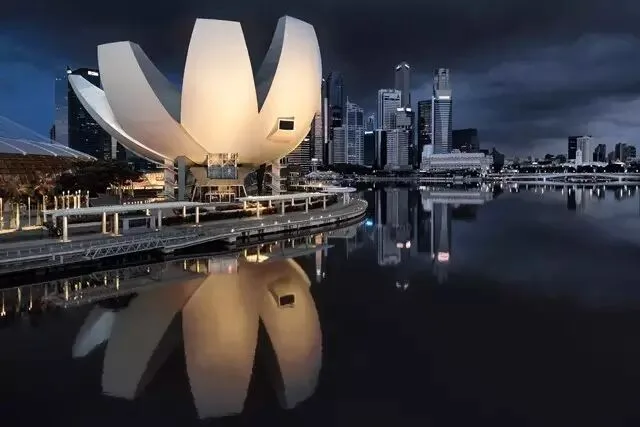
The processing of the photo below borrowed a similar idea.
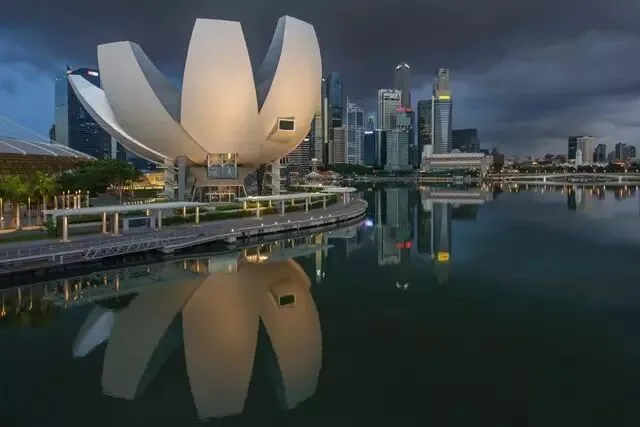
The original foreground was a mess of colors: the local tools selected the greens and turned them all warm yellow.
The original background was a jumble too: local tools adjusted each part, unifying them into dark, cool tones.
A photo without unity is full of things that distract the viewer.
A unified photo has more atmosphere and rewards a longer look.
2.3
Unified Yet Varying
A photo that is unified but lacks variation is plain and dull.
A photo that varies but lacks unity is gaudy and tiresome.
The difficulty of local adjustment lies in making the elements unified in some dimensions and varying in others, forming a photo that is unified yet varying.
Take the foreground of the photo below: as mentioned, many local tools were used to make the tonal variation of rocks and ice more dramatic.
But all this variation was done under one unified keynote — the overall blue-purple cold tone of the photo.

In the other photo, a lot of unifying work was done, yet the contrast of brightness, warmth and saturation between foreground and background, and the texture contrast between the building and the water and sky, bring abundant variation into the unified photo.
Local adjustment is the core of post-processing, and being unified yet varying is the goal of local adjustment.
3
Learning Local Adjustment Tools
Where to start learning local adjustment tools?
Start with the simplest local filters and brushes in Lightroom and PS Camera Raw!
Thomas has recorded three video tutorials for you:
'Reshaping Light and Shadow with Local Filters'
'How to Make Photos Less Monotonous with PS Brushes (Tools)'
'How to Make Photos Less Monotonous with PS Brushes (Practice)'
Summary
1. Local adjustment is the core of post-processing. 2. Unified yet varying is the ultimate goal of local adjustment. 3. To learn local adjustment, start with Thomas's video tutorials on graduated filters, radial filters and adjustment brushes.
Happy National Day, everyone!
I'm @Thomas Chu Photo — every Sunday evening I share an original piece of practical photography knowledge.