Photography Tutorial · 2016-09-04
How to Reshape Light and Shadow with Local Filters
The core of photography is light and shadow. And in post, the simplest and handiest tools for local light work are Camera Raw's Graduated Filter and Radial Filter.
This week is Thomas's first video tutorial, demonstrating in detail how to strengthen — or even reshape — a photo's light and shadow with just 2 local filters.
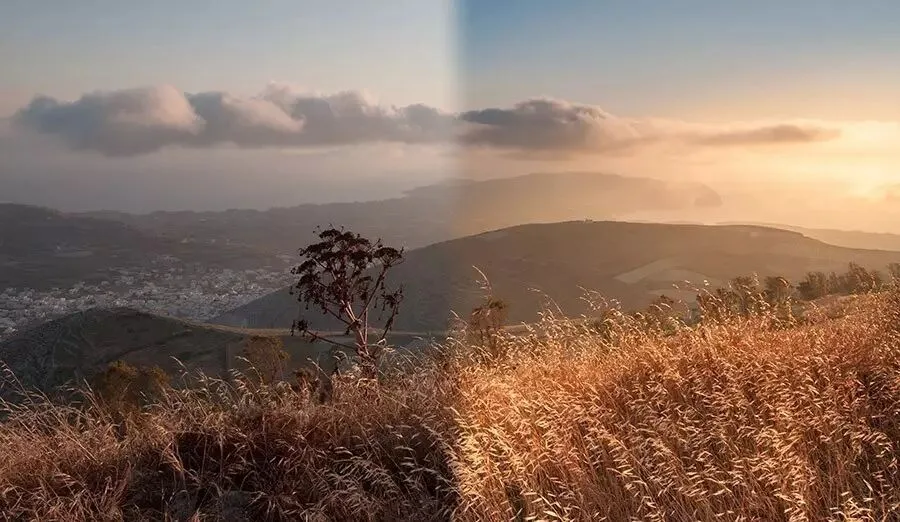
Topics: graduated filter, radial filter, feather, masking
Tutorial video, 14 minutes, at 1.2× speech rate (HD link: http://v.qq.com/x/page/i0326hbmblo.html)
If you're not used to the sped-up speech, here's the normal-speed 18-minute version (HD link: http://v.qq.com/x/page/v0326kgpefx.html)
Video outline

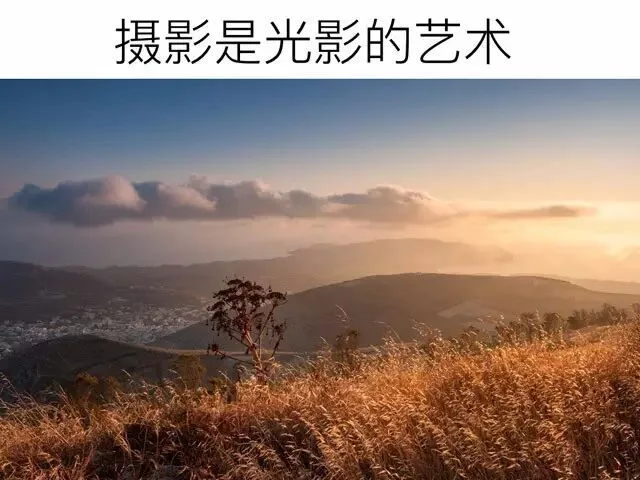
Photography is an art of light and shadow — light can come from natural sources or artificial ones.
Artificial light falls into two categories: in-camera and post. In the field we can rearrange the scene's lighting with flashes and other gear; in post, within Photoshop and ACR, we can use various tools to strengthen or even reshape that light.
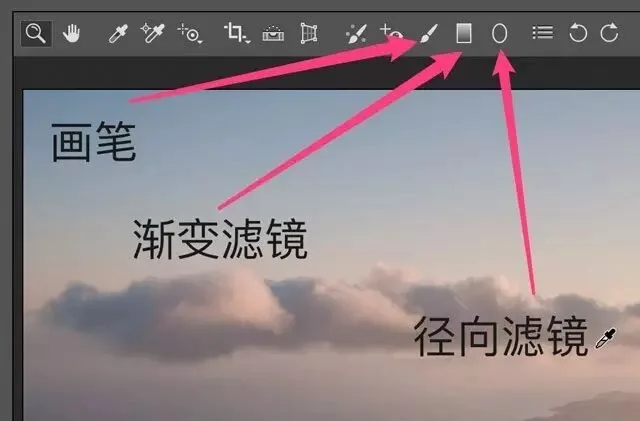
ACR has 3 local light-processing tools:
1) Adjustment Brush (next week's topic)
2) Graduated Filter
3) Radial Filter
The Graduated Filter is a linear gradient: above the green line the effect is 100%, below the red line there's none, and between the green and red lines is the transition zone where the effect fades from 100% to 0%.
The Graduated Filter is generally used for subjects with clear outlines occupying one direction of the frame — sky, grassland, sea surface.
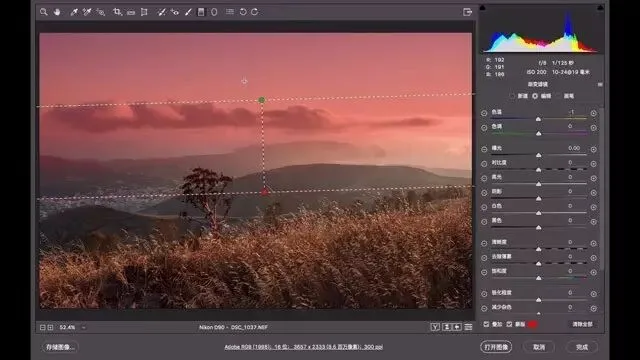
The Radial Filter is also a gradient effect, but its shape is circular (elliptical), so it suits general subjects better — a person, a tree, a building complex.
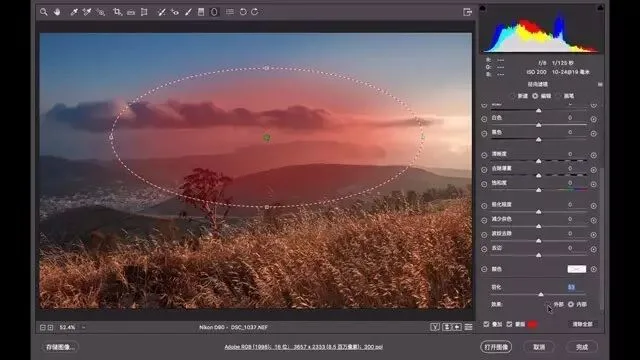
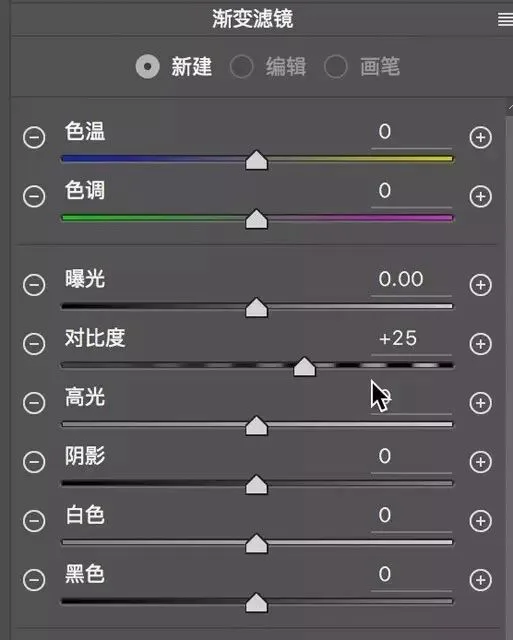
To the right of the Graduated Filter is the adjustment panel, deciding the actual effect on the filtered area.
Temp: cools (blue) or warms (yellow) the filtered region
Tint: adds green or magenta tint to the filtered region
Exposure: corresponds to the midtones of the filtered region
Contrast: adjusts overall contrast of the filtered region
Highlights: controls the brighter areas' brightness in the filtered region
Shadows: controls the darker areas' brightness in the filtered region
Whites: controls the brightest areas' brightness in the filtered region
Blacks: controls the darkest areas' brightness in the filtered region
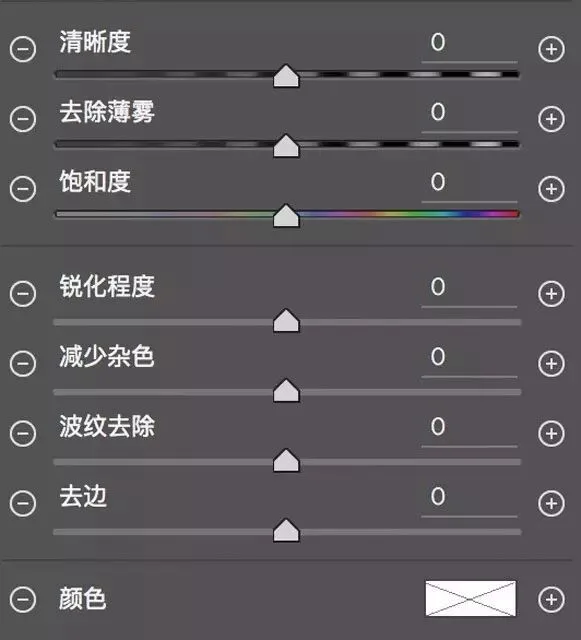
Clarity: increases/decreases detail rendering and edge contrast in the filtered region
Dehaze: right removes haze from the filtered region, left adds haze
Saturation: controls color vividness in the filtered region
Sharpness: sharpens the filtered region (strengthens edge contrast)
Noise Reduction: reduces noise in the filtered region
Moire: removes moiré in the filtered region
Defringe: removes color fringing in the filtered region — purple/green fringes from lens aberration, white bright edges in high-contrast areas, etc.
Color: overlays the chosen color tone onto the filtered region
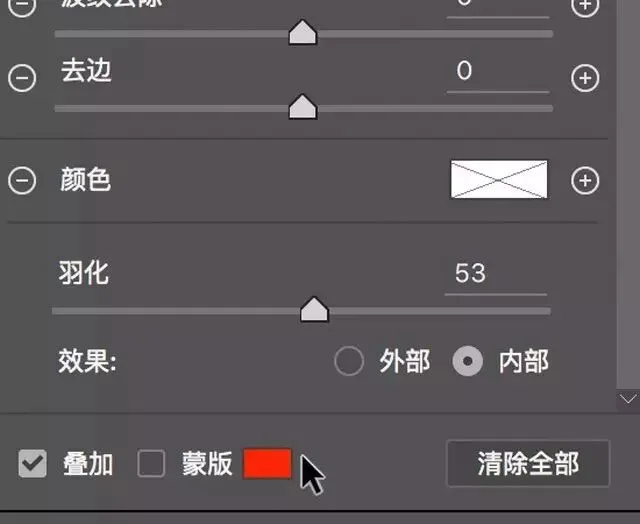
Finally, two settings unique to the Radial Filter:
Feather: adjusts whether the filter's edge transition is hard or smooth
Inside/Outside: decides whether the Radial Filter affects the inside or outside of the ellipse
Click 'Overlay' at the bottom to show/hide the filter's control points in the photo for easier preview
Check Mask (you can also pick a custom color) and the filtered region displays in the chosen color (red here).
'Clear All' removes all graduated or radial filters; combined with Ctrl+Z (undo), you can preview the photo with and without filters.
The Graduated and Radial Filters also have a Brush panel, letting you subtract from or add to the filtered region with a brush.
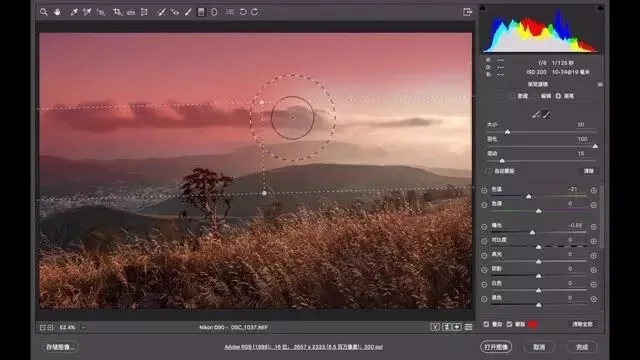
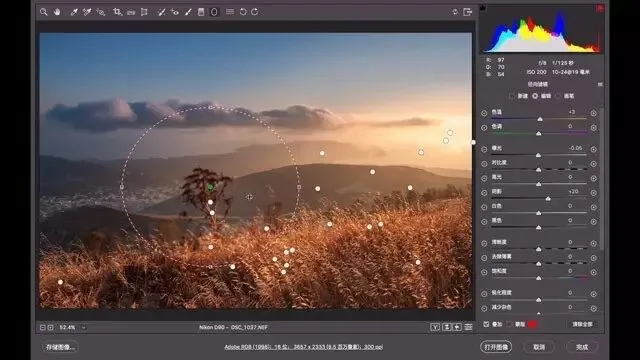
The secret to natural filter transitions is 'rather more filters than too much effect' — use multiple filters with small adjustments for natural blending.
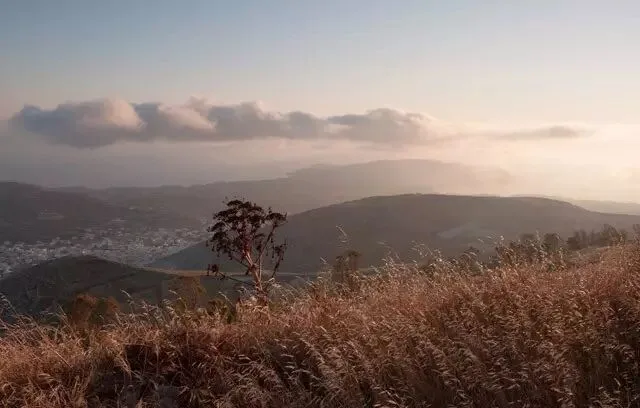
Sample photo, before:
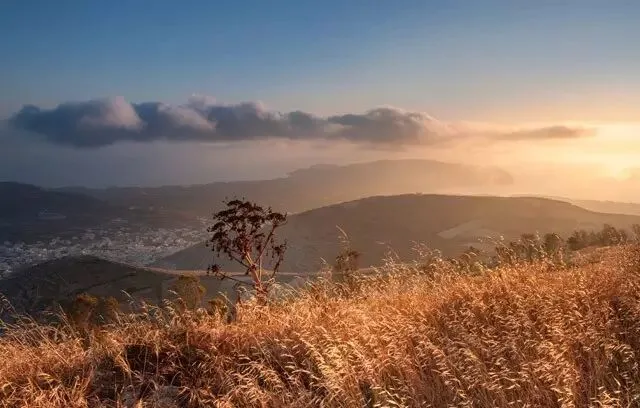
After Graduated/Radial Filter processing:
This week Thomas showed the magic of the Graduated and Radial Filters. Next week Thomas will cover another handy local-processing tool in ACR — the Brush. Stay tuned~
I'm @Thomas Chu Photo — every Sunday evening I share an original piece of photography know-how.