Photography Tutorial · 2020-02-16
A Super Useful Post Tool: LR/ACR Local Adjustment Filters — Summary and Practice
Thomas Chu Photo
Local adjustment is the core idea of photo post-processing. In a single photo, different objects and regions — sky, vegetation, rivers — may need their color and brightness adjusted separately.
Both Lightroom (LR) and Adobe Camera Raw (ACR) offer three local adjustment tools: the Graduated Filter, the Radial Filter and the Adjustment Brush.
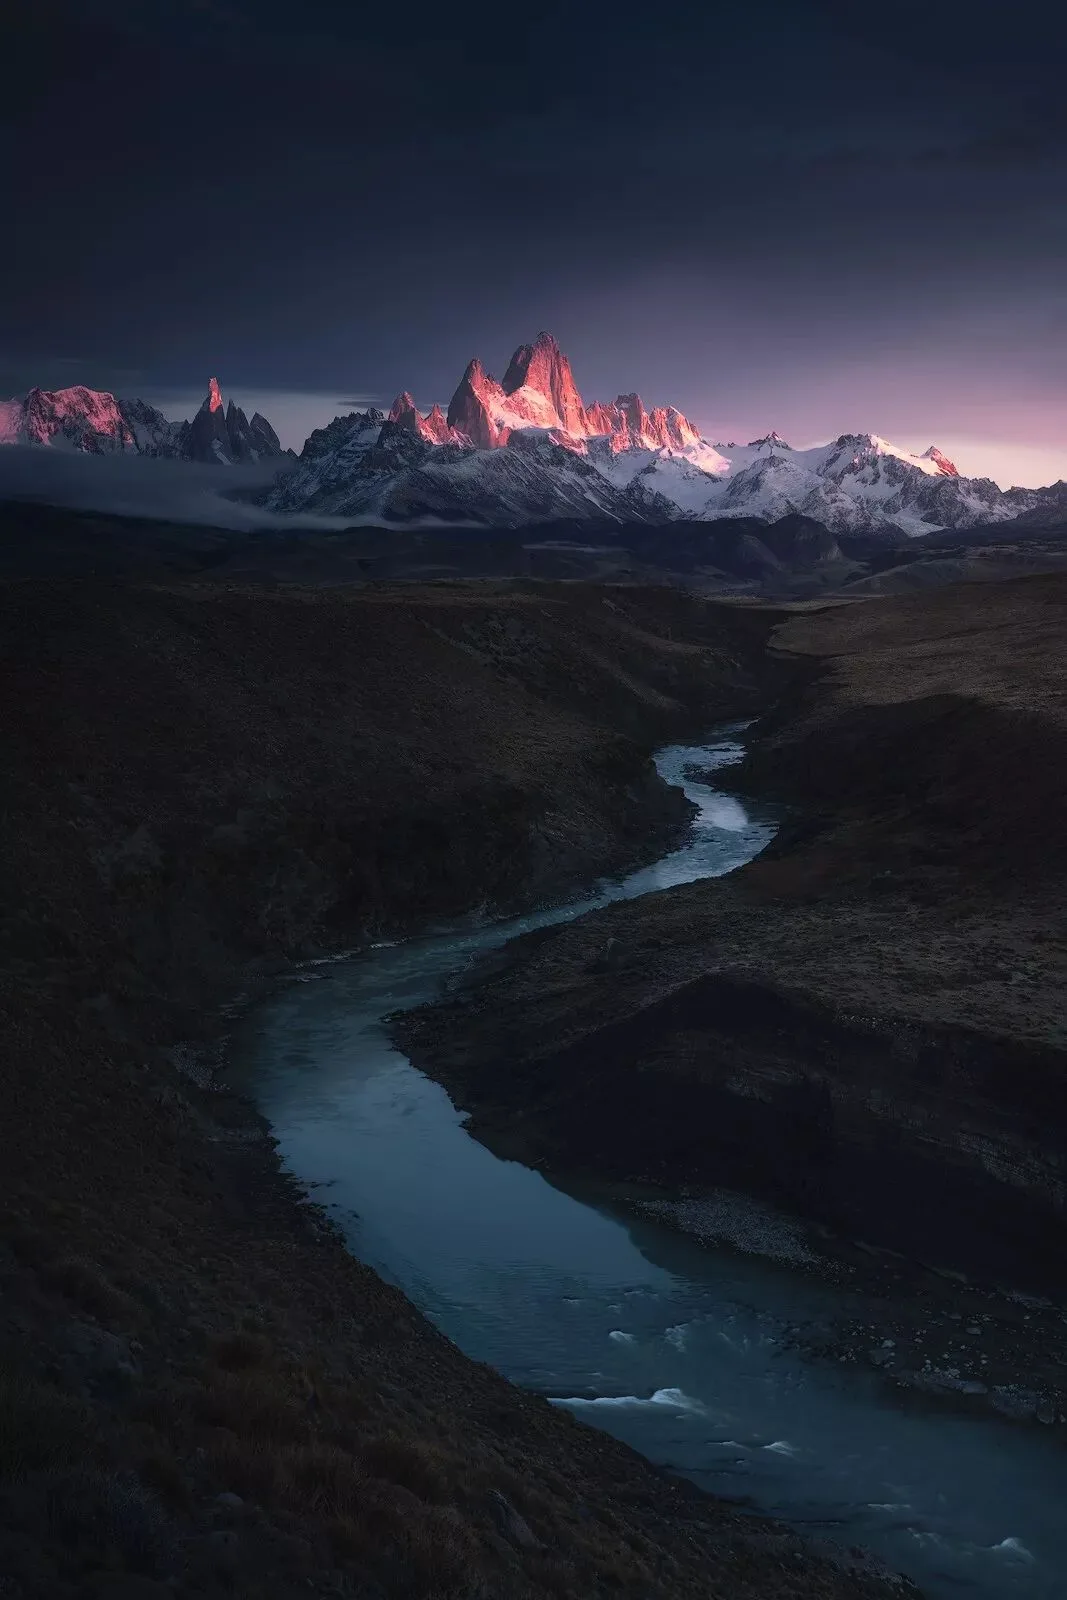
In today's tutorial, using the photo above as an example, Thomas summarizes the differences and usage of these three tools.
Video Tutorial
▶ Watch the video tutorial on Bilibili
This is the fully illustrated companion to the video above. The Graduated Filter, Radial Filter and Adjustment Brush are the three most-used local adjustment tools in Lightroom and Adobe Camera Raw; using a river-valley photo beneath snow peaks, Thomas covers their scope, key parameters and practical routines in one pass — including the Auto Mask gem. This article follows the video's order, with keyframe screenshots for every move.
01 One Difference: the Area They Affect
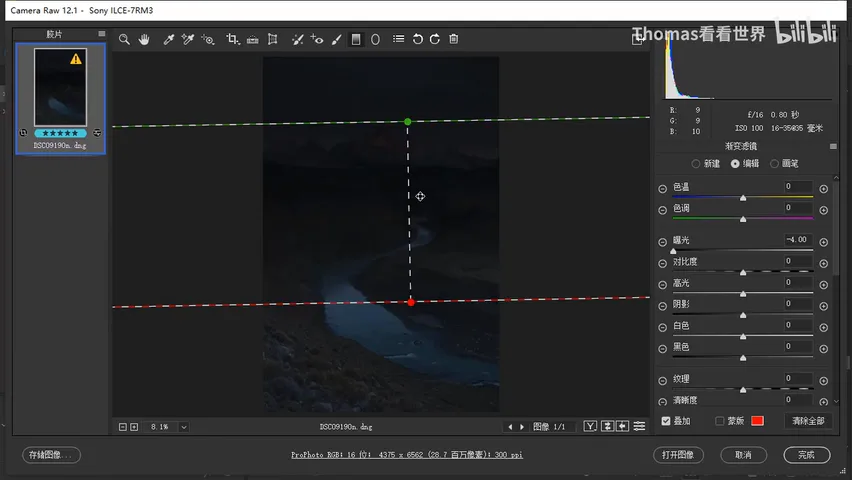
Pick any of the three tools and the same set of sliders appears on the right — color temperature, tint, exposure, contrast, highlights, shadows — meaning they can make identical adjustments, differing only in the area they affect (at 0:54 in the video). A neat demo trick: pull Exposure to -4 and the tool's scope becomes obvious. Drag out a Graduated Filter and you get a solid line plus a dashed line: 100% effect above the solid line, 0% below the dashed one, with a transition band between — exactly like a physical graduated filter on the lens (at 1:07 in the video). It suits long-strip regions — top, bottom, left, right — such as darkening a sky.
02 The Radial Filter and the Adjustment Brush
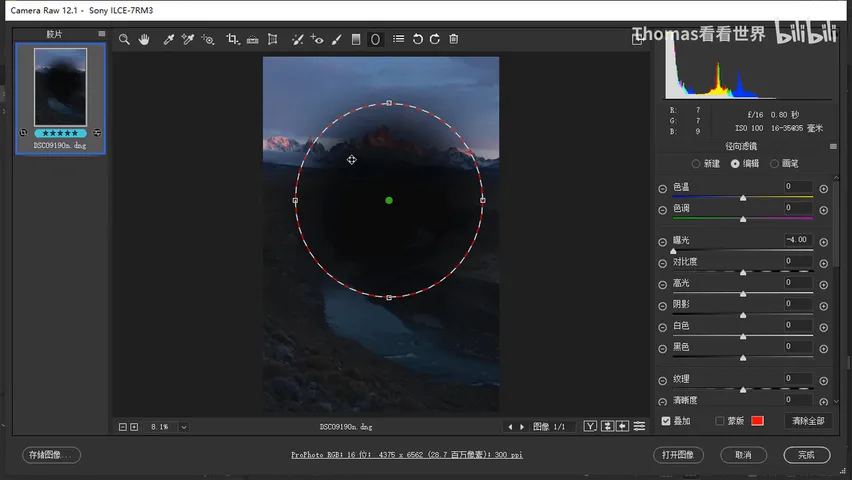
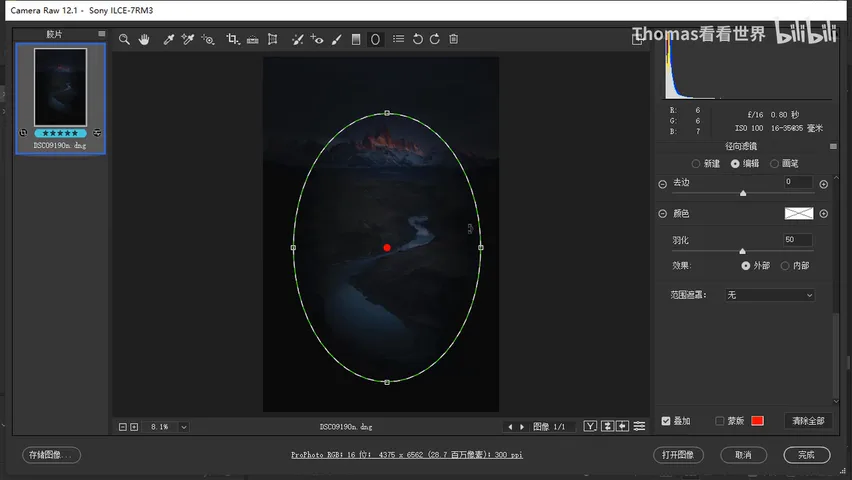
For the center of the frame, reach for the Radial Filter: a circle or ellipse that acts at 100% in the core and feathers outward (at 2:15 in the video). Feather is the key slider — at 0 it stamps a harsh, odd-looking circle; keep it at 50 or higher, and push toward 100 whenever the transition feels hard (at 2:41 in the video). It also has an Inside/Outside switch: choose Outside and reduce exposure, and you have a ready-made vignette tool (at 3:16 in the video). Its weakness is just as clear: the shape is always round or elliptical, so selections lack precision.
That's when the Adjustment Brush takes the stage: it paints any shape with fine precision, and four parameters — Size, Feather, Flow, Density — are all adjustable (at 3:48 in the video). Feather 0 gives a hard, unpleasant edge, so Thomas keeps Feather pinned at 100 (at 4:22 in the video). Flow and Density both govern stroke strength, but differently: Flow accumulates — a first stroke at 20% becomes 40% when you brush back over it, stacking indefinitely; Density caps — at 10% Density, no matter how much you scrub, the effect never exceeds 10% (at 4:58 in the video). Hence his habitual setup: Density 100%, Flow 20-50% — smooth buildup that still reaches full strength.
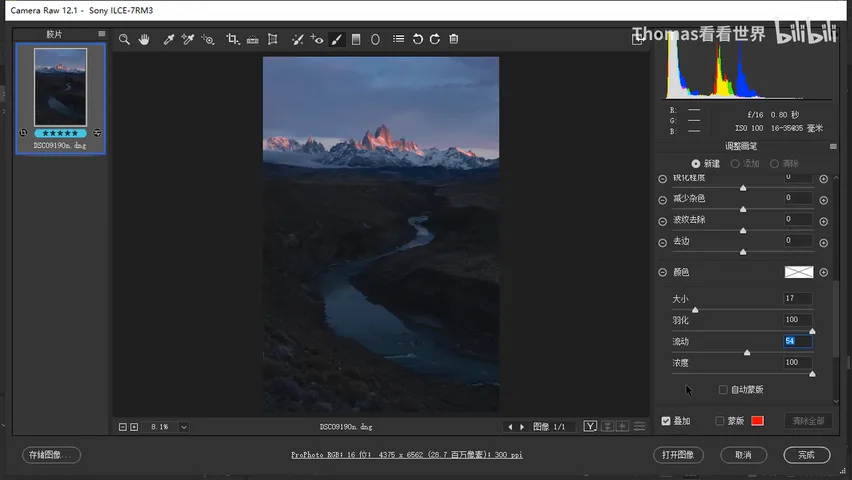
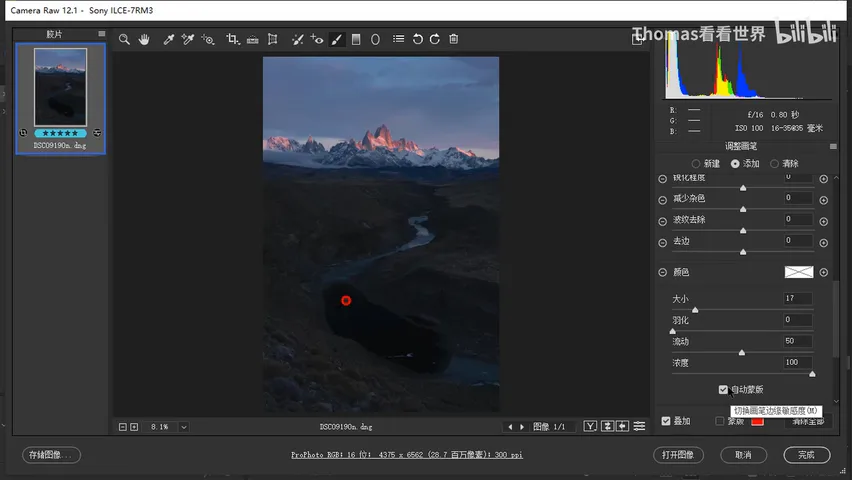
03 Auto Mask: the Brush's Secret Weapon
Below the brush sits a crucial switch — Auto Mask (at 5:45 in the video). Off, it's a plain round brush whose reach follows your stroke; on, the cursor becomes two concentric circles: the inner one samples the color and structure beneath it, and the outer one halts the effect at detected color or structure breaks — object edges (at 5:58 in the video). The video's comparison is striking: without Auto Mask one stroke floods the bank and everything on it; with it, the brush acts almost only on the teal water mid-river and barely touches the banks — fast, accurate recognition for complex-edged subjects like rivers (at 6:36 in the video).
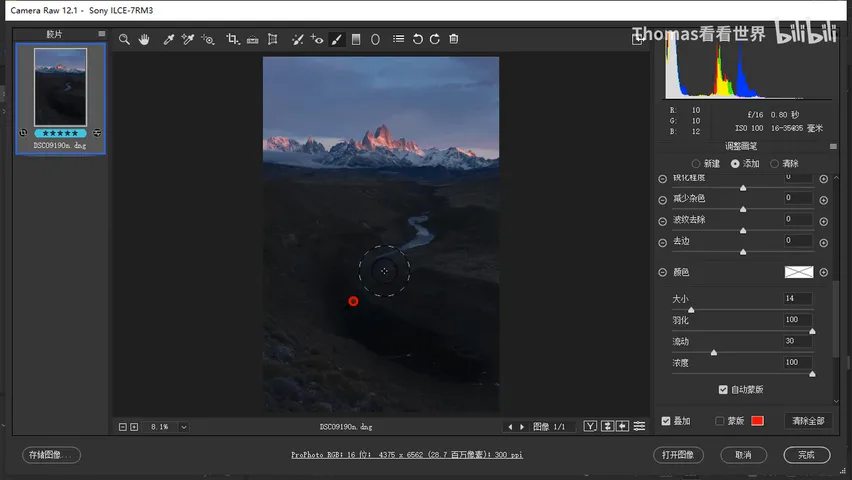
04 Hands-On: Darkening the Sky with Multiple Grads
Now the hands-on edit of this river-valley frame (at 7:29 in the video). Step one is darkening the sky, and Thomas's rule is: keep each filter's strength small — a single -0.5 EV grad is instantly spotted, so he uses about -0.25 and pulls several, each with a different span and angle: one across the sky, one tilted, another on the left since the light comes from the right, plus a gentle one over the foreground. Stacked small grads blend far more naturally (at 8:18 in the video).
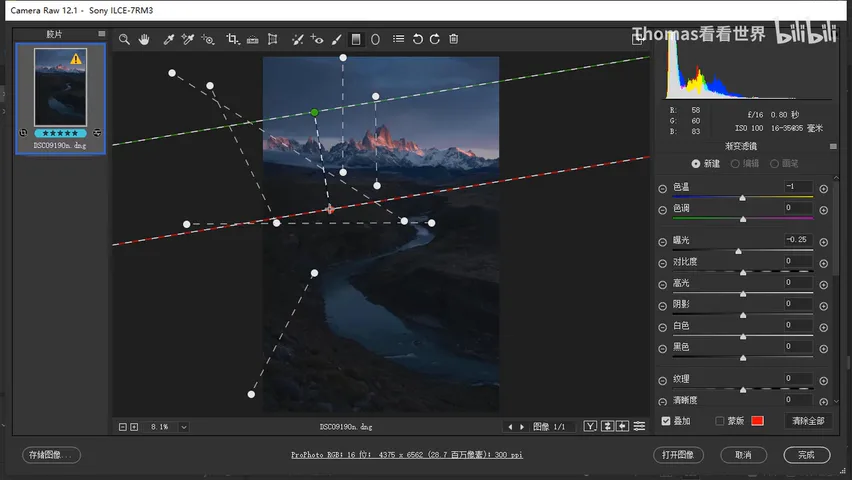
Two management tricks are worth remembering (at 8:36 in the video): a new filter inherits the previous one's settings, and instead of zeroing sliders one by one, the panel's reset button clears them all at once; hover over the photo with overlays hidden to judge the true effect without control lines; and for before/after, hit Clear All to see the original, Ctrl+Z to restore, toggling as needed (at 9:13 in the video). Also, clicking a filter's line switches to Edit mode for further tweaks to its span and values; clicking empty space or choosing New duplicates an identical filter (at 9:58 in the video).
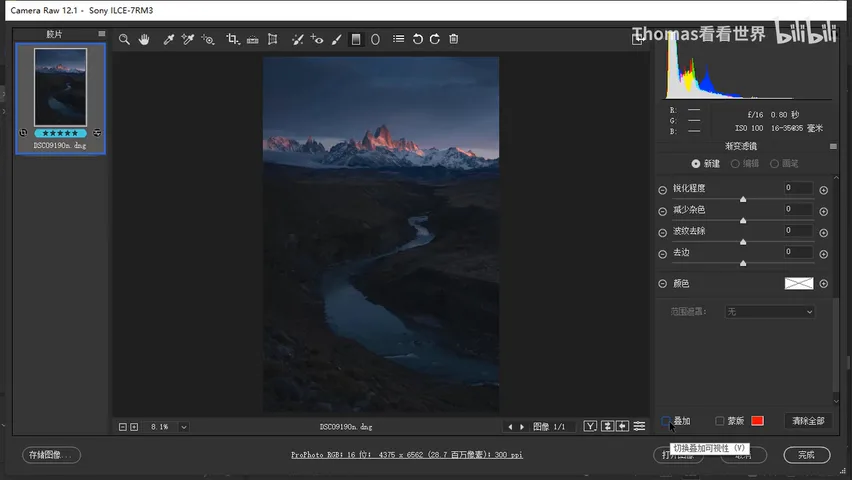
05 Hands-On: Rendering a Beam of Light
Step two renders light: the sun comes from the right, so pull a grad there and raise color temperature, tint, a touch of exposure and shadows — even reduce Clarity slightly, since sunlit areas carry that misty softness (at 10:17 in the video). Immediately a warm beam enters the frame; keep stacking small doses (about 0.2 EV) over growing, varying spans — each glow a little larger, the transitions beautifully smooth (at 10:47 in the video). Finish with a few elliptical Radial Filters of warm light through the middle. Before and after, the frame now feels awash with wandering light (at 11:27 in the video).
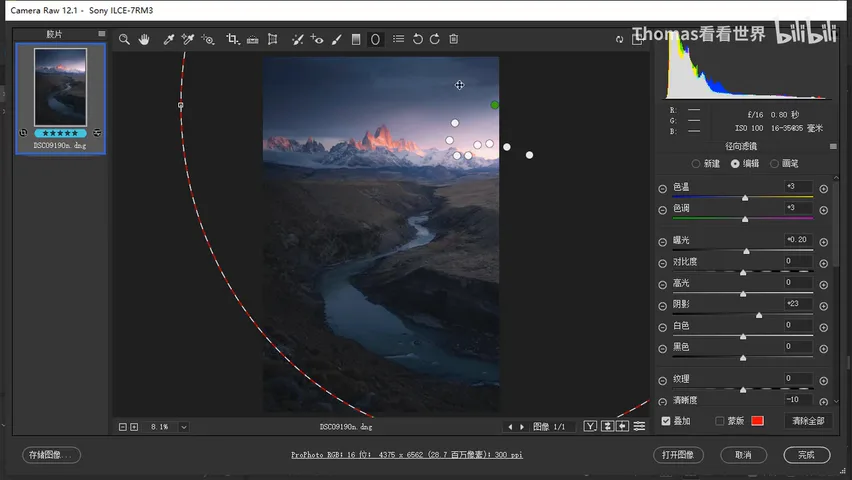
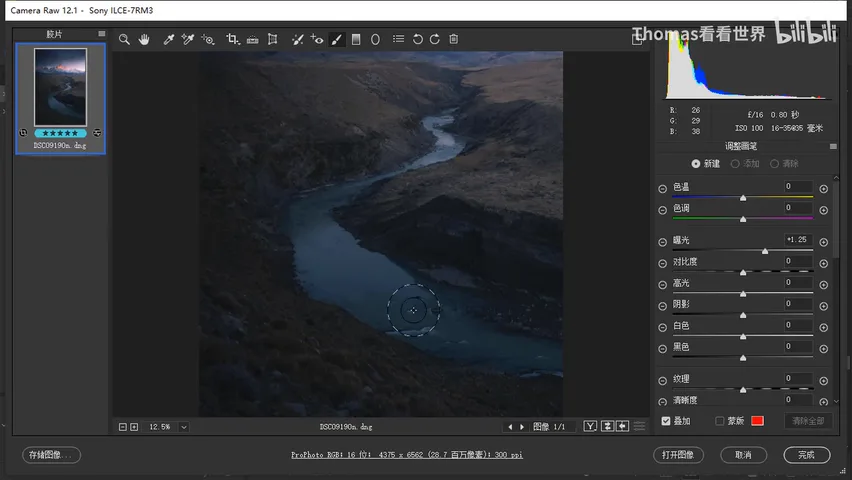
06 Hands-On: Refining a Teal River with the Brush
Step three refines the river at the center (at 11:34 in the video). Always tick Auto Mask first, so the brush automatically respects the riverbank boundary as you paint — the water is teal while the banks are green and texturally messy, and Auto Mask separates them with ease. Brighten the river substantially: raw exposure easily overshoots, so lift Highlights instead — they act on the water's existing brightness for a more natural result (at 13:58 in the video); then add a little blue and green to cool the water toward teal, finish with saturation, and the river gains real dimension.
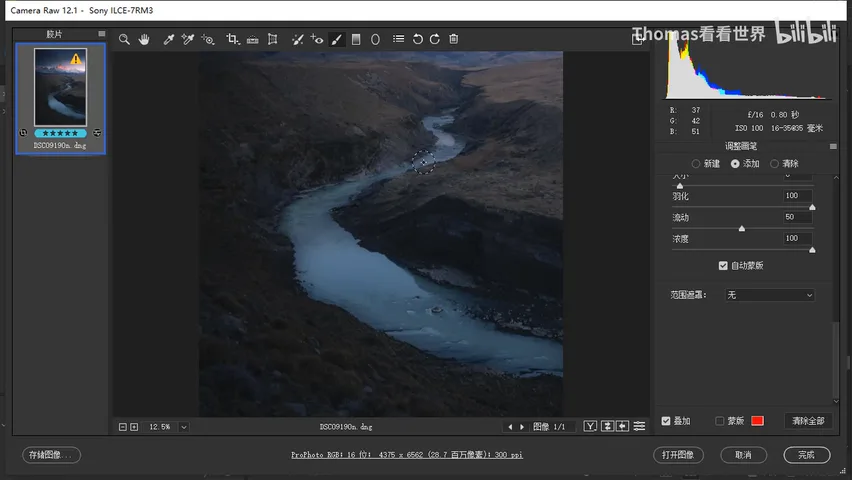
Over-painted spots get erased with the Erase mode (at 12:24 in the video); when you can't tell what's been adjusted, enable the mask display — red marks the untouched areas (older versions showed the opposite, marking affected areas), and the color is customizable, red being the usual choice since it rarely appears in photos. With the mask on, misses and over-reaches show at a glance (at 13:00 in the video). One detail: boulders mid-river are recognized as separate objects by Auto Mask, so temporarily switch it off to include the rocks with the water, then switch it back on to keep refining (at 13:34 in the video).
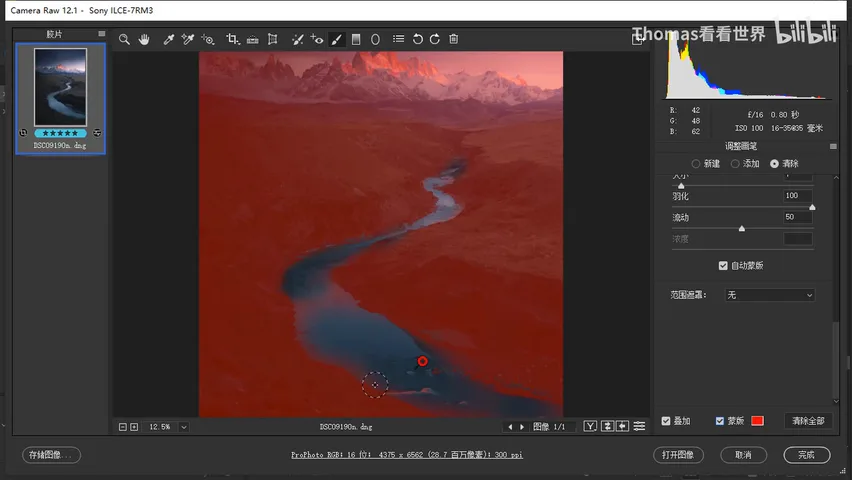
To wrap up: at the bottom sits Range Mask — Color, Luminance and Depth range masks can further constrain what a filter affects; Thomas covers those in earlier tutorials, linked in the WeChat article or the Bilibili comments. One last pass over the division of labor: Graduated Filters for long strips along the edges (sky, sea, corners), Radial Filters for elliptical zones in the middle, and the Adjustment Brush with Auto Mask for precise shapes of any kind (at 14:32 in the video).
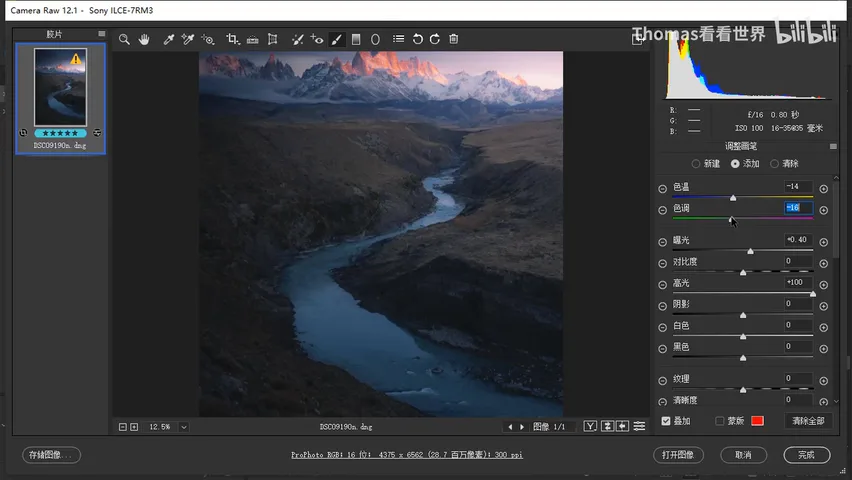
1. The three tools share identical capabilities and differ only in scope: long strips along the edges, elliptical zones in the middle, any hand-painted shape; 2. Remember two parameter sets: Radial Feather at 50+, and Adjustment Brush Density 100% with Flow 20-50% — Flow stacks, Density caps; 3. Auto Mask lets the brush detect object edges, the go-to for refining rivers, trees and other complex outlines; 4. Field wisdom: small adjustments per filter, stacked repeatedly over varying spans, checked with the mask display and compared via Clear All plus Ctrl+Z.