Photography Tutorial · 2016-11-13
The Powerful Lightroom/ACR Brush: Master It in This One Article
The Adjustment Brush in Lightroom and Camera Raw makes local adjustments easy — enhancing or even reshaping a photo's light and shadow.
Learning the brush is simple too: understand its control options like Size, Flow and Density, plus the common Temp, Exposure and Clarity sliders.
Topics: brush size, feather, flow, density and other options
1
What is the Brush tool for?
Thomas mentioned it in the earlier article 'Local Processing Is the Core of Post-Processing'. A key idea in post is local processing and optimization — when adjusting one part of the frame, don't affect unrelated areas.
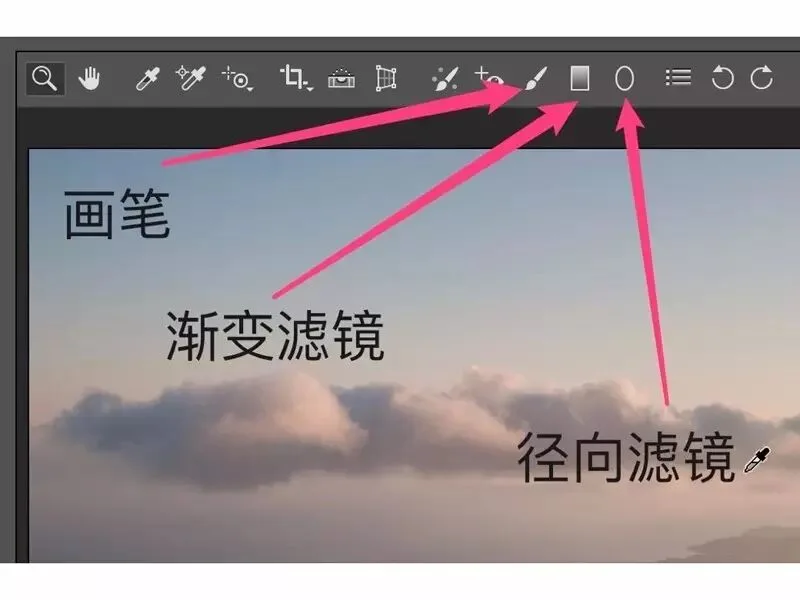
In Photoshop we have selections, masks, channels and more for local adjustments. In Adobe Camera Raw or Lightroom, we have three tools — the Radial Filter, Graduated Filter and Adjustment Brush — of which the Brush is the most powerful.
Take the photo pushed yesterday as an example. I shot this moonset-over-cloud-sea scene while hiking in India this week (what's setting in the frame is the moon, which is why the night sky is full of stars).
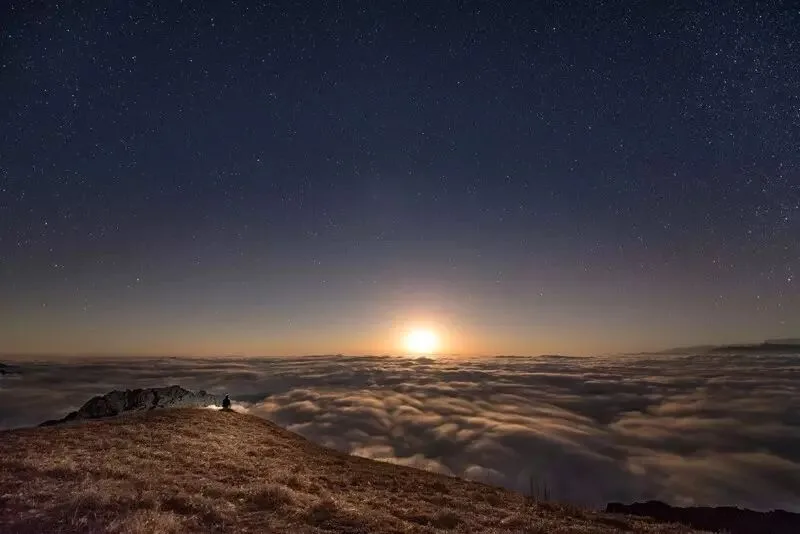
Below is the original capture. The foreground grass is quite dark with no detail, failing to set off the atmosphere of the backlit moon.
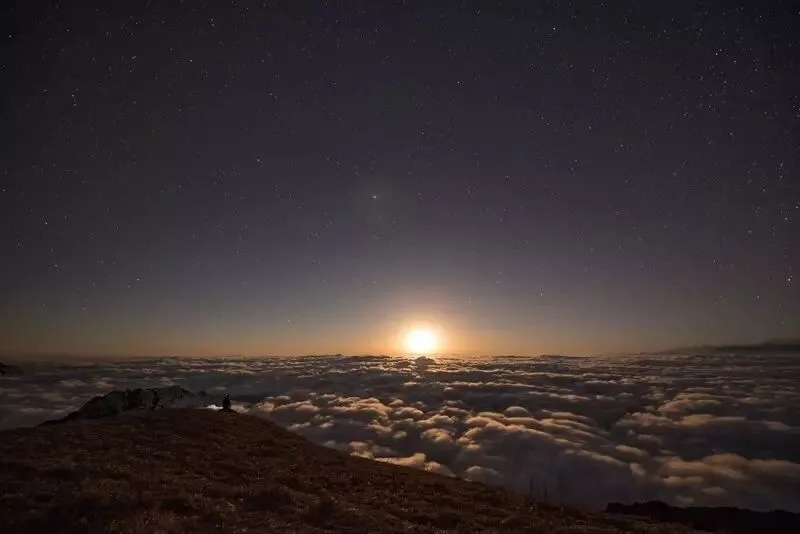
I wanted the foreground grass brighter, without affecting the cloud sea and starry sky.
So I used ACR's Brush tool to paint over the foreground grass, raised the exposure and added a touch of color temperature — the backlit glow of the grass immediately stood out.
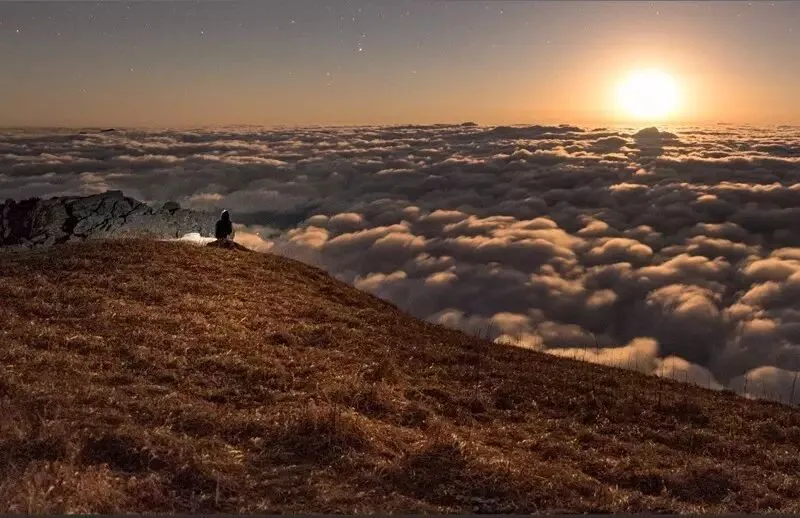
Photography is an art of light. But in landscape photography it's hard to change the lighting at the scene. With tools like the brush, local processing in post can strengthen the existing light — or even reshape the scene's light and shadow.
For example, the London night scene below. The original (lower image) was a dull overcast day. But by adjusting the sky alone with the brush in post — darkening the upper sky with blue, brightening the lower sky with red-purple — the final image (above) gains a 'sunset afterglow' feel.
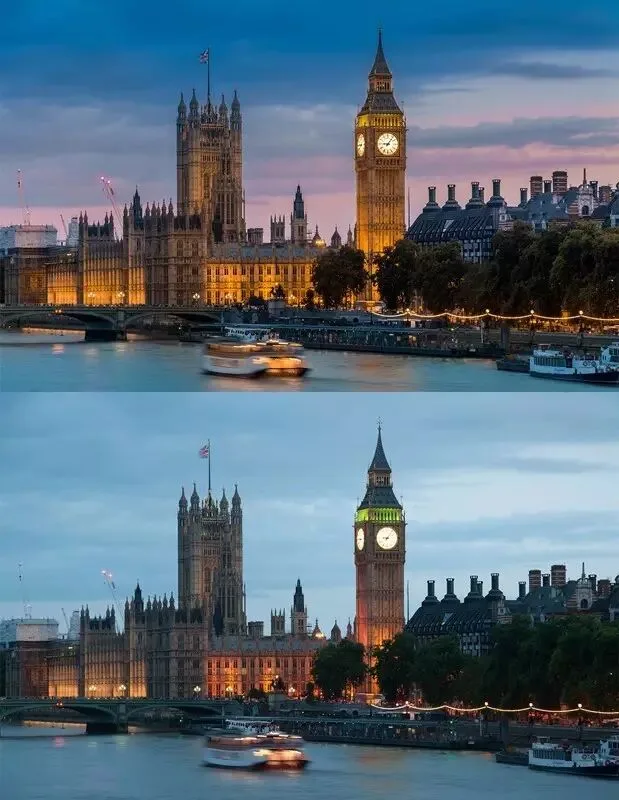
Repainting the sky's light with the Brush takes just minutes and a few simple steps — see the video at:
http://v.qq.com/x/page/g0328yr2c9v.html
2
Brush control options
The Brush panel has twenty-plus densely packed sliders and options — seemingly very complex.
Actually these options fall into two simple categories:
1) Controlling the brush (strength and region of effect)
2) Deciding what adjustment effect the brushed region gets
The brush-controlling options sit at the very top and very bottom of the panel.
At the very top are three modes: New, Add, Erase.
When entering the Brush panel, the default is 'New'. Painting in the photo creates a 'pin' icon, meaning we've created a new brush adjustment.
Afterward the option automatically switches to 'Add'. In Add mode, newly painted areas belong to the same 'pin' brush, sharing its Temp, Exposure and other adjustments.
If we want a different Temp or Exposure adjustment on a new area, we click 'New' again to create another brush adjustment — a new 'pin' appears.
Clicking different 'pins' shows each brush's affected region. If we overpaint, click that brush's 'pin' to activate it, choose the 'Erase' option, and paint again — the painted-over areas are subtracted from the brush's region.
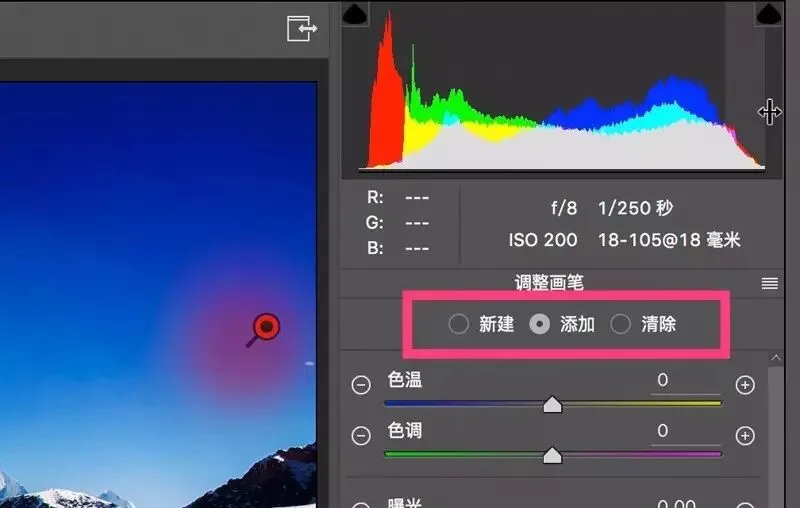
The top three options are the brush modes; the options below control the brush's size, shape and opacity.
The first, 'Size', is easy: brushes in ACR and Lightroom are circular, and the size value is the diameter. Larger value, larger affected area.
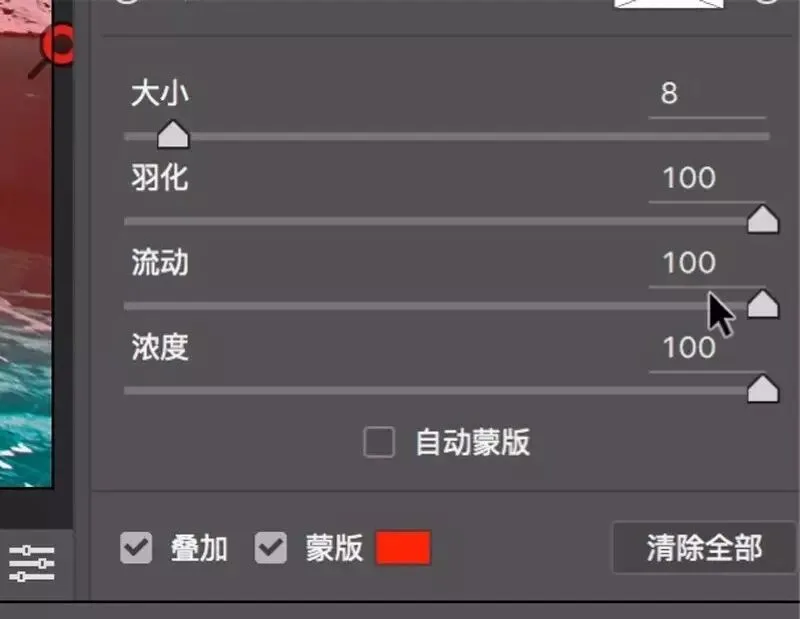
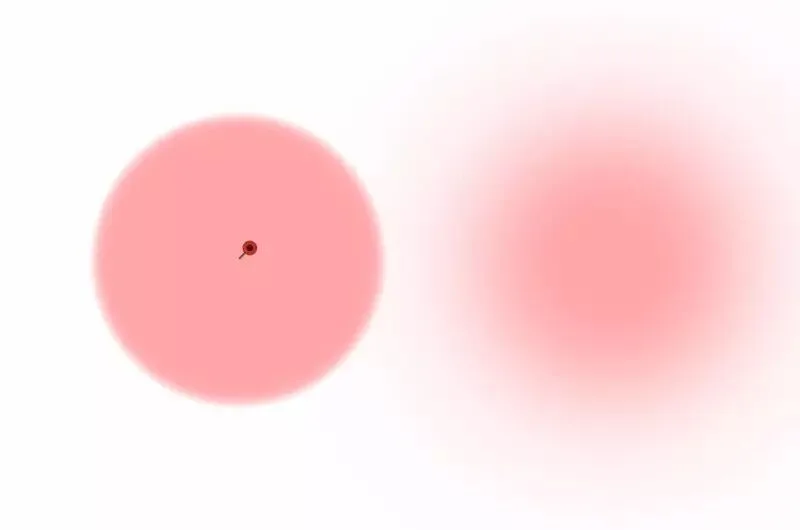
The 'Feather' slider controls the brush's transition. At low feather, the transition between affected and unaffected areas is hard (lower left) — good for objects with clear boundaries and sharp outlines.
At high feather, affected and unaffected areas blend with a smooth gradient — suitable for painting on water, grass and similar surfaces.
'Flow' and 'Density' control the brush's opacity. Think of Flow as the amount of ink flowing from a fountain pen — it stacks up continuously. Density is the ink's concentration, capping the brush's maximum opacity. (Imagine a dark-gray (density) ink: if the pen's flow is tiny, only light gray lands on paper; but I can paint repeatedly until dark gray appears. Yet because of the ink's density, I can never draw black with gray ink~~)
For example, with Flow at 5% and Density at 30%, one stroke gives that region 5% brush opacity. Since Flow stacks, repeated strokes over the same area keep accumulating opacity — capped at the 30% set by Density.
'Auto Mask' is a powerful option for complex boundaries with distinct brightness or color. With it checked, the software tries to draw precise boundaries automatically. Below, without Auto Mask the brush inevitably spills onto the snow by the lake.
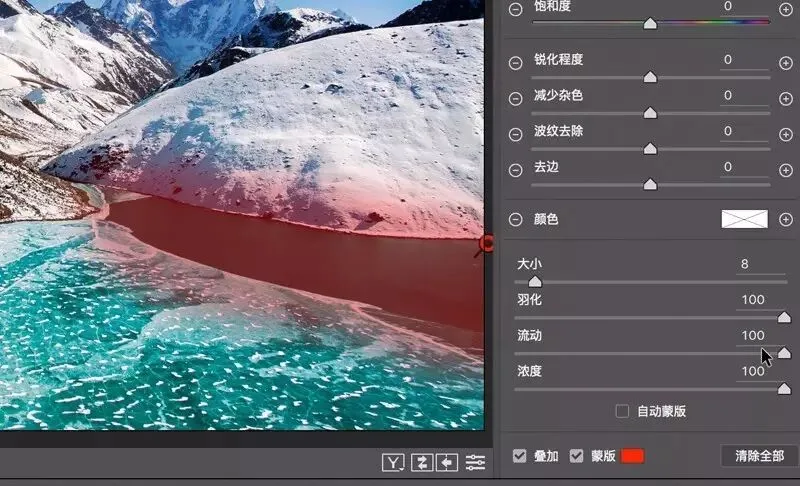
With 'Auto Mask' checked, painting the lake surface makes the brush recognize the boundary and exclude areas that shouldn't be affected — much more accurate.
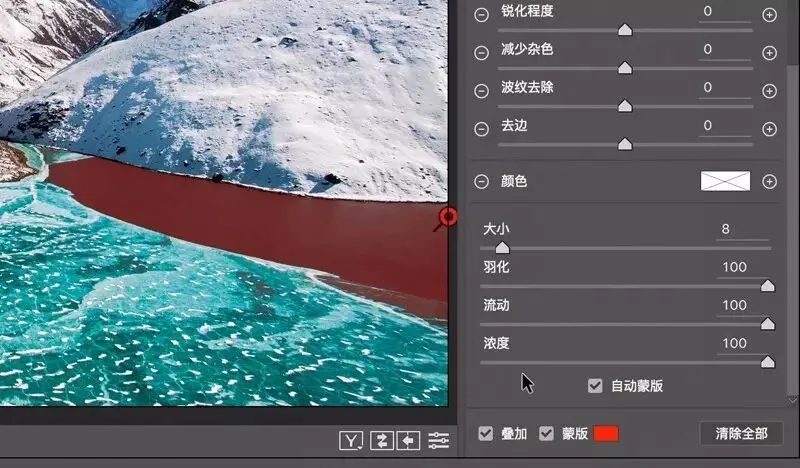
At the very bottom, 'Overlay' shows/hides the brush pins in the photo; checking 'Mask' displays the brushed region in the chosen color — red in the image above. Both options aid preview. Finally, the 'Clear All' button deletes all brush adjustments in the photo.
3
The brush's adjustment sliders
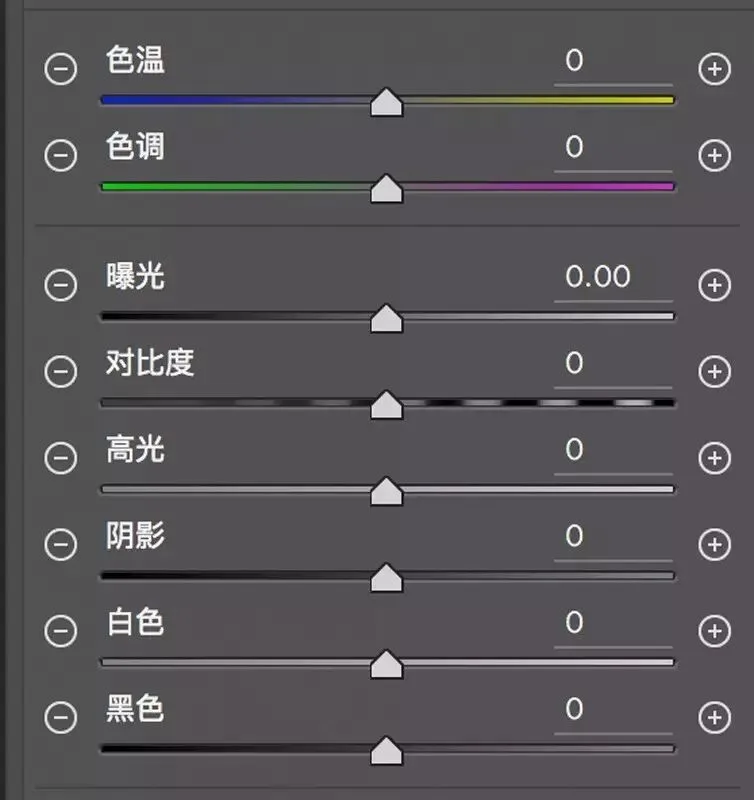
Besides the control options at the top and bottom, the sliders in the middle decide the brush's adjustment effect. Most are identical to those in 'Beautify Your Photos with Ease — Understanding the Tone & Contrast Controls in Lightroom's Basic Panel' — except here they act only on the brushed region.
Temp: cools (blue) or warms (yellow) the brushed region
Tint: adds green or magenta tint to the brushed region
Exposure: corresponds to the midtones of the brushed region
Contrast: adjusts the overall contrast of the brushed region
Highlights: controls the brighter areas' brightness within the brushed region
Shadows: controls the darker areas' brightness within the brushed region
Whites: controls the brightest areas' brightness within the brushed region
Blacks: controls the darkest areas' brightness within the brushed region
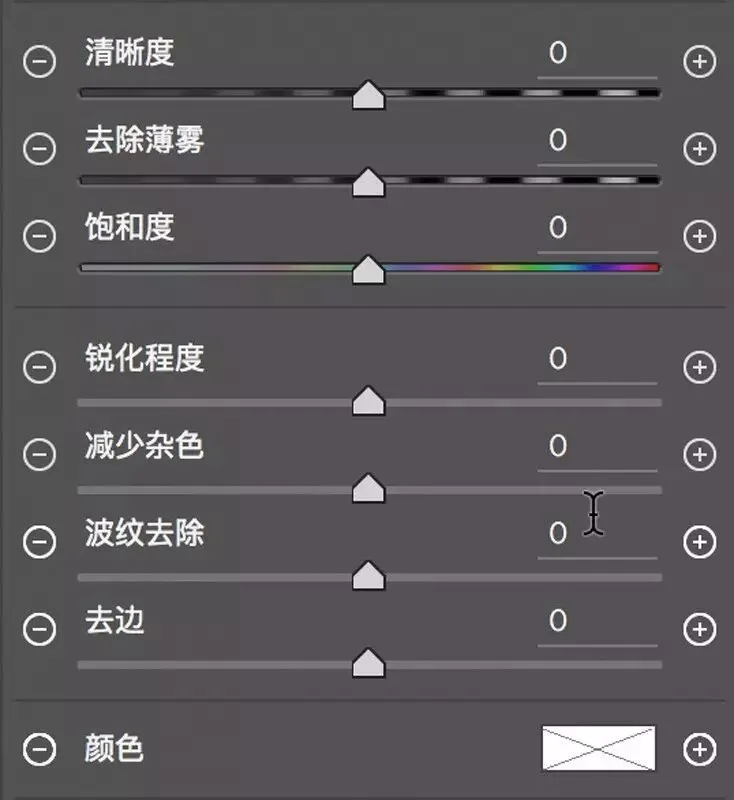
Clarity: increases/decreases detail rendering and edge contrast in the brushed region
Dehaze: right removes haze from the brushed region, left adds haze
Saturation: controls the color vividness of the brushed region
Sharpness: sharpens the brushed region (strengthens edge contrast)
Noise Reduction: reduces noise in the brushed region
Moire: removes moiré in the brushed region
Defringe: removes color fringing in the brushed region, including purple/green fringes from lens aberration and white bright edges in high-contrast areas
Color: overlays the chosen color tone onto the brushed region
Video walkthrough:
http://v.qq.com/page/k/1/8/k0327f0vp18.html
Summary
1. In Adobe Camera Raw or Lightroom, we have three tools for local processing — the Radial Filter, Graduated Filter and Adjustment Brush — of which the Brush is the most powerful. 2. At the top of the Brush panel are the New/Add/Erase modes; at the bottom are Size, Feather, Flow and Density. 3. In the middle are common effect options like Temp, Exposure, Clarity and Sharpness.
Follow @Thomas Chu Photo —
learn one photography skill every Sunday.