Photography Tutorial · 2022-06-19
Trendy Color Looks in One Step: The LR Calibration Panel Primaries in Action
In last week's tutorial, "The Hidden King of Color Grading in PS — The Calibration Panel's Primaries Tool!", Thomas introduced the basics of this tool.
In today's post-processing tutorial, Thomas puts the Calibration panel's Primaries tool in LR/ACR into real-world action.
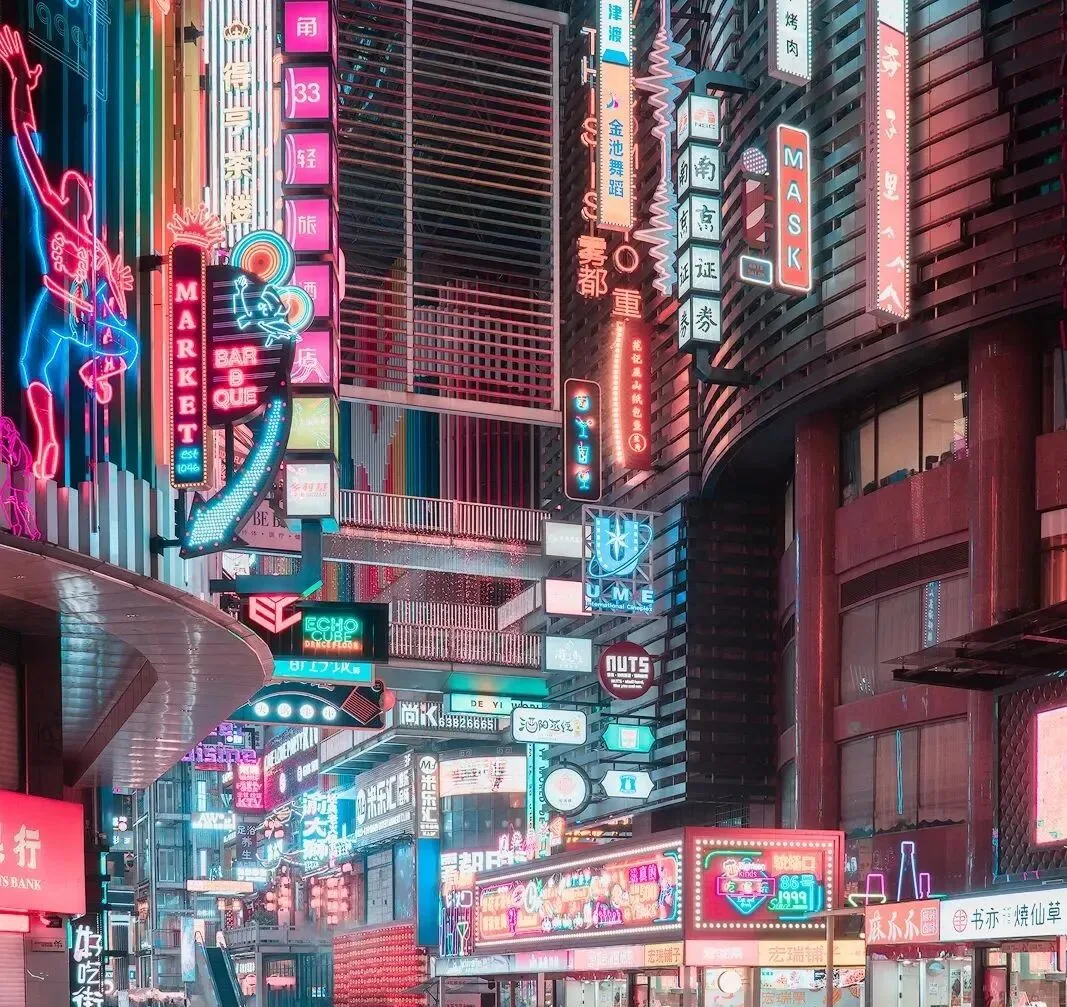
Teal-and-orange, blue-and-pink, and cartoon color looks — all these trending grades can be done in a few steps with the Primaries tool.
This tool is truly a grading gem for cityscape post-processing!
Video
▶ Watch the video tutorial on Bilibili
This is the fully illustrated companion to the video above. Where last week's tutorial explained the theory of the Calibration panel's Primaries tool, this one shows four real assignments: the ice-berry-pink background Thomas graded for a GAC Aion car campaign, the teal-pink contrast on a vertical night shot, the one-slider teal-orange night look, and the cartoon-candy unification recipe. Learn the routines here, then watch the sliders move in the video.
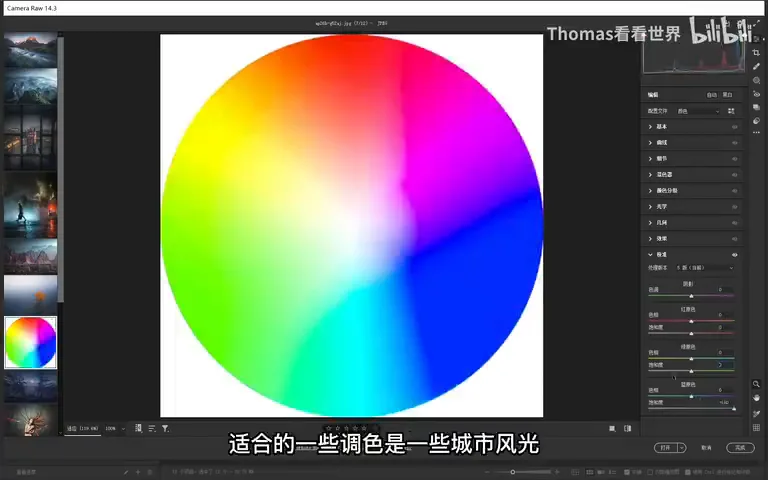
First, know the tool's boundaries: the Primaries tool shines on cityscapes — man-made colors tolerate heavy stylization — while in nature, apart from the blue primary, the other two are usually left alone. The diagram below captures the whole idea: sliding the blue primary left turns blues toward cyan and orange-yellows toward red, while the green and red primaries each drag their own color regions along. The color-wheel demo at 0:22 in the video shows this ripple effect.
01 An Ice-Berry-Pink Background for a Car Campaign
The first case comes from a real commission: Thomas recently shot a set of city night backgrounds for GAC Aion car photos, with an ice-berry-pink / rose-pink target — a teal-blue plus pink combination. Below is the untouched original: a city skyline at dusk, faithful but plain (at 1:08 in the video).
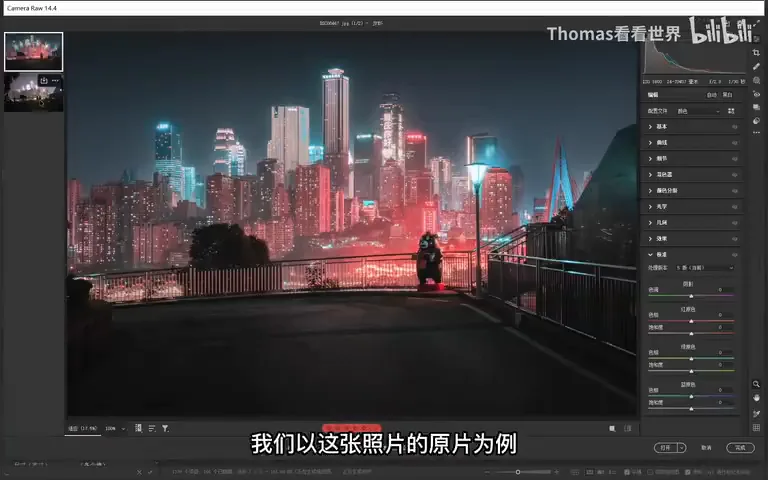
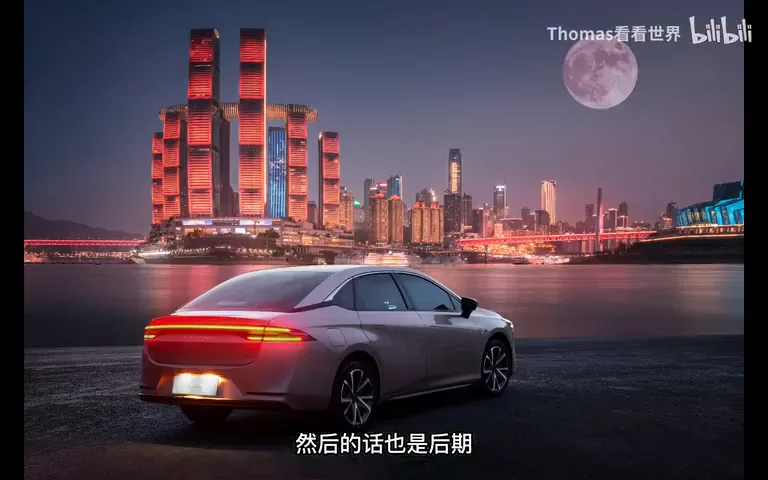
The first color move is not the primaries but the white-balance tool: since the scene's base is a cool blue-sky cast, set an explicitly blue temperature baseline first, so the later primary shifts all start from the same reference. The graded background was then composited into the final car campaign — the pink sky and the car's paint echo each other (at 1:32 in the video).
02 Blue Left, Green Right: Mixing Teal and Pink
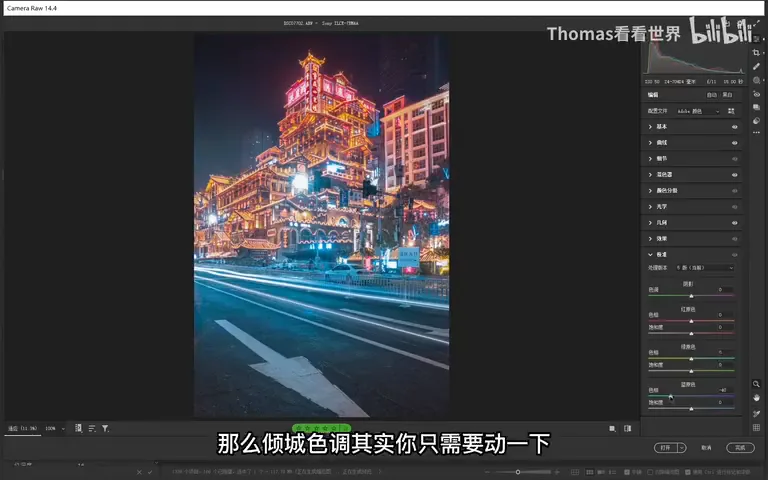
Into the Calibration panel. Slide the blue primary's hue left: the blue background instantly turns cyan while the orange-yellow lights drift toward red-orange — half of the teal-pink contrast is in place (at 1:49 in the video). He tries the red primary, finds it pushes colors the wrong way, and zeroes it out; the green primary is the key — sliding it right summons the pleasing pink tones (at 2:17 in the video).
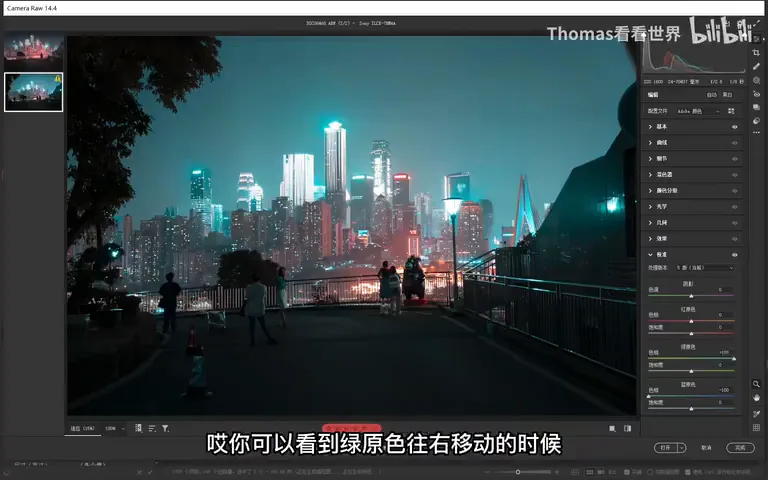
After the rough pass the frame leans a bit too green — bringing the blue primary back a little fixes it. Leftover stray colors go to the HSL mixer: nudge the aqua hue slightly toward blue and the cool range is fully unified. Before versus after, the unification takes only a few moves (at 2:40 and 2:50 in the video).
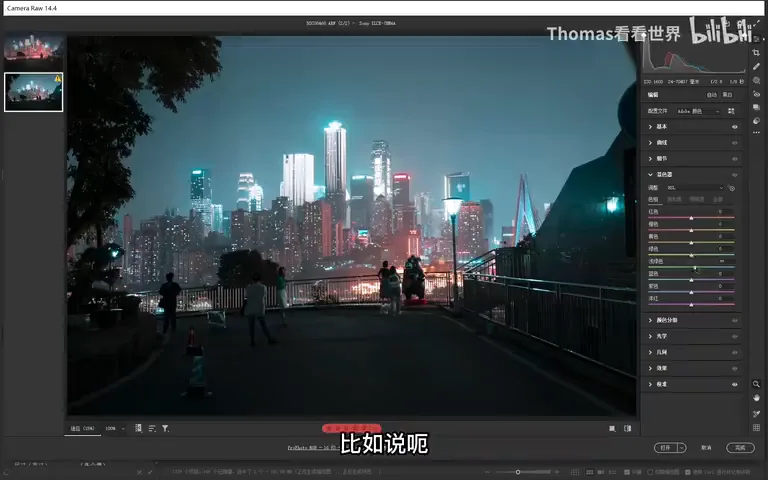
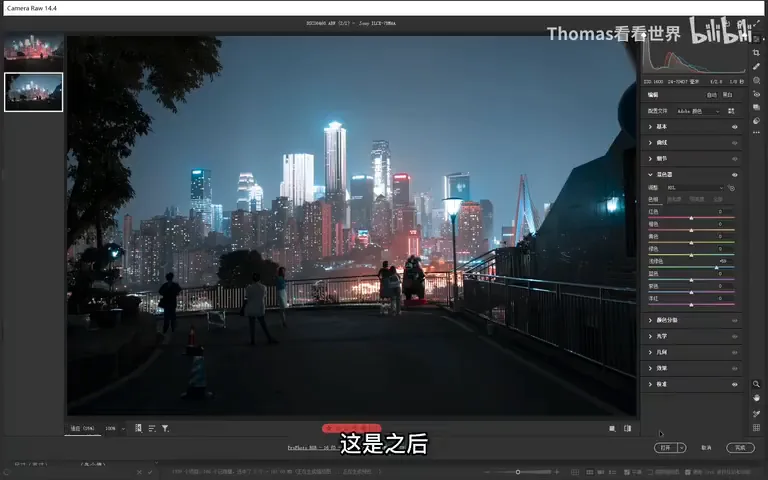
One Night Frame, Two Trending Contrast Looks
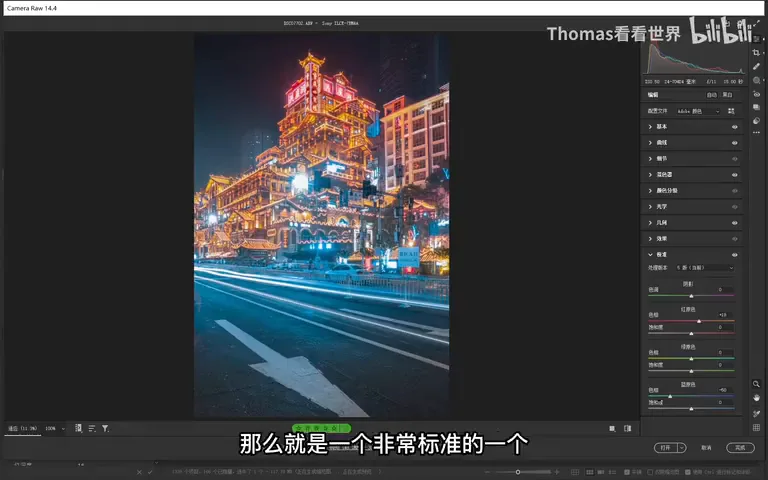
Switch to a vertical night frame and the same recipe still works: blue primary left brings up orange with a touch of red; green primary further right deepens the pink; then bias the temperature slightly blue and the teal-pink contrast look is done (at 3:00-3:16 in the video).
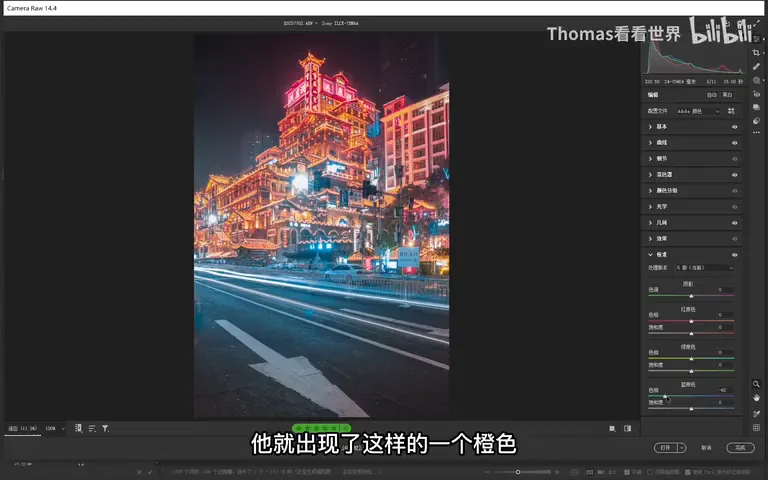
On the same photo, the classic teal-orange night look is even simpler: touching just the blue primary already delivers the vibe; slide the red primary right as a finishing move and you get a textbook teal-blue versus red-orange contrast (at 3:23 and 3:32 in the video). That's why the Primaries tool is such a night-grading workhorse — always paired with the temperature/tint tools and the HSL mixer for the final pass.
04 Cartoon-Candy Color: Build the Bright, Hazy Base First
Case three is the cartoon / candy look. Step one still comes before the primaries: lift the shadows, raise exposure slightly, pull highlights down, until the photo sits in a bright, hazy, low-contrast state — the foundation of the candy feel (at 4:00 in the video).
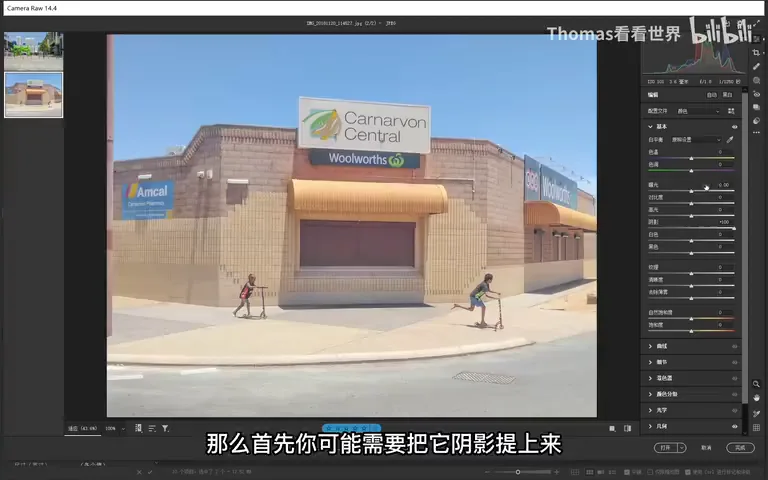
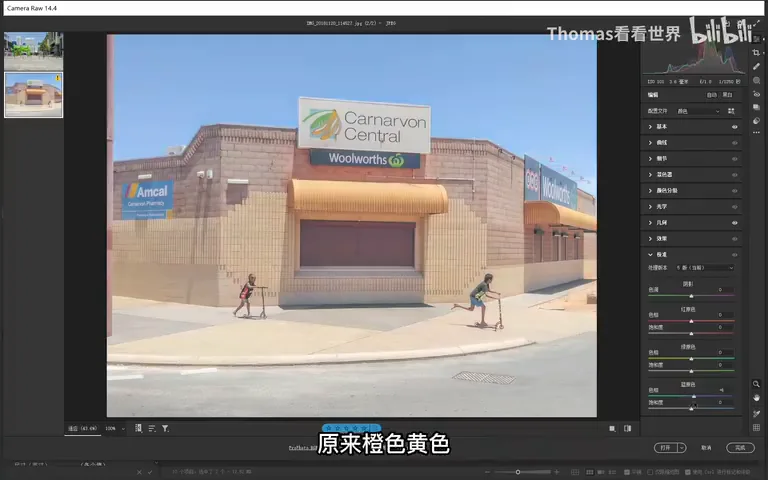
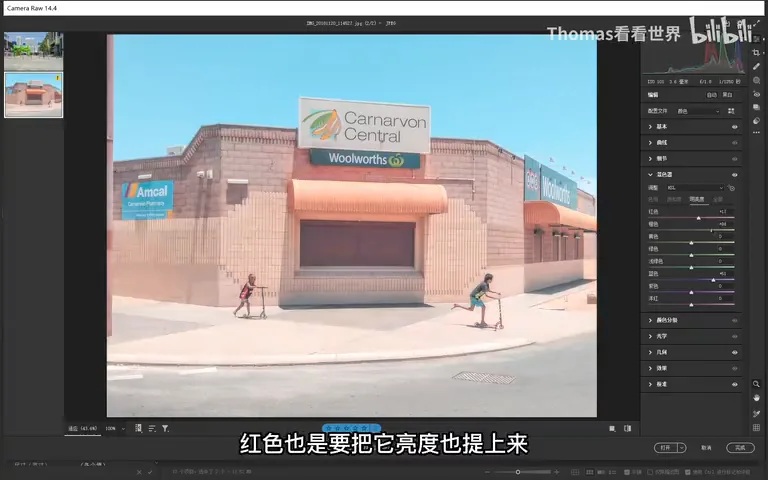
Then slide the blue primary straight left: the orange and yellow areas shift into pleasing pinks while the sky's blue leans cyan (at 4:12 in the video). Back in the mixer for the finish — the blue's luminance shouldn't sit too low, raise the orange and red luminances too, then boost overall saturation a touch, and the cartoon feel lands (at 4:28 in the video).
05 A Second Drill and the Four-Step Universal Workflow
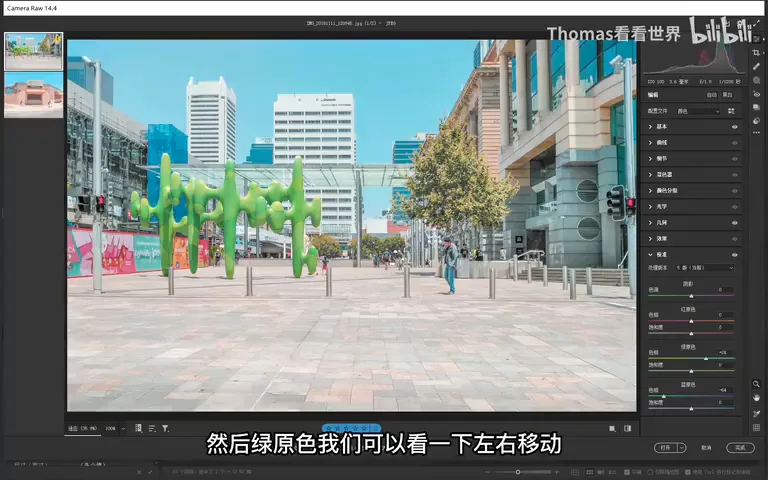
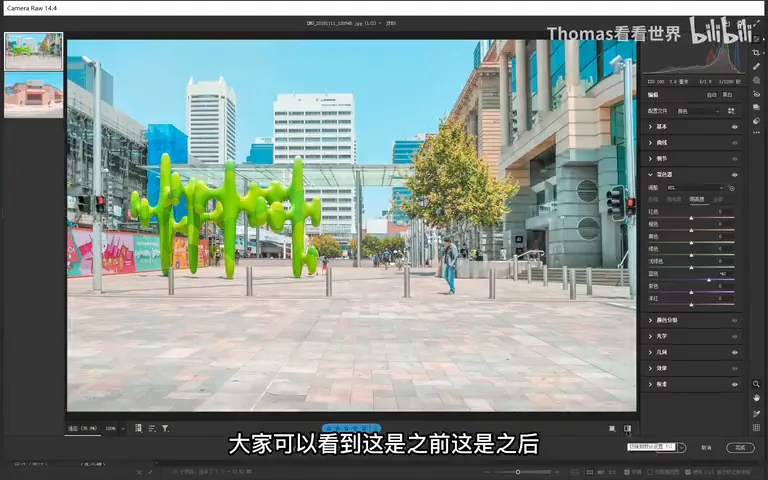
The final drill photo has too many colors and looks messy. The routine holds: lift shadows and whites for brightness first, then in the Calibration panel slide blue left, test green both ways and settle slightly left, and take red left too — three moves pull the whole palette together (at 4:56 in the video). One over-loud red goes back toward orange via HSL; green leans a bit greener, magenta toward red; finish by boosting saturation and slightly raising the blue's saturation and luminance — a unified cartoon-color template complete (at 5:22-5:40 in the video).
After the before-and-after, distill everything into a universal workflow: step one, set the basic warm-cool direction with temperature and tint in the Basic panel; step two, unify colors and cast the overall tone with the Calibration primaries; step three, fine-tune each color locally in the HSL mixer; step four, finish with radial and graduated filters. The workflow serves cityscapes equally well by day and by night (at 5:50-6:14 in the video).
1. The Primaries tool suits stylized grading of man-made cityscape colors; in nature, generally touch only the blue primary; 2. The universal four steps: temperature/tint sets the baseline → Calibration primaries unify the palette → HSL mixer fine-tunes each color → radial/graduated filters finish locally; 3. Remember two moves: blue primary left turns skies cyan and oranges red; green primary right conjures pink; 4. For teal-orange nights, the blue primary alone nearly does it — a touch of red primary right completes the classic teal-blue versus red-orange contrast.