Photography Tutorial · 2021-11-14
Epic Upgrade for Camera Raw/Lightroom: Layers and Masks — No More Photoshop?
Thomas Chu Photo
Camera Raw/Lightroom's local adjustment capabilities just got a major power-up!
In a recent Camera Raw update, the Masking feature (with layers built in) merged the former Radial/Graduated/Brush local adjustment tools, added AI-powered Select Sky/Select Subject, and introduced new intersect/add/subtract modes for selections. It's genuinely a joy to use.
Perhaps most uncomplicated edits will never need Photoshop again?
Video Tutorial
▶ Watch the video tutorial on Bilibili
This is the fully illustrated companion to the video above. In this update, Camera Raw and Lightroom fold all the old local tools — radial filter, graduated filter, brush — into a brand-new Masking system, adding AI-powered Select Sky and Select Subject plus add, subtract and intersect modes for selections. Thomas first weighs PS against ACR/LR, then walks from the familiar old workflow to a complete hands-on of the new features, transcribed below in video order.
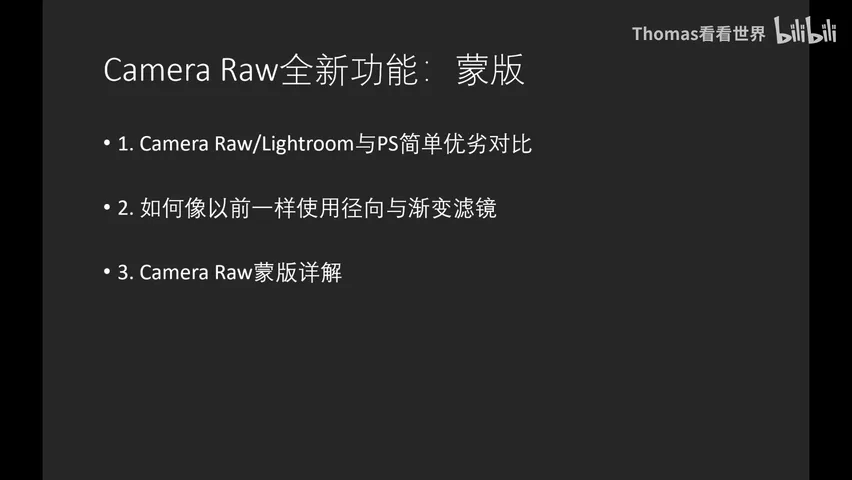
The video opens with an outline slide (at 0:05) that splits neatly into three parts: a PS versus Camera Raw/Lightroom comparison, the familiar radial and graduated filters in their new home, and a deep dive into the new Masking system.
01 First Principles: Select Locally, Then Apply Effects
Post-processing has many tools but only two core operations: selecting locally, and applying effects. That lens clarifies Photoshop's three traditional advantages: first, far more precise selections — channels, Quick Selection, Select and Mask, the Pen tool; second, richer effects — adjustment layers of every kind, plus third-party plugins and filters like the Nik Collection; third, layers, masks and channels form a great system for organizing every editing step.
Photoshop's weakness is equally obvious: it's complicated. Camera Raw is far simpler, and unlike PS it doesn't carry design and illustration baggage — it is built purely for photo editing, so almost everything in it is something a photographer actually needs. It's also convenient for batch processing, and the whole workflow is non-destructive and endlessly adjustable.
The new Masking feature essentially brings Photoshop's layers-and-masks concept into Camera Raw. It does make the software more complicated — the main complaint of those who find it less friendly than before — but what it buys in return is a quantum leap in local adjustment power. The hands-on demo below proves it.
02 The Old Workflow Survives: Every Local Tool Lives in Masking
Open the Masking panel and all the familiar tools are there: Brush, Linear Gradient and Radial Gradient, none missing. Color Range and Luminance Range, formerly buried as sub-options of the gradient tools, are now standalone entries; and at the top of the list sit two new AI options — Select Subject and Select Sky (at 2:13 in the video).
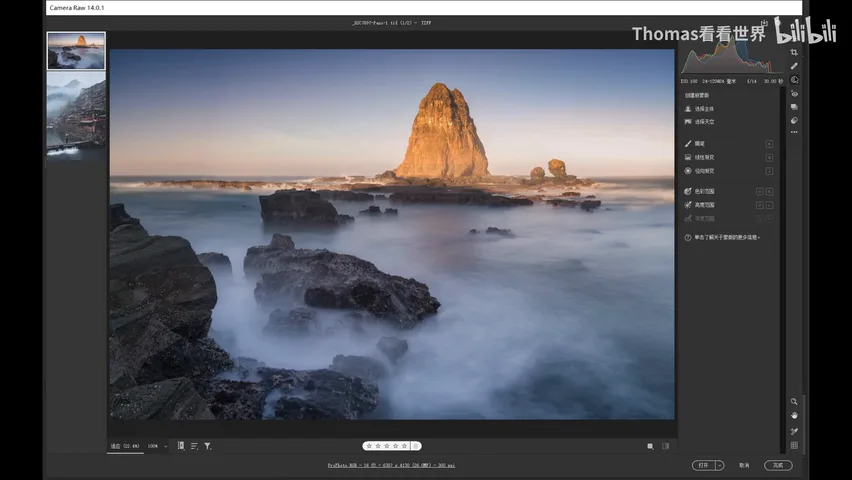
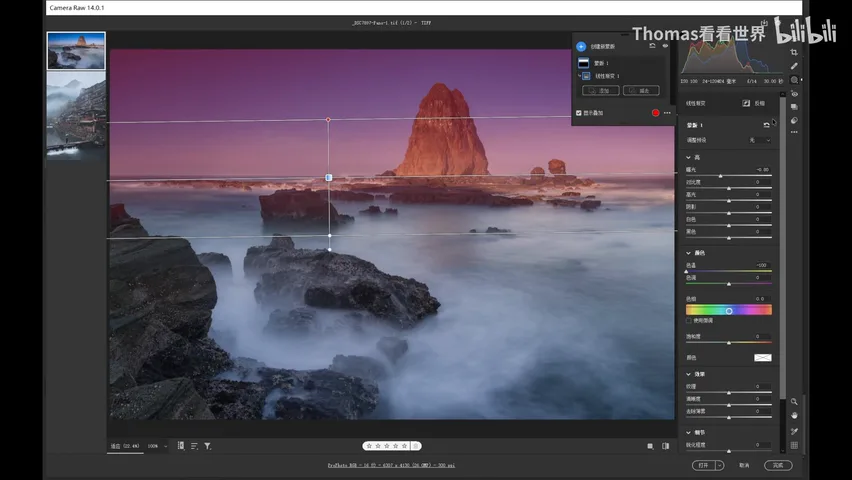
Working exactly as before is fine: to darken the sky, create a new Linear Gradient and drag it down from the top. The only new rule to remember — every mask carries its own independent set of parameters, so separate adjustments need separate masks; after darkening the sky, any additional local effect means creating yet another new mask (at 2:43-3:00 in the video).
03 AI Power: One-Click Sky and Subject Selections
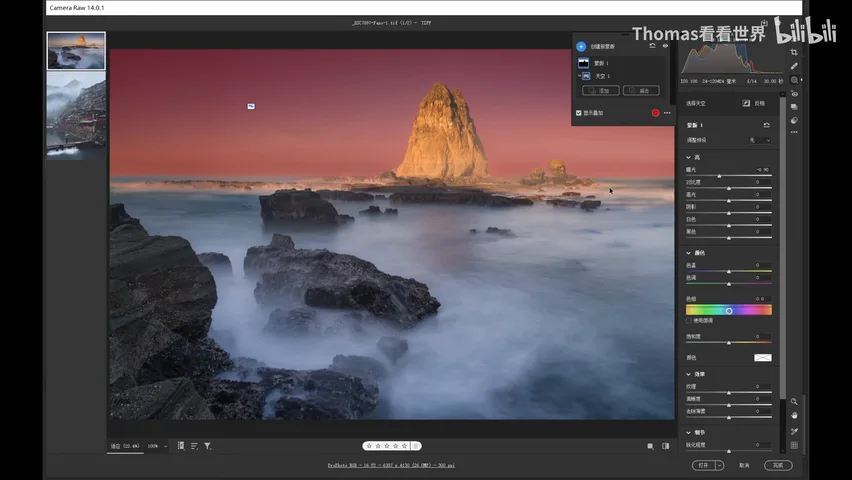
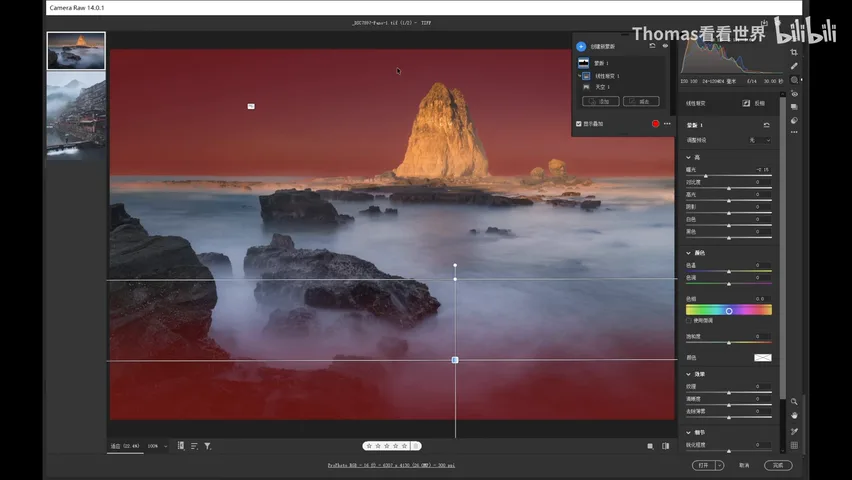
The two most visible additions are the AI creation paths: Select Subject and Select Sky. Take Select Sky: a gradient used to miss — especially where rocks intersect the horizon, the gradient darkened the rocks along with the sky. Now one click on Select Sky and the AI outlines the entire sky. Tick Show Overlay (usually red, same idea as the old overlay option) to inspect the selection edges — this sky is beautifully cut out, and darkening it lands precisely where it should (at 3:21-4:00 in the video).
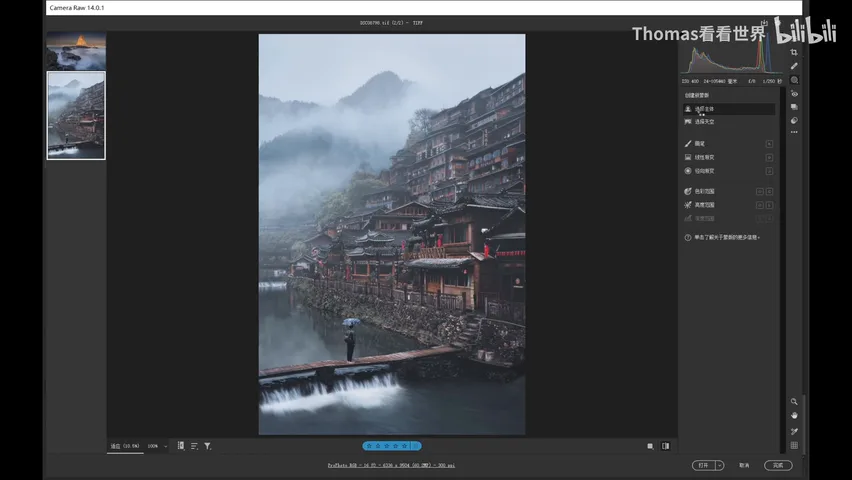
Select Subject targets photos with people or obvious subjects. In the riverside village shot below — a walker with an umbrella on the bridge — cleanly selecting the person used to mean a trip to Photoshop for a proper cutout; now it's one click on Select Subject inside Camera Raw, and the edges come out excellent (at 4:02-4:20 in the video).
04 A Mask Is a Container: Add and Subtract Selections
The reason masks are organized this way: a single mask can hold multiple selections that add, subtract or intersect — that's the whole point of masks. Say you already have a sky selection and want the sea darkened too: click Add and draw a Linear Gradient; the mask now contains both sky and sea, and a -2.5 exposure adjustment acts on both at once (at 4:41-5:12 in the video).
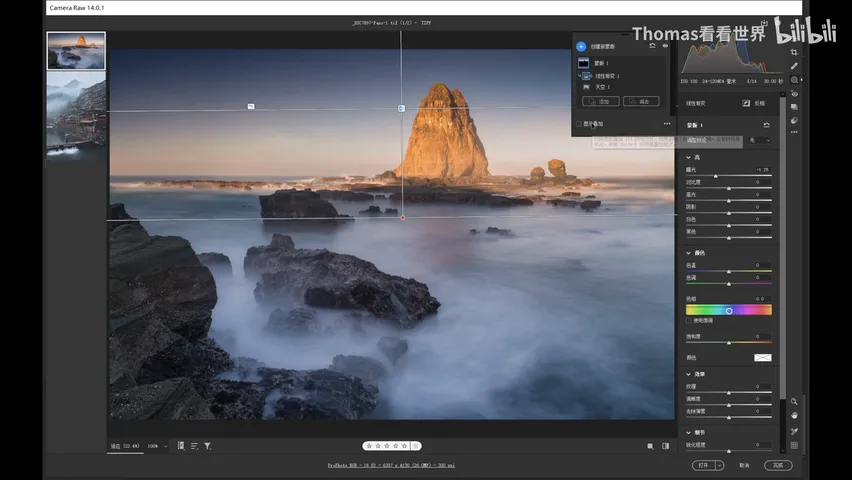
Subtracting is just as useful. Darkening the whole sky selection at once looks harsh — a real sky never goes uniformly black. So use Subtract and remove a Linear Gradient from the selection: the darkening now strengthens gradually from bottom to top, leaving the sky near the sea almost untouched (at 5:17-5:56 in the video).
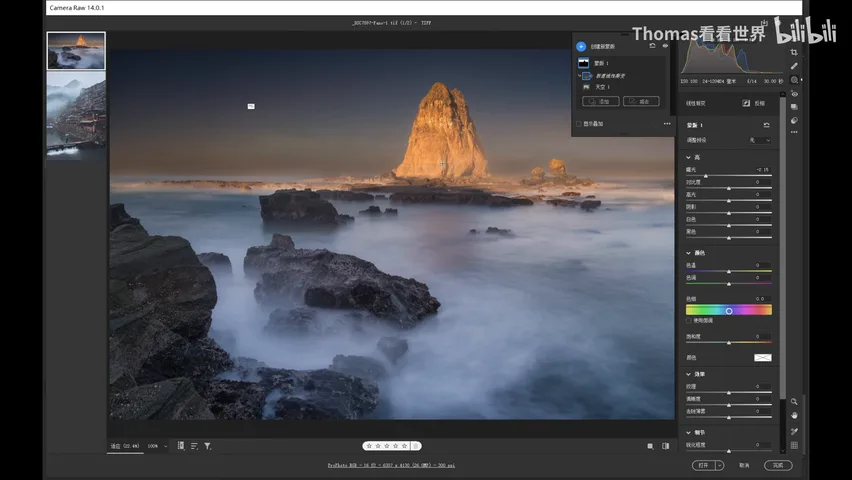
Compare with and without that gradient: with the sky selection alone the darkening looks distinctly unnatural; after subtracting the gradient it gains a smooth weak-to-strong transition (at 6:15-6:35 in the video). The standard recipe for darkening skies is now: Select Sky first, then shape the effect with a gradient.
05 Intersect Mode: Three Sieves Isolate the Reef's Shadows
One reminder: each mask owns its parameters, and the selections inside a mask merge into the mask's final selection sharing one set of adjustments — so a different effect means a new mask. The goal of this exercise: darken the shadows of the central sea stack a touch and cool them down (at 6:36-7:18 in the video).
Step one: create a mask and hit Select Subject — the AI nails the reef. After darkening and cooling it, the problem shows up: the entire reef went cold, when only the shadows should have (at 7:20-7:41 in the video).
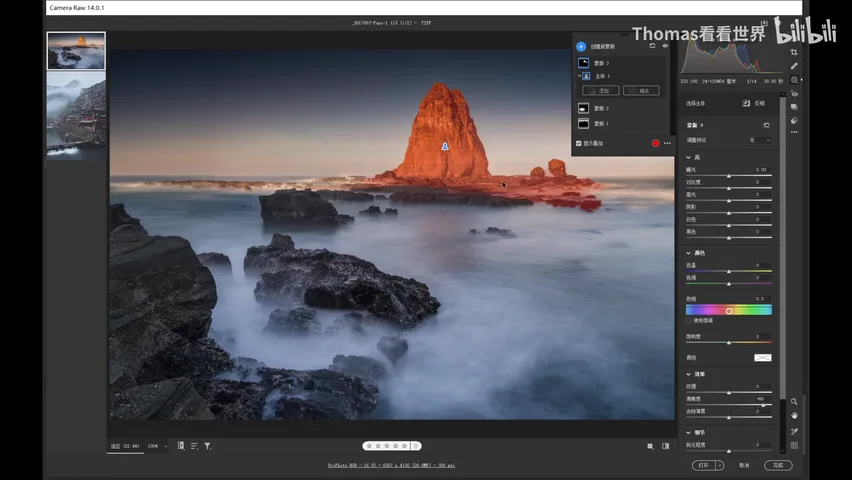
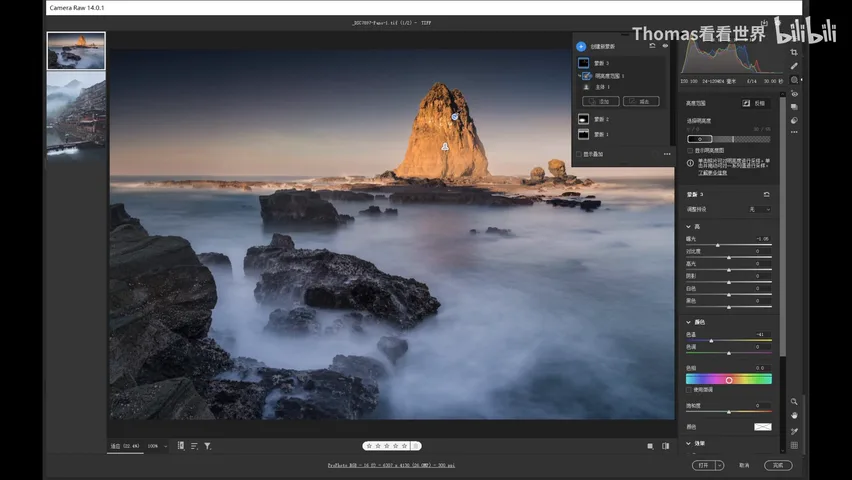
Step two: intersect (multiply). Not Add, not Subtract — the component menu's Intersect with Mask. Intersecting means the new selection is AND-ed with everything before it, sieving layer by layer. First intersect a Luminance Range keeping only the shadows, with feather and range adjustable; the effect now touches only the reef's dark areas, defined jointly by the subject selection and the luminance selection (at 7:42-8:27 in the video).
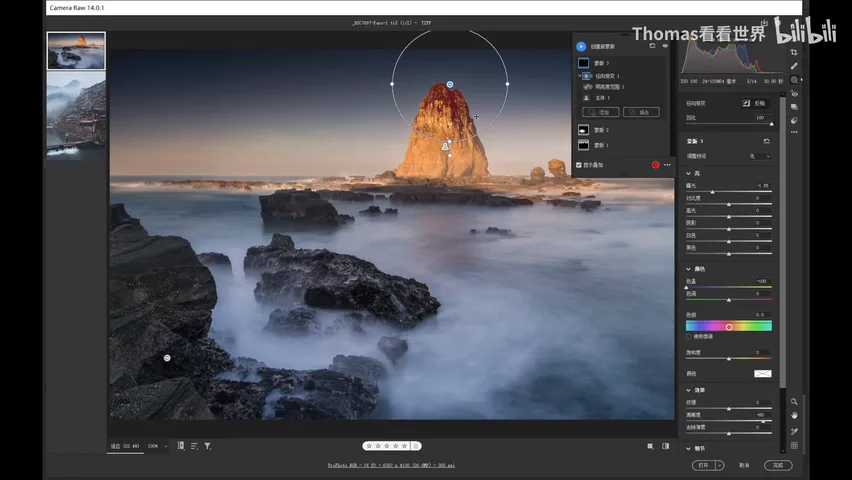
Step three, one more sieve: only the part of the reef nearest the horizon deserves the dark, cool treatment, so intersect a Radial Gradient covering just the stack's upper section with a wide feather. The negative exposure and cooler temperature now land only on subject ∩ shadows ∩ upper reef — selections this precise are what the new masking system is for (at 8:29-9:58 in the video).
1. Post-processing boils down to selecting locally and applying effects; PS wins on precise selections, rich effects and layer/mask organization, while ACR/LR win on simplicity, photo focus, batch work and non-destructive editing; 2. The new masking system houses every local tool, the old workflow still works, and each mask keeps its own parameters; 3. AI Select Sky and Select Subject generate precise selections in one click, with Show Overlay to verify anytime; 4. A mask is a container: selections can add and subtract, and the component menu offers Intersect (multiply) — subject ∩ luminance range ∩ radial gradient sieves out targets as specific as a reef's shadows.