Photography Tutorial · 2020-03-15
Exposure Blending with Luminosity Masks: The Right Way
Thomas Chu Photo
Luminosity masks are an important post-processing tool, but used incorrectly they can actually make a photo look worse.
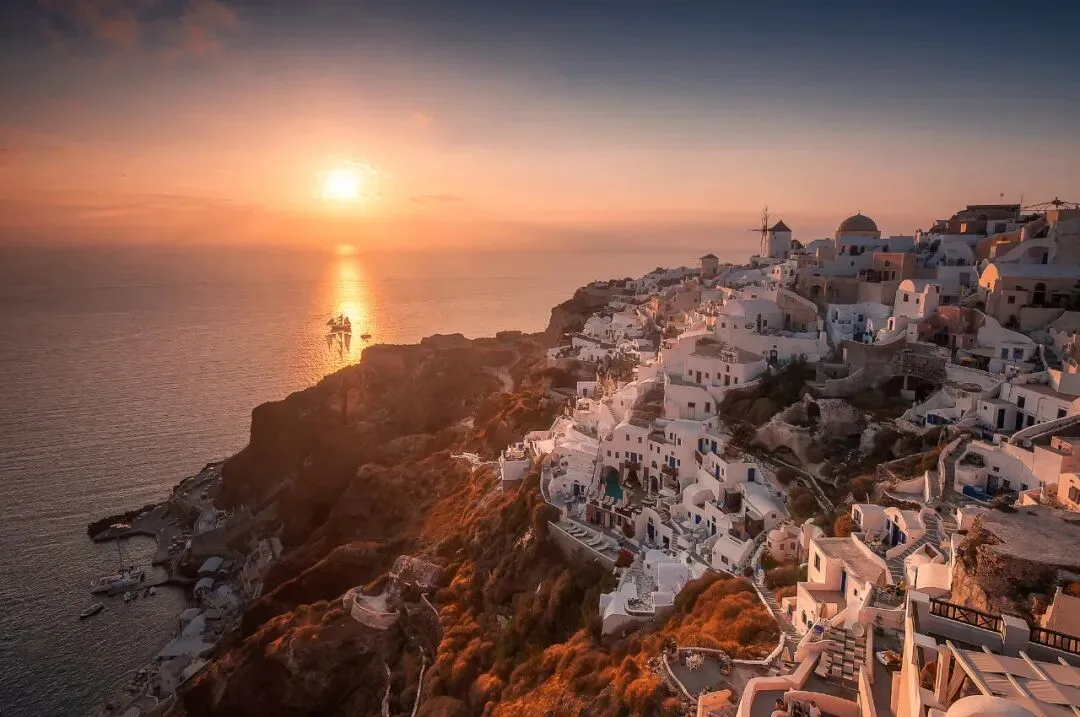
In today's video tutorial, Thomas shares a method for applying luminosity masks locally — perfect for exposure blending and selective color work.
Video Tutorial
▶ Watch the video tutorial on Bilibili
This is the fully illustrated companion to the video above. In the previous episode Thomas generated the luminosity channels (Lights 1-7, Darks 1-7) with a single action; this episode answers the more important question — how to turn those channels into masks for exposure blending. In just 7 minutes it calls out the mistake most people make: applying a luminosity mask globally with no local restriction. The five steps below follow the video's order, with keyframe screenshots — skim here for the framework, then dive into the video for the details.
Start with the result: a Santorini sunset in Greece, blended from two bracketed exposures — detail in the sun, reflection on the sea, and clean shadows in the clifftop village. The whole tutorial builds toward this one image, and the key is a single group mask.
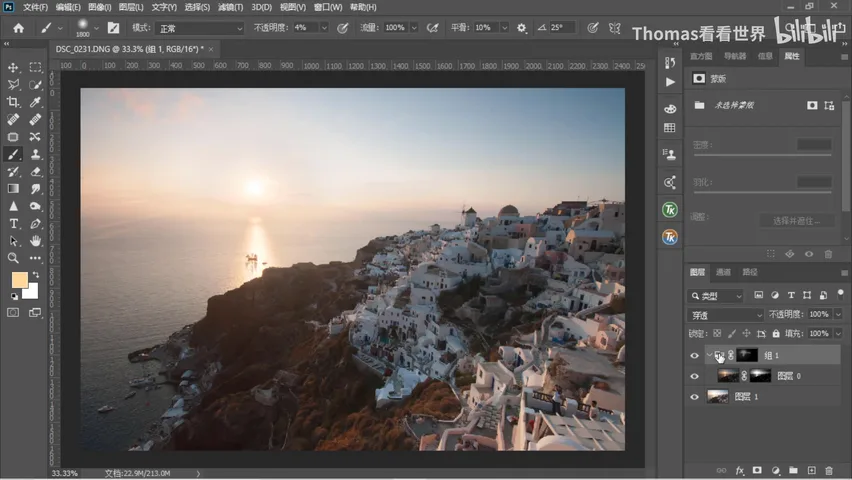
01 The Source: Santorini Brackets
The case is a bracketed sunset set from Santorini, Greece (at 1:13 in the video). The first frame is exposed for the highlights: slightly underexposed, so apart from the sun itself the clouds and the sea reflection are not blown. The second is exposed for the shadows: the darks are clean and nearly noise-free, but the sky and sea reflection are clipped. One frame protects highlights, the other protects shadows — standard material for exposure blending.
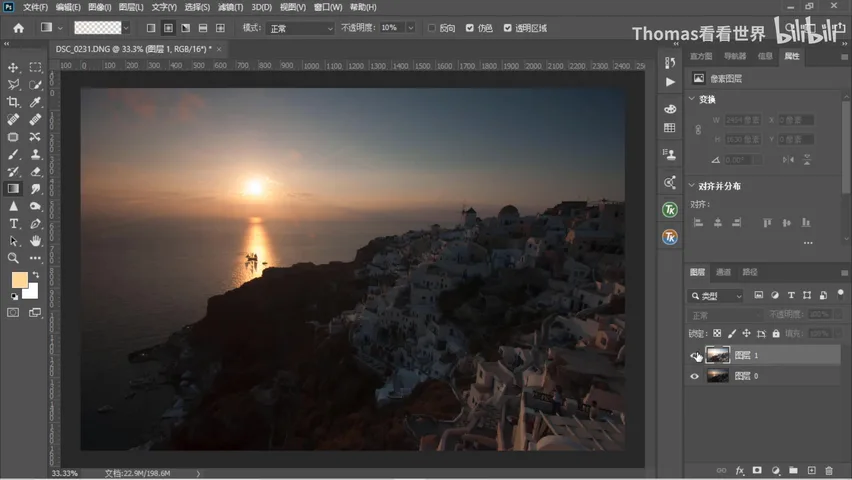
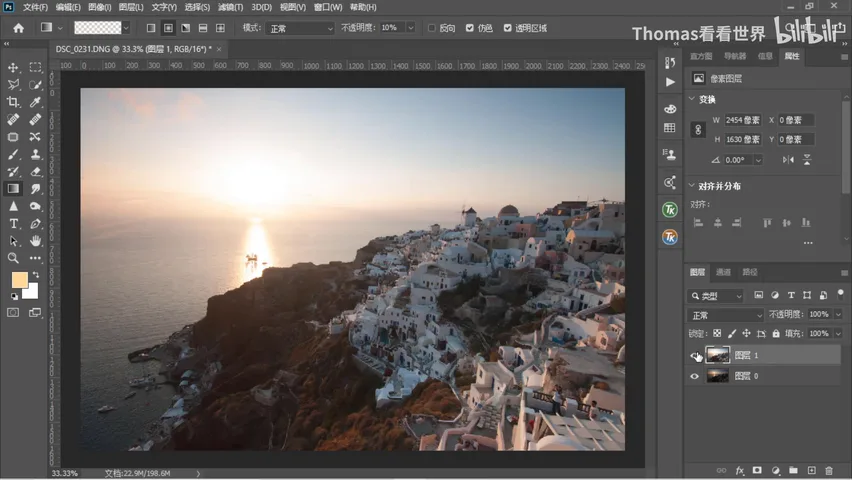
You could simply feed both frames to an HDR merge, but Thomas demonstrates the manual route with luminosity masks — far more control, and the real subject of this episode (at 1:50 in the video).
02 Picking the Channel That Isolates the Clipped Area
Step one with luminosity masks is finding the right brightness channel. Run the channel-generating action on the brightest (underexposed) layer to get Lights 1-7, Darks 1-7 and the rest (action panel demonstrated at 0:32 in the video).
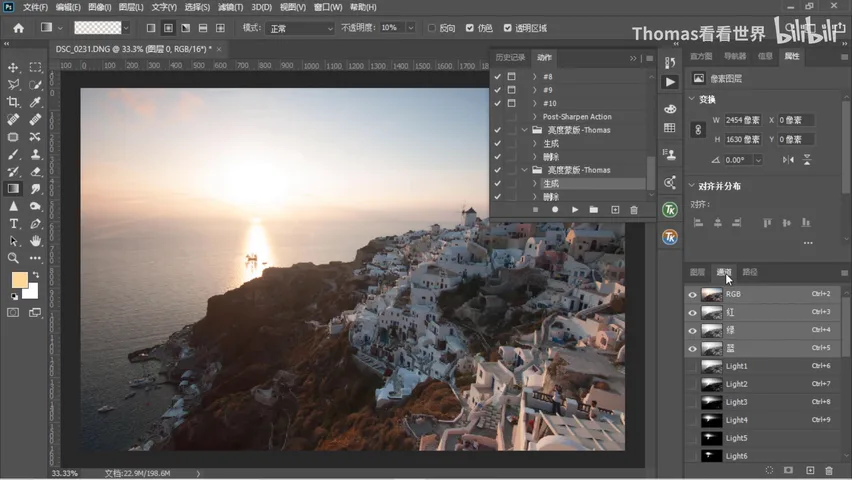
Three criteria for picking a channel: it should cover the clipped area as fully as possible, include as much of the unclipped area as possible, and transition smoothly (at 2:11 in the video). Inspecting the panel, both Lights 2 and Lights 3 isolate the blown highlights well; Thomas goes with Lights 3.
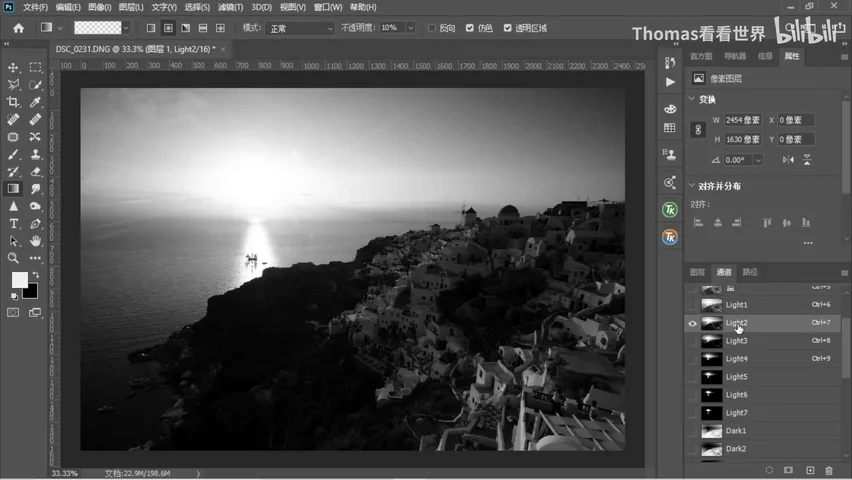
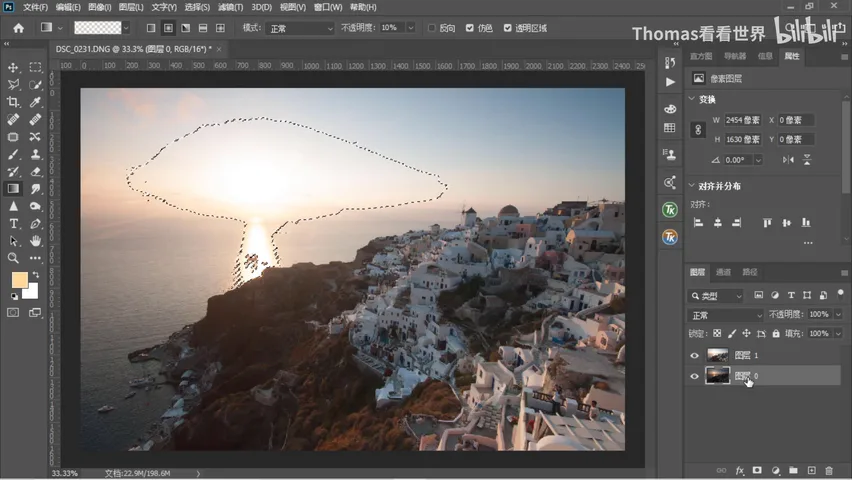
The conversion is one shortcut: Ctrl-click the Lights 3 channel and it becomes a selection — the marching ants tracing the bright sky and sea areas (at 2:37 in the video).
03 The Wrong Way: One Mask Across the Whole Frame
Next, drag the shadow-exposed frame (the brighter, detail-rich one) to the top of the stack, select it, and click Add Layer Mask — the selection converts into a mask automatically. The sky and sea are no longer blown. But stopping here is exactly the wrong way to use a luminosity mask (at 2:59 in the video).
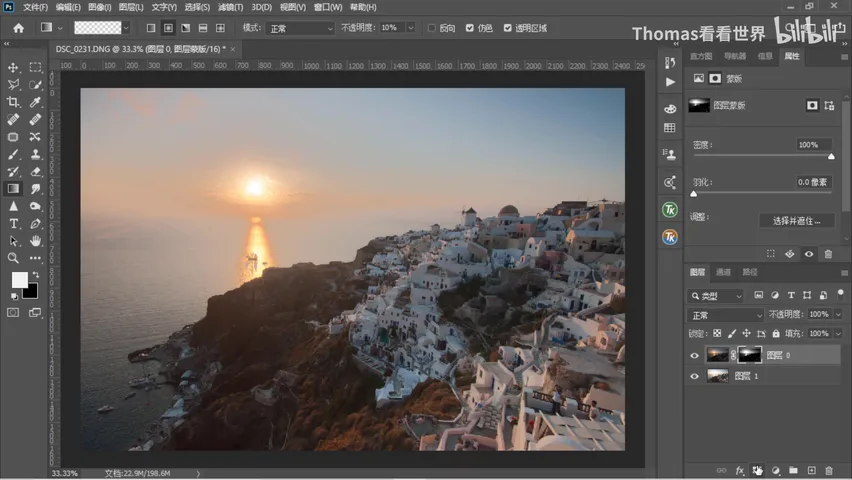
Two problems follow (at 3:15 in the video). First, the sun blends unnaturally: a bright frame forced into an underexposed one is bound to show a harsh brightness seam. Second, areas that were only somewhat bright — not clipped at all, their blue reflective highlights pleasant and full of dimension — get 'repaired' along with everything else. Fixing what didn't need fixing is the price of letting the mask run unchecked.
04 The Right Way: Groups and a Restricting Group Mask
The fix is to restrict the luminosity mask locally: let it act only on the sun and the blown sea, and only as a mild exposure correction. Thomas's method is grouping: create a group, drag the luminosity-masked layer into it, then add a mask to the group itself (at 4:09 in the video).
One sentence explains a group mask: a group is a set of layers, and its mask restricts everything inside it one level further (at 4:21 in the video). Fully black, the group's effect drops to zero with no impact on the image; invert it with Ctrl+I to white and the group's effect applies across the frame. Mask on mask stacks, and the working area becomes very narrow.
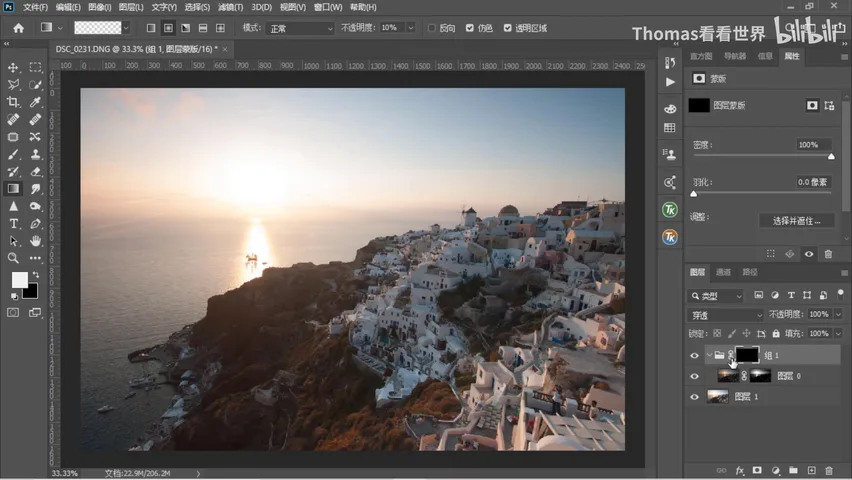
In practice: pick a white brush, drop the opacity to around 10%, and slowly paint over the truly blown areas — the sun and the sea reflection — on the group mask (at 5:06 in the video); for the surroundings lower the opacity further to 4% and use a large soft brush to ease the transition (at 5:37 in the video).
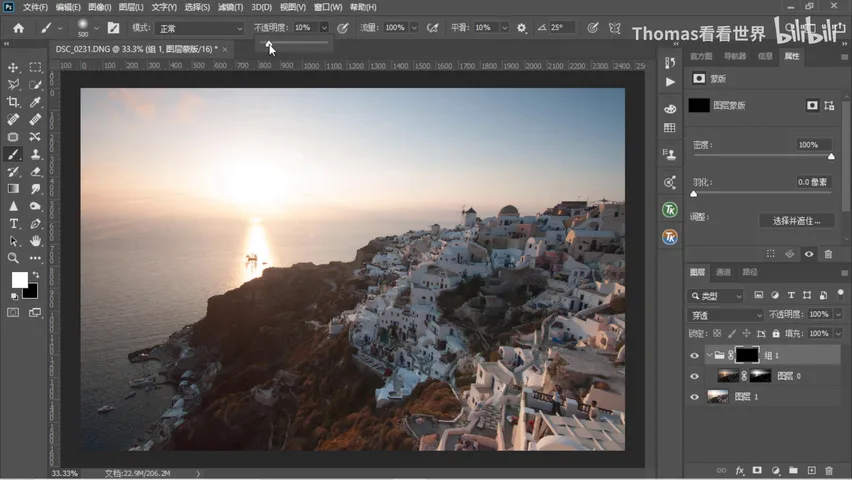
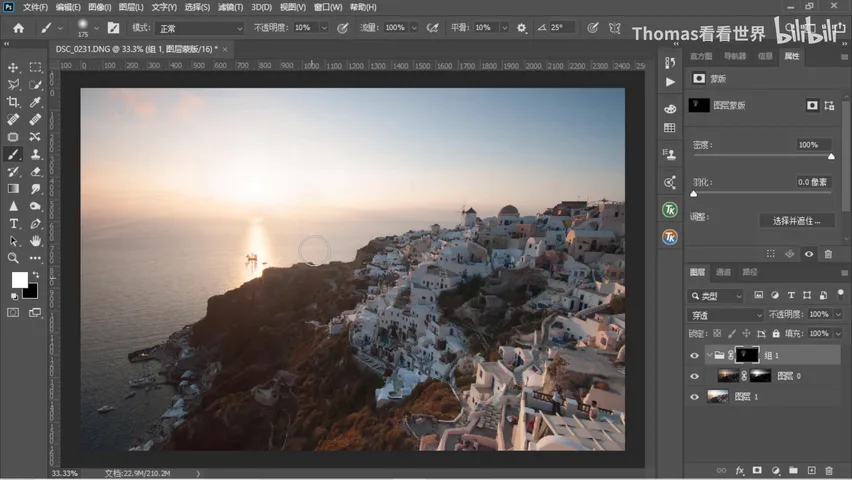
05 Three Layers of Control: Why the Blend Looks Natural
At the end of the video Thomas toggles both masks off and on, explaining what each contributes (at 5:56 in the video). The underexposed frame keeps all the sky detail; the luminosity mask makes sure it shows only where it is truly bright — only the clipped areas get selected; the group mask restricts further, protecting regions that were never blown yet happened to fall inside the luminosity selection.
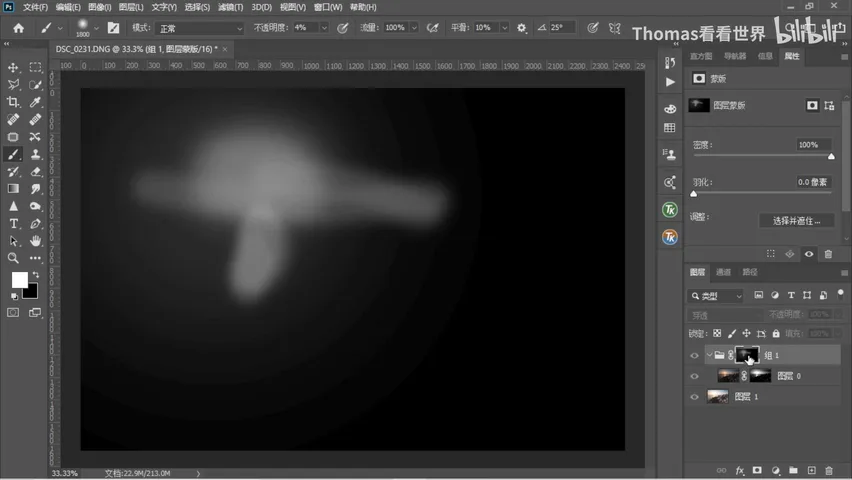
The third layer of control is the low-opacity brush: painting in gradually produces a natural blend instead of the harsh brightness transition you get without this setup. Luminosity mask picks the range, group mask tightens the boundary, low-opacity brush smooths the transition — that is the best way to use luminosity masks (at 6:44 in the video).
1. For exposure blending, generate luminosity channels from the brightest frame and pick one by three criteria — covers the clipped area, keeps the unclipped area, transitions smoothly (Lights 3 here); 2. Ctrl-click the channel into a selection, then into a layer mask — but never apply it globally: the sun seams harshly and near-highlight detail gets wrongly 'fixed'; 3. The right way is a group with its own mask, painting back only the sun and blown sea with a 10%-4% opacity white brush; 4. Luminosity mask for range, group mask for boundary, low-opacity brush for transition — three layers of control make the blend natural.
Practice files and luminosity mask action download:
Baidu Cloud link: https://pan.baidu.com/s/1V6knr5YfICsiOr37nRbk6g — extraction code: es84
Or Tencent Weiyun link: https://share.weiyun.com/51HPn0e