Photography Tutorial · 2021-02-07
Core Local Editing: Precise Object Adjustments with Luminosity Masks
Thomas Chu Photo
Luminosity masks are a luminance-based local selection tool.
If Ansel Adams' Zone System guided photographers at capture time, then luminosity masks give photographers — landscape shooters especially — an essential tool for local adjustments in post.
Today is episode 9 of the luminosity mask series: how to precisely select and adjust individual objects with luminosity masks.
Video Tutorial
▶ Watch the video tutorial on Bilibili
This is the fully illustrated companion to the video above — episode 9 of the luminosity mask series. Where earlier episodes covered theory and exposure blending, this one tackles a more everyday task: precisely selecting a single object in the frame with luminosity channels. Thomas runs two demos on one Alpine valley photo — brightening the waterfall's flow, then adding a light render to the treetops. From channel selection to narrowing the mask and the double restriction of a group mask, it is a complete, repeatable workflow.
Start with the result: the waterfall is brighter, the treetops glow with translucency, while the cliff, the shadows and the sky are barely touched. That is what luminosity-mask selection can do — unpacked step by step below.
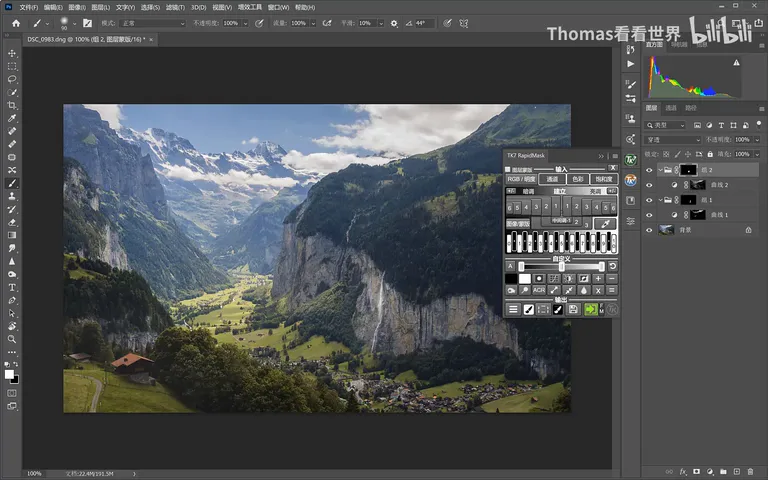
01 One Photo, Two Local Tasks
The case is a photo of the Lauterbrunnen valley in Switzerland, given two tasks: first, brighten the waterfall's flow — which requires selecting the fall itself precisely; second, render the highlights of the forest for a more translucent, luminous feel (at 0:13 in the video). Both operations depend on luminosity masks for local selection.
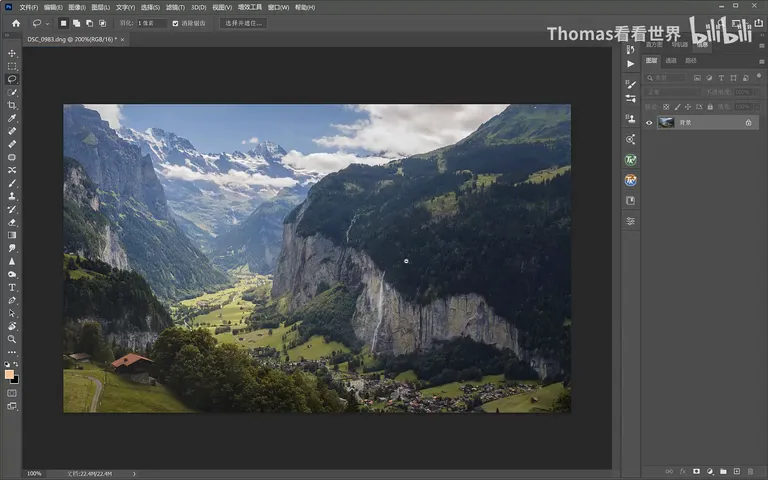
02 Generate Channels, Pick the Highest Contrast
Skipping the basics, Thomas runs his Photoshop luminosity-mask action: load it into the Actions panel, select the generator, hit play — and the Channels panel fills with a full set: Lights 1-4, Darks 1-4 and Midtones 1-6 (at 1:32 in the video; the action download is linked in the comments).
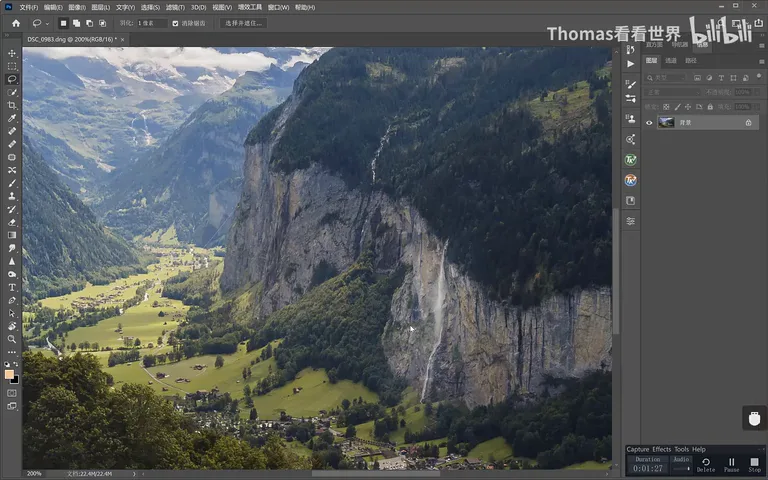
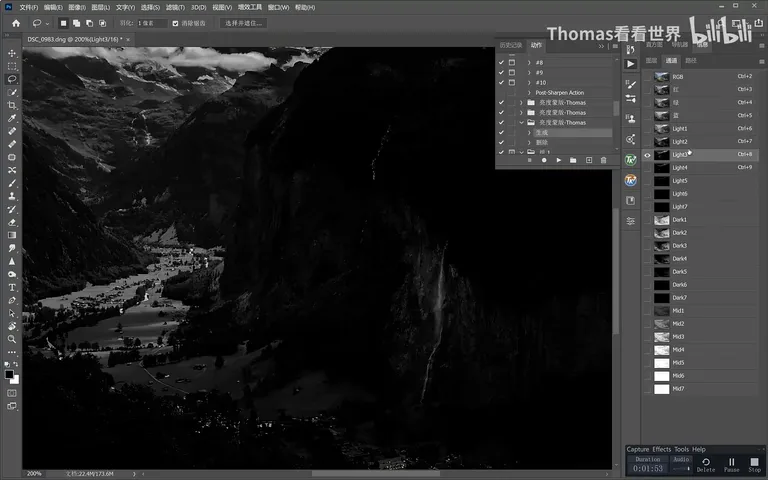
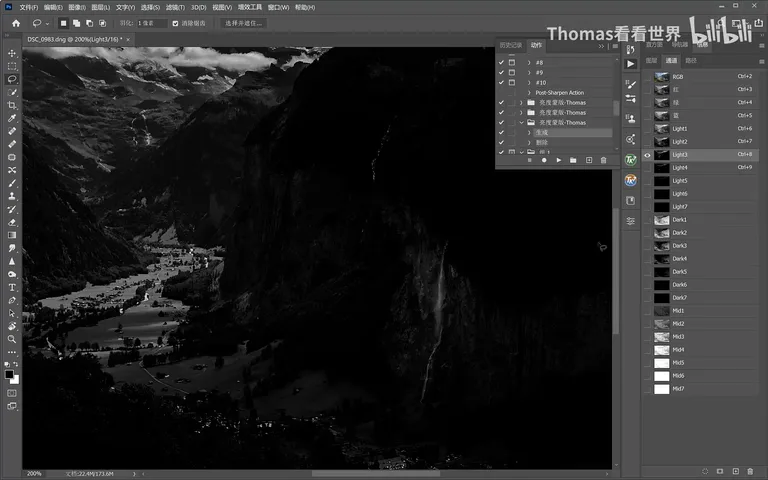
What follows is simple: pick the channel where the target object reads bright white while its surroundings read dark — the one with maximum contrast (at 1:48 in the video). For the waterfall, Lights 1 fails: the fall is bright, but so is the cliff around it, and the two blend together (at 2:07); Lights 4 overshoots, the fall turning too dark to see (at 2:18); Lights 2 or 3 work, and Thomas settles on Lights 3.
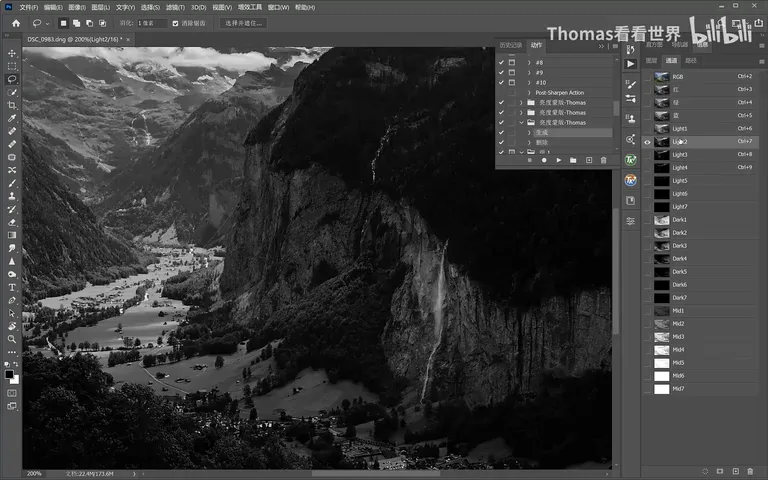
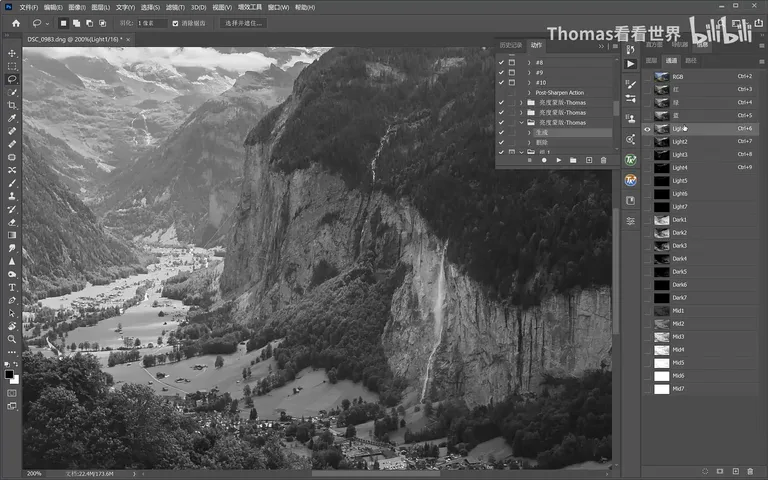
Ctrl-click the Lights 3 channel to load it as a selection (at 2:30 in the video).
03 Brighten with Curves, Then Tighten the Mask
With the selection active, add a Curves adjustment layer and pull the curve up — the brightening lands almost exclusively on the waterfall; the Lights 3 channel can be hidden again (at 2:34 in the video). The cliff may still catch a faint lift, but it is a naturally feathered transition and usually good enough.
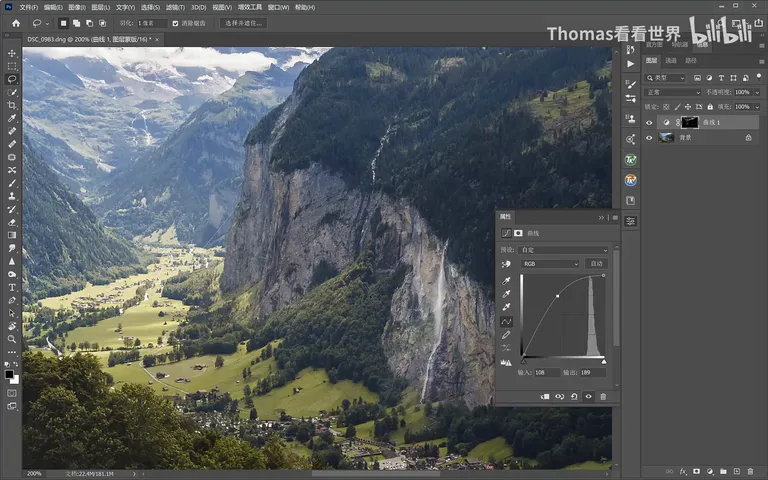
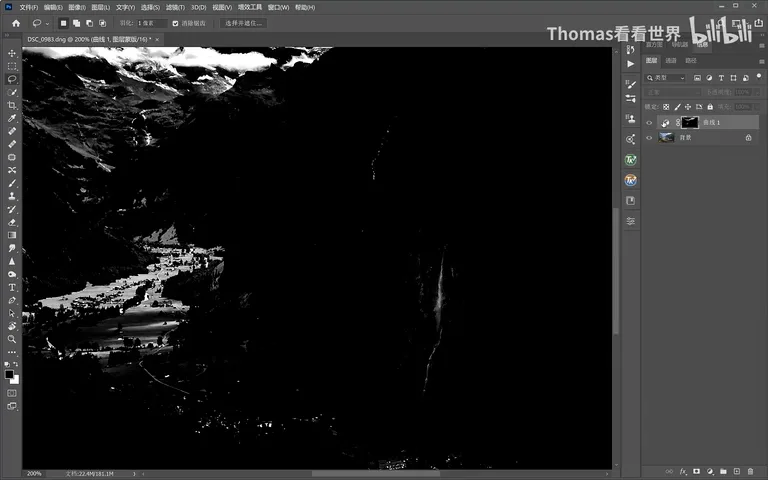
To exclude the cliff entirely, tighten the mask further: Alt-click the mask thumbnail to view it in black and white, then drag the sliders in the Properties panel's Masks — Adjust Edge to raise contrast — the goal being the waterfall growing brighter while its surroundings sink to black (at 3:02 in the video). When the mask shows nothing but the white fall on pitch black, the brightening acts on the water alone.
04 Double Restriction: Luminosity Mask Plus Group Mask
But a luminosity mask only knows brightness: its selection covers the waterfall plus every other bright area, sky included (at 3:40 in the video). So add a second restriction — create a group, drag the Curves layer into it, and give the group an empty black mask: either Alt-click the Add Layer Mask button, or add a white mask and invert with Ctrl+I (at 3:55 in the video). The Curves adjustment is now governed by both its luminosity mask and the group mask.
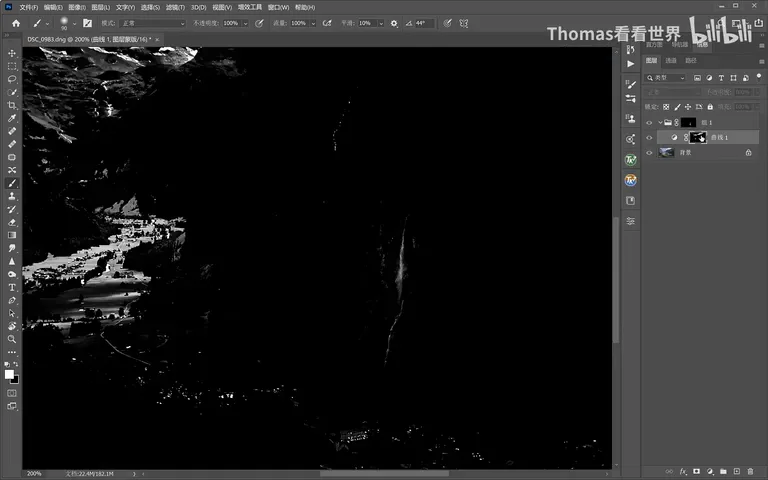
Then set white as the foreground color and lightly brush over the waterfall (at 4:22 in the video). Note how large Thomas paints — even over the neighboring cliffs — yet only the waterfall brightens, because the luminosity mask underneath does the gating. That is the most forgiving part of the whole method: brush loosely, and the luminosity mask keeps the edges honest.
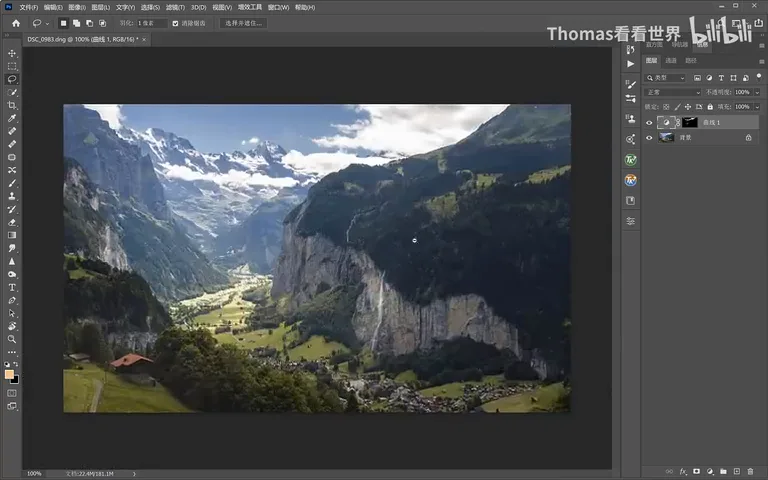
Neither mask works alone: without the luminosity mask, one brushstroke lights up the whole neighborhood; without the group, every bright region in the frame falls under the adjustment's control (at 4:37 in the video). Only the two together mean 'just the bright flowing water of the waterfall' — the core idea of precise local selection with luminosity masks.
05 Light Render: Treetop Glow with the TK Panel
The second task renders the forest highlights for a more translucent glow. The workflow is identical, but this time Thomas generates the mask with the TK Actions plugin: add a Curves adjustment layer (outside the group, since this acts on another region) and raise the whole curve first — no matter that the entire frame brightens, a new selection is about to replace it (at 5:41 in the video).
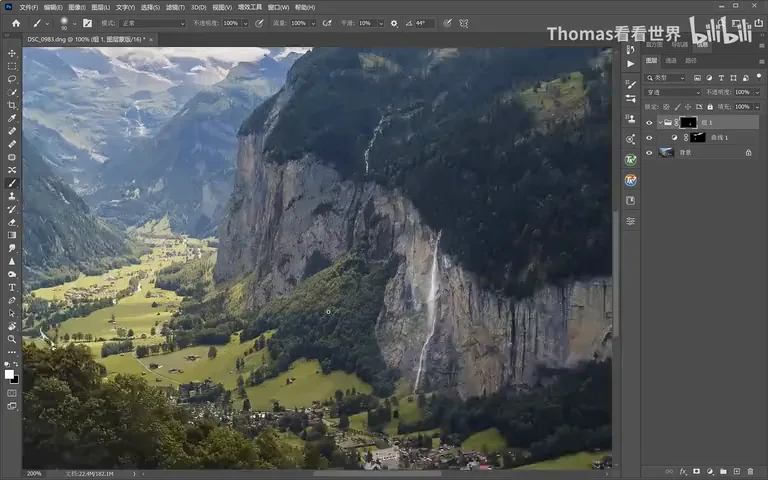
The plugin's convenience is mask-on-demand: click 1, 2, 3 and the panel previews each Lights mask directly — apply when satisfied (at 6:02 in the video). For the treetops, Lights 2 works best — highlights mostly in, surroundings pressed low; if it needs refining, a Levels adjustment on the mask will do. From here the routine repeats section 04 exactly: new group, empty mask, Ctrl+I to invert, then a white brush to lift the central forest a touch (at 6:30 in the video).
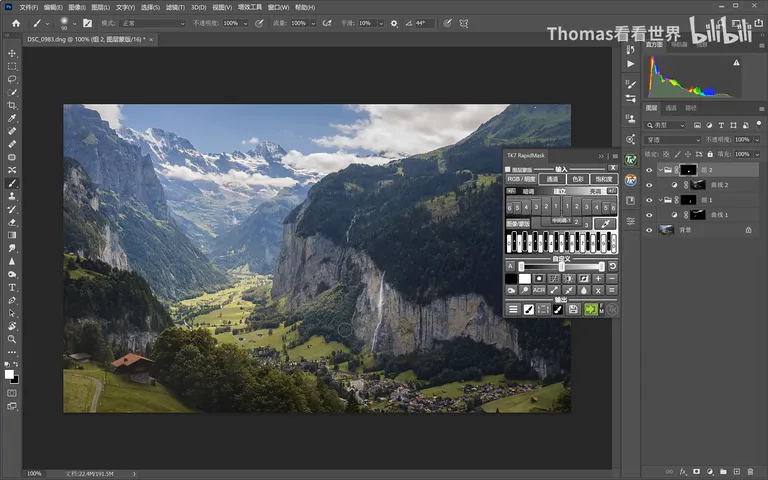
However sloppily you brush across the surrounding shadows, the luminosity mask keeps them dark — only the canopy highlights come alive, and the central forest suddenly glows (at 6:53 in the video). Reverse the setup and it fails both ways: without the group the whole frame brightens; without the luminosity mask the brushed patch looks garish and unnatural. A luminosity mask is a superb local-selection tool that makes light renders natural, comfortable and precise — but only when paired with groups and local masks to constrain it (at 7:05 in the video).
1. The rule for selecting an object: it should read bright white on a dark surround — pick the channel with maximum contrast (Lights 3 for the waterfall, Lights 2 for the treetops); 2. Ctrl-click the channel into a selection, brighten with Curves, and if precision still falls short, use Masks — Adjust Edge to raise contrast until the target whitens and its surroundings blacken; 3. A luminosity mask only knows brightness and will catch the sky — house the adjustment in a group with a black group mask, then brush boldly in white: however wide you paint, only the target brightness responds; 4. The TK Actions panel generates and previews masks at the click of a number — combined with groups and local masks, your light renders become natural and exact.
Download the custom luminosity mask action:
Link: https://pan.baidu.com/s/1pLUY8IC4pEOuJ3DWuTb4hA
Extraction code: kci3