Photography Tutorial · 2020-06-21
Precise Tonal Adjustments with Luminosity Masks
Thomas Chu Photo
Luminosity masks are a luminance-based local selection tool.
If Ansel Adams' Zone System guided photographers at capture time, then luminosity masks give photographers — landscape shooters especially — an essential tool for local adjustments in post.
Today is episode 8 of the luminosity mask series: how to precisely select and adjust local tones with luminosity masks.
Video Tutorial
▶ Watch the video tutorial on Bilibili
This is the fully illustrated companion to the video above — episode 8 of the luminosity mask series. After generation and exposure blending, this episode covers the technique's core: precise tonal control of a single image. Three live demos — an S-curve on the midtones, a filmic matte lift in the shadows, and a local brightening of sunlit rock and figure — walk the full pipeline from generating channels, to one-click masks in the TK panel, to a second round of restriction via a group mask.
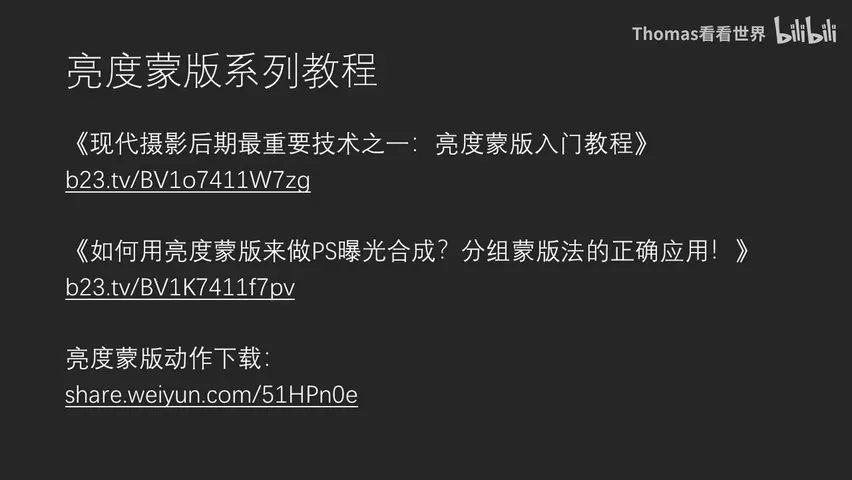
Start with the series map: this outline card from the top of the video links the previous episodes and the action download; the three demos below all use the same panoramic sunrise over a snowy fjord.
01 Where the Masks Come From: Actions and Plugins
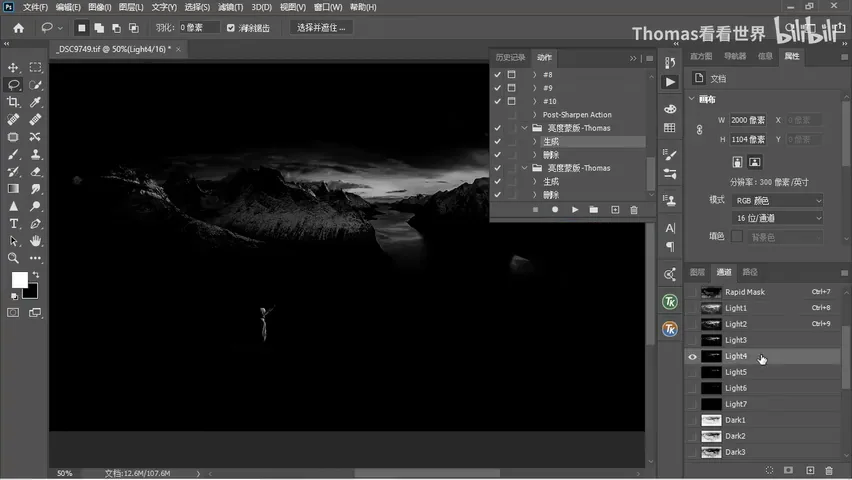
There are two mainstream ways to generate luminosity masks: actions and plugins. Thomas offers his own Photoshop action — install it, run the generator in the Actions panel, and the Channels panel fills with a full set (at 1:27 in the video): Lights 1-7 from broad bright areas down to only the very brightest, Darks 1-7 from faint shadows to the deepest blacks, and Midtones 1-7 in between.
If you prefer plugins, the Snowman panel and TK Actions are both sold legitimately on Taobao, and a Baidu search for 'luminosity mask plugin' turns up plenty of free options too (at 0:54 in the video). Thomas's point: they all do the same core job — generating the masks — so just pick the one you like.
02 Midtone S-Curve: Contrast Where It Belongs
The case is a panoramic sunrise over a snowy fjord. The intuitive way to add contrast and saturation is an S-curve — instant results, but the highlights and shadows take a heavy hit, and the whole photo suddenly turns harsh and over-contrasted (at 2:31 in the video).
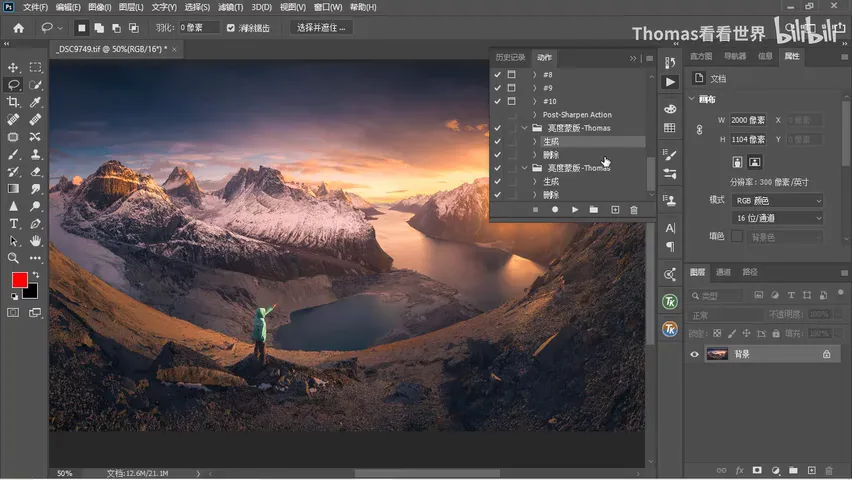
The fix is to restrict that curve with a midtone mask. Pick a fairly broad midtone such as MID2 in the Channels panel and Ctrl-click it into a selection; to move the selection onto a mask, fill it with black via Edit-Fill on the existing mask, then press Ctrl+I — the channel is white-on-black while the mask needs the inverted arrangement, and only after inverting do you hold a true midtone luminosity mask (at 3:13 in the video). With the mask in place the S-curve acts on the midtones alone: contrast and saturation rise while the image stays comfortable.
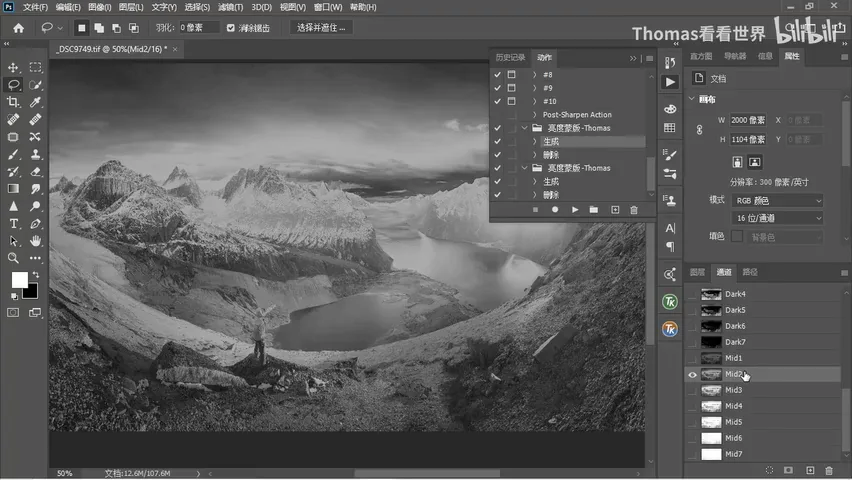
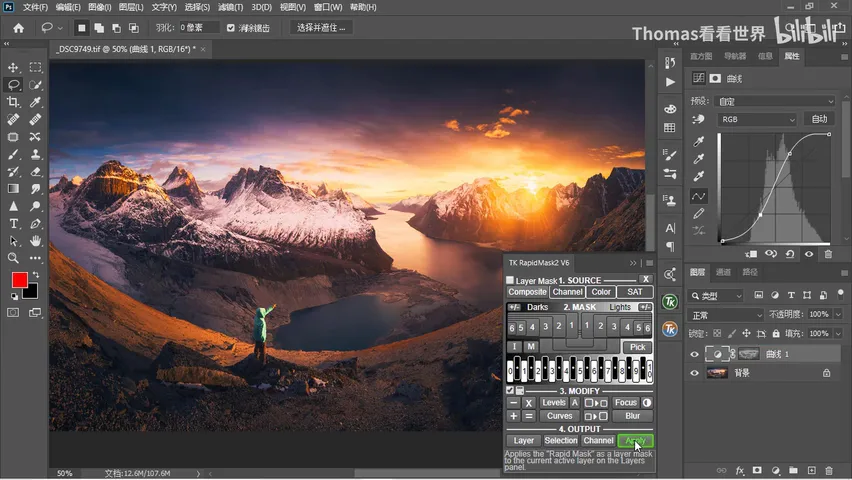
The TK Actions panel makes it even more direct: its header treats the horizontal axis as a histogram, and the middle block is the midtones. Drag a wildly exaggerated S-curve, click Midtones 2, hit Apply — the mask lands straight onto the Curves layer (at 4:30 in the video). Alt-click the mask off to compare: without it the contrast swing is brutal; with it, the lift concentrates in the midtones and the photo reads harmonious (at 4:55 in the video).
03 Shadow Air: The Precise Matte Curve
The second application is the beloved filmic matte: lift the shadows, the black point softens, the mood turns gentle. But a curve is pulled as a whole, and lifting shadows inevitably disturbs the highlights and midtones. The old trick is pinning the ends with anchor points — workable, hardly elegant (at 5:46 in the video).
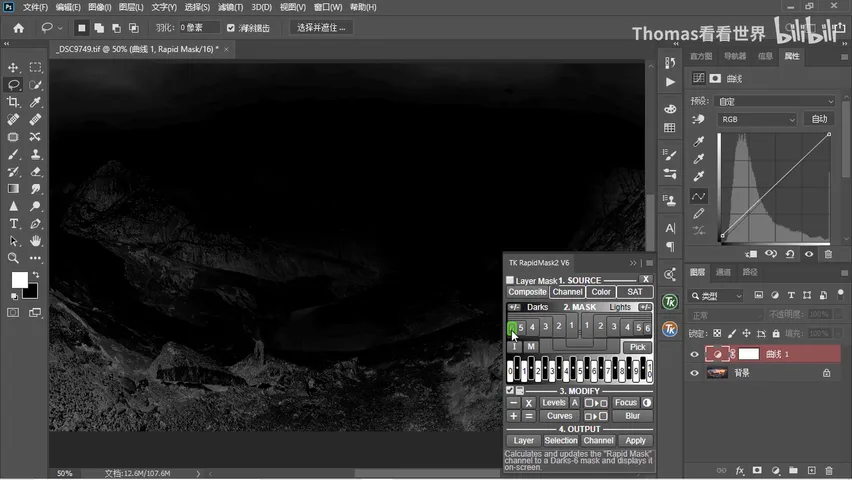
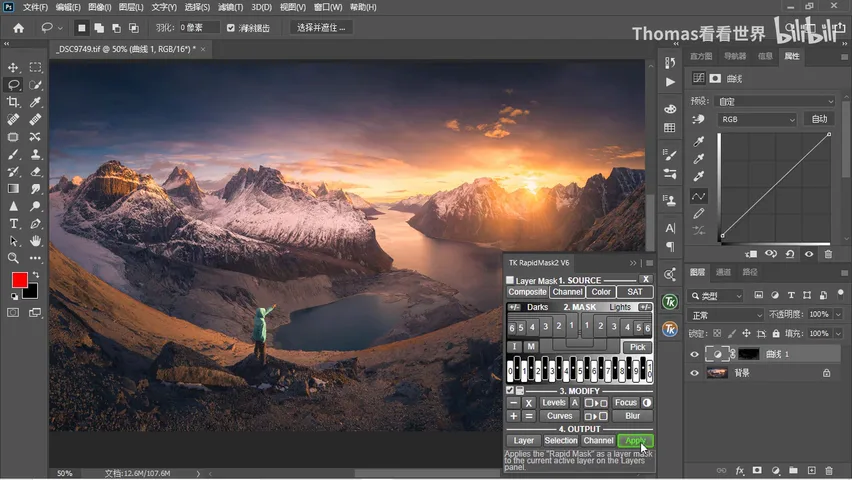
With luminosity masks there's a new way: on the TK panel try Darks 6 first — it selects only the very darkest sliver; Apply it to the curve, find the lift too small because the range is narrow, then switch to Darks 5 and Apply again — swapping masks is exactly what the plugin makes effortless (at 6:02 in the video). The result: rock shadows lift substantially, the photo loses its heavy blacks, yet the midtones and highlights are untouched and the overall look barely changes (at 6:30 in the video).
04 Local Brightening: Painting In the Sunshine
Everything so far acted on whole tonal bands. What if you want to brighten only the sunlit rock and the figure, amplifying that sunny glow? Freehand brushing works, but edges stray easily and the result looks ragged (at 7:19 in the video).
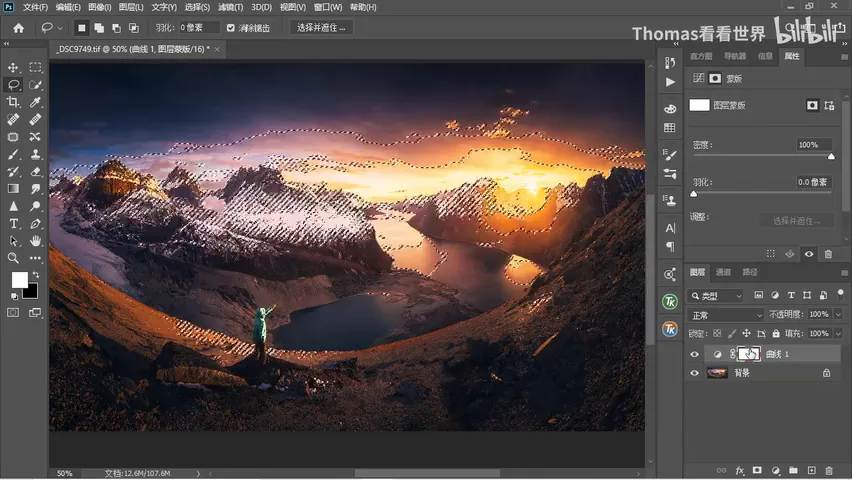
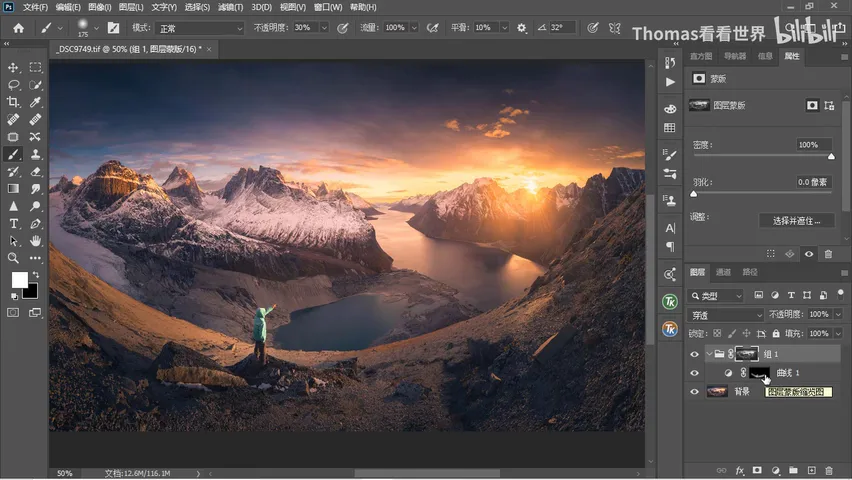
Thomas's pipeline: add a Curves layer and lift it, press Ctrl+I to invert its mask to black (at 7:44 in the video), then freely brush the target areas back in white — sloppy strokes are fine, because a luminosity mask will arbitrate later (at 8:00). Next create a group, move the Curves layer inside, and mask the group: checking the channels, in Lights 1 the sunlit faces of rock and jacket read near-white or light gray while the shadow sides and the darker background fall to black — good enough (at 8:57 in the video). Ctrl-click Lights 1 for a selection, delete the group's empty mask and add a new one, and the selection converts automatically.
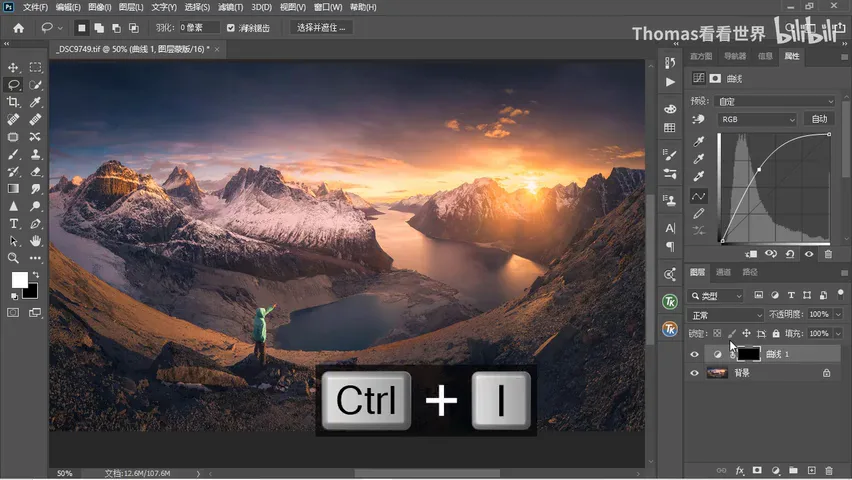
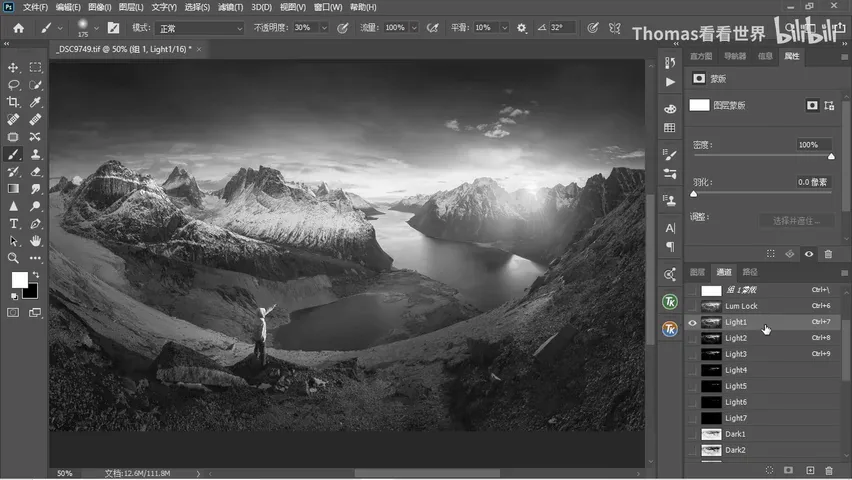
Two before-afters tell the story: without the luminosity mask, brushed areas show ragged edges and eerie brightness; with it — the mask being derived from the image's own light, lifting bright areas more and dark ones little or not at all — even the sloppiest strokes end up brightening only the sunlit rock faces and the jacket (at 9:47 in the video). Conversely, disable the painted position mask and keep only the luminosity mask, and every highlight in the frame lifts, not just the patch you meant (at 10:30 in the video). Only both masks together yield the final precision.
05 Wrap-Up: Bands Plus Locals, Tone on Demand
This episode lays out what makes luminosity masks so useful: the deepest shadows, the softer shadows, the midtones, the highlights — any tonal band can be isolated and adjusted precisely; and through grouping, that adjustment can be confined further to any local region — the bright faces of a rock, the darkest folds of a jacket, the midtones of a mountain (at 10:57 in the video). The midtone S-curve, the matte shadows and the local lift are simply the three most common outlets of one idea.
1. Generate masks with an action or plugin: Lights 1-7, Darks 1-7, Midtones 1-7 cover every tonal band from deepest black to brightest white — tools differ, the core is identical; 2. When an S-curve adds midtone contrast and saturation, always restrict it with a midtone mask (say MID2), or highlights and shadows suffer; 3. For the filmic matte, lift the black point on a Darks mask — Darks 6 too narrow? switch to Darks 5 — leaving midtones and highlights untouched; 4. Local brightening = lifted curve + Ctrl+I black mask brushed loosely + a group mask loaded from Lights 1: sloppy strokes are fine, and only two masks together give precise tonal control.
Download the custom luminosity mask action:
Link: https://pan.baidu.com/s/1pLUY8IC4pEOuJ3DWuTb4hA
Extraction code: kci3