Photography Tutorial · 2018-01-31
Complete Guide to Observing and Photographing a Lunar Eclipse
Thomas Chu Photo
One in-depth tutorial every week — making photography easy to learn
Tonight brings a rare total lunar eclipse, and weather permitting, it will be visible from most of the country.
The author of this article is Li Zhaoqi, former president of the Tsinghua University Astronomy Association. In this detailed piece, he teaches you how to scientifically observe and photograph a total lunar eclipse.
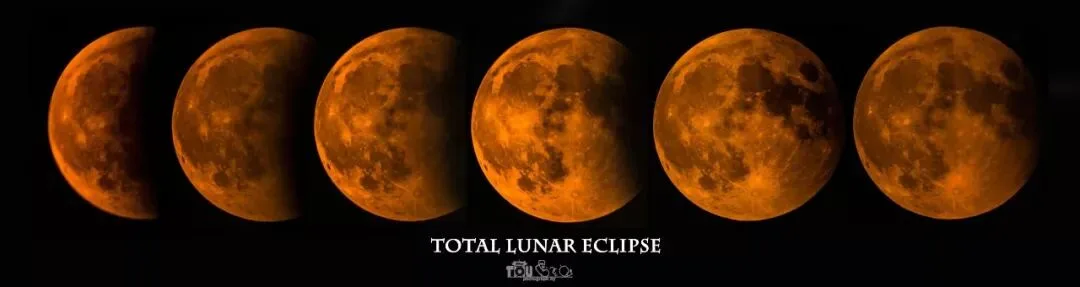
On the evening of January 31, 2018, there will be a rare "supermoon + blue moon + total lunar eclipse" — the best opportunity to observe a total lunar eclipse since April 4, 2015 — and the seldom-seen "blood moon" will be visible.
This total lunar eclipse is visible from every region of China. And because a lunar eclipse can be watched from within the city — no need to escape light pollution — this is a rare chance not to be missed.
Below, let's look at how to scientifically observe and photograph the blood moon.
Table of Contents
1. The basic principles of a lunar eclipse
2. Details of this eclipse and an observing guide
3. Equipment and settings
4. Focal length choices and their results
1. The Basic Principles of a Lunar Eclipse
We know moonlight is reflected sunlight. When the Earth blocks that sunlight, a lunar eclipse occurs.
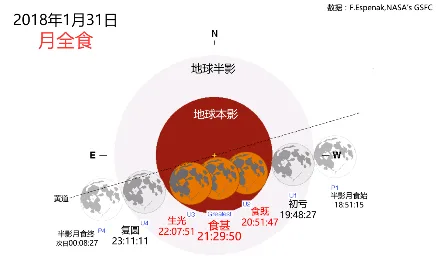
Take a look at the diagram below:
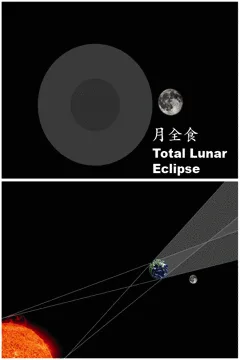
In ancient China, people believed a lunar eclipse was a "toad devouring the moon", and when one appeared they would bow in worship and pray for the gods to drive the toad away.
The idea of the "toad devouring the moon" comes from Sima Qian's Records of the Grand Historian (Western Han dynasty): "The moon, as punishment and counterpart, is eaten by the toad (commonly called the toad)." The Tang-dynasty poet Li Bai wrote in "Song of the Old Moon": "The toad gnaws the round disc; the bright night is already fading."
In the Han dynasty, Zhang Heng had already discovered part of the eclipse's principle: he believed the Earth moves in front of the Moon and blocks the Sun's light — "When facing the Sun, the light often fails to arrive, blocked by the Earth; this is called the dark void. Stars dim within it, and when the Moon meets it, a lunar eclipse occurs."
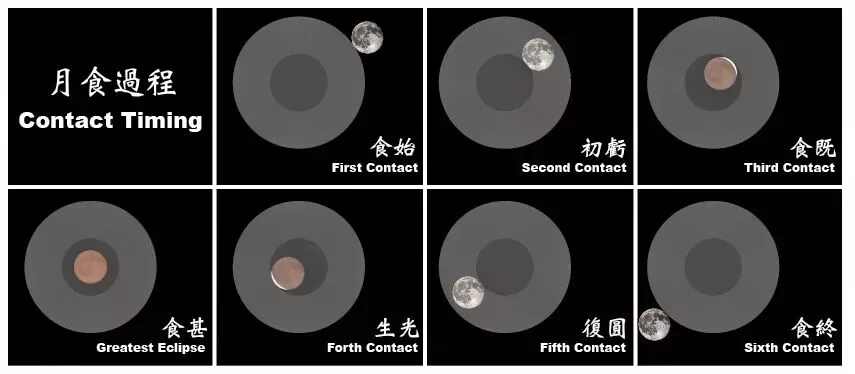
Combining the diagram above, we can see a total lunar eclipse has several stages:
1. Penumbral lunar eclipse: the Moon has just touched the penumbra; its surface brightness drops slightly, but the change is hard to notice with the naked eye. 2. First contact (partial and total eclipses only): the moment the Moon's eastern edge enters Earth's shadow — the first external tangency with the umbra. 3. Totality begins (total eclipses only): the moment the Moon is completely inside Earth's umbra — the first internal tangency. 4. Maximum eclipse: the instant the center of the lunar disk is closest to the center of Earth's umbra; around this time the lunar surface appears copper-red or dark red (total eclipses only). 5. Totality ends (total eclipses only): the moment the Moon begins to leave Earth's umbra — the second internal tangency. 6. Last contact (partial and total eclipses only): the Moon completely leaves Earth's umbra — the second external tangency. 7. Penumbral eclipse ends: the Moon leaves the penumbra, and the entire eclipse is officially over.
If you record the whole process with a camera, it looks like this:
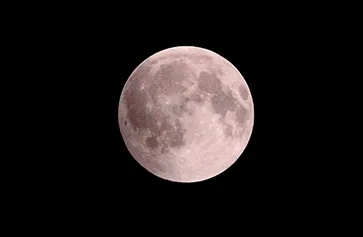
Why the moon turns red: (As sunlight passes through Earth's atmosphere it refracts, bending inward — but each wavelength bends by a different amount (dispersion). Red light, with the longest wavelength, is scattered least and survives to be refracted into Earth's umbra, landing on the Moon. In addition, because the amount and position of dust and clouds in the atmosphere vary, the degree of refraction differs, so during totality the Moon appears dark red, copper-red, or orange. For the same reason — atmospheric refraction — the rising and setting sun is not white but orange or red, depending on altitude and the degree of refraction.)
2. Details of This Eclipse and Observing Guide
Basic information:
This eclipse is the 49th of Saros cycle 124
Moonrise: 18:00 (horizon azimuth: 71°)
Sunset: 18:11 (horizon azimuth: 252°)
Penumbral eclipse begins: 18:51 (horizon azimuth: 76°, altitude: 11°)
Partial eclipse begins (first contact): 19:48 (horizon azimuth: 80°, altitude: 23.5°)
Totality begins (second contact): 20:51 (horizon azimuth: 85°, altitude: 37°)
Maximum eclipse: 21:30 (horizon azimuth: 88°, altitude: 46°)
Totality ends (third contact): 22:08 (horizon azimuth: 92°, altitude: 54°)
Partial eclipse ends (fourth contact): 23:12 (horizon azimuth: 101°, altitude: 68.5°)
February 1
Penumbral eclipse ends: 00:09 (horizon azimuth: 124°, altitude: 80°)
The umbral eclipse lasts 3 hours 24 minutes,
with a maximum umbral magnitude of 1.317.
Five things to note:
1. Moonrise time varies by region — roughly around sunset.
2. The penumbral stage is almost indistinguishable and not very worth watching.
3. The change is visible from first contact to last contact — that's the best window for observing.
4. This eclipse's blood moon comes late (20:51-22:07) with the Moon high in the sky, so even low-altitude haze won't matter much. The downside: shooting a telephoto blood moon with foreground scenery will be trickier.
5. This Moon is also a "blue moon" — not because of its color, but because it is the second full moon within the same calendar month, which is relatively rare, hence the Western name. Observing-wise it makes no difference. On top of that, it's a so-called "supermoon", appearing 14% larger than usual.
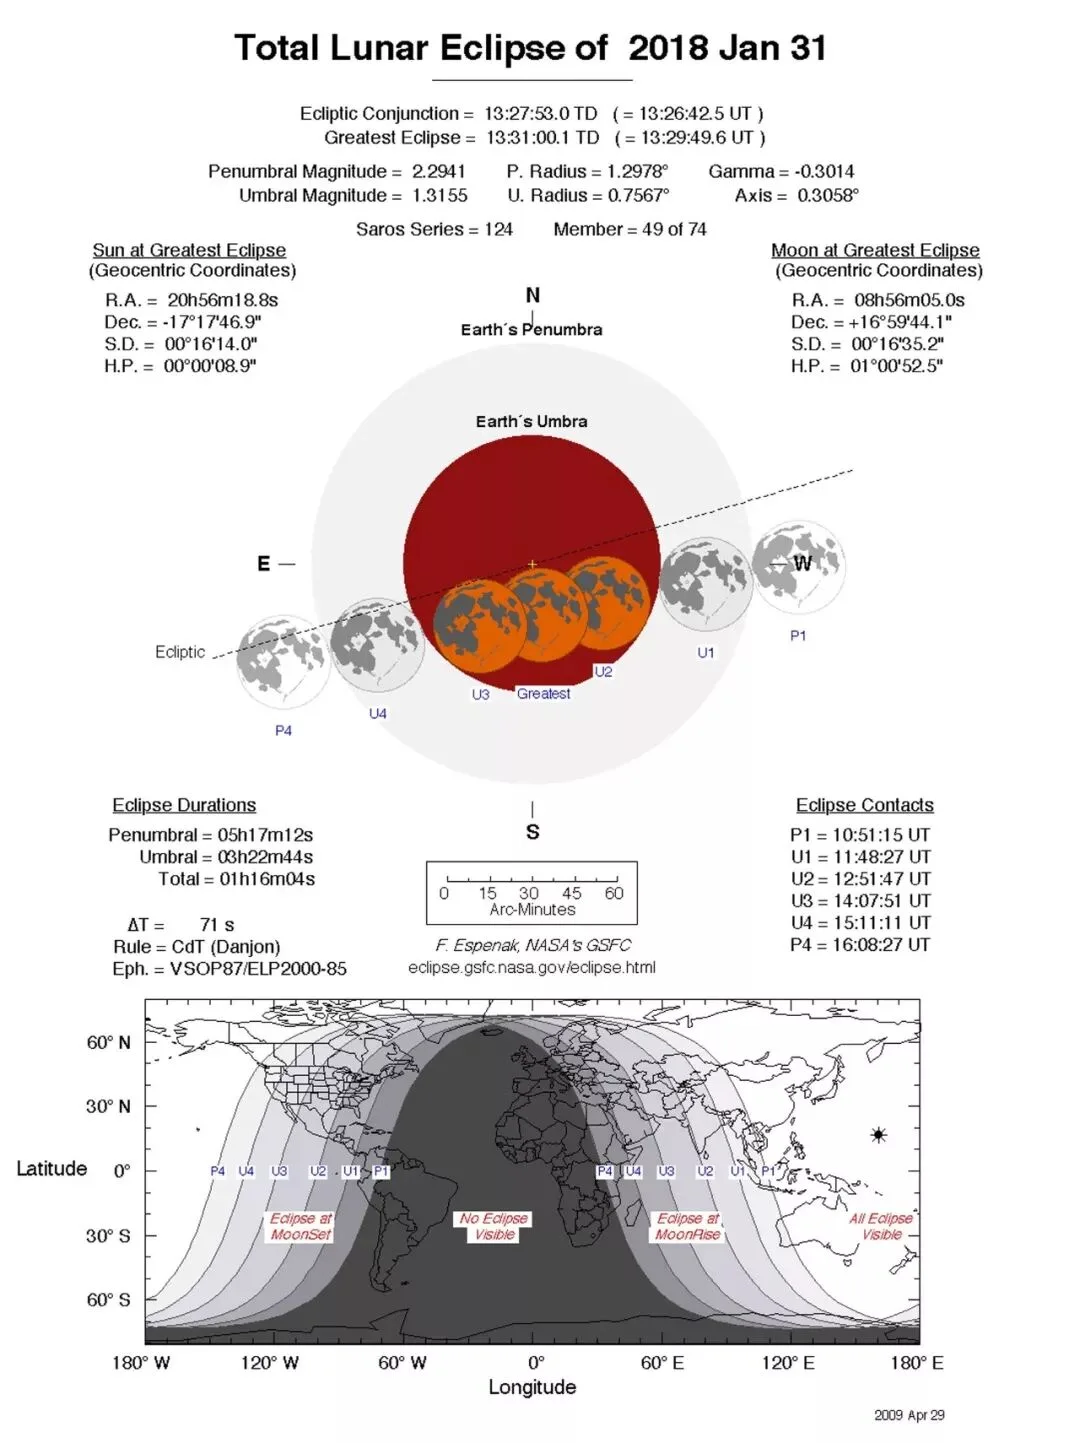
The white areas in the map above show where the total lunar eclipse is visible
Observing guide:
1. Since the Moon is bright, you don't need dark skies to watch a lunar eclipse — anywhere in the city with a view of the Moon works.
2. Short of extreme smog, ordinary haze will not affect observing or photographing this eclipse.
3. The eclipse can be seen through thin clouds but not thick ones, so choose a cloudless location.
4. Since the Moon is small, a telescope or binoculars are recommended for a better view.
5. As the Moon dims, the starry sky becomes more prominent. If you head to the suburbs, you can watch the stars go from few to many and back to few.
3. Equipment and Settings
Basic camera setup:
Manual (M) mode, turn off optical stabilization, focus manually, and optionally enable mirror lock-up (to reduce shutter-induced vibration).
Exposure:
Moonlight varies greatly across eclipse stages — from f/5.6, 1/1000s, ISO 200 at full moon to f/2.8, 1/5s, ISO 1600 for the blood moon. Exposure settings differ considerably under different haze and light-pollution conditions, so adjust to your local situation.
To keep the Moon sharp without an equatorial mount, exposure should not exceed 300 / focal length seconds — for a 200mm lens, no longer than about 1.5s.
If you want the Moon combined with a foreground and the dynamic range is large, use HDR / exposure bracketing (one normal exposure + one underexposed + one overexposed).
Sensor format:
A crop-sensor body with the same focal length renders the Moon larger. If you have a crop camera with good image quality, use it for telephoto eclipse shots.
Tripod:
A tripod is essential — stable shooting and a fixed composition depend on it.
Shutter release:
A shutter release cable makes time-lapses easy and reduces vibration when pressing the shutter.
Equatorial mount:
For telephoto shooting it can track the Moon for higher-quality images. Generally unnecessary for wide angles.
4. Focal Length Choices and Their Results
First, keep three things in mind:
1. If you're shooting the eclipse, shoot between first contact and last contact. The penumbral stage shows little visible or photographic effect.
2. The blood-moon stage runs from totality's start to its end. If haze is heavy, the Moon will look reddish through the whole process.
3. Since the Moon's apparent size differs at different focal lengths, what you shoot will differ too.
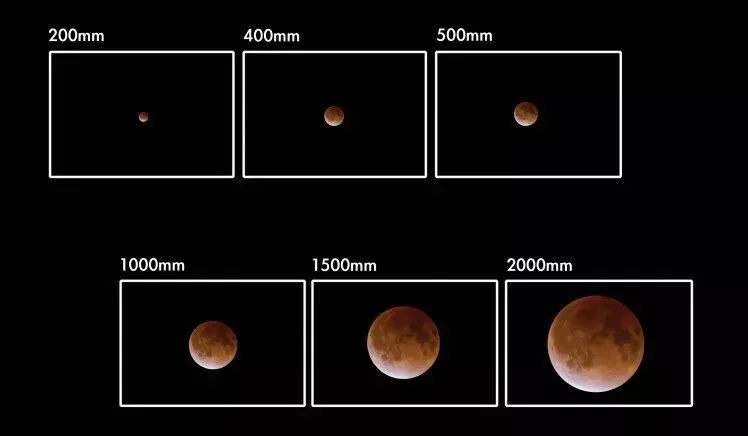
The specific effects on a full-frame camera are shown below (made by LaoT, simulated with the Planit app)
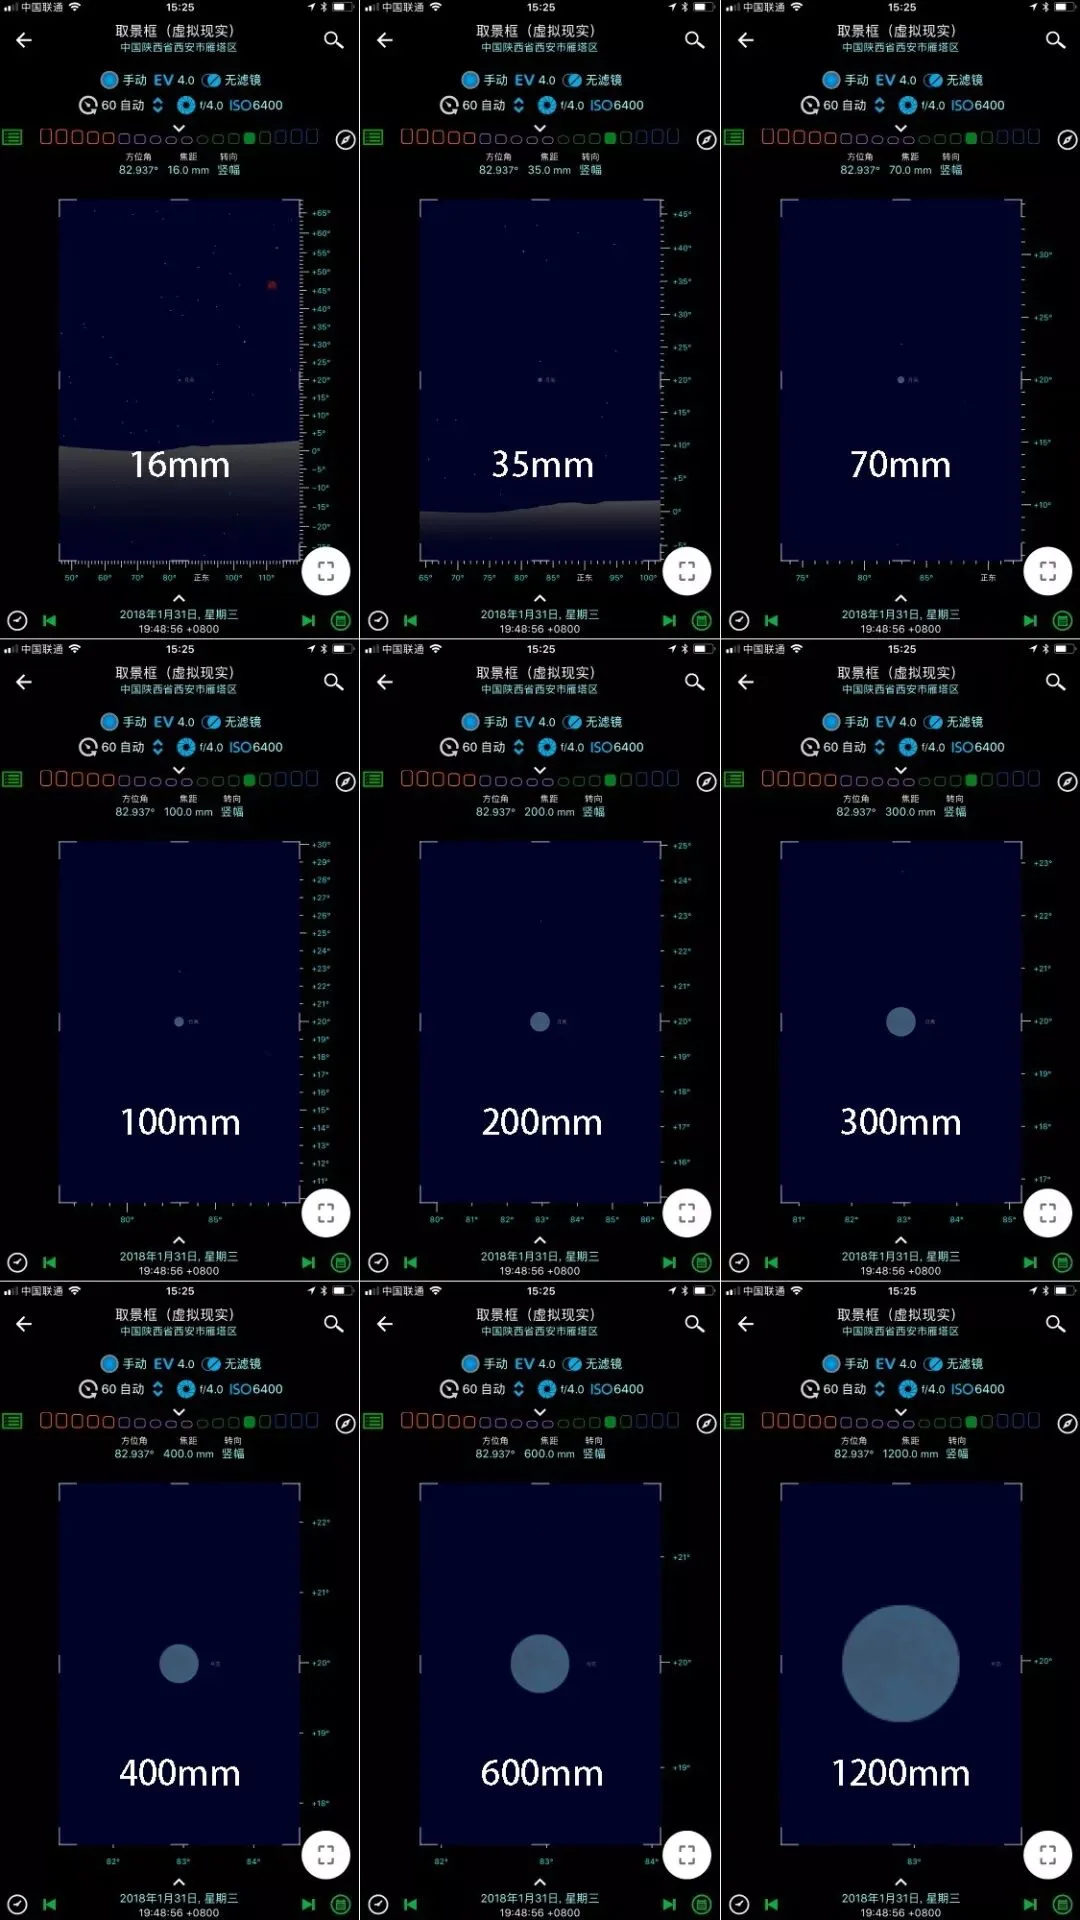
As shown above, wide and medium focal lengths reveal no lunar detail, so plan exactly what you want to shoot beforehand.
Wide angle (8-35mm)
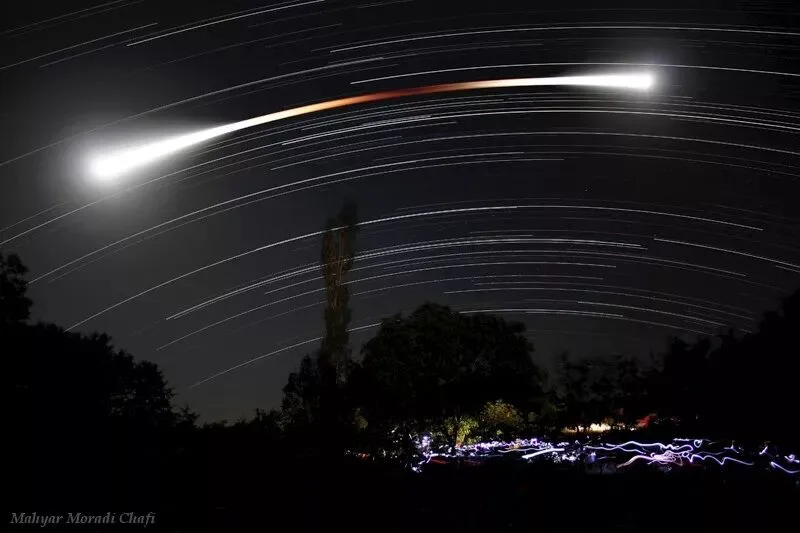
by:Mahyar Moradi Chafi
Below 50mm, the Moon shows no detail — it may be just a dot — though you can tell it turning red. So combine it with a tall foreground and shoot a moon-trail sequence; a time-lapse works well as a record of the process. Use star-trail parameters (after setting exposure appropriate for the foreground, fix aperture, shutter speed, and ISO, and shoot the entire eclipse continuously).
Medium telephoto (35-100mm)
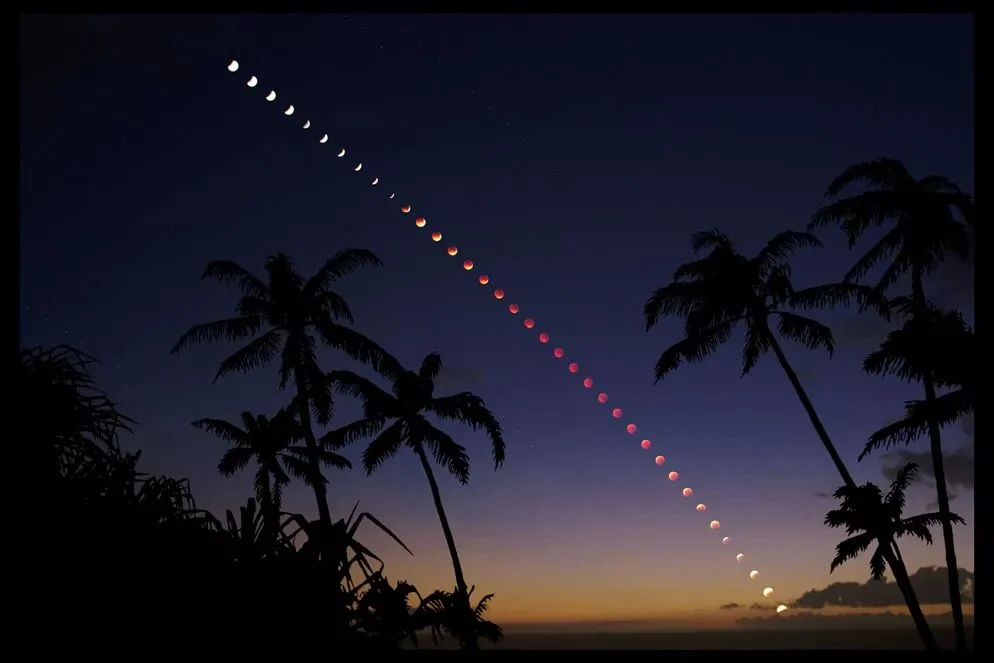
by Fred Espenak
At medium focal lengths we can barely capture a little lunar detail. In this case, a Moon sequence is recommended: pick a foreground, shoot the entire eclipse continuously, extract one frame every few minutes (about 10-minute intervals), and blend them with a lighten stack — the process can also serve as a time-lapse.
Since the Moon is high at maximum eclipse, you can use buildings on distant hilltops as background, or tall bridges and structures. For example:
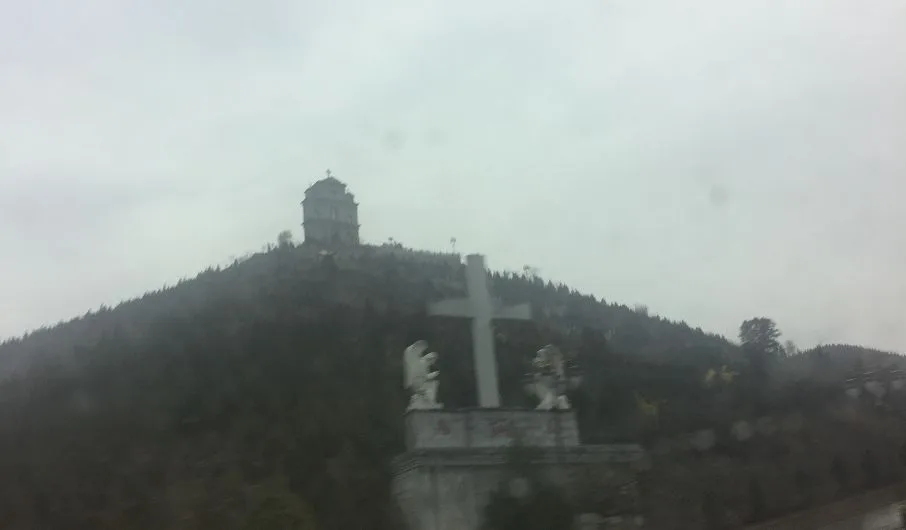
Of course, because the Moon's brightness drops enormously during the eclipse (at maximum it equals roughly a magnitude -3 object), you can even capture the blood moon together with the Milky Way — night-sky shooters can try this kind of shot. (The winter Milky Way is faint.)
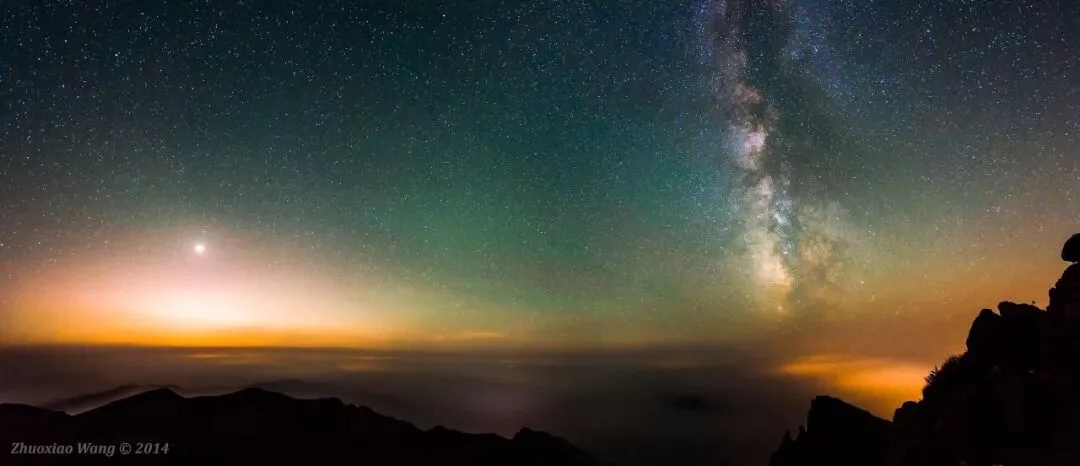
by Wang Zhuoxiao, shot on the summit of Dongling Mountain
Telephoto (85-400mm)
With a long lens, you can shoot the blood moon alone combined with a foreground. Below: the Moon and the Great Wall.
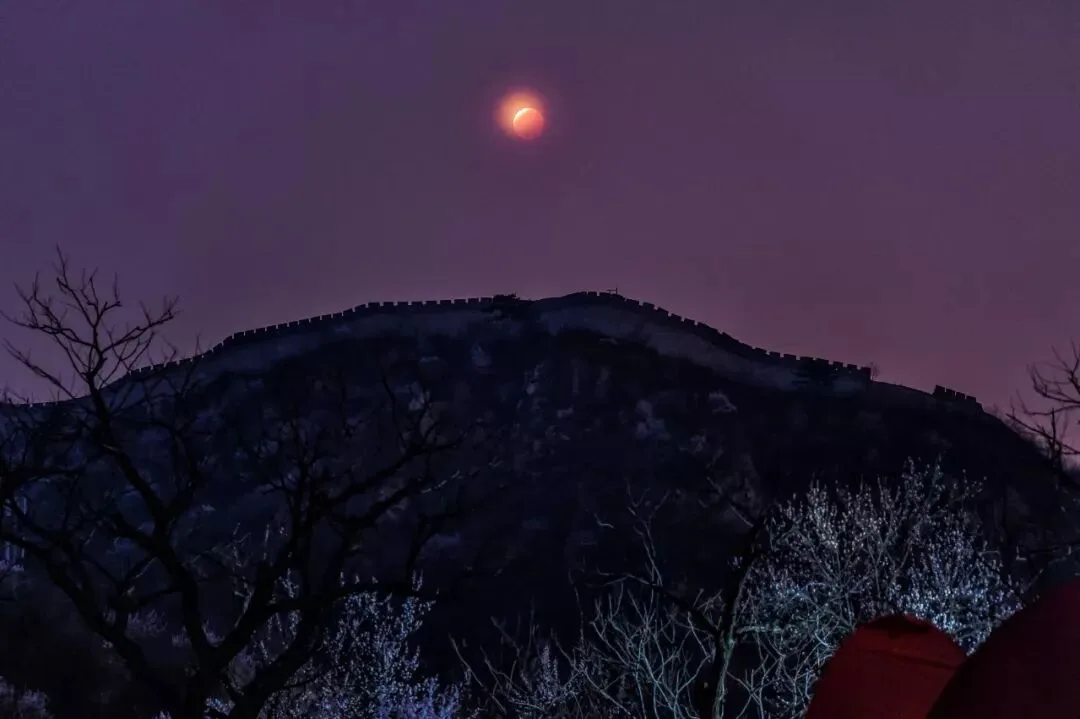
by: Li Zhaoqi
Since the Moon moves fast at long focal lengths, keep exposures short, open the aperture fully, raise ISO appropriately, and ideally use an equatorial mount for tracking.
Because the Moon will be high during this eclipse (around 40°), choose tall foregrounds — high buildings, tall bridges, or shooting buildings on a mountain from below a cliff — distant targets with big elevation differences.
Here's an example:
In the image below, an ancient building sits on the distant hilltop
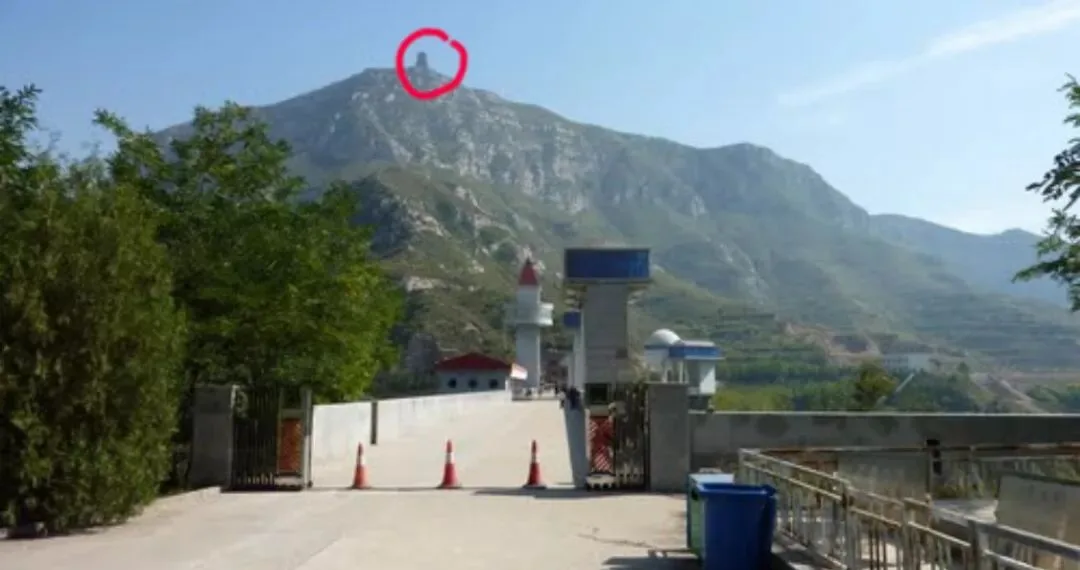
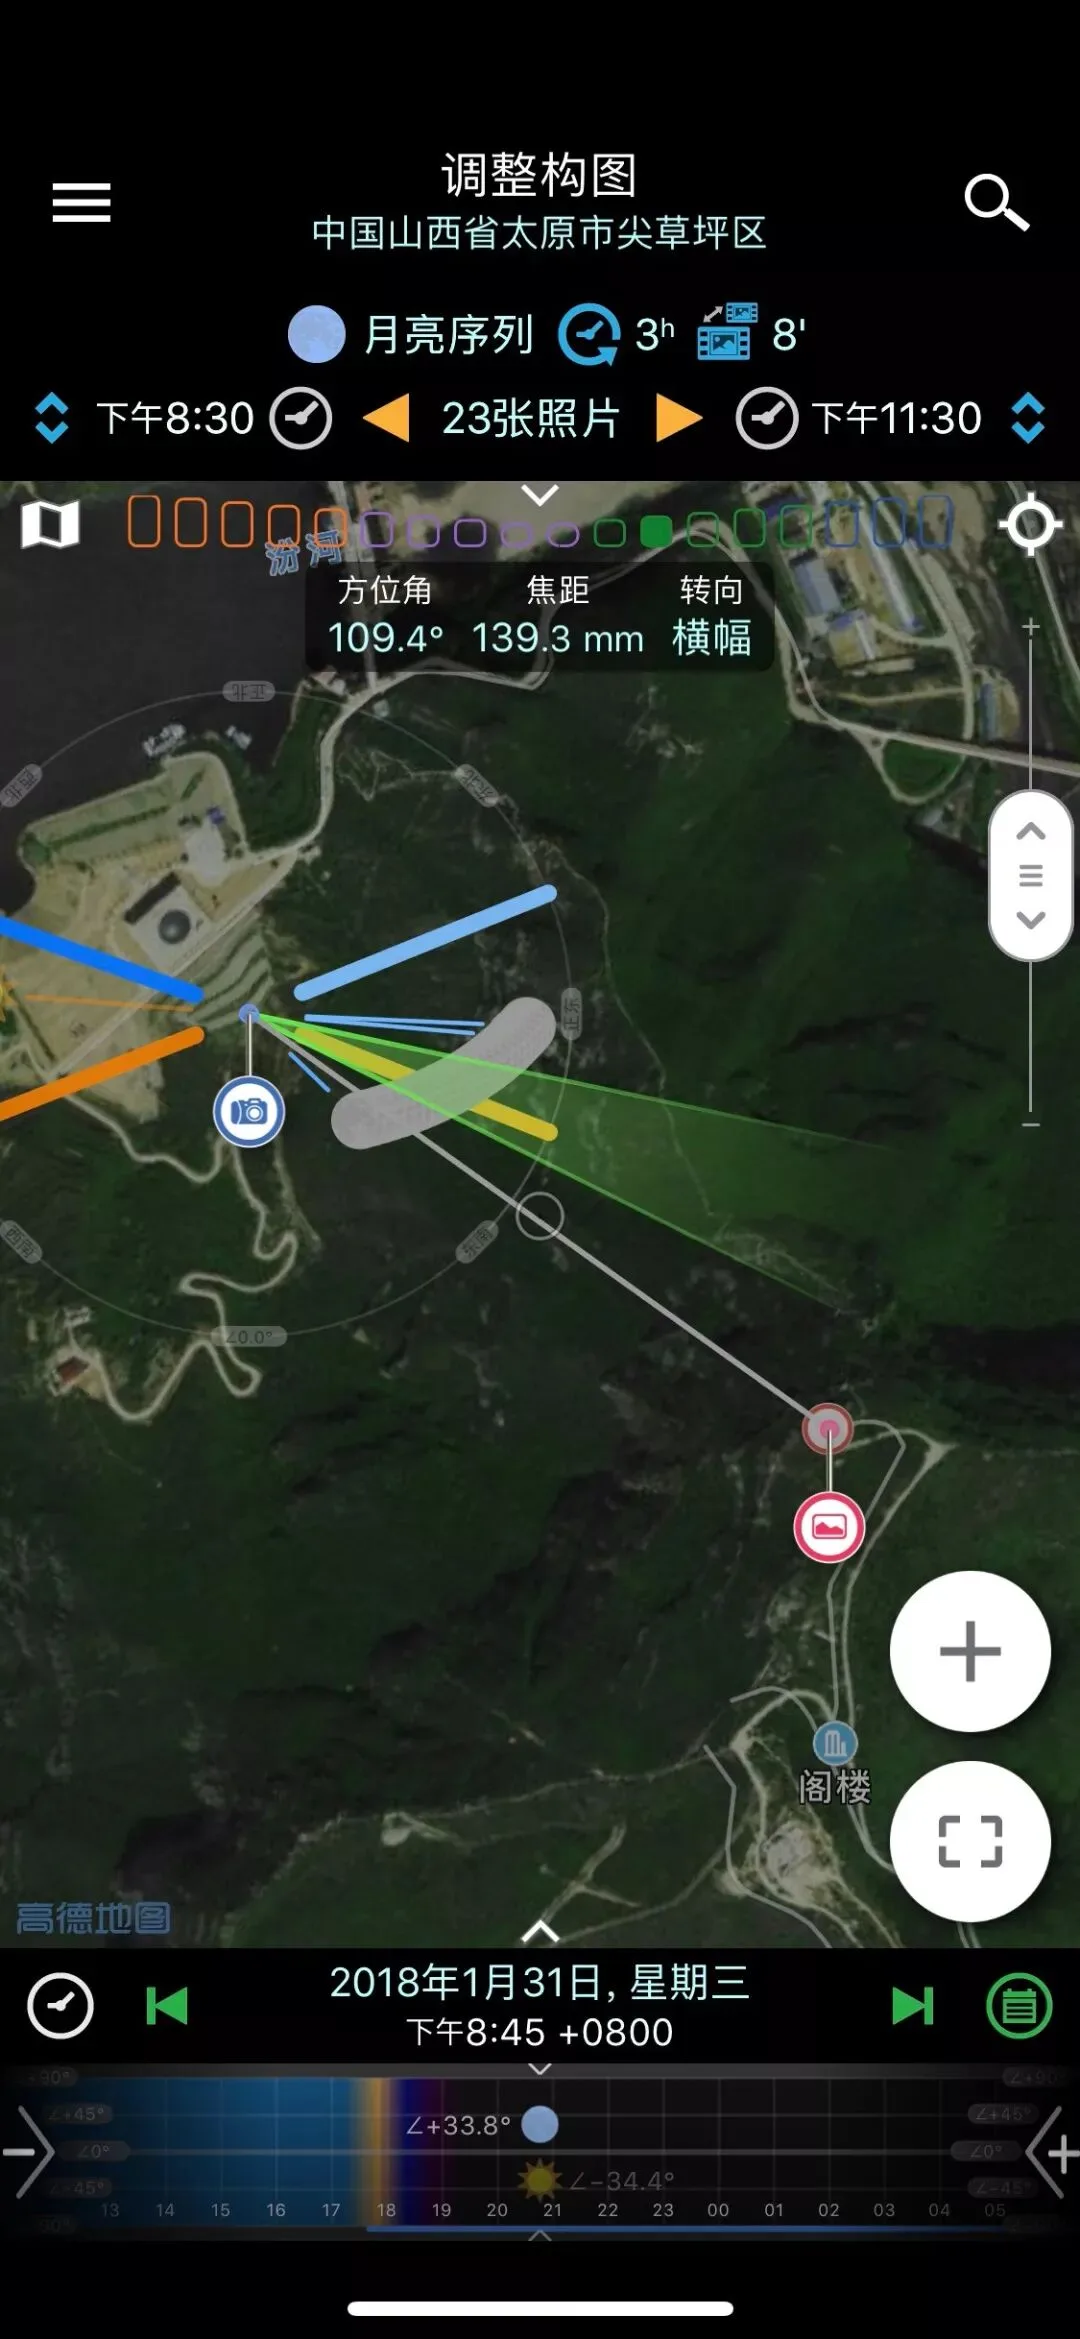
Using the Planit! app to simulate, set the camera position and the target position, add a marker, and enter the building's height and width.
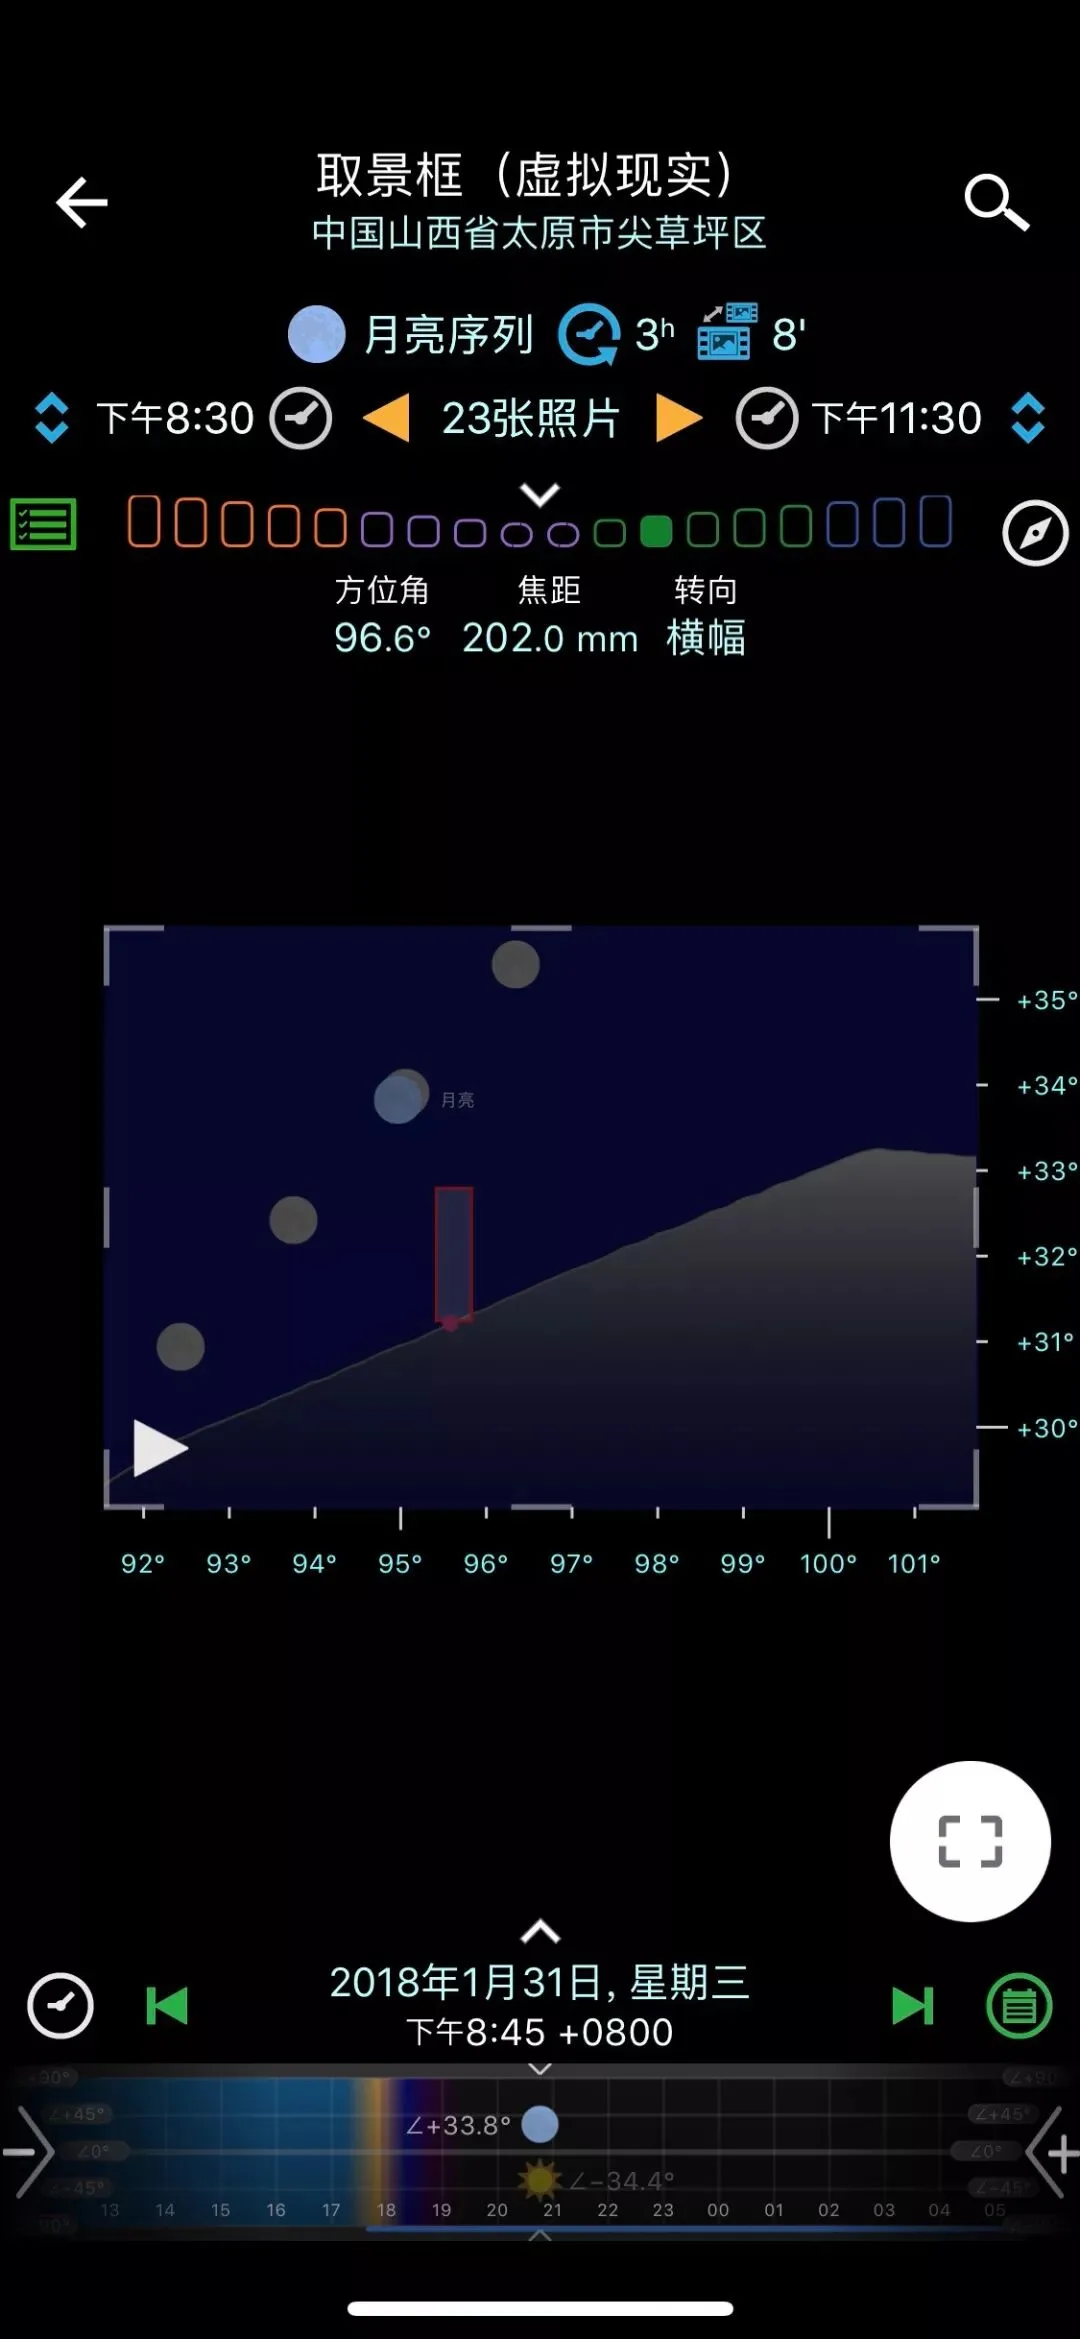
The virtual view simulates the actual shooting result:
For a detailed software tutorial, see the article "Spring Equinox Approaches: The Great Suspended-Sun Battle".
Super telephoto (400-2000mm)
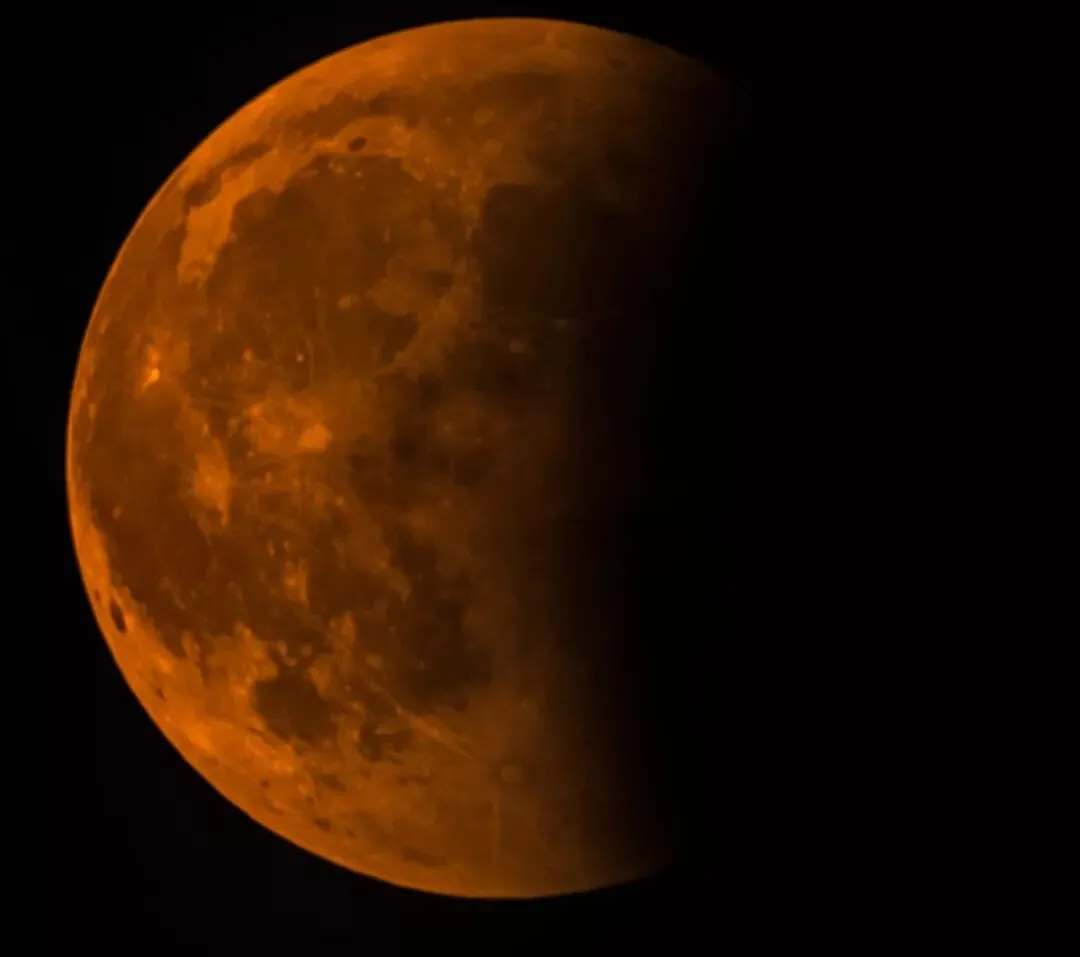
by: Li Zhaoqi
With a long lens / telescope, shoot lunar close-ups (best with equatorial tracking), or team up with a friend on top of a tall building. (Focus once on the Moon, then once on the person.)
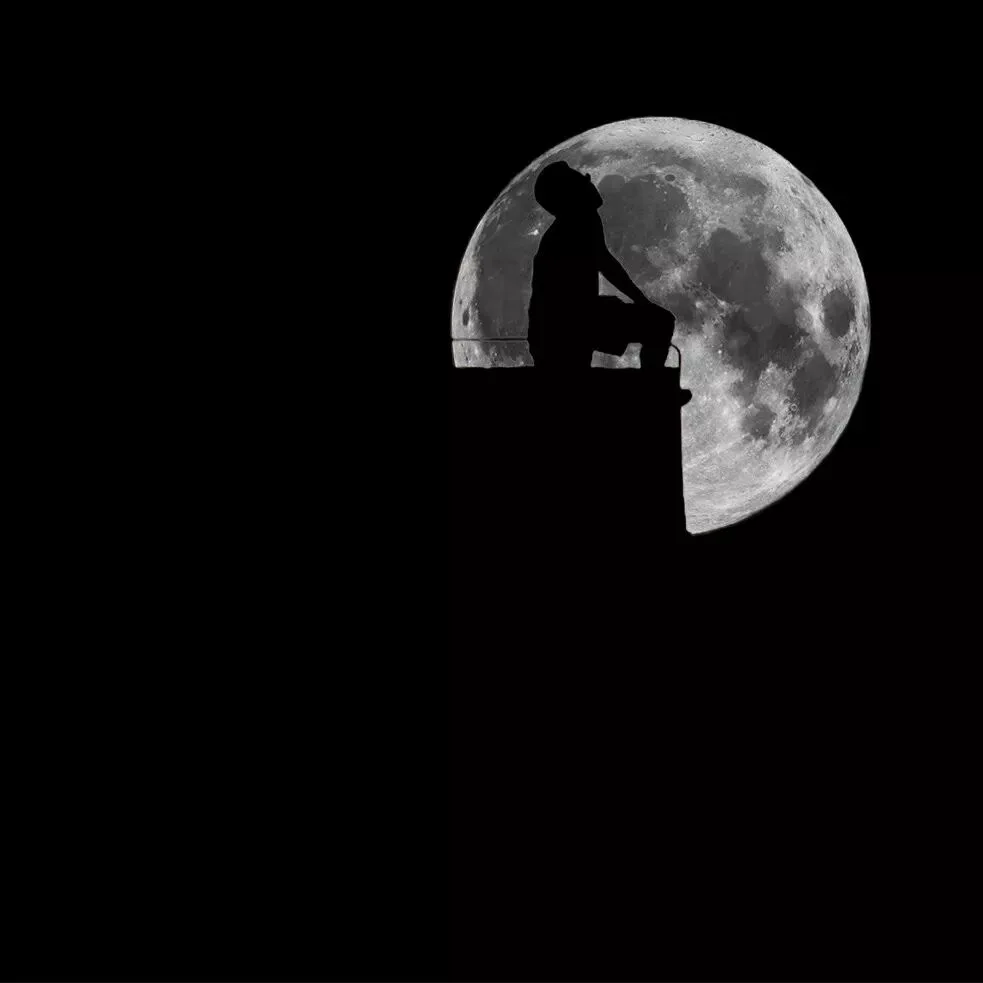
by: Li Zhaoqi
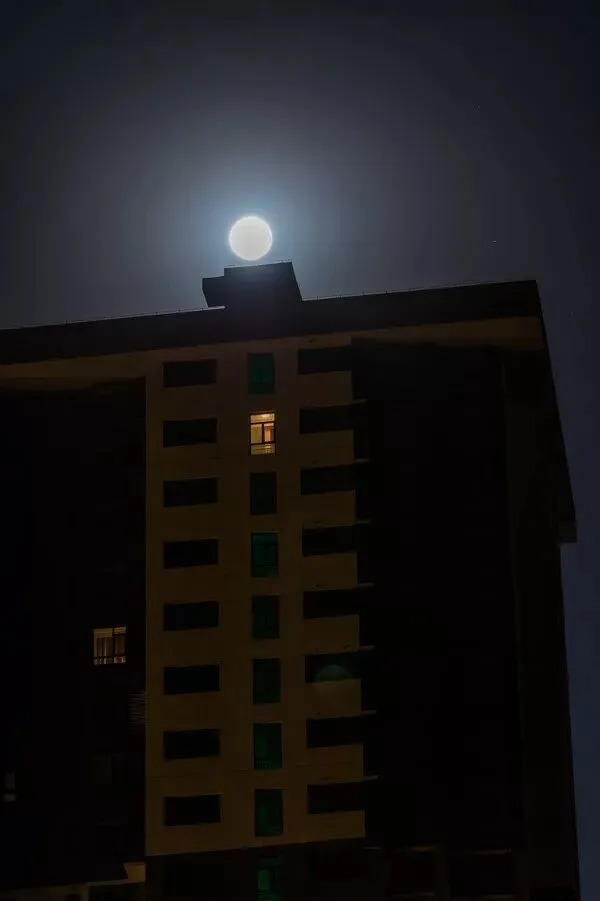
Special compositions:
Full-sky fisheye: similar to wide angle — you can try star trails.
Tiny planet: since a tiny-planet projection stretches the edges of the sky, placing the Moon near the edge gives a slight magnification effect.
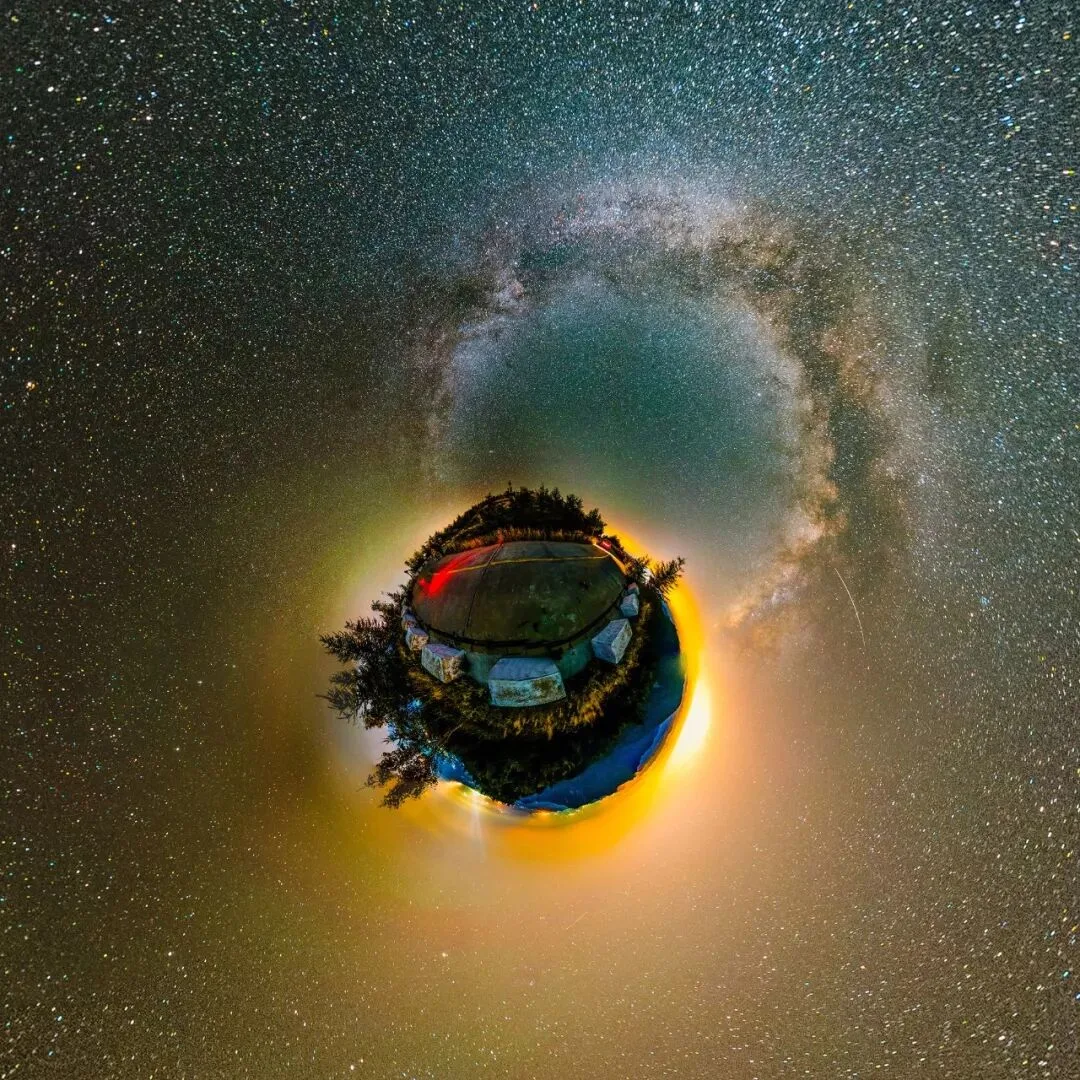
by: Li Zhaoqi
------------------------------
One last reminder: this is a rare opportunity — don't miss it!
That's the tutorial for this total lunar eclipse. Leave a comment if you have other questions.
------------------------------
Text references
wiki
NASA
Hong Kong Observatory
------------------------------
Author: Li Zhaoqi