Photography Tutorial · 2019-06-23
Milky Way Arch over Golden Snow Mountains: Shoot and Edit Revealed
Thomas Chu Photo
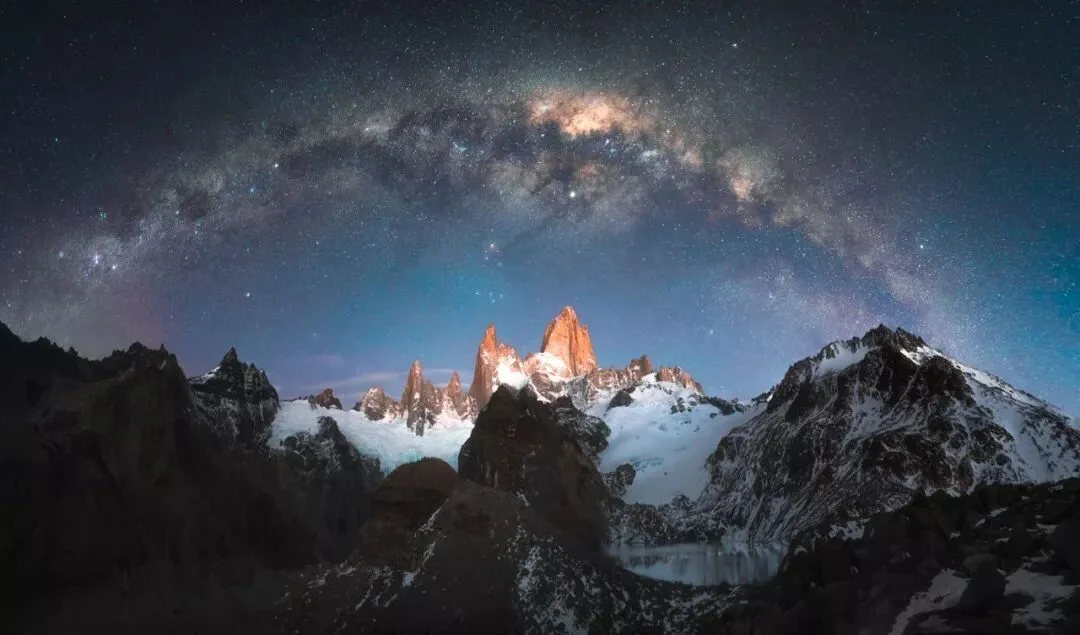
A while ago, Thomas's "Golden Mountain under the Milky Way" photo, shot below Mount Fitz Roy in Argentina, went viral online — over 15 million views on Weibo — and was reposted by major media outlets including People's Daily Overseas Edition.
Many people wondered: is this Disney-castle-like golden snow mountain, paired with a spectacular galaxy worthy of the Paramount logo, really something that exists in nature?
Today Thomas shares the planning, shooting, and post-processing behind this photo. The editing section focuses on using Photoshop's Adaptive Wide Angle filter to correct distortion in panorama stitches.
Video tutorial
▶ Watch the video tutorial on Bilibili
This is the full illustrated write-up of the video above. Thomas documents the complete behind-the-scenes of his viral 'Golden Peak Milky Way' image — the Milky Way arch over Mount Fitz Roy in Patagonia, Argentina — from planning with the PlanIt app, to shooting the panorama in the field, to fixing panoramic distortion and removing a passerby in Photoshop, with key frames from the video.
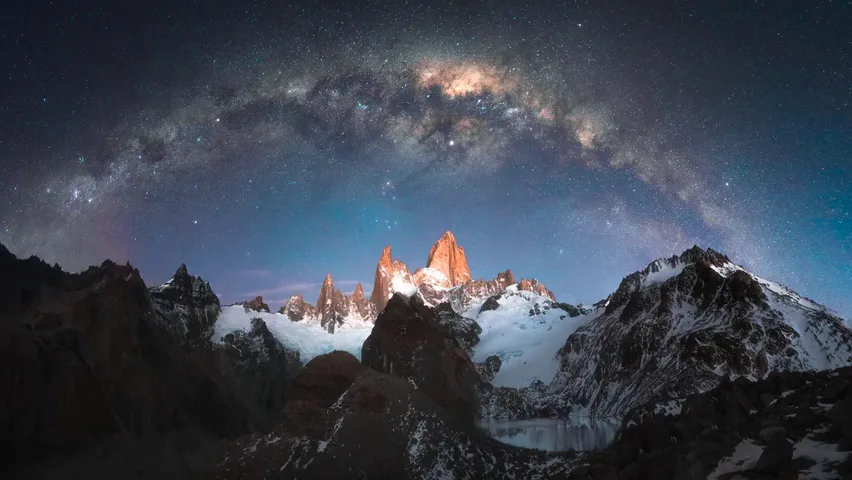
Start with the final image (0:13): a Milky Way arch spanning the sky above snow peaks glowing red in golden twilight. The scene really does exist in nature — provided you calculate exactly when it will appear.
01 PlanIt: Calculating the Arch Before Dark
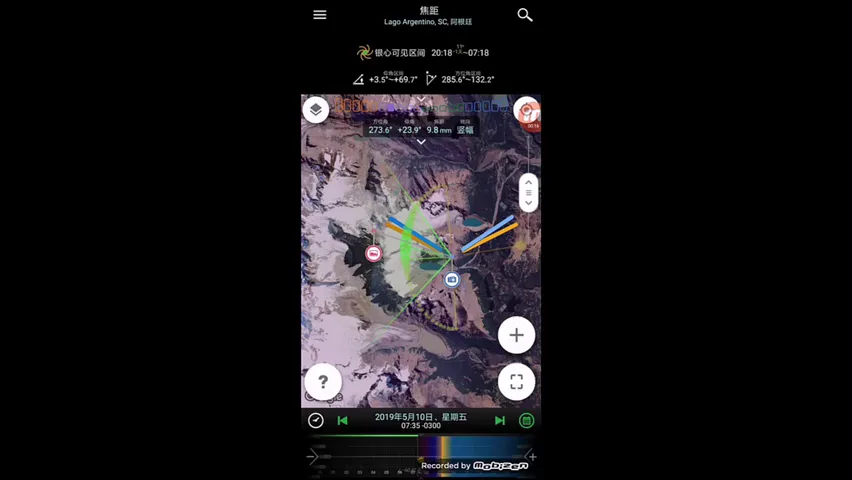
Before the shoot, Thomas planned with the PlanIt! for Photographers app: he set the date to May 10 and marked both the shooting point and the camp below on the map. Dragging the timeline reveals how the Milky Way's azimuth changes, along with sunrise and sunset times (0:16-1:00).
The simulation showed that between 7 and 8 o'clock the galactic center would sink to a low position, draping the arch right over the towering peaks; the app's VR mode, loaded with local terrain data, even allowed a rehearsal of the composition — the sharpest summit being Fitz Roy itself. After 8 o'clock the sky brightens and the Milky Way fades. The window is genuinely short (1:02-1:43).
02 In the Field: Three Setups and the Magic Moment
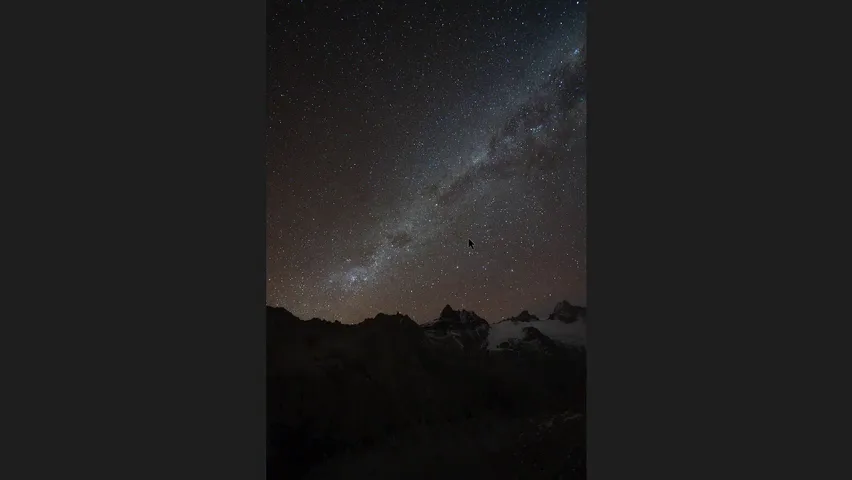
Around 7 o'clock he reached the shooting point and captured the first panorama — but the peaks were not yet lit: the Milky Way was crisp while the foreground lagged behind (1:47-2:00). So he tilted the lens down and shot a second set dedicated to the landscape, banking extra material for blending.
A third experiment: shooting landscape-oriented frames vertically stitched, so a two-row mosaic could capture both the arch and the peaks. The real magic moment arrived near 8 o'clock — twilight (sunlight refracted through the atmosphere from below the horizon) set the snow mountains aglow in red while the Milky Way was still plainly visible (2:02-2:57).
03 Settings: ISO 3200 and 50% Overlap
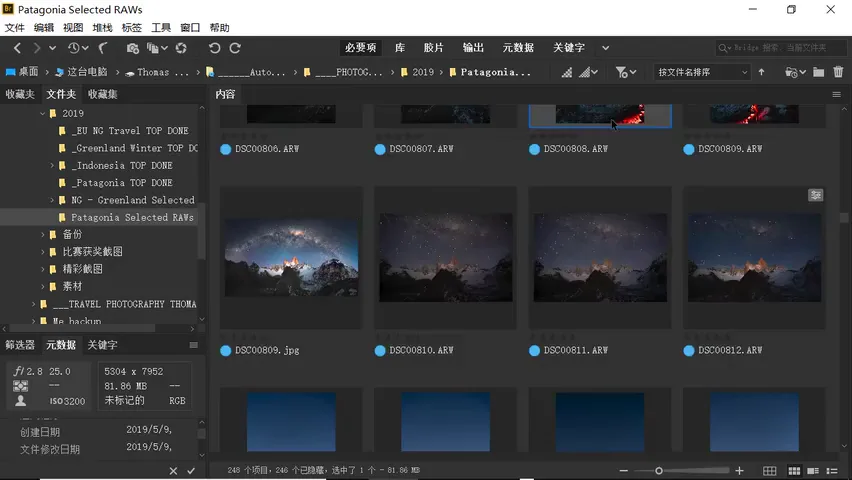
He ultimately chose five vertical frames for the stitch. The settings: ISO 3200, f/2.8, 30 seconds per frame at 16mm (2:58-3:08) — the classic high-ISO, fast-aperture, long-exposure recipe for night skies.
Because this is a wide-angle vertical stitch, Thomas stresses keeping at least 50% overlap between adjacent frames — too little and the panorama fails to assemble. The five frames run from the middle of the peaks out to both ends of the arch; the stitched, color-graded result appears at 3:36 in the video.
04 Stitching: ACR Panorama Merge and Three Projections
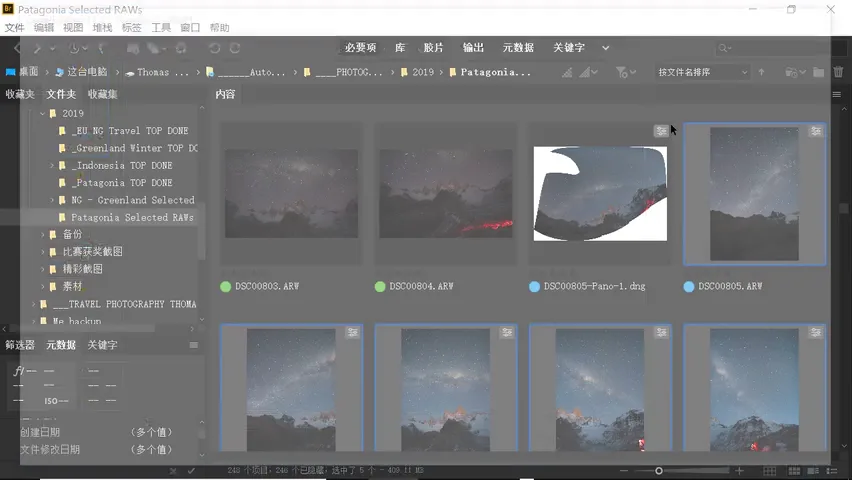
For stitching you can reach for a dedicated tool like PTGui, or simply use the panorama merge built into Photoshop's ACR. Thomas's route: select the five raw files in ACR, right-click and choose 'Merge to Panorama', and let the computer do the math (4:22-4:47).
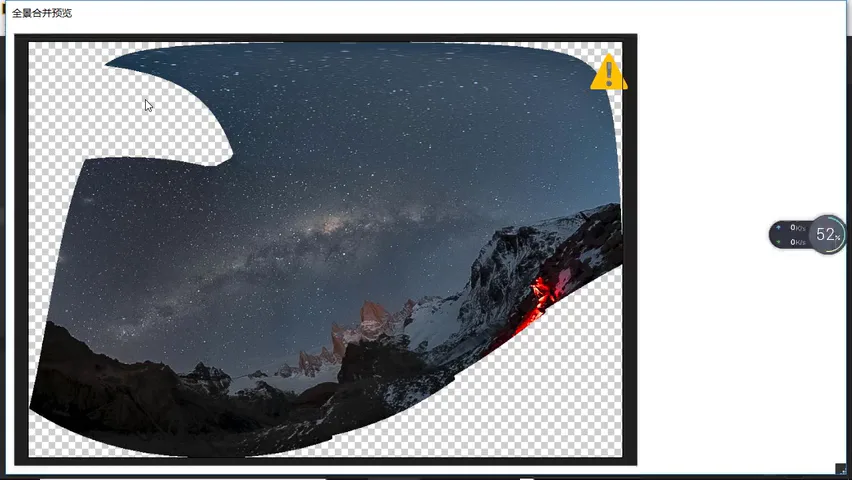
The projection choice in the dialog is critical: Spherical wraps the scene onto a sphere and suits ultra-wide or multi-row panoramas; Cylindrical is gentler, for single-row wide or normal-lens stitches; Perspective is a flat mapping for telephoto stitches made to gain resolution. Being an ultra-wide stitch, this case uses Spherical (4:50-5:53).
05 Correction: the Adaptive Wide Angle Filter
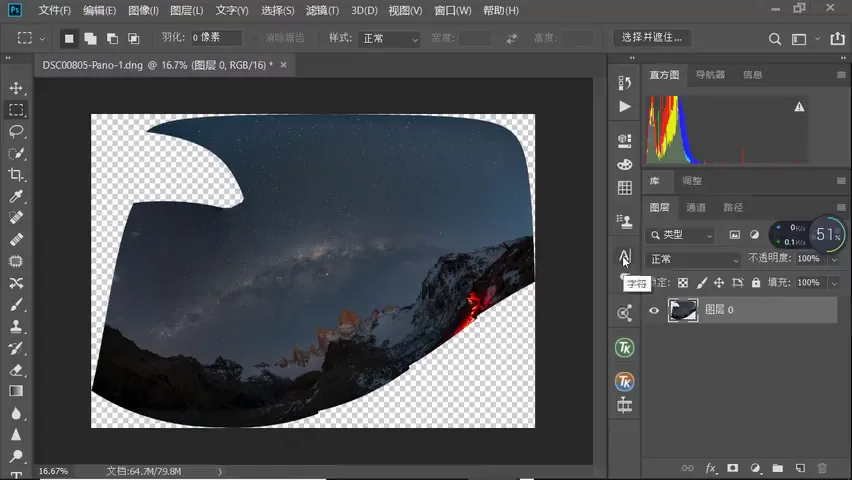
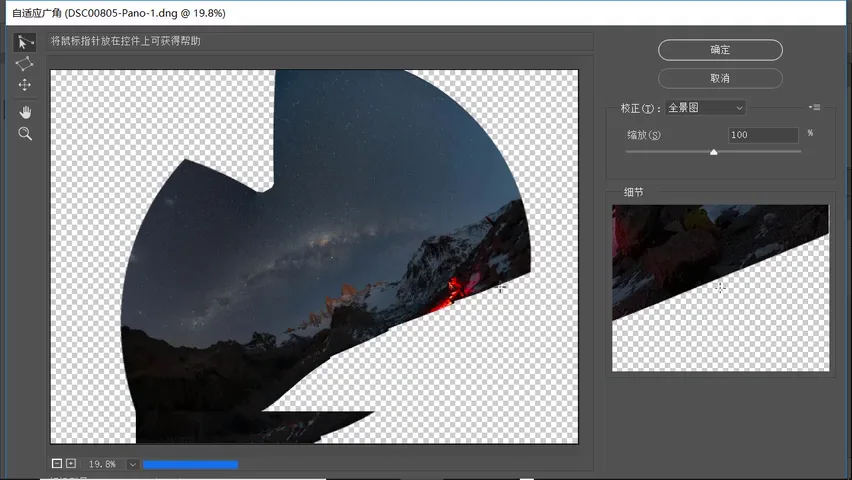
Opening the merged file in Photoshop, the problems surface at once: because the lens was tilted up, the peaks lean and taper, and the entire horizon has been bowed into a curve by stitching distortion (5:58-6:26).
For panoramic distortion like this, Thomas calls on a tool he had not covered before: the Adaptive Wide Angle filter, built precisely for ultra-wide and panorama warping. Set the correction to 'Panorama', then use the first tool, the Constraint tool, to drag lines along the bent ridges — the software detects the lines in the image and forces the curves straight; combined with rotation, the horizon levels out, peak by peak, center and sides (6:30-7:57).
06 Transform, Crop and Removing the Passerby
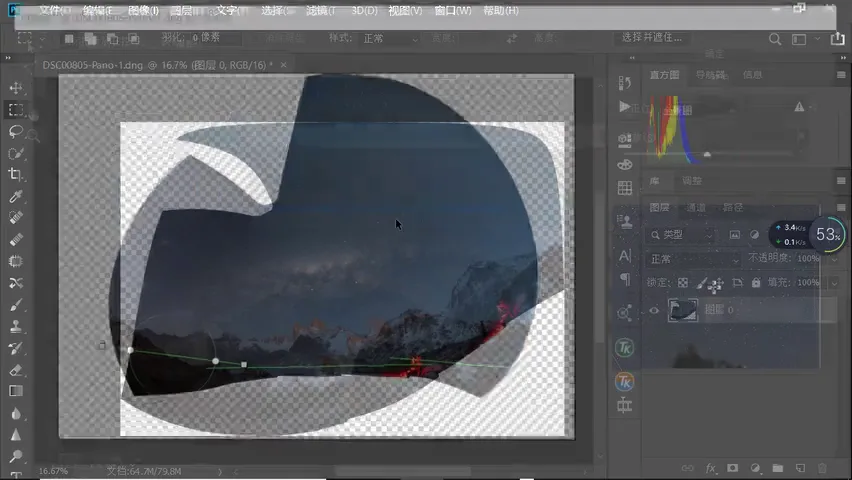
Fine-tuning follows: Ctrl+T free transform nudges the frame perfectly level; then, holding Shift, he stretches it — the upward angle had visually flattened both the peaks and the arch, and the proportions didn't match what his eyes saw on site, so a little stretch restores the awe of the moment (8:21-9:31).
The price of the tilted lens: heavy distortion up top, compression below. He selects the lower portion alone and stretches its base back to shape; gaps in the middle are filled by selecting, duplicating and dragging pixels downward with free transform, before a final crop (9:32-10:53).
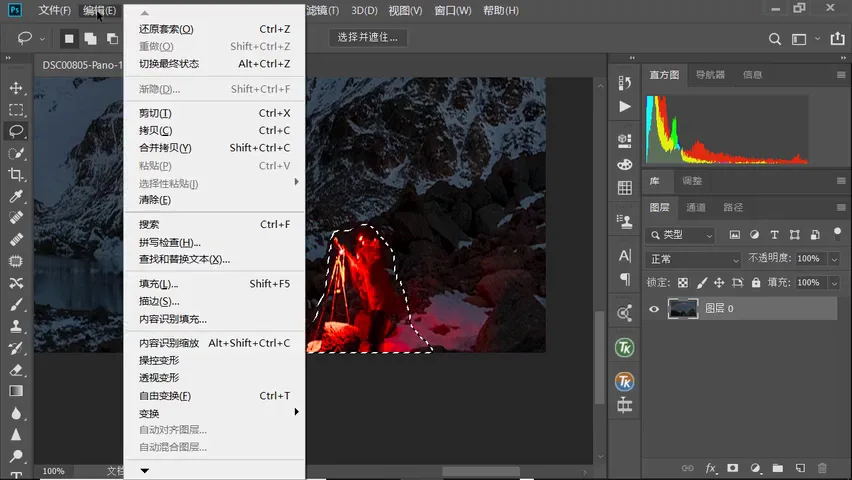
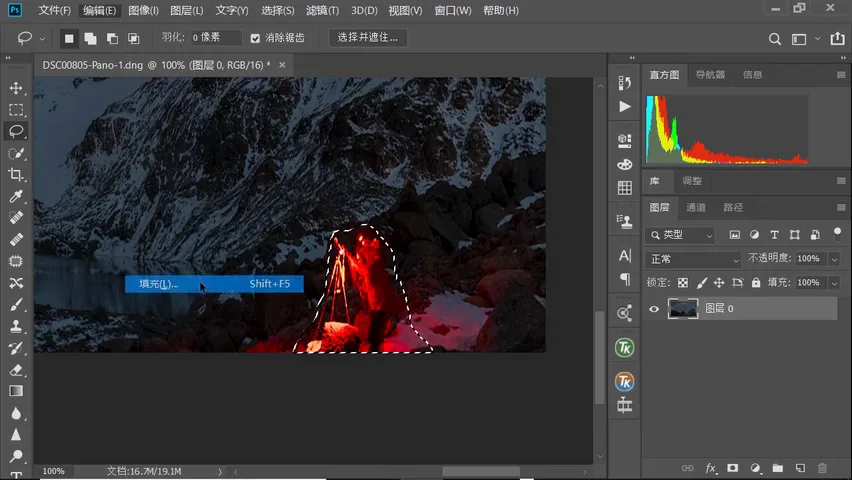
A photographer had wandered into the frame — harder-looking to remove than it is: select him, run Edit > Fill > Content-Aware Fill, and Photoshop rebuilds the area as rock; then a Hue/Saturation layer sucks out the leftover reds and purples with the eyedropper, a touch of darkening, and the spot is clean (10:53-11:53). For color grading he points to his earlier star-color tutorial rather than repeating it here.
1. Plan with PlanIt: galactic azimuth, twilight timing and a terrain VR rehearsal squeeze the most into a brief window; 2. Stitch vertical wide-angle frames at ISO 3200, f/2.8, 30s, keeping 50%+ overlap; 3. Merge ultra-wide panoramas with the Spherical projection, then straighten the bent horizon with the Adaptive Wide Angle constraint tool; 4. Stretch to restore true proportions, and Content-Aware Fill removes wanderers with ease.
HD video:
https://www.bilibili.com/video/av56512397/