Photography Tutorial · 2016-10-09
The Gap Between You and Great Shots Isn't Gear — It's Mindset
Many photography beginners believe their photos aren't good because of their gear.
In this article, Thomas uses a photo shot on a D90 to show you: the gap between you and great work isn't equipment — it's mindset.
Key topic: the shooting & editing mindset
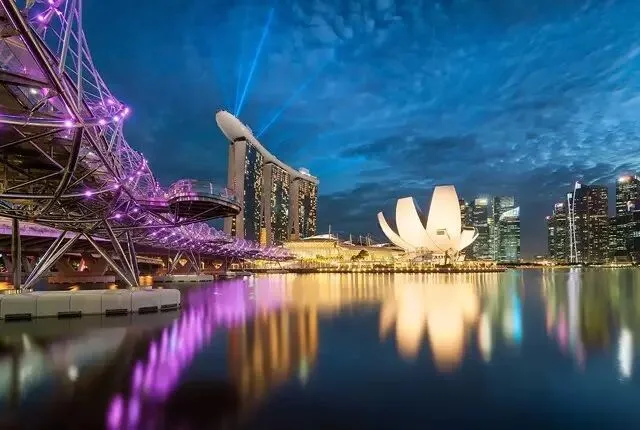
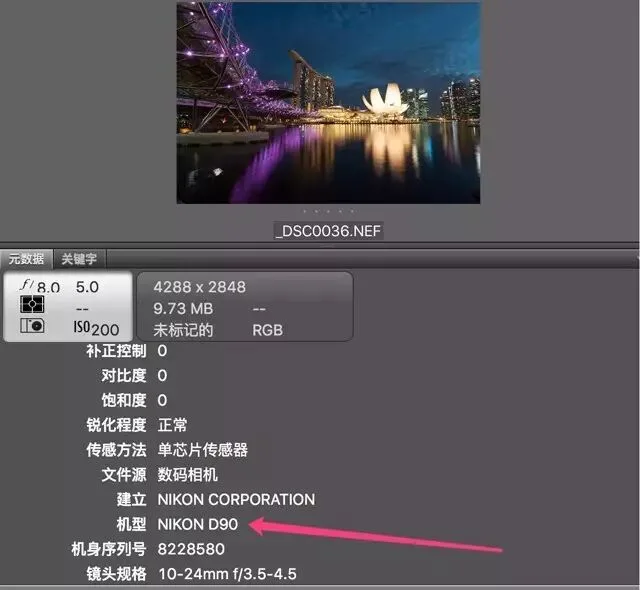
The example photo in this article was genuinely shot on a Nikon D90 — a classic entry-level crop-sensor body from 2008. Really, no kidding.
Idea 1
Behind one great image, there may be 100 raw frames
The earlier tutorial 'Local Adjustments Are the Core of Post-Processing' explained that the core of editing is optimizing every local area so each is at its best while staying consistent with the whole.
Capture works the same way: not every raw frame makes it into the final image. If each frame makes one part beautiful, blending them gives an image that's beautiful everywhere.
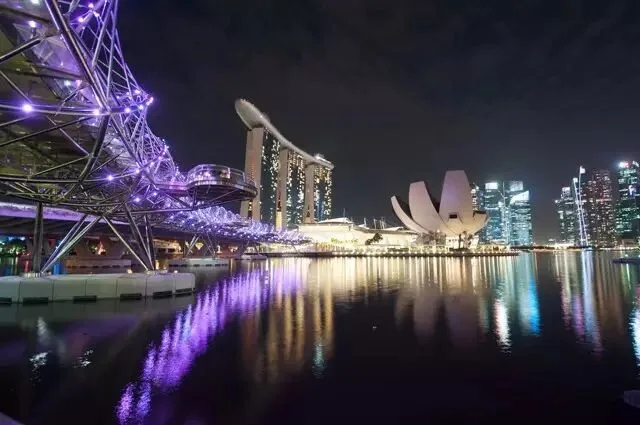
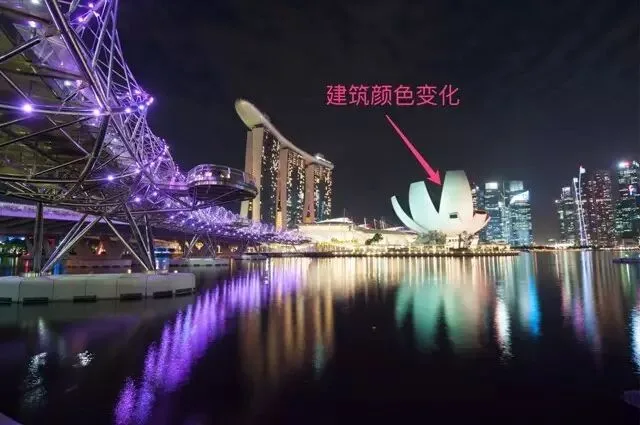
The photo below is an ordinary night shot with two limitations:
1) Due to the camera's dynamic range, the frame contains both overexposed and underexposed areas.
2) Although the brilliantly lit buildings look great, the water, sky and bridge are not especially pretty.
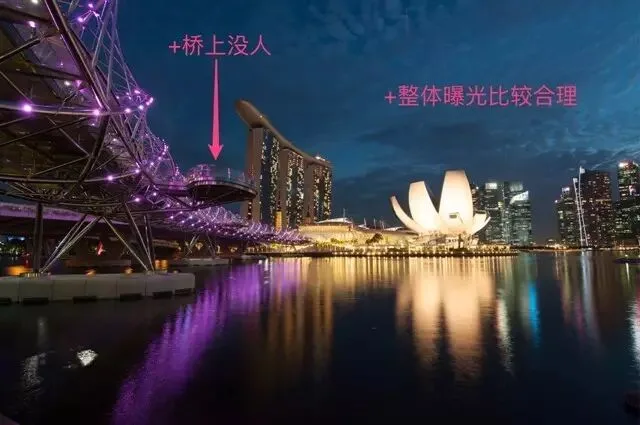
Below is a better photo from the same spot. The difference: it wasn't made from one raw frame, but from 6 frames selected out of 100 — all from the identical position, differing only in settings and shooting time.
This is the core frame, which I call the base image. Its overall exposure is balanced, the sky is still blue and detailed, and there are few tourists on the bridge at this moment. Most of the final image comes from this frame.
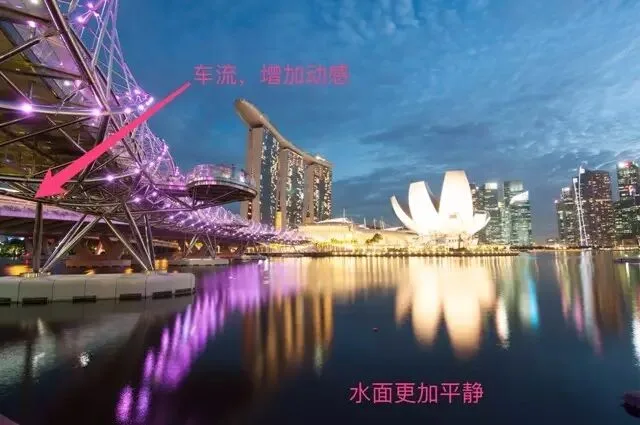
But that frame has a big flaw: the water's ripples are messy, with no mirror-like effect. So I made a long exposure to capture calm water and flowing car lights.
This frame is heavily overexposed in many areas — no problem; I only need the water and the light trails.
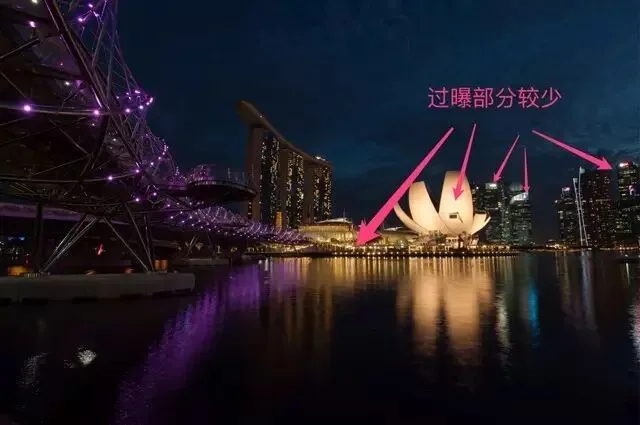
The highlights were blown in both previous frames, so I deliberately underexposed another frame to recover the distant lit logos and the facade detail of the 'flower' building (Singapore's ArtScience Museum).
Exposure bracketing done, every part of the final image should now be correctly exposed. Time to pack up and go home?
No, no, no…
Thomas waited another hour there. Why?
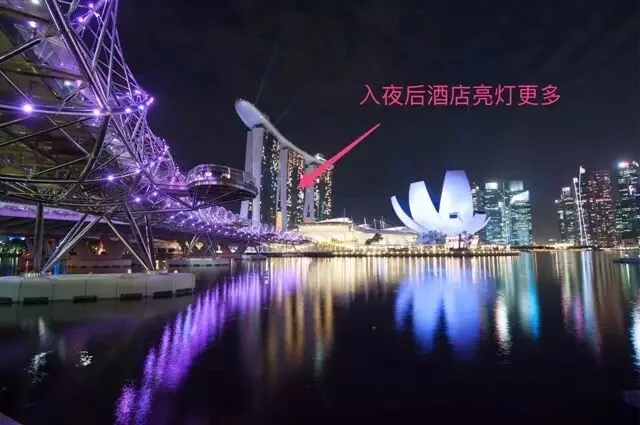
Because later, when tourists return to their hotels, more rooms light up in the Marina Bay Sands in the distance!
And at a fixed time every evening there's a light show with beautiful beams to capture.
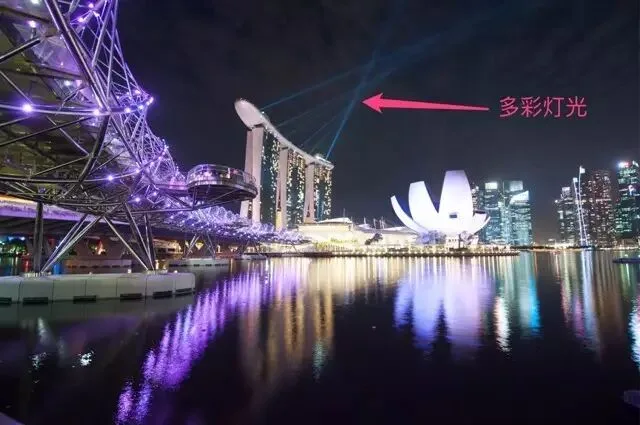
The buildings' colors also change.
That night I shot over 100 raw frames and finally selected 6.
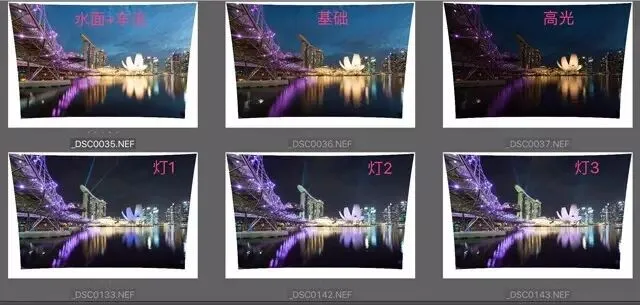
Together they formed the single final image.
Idea 2
Behind one great image, there may be 100 adjustments
Behind a beautiful portrait there may be the photographer's meticulous work on eyes, nose, brows — every single part.
Likewise, behind a striking landscape image there are subtle local adjustments to the sky, the foreground, even a distant tree stump.
For example, the image mentioned earlier looked like this when first imported into Photoshop.
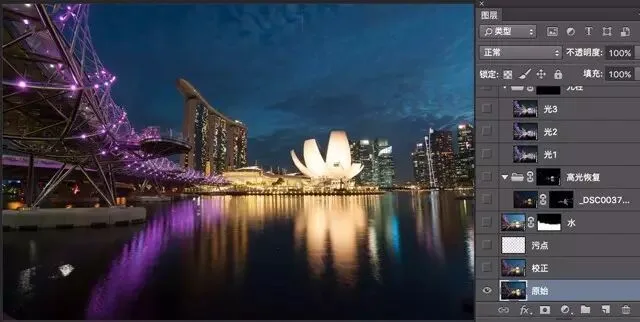
Step one, of course, is correcting distortion so the buildings stand straight.
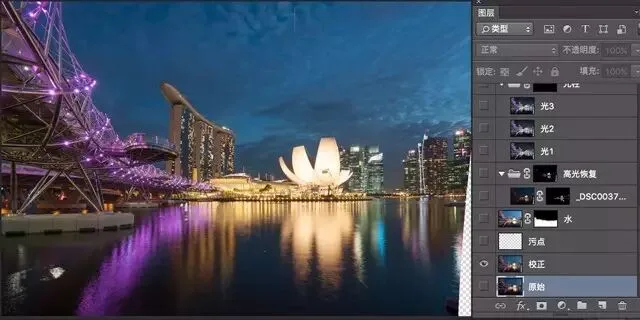
Then bring in the separately shot water and car lights, blending them in with a hand-painted mask.
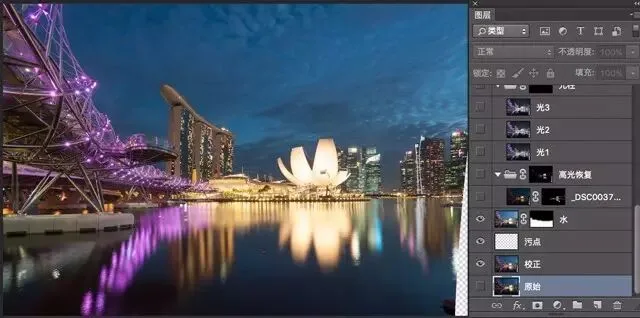
The separately captured highlight frame is also imported and blended with a luminosity mask.
(Note: this is only a rough outline of the steps to convey the mindset. The specific tools and techniques will be covered systematically in future tutorials.)
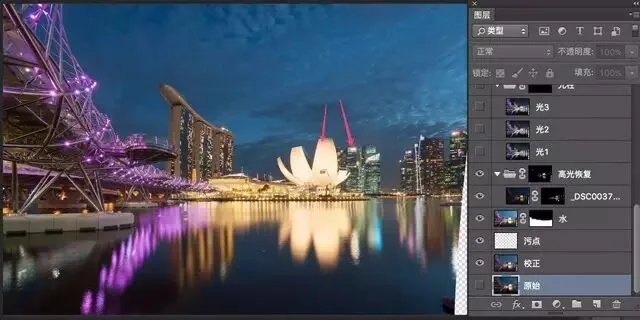
At this point it's already a well-exposed photo. But only after loading in the light beams we captured does the image get its 'wow' factor.
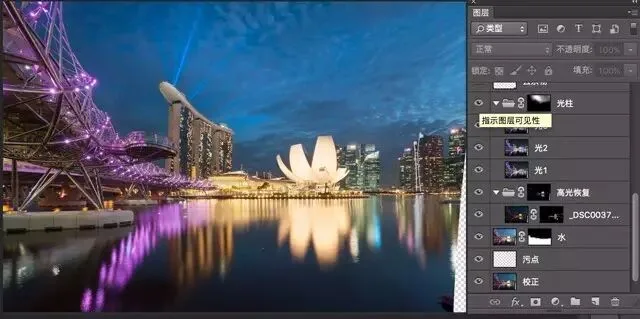
Correcting the distortion earlier left an empty patch in the bottom-right corner — that area has to be conjured from nothing with the clone stamp and brush.
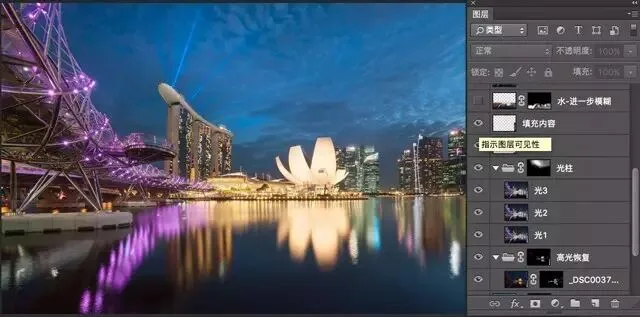
The water under the bridge still isn't calm enough; blur and soften it further in post. No detail gets a pass.
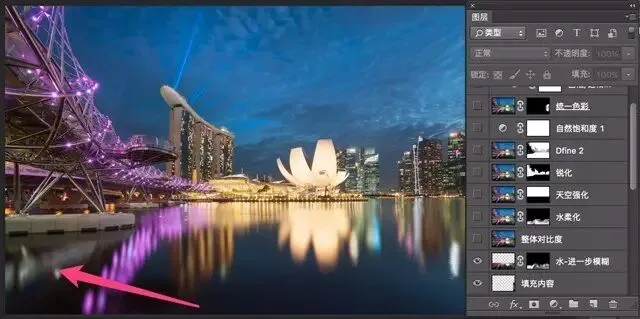
After the water comes the sky: since the water is smooth and silky, I enhanced detail and texture in the sky for contrast.
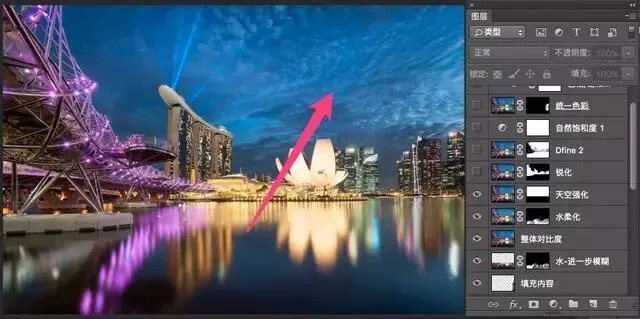
Noise reduction and sharpening are opposing actions — applying both globally is self-contradictory, so they too demand refined local treatment.
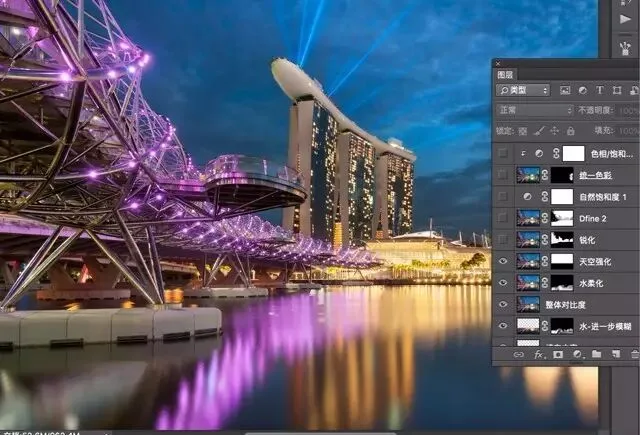
Sharpen the buildings, especially the metallic texture of the bridge in front; denoise the sky and water to keep them pristine.
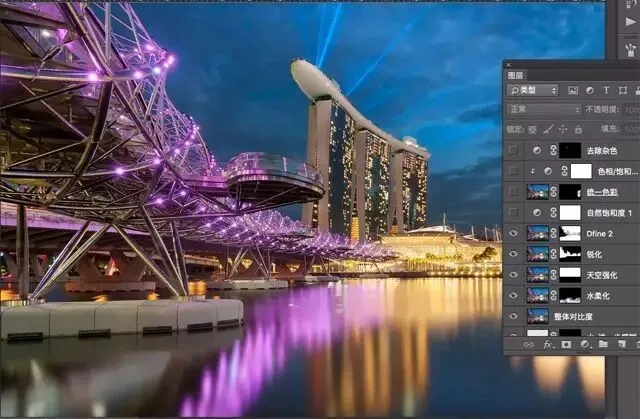
This photo has four main colors: golden yellow at center, blue of sky and sea (warm-cool contrast), the purple bridge at front-left, and the green financial district at back-right (magenta-cyan contrast). But one golden building sneaks into the green financial district on the right.
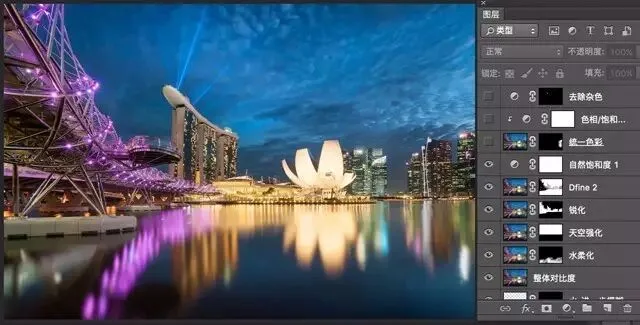
So more local adjustments are needed to unify the colors of each small area.
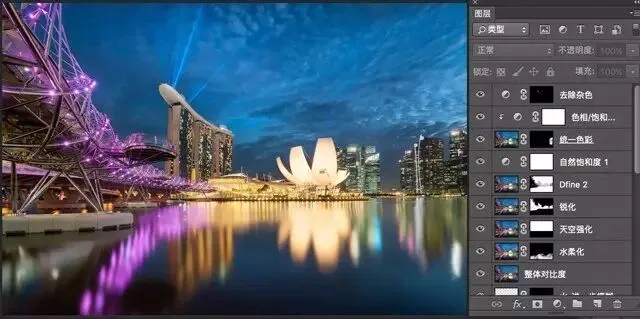
Ta-da — after more than a dozen steps, the result finally satisfies. Of course, some details could be refined even further.
Summary
1. Behind one great image there may be 100 raw frames. 2. Behind one great image there may be 100 adjustments. 3. The gap between you and great work may not be gear — but mindset.
I'm @Thomas Chu Photo, sharing an original photography tutorial every Sunday evening.