Photography Tutorial · 2020-03-29
Low-Saturation Teal-and-Orange in a Few Steps: ACR/Lightroom Grading Tutorial
Thomas Chu Photo
The low-saturation teal-and-orange tone is harmonious and easy on the eyes — a favorite among Instagram influencers.
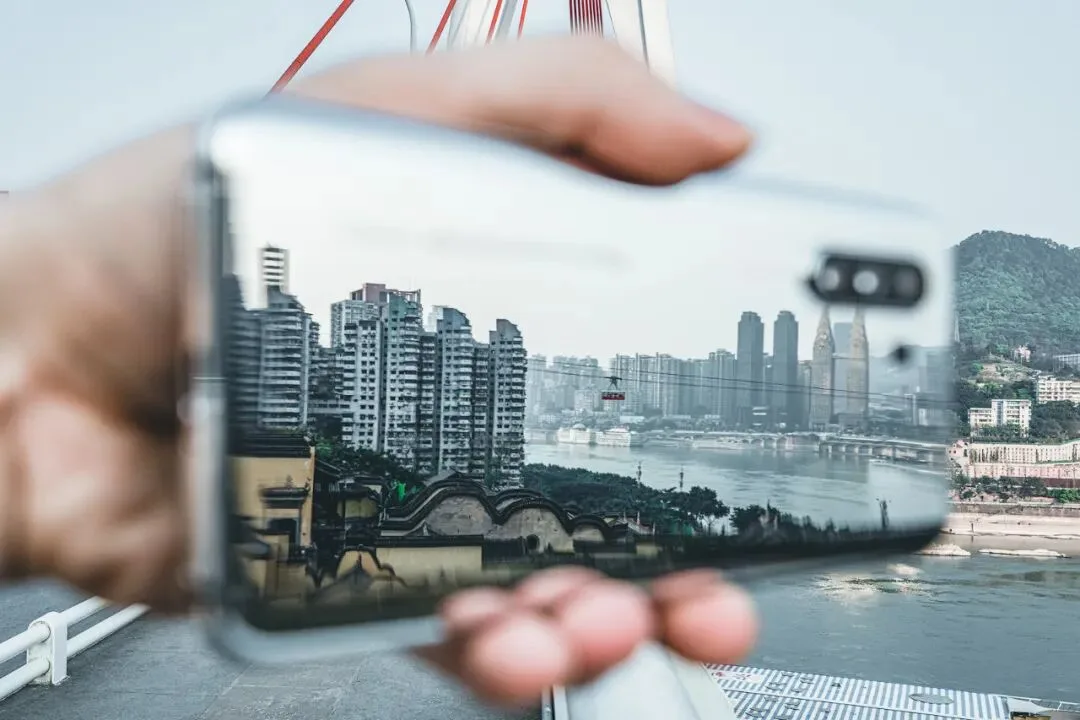
I used this grade extensively in a recent series of Chongqing city images from the Thomas x vivo x alexanderwang phone collaboration.
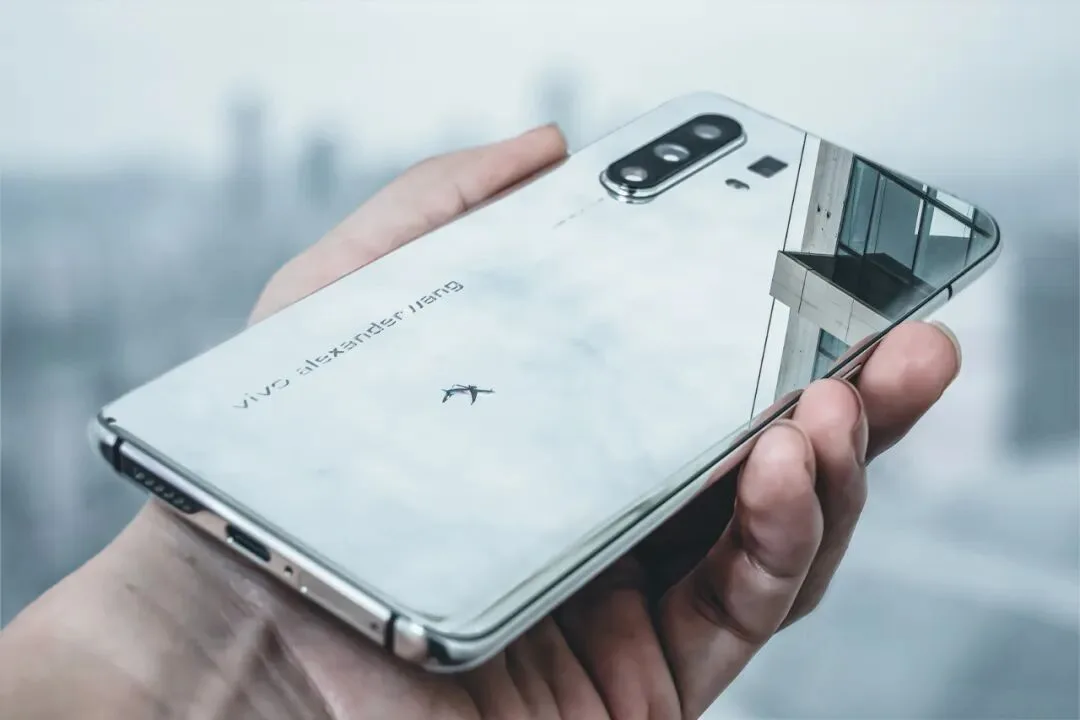
In today's video tutorial, Thomas shares how to create this look in Adobe Camera Raw (Lightroom works similarly) in a few simple steps.
Video Tutorial
▶ Watch the video tutorial on Bilibili
This is the fully illustrated companion to the video above. Using a mirror-play creative photo shot in Chongqing for a vivo collaboration, Thomas walks through the complete recipe for the popular muted teal-orange look: from analyzing the palette's rules, through corrections, exposure, desaturation, Split Toning, and the Calibration and HSL tools in Camera Raw. Screenshots of every step let you follow along directly.
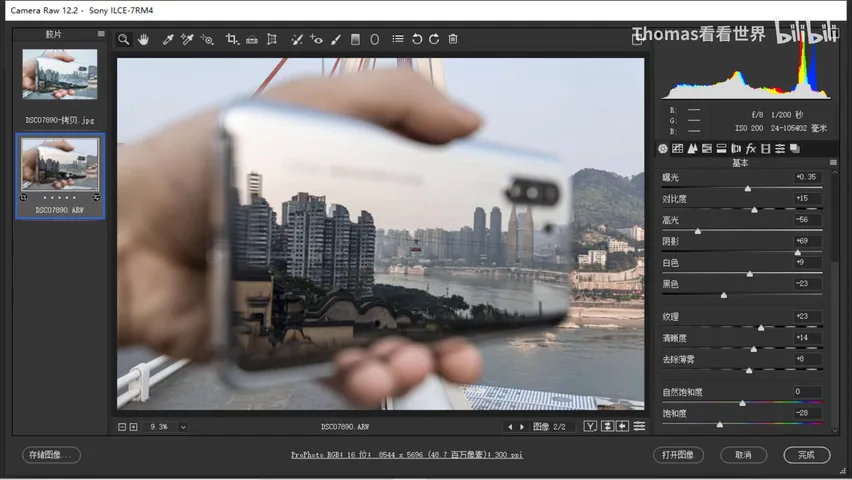
Start with the before-and-after: the first image below is the original, the second the finished grade. The steps are genuinely simple — a few moves in Lightroom or Camera Raw get you there (at 0:53 in the video).
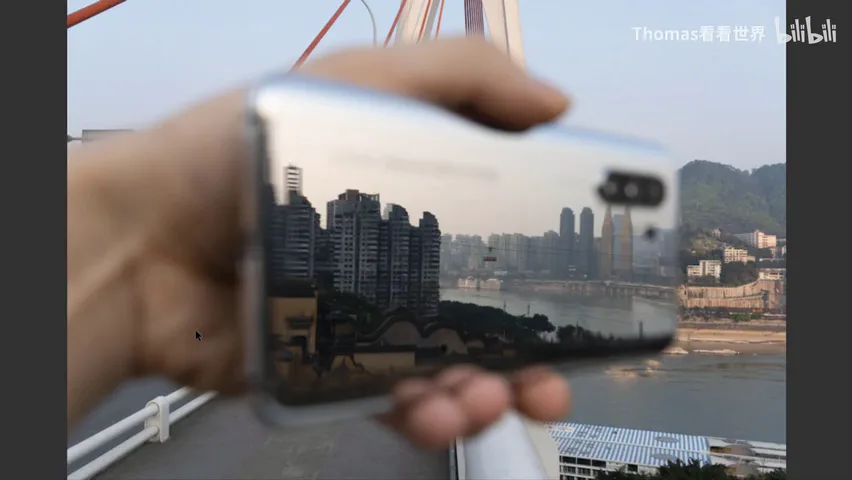
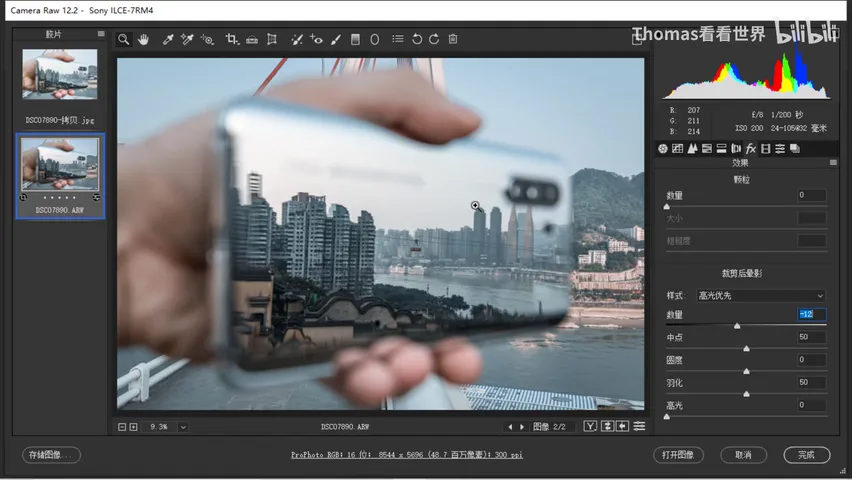
01 Corrections, Cropping and Exposure Basics
Before grading, analyze the rules behind this muted teal-orange look (at 1:07 in the video): the finished photo is remarkably unified, wrapped in a teal cast — yet some areas regain their original colors: the hand, the distant houses, the dirt all return to natural warm yellows. So the recipe has three moves: strip away the original chaotic colors, cast the whole frame in teal, then restore warm yellow subjects to believable color.
In Adobe Camera Raw, step one is always removing chromatic aberration and enabling profile corrections — tick these for every photo (at 2:11 in the video). Because this frame holds a phone and buildings, open the Transform tool; when auto fails, drag guides manually so the phone and the distant architecture sit perfectly level and plumb (at 2:23 in the video). Then crop: cut the distracting red object in the upper-left and the messy trees in the lower-right, so the mirror world on the phone's glass takes center stage (at 2:49 in the video).
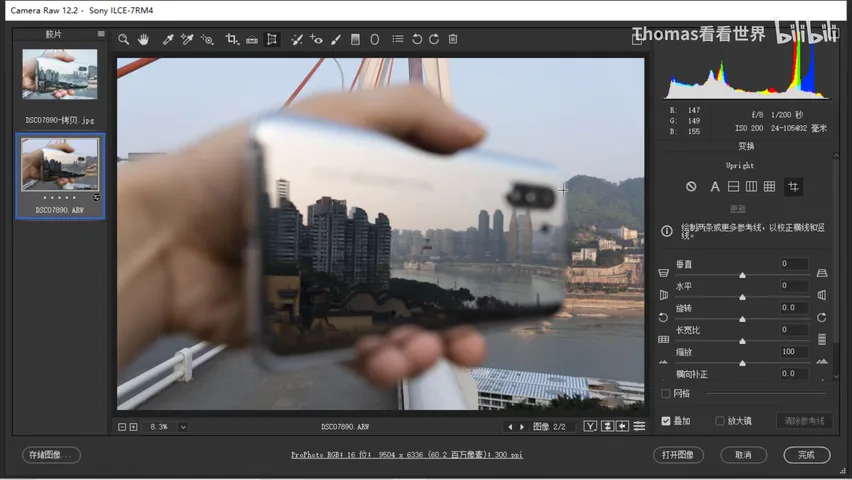
Exposure (at 3:14 in the video): lift the overall exposure slightly and raise the shadows — without it the architecture drowns in gloom with no detail; lifting flattens contrast, so add some back, pull the Blacks slider left to re-anchor the black point, raise Whites, and ease the Highlights down until the brightest areas sit in a controlled, bright-but-detailed zone.
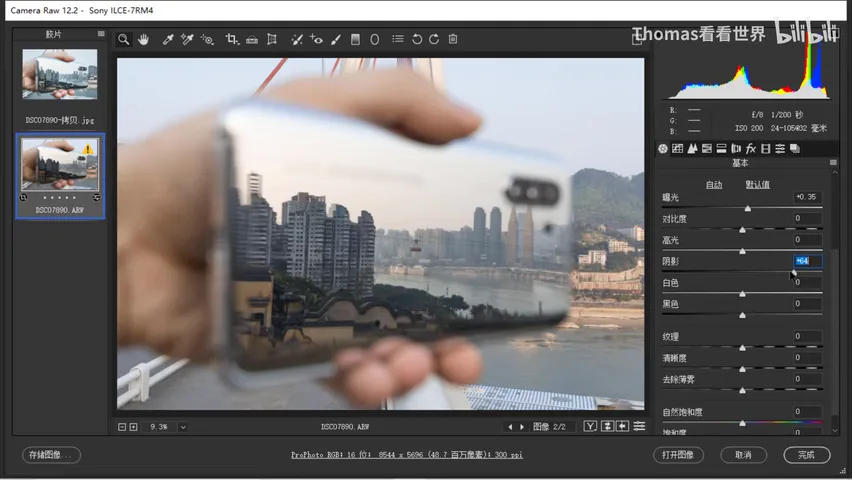
Since the subject is architecture, add some Sharpening and Clarity to enrich edge detail, plus a touch of Dehaze (at 3:53 in the video). What each of these sliders actually does is covered fully in Thomas's earlier articles.
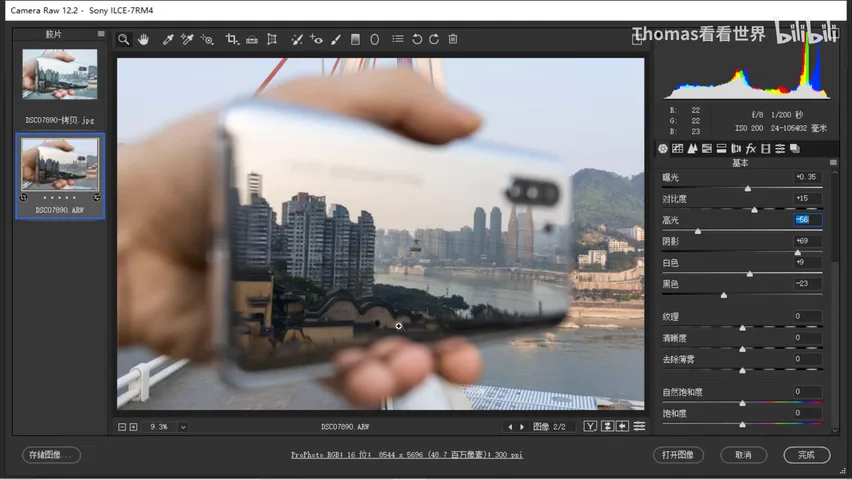
02 Desaturate to Make Room for New Color
Here comes the crucial move: desaturate the photo (at 4:22 in the video). The finished image is only moderately saturated, and the reason for pulling saturation down is that the original colors must be suppressed first, so the new cast can take over cleanly — otherwise old and new colors fight each other. Trim every color back a little and the color you add later will read pure.
03 Split Toning: Cast the Frame in Teal
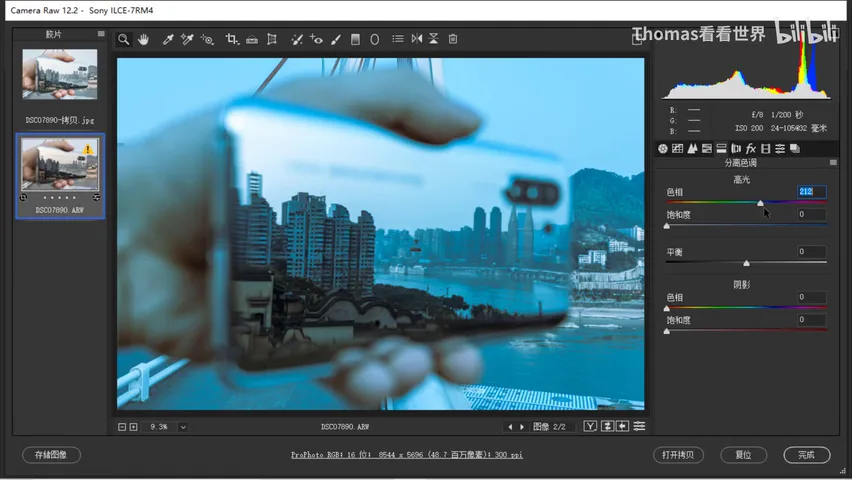
Color can be added with white balance or other tools, but Split Toning is used here for its precise hue control (at 5:01 in the video). The target is a teal-blue cast: in the Highlights, push the hue slider to a teal-blue around 212 and raise saturation to about 15 (at 5:17 in the video); cast the Shadows in teal too, at 218 or 206, leaving a faint hue difference between highlights and shadows, with saturation raised as well. Now the whole frame wears that teal veil.
04 Calibration and HSL: Bringing Back Accents
After the teal cast a problem appears: the whole frame is veiled, and originally yellow objects — the hand included — turn an ugly greenish tone (at 5:55 in the video). Time to restore what should look normal. Start with the hue sliders in Camera Calibration (at 6:21 in the video): sliding left shifts orange, yellow and red toward orange-red while blue shifts toward teal; sliding right sends orange toward green and blue toward purple. To give the hand back its warm, lively orange, slide left — the frame's blue drifting slightly toward magenta is fine, because HSL fine-tuning comes next: if the blue is too teal, nudge it back left; if aqua leans too blue, left again (at 7:02 in the video).
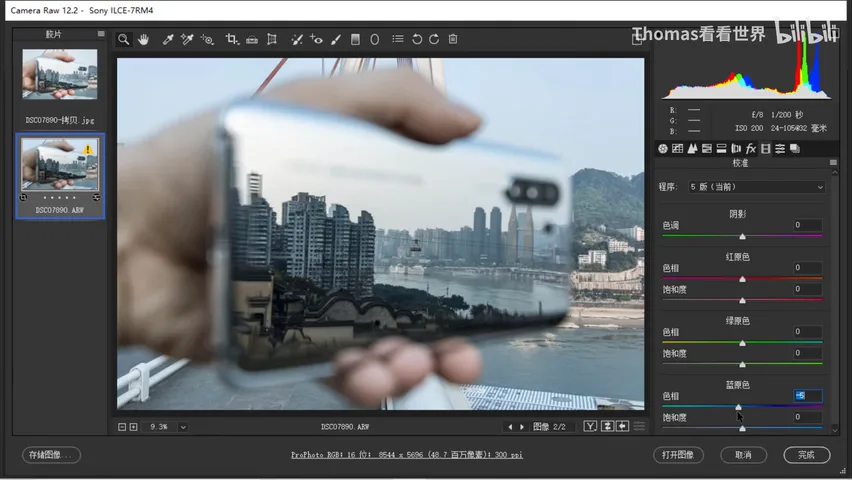
Green can go either way in a teal-orange grade — toward orange-yellow or toward teal; here leaning teal unifies the frame better (at 7:22 in the video). The orange hand needs dedicated care: shift yellow toward orange, orange toward red, and red slightly toward orange, until the skin returns to a healthy orange-red (at 7:37 in the video).
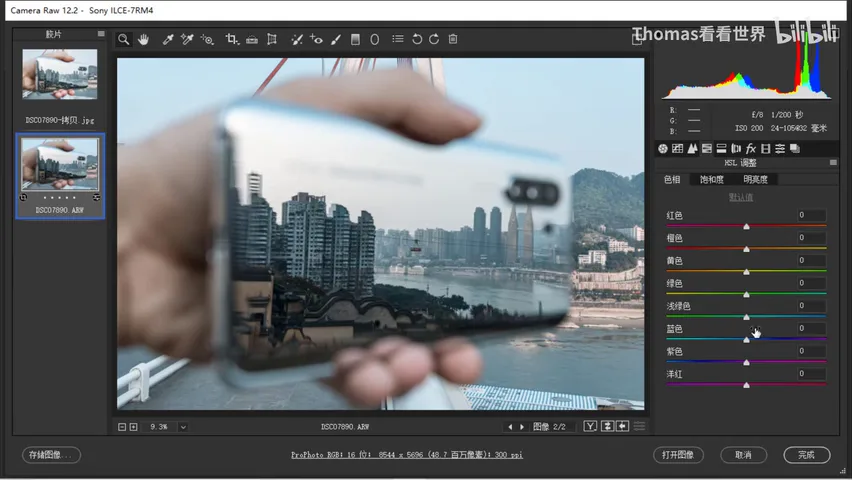
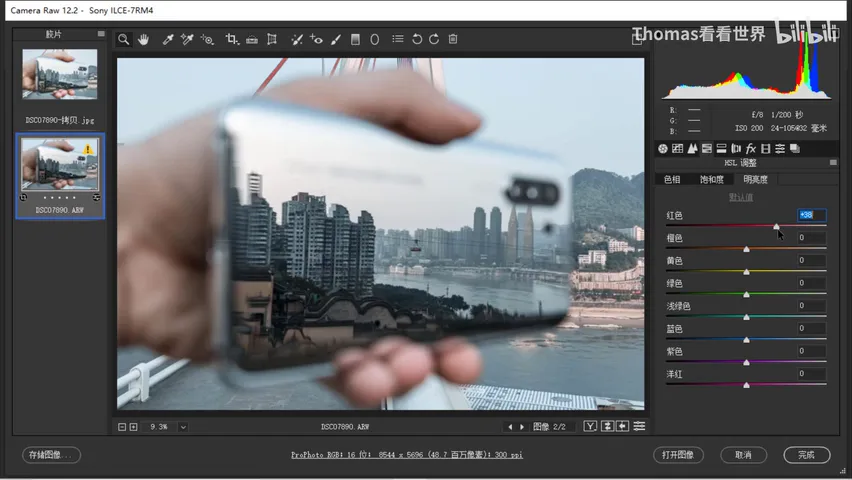
Saturation works similarly (at 7:57 in the video): give red some saturation back so the hand gains color and the red paint on the bridge behind shows through — keeping a few accent colors alive under the unified cast is exactly the goal. Add a touch to orange, a little to yellow, and pull green down slightly; aqua and blue are the cool tones here, so reduce their saturation to keep the teal veil from getting too heavy; purple and magenta barely exist in this frame — leave them.
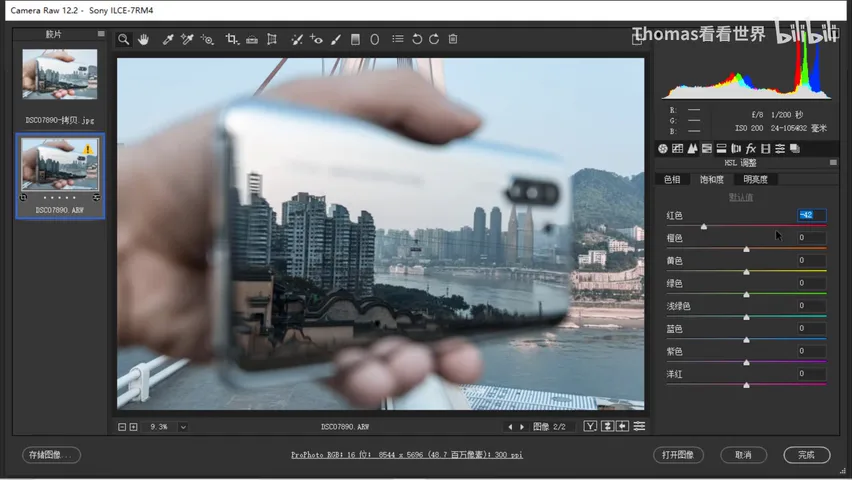
Luminance (at 8:53 in the video): raise red so the hand glows a bit more; orange can stay or rise slightly; yellow can come up some; lower aqua and blue moderately — building a brightness contrast between warm and cool, with cools darker and warms brighter. The grade is essentially done (at 9:21 in the video): desaturate, cast teal with Split Toning, then use Calibration and HSL — mostly HSL — to bring back the yellows and reds of the hand and bridge as accents, and restore natural skin.
05 Finishing Touches and the Shoot Location
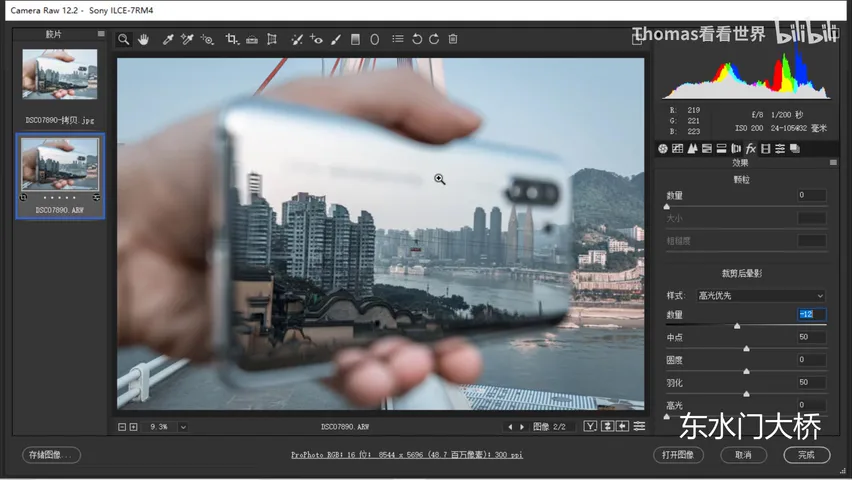
After that, fine-tune to taste: lift the shadows further, add a vignette to sink the edges, or refine local areas with the Radial Filter (at 9:53 in the video). The DNG practice file for this photo is linked in the Bilibili comments, on WeChat, Weibo and in the article — download it and try the grade yourself.
Finally, the location (at 10:28 in the video): the Dongshuimen Bridge in Chongqing, with the Huguang Guild Hall below, and the Yangtze River cableway plus Nanbin Road in Nan'an district in the distance — a bustling stretch. With mountains, water, river and city in one view, it is a gorgeous spot for photographers; don't miss it when you visit Chongqing.
1. The muted teal-orange recipe in three moves: desaturate to strip clutter, cast the frame in teal, then restore warm yellow subjects to believable color. 2. Before grading, remove chromatic aberration, apply lens corrections, straighten with Transform, crop, then lift shadows, re-anchor blacks and tame highlights. 3. Split Toning gives the most precise teal: highlights near hue 212, shadows at 206-218, saturation from 15. 4. Slide Calibration hues left to restore orange-red skin, then in HSL lower cool saturation and raise warm luminance for a double warm-cool contrast.
The original was shot on a Sony a7R IV; the editing demo runs on a Dell XPS 15.
Practice files download:
Baidu Cloud link: https://pan.baidu.com/s/1QquwHRX-QYCIM2oLzNeBKg Extraction code: xxxb
Or Tencent Weiyun link: https://share.weiyun.com/5K54Fc7