Photography Tutorial · 2017-04-16
How to Photograph Beautiful Night Light Trails
How do you shoot beautiful city light-trail photos at night?
In this week's video tutorial, Thomas demonstrates the full process — on-location capture plus stacking and grading in post — for a beautiful urban night light-trail shot.
Video Tutorial
▶ Watch the video tutorial on Bilibili
Source files download: https://pan.baidu.com/s/1dERYgz3
Written Summary
For this lesson's capture we used not a tripod and DSLR, but a DJI Mavic Pro drone to reach a unique bird's-eye angle.
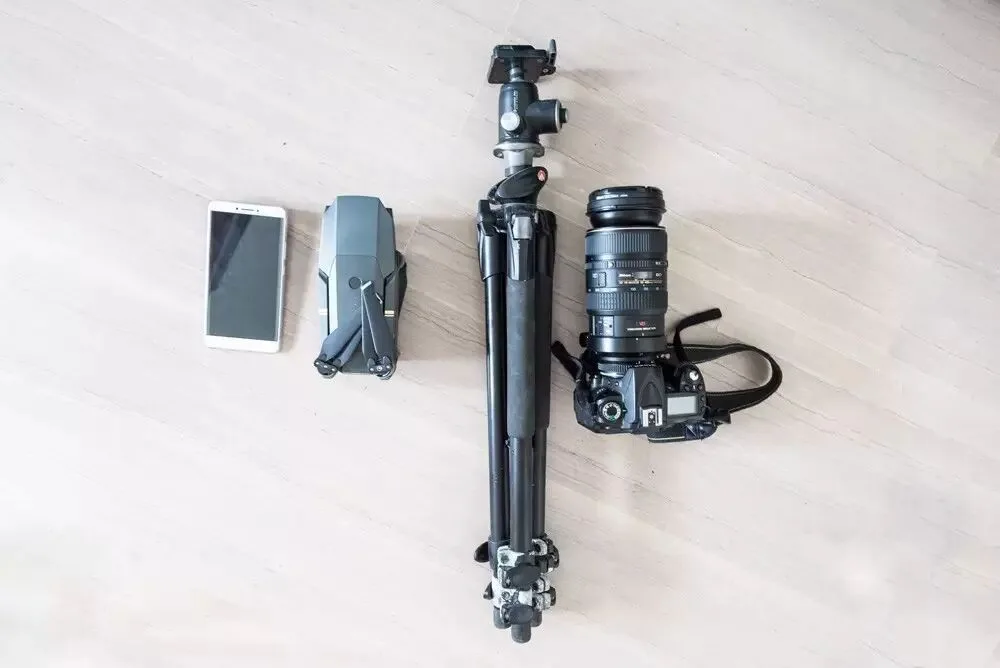
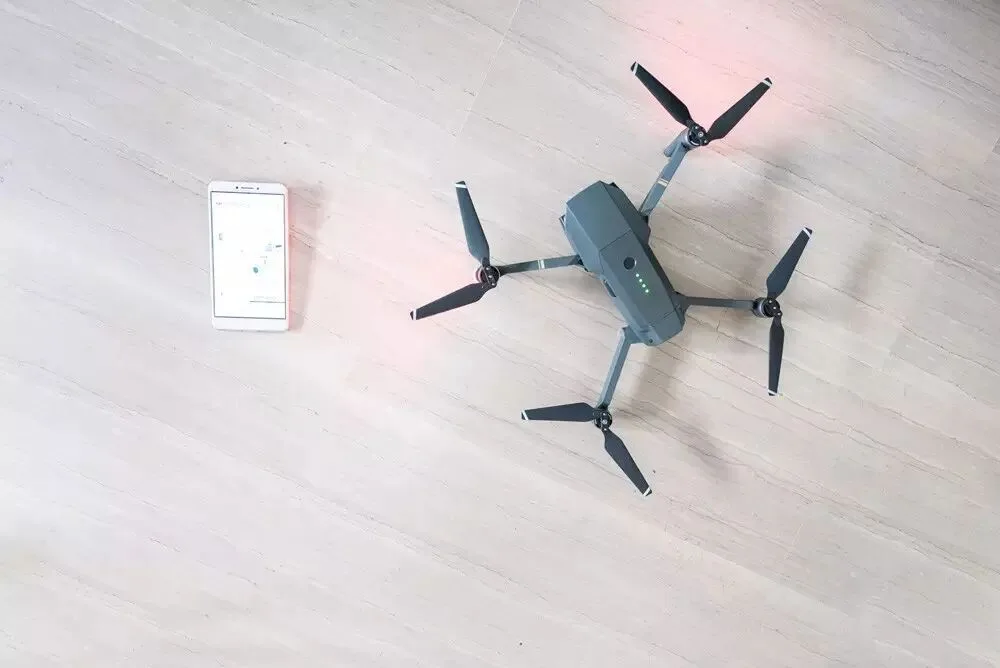
Set the drone to 'Tripod Mode' and '7-frame burst', ISO 100, 2-second exposures (the Mavic's aperture is fixed at f/2.8).
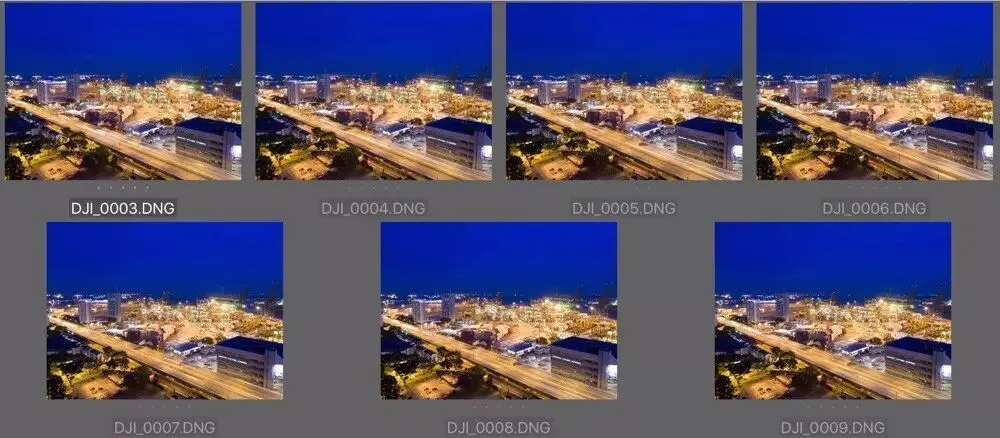
That gives us 7 consecutive frames of traffic flow.
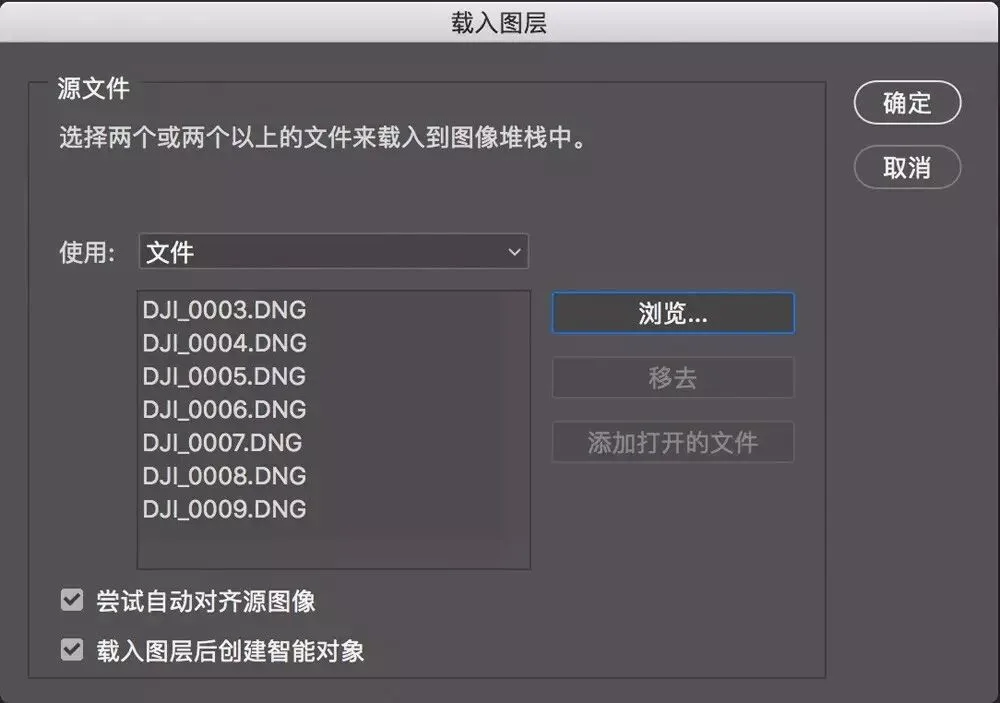
In Photoshop, load the 7 photos into a stack.

Check 'Auto-Align Source Images' to correct tiny shifts between frames, and 'Create Smart Object' to prepare for maximum stacking.
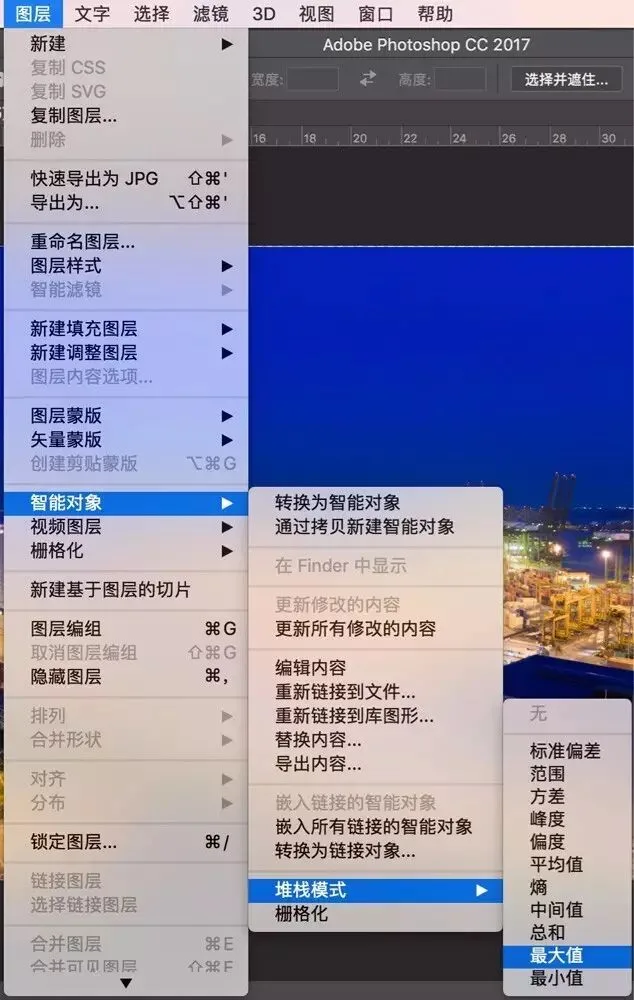
Once converted to a Smart Object, choose Layer → Smart Objects → Stack Mode → Maximum. Every part of the final image takes the brightest value across all frames.
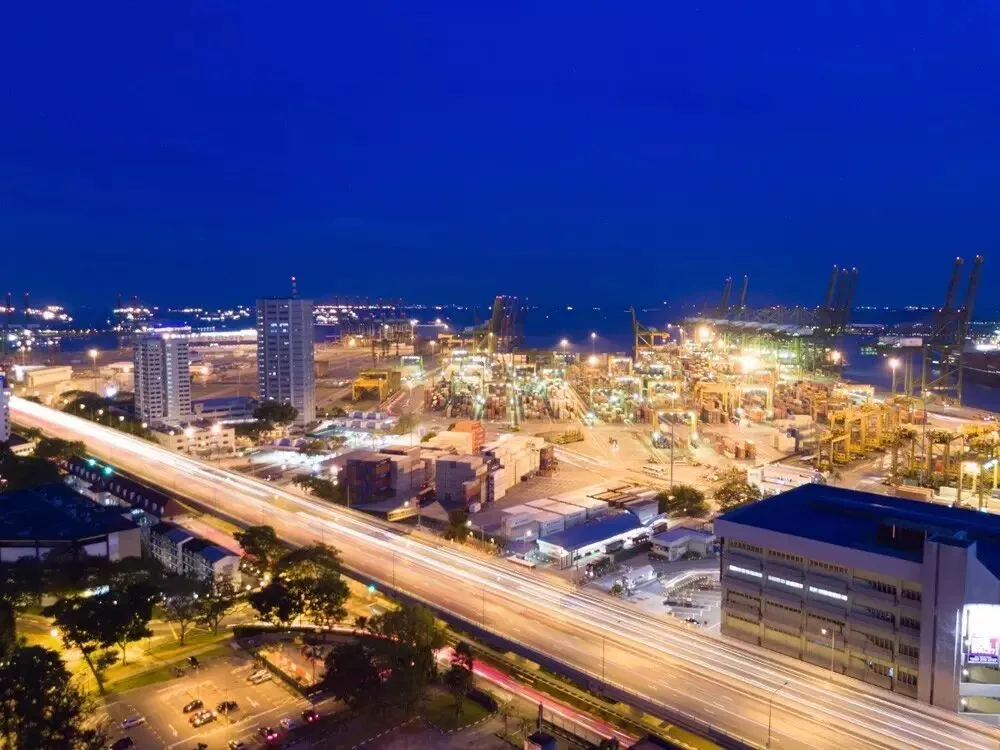
After stacking, dense continuous light trails appear on the road.
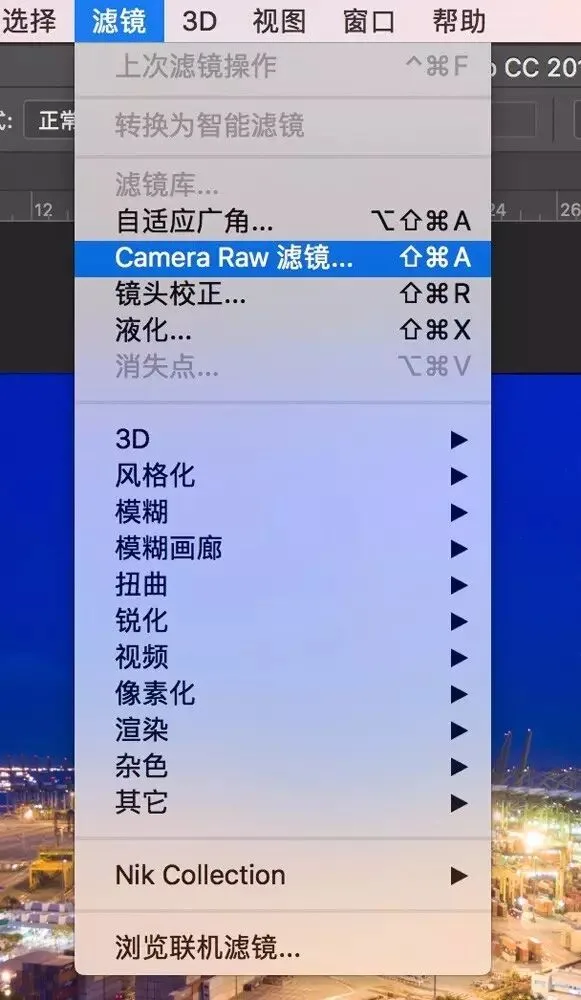
Next comes basic correction, exposure and grading — open Filter → Camera Raw.
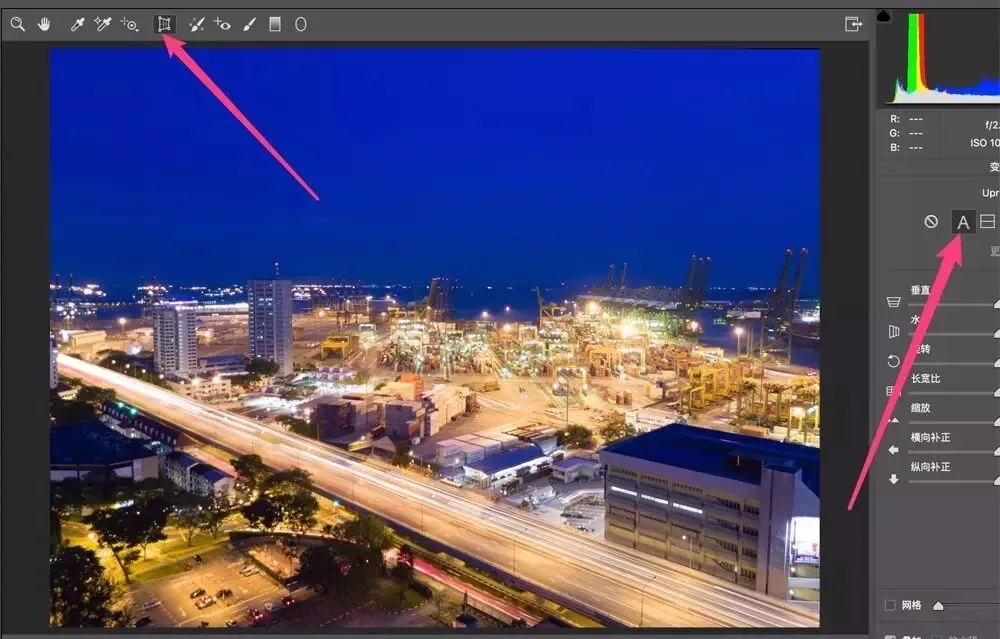
First use 'A' (Auto) in the Transform panel to fix the horizon and correct the buildings' perspective distortion.
Then in the Basic panel, recover highlights, lift shadows and blacks, and add contrast and clarity.
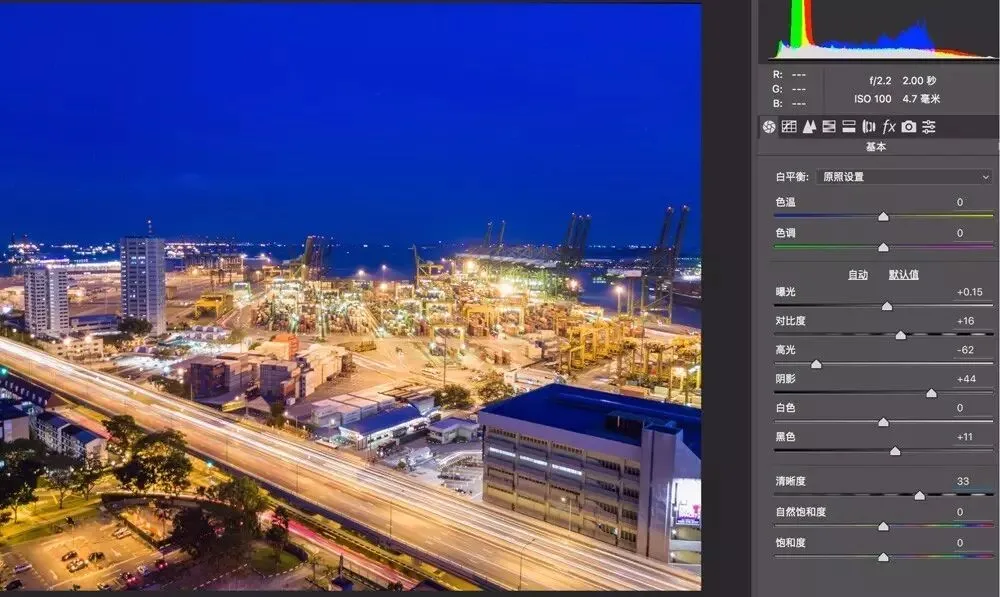
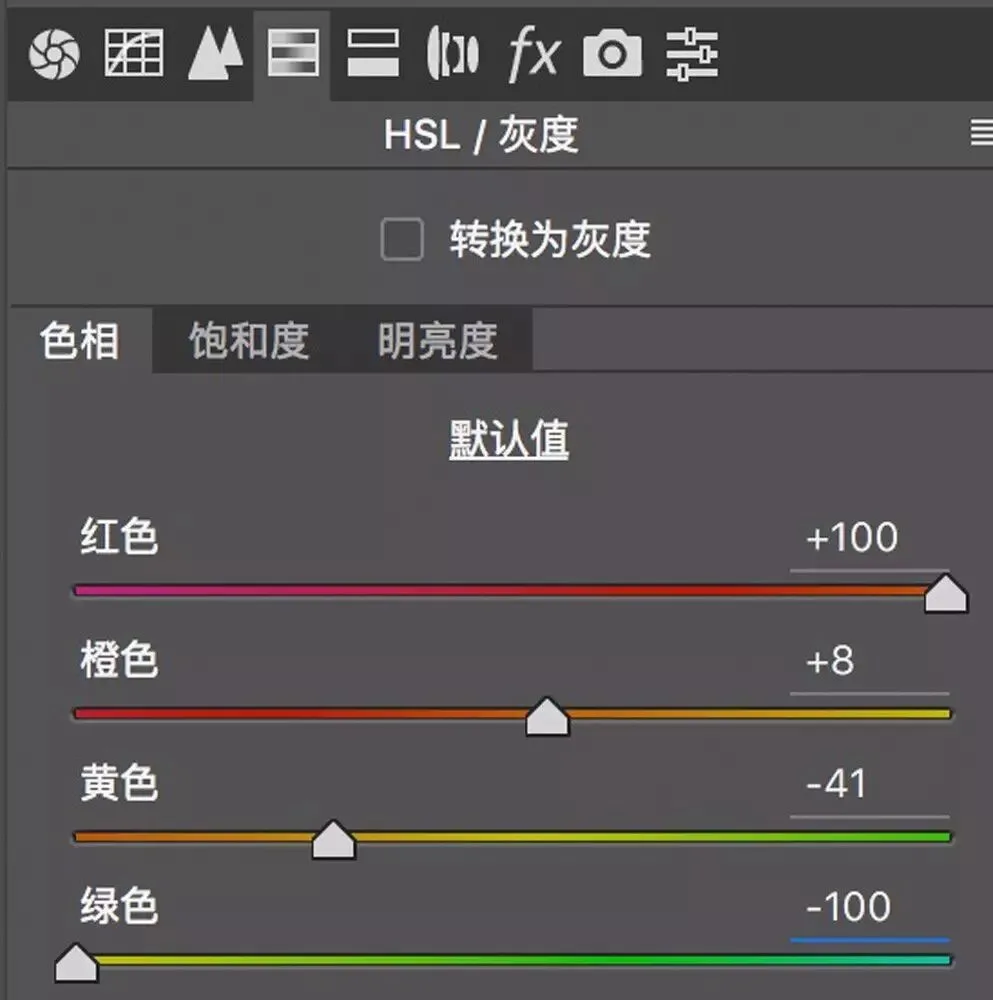
In night photos, colorful lights clash with each other, so we reduce the number of hues. Shift all four warm tones — red, orange, yellow, green — toward golden yellow.
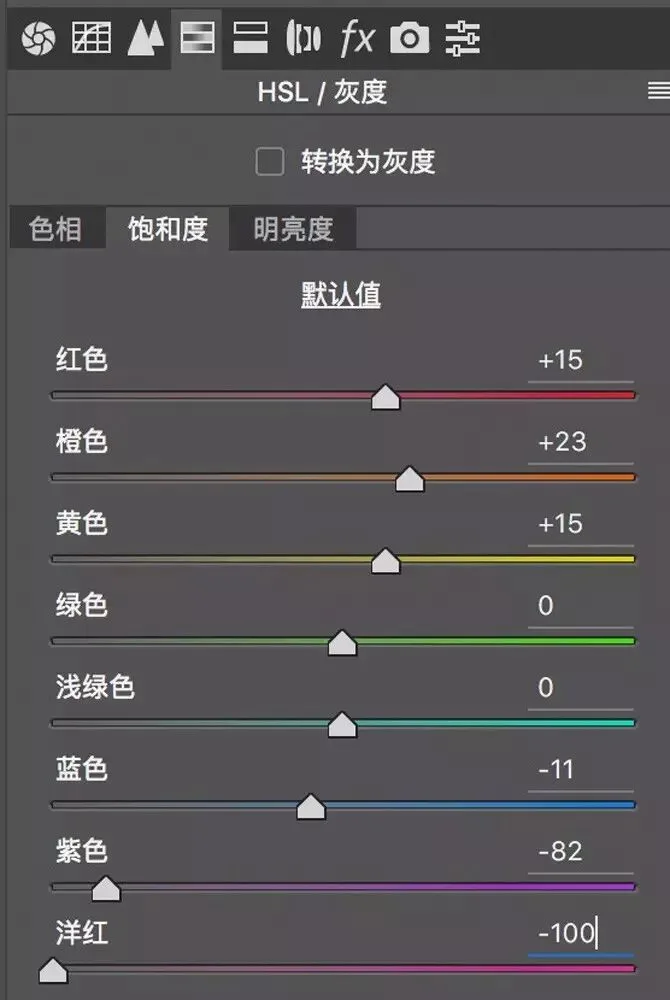
For saturation: boost warm saturation to emphasize the city's glittering lights, and reduce cool saturation to control the cold tones in shadows and sky.
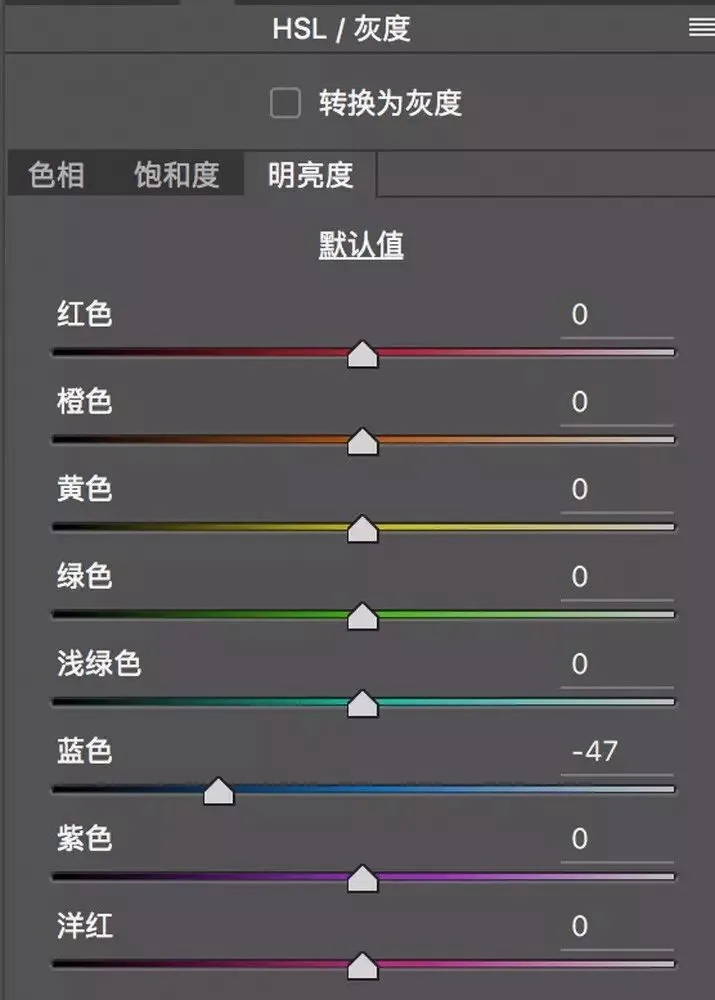
Finally, darken the blue sky to contrast against the bright warm lights.
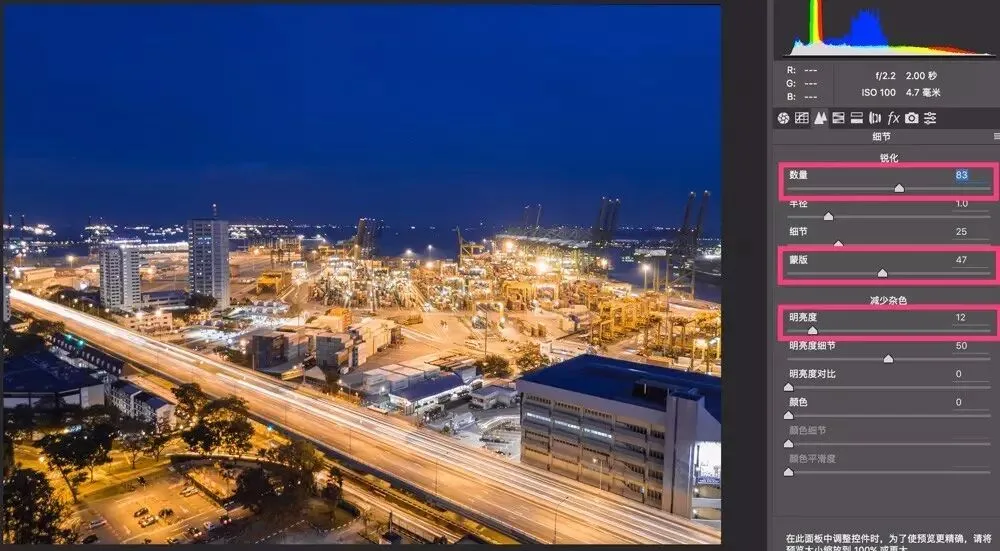
After some basic sharpening and noise reduction, the Camera Raw stage is done.
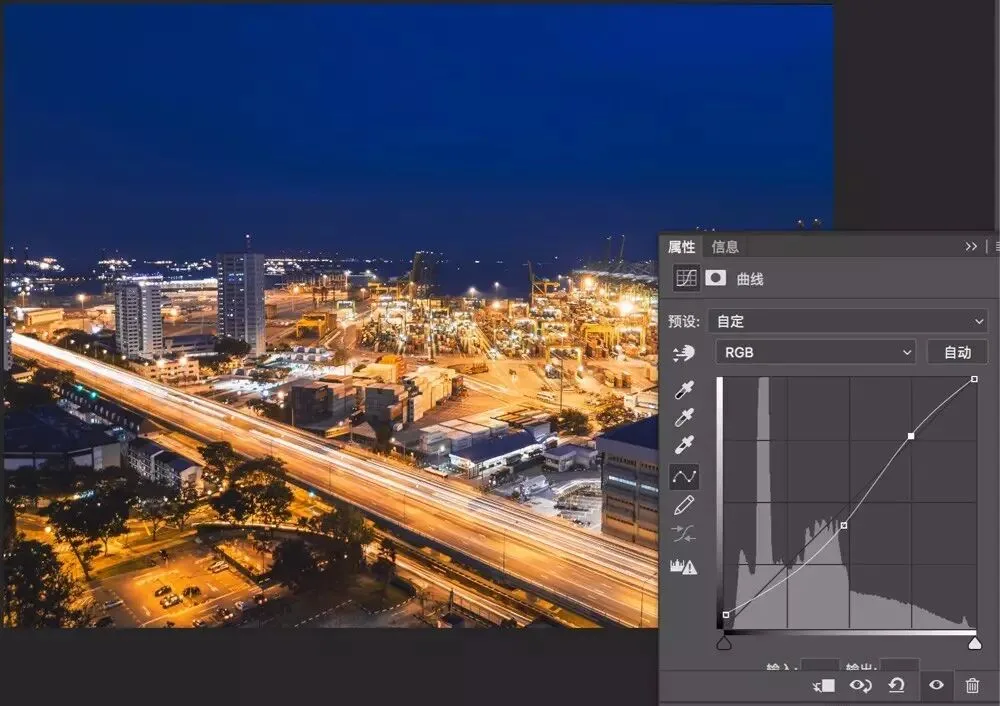
Add an S-curve and raise its black point — increasing contrast while removing crushed dead blacks.
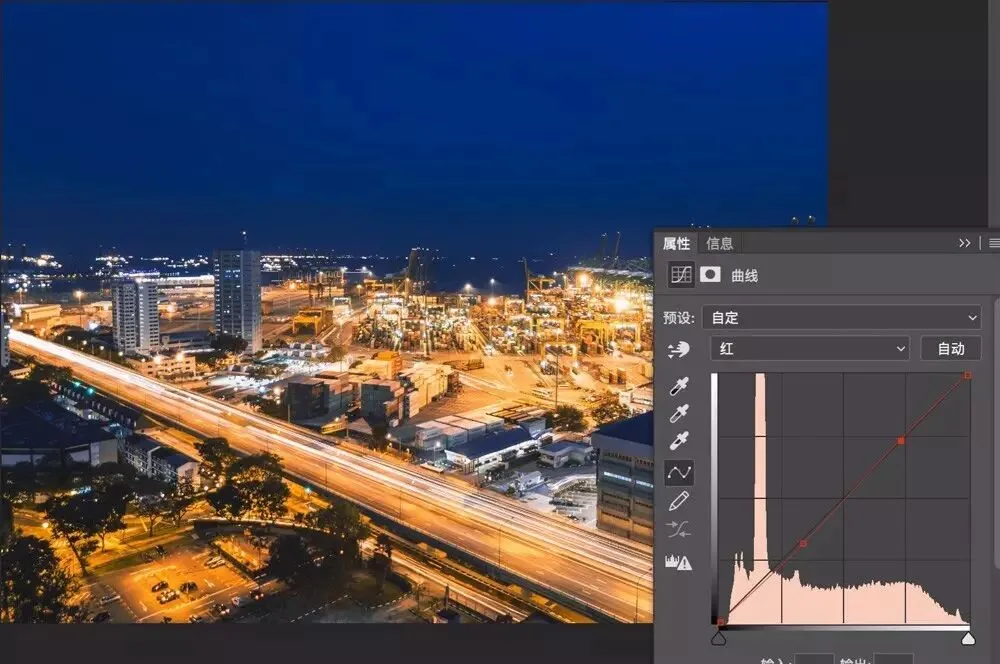
Add an S-curve to the red channel too: more red in highlights, less red in shadows (less red equals more cyan).
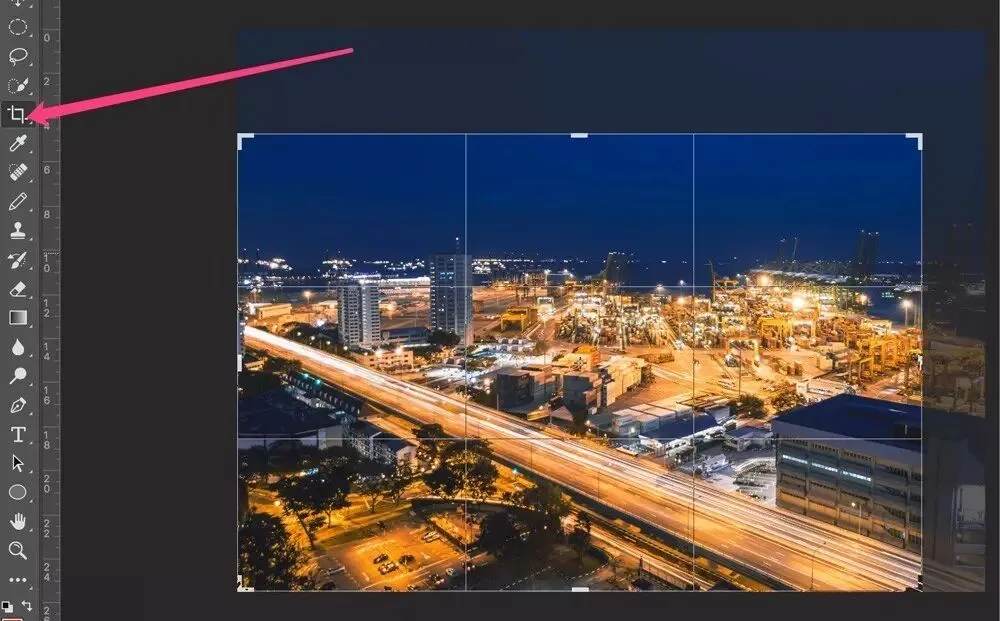
Finally crop away excess sky and a distracting billboard — post-processing complete.
Before post-processing:

After maximum stacking + grading:

Follow @Thomas Chu Photo and learn one photography skill every week.