Photography Tutorial · 2024-06-11
Nik Collection 7: A Complete Guide to My Most-Used Features
Nik Collection 7 is probably my most-used PS plugin and filter library.
Nik's Control Point selection is now more powerful than ever, and with Viveza built into the Color Efex library, you can quickly make local color adjustments without complex selection tools like channels or the Pen.
In today's tutorial, Thomas shares a complete guide to the features he uses most in Nik Collection 7!
Video
▶ Watch the video tutorial on Bilibili
This is the fully illustrated companion to the video above. Nik Collection 7 is Thomas's most-used plugin library in Photoshop, and in this episode he runs through his favorite filters on a single snowy-village photo: the entry point and filter libraries first, then Nik's signature selection tools — Control Points, Control Lines and Polygons — plus the White Balance fix, and finally go-to filters like Polarization, Classical Soft Focus, Tonal Contrast and Foliage. Everything below follows the video in order, with parameter panels and mask states captured as keyframes so you can follow along.
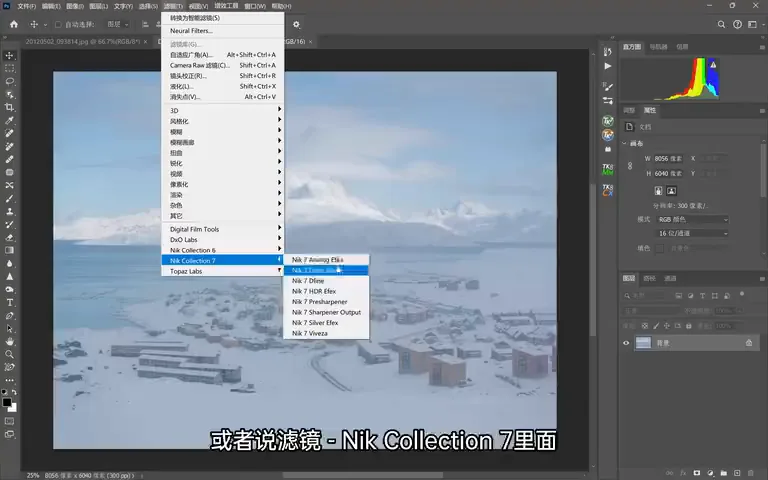
First, the entry point: this screenshot from 0:30 in the video shows the Filter menu in Photoshop, where the full Nik Collection 7 module list lives — the starting point for every demo in this guide.
01 Entry Points and the Filter Libraries
Once Nik Collection is installed, every module is reachable from the plugin panel inside Photoshop or via Filter → Nik Collection 7 (at 0:30 in the video). The division of labor is clear: Analog Efex for film looks, Color Efex for color work, Dfine and Sharpener Pro for noise reduction and sharpening, and Silver Efex for black and white (at 0:32-0:43 in the video). Thomas's workhorse by far is Color Efex, the color grading library.
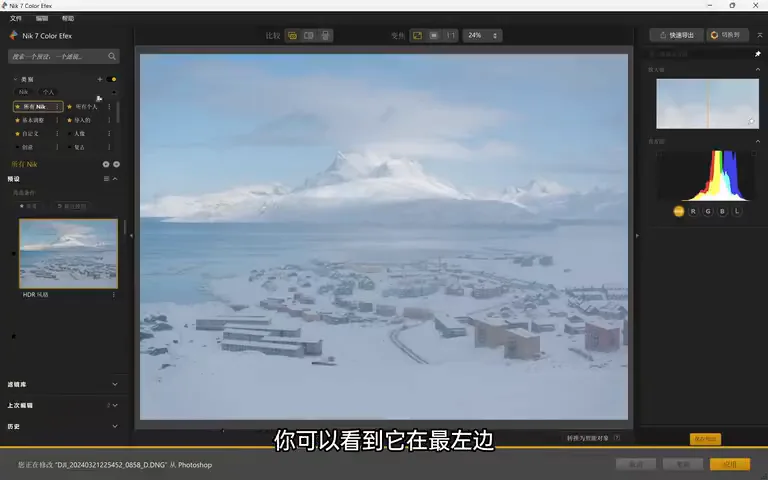
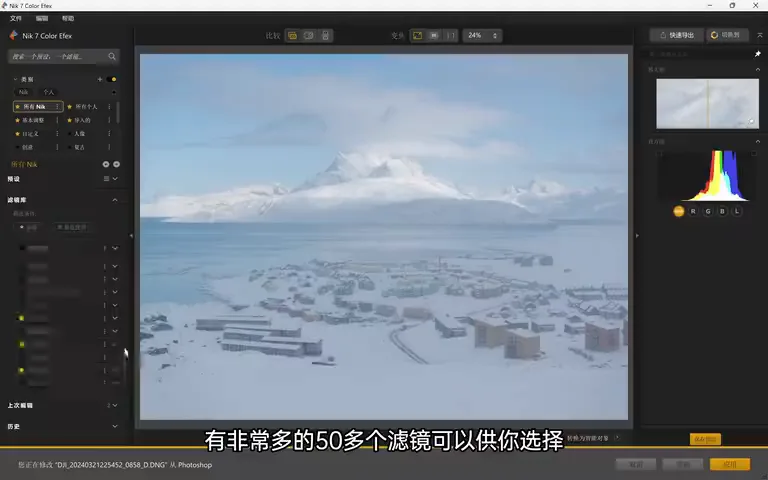
Inside the library, a column of presets sits on the far left (at 0:57 in the video) — one click applies a unified tone or a high-key look, great for a quick first pass; scrolling down reveals the full list of over 50 filters (at 1:12 in the video). Thomas has starred his most-used ones, so they are always one glance away.
02 Opening Moves: Dehaze, Curves, White Balance
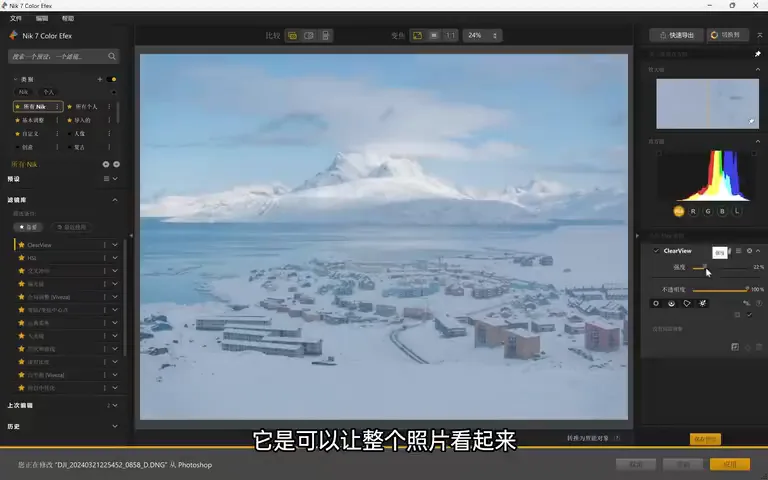
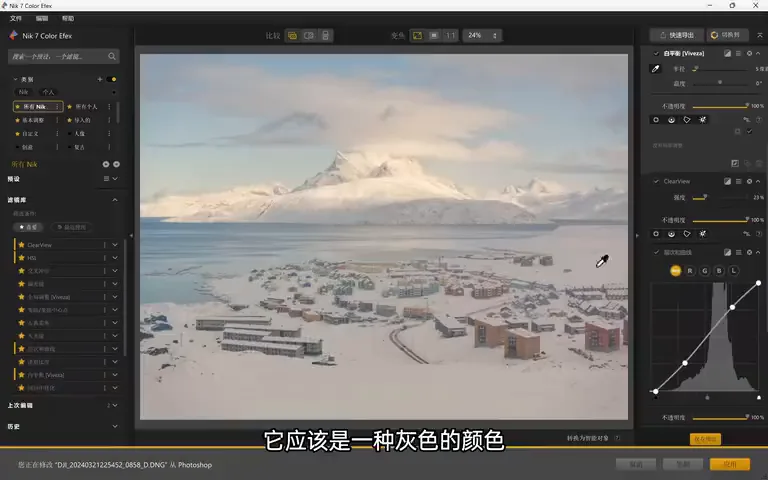
The live demo uses this snowy-village photo. Step one is the ClearView filter — something like a dehaze — which cuts the misty, washed-out feeling (at 1:26 in the video); step two is stacking a Curves tool and pulling a gentle S-curve for extra punch (at 1:36 in the video). Those two moves open most of his edits.
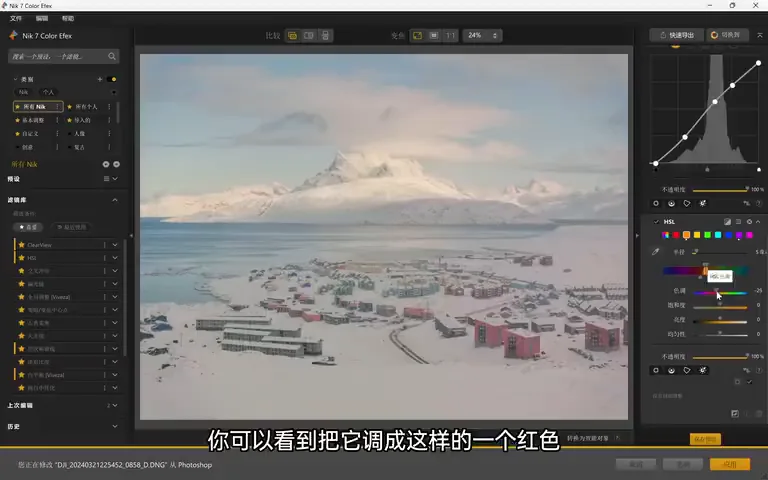
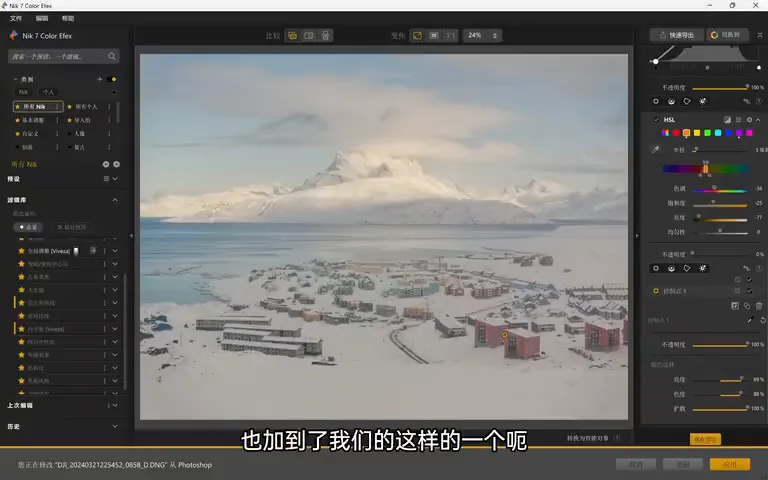
Next he tries an HSL move — shifting the houses' orange toward red — and nothing happens no matter how the saturation or hue sliders move (at 1:53 in the video). The cause is a classic: the photo's white balance is off, so the eyedropper is actually sampling a purplish hue. Always fix white balance before HSL — it is the trap this tool catches most people in (at 2:01 in the video).
The Color Efex filter stack has White Balance and Neutralize White tools right at the top (at 2:13 in the video). Drag White Balance to the top of the stack so it runs first, then click the eyedropper on the snow — which should be neutral gray — and the photo's white balance snaps back (at 2:32 in the video). While at it, pull the slightly blown highlights down and lift the midtones a touch with Curves (at 2:44 in the video). Now selecting orange actually works: shift it to red, ease the saturation and lightness down a little, and the building melts into its neighbors (at 3:00 in the video).
03 Control Points: Nik's Strongest Selection Weapon
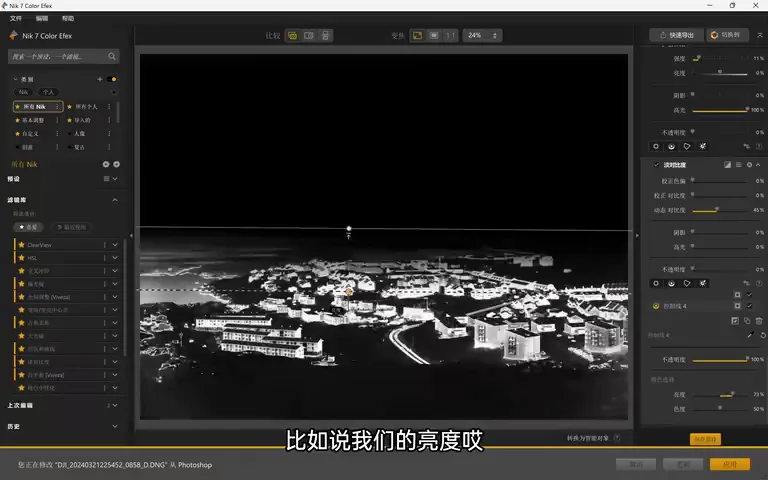
What if only these few houses should change? That is where Nik's signature Control Points come in (at 3:25 in the video). Click the image to drop one: it works as a center point with a circular falloff — the center samples the target, and "Diffusion" sets the radius and feather (at 3:52 in the video). Toggle the mask display to see exactly what got selected.
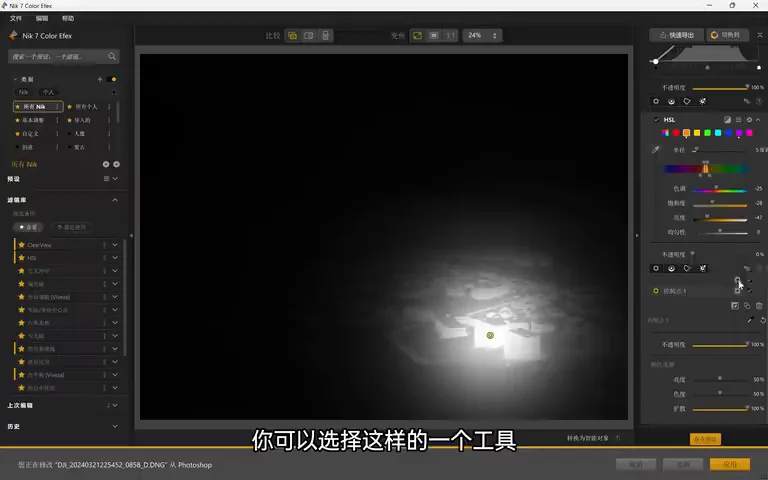
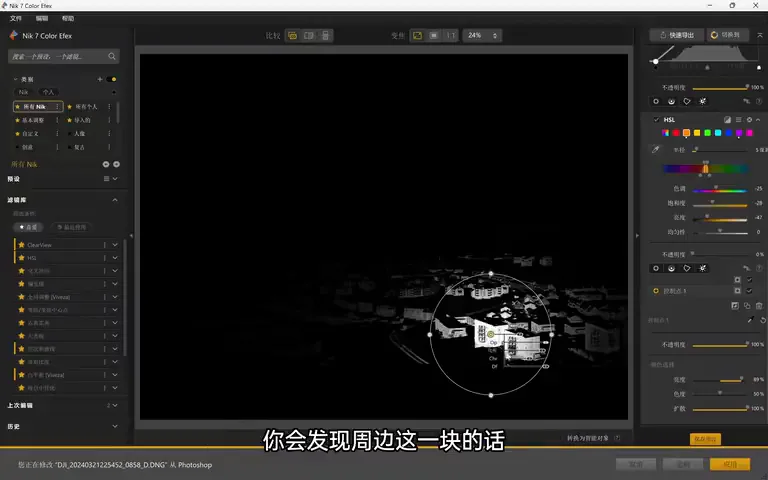
The real killer features are two more parameters: Luminosity and Chrominance (at 3:58 in the video). Raise Luminosity and only areas with brightness similar to the center point get selected; raise Chrominance and only similar colors do (at 4:03 in the video). The circle gives reach, the thresholds give precision — a few slider tweaks and effectively just those two houses are affected, as the before/after shows (at 4:41 in the video).
04 Viveza, Control Lines and Polygons
New in Nik Collection 7: Viveza, the global-adjustment filter, is now built into Color Efex (at 4:56 in the video). Brightness, contrast, saturation and color bias are all adjustable right there — no module switching needed (at 5:06 in the video).
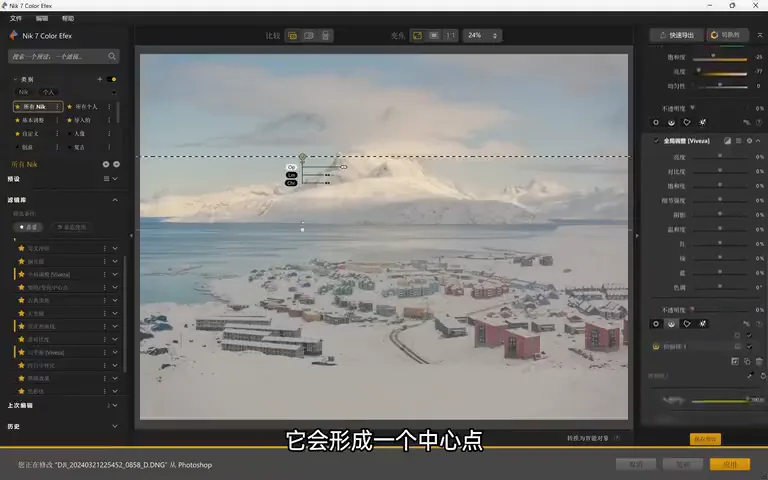
To darken just the blue of the sky, reach for the second tool: Control Lines (at 5:20 in the video). Click and drag to create a center point with a gradient region — like Camera Raw's graduated filter, but with a similarity test on top: only areas whose color closely matches the center point get selected (at 5:35 in the video). The clouds stay almost untouched; then lowering brightness and adding a touch of cyan and blue darkens the sky cleanly (at 5:57 in the video). For the zenith where sampling is thin, Alt-drag to duplicate a smaller Control Point and patch it (at 6:19 in the video).
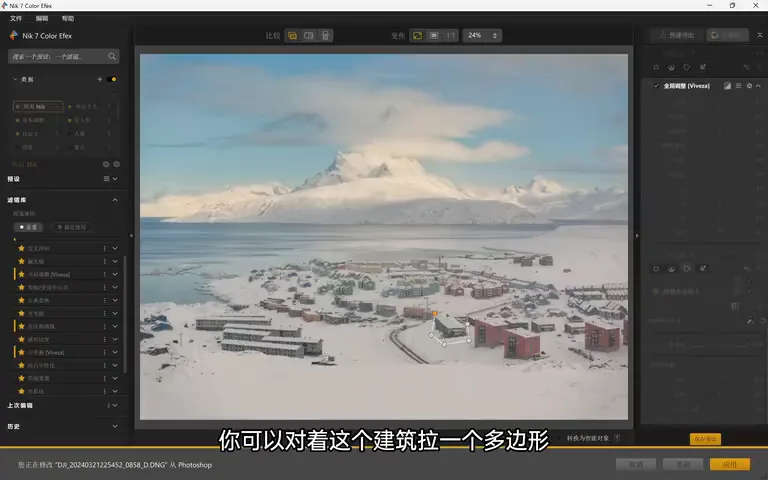
To brighten the snow, add another Viveza and pick the Luminosity mask at the end of the list (at 6:46 in the video) — the snow lifts automatically, but the sky brightens along with it, so drag a gradient mask while holding Alt to turn it into a subtraction and shield the sky (at 6:55 in the video). For a building with a complicated shape there is a third tool: the Polygon (at 7:12 in the video). Draw one around the building and it too carries a center point — widen the Luminosity and Chrominance thresholds and the polygon hugs just the colorful part of the structure, ready for any brightness or color tweak (at 7:29 in the video).
05 Favorite Filters: Polarizer, Soft Focus, Contrast, Foliage
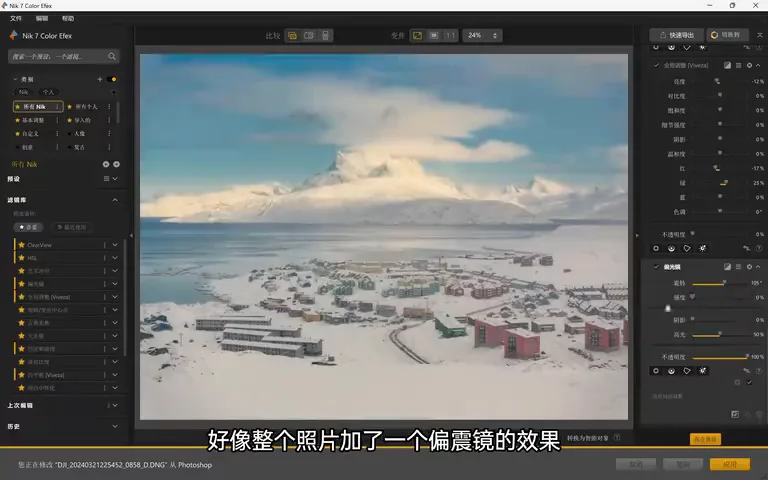
Finally, a few of Thomas's favorite effect filters. Polarization: crank the strength and the photo acts like a polarizing filter was screwed on — whites pick up warmth, warm tones intensify, and the sky darkens (at 8:05 in the video). Skylight gilds the frame with the golden and violet cast of sunrise and sunset — not needed here (at 8:21 in the video). Classical Soft Focus makes the image dreamy: Method 1 brightens while Method 3 does not; he runs Strength 5 for overall softness, then stacks a second pass at Method 3, Strength 11%, with a gradient so it only affects the distance while highlight recovery keeps clipping away (at 8:36 in the video).
The Tonal Contrast filter boosts midtone clarity (at 9:13 in the video). Wanting the foreground houses to pop, he pulls a gradient as usual, drops the center point on the green house, and fine-tunes the Luminosity and Chrominance thresholds until the mask covers little but the buildings (at 9:36 in the video). Opacity then scales the effect: 0% no influence, 50% half, 100% full (at 9:48 in the video). Darken/Lighten Center adds a vignette — Thomas keeps the contrast gentle; a touch of it simply makes the frame feel more comfortable (at 10:17 in the video).
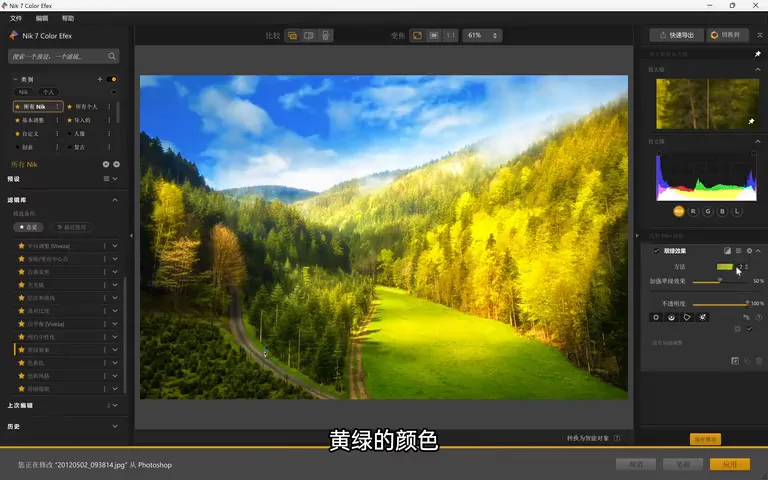
One more favorite is the Foliage filter, demonstrated on a vegetation photo: it turns greenery golden, yellow-green or deeply emerald (at 10:40 in the video), and the effect can be pushed hard for instant autumn (at 10:51 in the video). Together these Color Efex weapons — with Control Points standing in for most of Photoshop's complicated channel and Pen selections — are what make Nik so powerful (at 7:53 in the video). The pinned comment carries a DxO discount link: 20% off all DxO software and filters, Nik Collection included (at 11:11 in the video).
1. Fix white balance before touching HSL: park the White Balance filter at the top of the stack and click the snow with the eyedropper — otherwise every hue sample lies to you; 2. Control Points are Nik's soul — the circular diffusion sets reach, while the Luminosity and Chrominance thresholds refine the selection down to "just those two houses"; 3. Nik 7 bakes Viveza into Color Efex, and with similarity-aware Control Lines and Polygon selections you never leave the module; 4. Polarization darkens skies and warms whites, Classical Soft Focus Method 3 avoids brightening, Tonal Contrast rides a mask to lift only the buildings, and Foliage brings autumn in one click.