Photography Tutorial · 2018-03-18
Boost Photo Detail in Post with Nik Detail Extractor
Thomas Chu Photo
One in-depth tutorial every week — making photography easy to learn
The point of Nik filters is to help us dial in all kinds of post-processing looks quickly and efficiently.
Today's Nik Detail Extractor filter can quickly enhance local detail in a photo, bringing out hidden textures, tactility, and fine structure.
If you haven't installed the Nik plugins yet, you can download them here:
(Nik for Mac) https://pan.baidu.com/s/1c1Q6WCC
(Nik for Windows) https://pan.baidu.com/s/1eTHsQfo
If you're new to Nik Color Efex Pro 4, I recommend reading the tutorial "Nik Color Efex Pro Plugin User Guide" first.
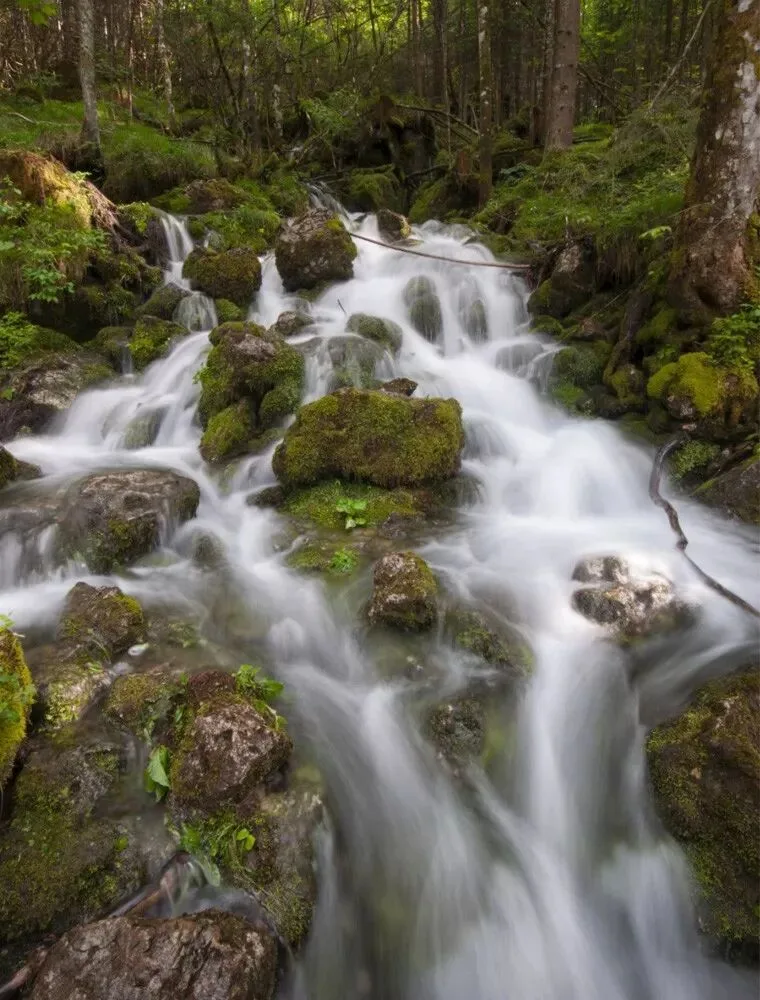
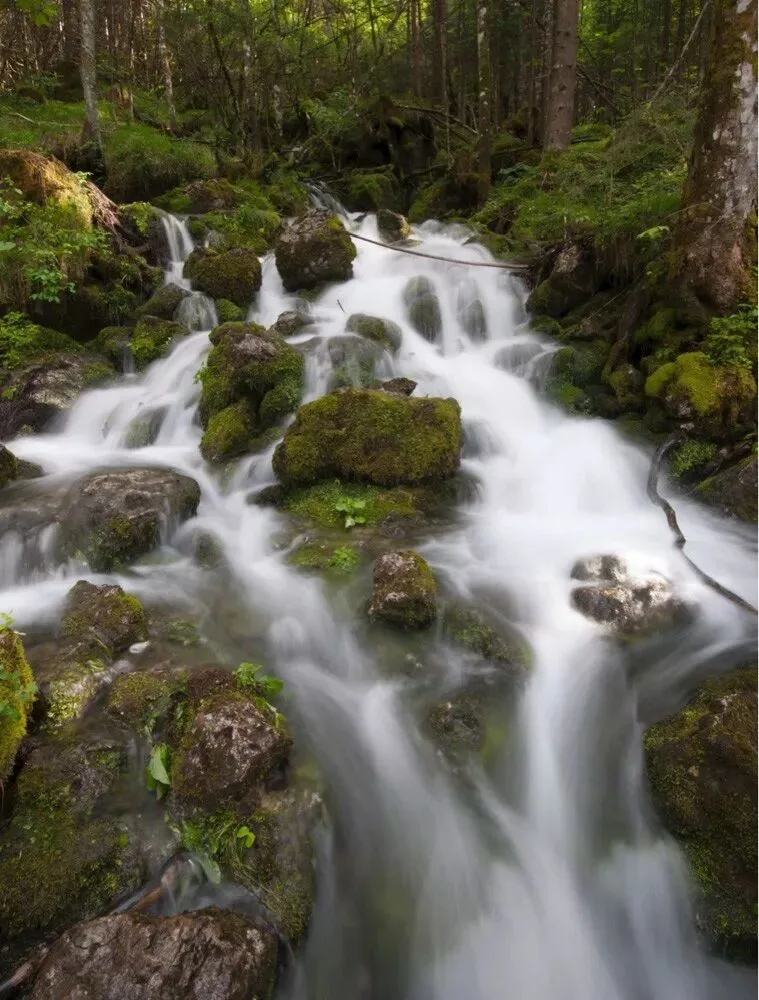
In this tutorial, I'll use a photo shot in Germany's Black Forest to show you how to extract texture detail from flowing water.
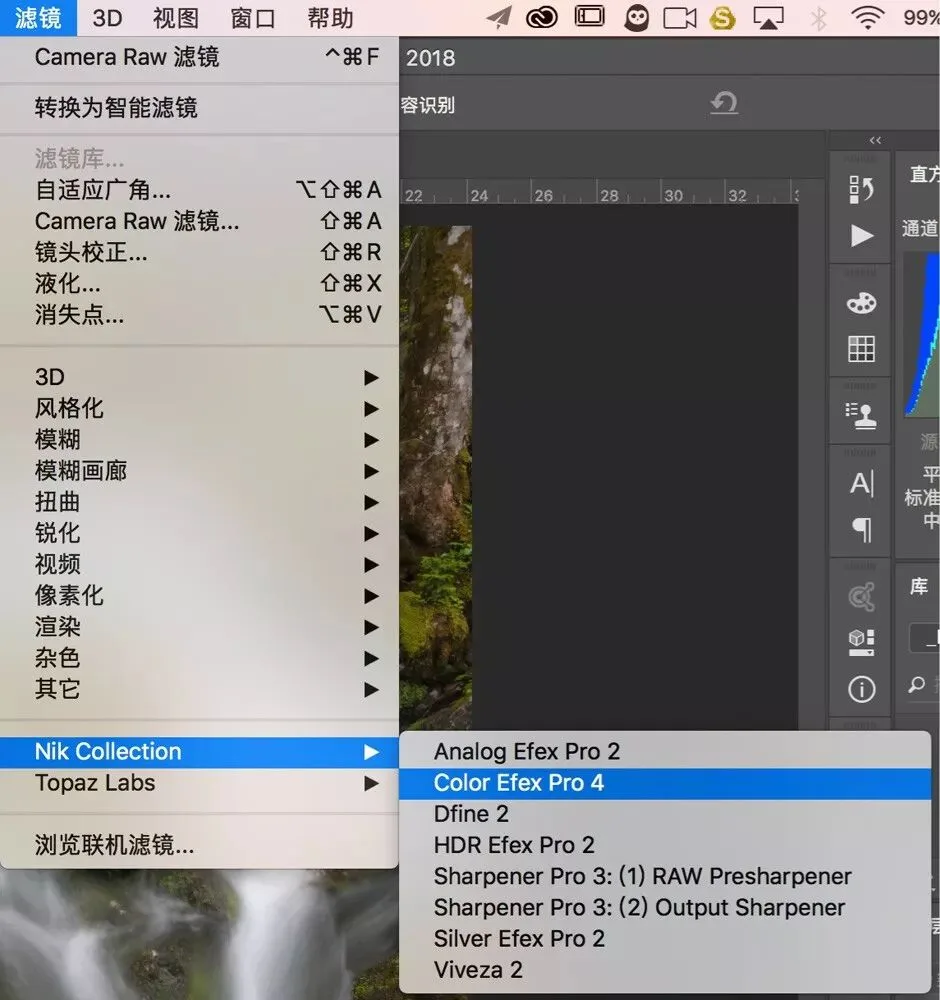
First, open "Filter - Nik Collection - Color Efex Pro 4".
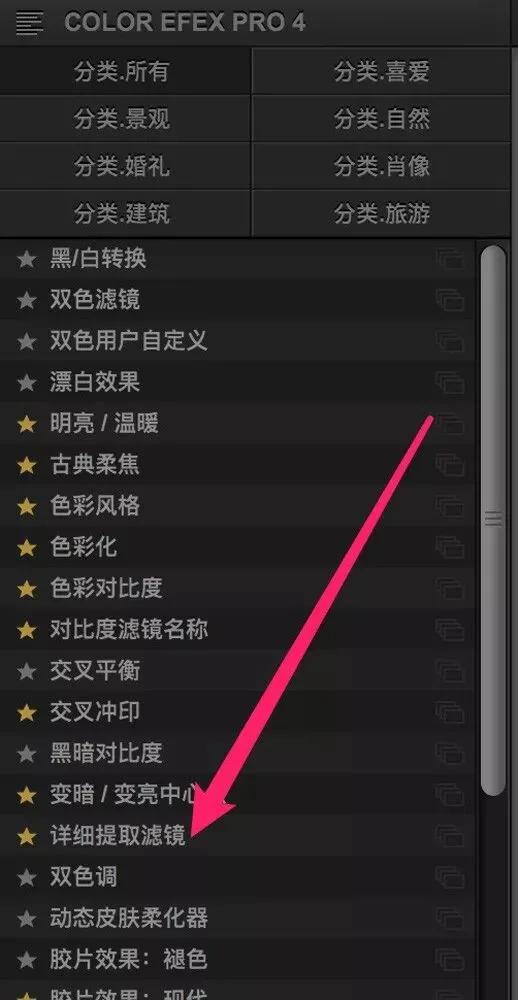
In the Color Efex Pro panel, you'll see a list of filters on the left. Choose "Detail Extractor" from the list.
The Detail Extractor control panel then appears on the right side of the screen. It has three sliders — Detail Extractor, Contrast, and Saturation — plus a dropdown for the radius effect.
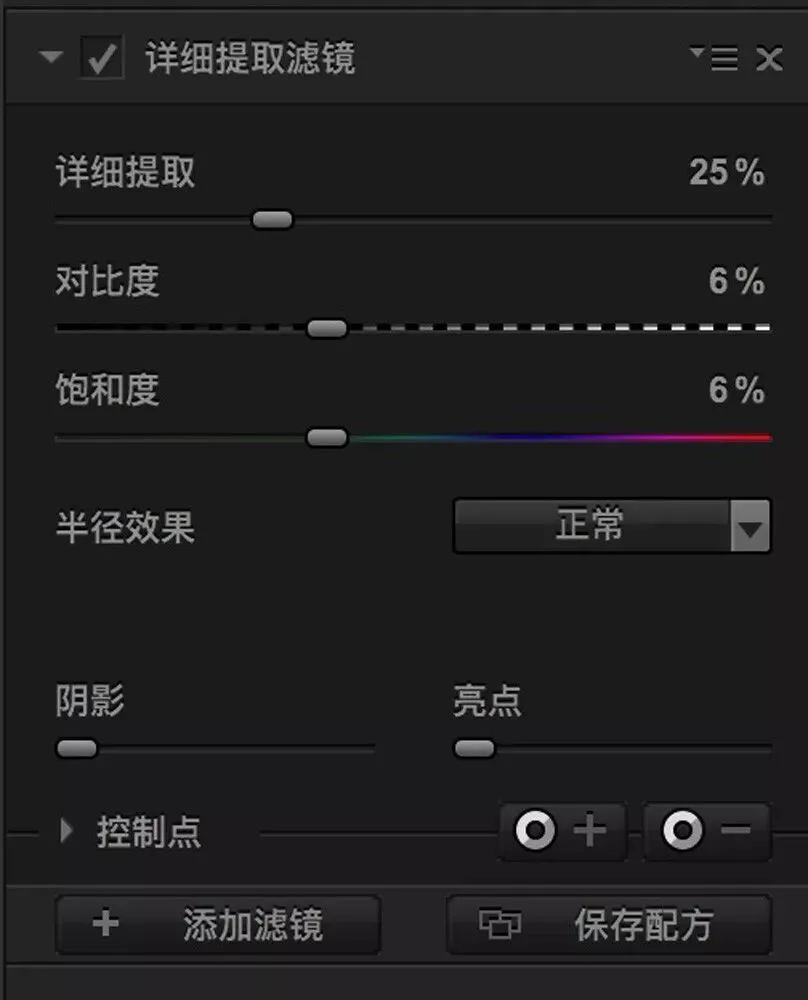
The first slider, "Detail Extractor", is the filter's most important parameter; it determines the strength of the effect. Increasing its value (moving the slider right) brightens local shadows and tones down local highlights, exaggerating details that were hidden or barely visible in the original photo.
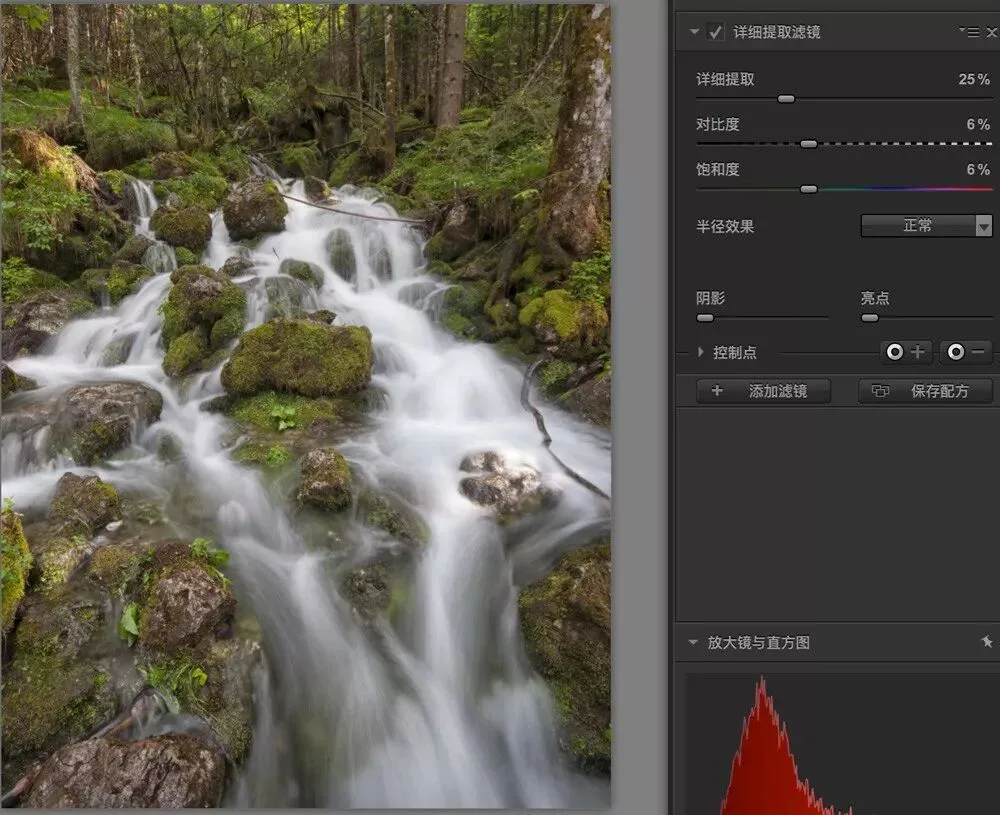
As you keep moving the "Detail Extractor" slider to the right, more and more detail emerges in the photo.
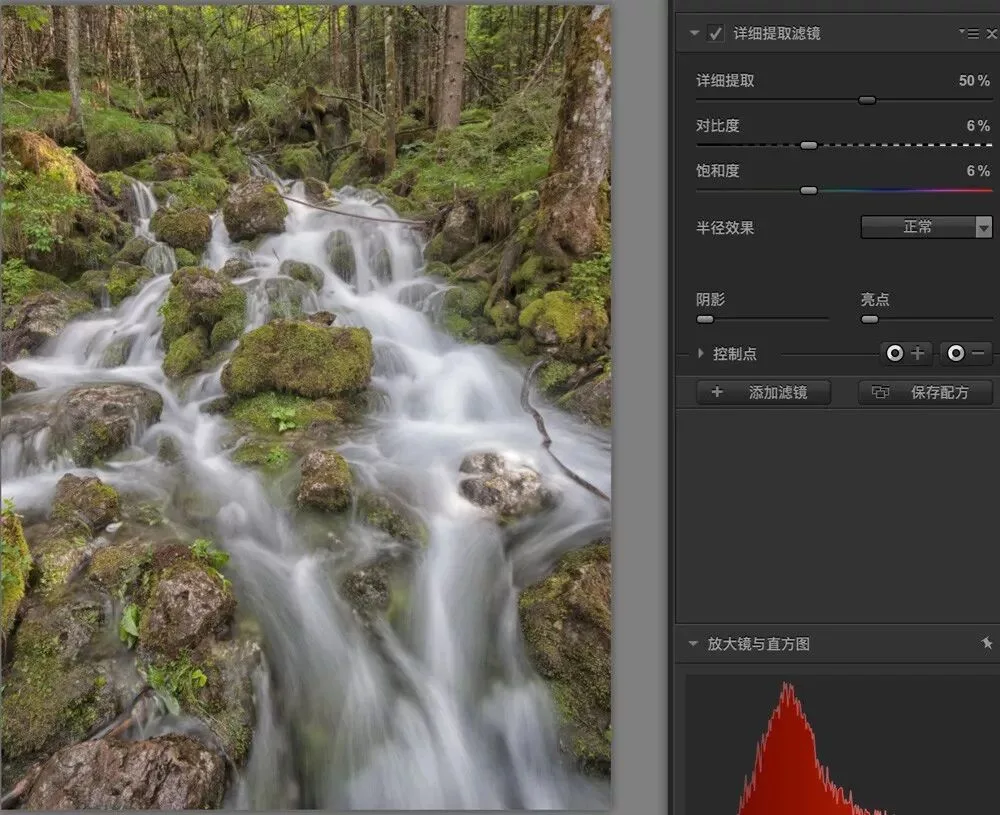
If the "Detail Extractor" strength is too high, the photo becomes overloaded with detail and looks dirty. And because local shadows are brightened while highlights are compressed, overall contrast drops dramatically, producing an exaggerated HDR look.
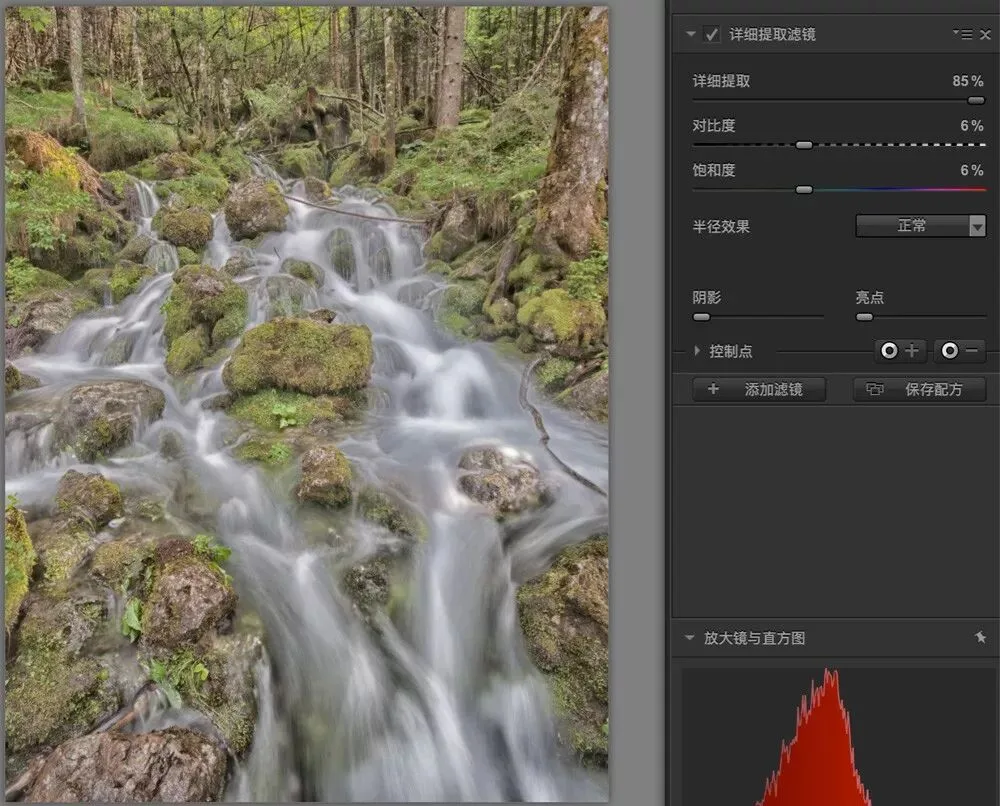
Besides the "Detail Extractor" slider, the radius effect dropdown also affects how detail is rendered. Its default value is "Normal".
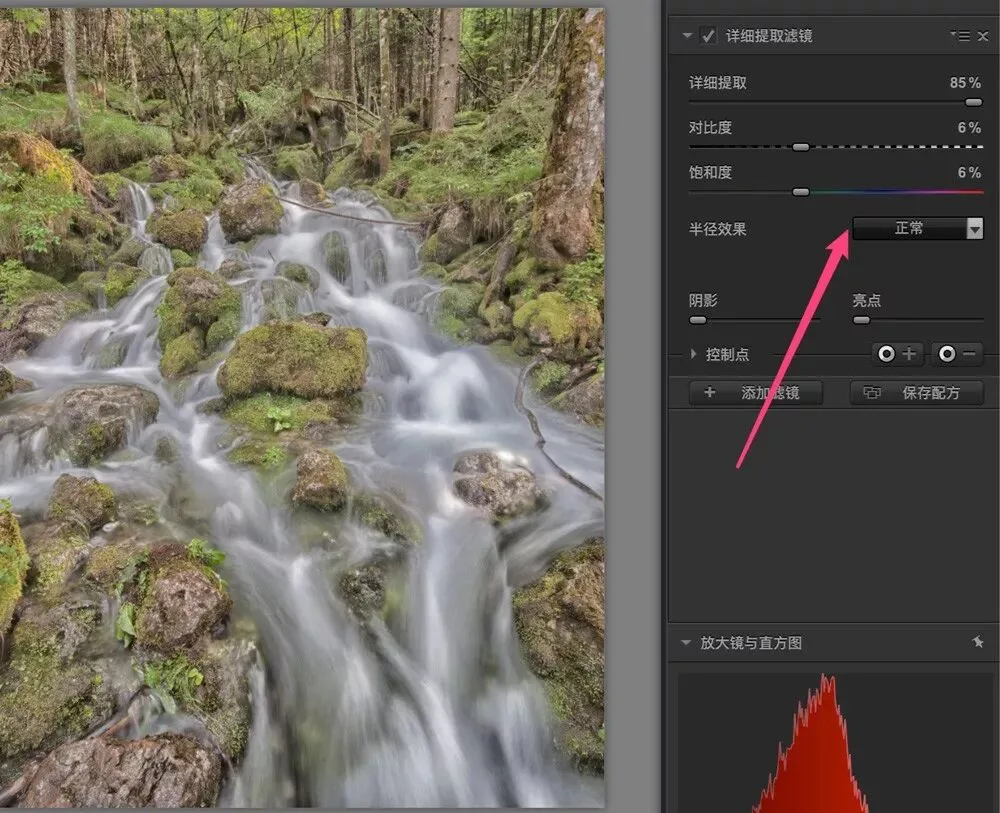
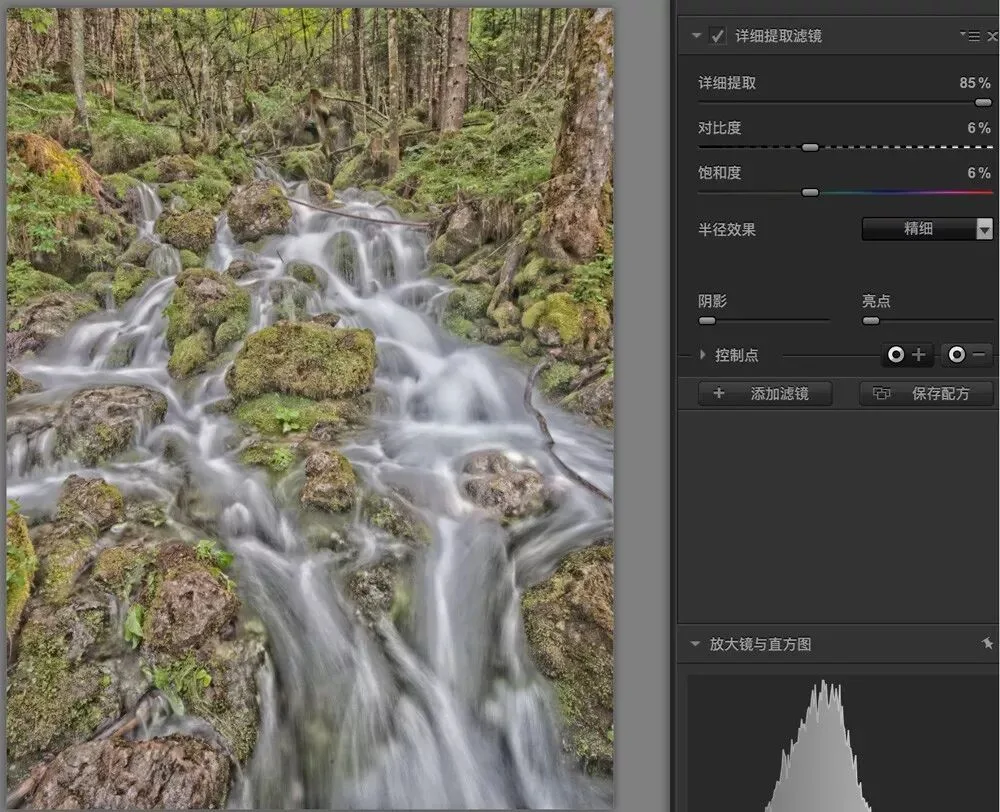
If you set the radius effect to "Fine", the extracted detail looks more delicate and the textures in the frame become richer.
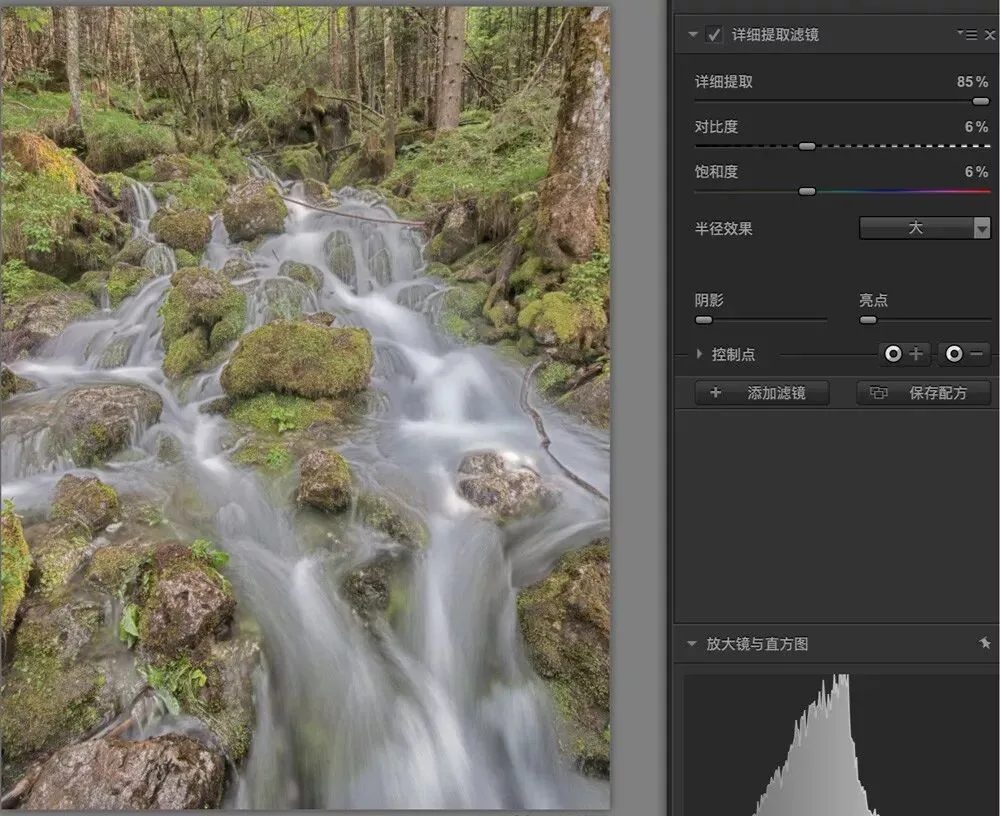
If you set the radius effect to "Large", the extracted detail looks coarser.
For this image, I found a Detail Extractor value of "32%" with the radius effect set to "Normal" gives detail that is clearly visible yet still natural.
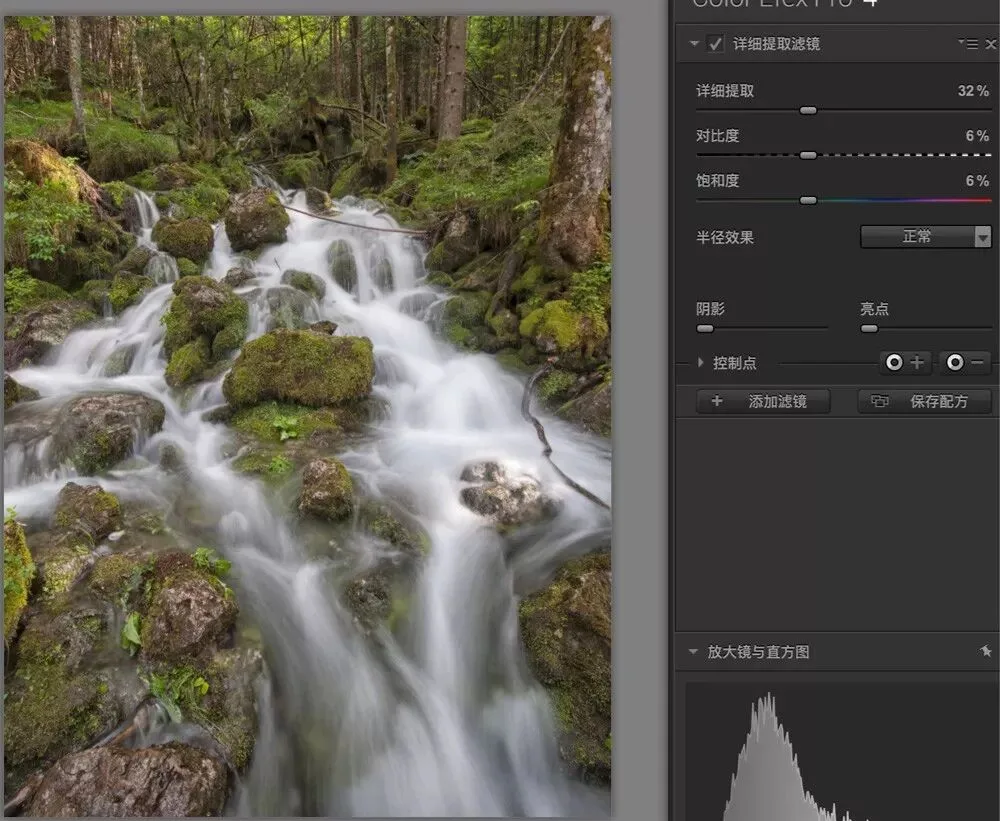
In the screenshot below, the area left of the red line is before the filter, and the area right of it is after. You can see that a side effect of Detail Extractor is reduced contrast and saturation.
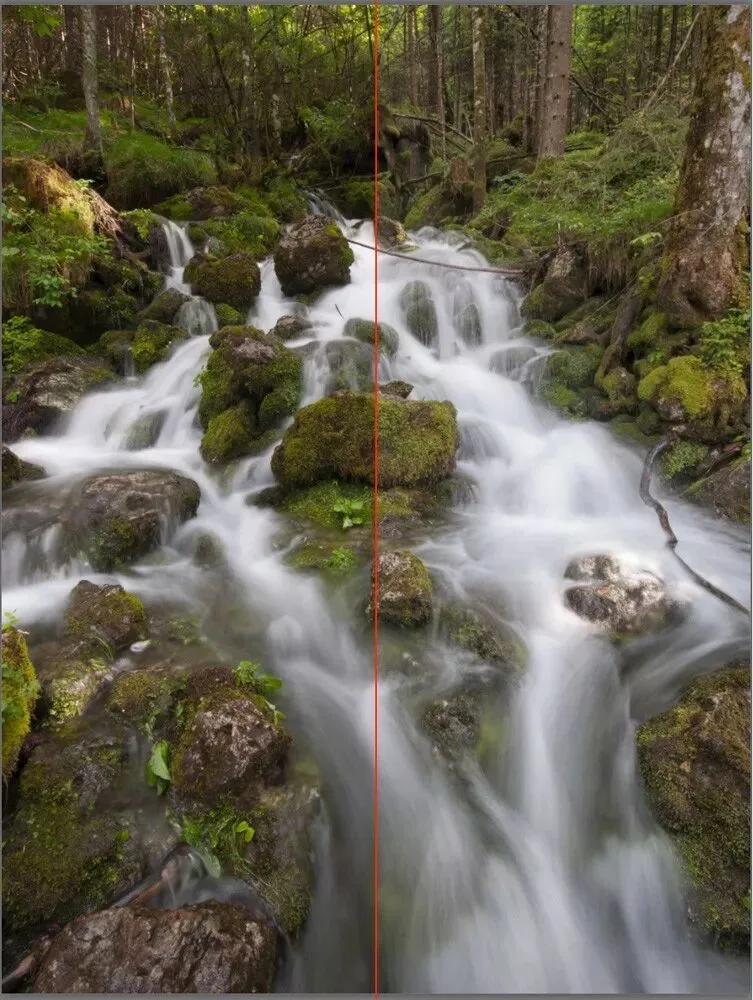
That's why this filter thoughtfully includes "Contrast" and "Saturation" sliders, so we can easily make up for the loss of punch and color caused by extracting detail. For this photo, I raised both contrast and saturation to 20% to recover them.
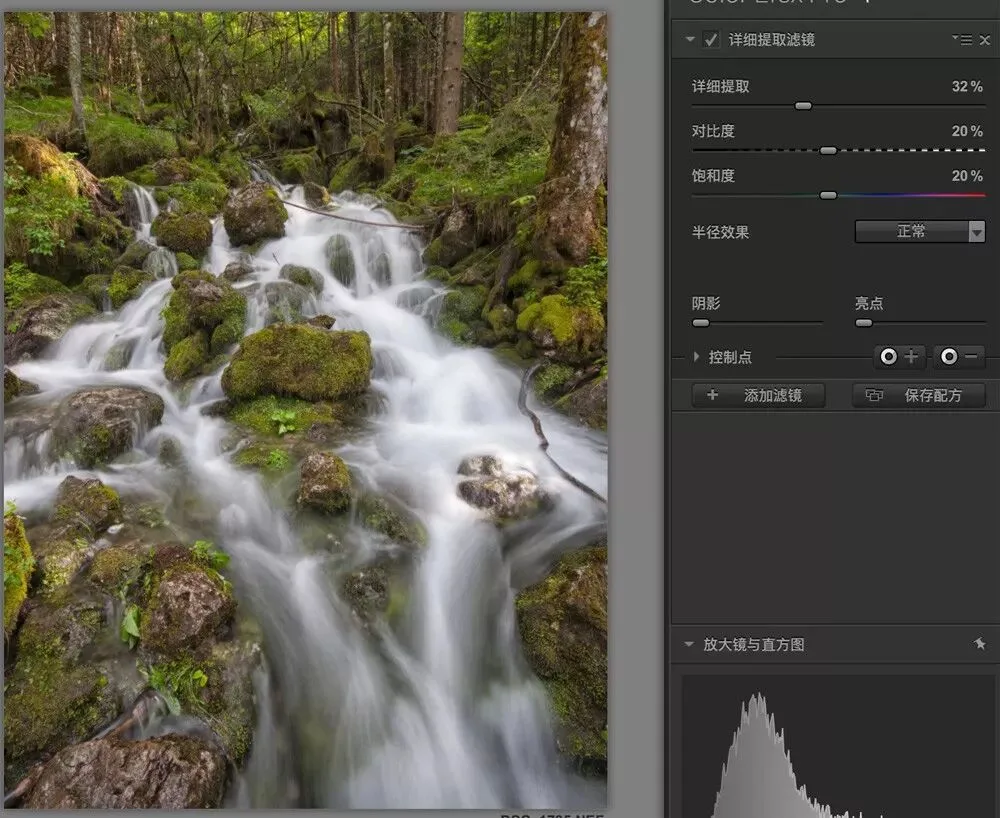
One of Nik's key features is applying filters locally with control points. If you're not familiar with control points, watch the tutorial video "Nik Color Efex Pro Plugin User Guide".
Here I add a + control point so the filter only affects the flowing water rather than the entire photo.
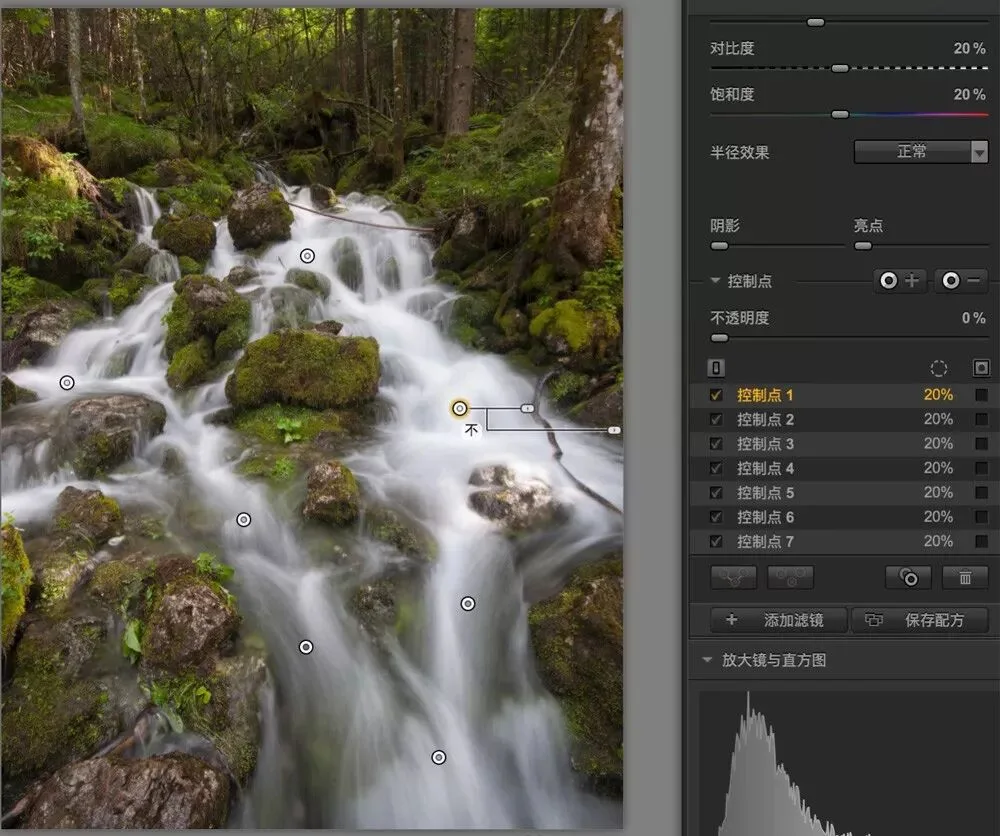
The image below shows the result before adding the control point: detail across the whole frame, including the trees, is boosted, which doesn't look good.
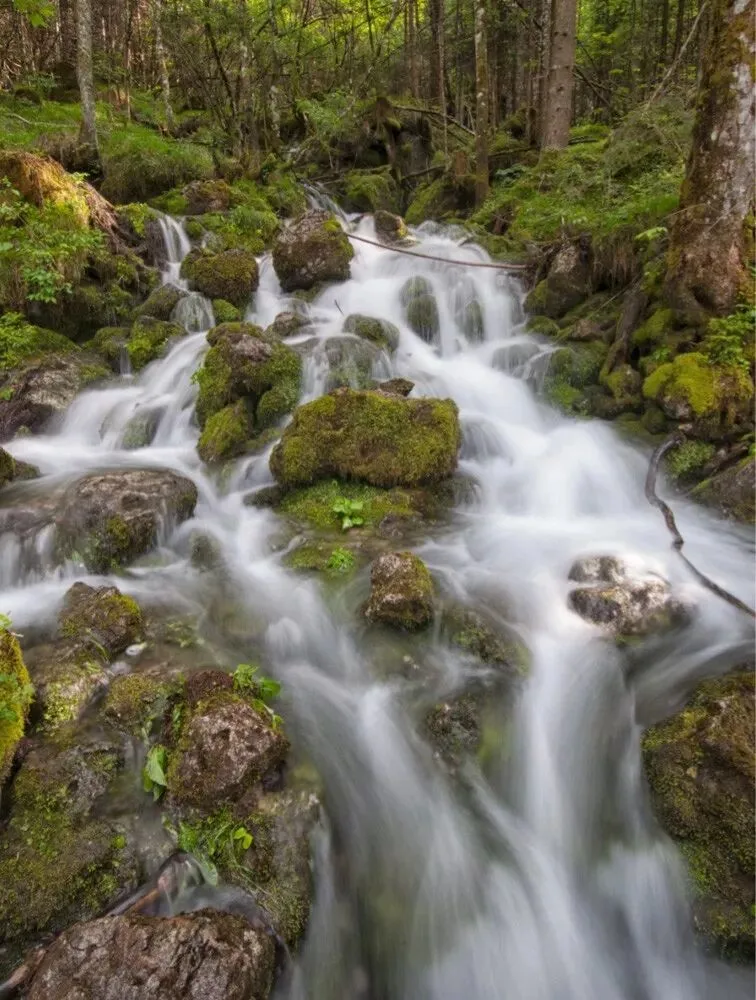
The image below shows the result after adding the control point: only the water's detail is greatly enhanced, while the forest behind keeps its original level of detail. The two no longer compete, giving the frame a better sense of depth.
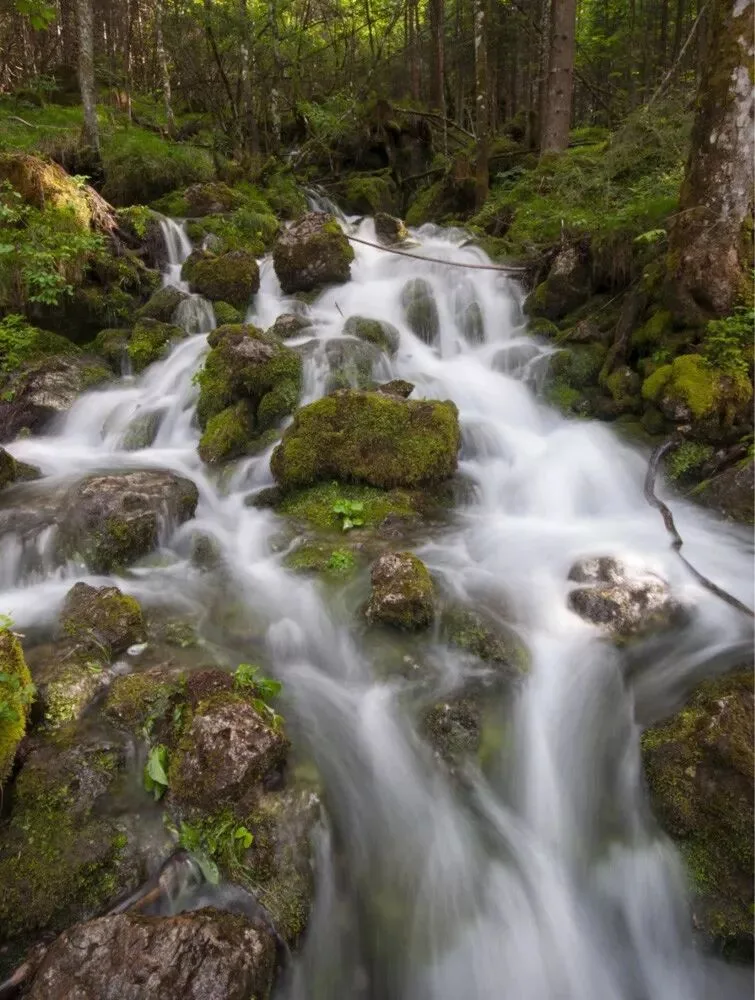
Finally, let's compare before and after. The image below is before the filter: the water surface is almost pure white with no detail at all.
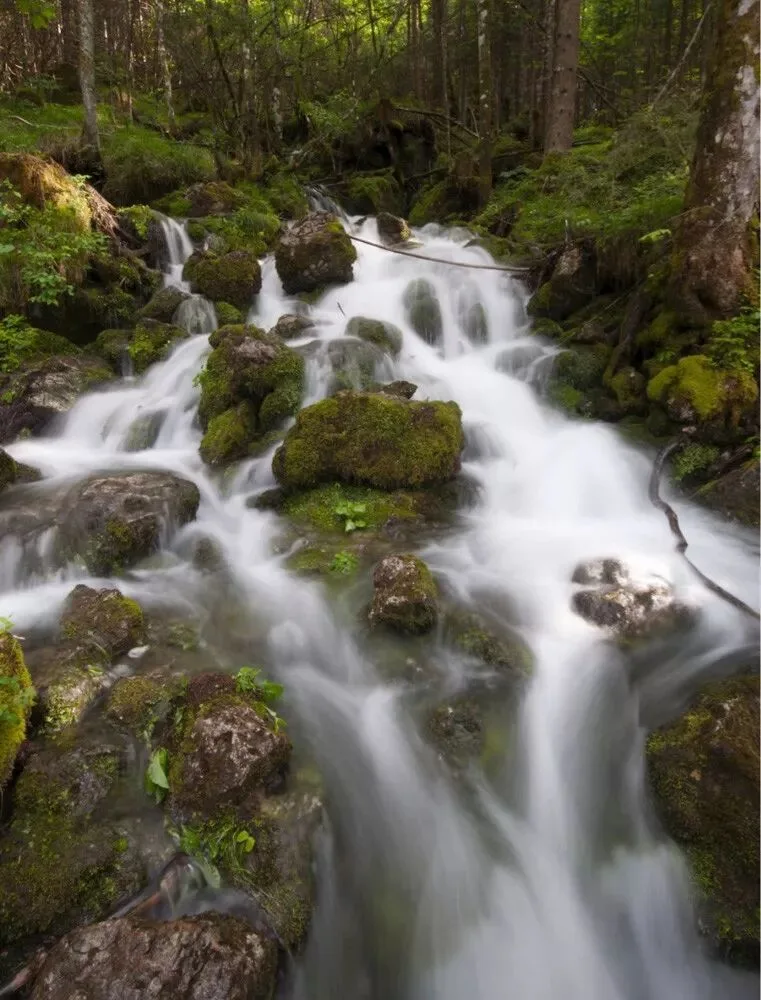
The image below is after the filter: the textures in the flowing water are much clearer and richer.