Photography Tutorial · 2017-08-13
Golden Autumn or Fresh Spring in 10 Seconds: Nik Foliage Filter
The point of Photoshop filters is to help us achieve all kinds of post-processing effects quickly and efficiently.
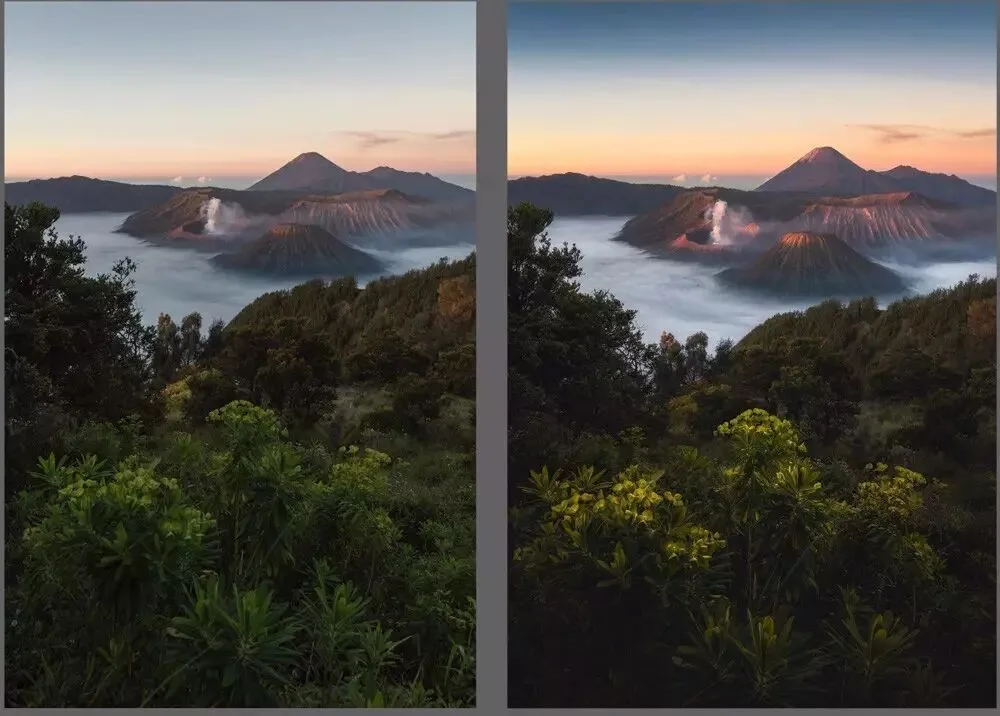
When processing photos with green vegetation, we often want to turn it autumn gold or spring emerald.
Today's Nik Foliage filter can do that job in just 10 seconds.

1
Nik Quick Start
Nik Collection is a free post-processing plugin suite; its Color Efex Pro 4 library bundles 50+ filters photographers commonly use. Today's subject is one of them — the Foliage filter.
Nik Collection download links for China (v1.2.11):
Windows: https://pan.baidu.com/s/1o8jhgxk
Mac: https://pan.baidu.com/s/1hsJlkpQ
Installation works like any other software, so we won't go into detail — there are plenty of guides online.
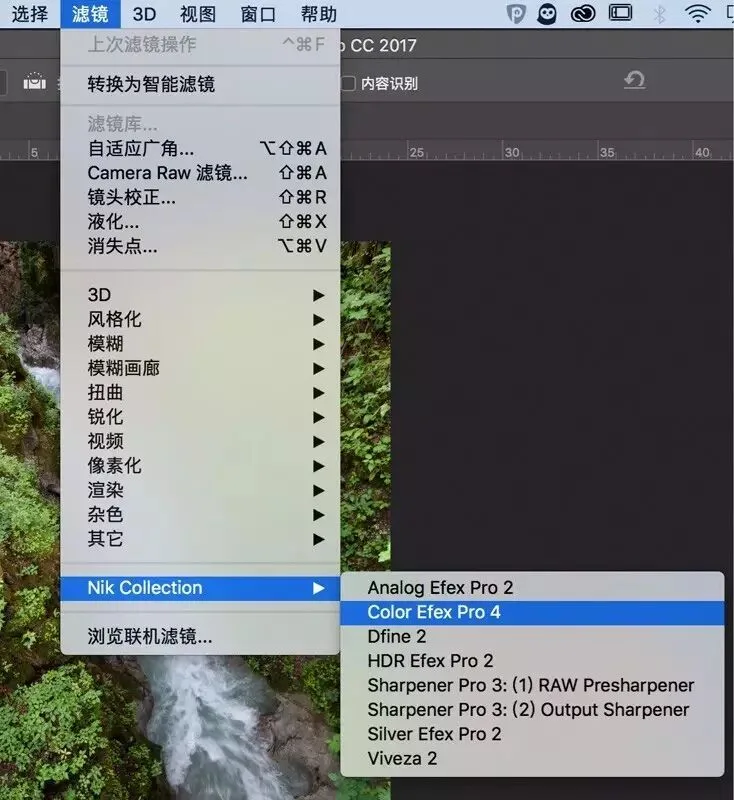
After installing, open PS and choose Filter - Nik Collection - Color Efex Pro 4 to launch the filter library.
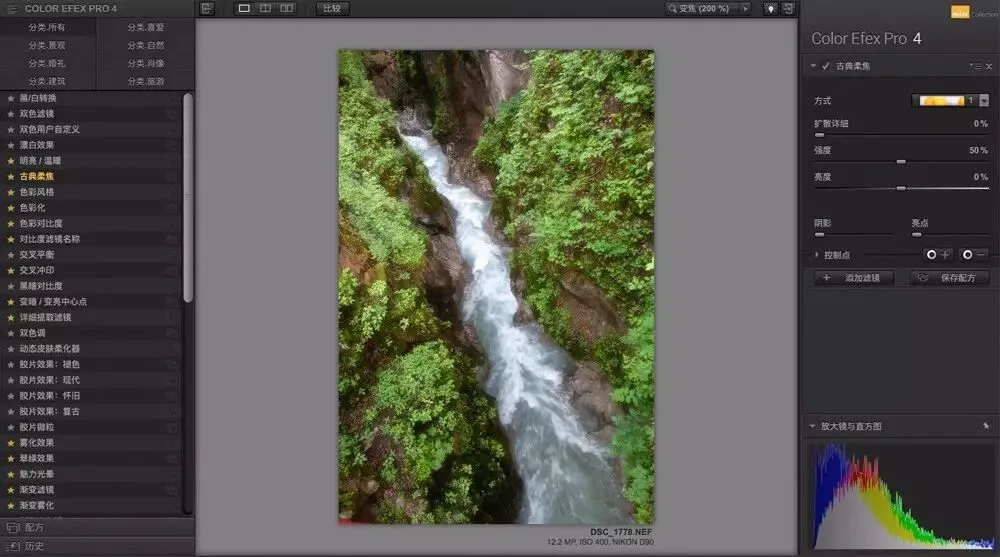
The Color Efex Pro 4 panel has three sections: the full filter list on the left, the image preview in the middle, and the selected filter's sliders and controls on the right.
If you're new to Color Efex Pro 4, we recommend reading the "Nik Color Efex Pro Plugin User Guide" first.
2
Using the Nik Foliage Filter
In the filter list on the left, find and select "Foliage."
The Foliage filter automatically finds vegetation in the photo by color and changes its hue — without touching skies, people, flowers, or other objects. Very handy.

Once Foliage is selected, the far right of the screen becomes its adjustment panel. The filter has only two parameters: "Method" and "Enhance Foliage."
Plus the "Control Points" every Nik filter has, for quickly building masks that limit where the filter applies.
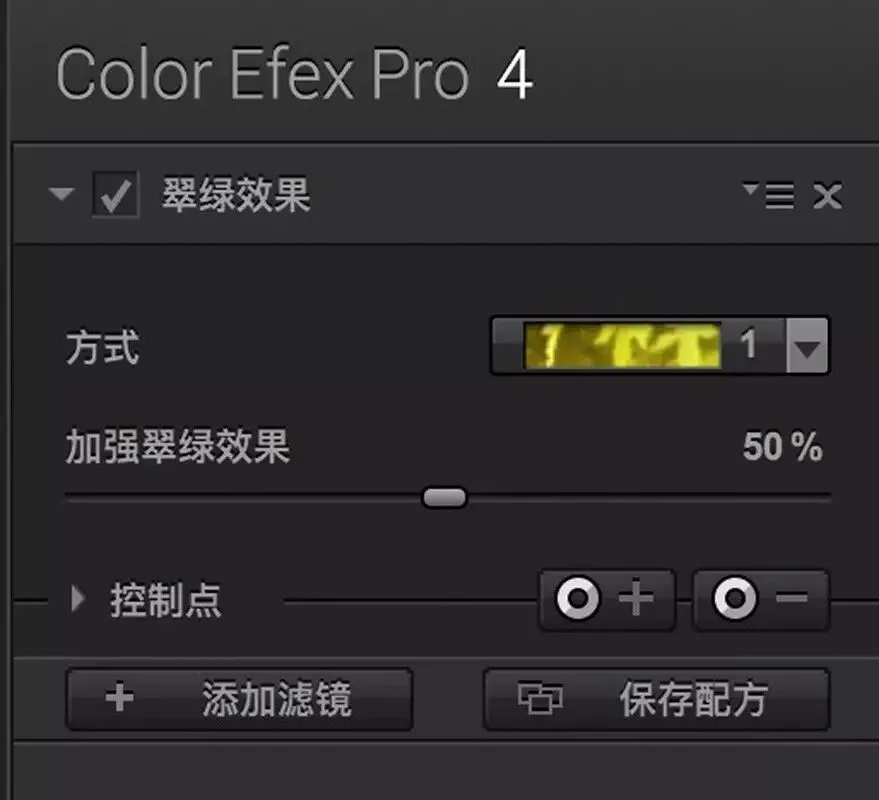
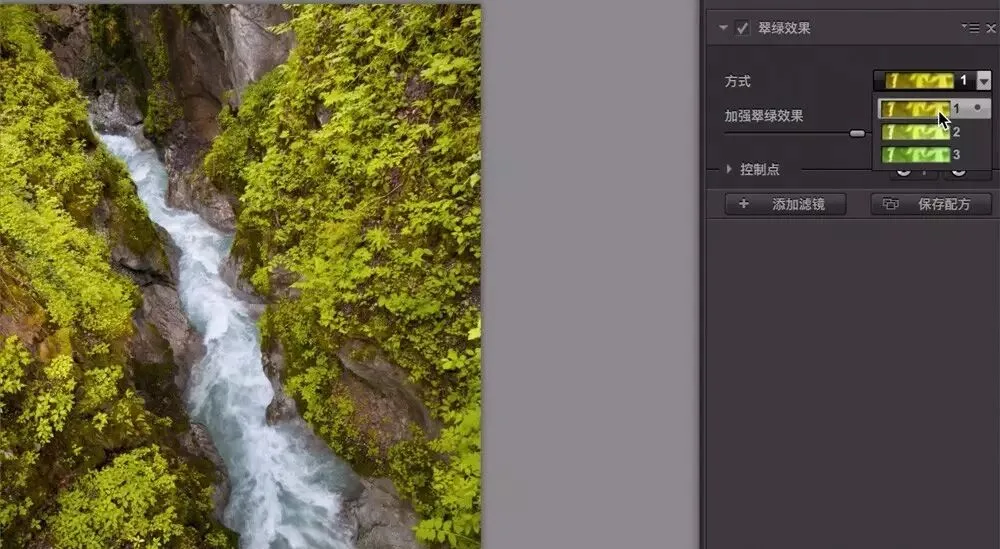
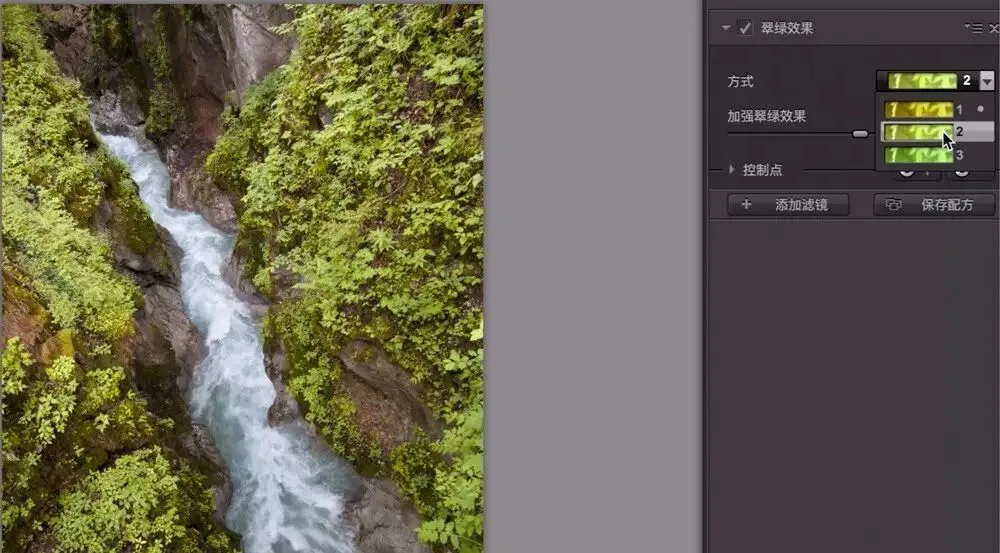
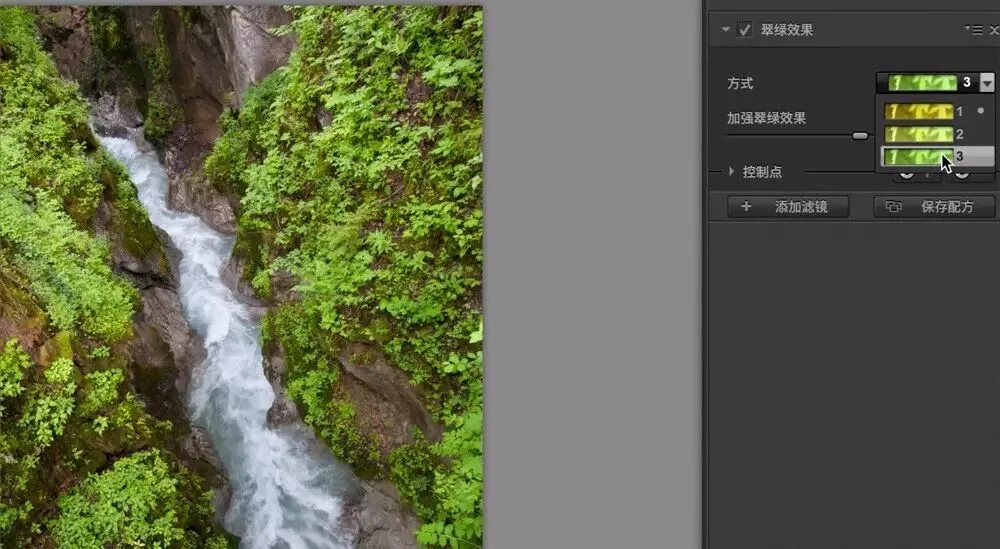
Foliage offers three Methods, each turning plants a different color: Method 1 = yellow, Method 2 = yellow-green, Method 3 = emerald green.
With Method 1, the pale-green plants look as if autumn has arrived, turning yellow.
With Method 2, the plants take on the yellow-green of early spring.
Method 3 jumps the season straight to late spring or midsummer — vivid emerald vegetation.
Below Method, the "Enhance Foliage" slider simply controls the strength of the color shift; the default is 50%. Move left to weaken, right to intensify.
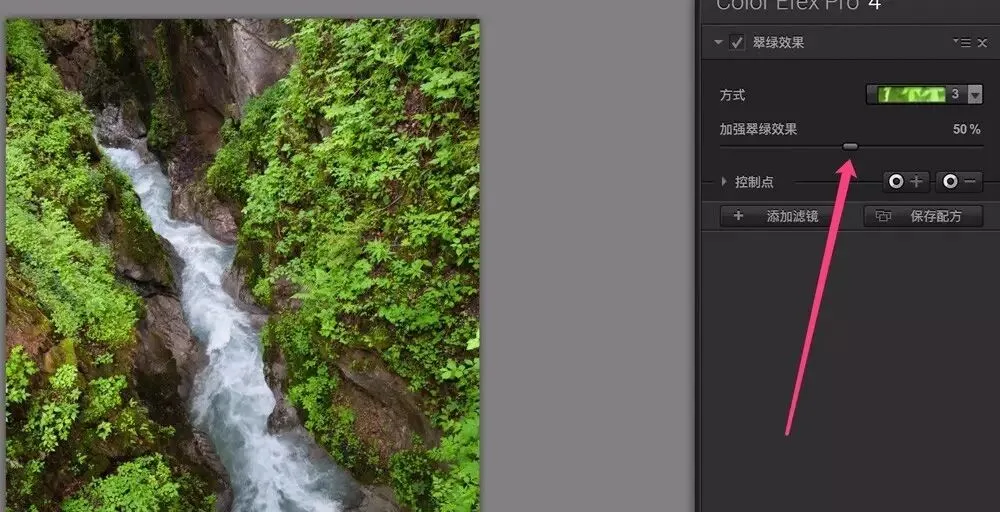
With Method 3 and Enhance Foliage pushed to 100%, the greens become even more vivid.
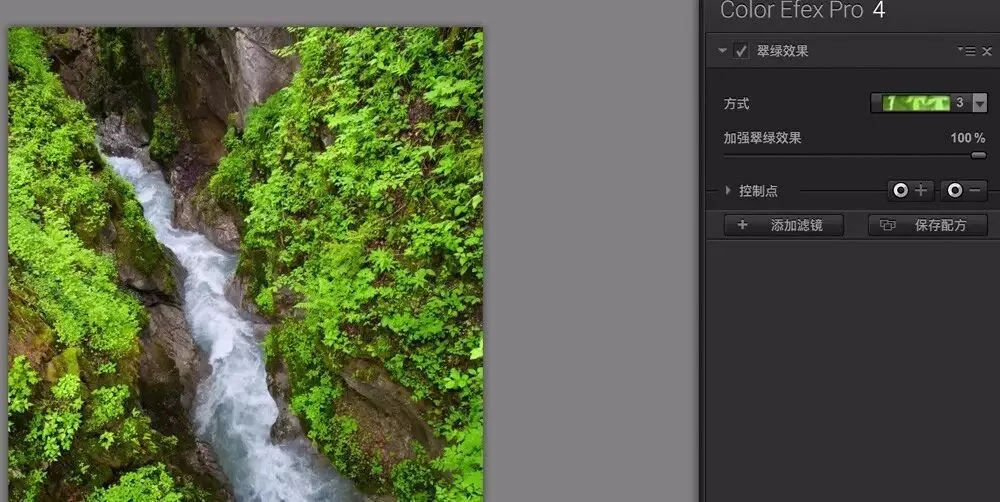
If that's still not enough, stack multiple Foliage filters: click "Add Filter" below, then choose Foliage again from the list.
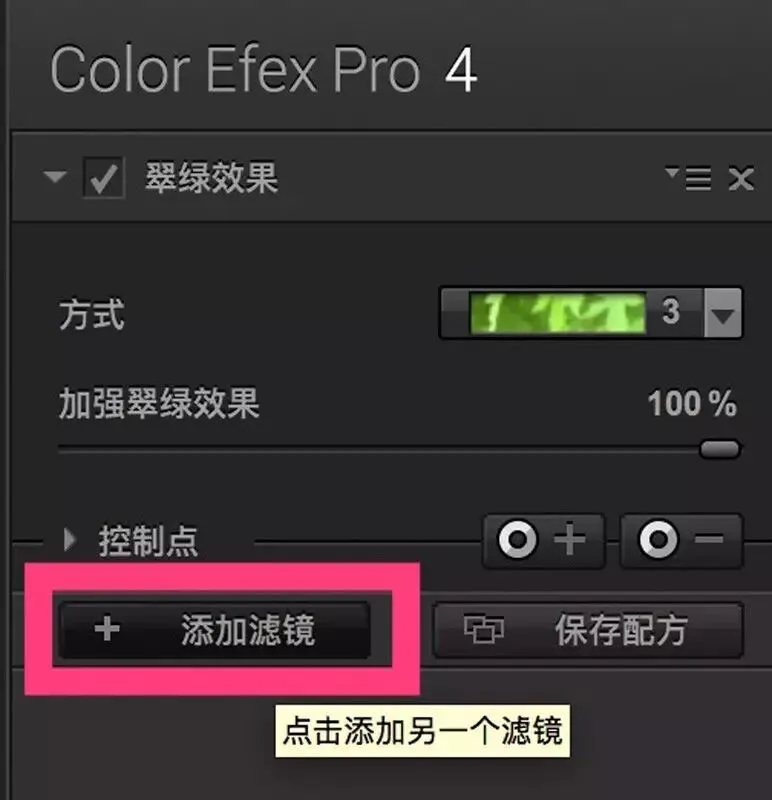
I set the second Foliage filter to Method 3 at 100% as well. Stacked together, the vegetation is now greener than physically plausible.

3
Limiting the Filter with Control Points
Foliage identifies plants by yellow-green colors and is usually quite accurate — but occasional "friendly fire" happens.
In the sample, the teal stream and yellow rocks were also somewhat affected. We can limit that with Control Points.
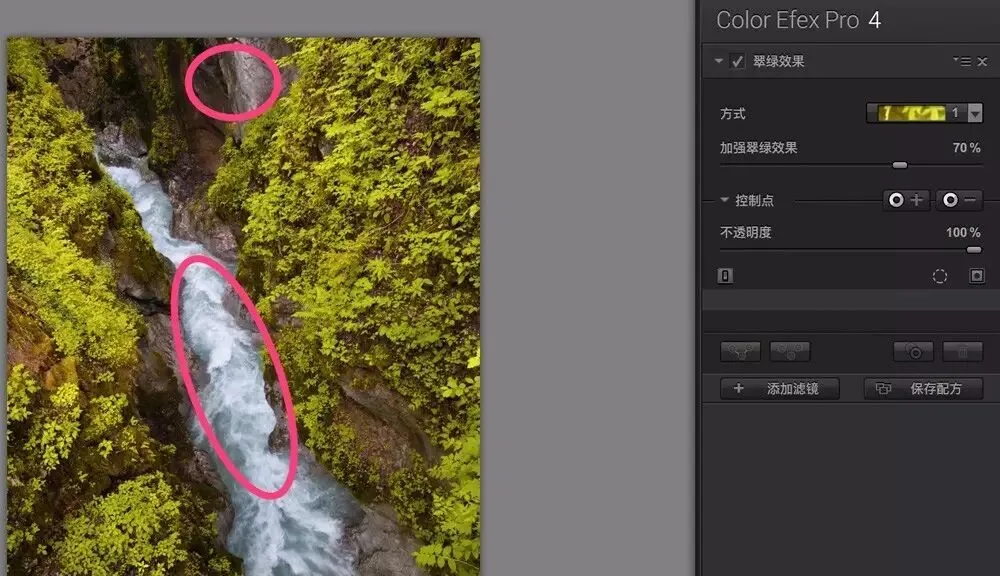
Choose the "-" (minus) Control Point, then click the rocks and water in the photo. Nik automatically detects the edges of water and rock to build a smart mask that restricts the filter's reach.
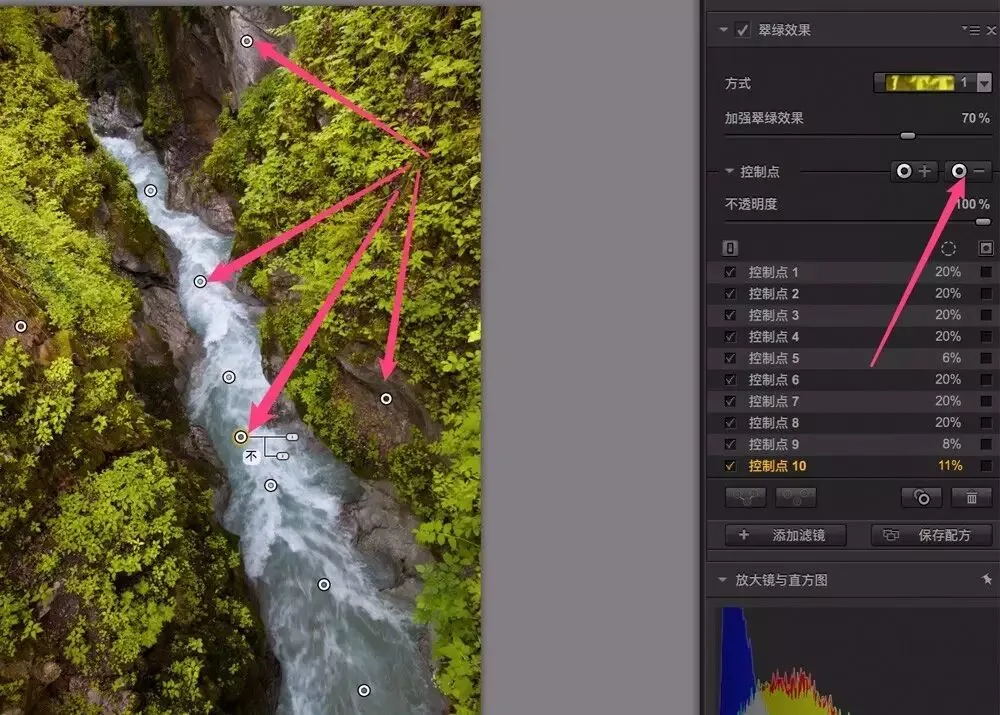
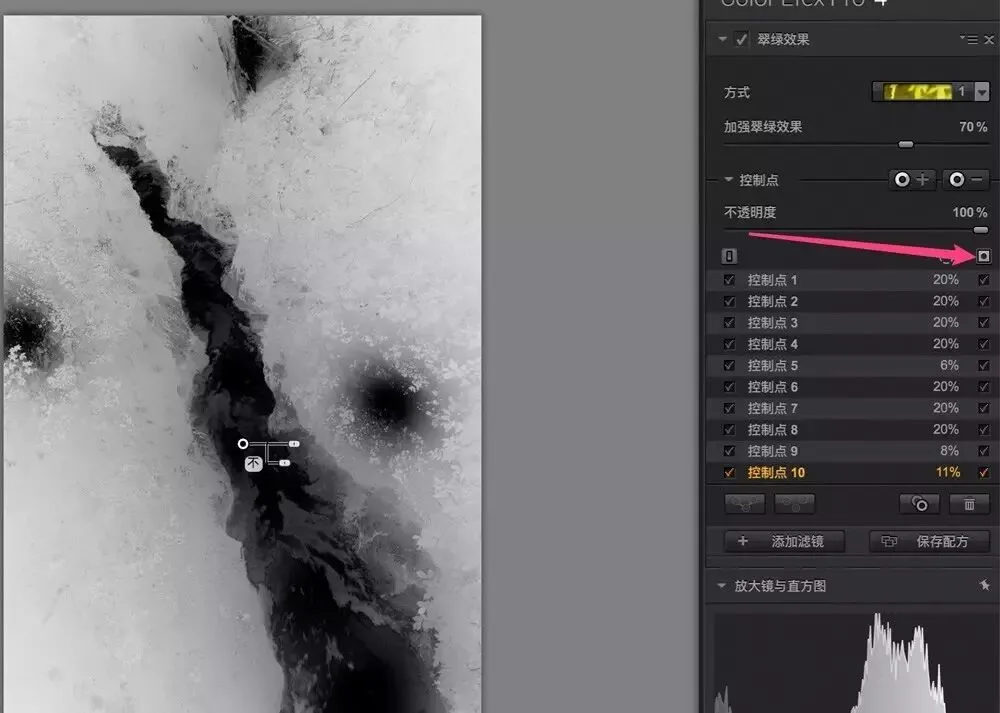
Once the Control Points are placed, we can preview the mask — the edges of Nik's smart mask are remarkably precise.
Black areas of the mask are untouched by the Foliage filter — here, the stream and large rocks we selected. White areas receive the effect.
For more on Control Points, watch the video tutorial "Nik Color Efex Pro Plugin User Guide".
With the Nik Foliage filter, we can easily adjust the color of grass and trees in a photo without affecting anything else.