Photography Tutorial · 2016-12-11
Still Using S-Curves? Try Nik's Contrast Filters Instead
When it comes to adjusting contrast, we usually think of the S-curve or the Contrast slider in PS.
In fact, the Nik Collection suite has several far more powerful contrast tools. Today Thomas introduces one of the most popular Nik filters — Pro Contrast.
The original image for today's case:

The result after applying the Pro Contrast filter:

Let's learn this powerful contrast filter together:
HD link: http://v.qq.com/page/q/i/x/q03541bolix.html
Video Summary
Nik Collection free plugin, download links for China (v1.2.11):
Windows: https://pan.baidu.com/s/1o8jhgxk
Mac: https://pan.baidu.com/s/1hsJlkpQ
After installing, open PS and go to Filter - Nik Collection - Color Efex Pro 4 to launch the plugin.
Find Pro Contrast in the filter list on the left.
The Pro Contrast panel then appears on the right:
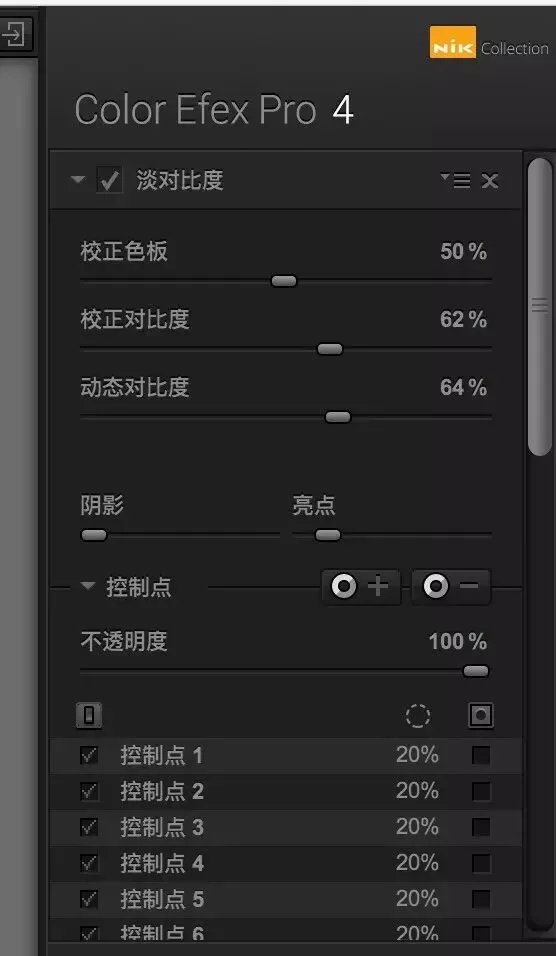
Correct Color Cast: automatically detects the photo's color cast tendency (e.g. too yellow, too blue); moving the slider right adds the complementary color to reduce the overall cast.
Correct Contrast: increases the overall tonal contrast of the photo.
Dynamic Contrast: the core of this filter — intelligently adjusts the internal contrast of each object while protecting highlights and shadows.
Shadows / Highlights: protect against over- and underexposure caused by the filter.
Control Points: like those covered in "Nik Viveza: A Better Local Adjustment Tool than PS", they quickly generate masks to shield areas from the filter.
Pro Contrast offers four advantages for adjusting contrast:
1. Protects highlights and shadows
2. Enhances internal object detail, making texture and micro-contrast more visible
3. Quick masking with Control Points
4. Quickly corrects color casts and haze-gray looks
Follow @Thomas Chu Photo,
and learn one photography skill every Sunday.