Photography Tutorial · 2016-12-04
Nik Viveza Guide: Local Adjustments Easier than Photoshop
There is a local adjustment tool that is as simple to use as radial and graduated filters, yet as precise as complex brushes and selection masks: Google's Nik Viveza plugin.
In today's video tutorial, Thomas introduces this free and powerful local adjustment tool.
1
Video tutorial
HD video link: https://v.qq.com/x/page/n0352g3tmeq.html
2
Written Summary

There are many local adjustment tools, such as the adjustment brush in ACR and Lightroom (see the tutorial "The Powerful Lightroom/ACR Brush — Master It in One Article").
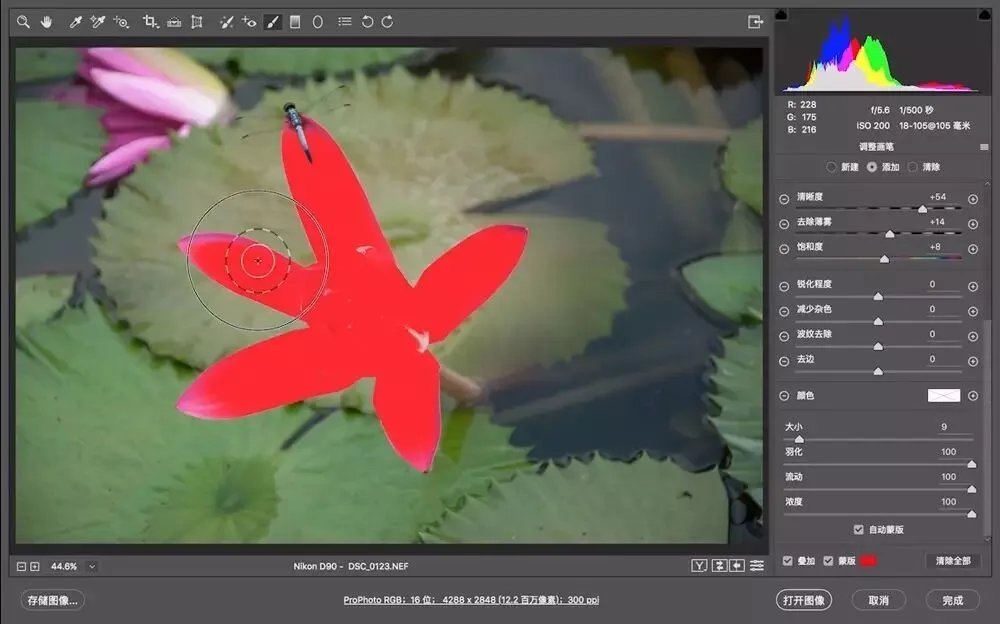
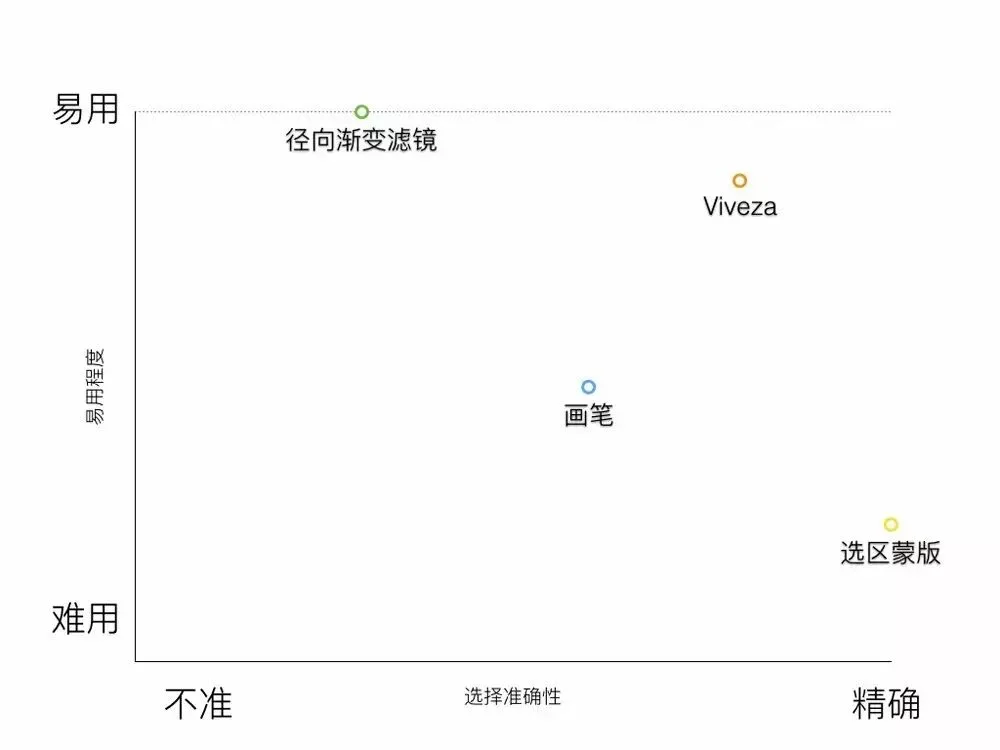
Among these tools, the radial filter is the simplest to use but very imprecise. Brushes, and selections and masks in Photoshop, are more precise but tedious and time-consuming to learn and operate.
Nik Viveza uses the same U-Point control point technology as the Snapseed mobile app, enabling local selections that are both convenient and accurate.
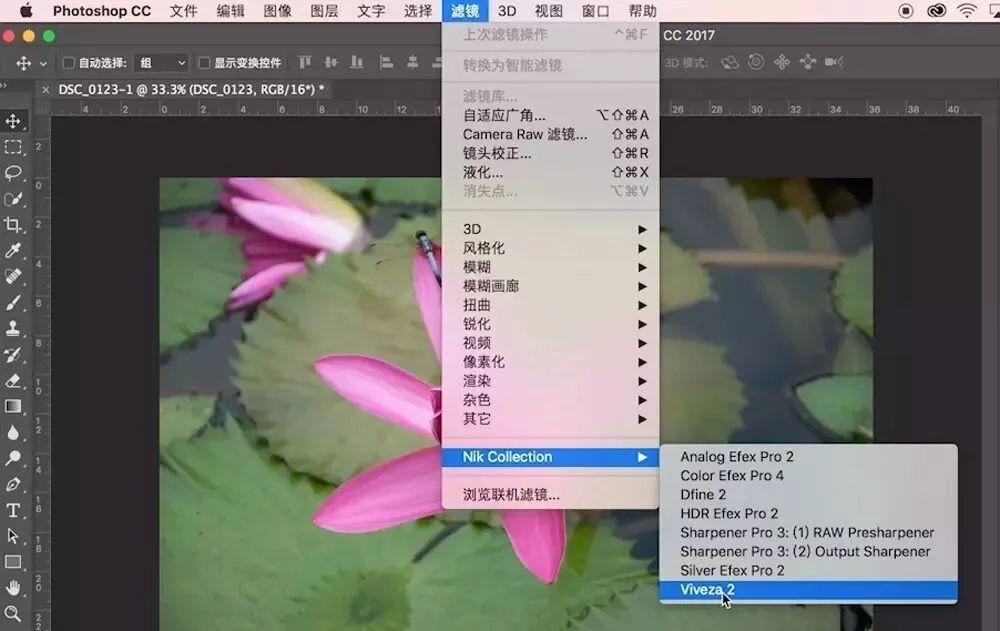
Nik Collection is a set of post-processing plugins from Google, including seven plugins such as Color Efex Pro 4 (color grading filters), Silver Efex Pro 2 (black-and-white film filters), and Dfine 2 (noise reduction). Viveza 2, today's topic, is the local adjustment filter in this feature-rich plugin set.
Nik Collection once sold for as much as $500 and was a secret weapon of professional photographers. Google has now made it free for everyone — a fantastic gift!
Official download link (requires a VPN in mainland China):
https://www.google.com/nikcollection/
Download links within China (version 1.2.11):
Windows: https://pan.baidu.com/s/1o8jhgxk
Mac: https://pan.baidu.com/s/1hsJlkpQ
Installation is the same as any other software, so I won't go into detail here.
After installing, open Photoshop and go to Filter - Nik Collection - Viveza 2 to launch the plugin.
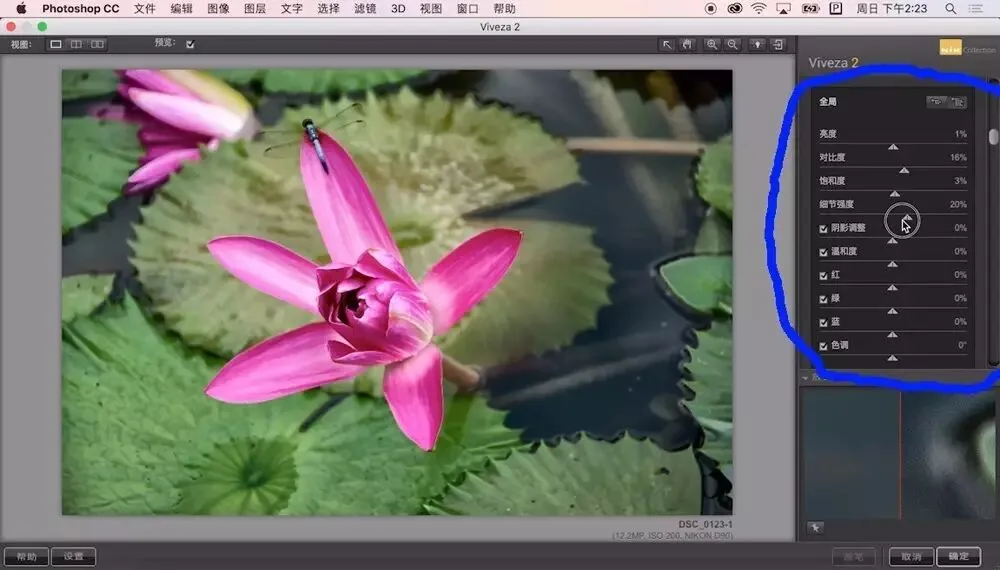
The plugin shows the image on the left and an adjustment panel on the right. The panel options are very similar to ACR's Basic panel.
One special control is the "Structure" slider: moving it right enhances texture and fine detail in the image.
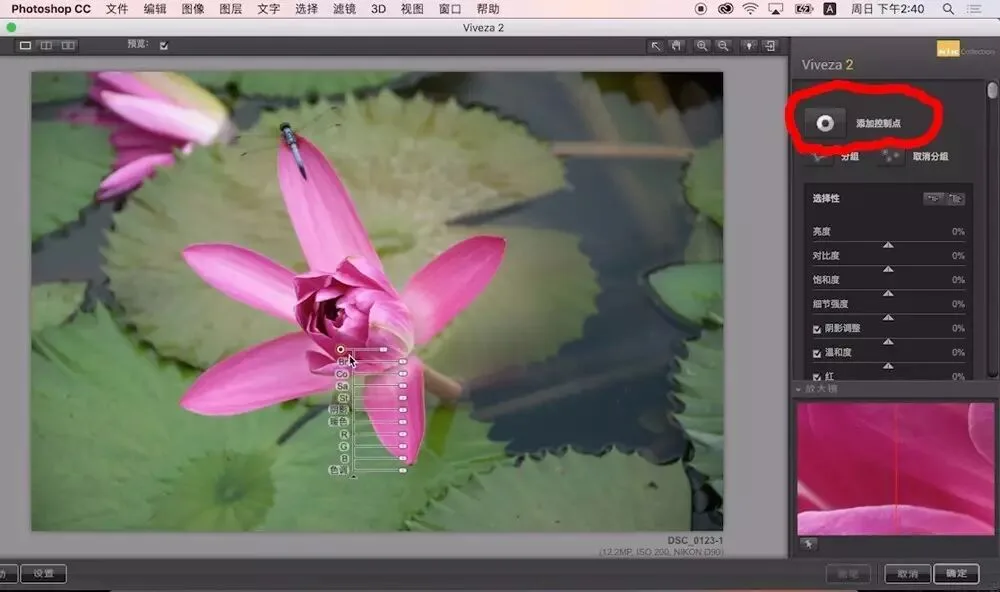
By default, the right-hand adjustment panel affects the entire image. If we only want to adjust a local area, we can click "Add Control Point" and then click a specific spot in the image to create a control point.
Each control point has a range slider that controls its size. The area a control point affects is not actually a circle — it covers the places within that circular range whose color, texture, and edges are similar to the control point.
In other words, Viveza intelligently detects the object we want to select based on the control point's center and range.
In the control point list, clicking the checkmark on the right shows the area each control point affects. The display works like a mask: white is fully affected, black is completely unaffected, and gray is partially affected.
You can see our first control point selected the central flower quite accurately — mainly its red-purple parts.
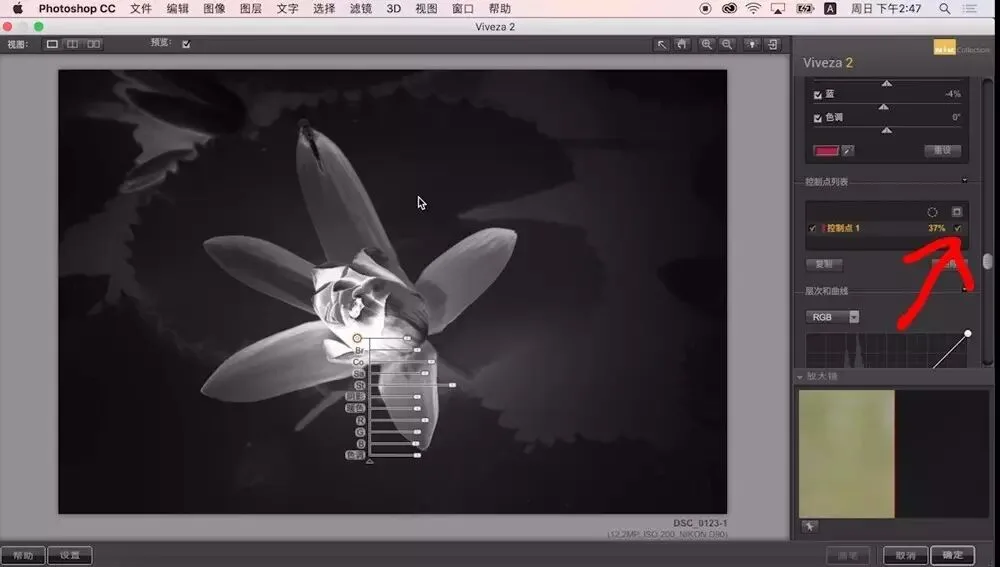
However, some objects around the flower were also slightly affected. Often this makes adjustment edges more natural with a smooth transition. But in this example, I only want to adjust the central flower without affecting anything else at all.
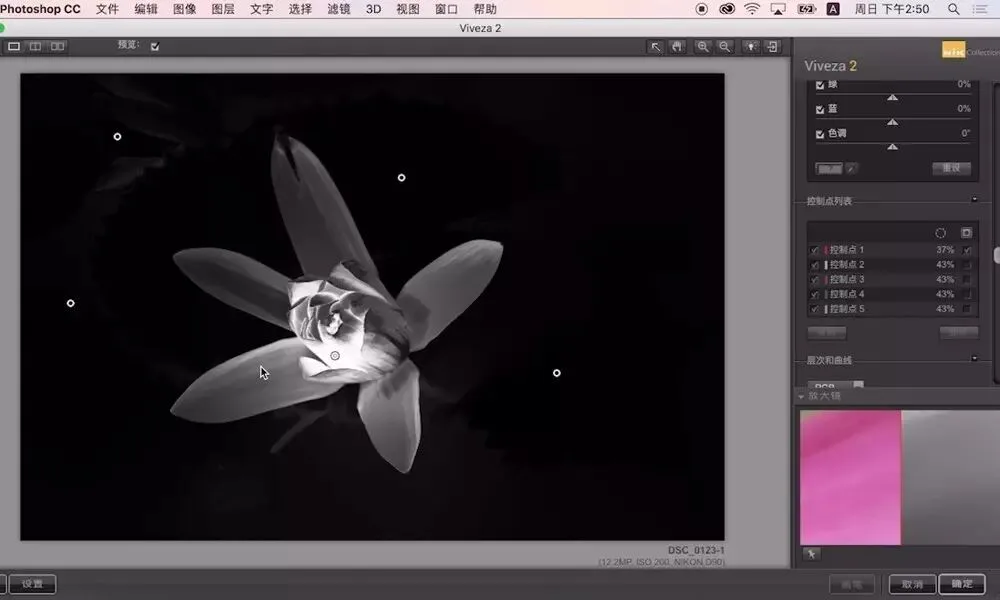
We can refine the selection by adding more control points. Control point ranges are mutually exclusive: if an area is claimed by control point B, it is subtracted from control point A. So after adding four more control points around the flower, the areas those four points claim are subtracted from the central flower's control point, giving a very precise selection.
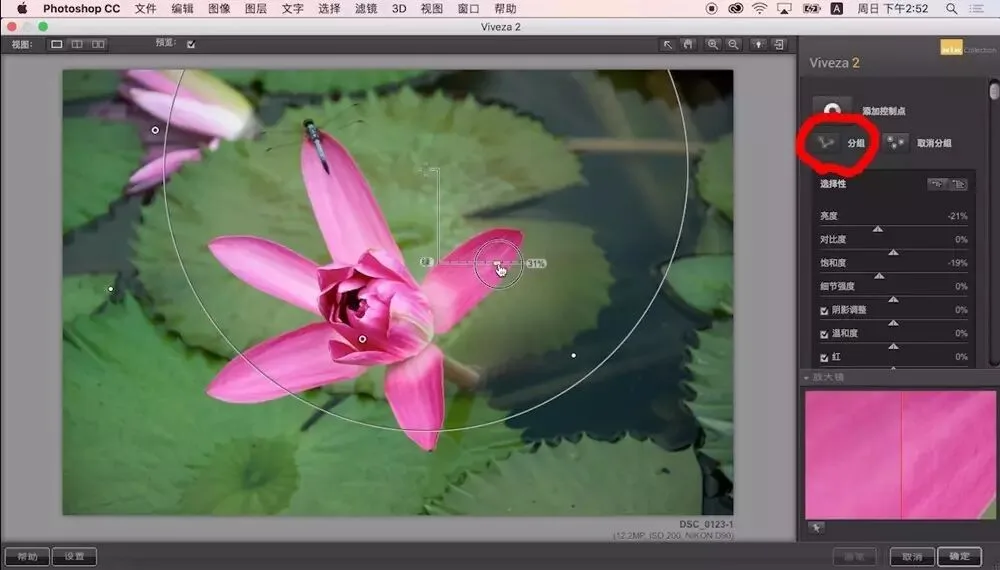
Each control point has its own affected area and adjustment sliders. If several control points target the same kind of object (for example, lotus leaves in different spots), we can group them. The group then covers the union of all its control points' ranges, and adjusting one slider updates the effect of every control point in the group.
There are two ways to group control points. One is to drag a rectangle in the image to select all control points inside it. The other is to hold Command (Ctrl on Windows) and select points in the control point list. With multiple points selected, click the "Group" button to group them.
Once you're practiced, you can select and adjust complex objects very quickly. For the sky in the image below, we only need two control points (grouped together) to select it precisely, then add blue and darken it. (Notice that the sky visible through gaps in the buildings is also affected — the selection is extremely accurate.)
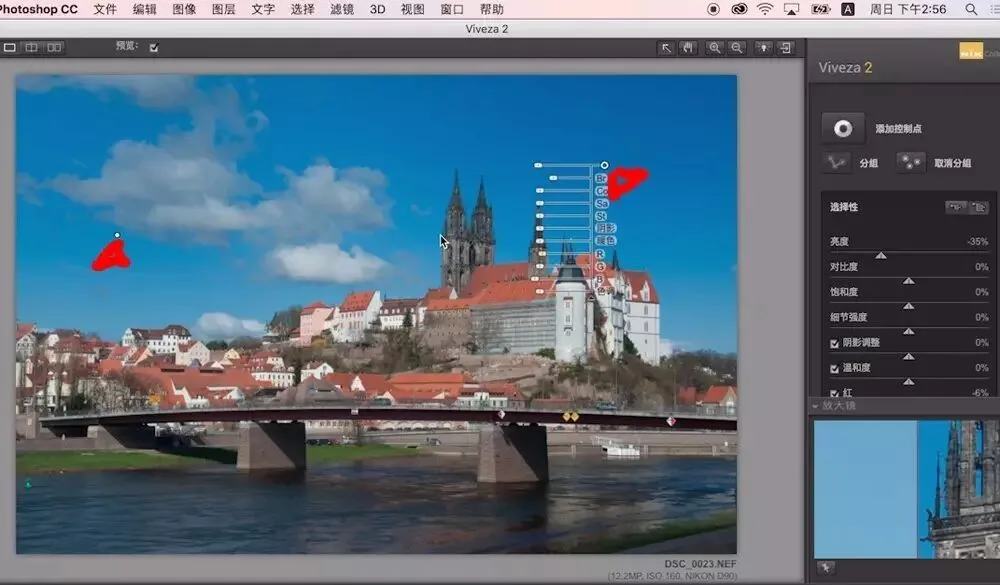
If the sky control points accidentally affect other objects, such as white clouds, we simply add a control point on the clouds, and the cloud area is subtracted from the sky control points (remember: control point ranges are mutually exclusive). We can also raise "Structure" on the clouds to bring out their texture and detail.
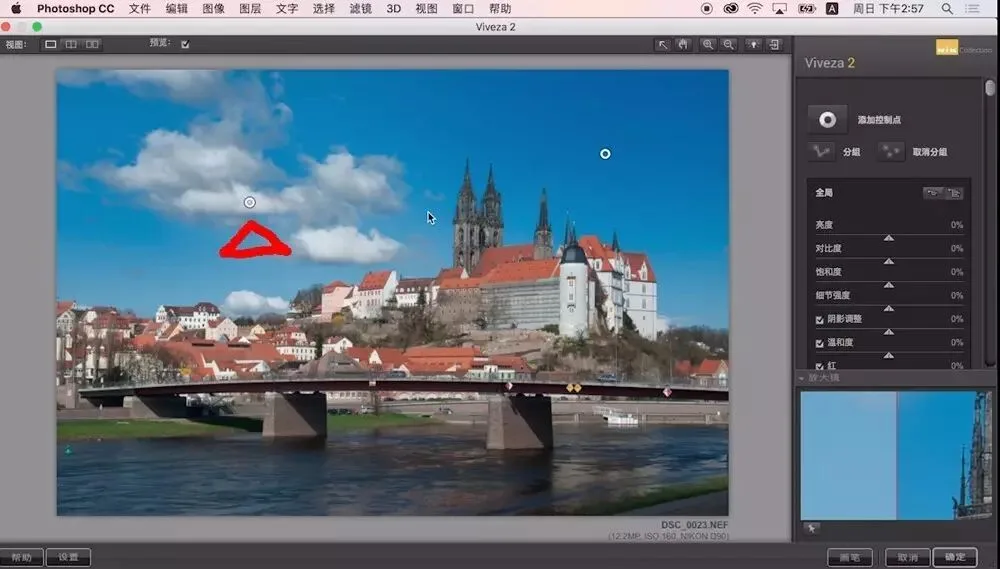
Requiring only a few control points like a radial filter, yet delivering channel-and-mask-level precision — that is the power of Nik Viveza.
Thomas has uploaded the raw files of both images in this tutorial online for everyone to download:
https://pan.baidu.com/s/1o7So0Ym
You're welcome to post your practice results on Weibo and @Thomas Chu Photo to share and discuss with everyone ^_^
Follow @Thomas Chu Photo,
and learn one photography skill every Sunday.

If you found this article useful, please share it with more friends ^_^