Photography Tutorial · 2020-08-09
The Perseid Meteor Shower Is Here: How to Shoot & Process Meteors
Thomas Chu Photo
On August 12, the annual Perseid meteor shower reaches its peak, with dozens of meteors streaking across the sky every hour — and for a month around the peak, you have a good chance of seeing meteors on any clear night.
In today's tutorial, Thomas shares the basic shooting and post-processing techniques for meteor showers.
Video Tutorial
▶ Watch the video tutorial on Bilibili
The annual Perseid meteor shower is back. In the video above, Thomas shares the complete workflow for shooting and post-processing meteors: when to shoot, what gear and settings to use, how to compose around trade-offs, and how to stack the meteors picked from hundreds of frames into one spectacular shower in Photoshop. This is the illustrated companion to that video — every step is paired with a screenshot, so you can build the mental model here and catch the details in the video.
01 Timing and Gear: Escape Light, Mount Up, Keep Shooting
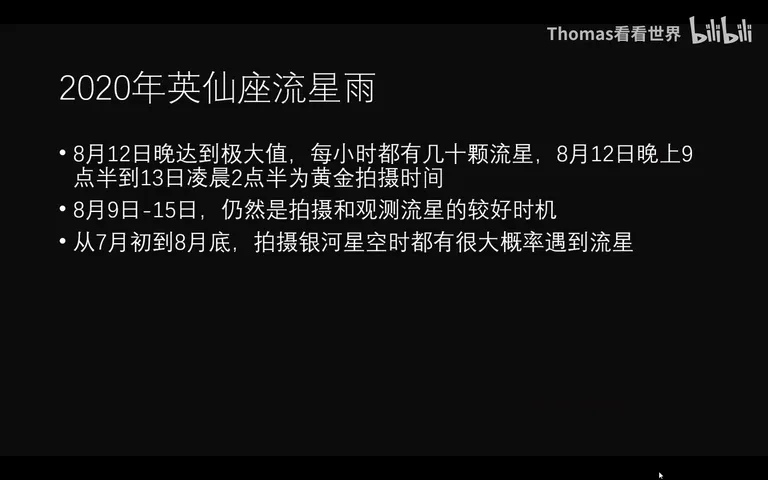
This year's Perseids peak on the night of August 12, with tens of meteors per hour; the golden window runs from 9:30 pm on the 12th to 2:30 am on the 13th — no twilight, no moonlight (at 0:23 in the video). If that night is cloudy or booked, August 9-15 is still a good window; more broadly, from early July to late August any Milky-Way shoot has a high chance of catching meteors — Thomas has recently been finding meteors in four or five frames out of every hour of star shooting (at 1:04 in the video).
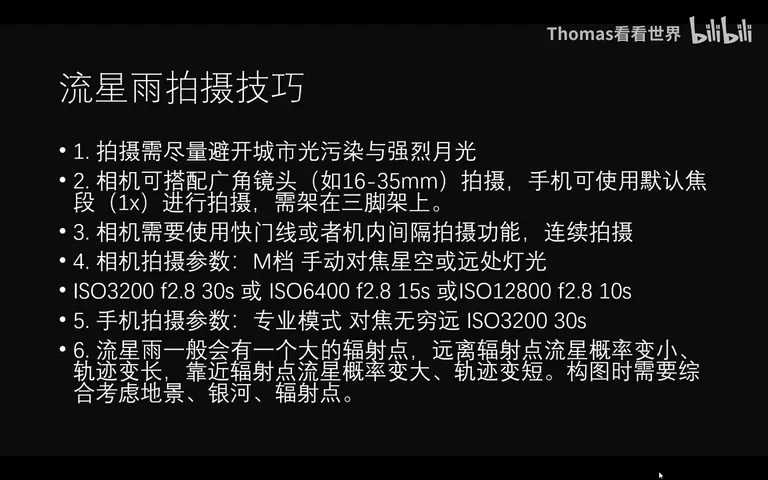
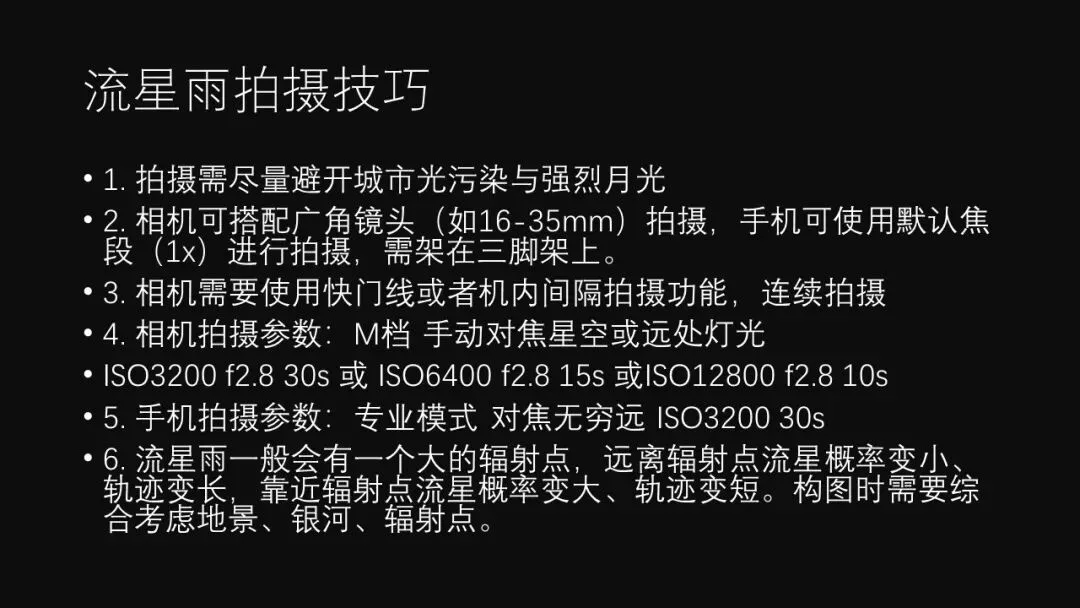
Both cameras and phones work: pair the camera with a wide lens like a 16-35mm to take in more sky and foreground; on a phone, stick to the default 1X main camera — ultra-wide and zoomed modules have smaller sensors and weaker algorithms (at 1:34 in the video). Everything must go on a tripod; a camera also needs a cable release or built-in interval timer so it keeps shooting without you pressing the shutter every 30 seconds (at 1:45 in the video).
The core idea is "give the meteor one extra stop of ISO": start at M mode with manual focus on the stars or a distant light. Standard star settings of ISO 3200, f/2.8, 30 s work, but a meteor crosses the sky in a second or two, so a 30-second exposure renders it dim against the background; switch to ISO 6400 at 15 s or even ISO 12800 at 10 s — the shorter exposure pulls the meteor's brightness away from the sky (at 2:28 in the video). On a phone, use the pro mode, focus at infinity, ISO 3200 and a 25-30 s exposure — a small sensor collapses at shorter exposures, so favor the full duration (at 2:55 in the video).
02 Composition and Fake Meteors: Foreground First, Radiant Last
The Perseids have a clear radiant (in Perseus). Meteors far from the radiant appear less often but streak long and beautiful when they do; near the radiant they are frequent but short (at 3:22 in the video) — a genuine trade-off. Thomas suggests composing for the foreground first, the Milky Way second, and the radiant last: on peak night meteors are so numerous that even the opposite direction delivers plenty (at 3:34 in the video), so a beautiful foreground always comes first.
Keep the camera shooting continuously so there is something to cull later: some frames are clean starfields, others catch a meteor mid-flight (at 4:10 in the video). Learn to separate meteors from satellites — a meteor's trail is bright in the middle and tapers at both ends, while a satellite's trace is uniform along its whole length. When in doubt, flip through the sequence: a satellite marches through adjacent frames, while a meteor appears exactly once and the next one lands somewhere else (at 4:51 in the video).
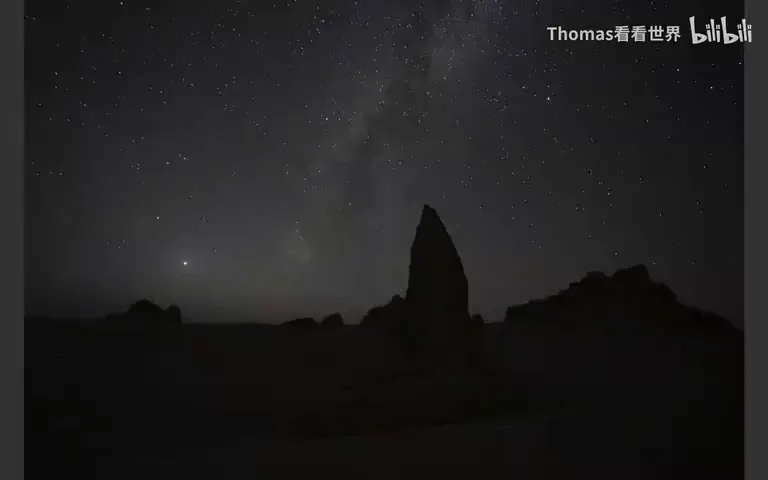
03 Preparing the Stack: One Meteor in a Hundred Frames
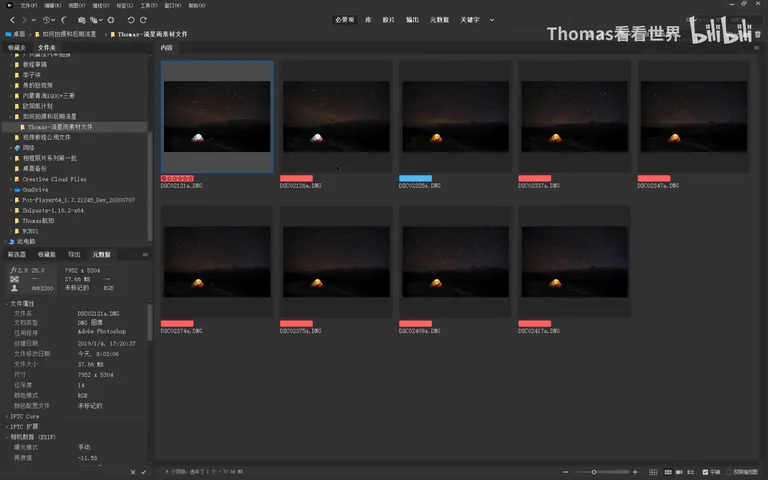
The post-processing demo uses last January's Quadrantids. First browse the night's burst in Lightroom and color-label every frame with a meteor — out of one to two hundred shots only a dozen or so make the cut (at 5:20 in the video). The practice files are linked in the Bilibili and Weibo comments and in the WeChat article, so you can follow along (at 5:32 in the video).
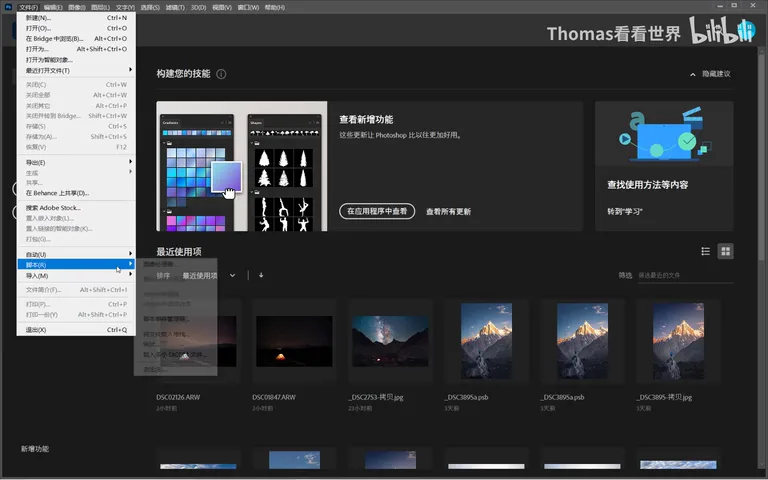
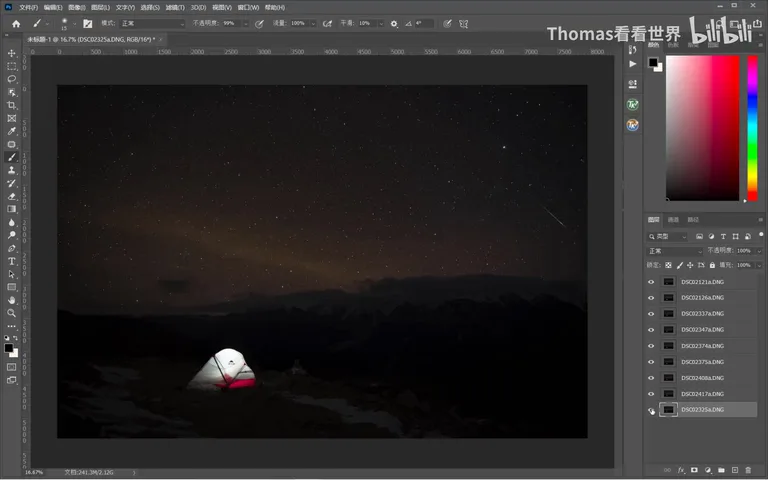
In Photoshop, run File > Scripts > Load Files into Stack, select the meteor frames and confirm — every photo lands as a layer in one document (at 5:51 in the video). Then choose a base plate for the sky: the criteria are a clean background, no messy clouds, and a transparent night sky (at 6:09 in the video).
The base plate can be upgraded: use a blue-hour or just-after-moonrise frame so the foreground gets better light — effectively a time blend — or stack several sky frames for a denoised, cleaner background (at 6:21 and 6:55 in the video). Once the base is set, it is time to bring each meteor down into it.
04 Lighten Blend: Align, Mask, Reveal
Set the meteor layer's blend mode to Lighten and the meteor immediately appears in the base — the meteor is brighter than the sky, and Lighten keeps whichever pixel is brighter (at 7:16 in the video). But Earth's rotation means the sky turns between frames, so the stars sit offset: press Ctrl+T, rotate and drag the top layer, nudge with the arrow keys until the reference stars nearly coincide — that keeps every meteor at its true position in the constellation. For a purely visual composite this step is optional (at 7:29 in the video).
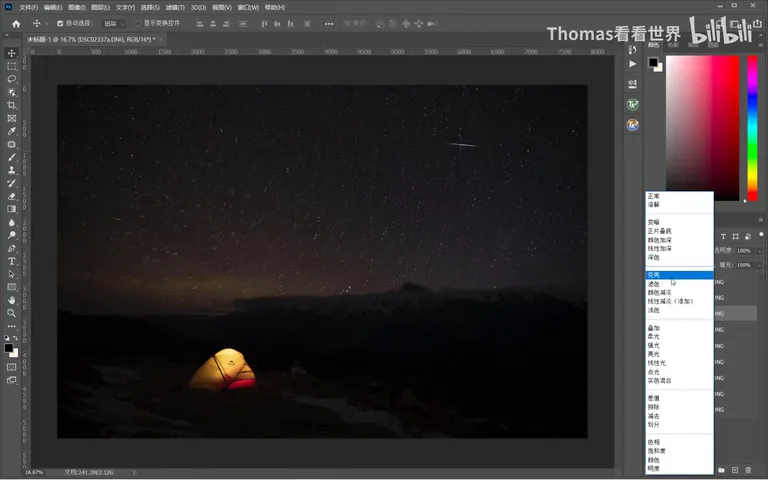
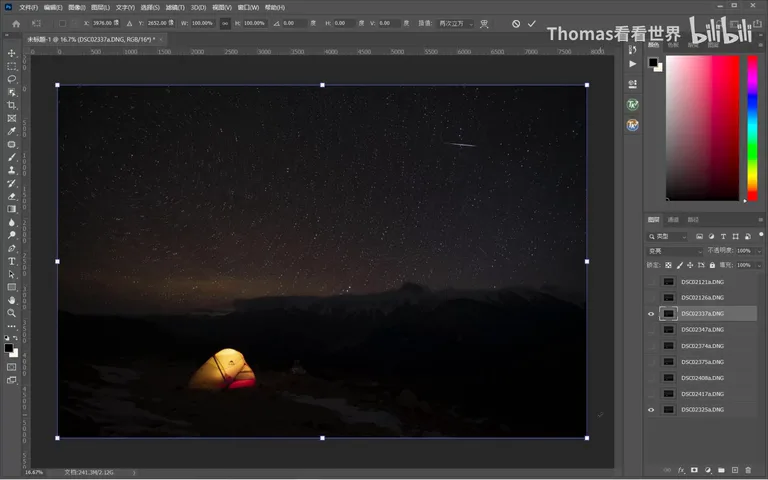
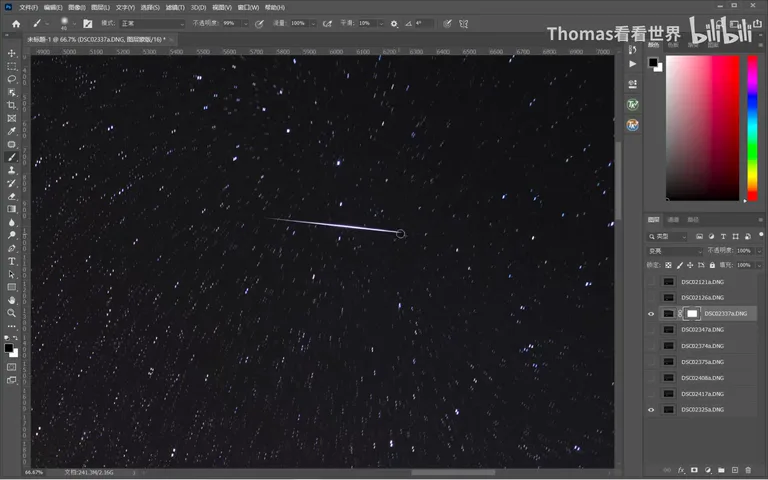
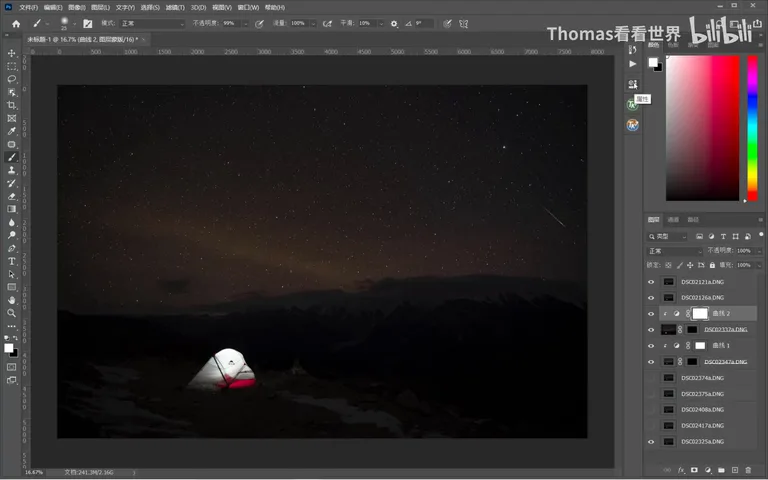
Lighten merges the meteor in — along with the rest of that layer's sky — so finish with a mask: paint along the meteor with a black brush (hold Shift between start and end points for a straight line) to erase the whole streak, then press Ctrl+I to invert the mask — only the meteor remains visible; tidy any rough edges with the same black brush (at 8:24 and 8:53 in the video).
05 Curves Rescue and a Closing Thought: One Meteor Is Enough
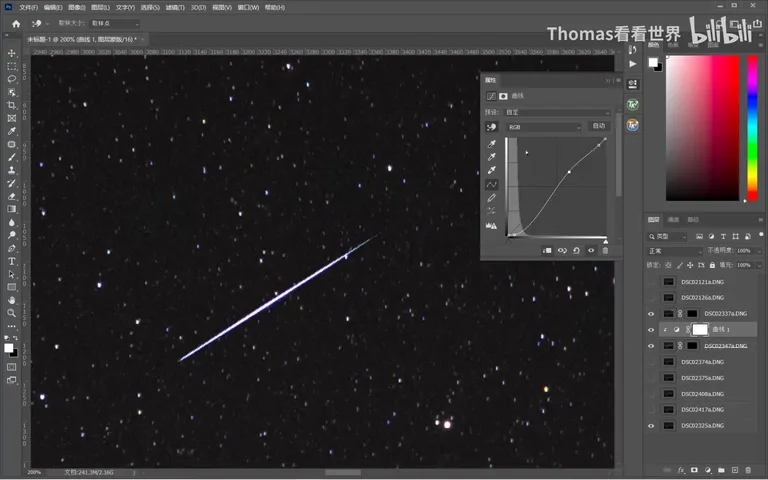
Some meteor frames were shot after moonlight or twilight crept up — the whole sky is brighter and the white balance has shifted — and Lighten would blend that bright sky into the base too (at 9:14 in the video). The fix follows the same logic: mask the meteor out, then add a Curves adjustment layer and Alt-click (Option on Mac) between the curve layer and the layer below to clip it, affecting only that layer (at 10:07 in the video).
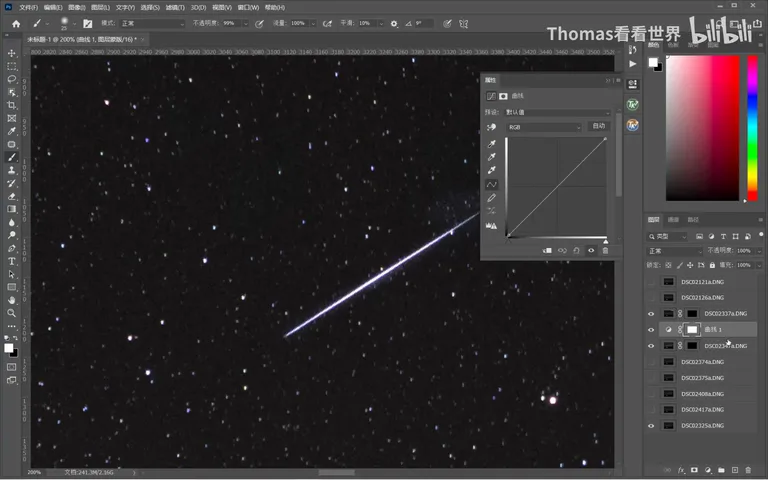
Drop two points on the curve: pin one at the meteor's brightness to protect it, and pull the background sky's point down — once darkened, Lighten stops blending that sky into the base; the same curve can just as easily lift a meteor that feels too faint. Repeat layer by layer and the individual meteors assemble into one spectacular shower (at 10:41 in the video).
Style matters too: stack frames aimed at the Perseid radiant and the meteors diverge like a true shower; aim elsewhere and they run roughly parallel, with an orderliness of its own (at 11:33 in the video). And you don't need a dozen meteors for a keeper — one Milky Way, a good forest foreground and one or two meteors, as in the video's closing frames, already make a beautiful picture (at 11:48 in the video).
1. The Perseid golden window is 21:30 Aug 12 to 2:30 am Aug 13, with Aug 9-15 still good — and any Milky-Way night from late July through August can catch meteors; 2. Tripod and continuous shooting, M mode with manual focus, starting at ISO 3200 f/2.8 30 s, then trade exposure for ISO (ISO 6400/15 s, ISO 12800/10 s) to make meteors pop; phones: pro mode, ISO 3200, 25-30 s; 3. Compose foreground first, Milky Way second, radiant last; meteors taper at both ends while satellites stay uniform — the frame sequence settles any doubt; 4. In Photoshop, Load Files into Stack and blend meteors with Lighten: Ctrl+T to align the stars, erase each meteor on a black-brush mask then Ctrl+I, and where brightness mismatches, use an Alt-clipped Curves layer to darken the sky and brighten the meteor.
Practice Files Download:
https://pan.baidu.com/s/1RiygEeh4VQblJ_wApqvB7Q Access code: 9z4m
Key Slides