Photography Tutorial · 2017-06-29
Portrait Lighting Essentials in One Article
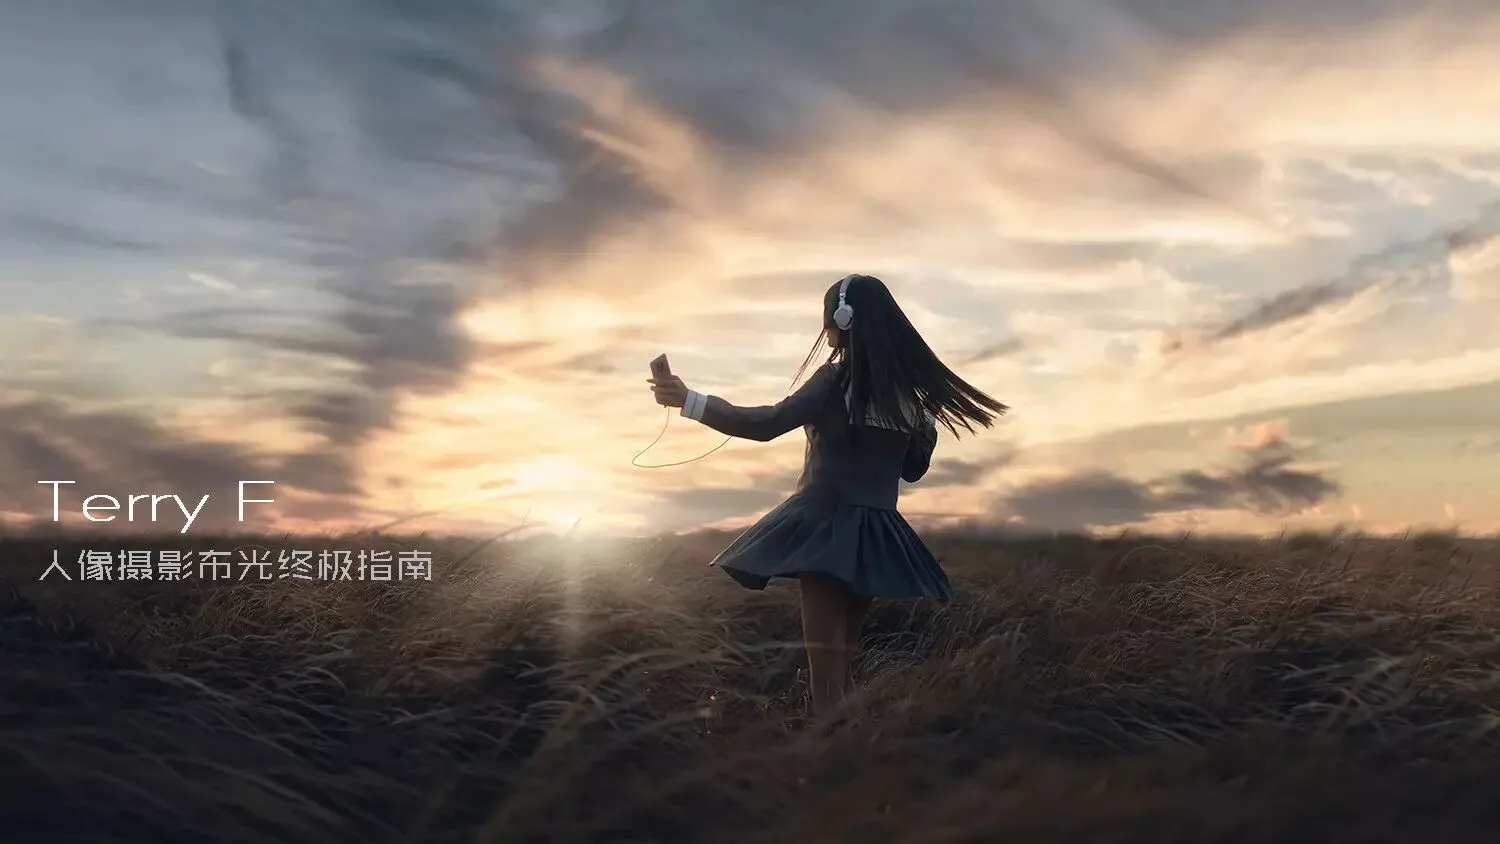
Introduction:
"Light" is the key factor that decides whether a photograph succeeds or fails. A qualified portrait photographer must be able to handle natural light and ambient light, and add artificial light at the right time and in the right way.
This article focuses on the characteristics of natural light, city light, and artificial light in portrait photography, and how to use them.
1. The Characteristics of the Three Light Sources
Natural light: undoubtedly the light source photographers encounter most often. Although used most frequently, its changeability and susceptibility to weather inevitably cause trouble. But compared with flash lighting, natural light is more intuitive to apply, less restricted by location, and cheaper to shoot with. It has another trait: it is easily accepted by viewers. A survey of the 500px audience found that viewers prefer photos shot with natural light — perhaps an instinctive response from people who have lived in natural light all their lives.
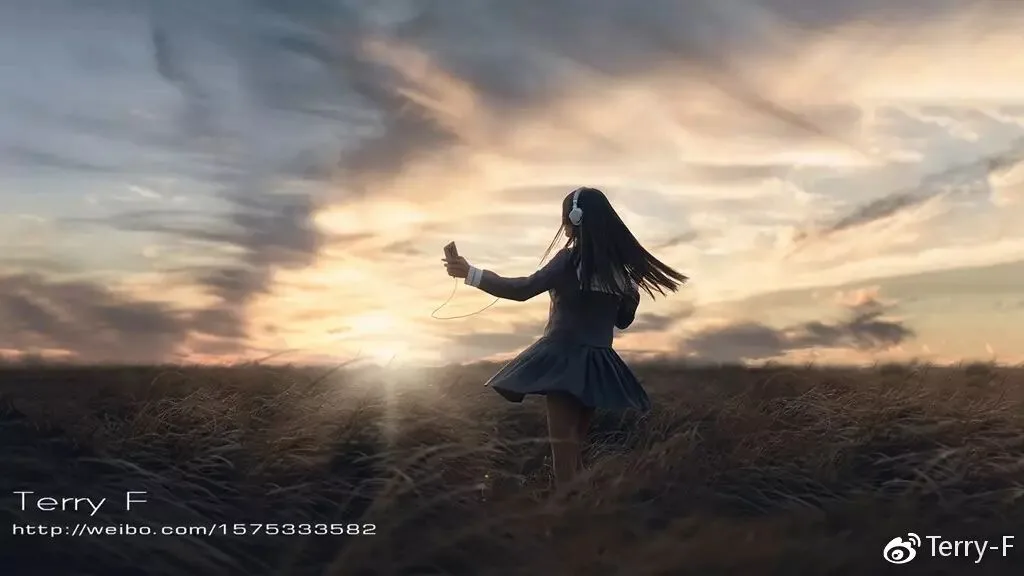
Model: @帅嘤嘤
City light: this source often plays a huge role in nighttime portraits. Without adding any artificial lighting, the key to winning with this source is finding a high-quality key light and a suitable background light. Compared with natural light, city light is more challenging to use, but the sources are stable — once mastered, they serve you effortlessly.
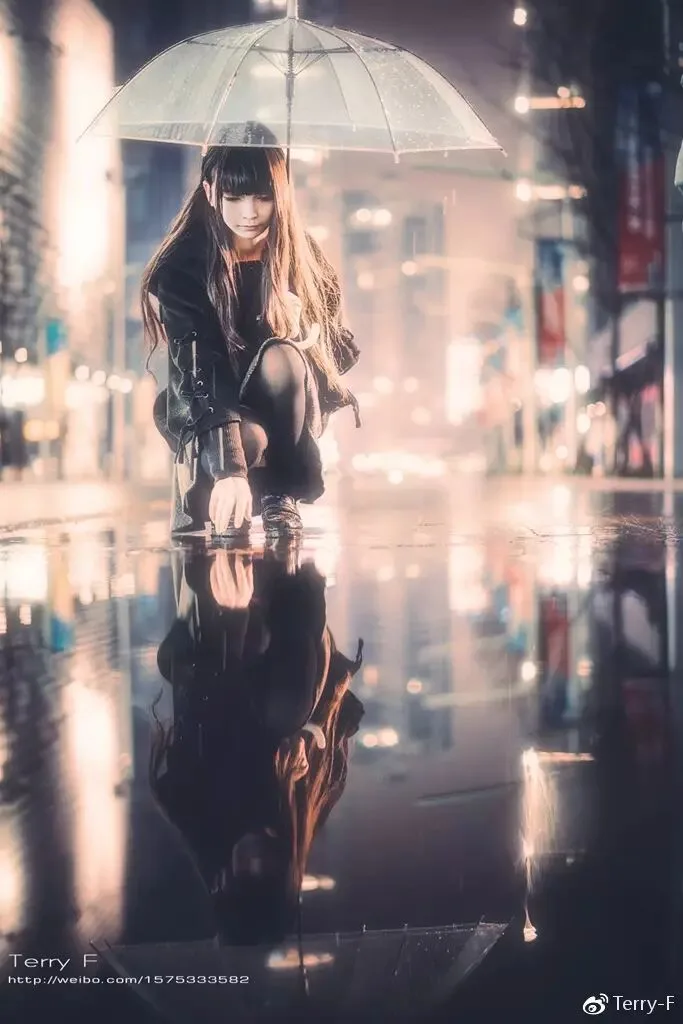
Model: Yuwan
Artificial light: artificial sources generally come in two kinds — continuous lights (such as LEDs) and flashes. These are undoubtedly the most "prestigious" of the three sources with the greatest visual impact, but their fiddly operation, heavy investment, and dependence on a crew understandably scare people off. For these reasons, many beginners mistakenly regard artificial-lighting skill as the measure of a photographer's lighting ability. In reality, the principles of using all three sources are basically the same, the difficulty ceiling is equally unlimited — only the lighting route looks different.
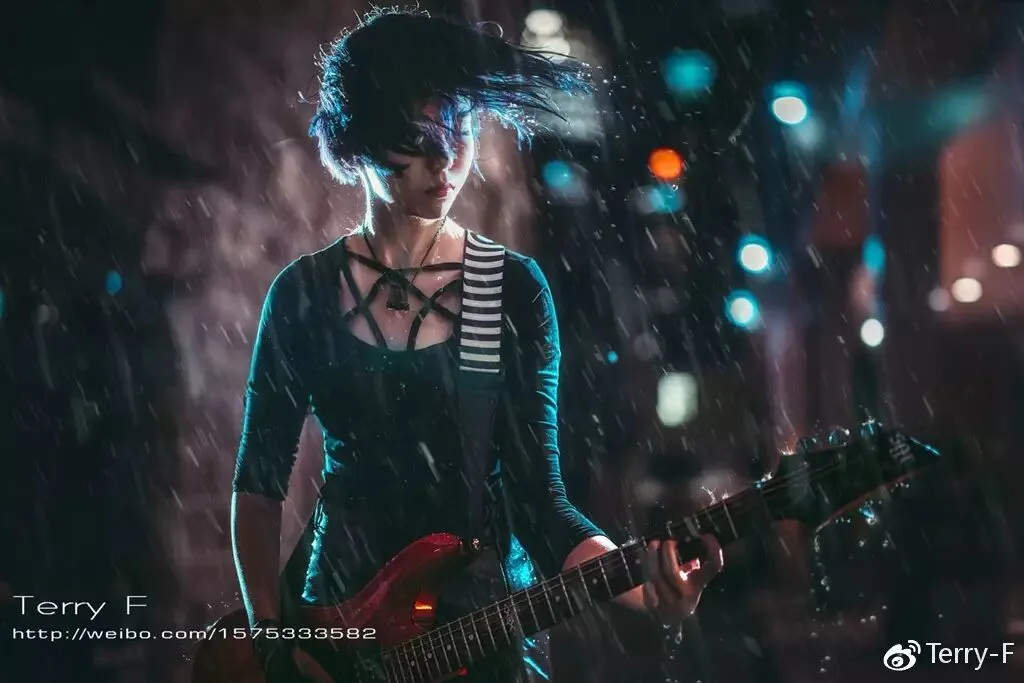
Model: @无敌少女天
2. Principles for Using the Three Light Sources
Use light to "make the person look good", not merely to "light the person up".
"Remember this, remember this."
3. Natural Light in Portraiture
3.1 Natural Light Intensity and Direction
By brightness, natural light falls into strong light, weak light, and faint light.
Strong light usually means direct sunlight outdoors. That's when the lighting ratio is greatest and the light hits hardest.
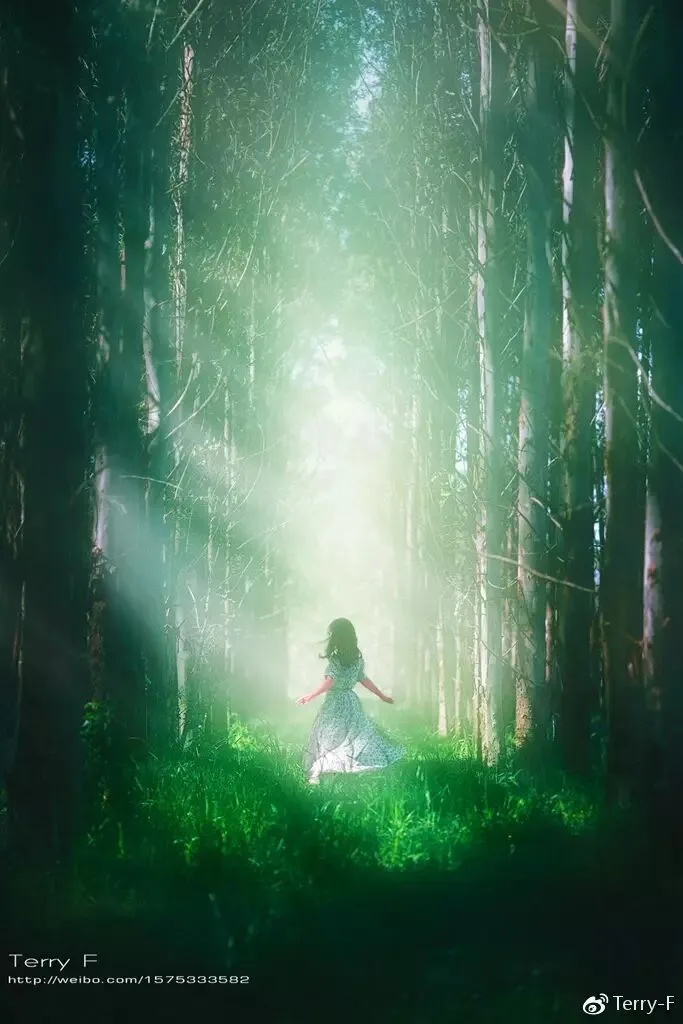
Model: Lena
Overcast or rainy days and indoor shoots are usually weak-light environments. The lighting ratio is relatively small and exposure is easier to control — great for beginners practicing their sense of light direction.
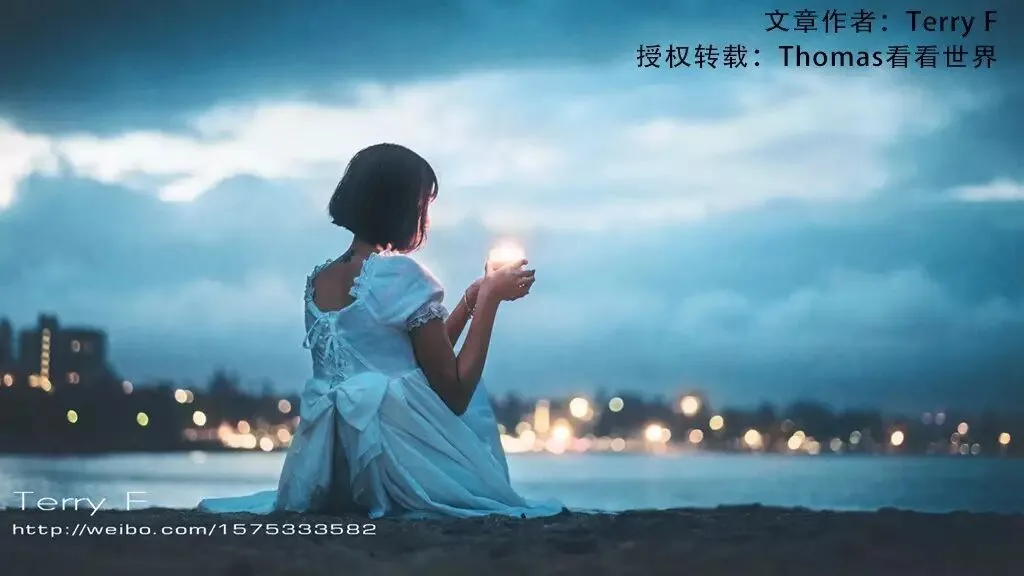
Model: @无敌少女天
Faint-light environments are mostly night scenes, which test a camera's high-ISO performance and a lens's maximum aperture. In urban environments there are many light sources, so you need to sort out which is primary when shooting.
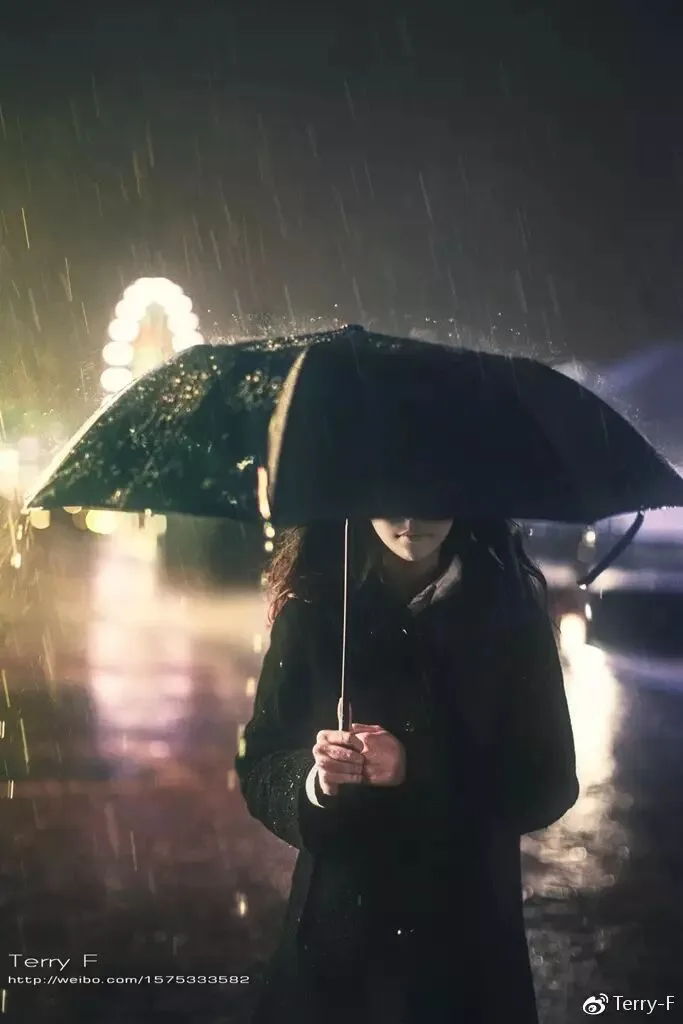
Model: 无敌少女天
By direction, natural light falls into front light, backlight, and side-backlight.
With front light, the subject is usually brighter than the background, creating contrast that makes the subject stand out.
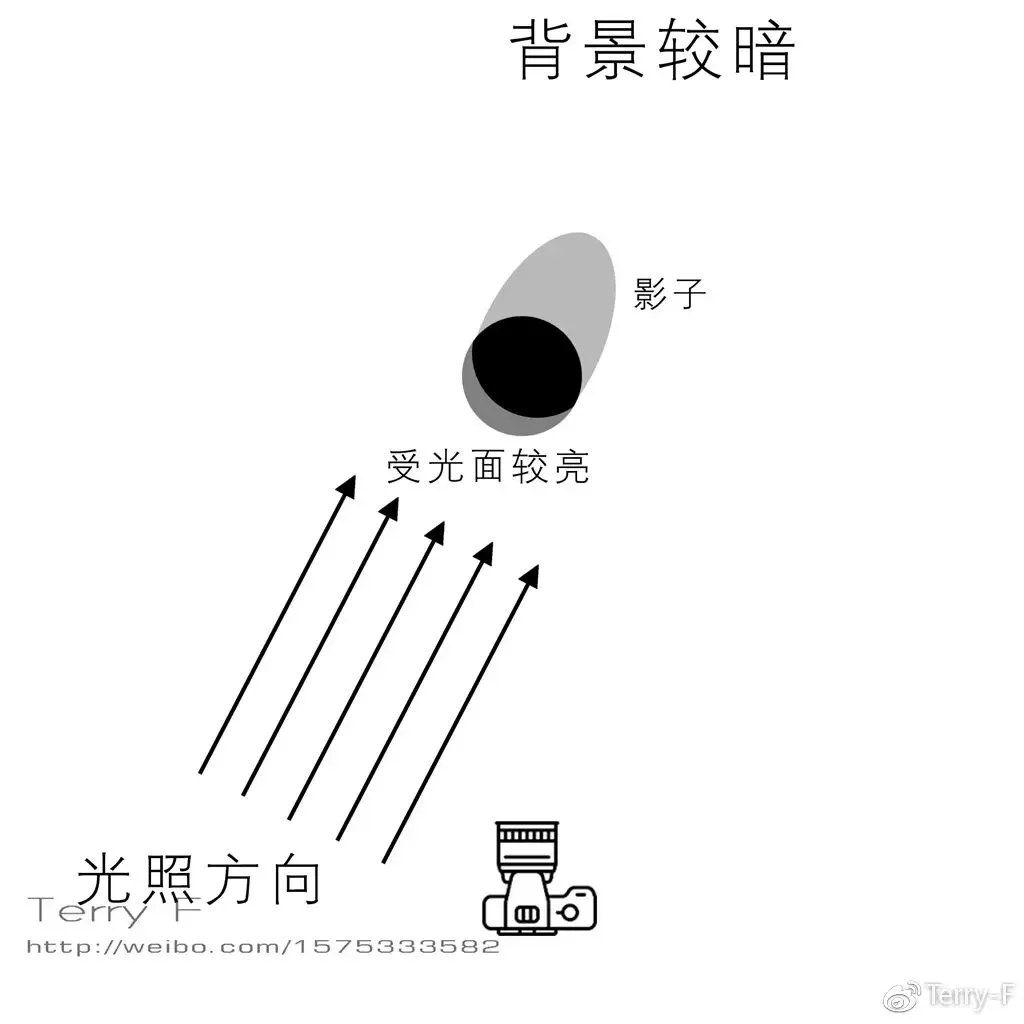
Front light characteristics:
·Light distribution: bright in front, dark behind
·Visual effect: subject stands out
·Shooting difficulty: low
·Visual impact: weak
Model: Yujin
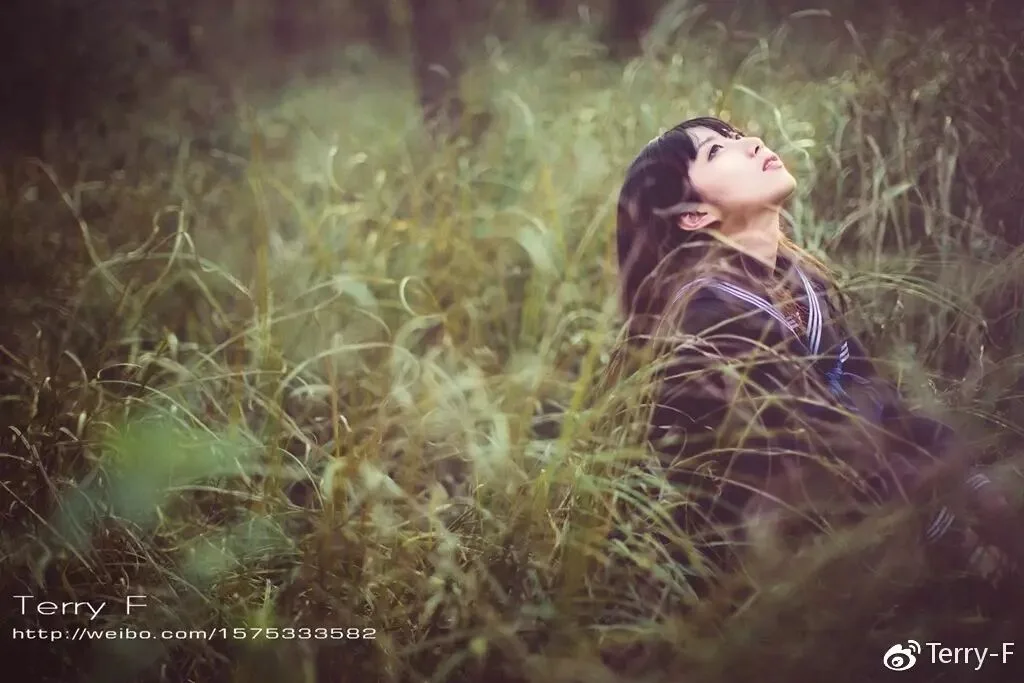
With backlight, the subject sits between camera and light source. The source lights the environment while the subject falls in shadow. Although subject and background differ greatly in brightness and you sometimes get a nice rim light, the subject shows little detail and the modeling of the face is unflattering.
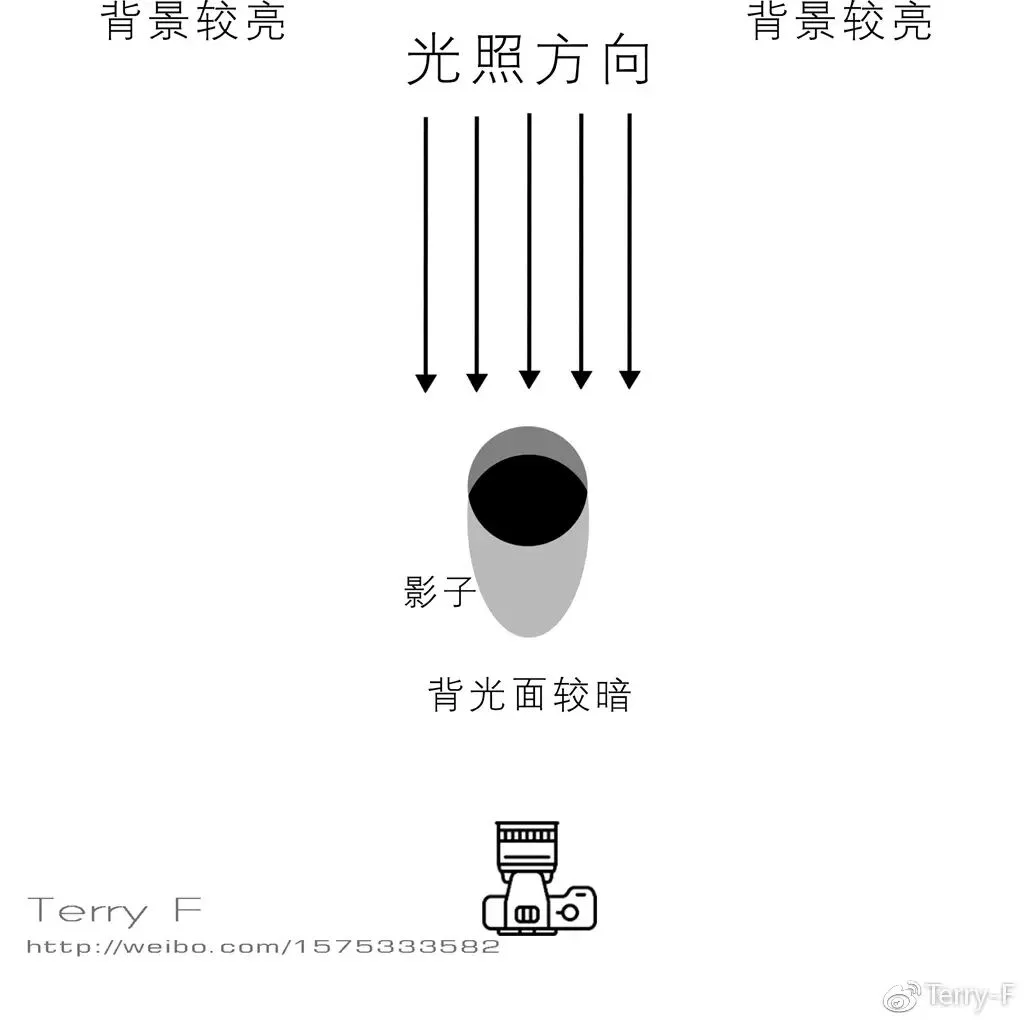
Backlight characteristics:
·Light distribution: dark in front, bright behind
·Visual effect: subject outline emphasized
·Shooting difficulty: high
·Visual impact: strong
Model: Yujin
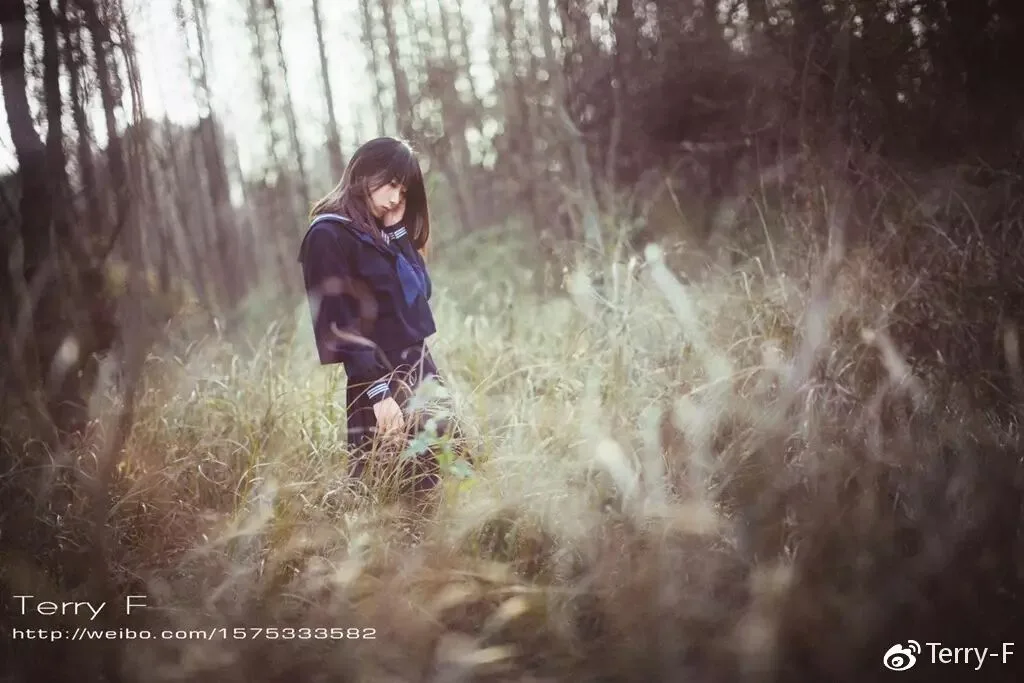
Side-backlight means the subject is still roughly between camera and source, but the source meets the subject at an angle — forming a rim light while also illuminating one side of the subject, giving more depth and somewhat more detail than pure backlight.
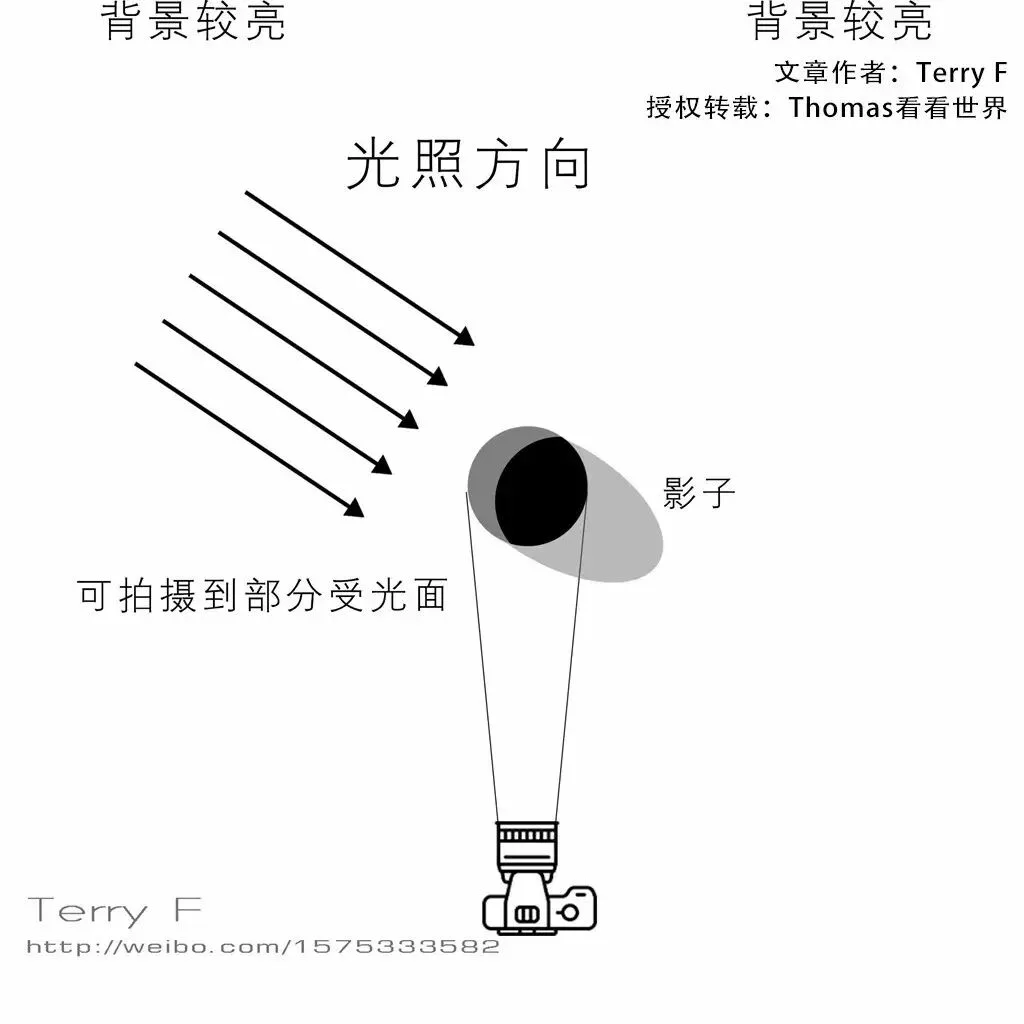
Side-backlight characteristics:
·Light distribution: dark in front, bright behind
·Visual effect: outline emphasized, some detail retained
·Shooting difficulty: medium
·Visual impact: strong
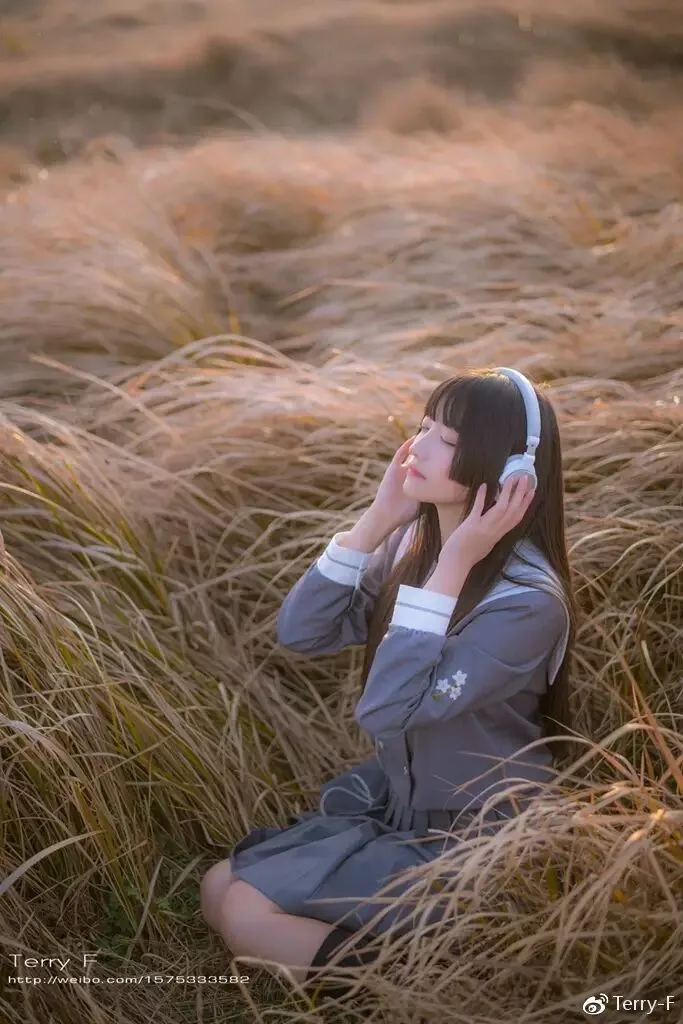
Model: 帅嘤嘤
Diffused light is common on overcast days: clouds block the sun and act like a giant softbox, spreading light evenly into every corner. Because the light-shadow transition is too soft and there is no clear tonal structure, neither the subject nor the environment shows much depth. It's easy to shoot, but the visual impact is weak.
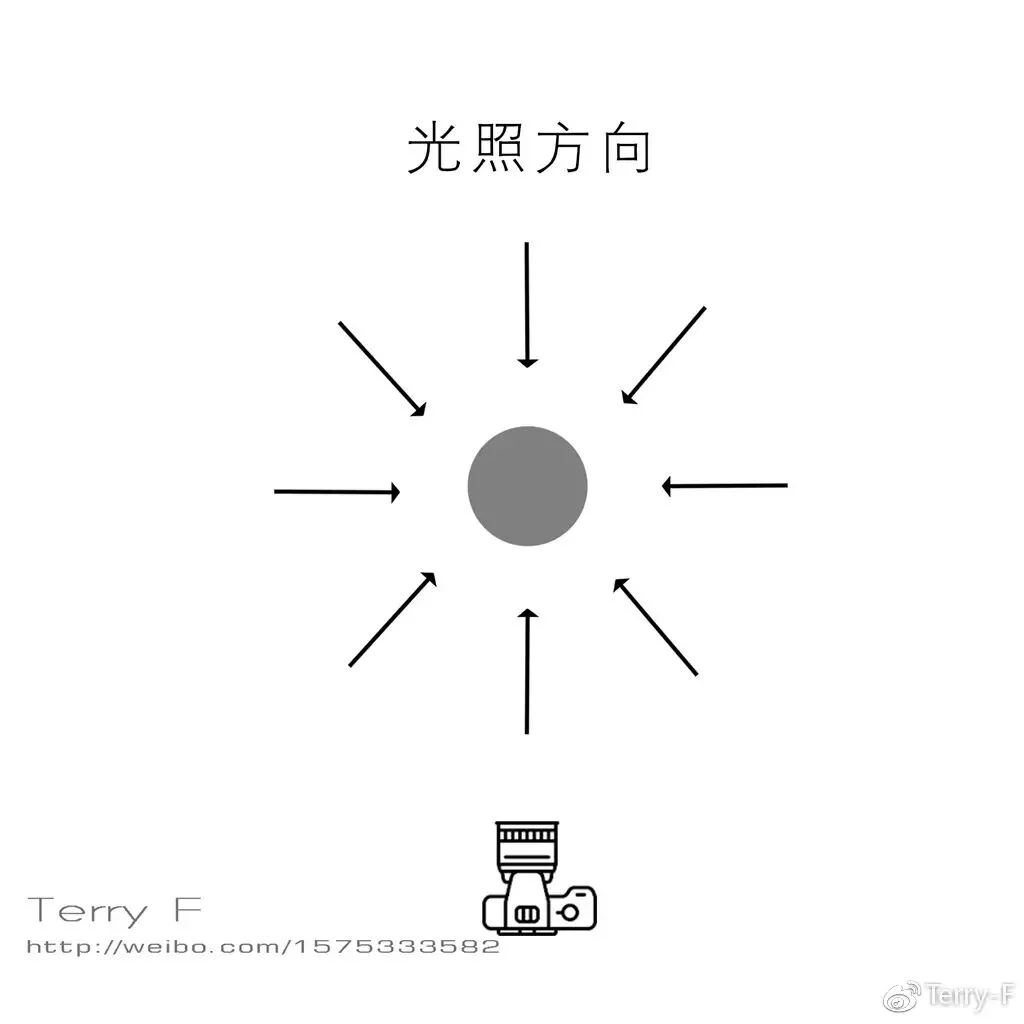
Diffused light characteristics:
·Light distribution: none
·Visual effect: poor
·Shooting difficulty: low
·Visual impact: weak
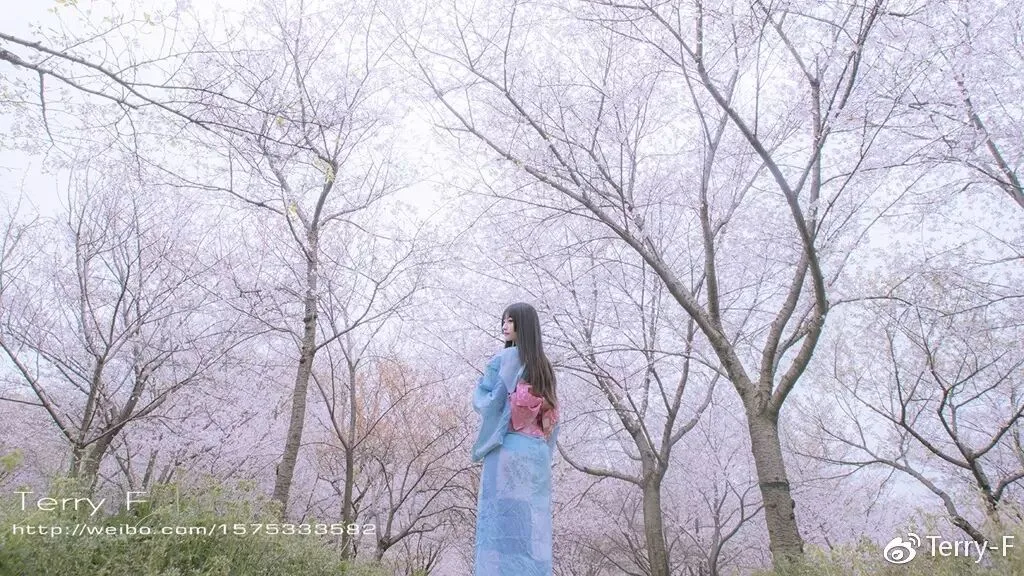
Model: 帅嘤嘤
3.2 Light, Shadow, and Composition
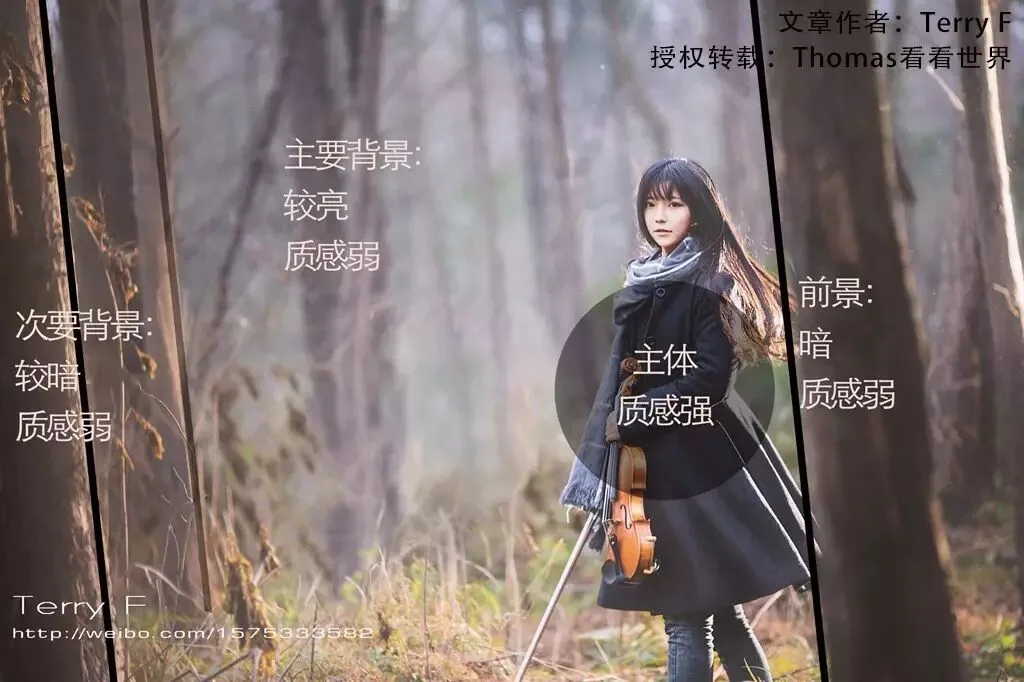
When people talk about composition, many think of points, lines, and planes. But except in minimalist photography, these three elements alone are not enough. A picture is a 2D plane, yet the photographer's job is to present a 3D effect on it — so beyond horizontal composition, you must use changes of light and shadow to strengthen the image's "depth".
In the image below, three trees of different brightness together with a brighter background build the image's vertical space. The subject sits at the golden-section point, and direct light creates strong contrast and texture — establishing the subject's dominance on one hand, and placing them in the middle of this vertical space on the other, strengthening the image's dimensionality.
3.3 Choosing the Right Moment
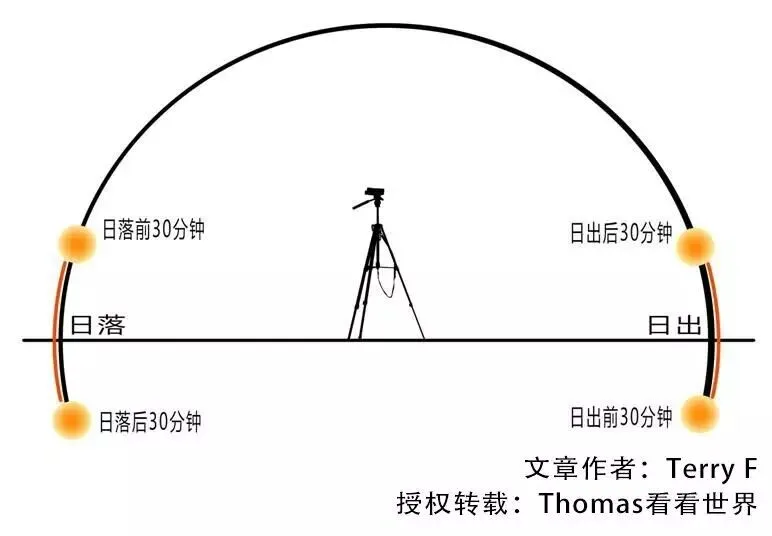
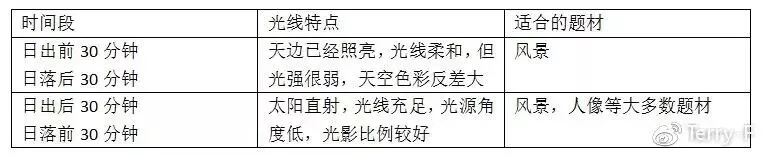
Since the key to natural-light portraiture is adapting to the environment's changes, choosing the right moment matters enormously. The best times of day for photography are basically the 30 minutes before and after sunrise and sunset.
3.4 Natural Light Techniques in Summary
When shooting portraits in natural light, think of light and shadow together: choose the appropriate light intensity, light direction, and shooting time for different subjects, so natural light plays a bigger role. In post, don't break the original image's light-shadow ratio as a rule; if you want to change the light relationships in post, deeper study is needed to do it well.
4. City Light in Portrait Photography
Besides daytime natural light, the lighting environment photographers most often encounter is urban night lighting. Many people mistakenly think city light is weak and street colors messy, so night scenes must rely on extra lights to compensate. In fact, the city holds many high-quality light sources waiting to be discovered.
4.1 Types of City Light Sources
Source 1: ambient light with a clear direction
This is also the easiest source to master. The source is singular with strong visual impact — great for silhouettes.
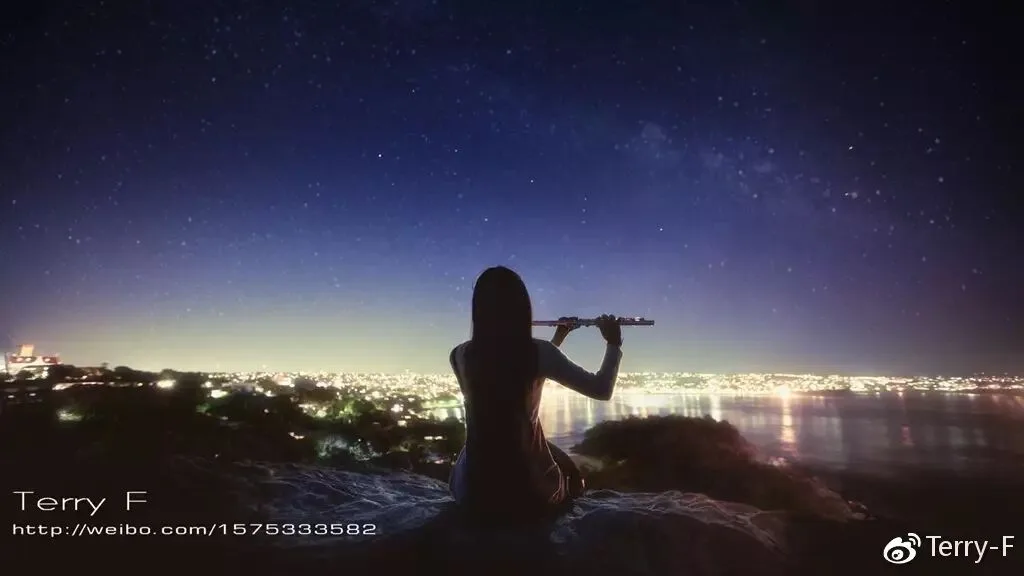
Model: Xishi
Focal length: 16mm
Aperture: f/2.8
Shutter: 2s
ISO: 5000 (this shot is special — ISO was the only option; the cases below don't demand high ISO)
The drawback of this source is that the light is very faint — it's best to shoot with a camera that has good high-ISO performance.
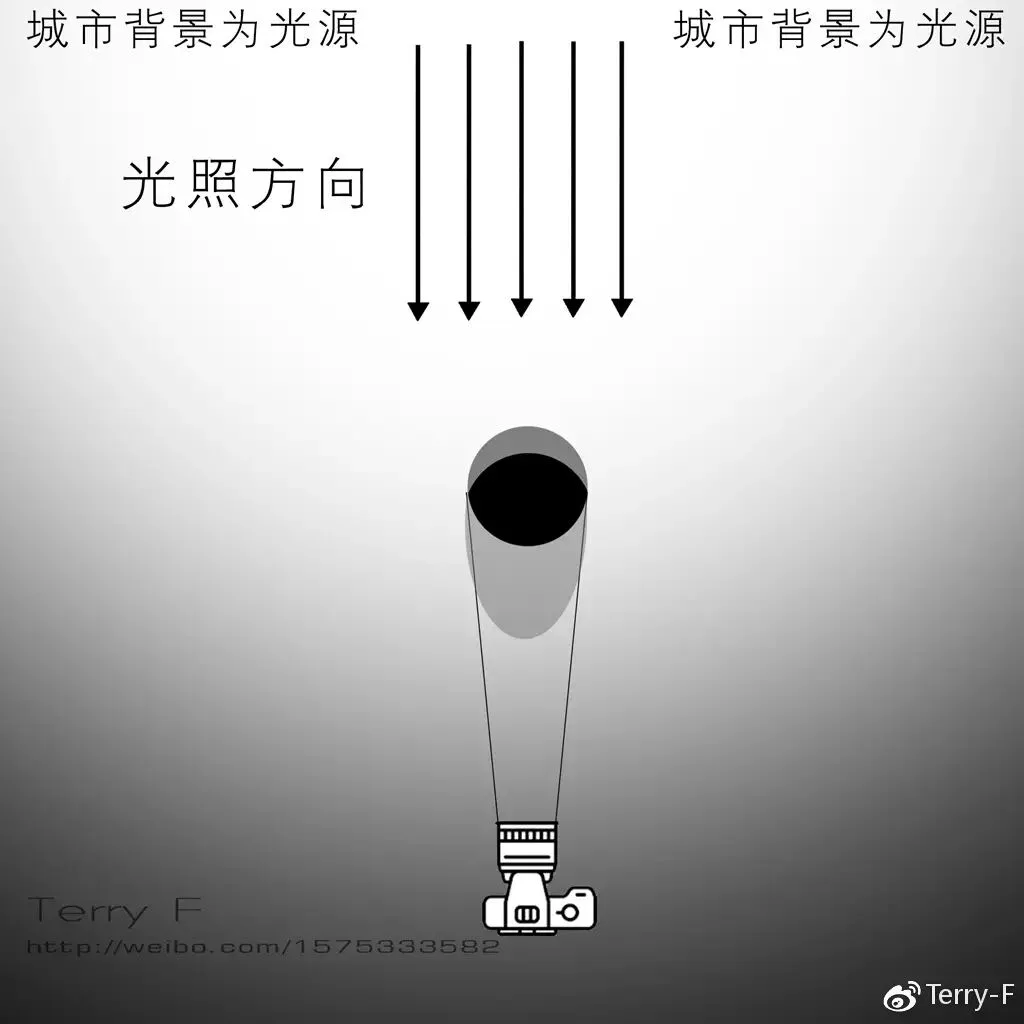
Source 2: billboards
Roadside billboards are among the best light sources: over two meters tall and over a meter wide — a soft-light area no ordinary softbox can match. Billboards are also usually well placed, on sidewalks near the road, leaving plenty of room for the subject's position and the background environment.
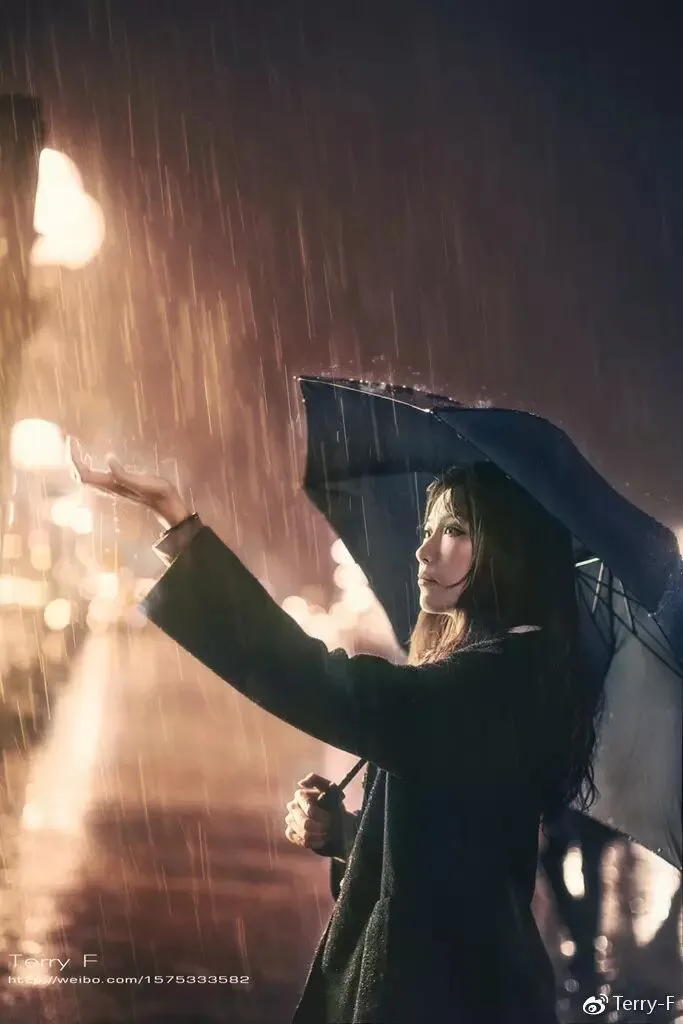
Model: 无敌少女天
Focal length: 50mm
Aperture: f/1.6
Shutter: 1/125s
ISO: 5000 (shot in harsh conditions — holding an umbrella in my left hand and the camera one-handed, so I raised ISO to keep the shutter fast; normally f/1.4, 1/60s, ISO 2000 would do)
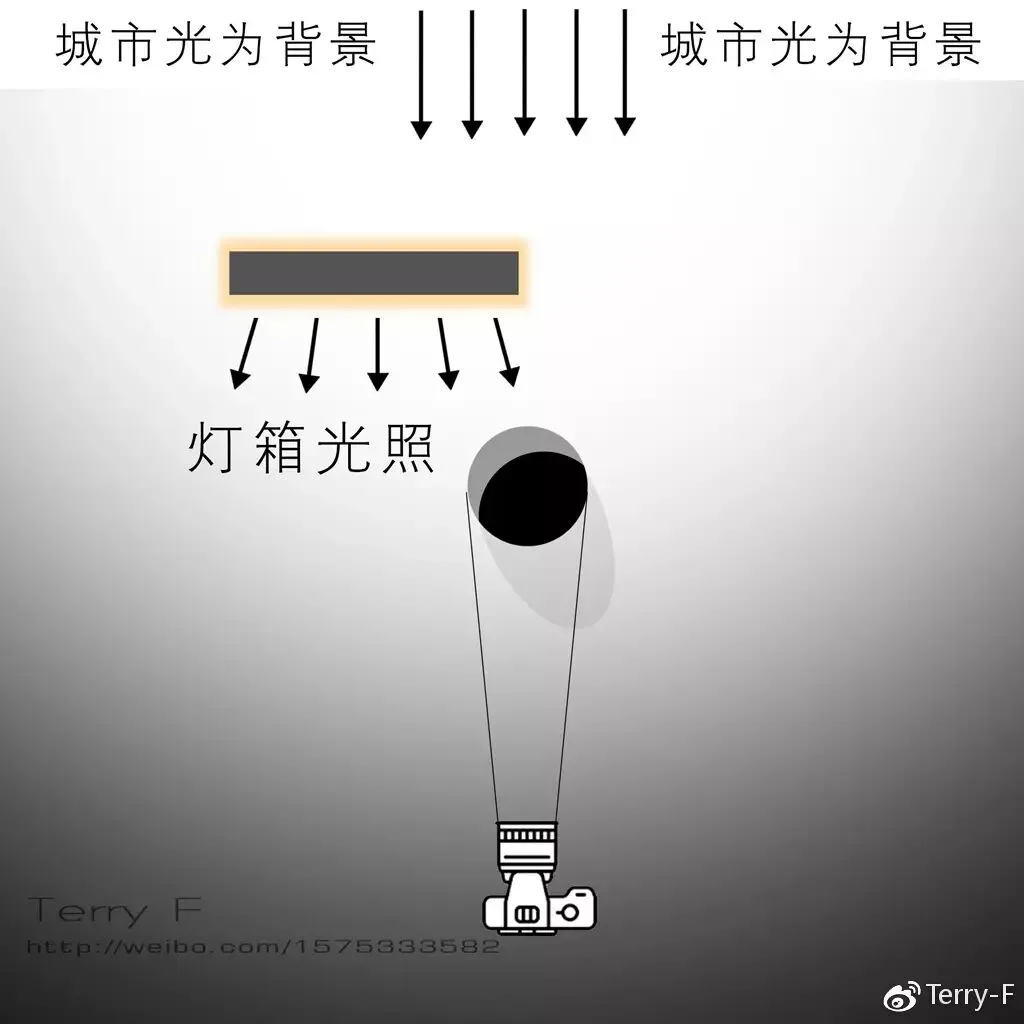
The billboard serves as fill from the opposite direction of the ambient light, lighting the subject's side, weakening the background light's dominance and bringing out the subject's detail. Note that the light on the subject still must not exceed the background light by too much, or it will look abrupt and break the overall tonality.
Source 3: shop windows outside malls
Shop windows outside malls are undoubtedly the largest soft-light source, and also very bright and stable. The benefit of a large soft source is extremely gentle light-dark transitions on the subject, and the high brightness greatly improves image quality. If you shoot close to a shop window, you'll find night portraits remarkably easy.
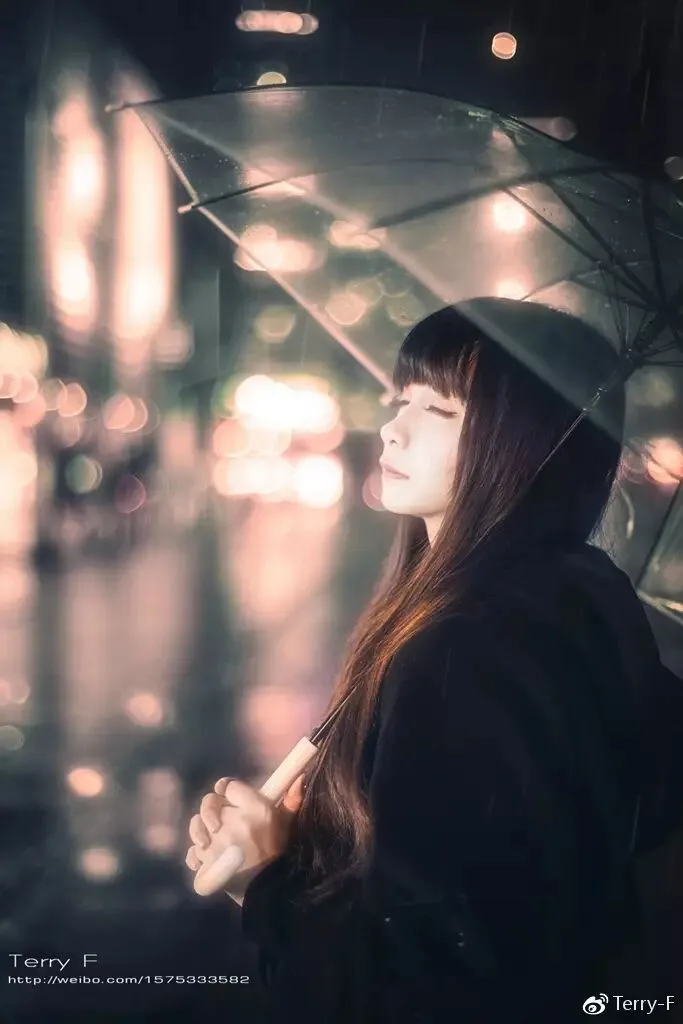
Model: Yuwan
Focal length: 50mm
Aperture: f/1.6
Shutter: 1/60s
ISO:2000
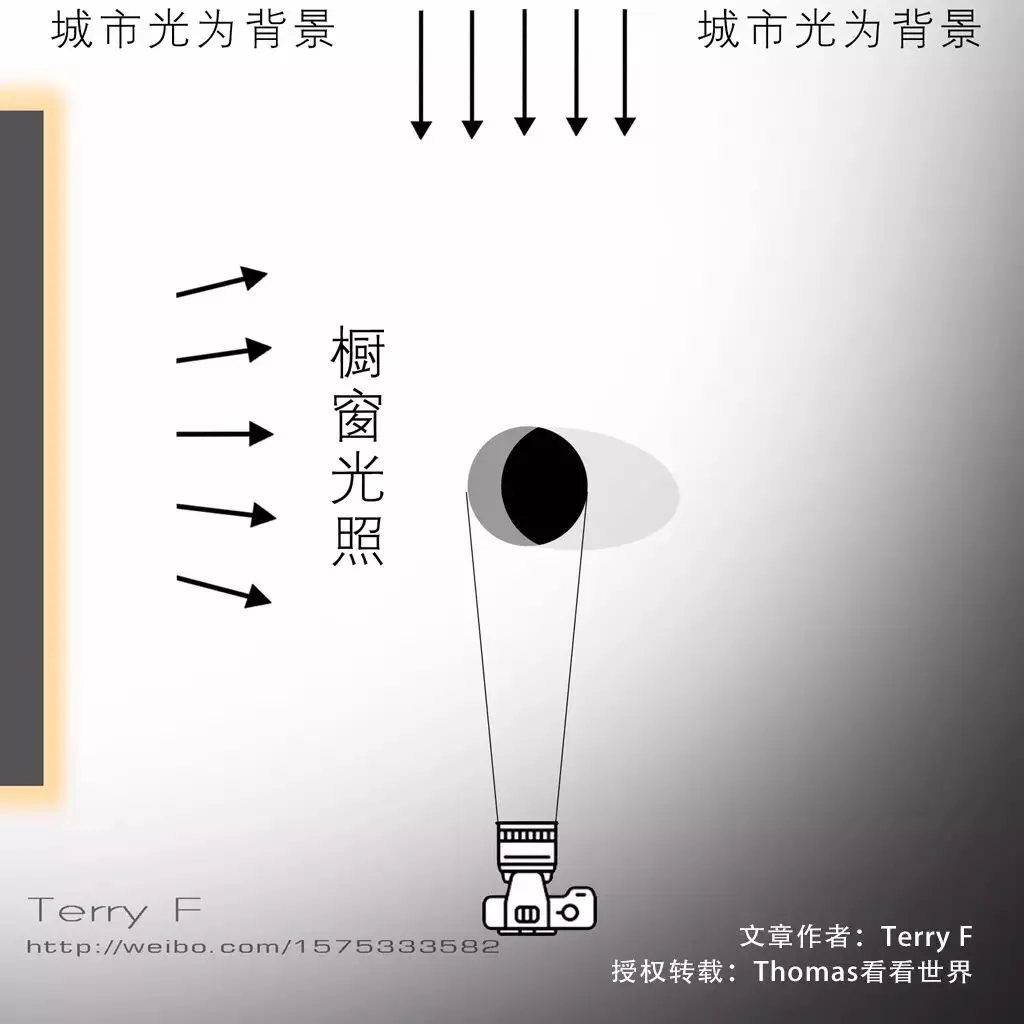
The shop window acts as the key light, illuminating the subject's side and front — the same method as billboard fill, but with higher image quality and shadow quality.
4.2 City Light Techniques in Summary:
·Look for luminous surfaces with large soft areas — billboards, bus stops, electronic screens, even whole buildings or the entire city.
·Think about the direction and intensity of light sources in the urban environment. Single-source situations are rare, because street lamps, buildings, and ground reflections all throw light onto the subject. You need to manage the distances between the subject and each source.
·Mind the intensity ratio between foreground light and background light. The bigger the ratio, the clearer the layering — but bigger is not always better.
·White balance can rarely be perfect; try to find fill sources whose color temperature is close to the ambient. If the environment is all yellow street lamps, a white billboard is a poor choice for a key light.
5. Artificial Light in Portrait Photography
When city light can't meet the needs of a night portrait, or the photographer wants to create more dramatic modeled lighting, it's time for flashes or continuous lights to take the stage.
The principles of flash use are the same as natural light. The quality of light and the direction from which it falls on your subject make an enormous difference.
So before everyone invests huge sums in mountains of lighting gear, let's discuss which elements are needed for beautiful artificial light.
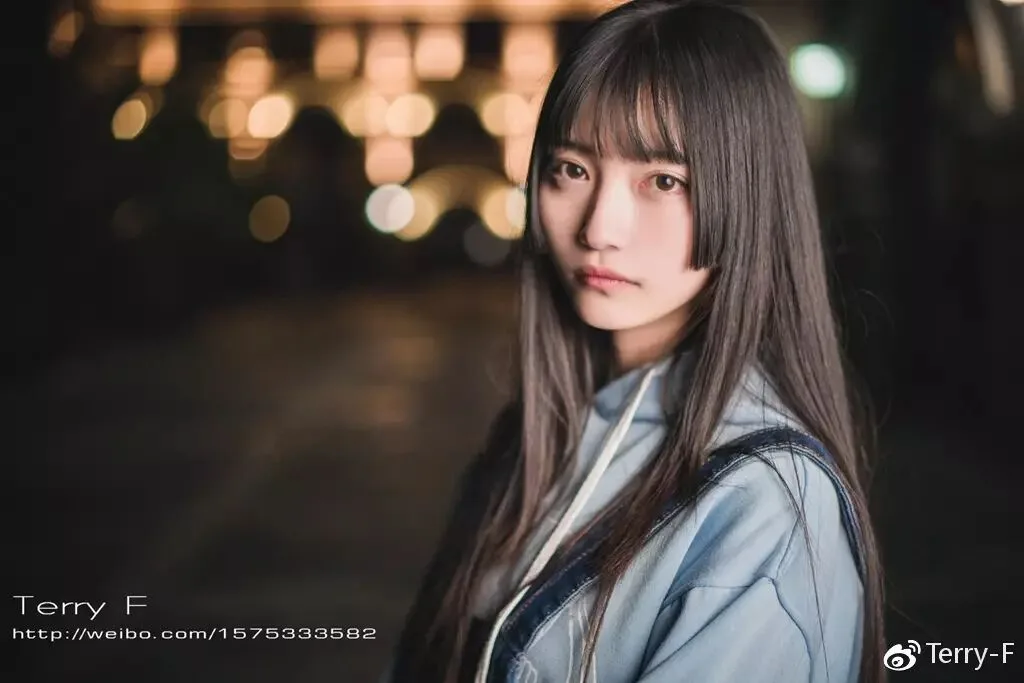
The most basic night lighting gear is undoubtedly a single flash. But a flash head is small — essentially a point source — which splits light and shadow on the face too sharply, with harsh transitions and a poor result.
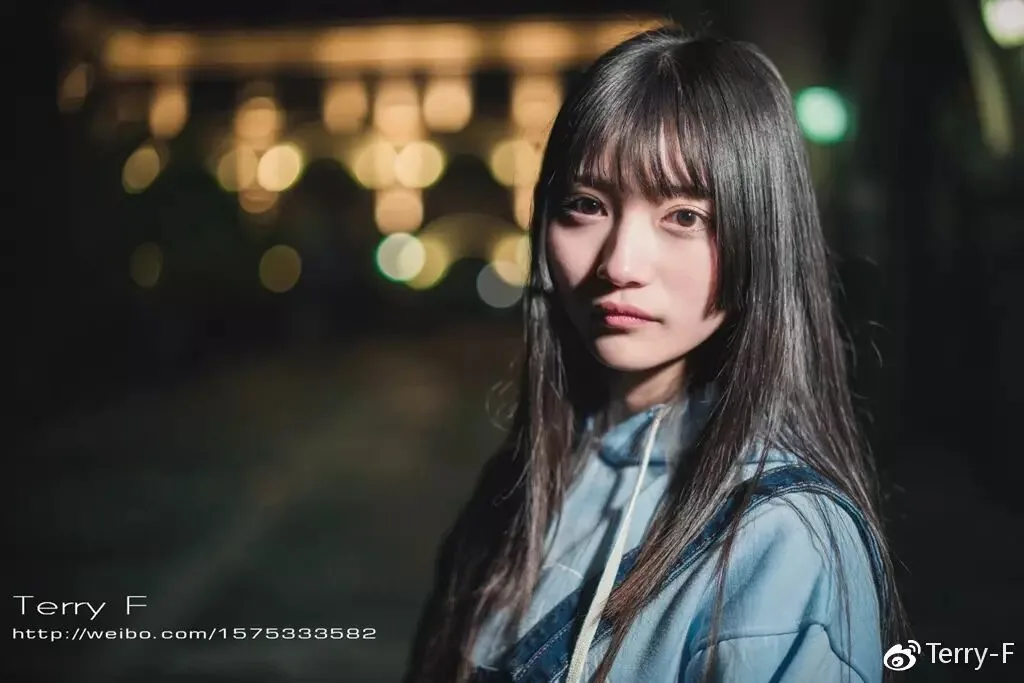
Model: 帅嘤嘤
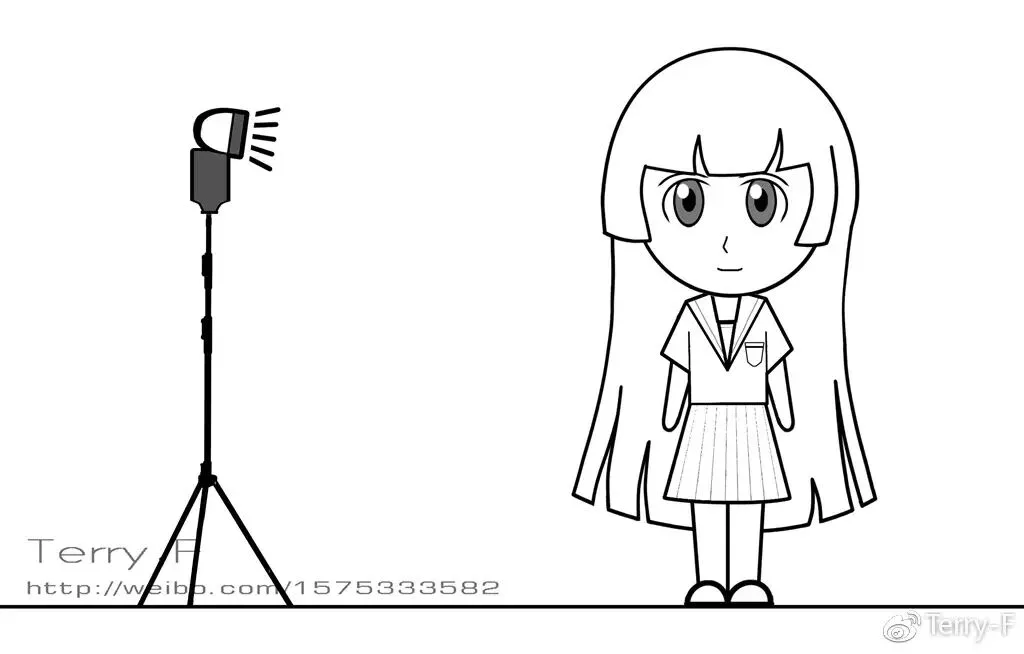
First, you need a high-quality source to light the subject — and a high-quality source means one with a sufficiently large area.
So we need at least an umbrella or a diffusion panel to filter the harsh light once.
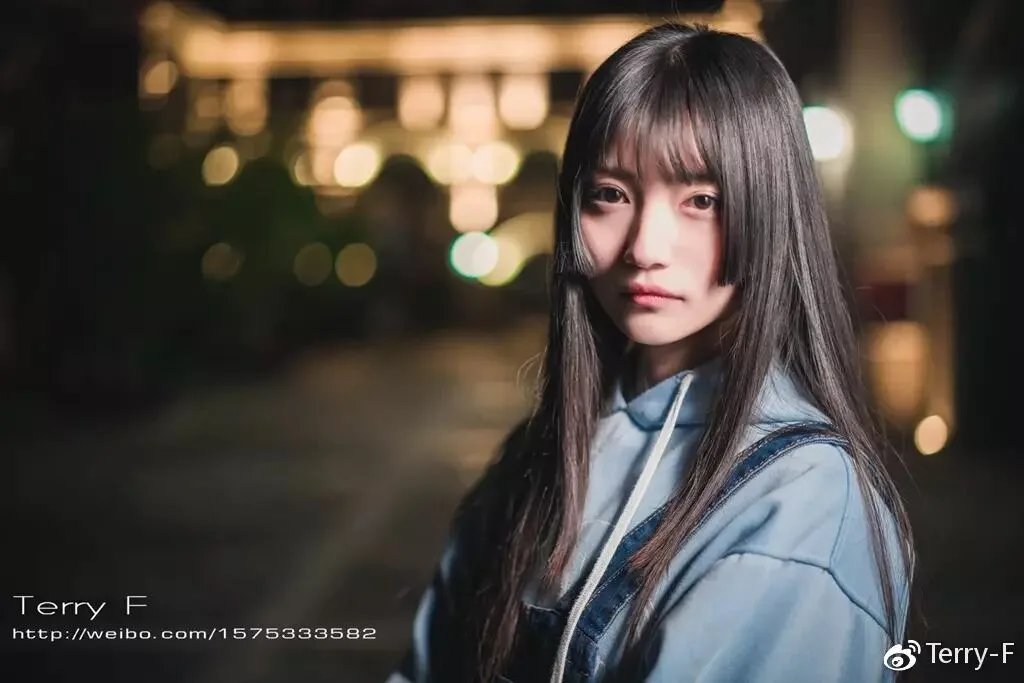
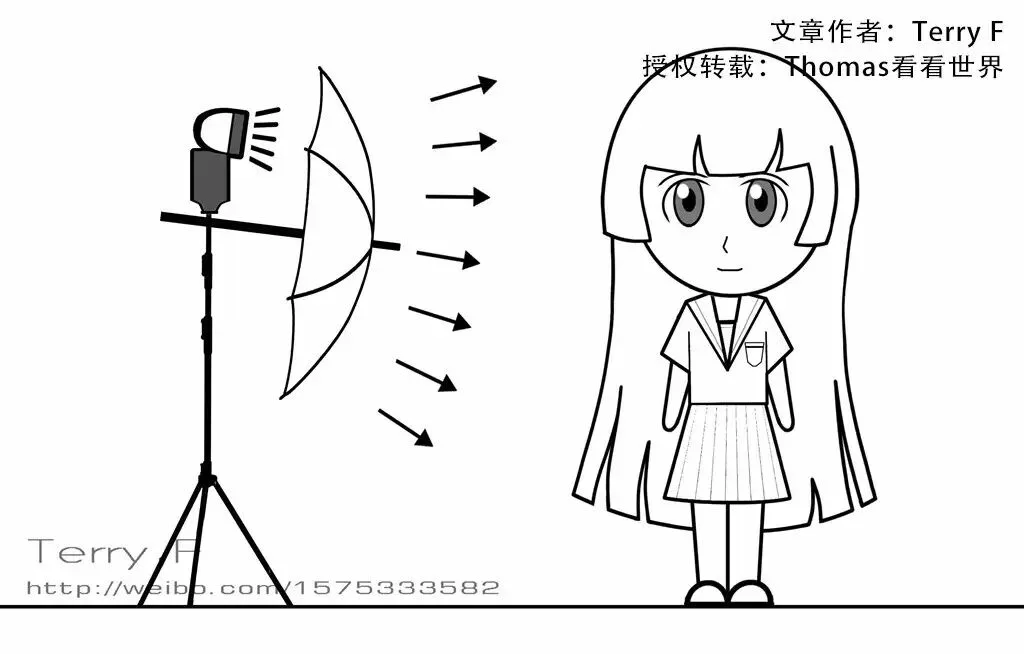
But the light quality of an umbrella is actually not ideal — its area is still small, and the light is too scattered, lacking direction. So if someone can help, consider a diffusion panel for a second pass of filtering.
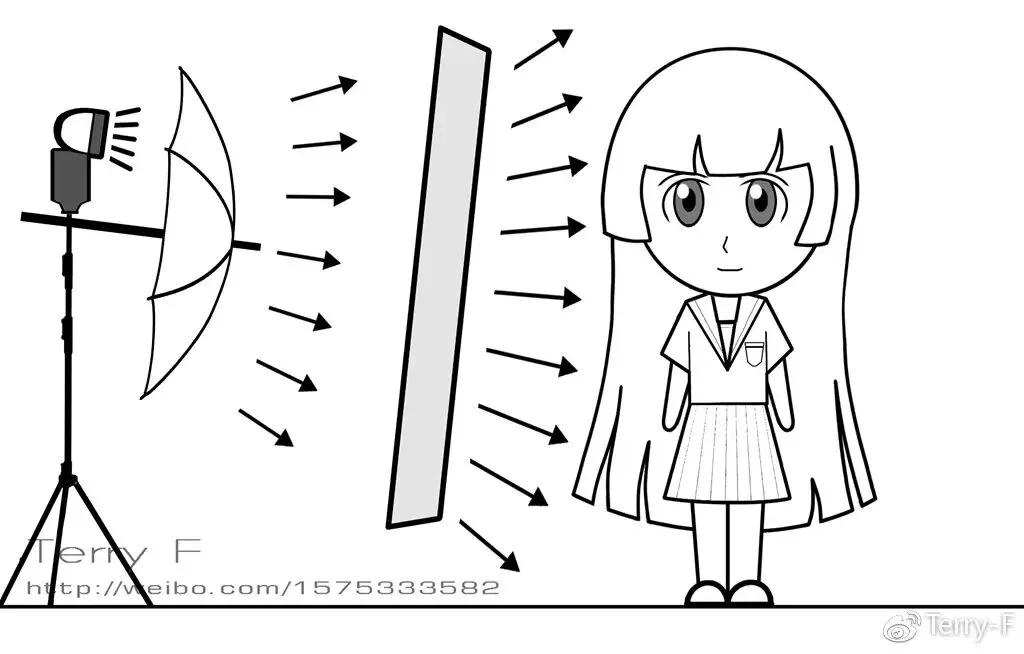
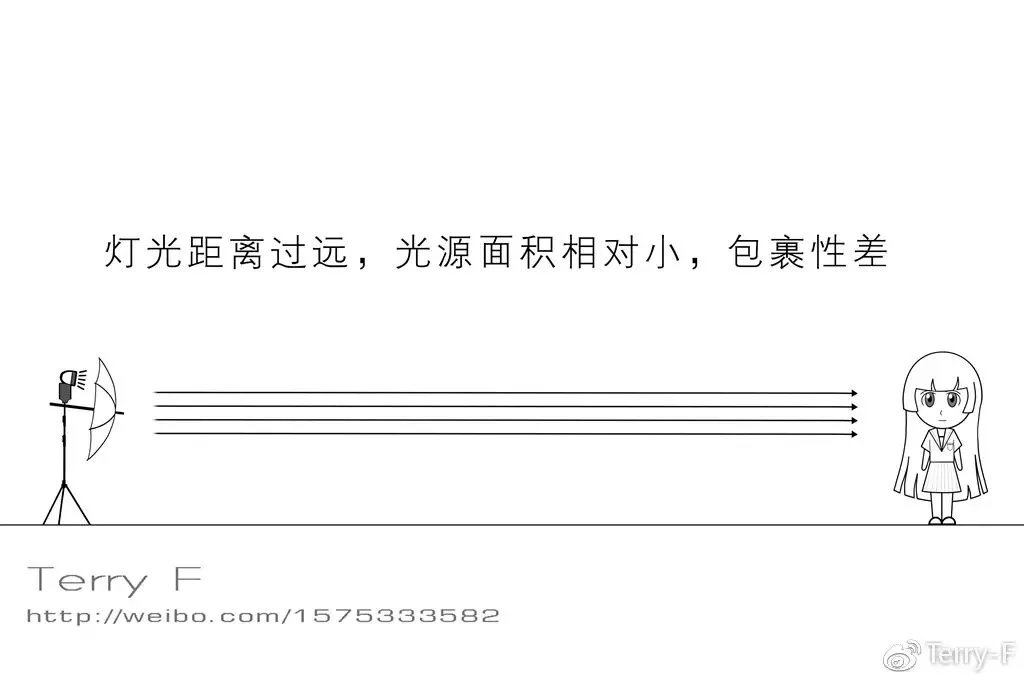
One thing to remember: the distance between the panel or umbrella and the subject directly determines how enveloping the light is. Too far away, and the light quality drops — the closer, the softer.
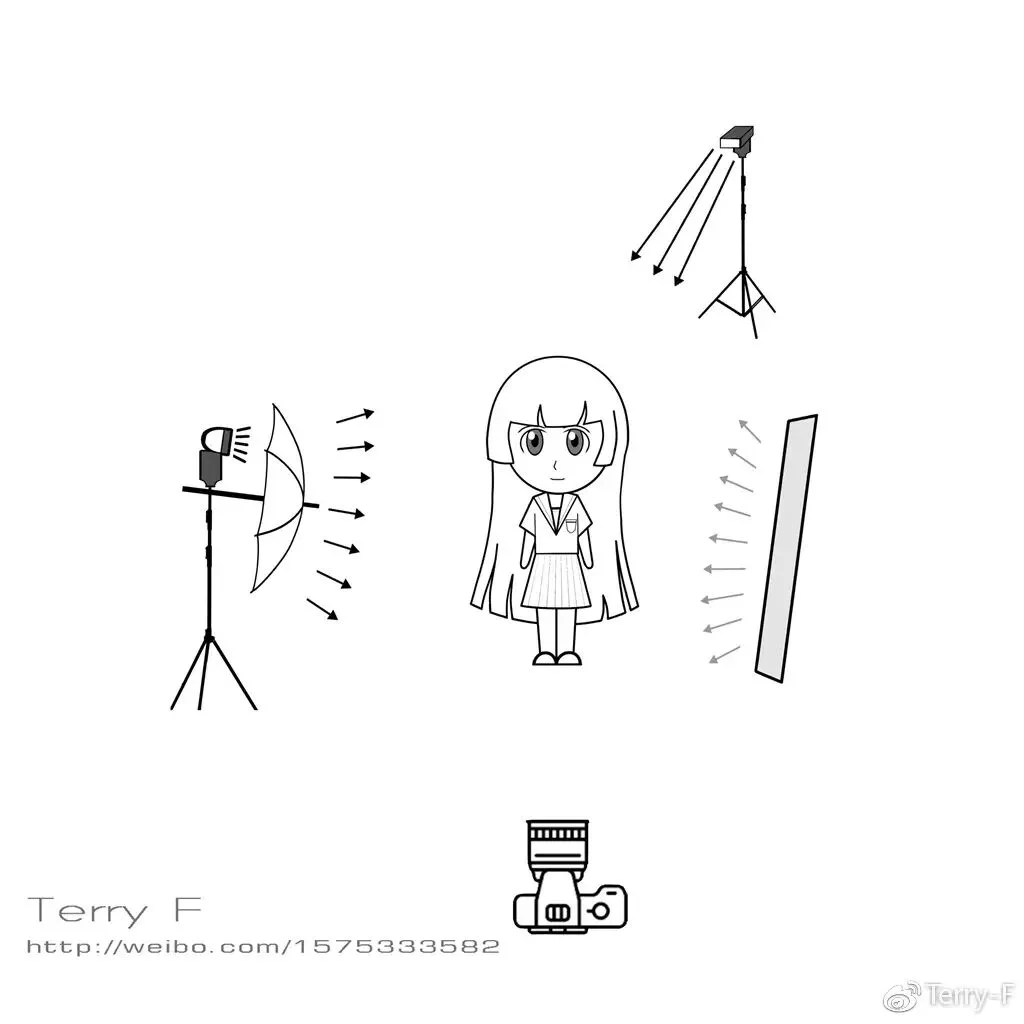
Beyond a single light, the most basic three-light layout is shown below: the key light illuminates the subject's front, the fill light adds fill to reduce the ratio between bright and dark, and the back light outlines the silhouette.
5. Comparing the Light Quality of Different Sources
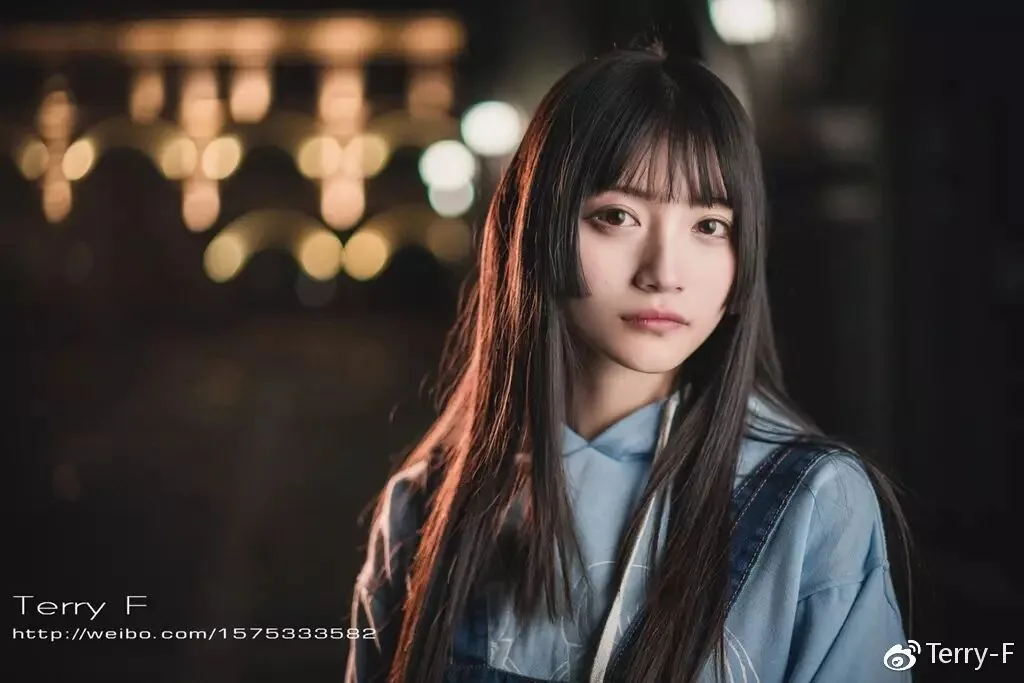
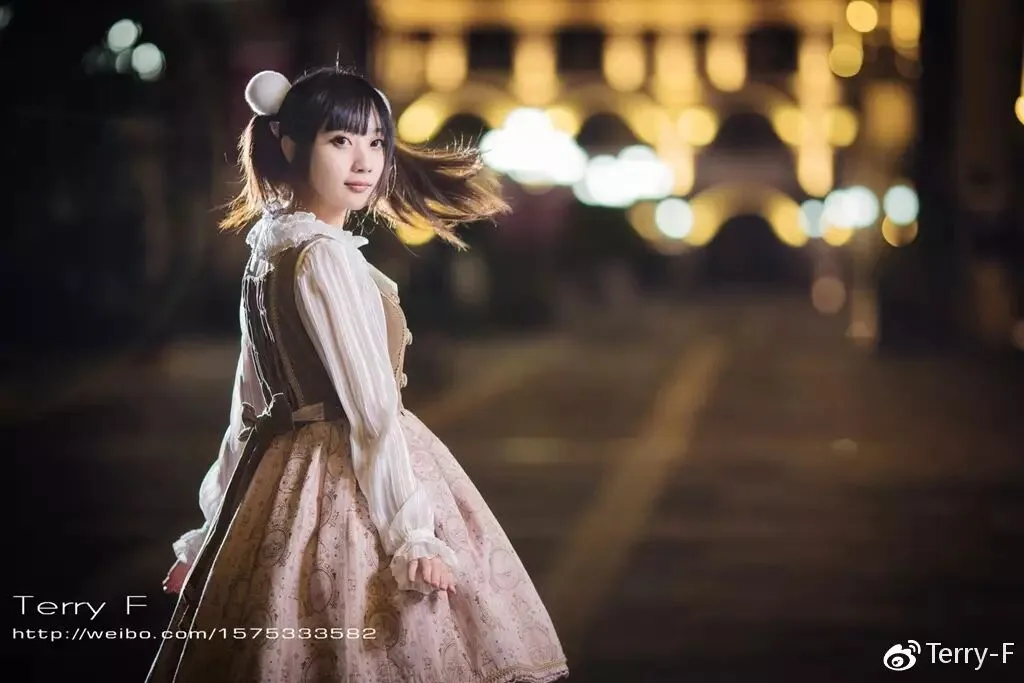
The four images below show the fill effects of an umbrella, an LED light stick, a billboard, and a shop window. You can see the LED stick casts the hardest shadows, the billboard is somewhat better, and the shop window is the softest. The umbrella has the strongest output and the least noise in the image, but its coverage and transition quality are far from ideal, and it can't be used in bad weather. The advantage of an LED stick or flash is that you can freely adjust the source's position and intensity.
Umbrella:
Model: Yujin
LED video light:
Model: 无敌少女天
Billboard:
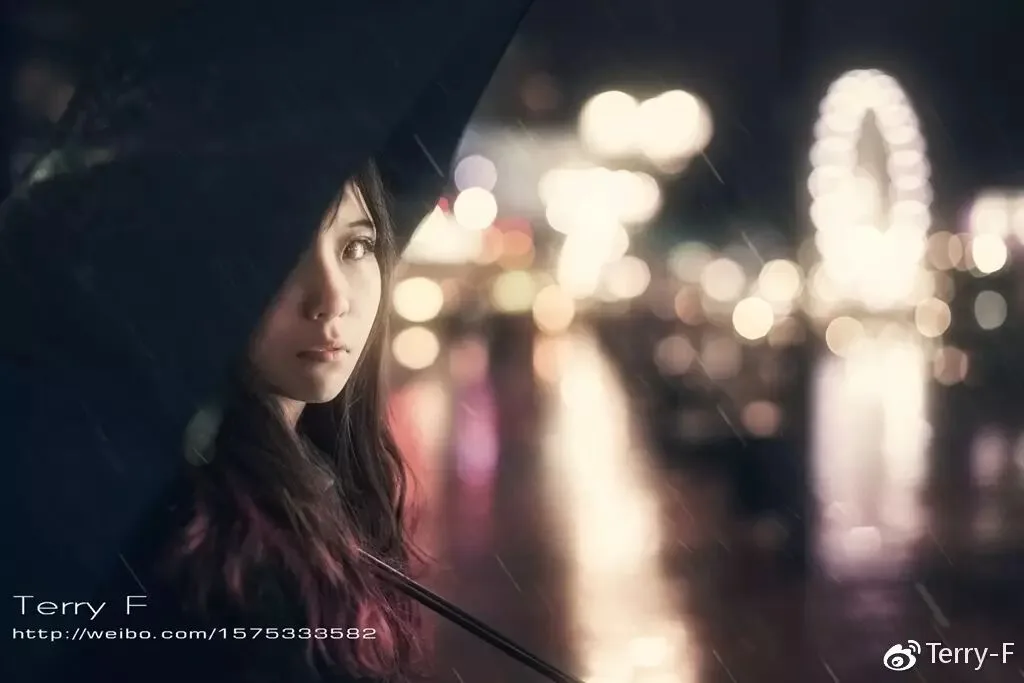
Model: 无敌少女天
Shop window:
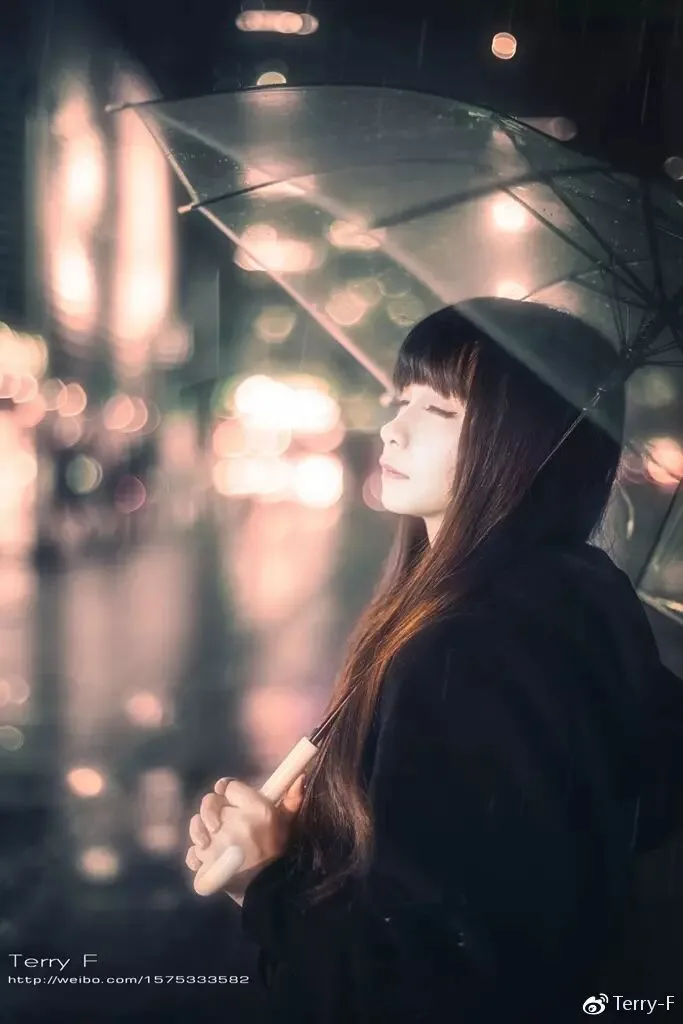
Model: Yuwan
Conclusion
This tutorial gave a comprehensive introduction to the three light sources commonly used in portraiture and how to use them. Each source has unique strengths and certain weaknesses; the photographer must choose or create the appropriate light according to the subject and style. In practice, whichever source you choose, always keep these principles in mind:
·Don't blow out the highlights
·Don't crush the shadows to dead black
·Keep the lighting of all parts of the frame in balanced proportion
·Learn to flexibly combine different light sources
I hope this tutorial gives you a comprehensive understanding of portrait lighting, but theory alone is never enough. Only practice brings faster improvement.
The handsome author
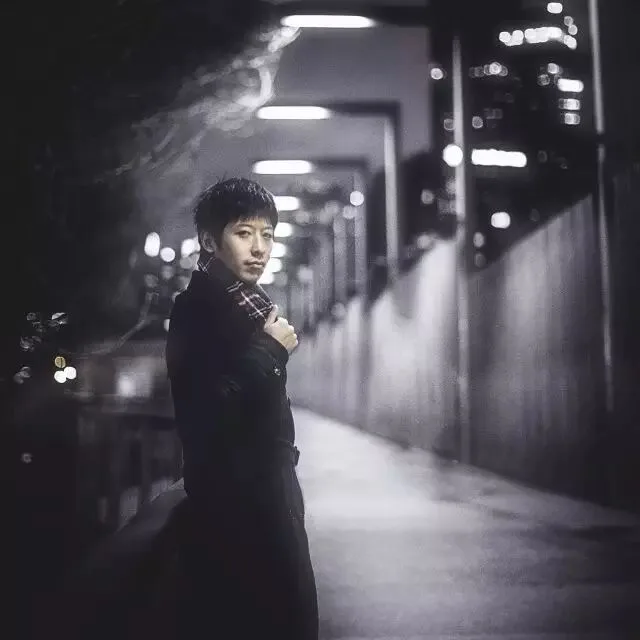
▲ Feng Tao (Terry F)
Getty Images contributing photographer
Huagai Creative contributing photographer
Lofter master
Weibo: @Terry-F
Lofter: terryfengphotography.lofter.com