Photography Tutorial · 2016-11-24
The Complete Guide to Natural-Light Portraits
The author of this article is Terry F, a brilliant portrait and conceptual photographer. He always skillfully harnesses natural light, giving his work a strong style and mood.
Although the examples here are all portraits, the knowledge in this tutorial — the characteristics of light at different intensities and directions, the relationship between light and emotion and composition, and how to cleverly add fill light in the field and in post — also applies to landscape photography, mobile photography, and other genres.
For a portrait photographer, regardless of morning or evening, regardless of season, the moment you press the shutter, natural light and ambient light directly determine the colors and tones of your work. Understanding natural light and putting it to use is every portrait photographer's most basic required course.
The benefits of shooting with natural light are countless. A survey of the 500px audience found that viewers prefer photos shot with natural light — perhaps an instinctive response from people who have lived in natural light all their lives. Moreover, compared with flash lighting, natural light is more intuitive to apply, less restricted by location, and cheaper to shoot with.
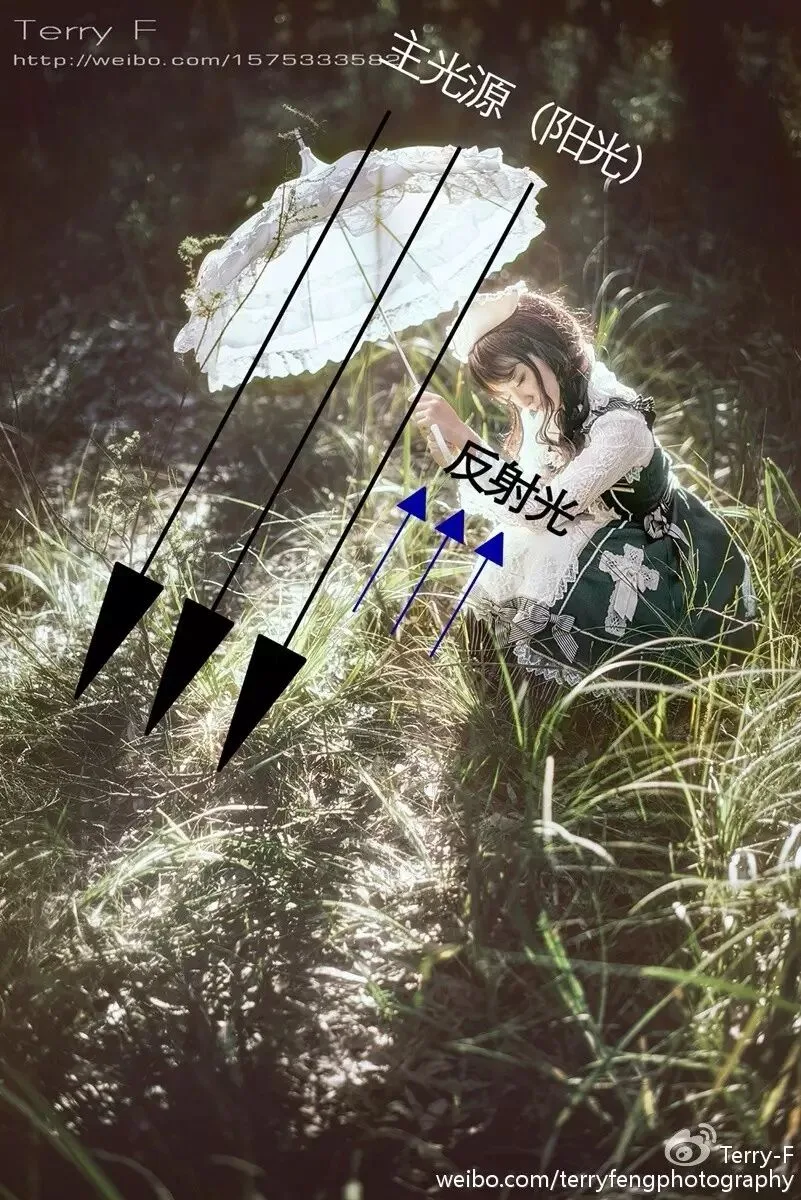
But the prerequisite for using natural light well is understanding it, and learning how to adapt to its changes in the environment. For example, after I published the image below, some friends asked: "In a backlit shot, why is the model's back still so bright and clear?"
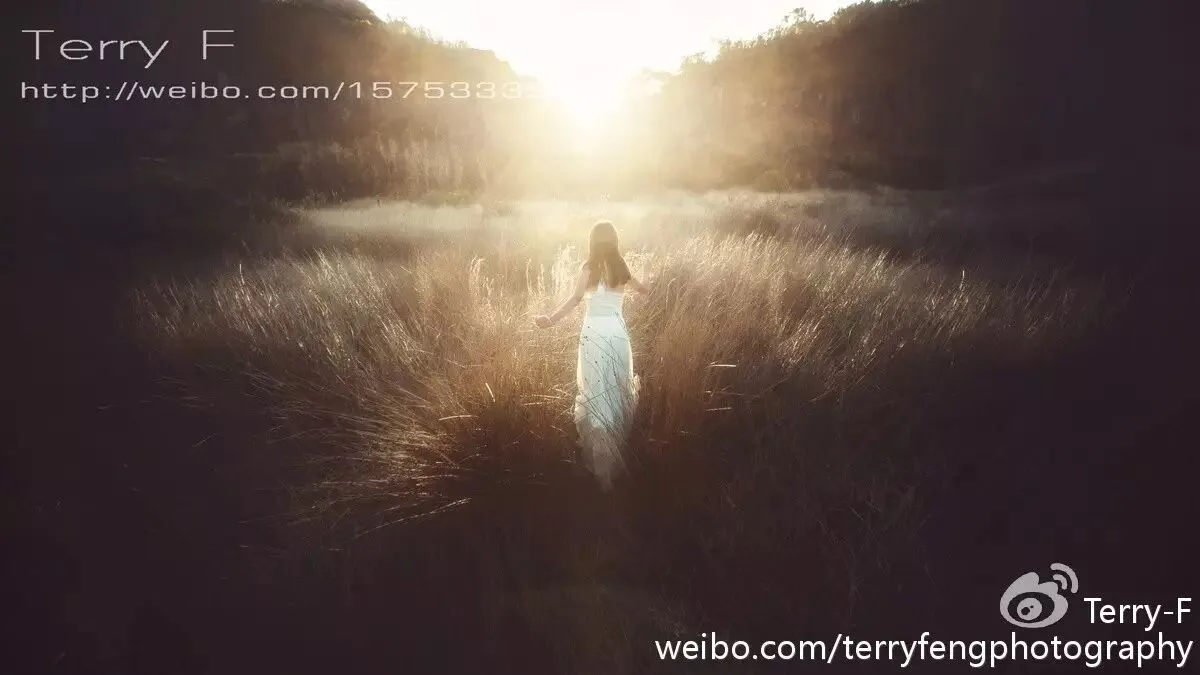
The reason: in winter the withered grass is pale and highly reflective, and the half-person-high grass bounced sunlight onto the white clothing, balancing the lighting ratio to a degree. By the same token, single-source situations are rare in natural light — most of the time, reflections from objects in the environment influence the light and shadow to varying degrees. This is a key point this tutorial will explain in detail. But before that, let's first understand some characteristics of natural light.
Main contents of this tutorial:
1. Light at different intensities
2. Light from different directions
3. Light and emotional expression
4. Light, shadow, and composition
5. Using reflected light
6. Choosing the right moment
7. Light and shadow in post
Summary
1
Light at Different Intensities
By brightness, there is strong light, weak light, and faint light. Strong light usually means direct sunlight outdoors. That's when the lighting ratio is greatest and the source hits hardest — but exposure must be more accurate, and post demands more from your gear's dynamic range, or you'll easily get "blown whites and dead blacks".

Overcast or rainy days and indoor shoots are usually weak-light environments. The lighting ratio is relatively small and exposure is easier to control — great for beginners practicing their sense of light direction.

Faint-light environments are mostly night scenes, which test a camera's high-ISO performance and a lens's maximum aperture. In urban environments there are many light sources, so you need to sort out which is primary when shooting.
One misconception: many people believe the stronger the light, the higher its quality. In fact, light intensity and light quality are not directly related. Midday sun casts ugly shadows on faces and flattens the environment's depth. Light quality is determined by the distribution of light and shadow in the frame — a sensible light-shadow ratio and distribution gives a photo more texture, and strong light is not required to achieve that.
2
Light from Different Directions
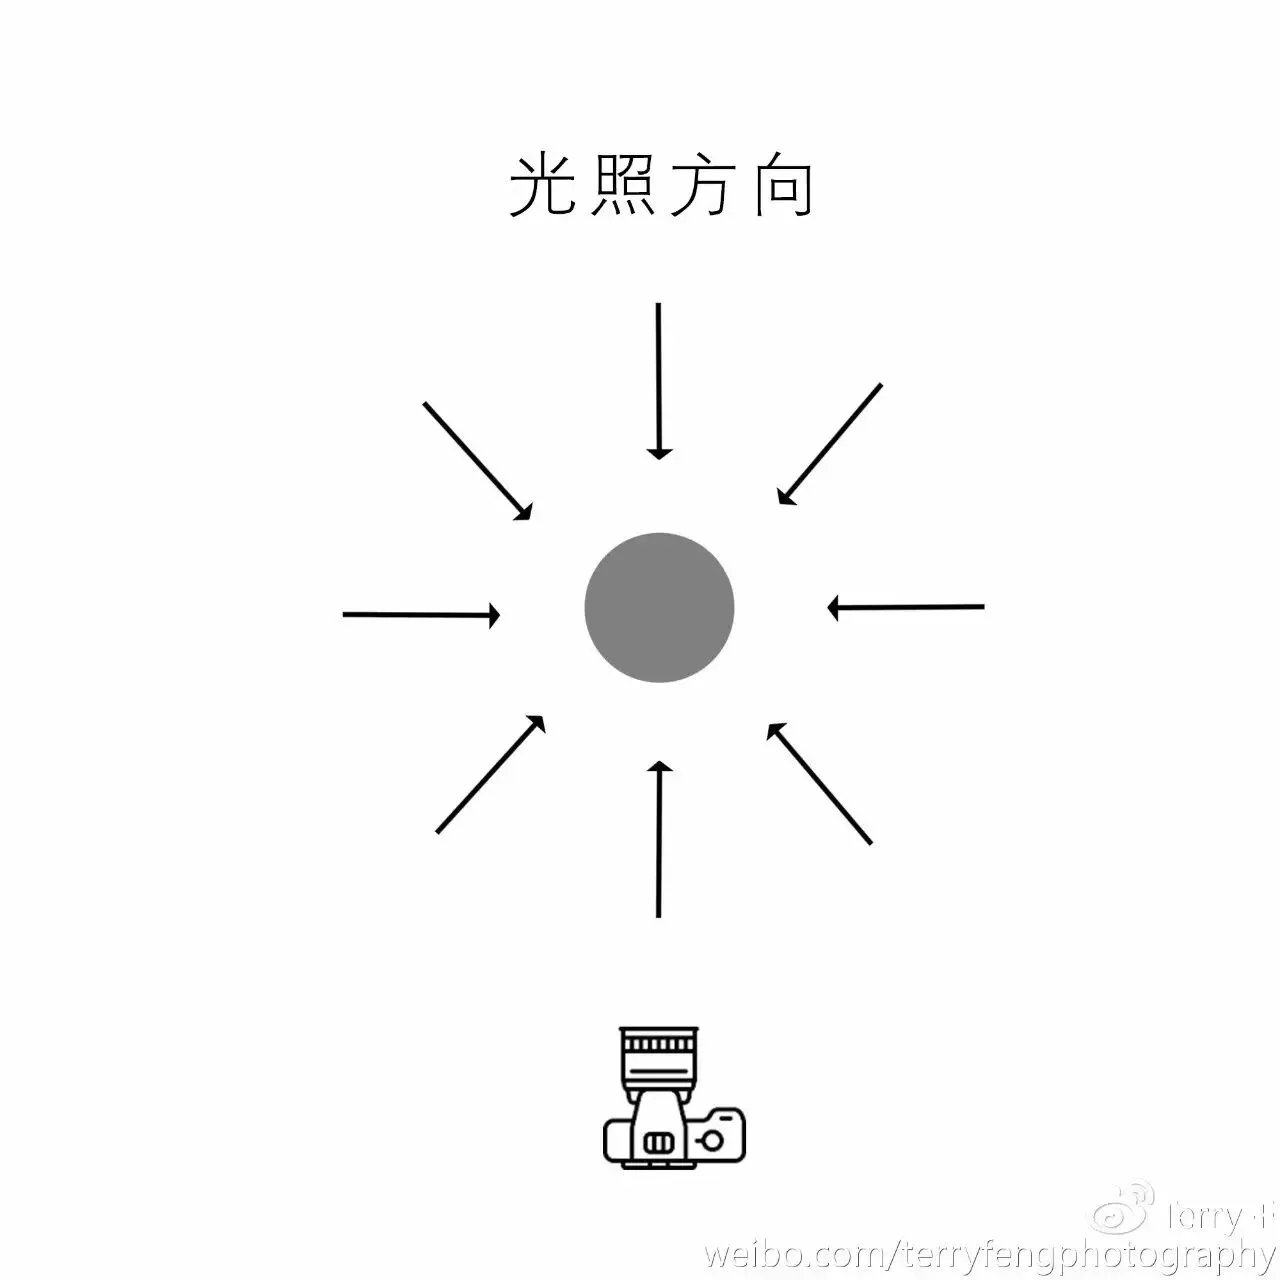
By direction, lighting falls into four categories: front light, backlight, side-backlight, and diffused light. Each direction can fundamentally change an image's tonality, style, and even emotion.
With front light, the subject is usually brighter than the background, creating contrast that makes the subject stand out. But if the light is too strong, the contrast becomes excessive — if you expose the subject correctly, the background easily turns into a mass of dead black. Also, since the subject's lit area is large, the modeling is weak and the subject's own depth is reduced.
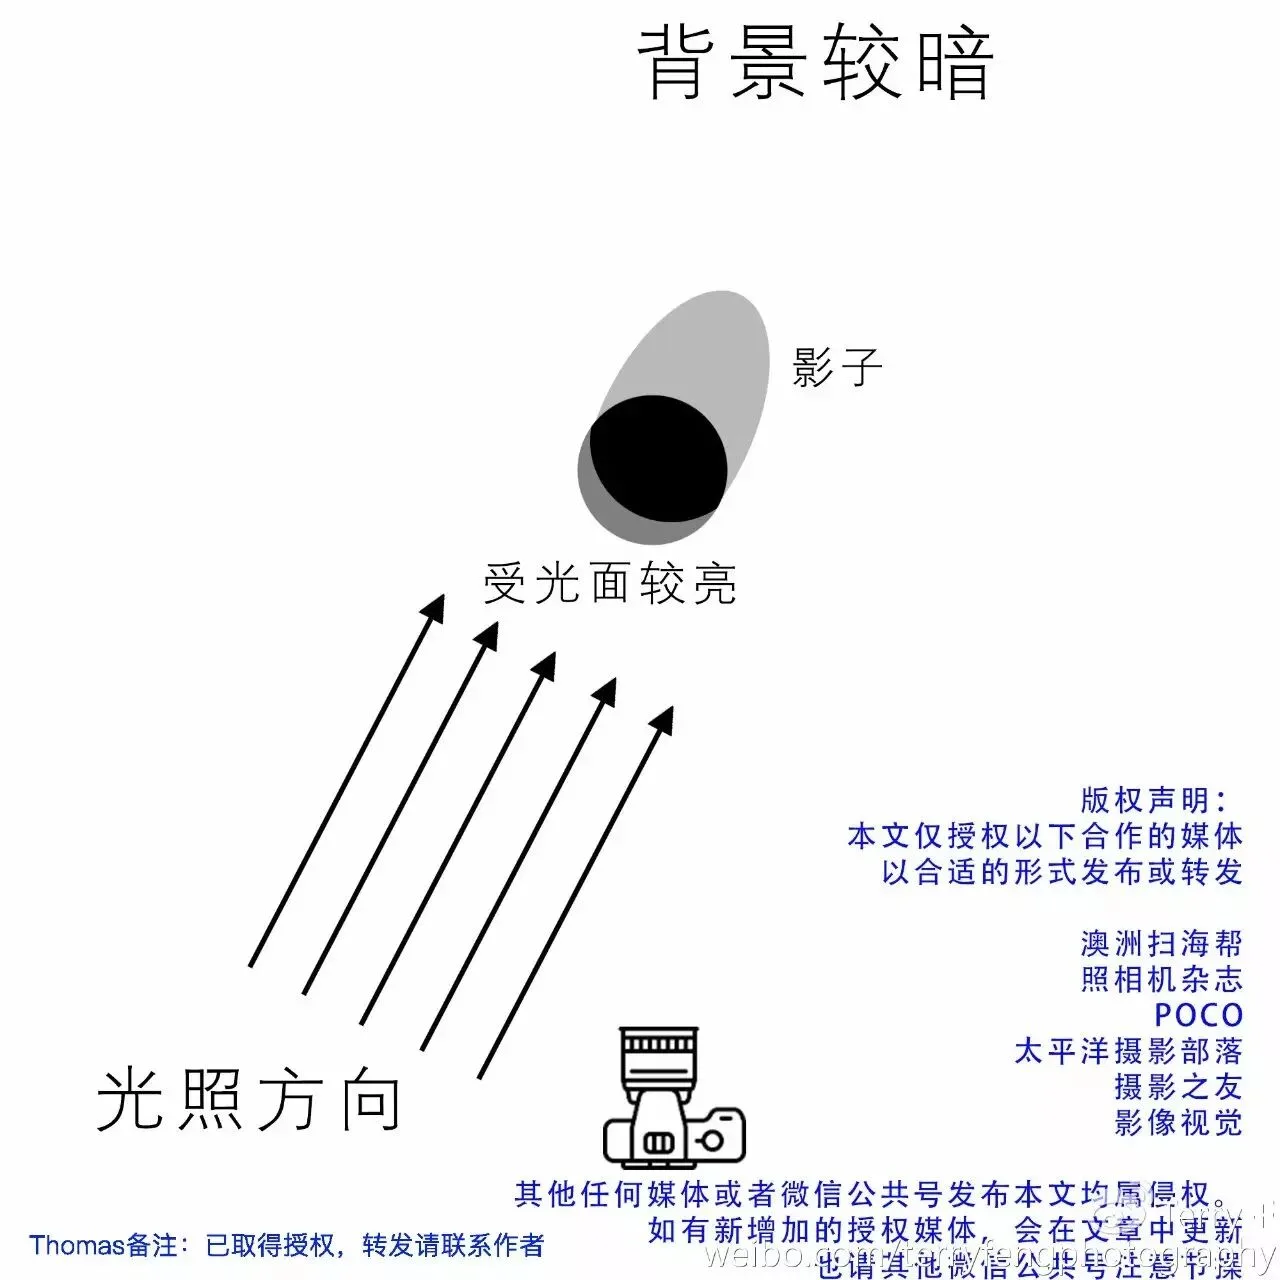
Front light characteristics:
·Light distribution: bright in front, dark behind
·Visual effect: subject stands out
·Shooting difficulty: low
·Visual impact: weak
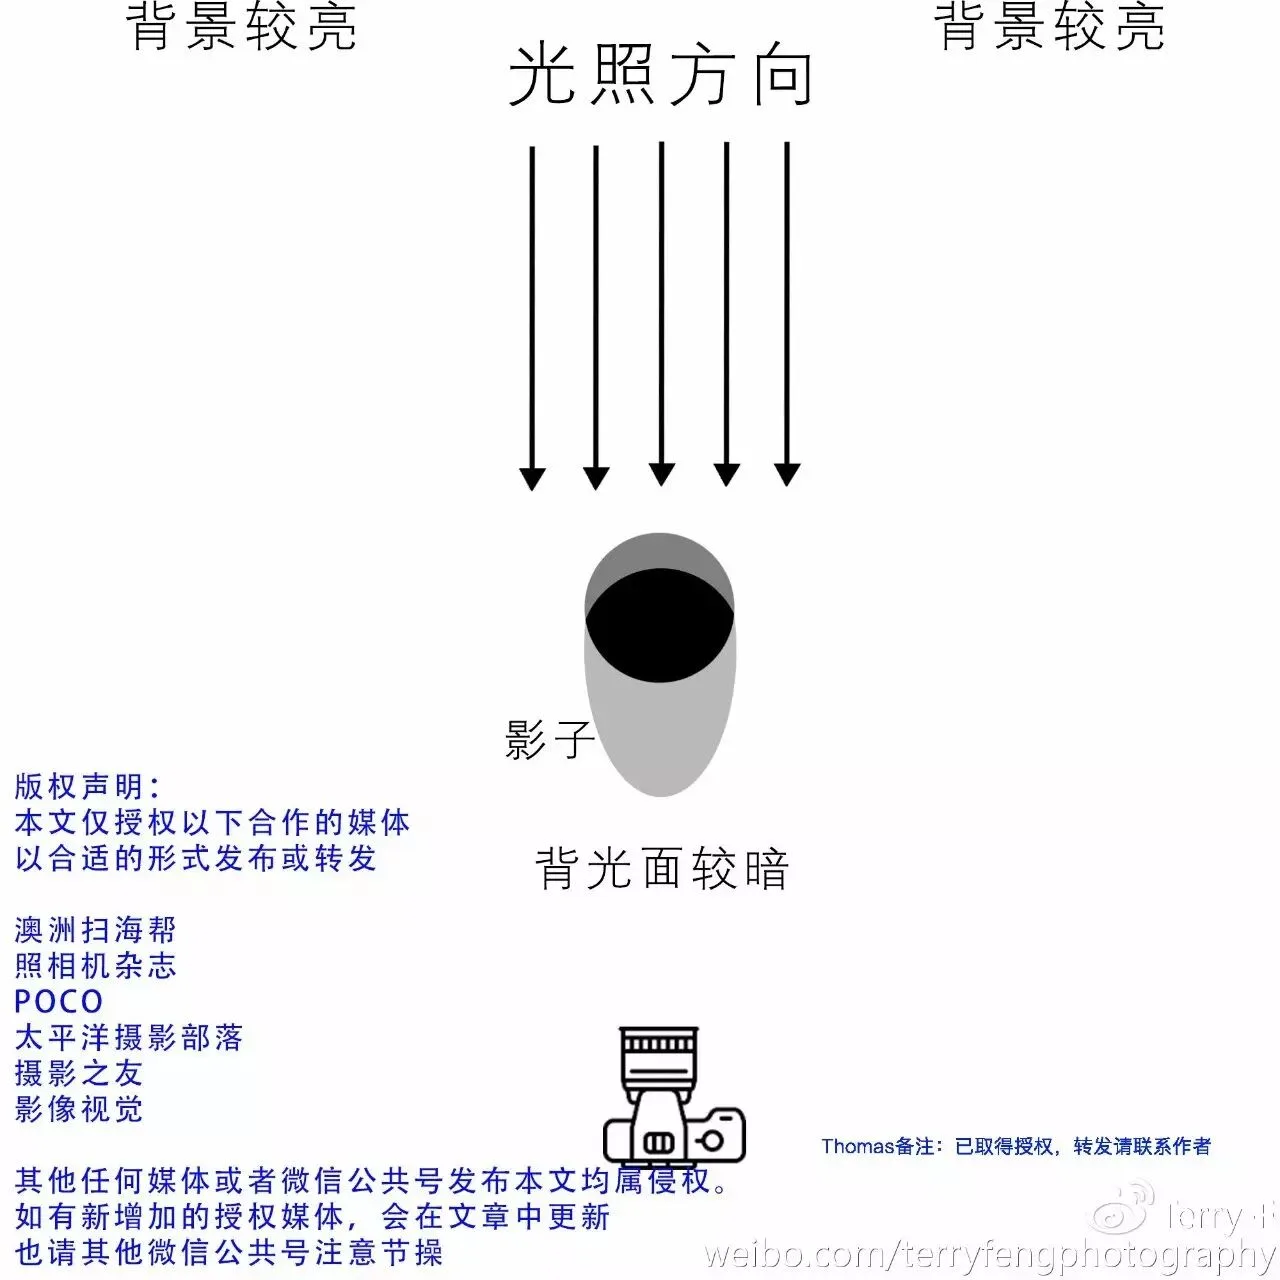
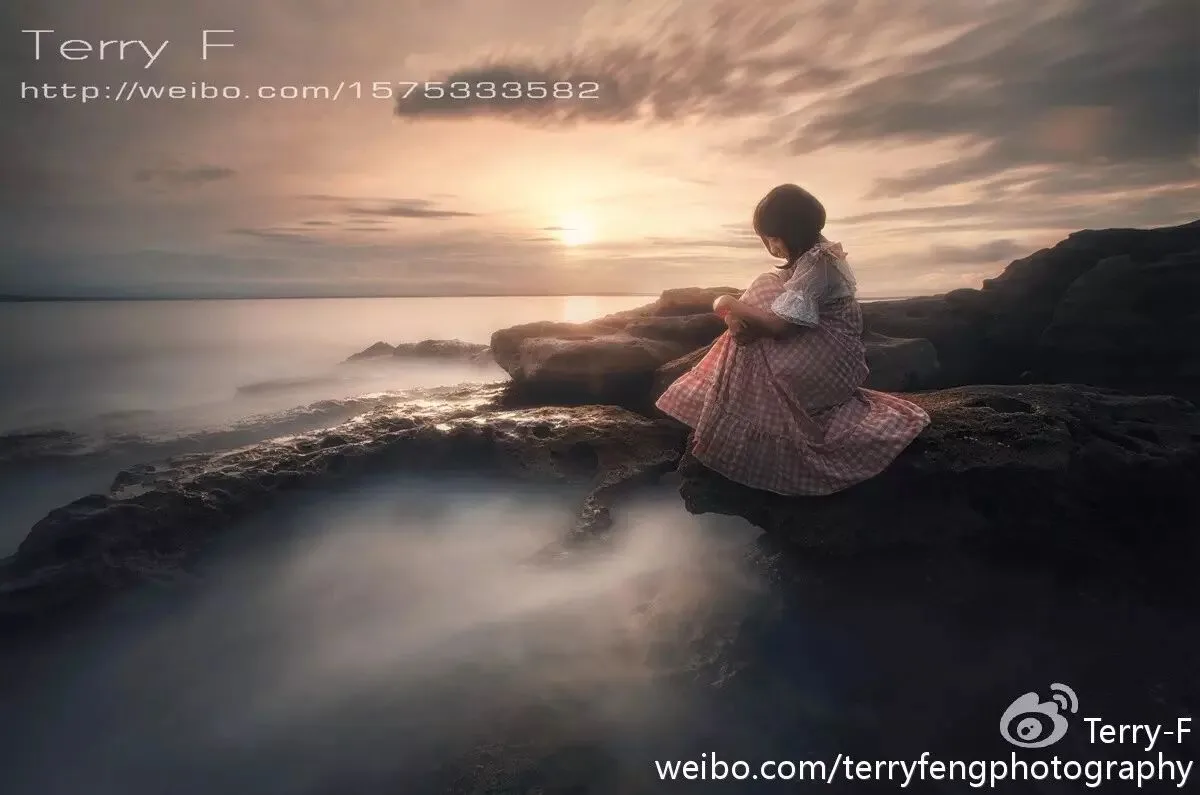
With backlight, the subject sits between camera and light source. The source lights the environment while the subject falls in shadow. Although subject and background differ greatly in brightness and you sometimes get a nice rim light, the subject shows little detail and the modeling of the face is unflattering. If you add fill with a reflector now, you introduce an extra source that breaks the original light-shadow balance and makes the image look unnatural.
Backlight characteristics:
·Light distribution: dark in front, bright behind
·Visual effect: subject outline emphasized
·Shooting difficulty: high
·Visual impact: strong
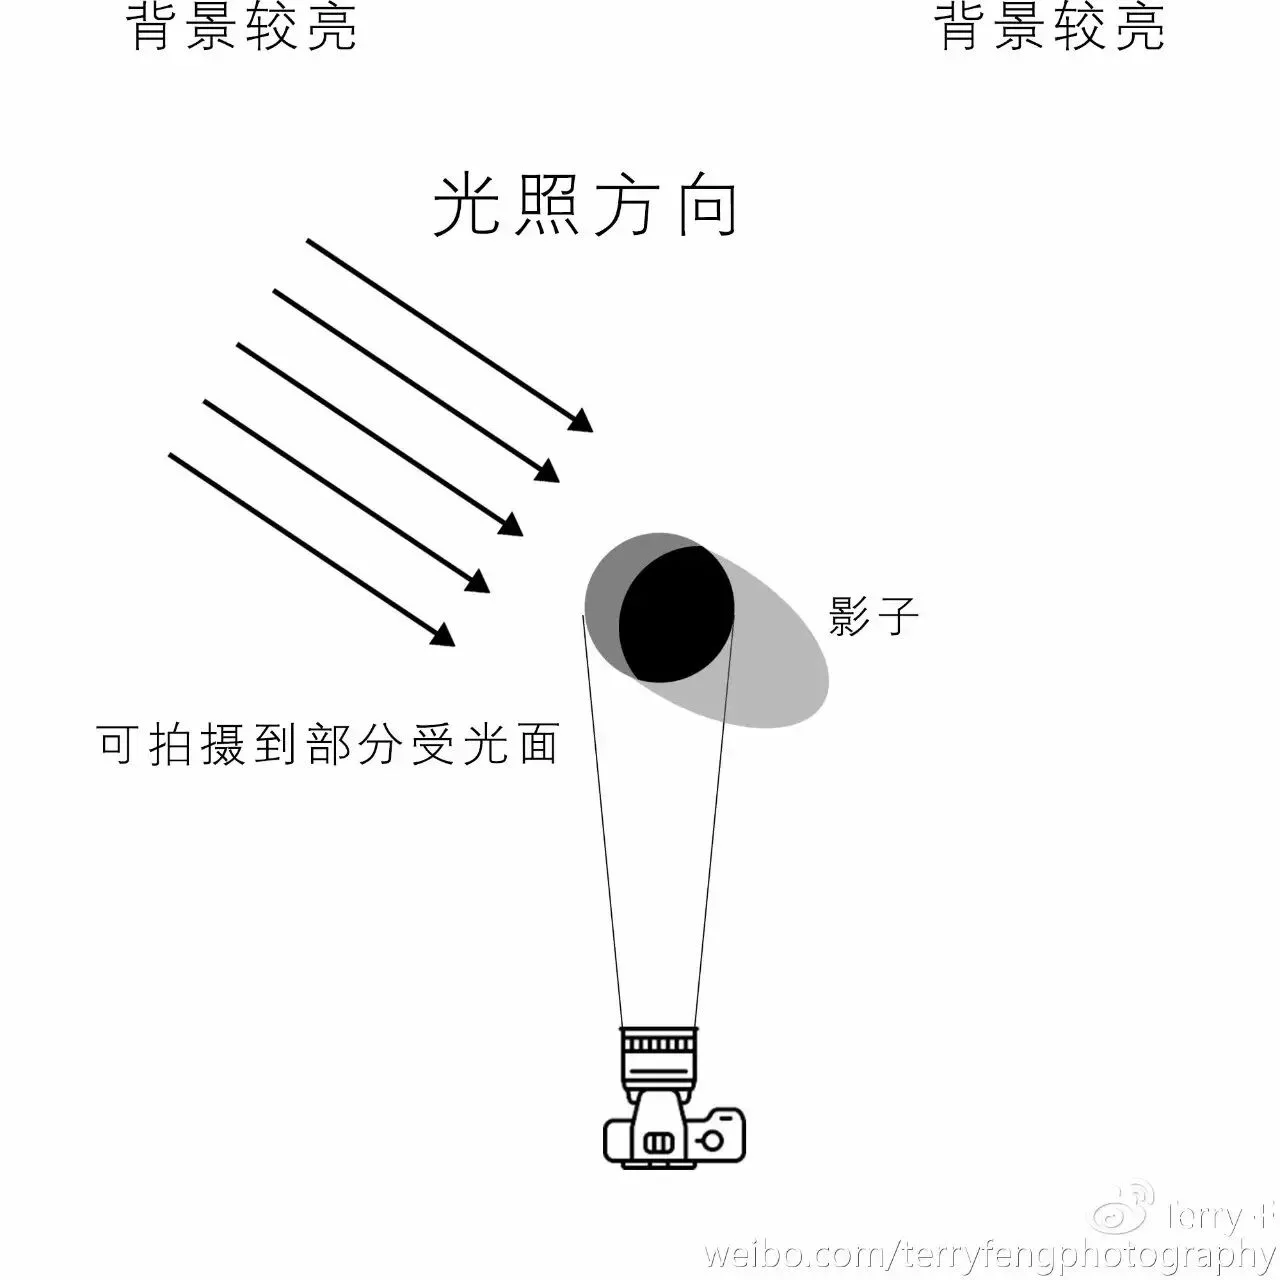
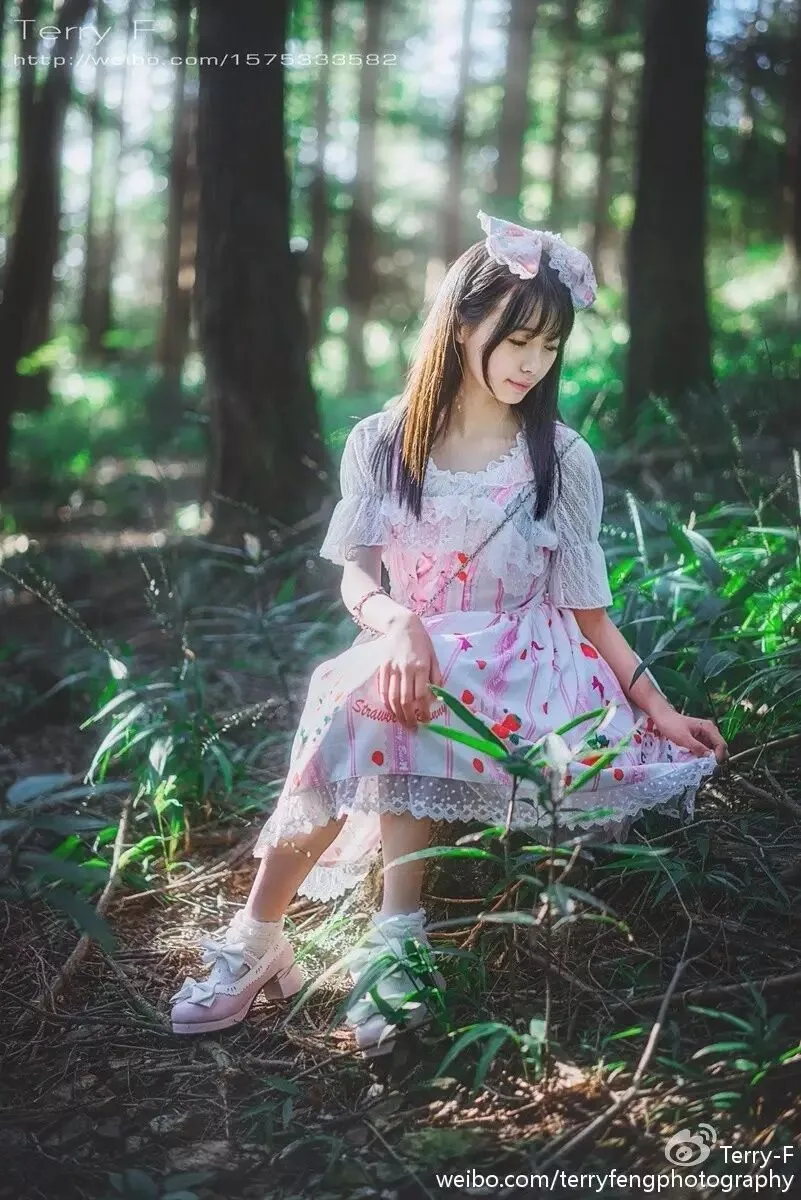
Side-backlight means the subject is still roughly between camera and source, but the source meets the subject at an angle — forming a rim light while also illuminating one side of the subject, giving more depth and somewhat more detail than pure backlight. This source position lowers the difficulty of exposure and post-processing, and is easier to manage than pure backlight.
Side-backlight characteristics:
·Light distribution: dark in front, bright behind
·Visual effect: outline emphasized, some detail retained
·Shooting difficulty: medium
·Visual impact: strong
Diffused light is common on overcast days: clouds block the sun and act like a giant softbox, spreading light evenly into every corner. Because the light-shadow transition is too soft and there is no clear tonal structure, neither the subject nor the environment shows much depth. It's easy to shoot, but the visual impact is weak. That said, diffused light suits certain specific subjects — which the next section explains in detail.
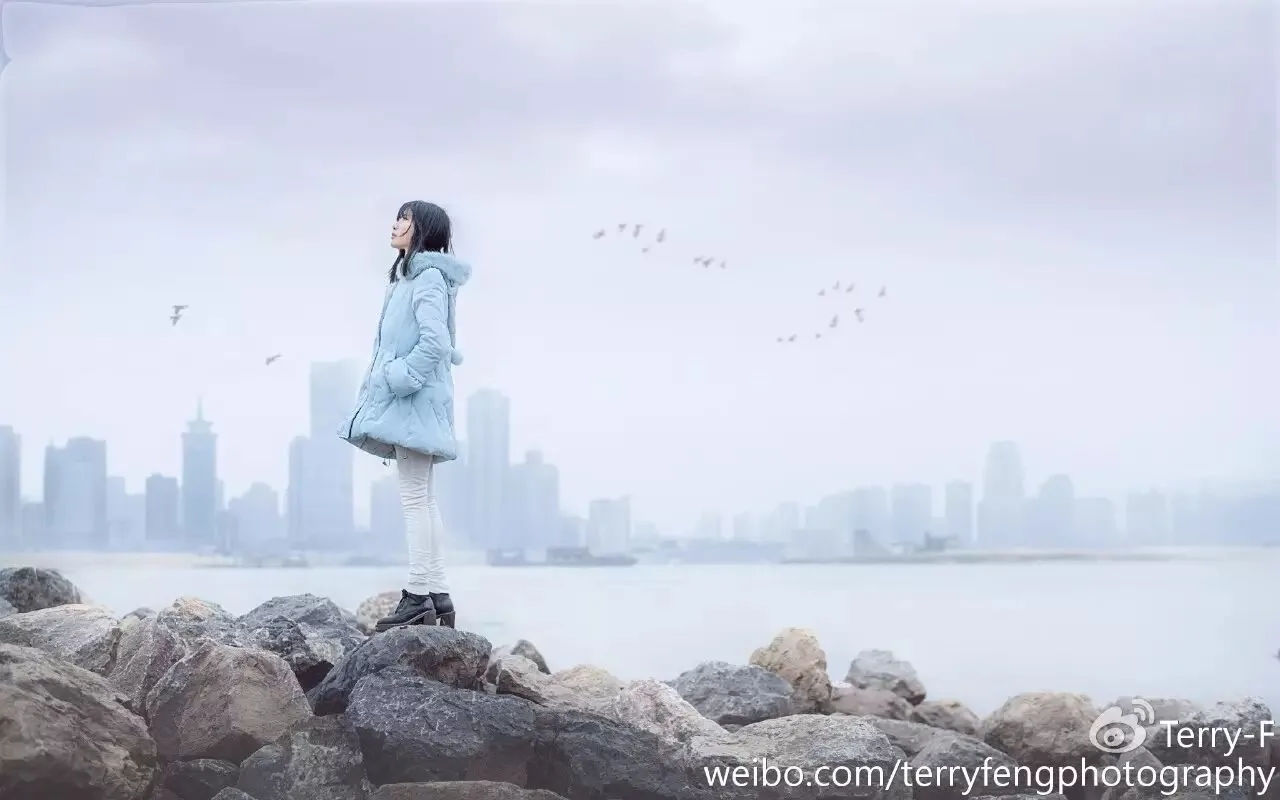
Diffused light characteristics:
·Light distribution: none
·Visual effect: poor
·Shooting difficulty: low
·Visual impact: weak
3
Light and Emotional Expression
Light produces shadow, and the relationship between the two in a frame can evoke all kinds of feelings in viewers. Photographers can use the pairing of the two to express emotion. Based on the characteristics of light, emotions can broadly be divided into three categories:
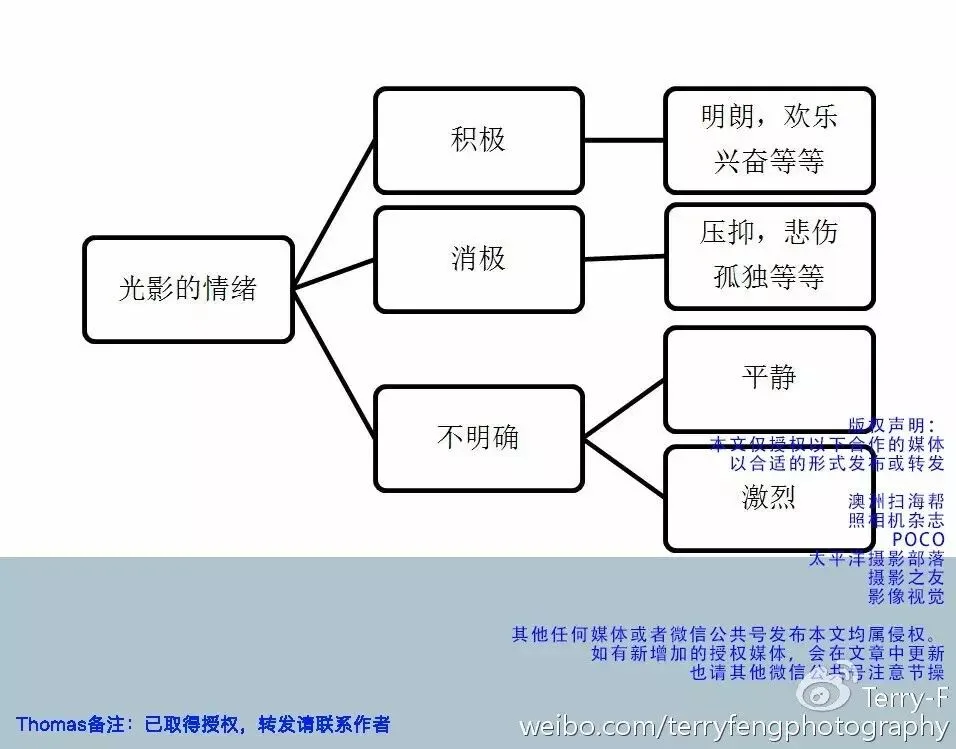
(This model only generalizes most situations; the photographer must adapt it to specific occasions.)
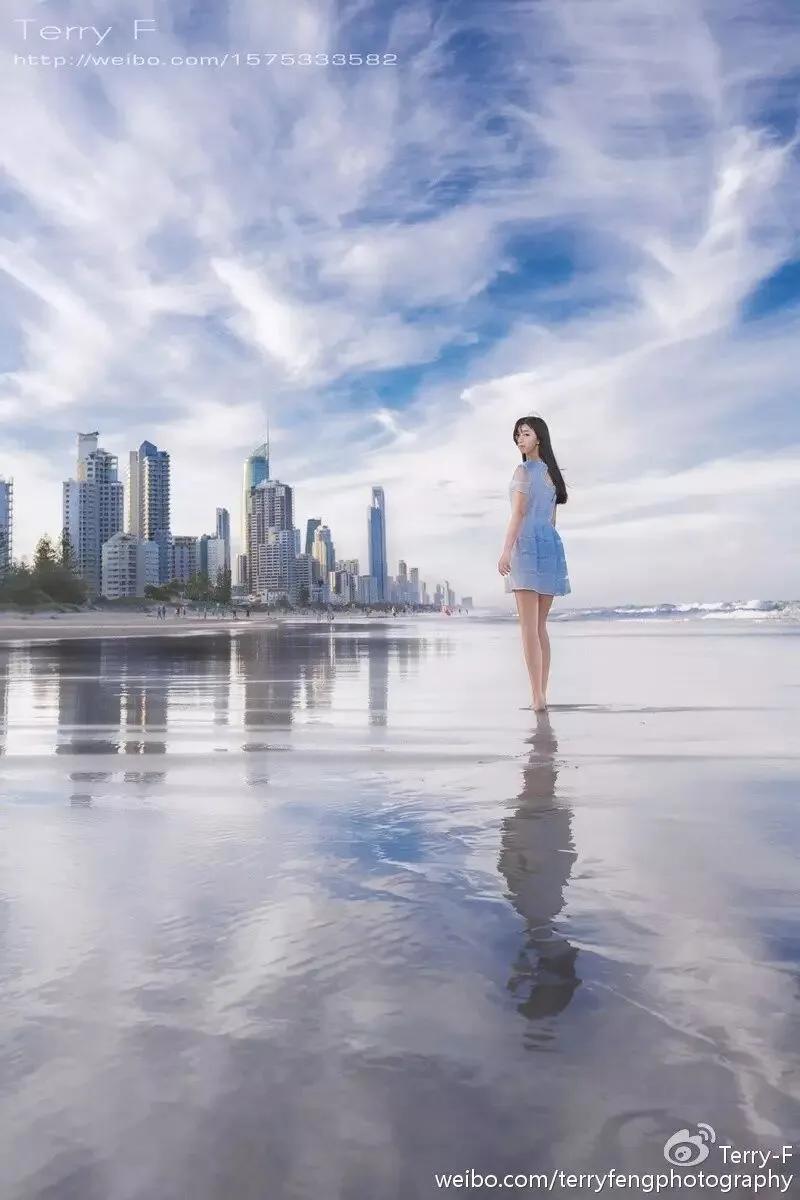
If bright areas dominate the frame, it can give viewers a positive feeling to a degree. In the image below, most of the frame is bright, expanding the perceived space and making people feel open and relaxed. In this situation, the photographer should pay more attention to the composition and detail of the dark areas — because the person and buildings in shadow are the point of this photo.
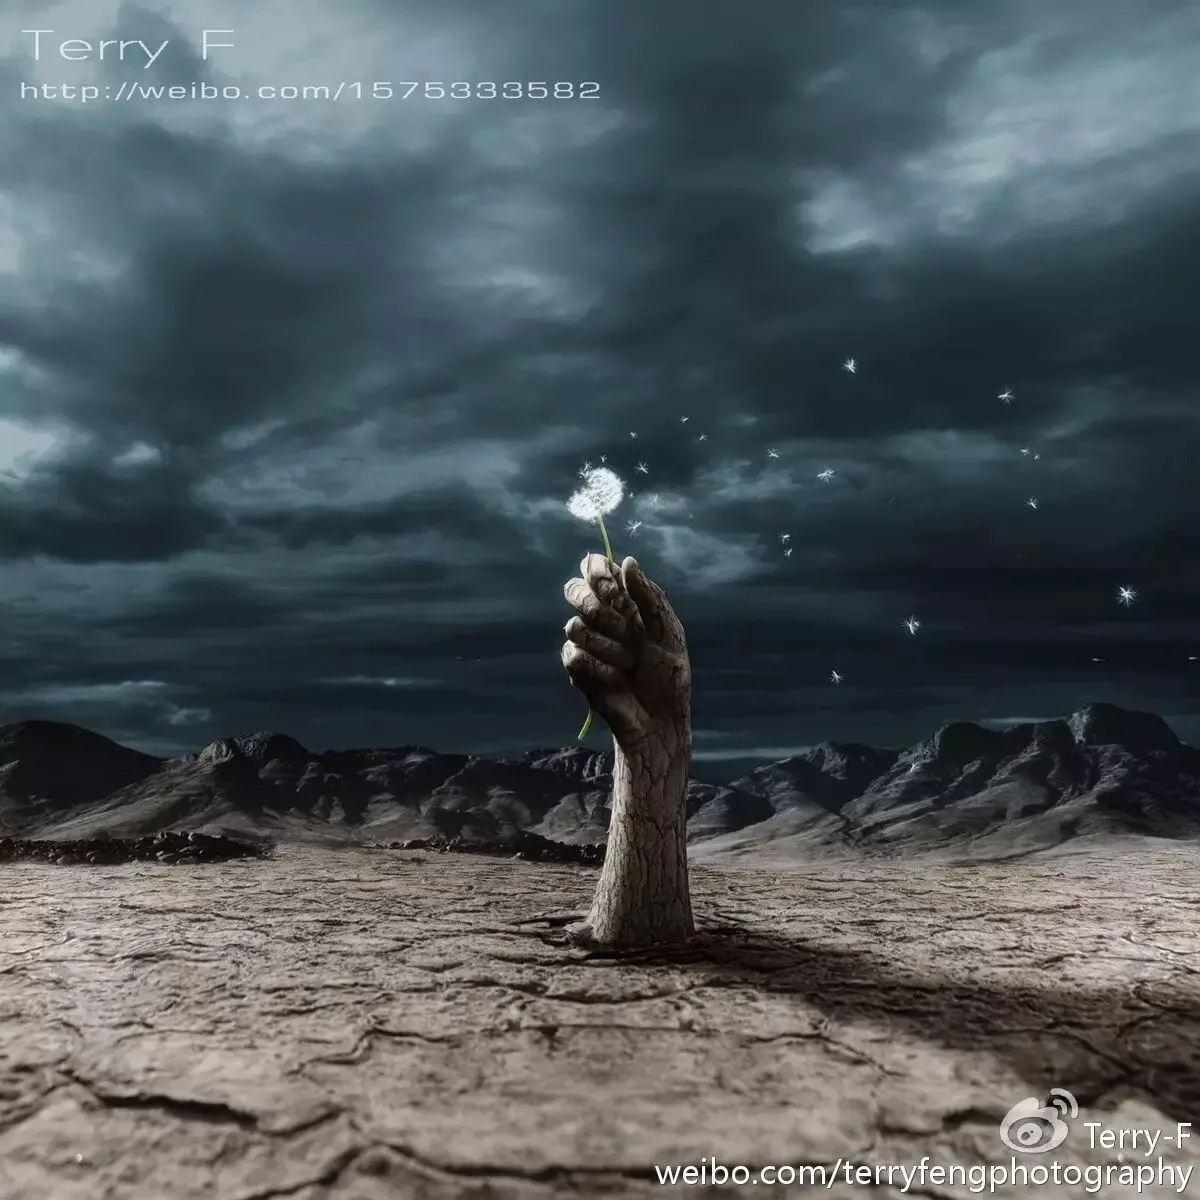
If dark areas dominate the frame, the perceived space is compressed and people feel a sense of oppression. In the image below, the overall darkness makes the narrow bright parts — the dandelion and the arm — stand out especially. So in this situation, the photographer should check whether the subject is bright enough to contrast with the environment. A photo that is uniformly dark or uniformly bright easily leaves viewers unable to find the point.
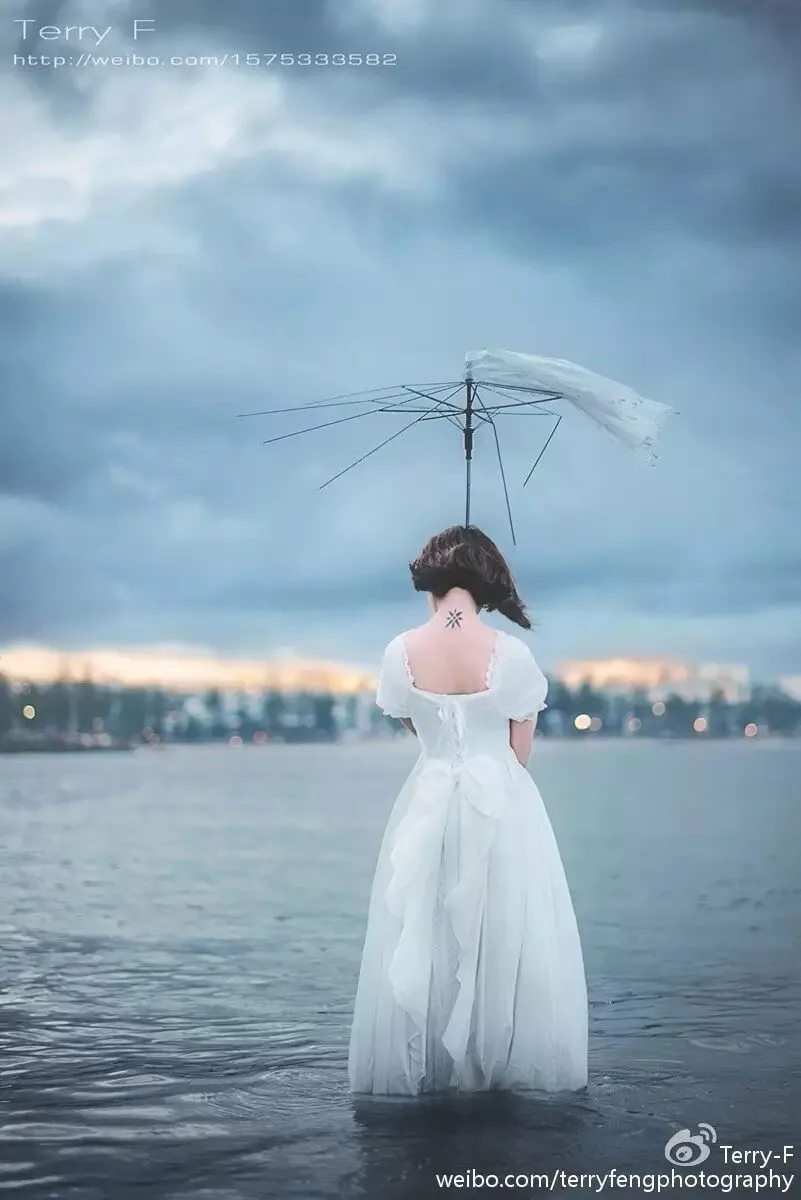
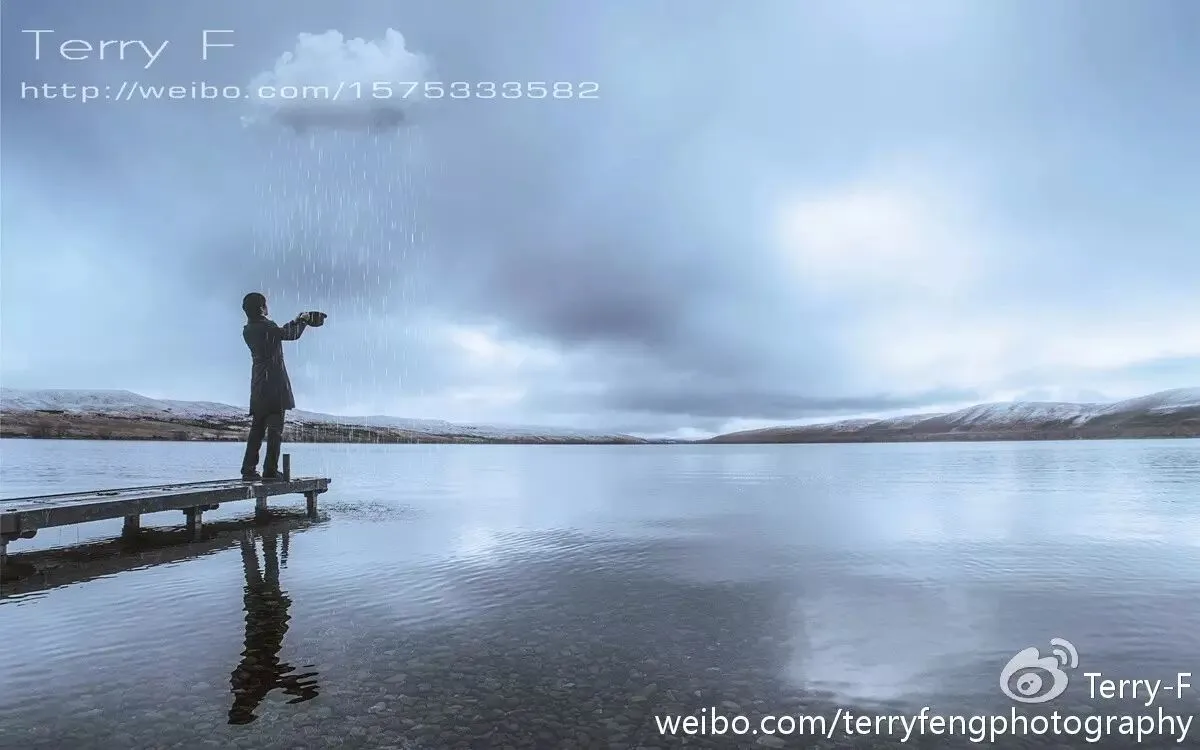
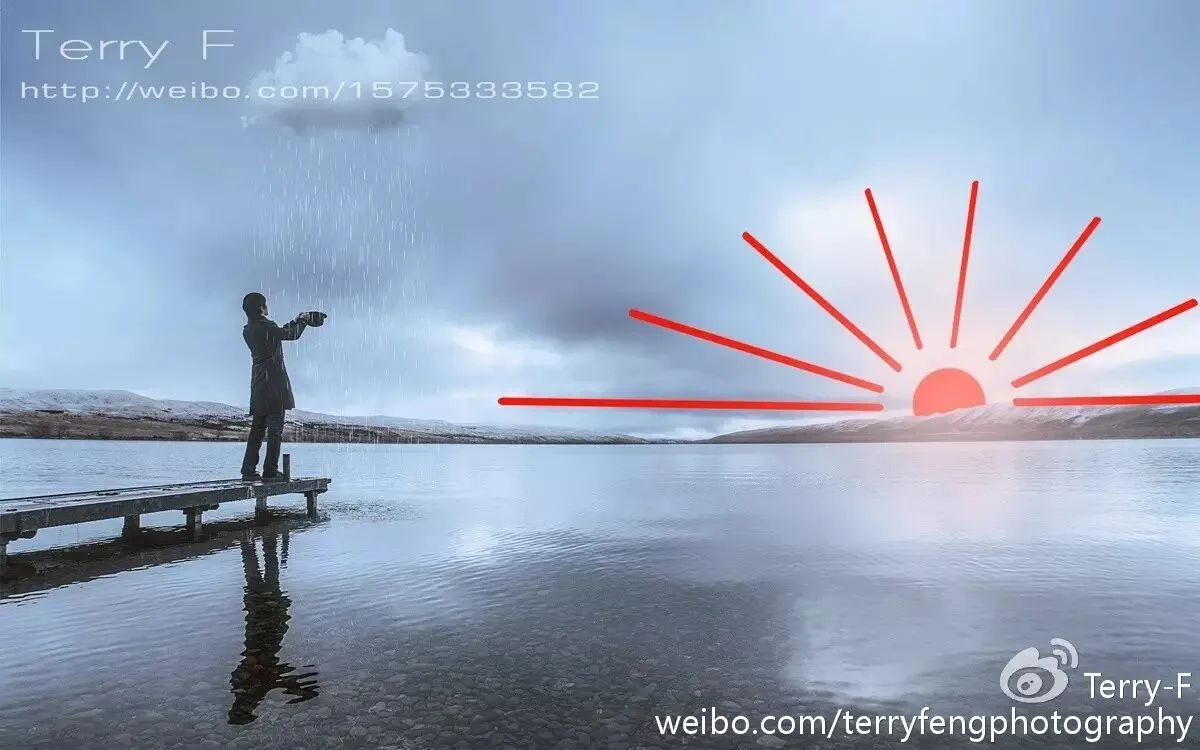
Weakening the lighting ratio can weaken emotional intensity to a degree. Although photos shot on overcast days are less visually striking, the subdued light lets the author exercise creativity in other aspects of the frame. In the image below, the overcast day was chosen because the picture's highlights are the subject's gesture and the mysterious clouds and rain — imagine if the right side of the frame were a fiery sunset sky: the viewer's eye could hardly settle on the person.
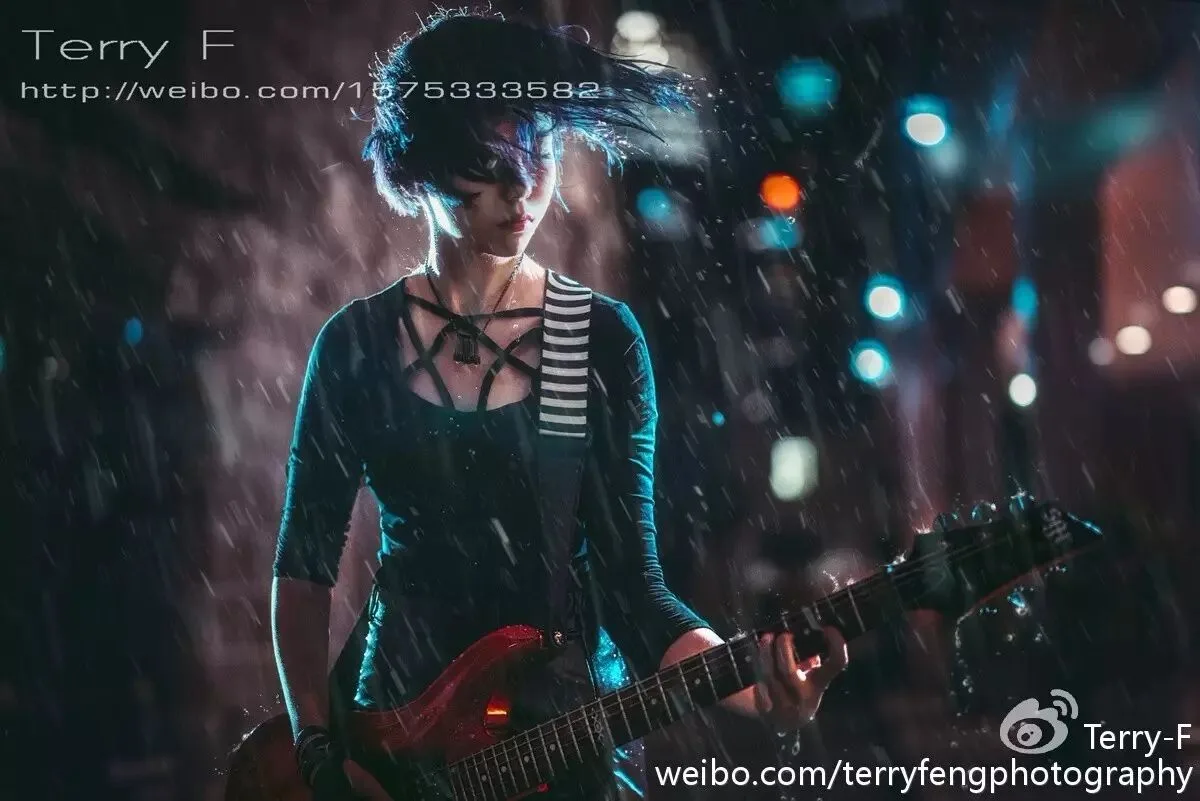
More light or more shadow can both express intense emotion. Generally speaking, the greater the contrast, the more intense the emotional expression.
4
Light, Shadow, and Composition
When people talk about composition, many think of points, lines, and planes. But except in minimalist photography, these three elements alone are not enough. A picture is a 2D plane, yet the photographer's job is to present a 3D effect on it — so beyond horizontal composition, you must use changes of light and shadow to strengthen the image's "depth".
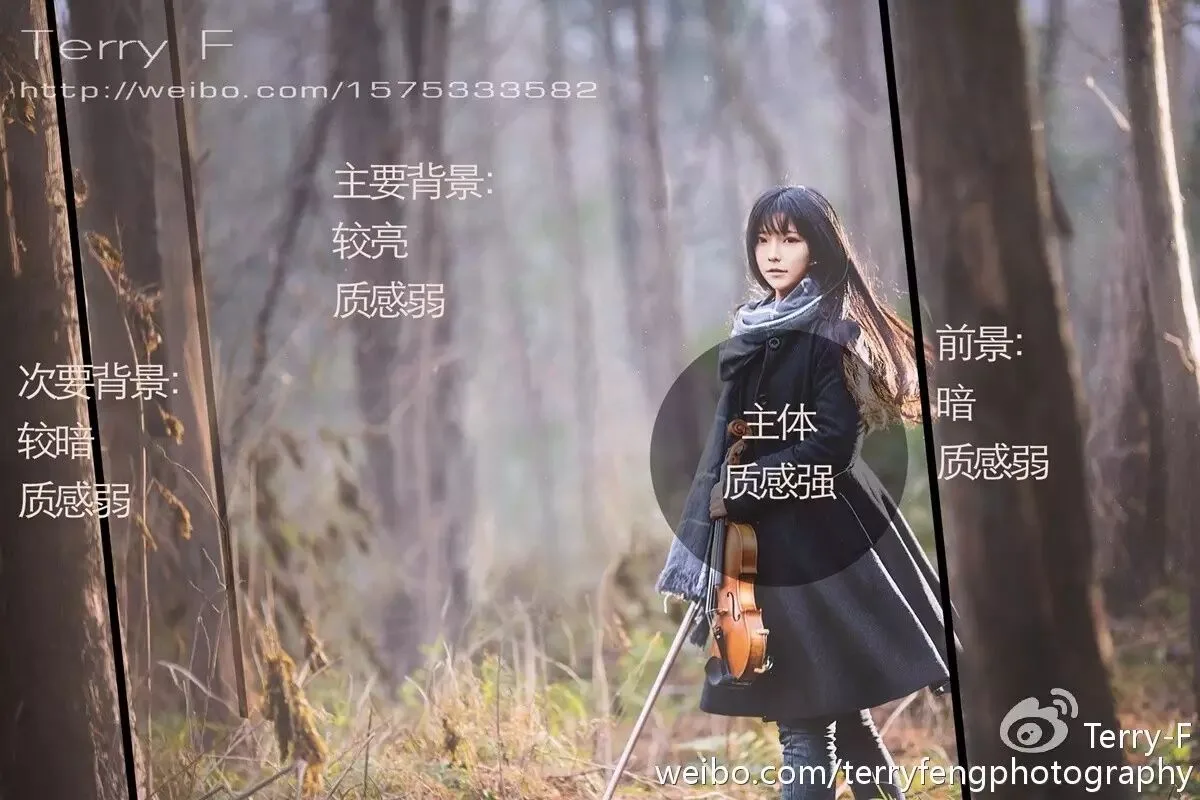
In the image below, three trees of different brightness together with a brighter background build the image's vertical space. The subject sits at the golden-section point, and direct light creates strong contrast and texture — establishing the subject's dominance on one hand, and placing them in the middle of this vertical space on the other, strengthening the image's dimensionality.
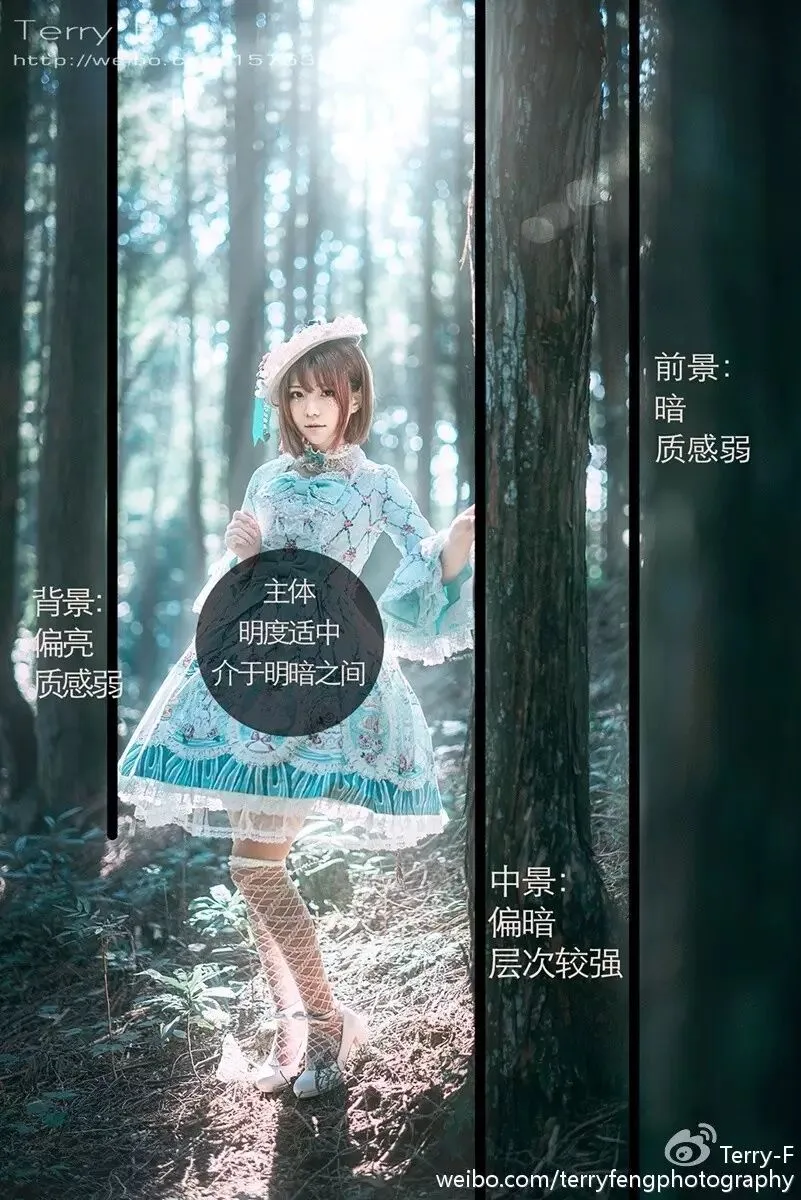
By the same logic, the image below also uses three trees — front and back — plus the background to create a sense of space; the subject's brightness contrasts with foreground and background, drawing the viewer's eye.
5
Using Reflected Light
Faced with a high-ratio backlight, many people first think of a reflector or a flash for fill. Yet artificial sources inevitably make the fill look stiff. Instead, the photographer can rely as much as possible on natural reflections in the environment to fill the shadows.
In the image below, sunlight comes from the right rear. Having the model bring a highly reflective paper boat close to her face fills the darker left side of the face and also softens shadows like nasolabial folds.

In the image below, having the model crouch down near the light reflected from the ground likewise creates sensible fill in a backlit environment.
6
Choosing the Right Moment
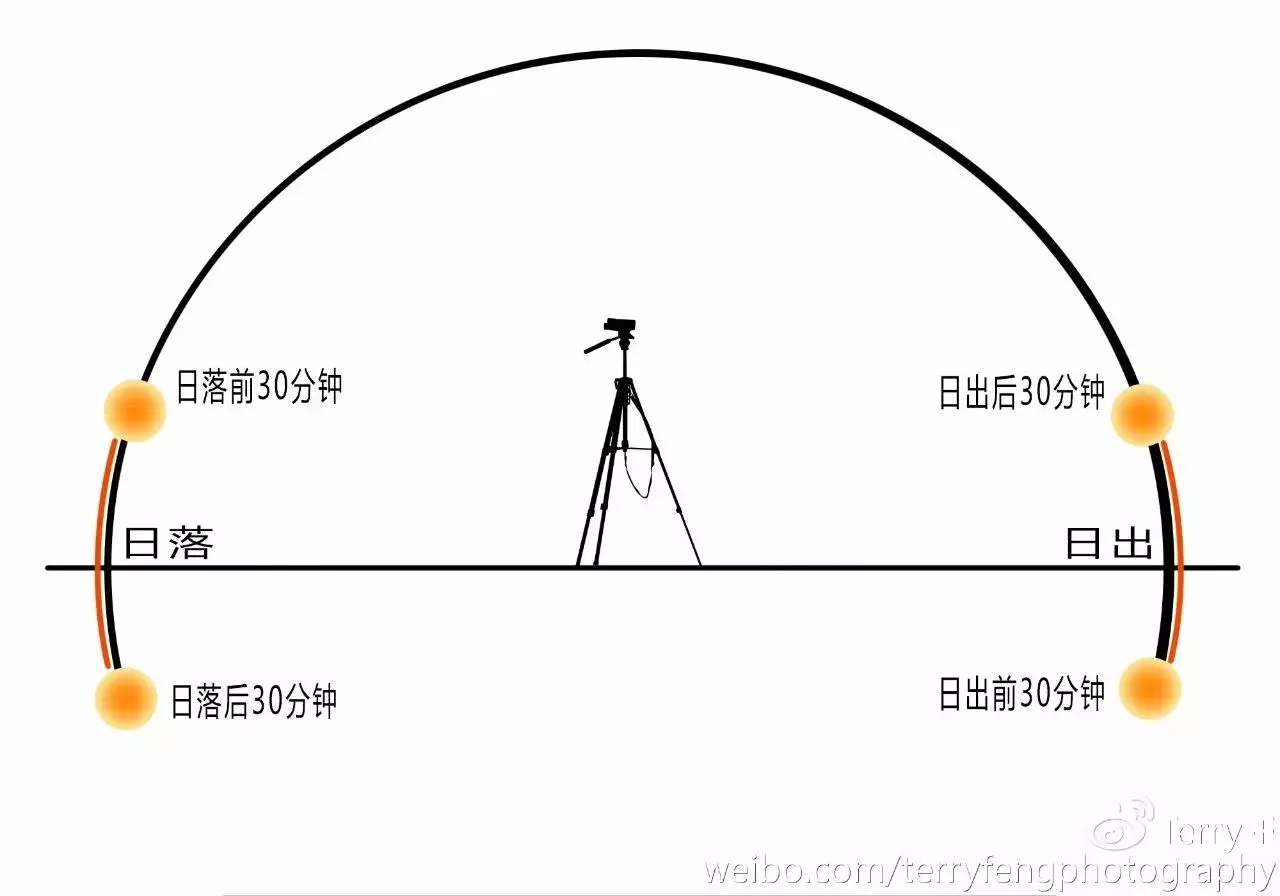
As mentioned above, the key to natural-light portraiture is adapting to the environment's changes, so choosing the shooting moment matters enormously. Generally, the best times of day for photography cluster within 30 minutes before and after sunrise and sunset.

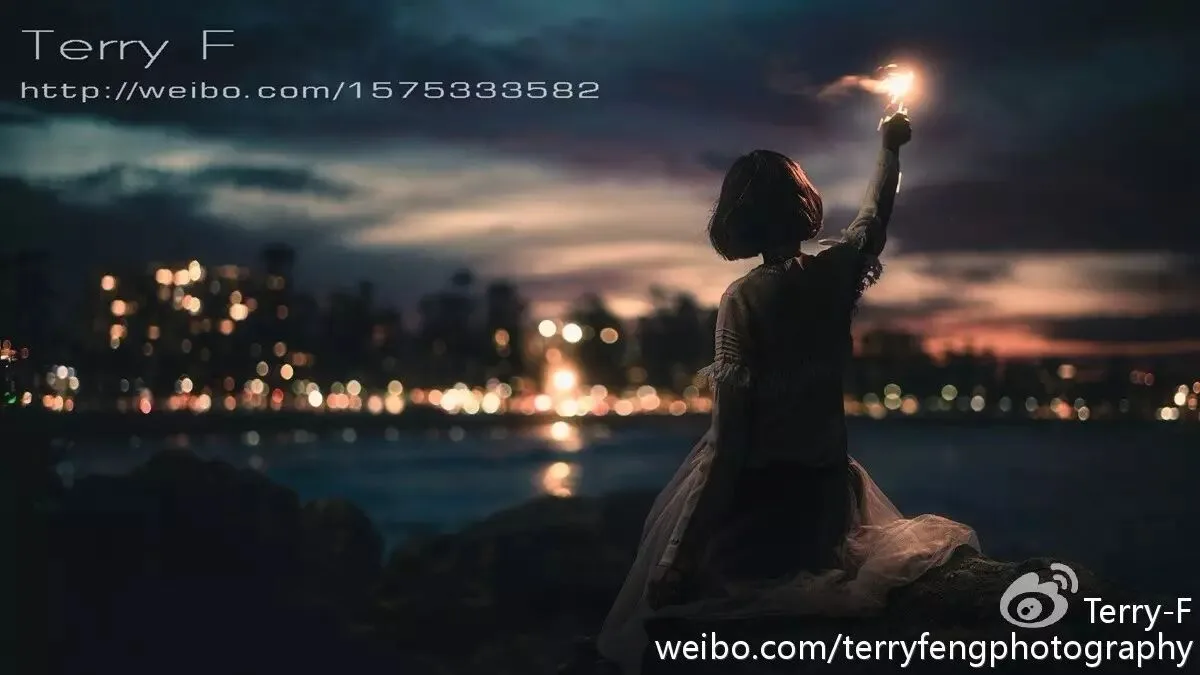
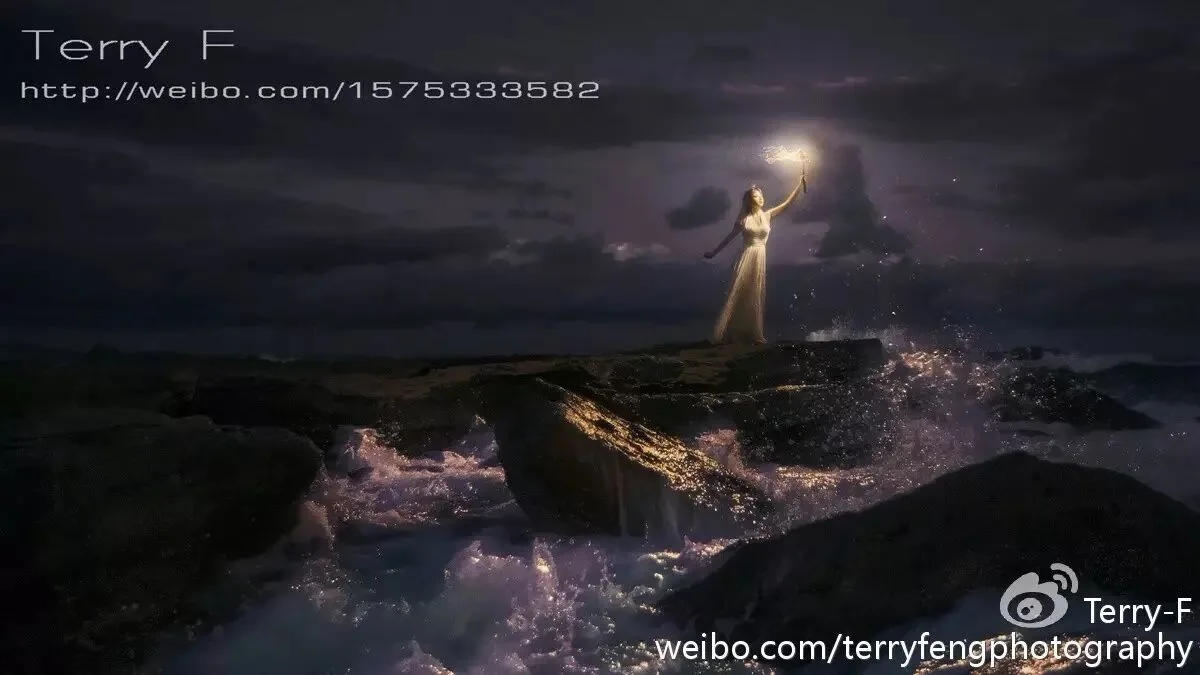
The image below was shot with front light about 20 minutes after sunset, using a flash held by the model with an orange gel to simulate torchlight. Although the sun no longer shines directly, the last glow at the horizon faintly lights the clouds, giving them the depth you'd see in daytime and lending some detail to the frame's dark areas.
Because the ambient light was so weak, the flash's brightness was enough to overpower the natural light's influence on the model, so viewers see no obvious daylight effect. Had I shot earlier, the flash couldn't have overpowered the sun; had I shot later, the sun's effect on the clouds and the dark areas would have been too small — the clouds would lack texture and the shadows would go dead black.
7
Light and Shadow in Post
A solid understanding of natural light also helps greatly in post. From basic grading to image compositing, everything involves adjusting light and shadow. In the image below, after compositing the three main elements — the wall, the balcony, the model — the lack of light and shadow made the whole image flat. Adding shadows lets viewers feel the presence of light and greatly enriches the visual effect.
Take this one: after putting the source material together, it lacks tonal structure and shows no sense of light.

Use a model to work out the direction of the shadows, then build them in Photoshop.

The finished image

Summary
Where there is light, there is shadow. When shooting portraits in natural light, think of light and shadow together: choose the appropriate light intensity, light direction, and shooting time for different subjects, so natural light plays a bigger role.
In post, don't break the original image's light-shadow ratio as a rule; if you want to change the light relationships in post, deeper study is needed to do it well.
When shooting portraits in natural light, consider these questions — they may give you some inspiration:
·Is the contrast between subject and environment sufficient?
·Are the light-shadow layers of subject and environment distinct?
·Is the lighting ratio on the subject too large? Can enough key detail be retained?
·Can the environment's light and shadow convey enough depth and texture?
·Can the environment's light and shadow convey the right emotion?
The most important point: observe more, think more, analyze the lighting of excellent works, then practice — that's how you quickly improve your understanding and application of natural light.
The handsome author
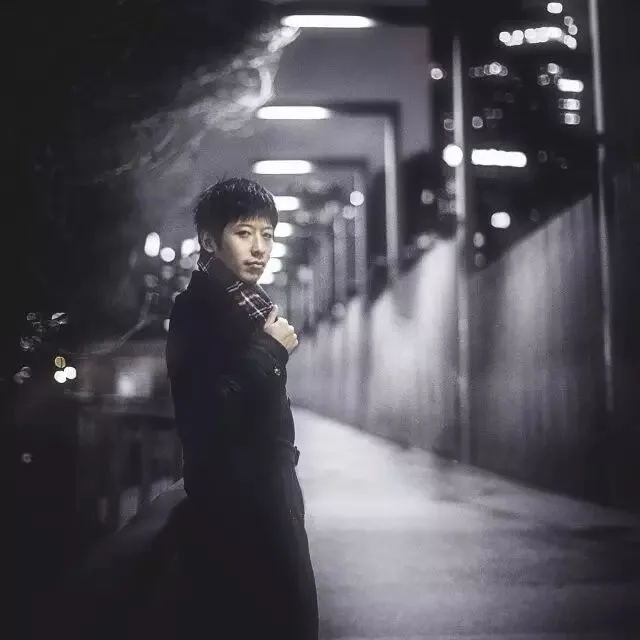
▲ Feng Tao (Terry F)
Getty Images contributing photographer
Huagai Creative contributing photographer
Lofter master
Weibo: @Terry-F
Lofter: terryfengphotography.lofter.com
Thanks to Terry for sharing. Do you now better understand the characteristics and uses of natural light?
Follow @Thomas Chu Photo,
and learn one photography skill every week.