Photography Tutorial · 2017-01-02
How to Preserve Maximum Image Quality Throughout Post-Processing
How can we minimize noise, maximize detail, and strengthen color in post-processing?
This article shares the six areas Thomas has found to matter most for image quality in his landscape post-processing practice:
1. Capture more information in the field
2. The order of sharpening and noise reduction
3. The "many small steps" principle
4. Non-destructive adjustments
5. Apply adjustments locally
6. Use the latest technology and professional plugins
1
Capture More Information in the Field
Although this article is about post-processing, post guides the capture — and depends on it.
The most powerful weapons for transforming image quality in post all rely on support from the field.
For example, the often-heard advice — shoot raw, set the camera to the Adobe RGB color space, record in 14-bit depth — is essentially about increasing the quality and quantity of information captured in the field.
Or consider modern landscape photography:
the way to minimize noise is stacking for noise reduction, plus exposing to the right and pulling back — both depend on how you shoot.
The most natural way to hold highlight and shadow detail is exposure blending, which requires bracketed shooting in the field.
And the weapon that keeps a scene sharp from foreground to background — focus stacking — is even more dependent on field technique.
Modern photography is no longer limited to the finite information of a single frame; it's built on massive, high-quality raw data from several or a dozen-plus frames, and the precision of every post-processing weapon improves exponentially!
Take astrophotography: a single frame at ISO 3200 will be full of noise in both the ground and the sky. With the limited information of one frame, noise-reduction algorithms always struggle to balance detail against noise — lift the shadows hard, and the noise is horrific!
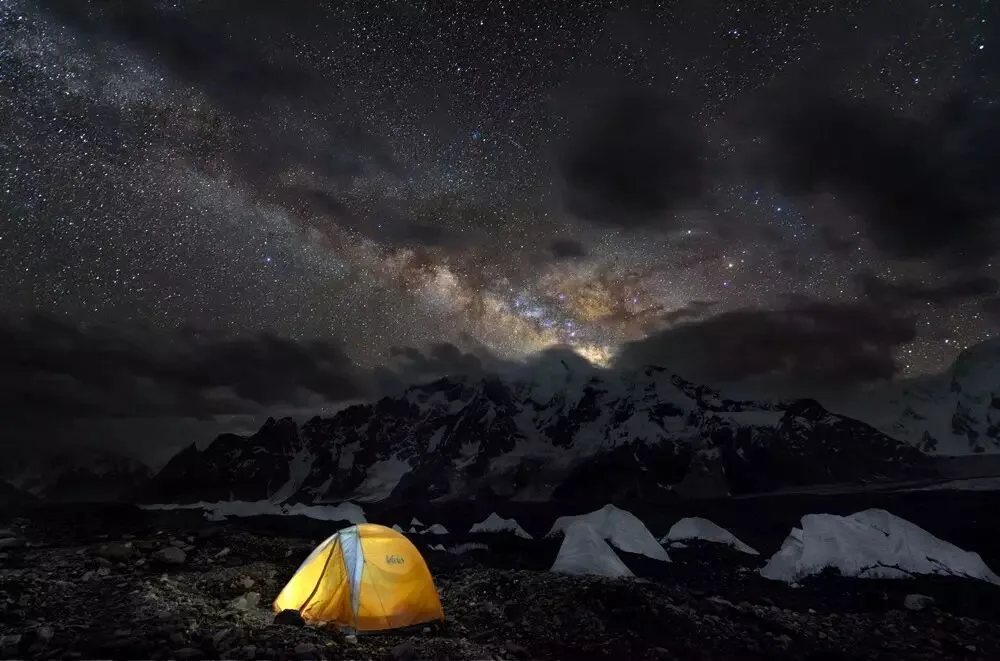
But shoot five consecutive frames in the field and stack them in post with mean or median noise reduction, and noise drops dramatically — with no loss of detail.
Below: the top image is a single frame; the bottom is the median stack of five frames.
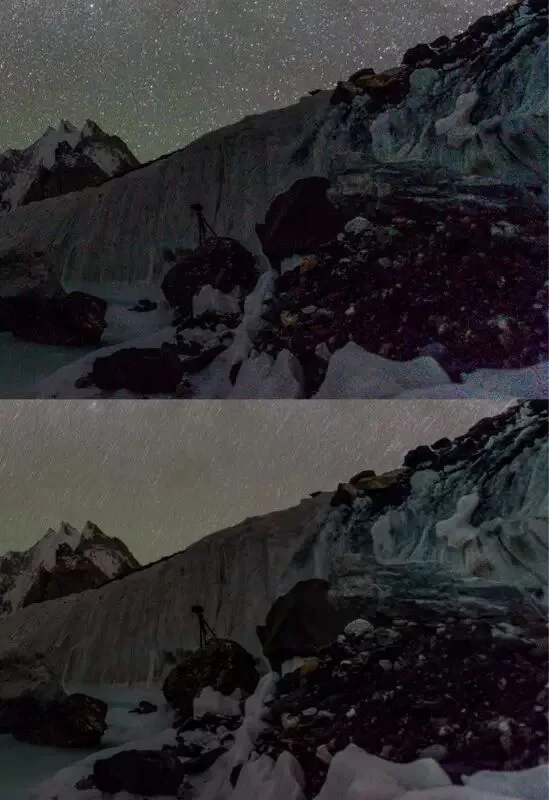
I've written the exact steps for stacking the sky and ground separately in the tutorial "How to Shoot Low-Noise Milky Way Photos with an Ordinary DSLR."
That's five frames for noise reduction; with ample time and a capable computer, stacking even more source frames is stronger still (with diminishing returns, of course).
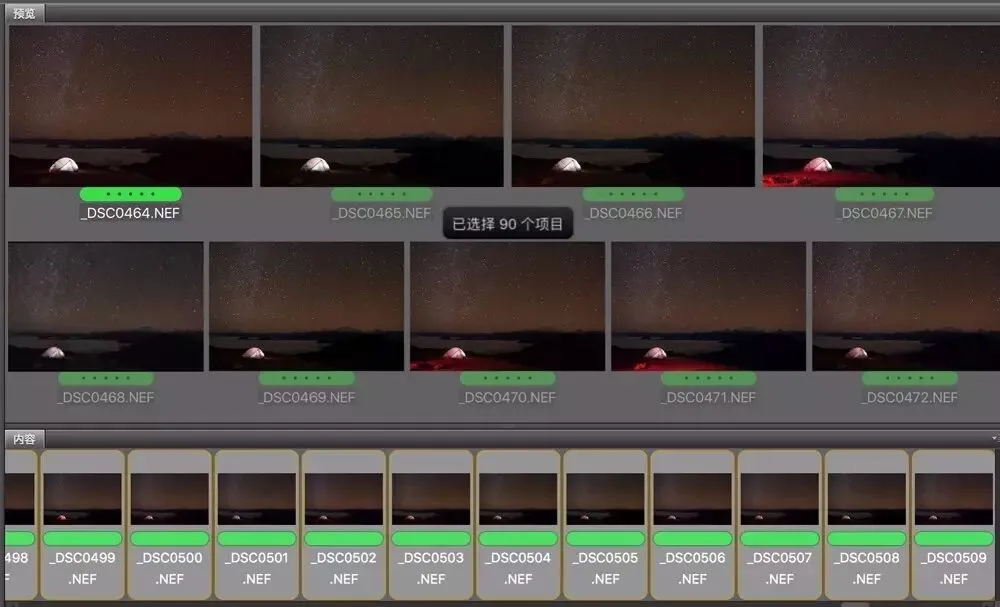
Multi-frame shooting is one way to increase your raw data — but there are other field methods.
For the starry sky, a portable star tracker counteracts Earth's rotation, allowing 10-minute exposures at ISO 800 or below — an even bigger jump in quality.
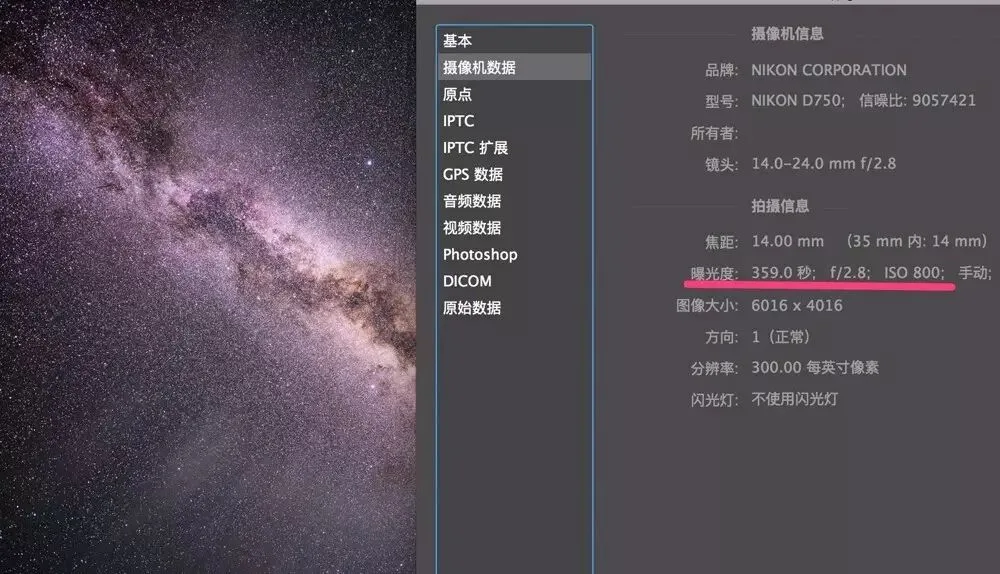
Then there's the foreground of a night shot: pitch black at night, so even 100 frames gather limited light information. Better to add artificial lighting for an exponential leap in light quality.
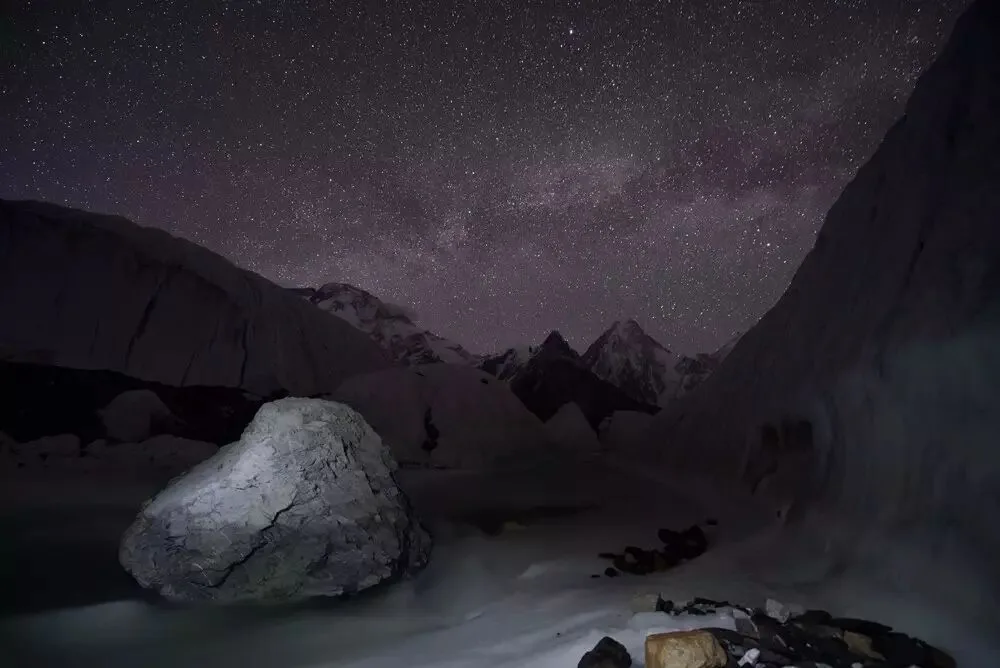
Another popular power move: shoot the foreground before dark, keep the camera position fixed, and shoot the sky later that night, blending the two. Foreground at ISO 200... the quality matches daylight exactly...
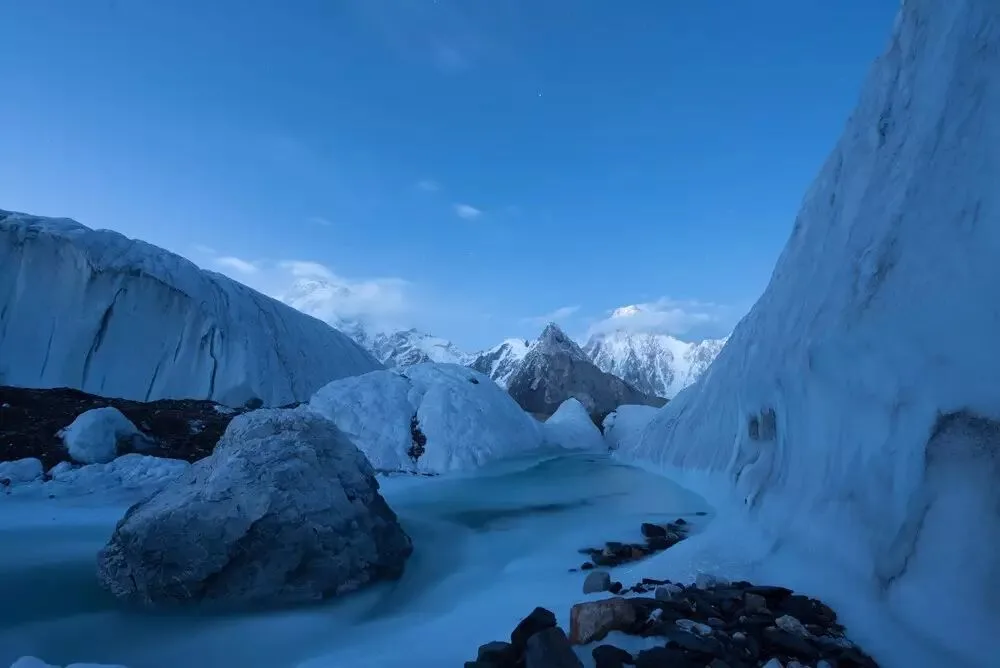
So capturing high-quality source frames and gathering more data in the field helps post-processing the most.
2
The Order of Sharpening and Noise Reduction
Noise reduction mainly happens in the first step; sharpening mainly in the last.
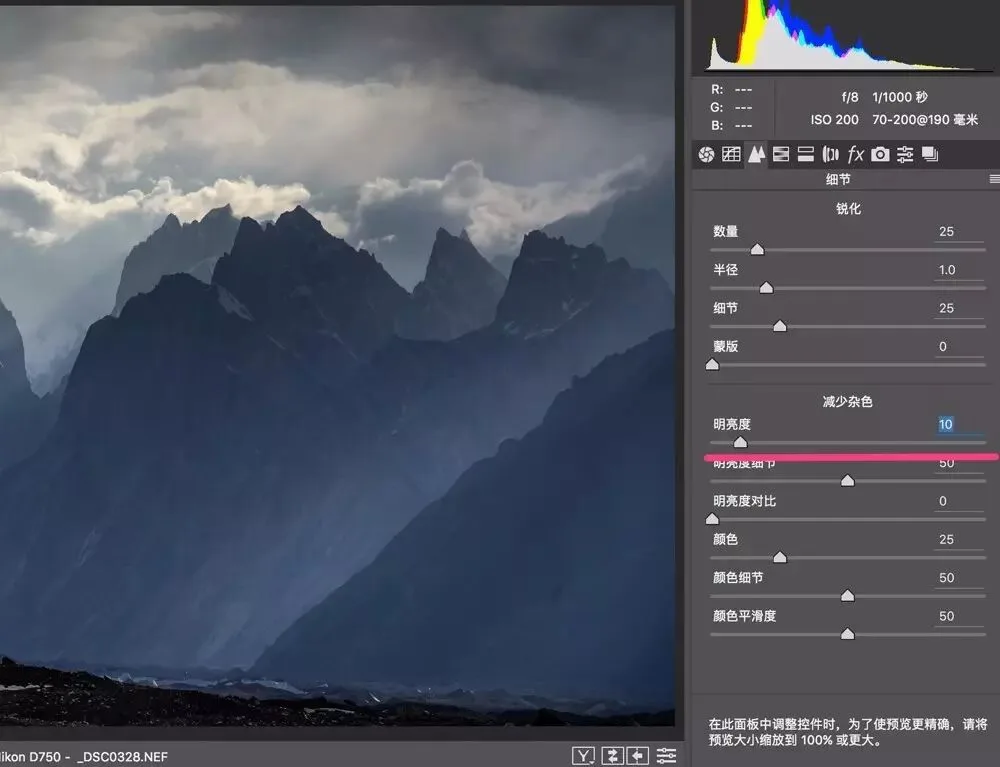
Since the order of adjustments inside ACR and Lightroom doesn't matter, I usually do a preliminary noise reduction at the end of the ACR stage.
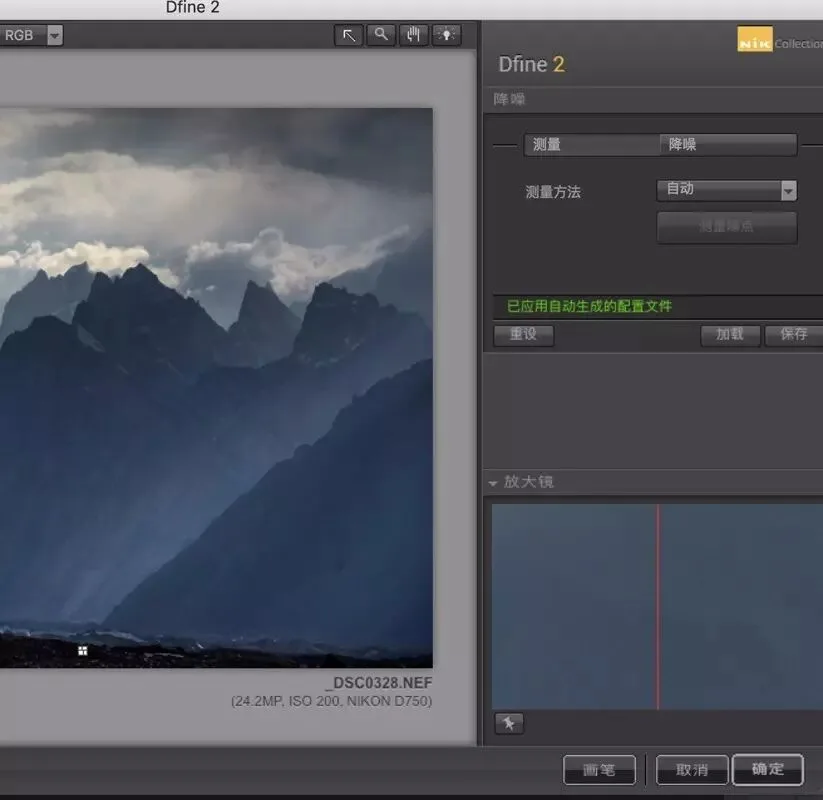
Once in Photoshop, the first step is further noise reduction with the Nik Dfine plugin.
Sometimes, after more editing in PS, previously invisible noise becomes prominent — so one more round of noise reduction may be needed before output. That's why I said noise reduction happens "mainly" in the first step. (For more, read "Three-Step Noise Reduction for Perfect Photos.")
Sharpening is more destructive to the image and is primarily output sharpening — the amount varies wildly with the display medium and size — so it mainly happens in the last step.
3
The "Many Small Steps" Principle
Better to adjust in many small steps than to try landing it in one go, because:
1) Post-processing is often a subjective judgment, hard to nail precisely in one pass. If it's not enough, add more later. But overshoot — say, pushing saturation too far — and backing it off costs you more.
2) Tools and steps interact. In a raw file, for instance, if saturation is set too high, later curves and contrast adjustments add yet more saturation; a round of Selective Color on top might push the reds straight into clipping...
So at the start, go easy on contrast, saturation, and clarity — a light touch is enough. Optimize step by step afterward.
4
Use Non-Destructive Adjustments Wherever Possible
Any edit that records only the resulting pixels is destructive — avoid it, or push it to the later stages.
For example, adding +100 contrast directly on the background layer is destructive; if you later dislike it, your only option is reducing contrast on that same layer — a very quality-damaging move.
The better way is adjustment layers or smart objects, where your contrast change is stored as original data plus an adjustment process; if you dislike it, simply undo that intermediate step.
The following are all forms of non-destructive adjustment:
1) Adjustments in Adobe Camera Raw and Lightroom are non-destructive.
2) Adjustments and transforms applied to smart objects.
So when bringing a file from ACR into PS, hold Shift to open it as a smart object rather than a background layer. And when compositing multiple images, wrap those layers in smart objects instead of stamping visible layers.
3) Smart Filters on smart objects are all non-destructive.
If you use Nik plugins, for instance, apply them as Smart Filters — then you can go back and re-tweak any filter's settings individually.
4) Non-destructive cropping. When cropping, leave "Delete Cropped Pixels" unchecked.
5) Adjustment layers. To change saturation, contrast, or color, use adjustment layers rather than editing the original layer directly.
6) Blank and 50%-grey helper layers. Clone stamping, spot healing, dodging and burning — do these on new layers too, not on the original.
5
Apply Adjustments Locally
Confining adjustments to local areas — rather than applying them globally and affecting unrelated regions — also greatly improves image quality.
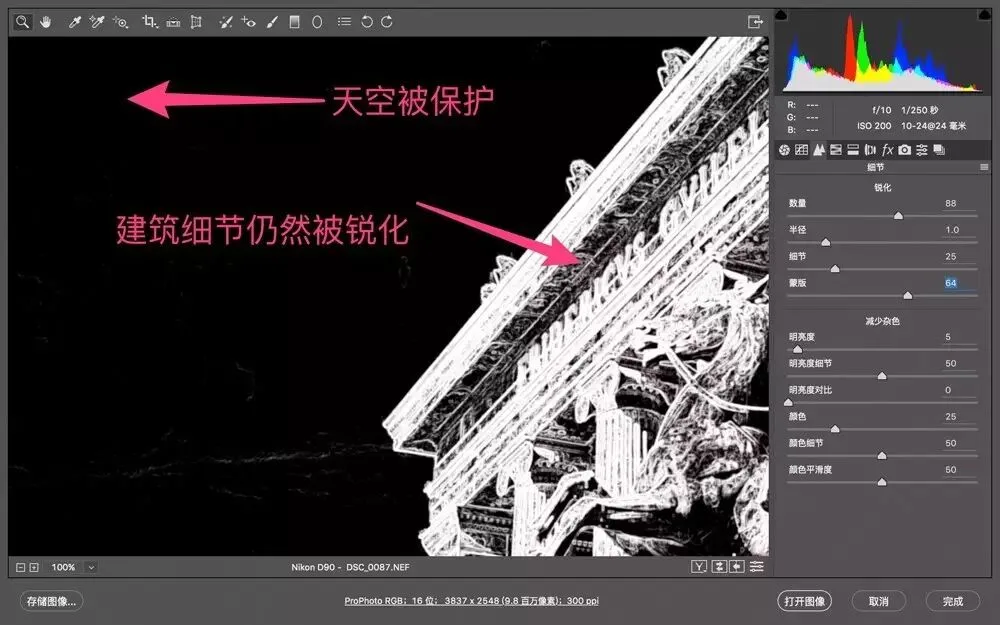
With ACR sharpening, for example, always hold Alt and use the Masking slider — don't sharpen large flat areas like sky and water.
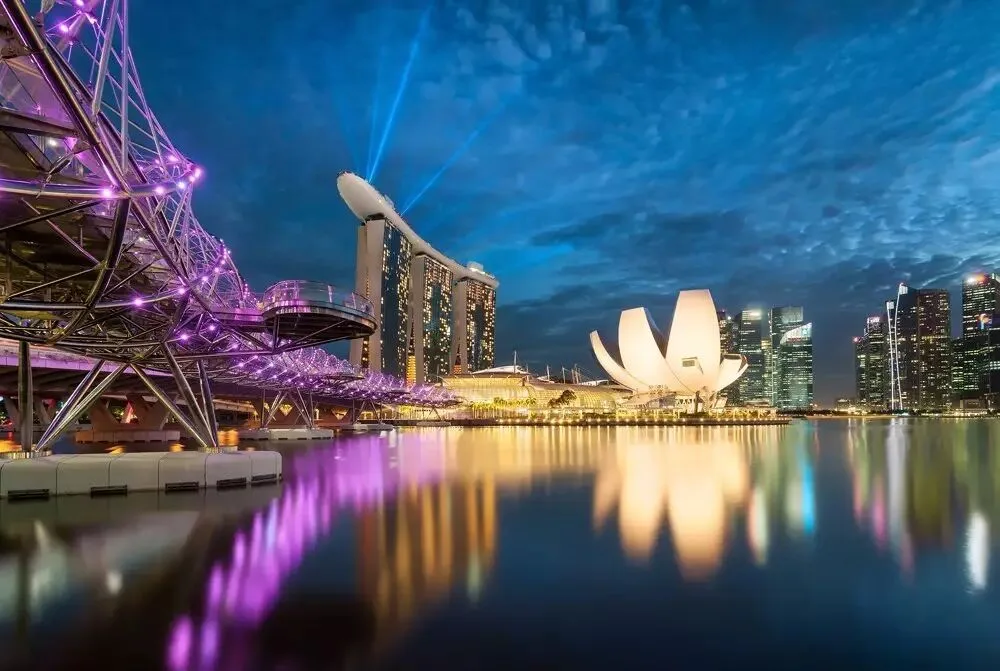
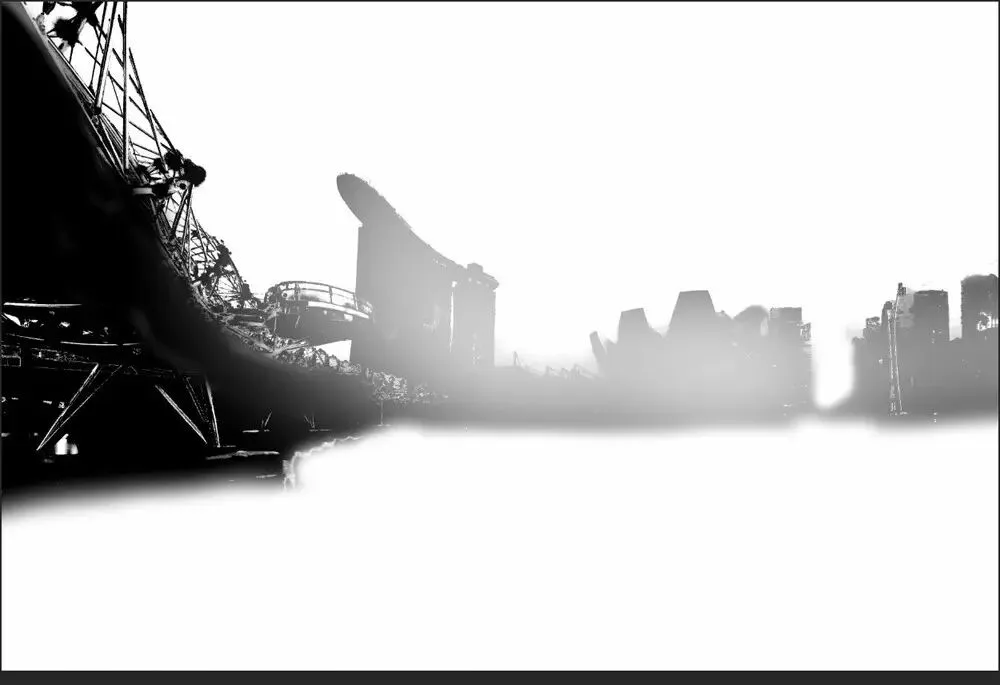
Noise reduction is the opposite: use a mask so it only affects low-detail areas.
6
Use the Latest Technology and Professional Plugins
The latest technology and professional plugins simply have better algorithms and are recommended.
For noise reduction, for instance, Nik Dfine 2 or Topaz DeNoise — even ACR's built-in noise reduction — all outperform Photoshop's own noise filter.
Summary
1. Capture more, higher-quality information in the field
2. Noise reduction mainly first; sharpening mainly before output
3. The "many small steps" principle
4. Non-destructive adjustments
5. Apply adjustments locally
6. Use the latest technology and professional plugins
Follow @Thomas Chu Photo, and learn one photography skill every week.